The Cave of RudiB
-
ShaunW
- NOT the sheep
- Posts: 26188
- Joined: November 26th, 2011, 6:11 pm
- Location: Pontefract West Yorkshire
Re: The Cave of RudiB
Great work with the DeLorean 
Doing - Tamiya 1/35th Universal Carrier.
Work is the curse of the modelling classes!
IPMS#12300
Work is the curse of the modelling classes!
IPMS#12300
-
Dazzled

- Modelling Gent and Scholar
- Posts: 9592
- Joined: October 1st, 2011, 11:08 pm
- Location: Mid Glamorgan, South Wales
- Contact:
Re: The Cave of RudiB
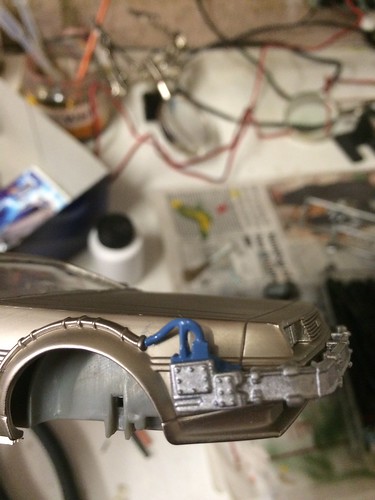
Good work pulling the DeLorean into shape. I definitely approve of the use of cable ties. Best invention ever. 
COLD WAR S.I.G. LEADER
Wherever there's danger, wherever there's trouble, wherever there's important work to be done....I'll be somewhere else building a model!
Wherever there's danger, wherever there's trouble, wherever there's important work to be done....I'll be somewhere else building a model!
-
RudiB
- Onto the Clever Stuff, Now.
- Posts: 152
- Joined: September 13th, 2015, 8:43 pm
- Location: Closer than you think
Re: The Cave of RudiB
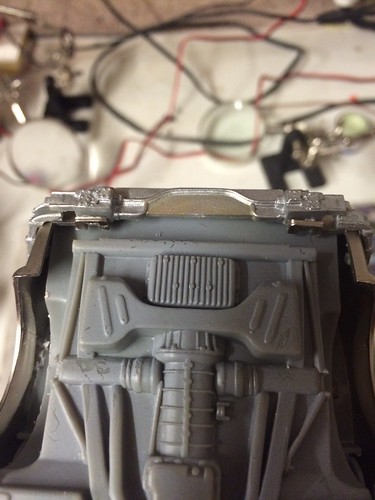
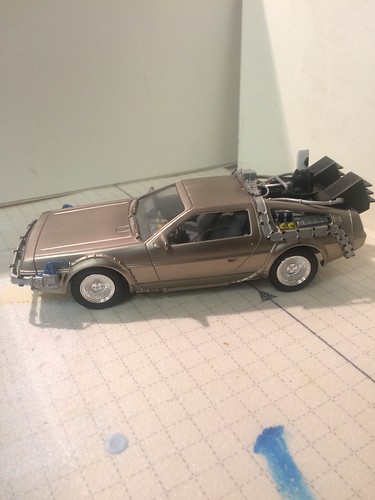
Quick update on the Delorean build,
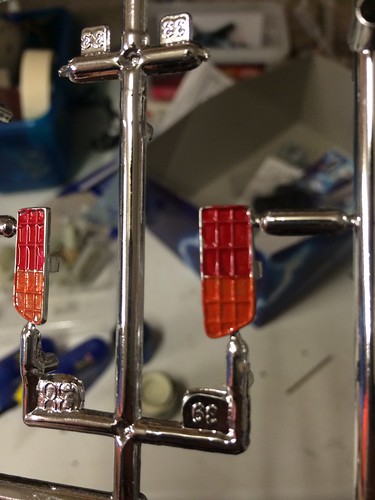
the front and rear lights are fitted,
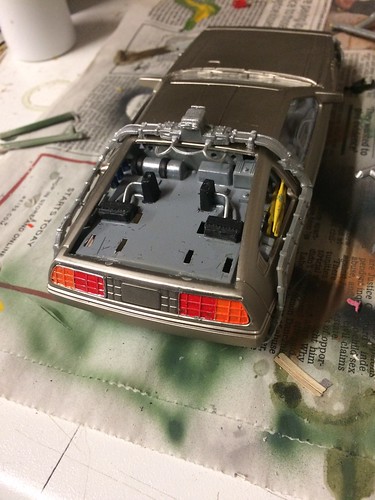
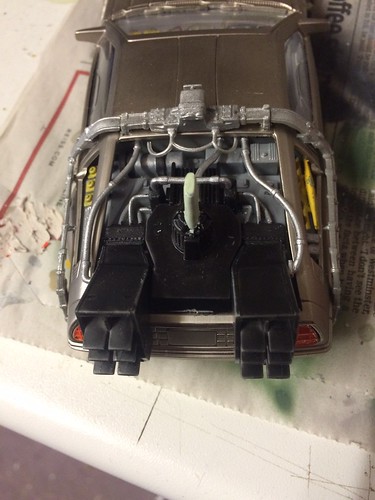
also fitted the flux bands, rear vents and Mr Fusion
Although the warped body has come back to haunt me, luckily its underneath at the back so wont show too much, nothing a knife and a dremel won't fix!
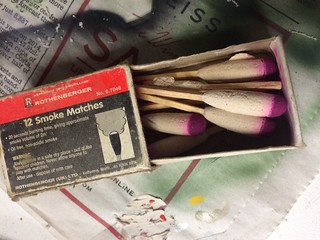
I was toying with the idea of fitting some small bore flexible hose through the rear vents to under the car as I found these the other day while having a sort out
Just a few paint touch ups left, fit the wheels and apply the ONE decal that came in the kit, may well have this done over the weekend.
the front and rear lights are fitted,
also fitted the flux bands, rear vents and Mr Fusion
Although the warped body has come back to haunt me, luckily its underneath at the back so wont show too much, nothing a knife and a dremel won't fix!
I was toying with the idea of fitting some small bore flexible hose through the rear vents to under the car as I found these the other day while having a sort out
Just a few paint touch ups left, fit the wheels and apply the ONE decal that came in the kit, may well have this done over the weekend.
-
Dazzled
- Modelling Gent and Scholar
- Posts: 9592
- Joined: October 1st, 2011, 11:08 pm
- Location: Mid Glamorgan, South Wales
- Contact:
Re: The Cave of RudiB
Cool idea
COLD WAR S.I.G. LEADER
Wherever there's danger, wherever there's trouble, wherever there's important work to be done....I'll be somewhere else building a model!
Wherever there's danger, wherever there's trouble, wherever there's important work to be done....I'll be somewhere else building a model!
-
ShaunW
- NOT the sheep
- Posts: 26188
- Joined: November 26th, 2011, 6:11 pm
- Location: Pontefract West Yorkshire
Re: The Cave of RudiB
Nice one Rudi that is shaping up very nicely. Those smoke matches will give quite an effect I would imagine!
Doing - Tamiya 1/35th Universal Carrier.
Work is the curse of the modelling classes!
IPMS#12300
Work is the curse of the modelling classes!
IPMS#12300
-
RudiB
- Onto the Clever Stuff, Now.
- Posts: 152
- Joined: September 13th, 2015, 8:43 pm
- Location: Closer than you think
Re: The Cave of RudiB
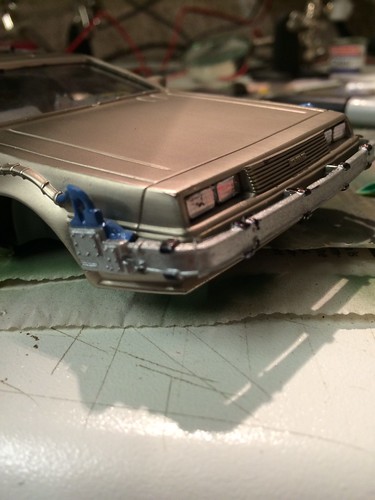
The Delorean is finished, a few touch ups and fitted the wheels.
I also fitted some flexible tubing to the rear vents for the smoke idea, threaded the tube through the body and out of the front wheel arch, but lets just say I now know why I hadn't used those smoke matches in a few years. They stink when lit and produce a LOT of smoke very quickly, think of badly burnt popcorn and melting plastic and you come close to the smell.
My idea of putting the smoke match in a big glass jar with two small hoses in the lid may well have worried the neighbours.
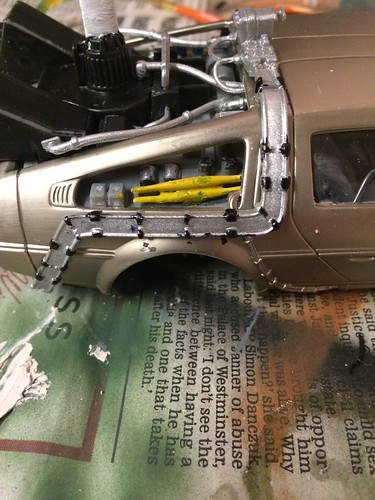
I've left the tubing in the model and tucked it up tight inside the wheel arch, I may revisit that idea at some point.
Here's the flux band detail
And the completed build
You can see some more of the completed model here
http://uamf.org.uk/viewtopic.php?f=24&t=13707
Now to delve into the stash for my next build, decisions....
I also fitted some flexible tubing to the rear vents for the smoke idea, threaded the tube through the body and out of the front wheel arch, but lets just say I now know why I hadn't used those smoke matches in a few years. They stink when lit and produce a LOT of smoke very quickly, think of badly burnt popcorn and melting plastic and you come close to the smell.
My idea of putting the smoke match in a big glass jar with two small hoses in the lid may well have worried the neighbours.
I've left the tubing in the model and tucked it up tight inside the wheel arch, I may revisit that idea at some point.
Here's the flux band detail
And the completed build
You can see some more of the completed model here
http://uamf.org.uk/viewtopic.php?f=24&t=13707
Now to delve into the stash for my next build, decisions....
-
ShaunW
- NOT the sheep
- Posts: 26188
- Joined: November 26th, 2011, 6:11 pm
- Location: Pontefract West Yorkshire
Re: The Cave of RudiB
Excellent, very nicely built Rudi
Doing - Tamiya 1/35th Universal Carrier.
Work is the curse of the modelling classes!
IPMS#12300
Work is the curse of the modelling classes!
IPMS#12300
-
Clashcityrocker

- Modelling Gent and Scholar
- Posts: 10819
- Joined: May 1st, 2011, 12:31 am
- Location: Adelaide. South Australia
Re: The Cave of RudiB
That takes me back. (see what I did there?)
Nigel
Nigel
-
RudiB
- Onto the Clever Stuff, Now.
- Posts: 152
- Joined: September 13th, 2015, 8:43 pm
- Location: Closer than you think
Re: The Cave of RudiB
Where to Clash, the past or the future? 
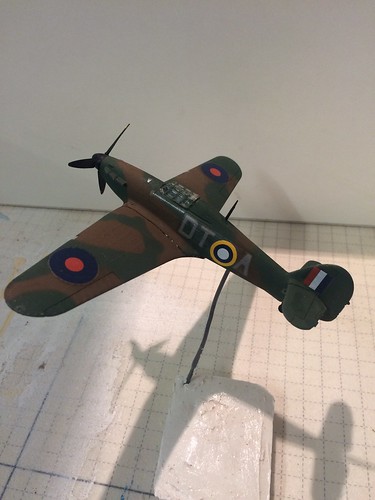
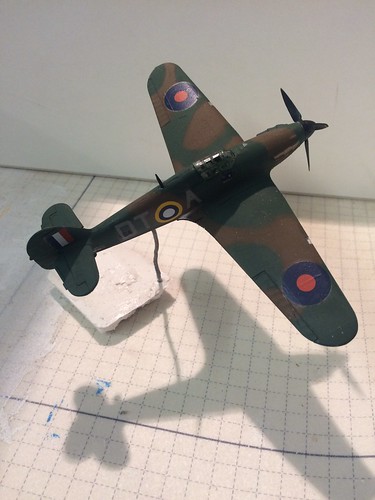
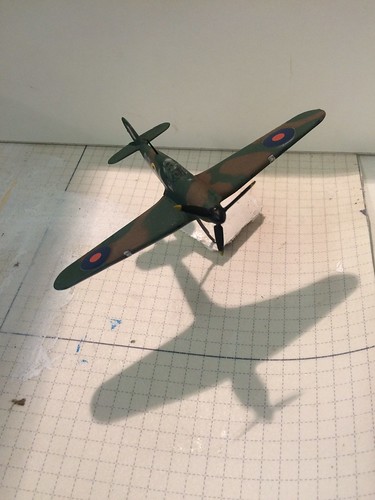
Went back and finished the Hurricane this weekend, here it is.
That's cleared the bench for my next build, here's a clue
Went back and finished the Hurricane this weekend, here it is.
That's cleared the bench for my next build, here's a clue

Re: The Cave of RudiB
Nice work on the Delorean and Hurricane. Love science-fiction.
Is that the matchbox/Revell Victor? That is one big kit. It is a bit of a beast to build (I tried it unsuccessfully as a kid). The Victor is one of my favorite aircraft. Looks all business! Fantastic!
Is that the matchbox/Revell Victor? That is one big kit. It is a bit of a beast to build (I tried it unsuccessfully as a kid). The Victor is one of my favorite aircraft. Looks all business! Fantastic!
Paul
This is it. The moment we should have trained for.
This is it. The moment we should have trained for.
-
RudiB
- Onto the Clever Stuff, Now.
- Posts: 152
- Joined: September 13th, 2015, 8:43 pm
- Location: Closer than you think
Re: The Cave of RudiB
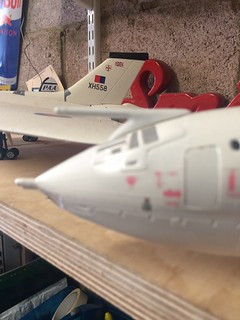
Thanks PGAS, that is indeed the Revell Victor, it was a beast of a build, no hard join points on the tail made it tricky. The Victor and Vulcan take up most of the shelf space, there's room for the Constellation and just enough space for my next build, which is also the same size.
-
Zen
- The Bug Has Well And Truly Bitten
- Posts: 271
- Joined: April 20th, 2016, 12:58 am
- Location: Portimão, Algarve, Portugal
Re: The Cave of RudiB
Both the Delorean and the Hurricane look great! Very nice work!
Zen
Zen
-
RudiB
- Onto the Clever Stuff, Now.
- Posts: 152
- Joined: September 13th, 2015, 8:43 pm
- Location: Closer than you think
Re: The Cave of RudiB
Following the relatively simple Delorean build I've now started on this :
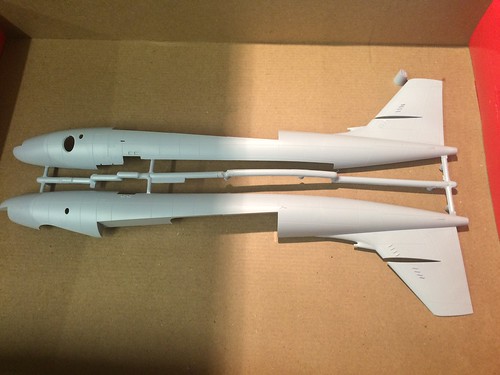
The final V Bomber, the Valiant. It's the 1/72 Airfix kit, the kit gives you three options to build, I'm going with the B option and using some decals from Hannants to turn it into XD818, which surprisingly isn't an option OOTB.
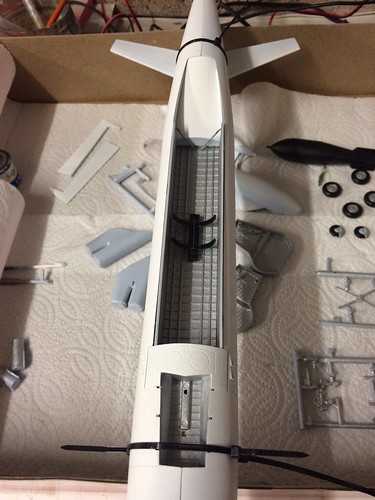
I'm almost at the stage of joining the two fuselage halves together, here's the cockpit detail, and Plenty of room for nose weights.
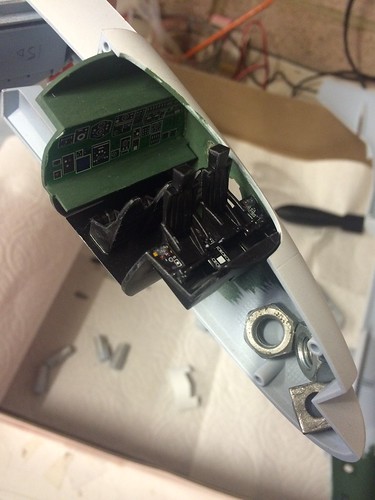
Unfortunately the carpet monster claimed its first part of this model, one of the cockpit rear windows, but I cut a new one out of some clear plastic and you'll never notice it when the two halves are joined.
The final V Bomber, the Valiant. It's the 1/72 Airfix kit, the kit gives you three options to build, I'm going with the B option and using some decals from Hannants to turn it into XD818, which surprisingly isn't an option OOTB.
I'm almost at the stage of joining the two fuselage halves together, here's the cockpit detail, and Plenty of room for nose weights.
Unfortunately the carpet monster claimed its first part of this model, one of the cockpit rear windows, but I cut a new one out of some clear plastic and you'll never notice it when the two halves are joined.
-
giulio_gobbi

- Modelling Gent and Scholar
- Posts: 1971
- Joined: May 4th, 2011, 8:37 pm
- Location: Naples, Italy
- Contact:
Re: The Cave of RudiB
I have some kits relics, used as meal for the Carpet Monster.
Vickers Valiant is my favorite V Bomber......I don'y why, it's so from I was eight.
Vickers Valiant is my favorite V Bomber......I don'y why, it's so from I was eight.
Sometimes the talent consists exactly in that: try five dozen times when others stop at three dozen...! (F.Labelle)
I think that modeling is a subtle mix of zen philosophy and absolute crazyness - but in my case I would not dare to specify the respective percentage of each......
I think that modeling is a subtle mix of zen philosophy and absolute crazyness - but in my case I would not dare to specify the respective percentage of each......
-
RudiB
- Onto the Clever Stuff, Now.
- Posts: 152
- Joined: September 13th, 2015, 8:43 pm
- Location: Closer than you think
Re: The Cave of RudiB
I must try that Giulio, I've plenty of spare parts to throw down before I start 
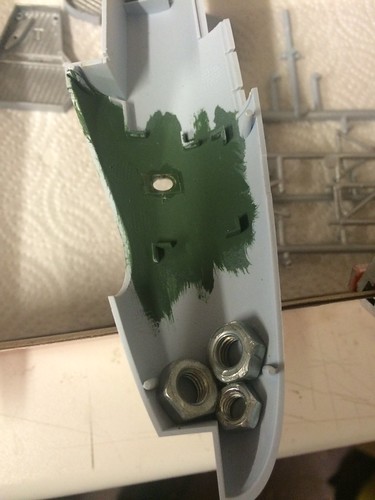
The main fuselage is now joined, a couple of adjustments needed to the internals to make it fit together without any gaps, and the front landing gear well had some extra strengthening added as it only attaches to each side of the fuselage by the edges meaning it could fall inside the model , so I added a few thick pieces of sprue off cut to wedge the wheel well inside the fuselage. The trusty cable ties have made a return, elastic bands just didn't hold it tight enough to give it a good squeeze
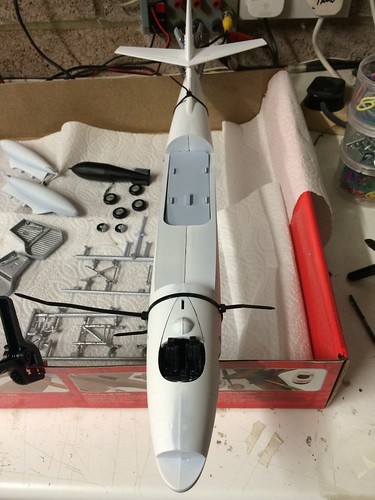
There a a few gaps around the joins namely the area behind the pilots and just in front of the front wheel well, however they will be covered by the cockpit canopy and bomb aimer's canopy so no major issue.
The main fuselage is now joined, a couple of adjustments needed to the internals to make it fit together without any gaps, and the front landing gear well had some extra strengthening added as it only attaches to each side of the fuselage by the edges meaning it could fall inside the model
There a a few gaps around the joins namely the area behind the pilots and just in front of the front wheel well, however they will be covered by the cockpit canopy and bomb aimer's canopy so no major issue.