Paul's Attempts
Re: Paul's Attempts
Well tidy comrade.
-
Canuck2016

- Active Participant
- Posts: 535
- Joined: March 6th, 2016, 4:03 pm
Re: Paul's Attempts
Fine-looking Yak, and the base sets it off nicely!
Can you explain again how you did the pitot tube? It looks great, but I don't understand how you did the wire and plastic tubing. Thanks!
Can you explain again how you did the pitot tube? It looks great, but I don't understand how you did the wire and plastic tubing. Thanks!
-
Softscience

- Staring out the window
- Posts: 7457
- Joined: April 5th, 2011, 4:34 pm
- Location: Maryland, near Washington DC
Re: Paul's Attempts
That is gorgeous!
-
skypirate

- Modelling Gent and Scholar
- Posts: 7293
- Joined: May 1st, 2011, 6:13 am
- Location: Port Macquarie, Australia
Re: Paul's Attempts
Very attractive Yak-3!
Neat finish!
cheers,
David
Neat finish!
cheers,
David

Re: Paul's Attempts
Thanks guys.
It is quite simple Fred. A plastic tube with an inner diameter slightly bigger than the guitar string is used. The plastic tube is placed over the guitar string and heated the same way you stretch regular sprue. The excess plastic is then cut and stripped off and you are left with a nice pitot tube(sometimes). As you could see. not all my attempts were successful. Stronger than straight plastic and takes paint nicely.Canuck2016 wrote:Fine-looking Yak, and the base sets it off nicely!
Can you explain again how you did the pitot tube? It looks great, but I don't understand how you did the wire and plastic tubing. Thanks!
Paul
This is it. The moment we should have trained for.
This is it. The moment we should have trained for.
Re: Paul's Attempts
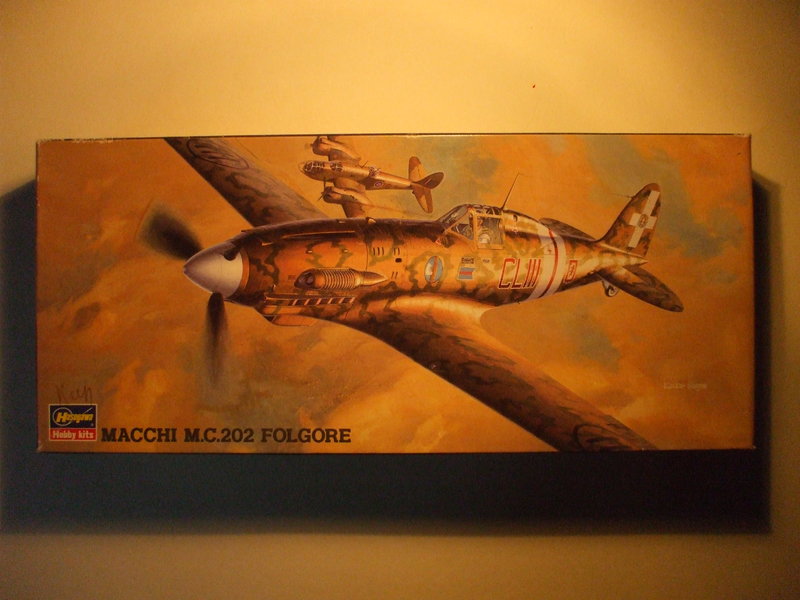
I started on a Macchi 202 Folgore from Hasegawa. I have always likes the lines of this aircraft. I am not looking forward to doing the smoke ring camo though. I will try to paint it with blue tac but as a back up, I have ordered decals from Mike Grant. I have seen them on other builds and they look impressive.
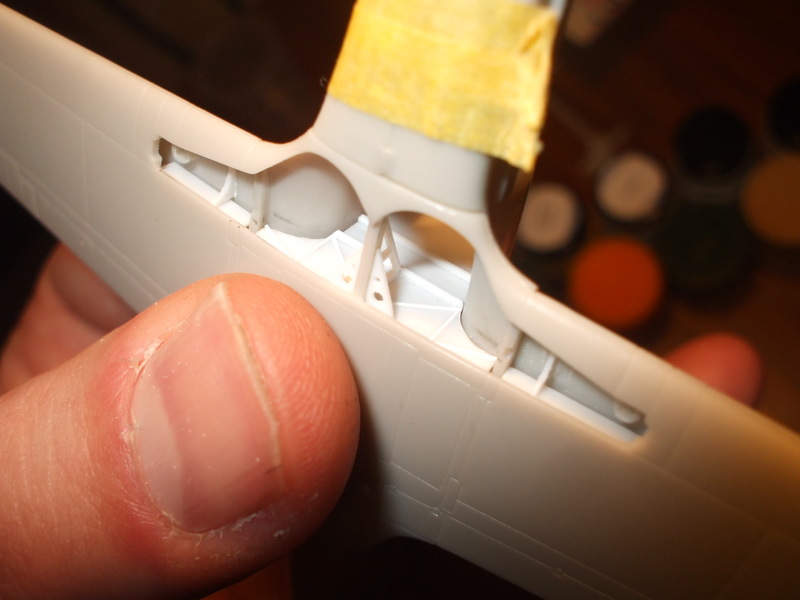
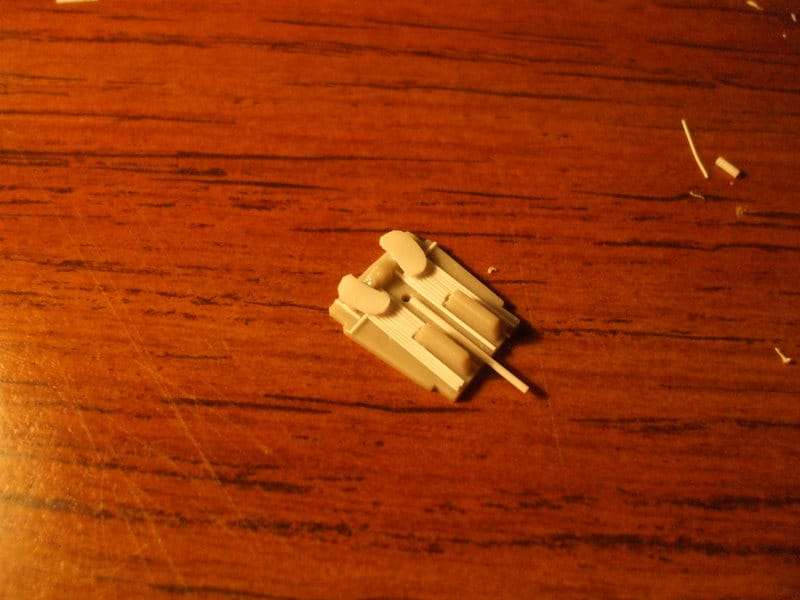
I removed the cockpit detail and also the flat plates that were the wheel well bottoms. They looked too shallow so I thought I would try to add some detail myself.
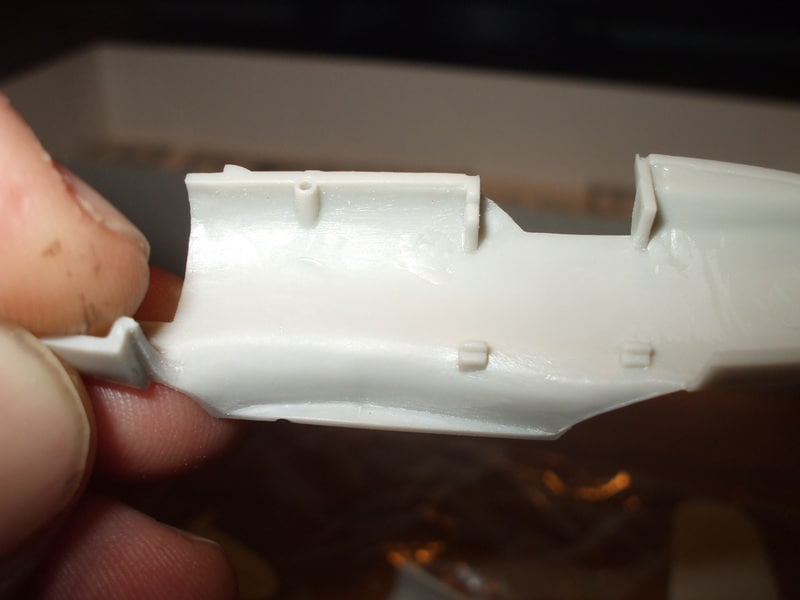
To make bulkheads for inside the fuselage I filled the interior with plaster and cut the plugs to trace accurate contours. I found that the plaster would flake off too easily when I scribed around the pattern so I ran thin CA glue on the plaster parts. The CA soaked in readily and the patterns became rock hard allowing me to scribe around them with no difficulties.
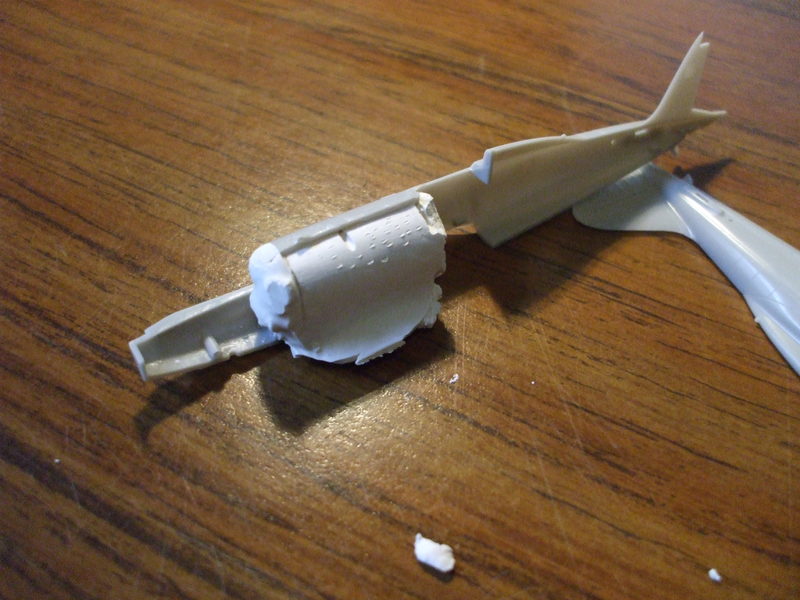
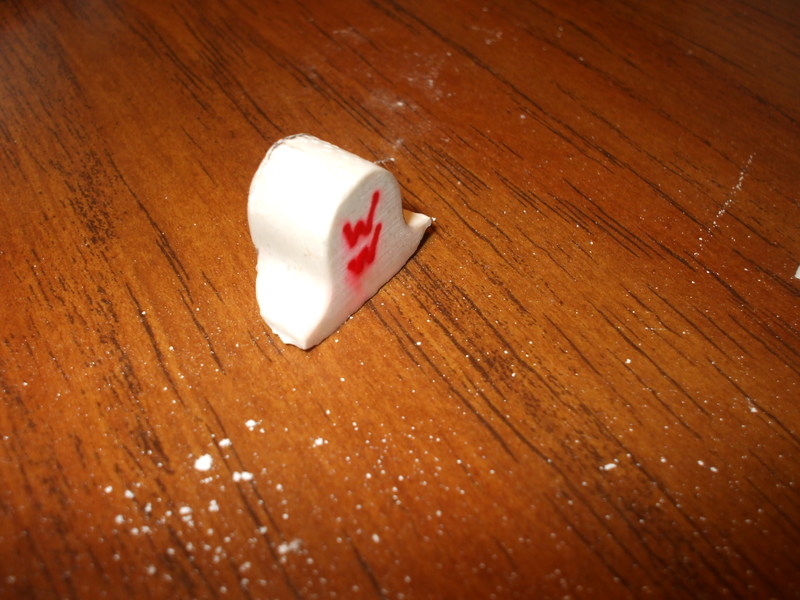
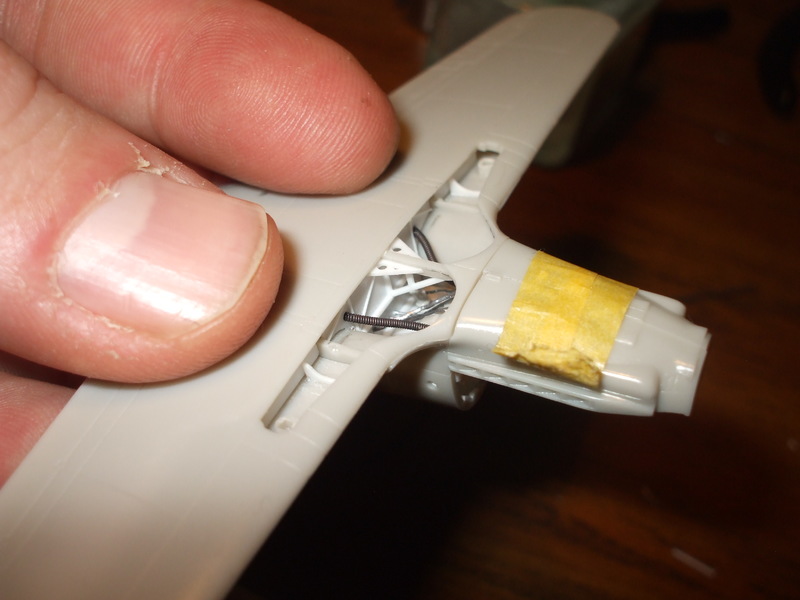
Wheel well wall in place and the fit was nice. Some detail added with plastic strips, guitar strings and lead wire.
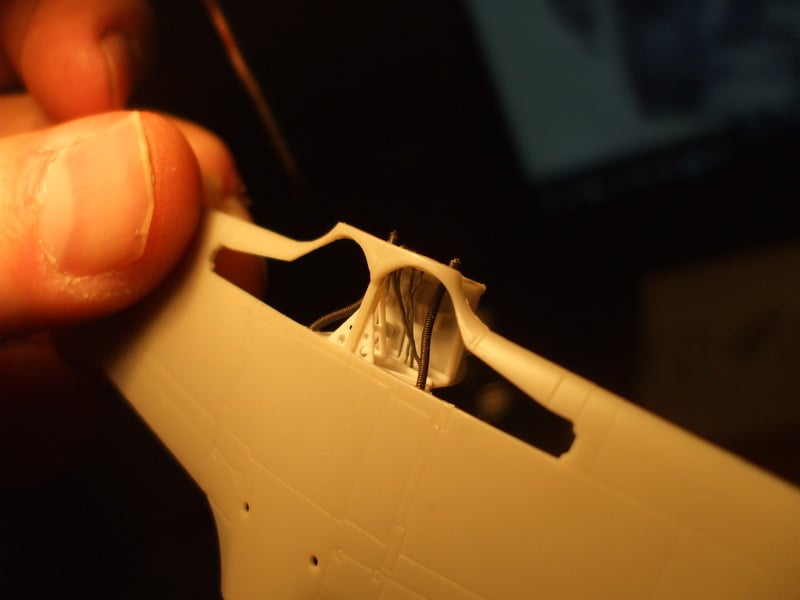
Cockpit given the same treatment. Should make it more busy looking.
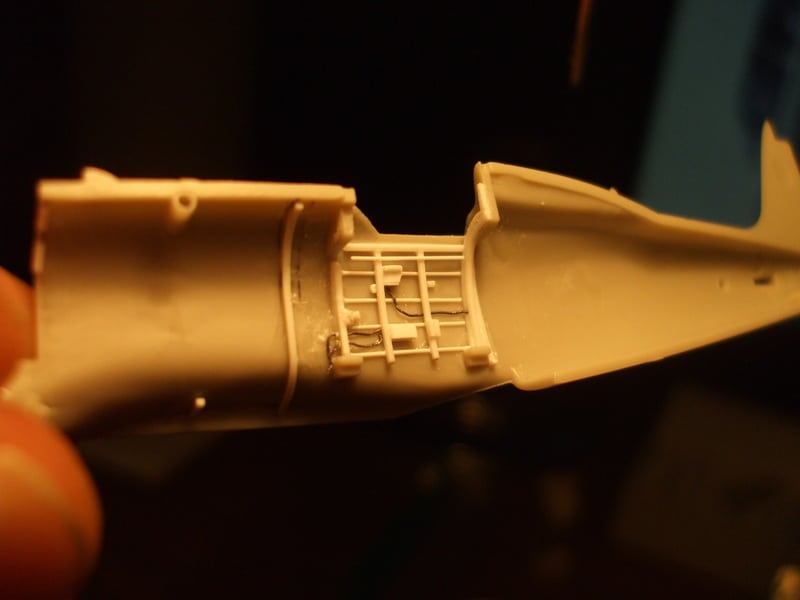
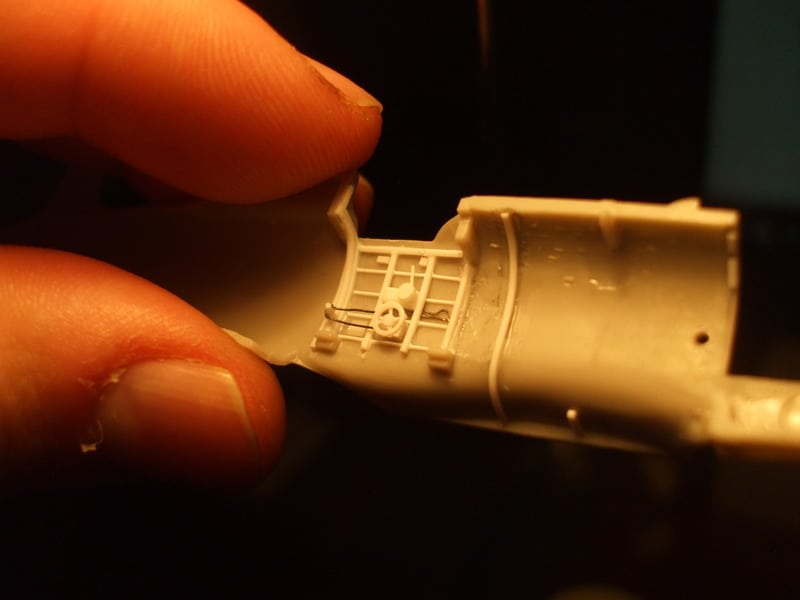
Thanks for looking.
I removed the cockpit detail and also the flat plates that were the wheel well bottoms. They looked too shallow so I thought I would try to add some detail myself.
To make bulkheads for inside the fuselage I filled the interior with plaster and cut the plugs to trace accurate contours. I found that the plaster would flake off too easily when I scribed around the pattern so I ran thin CA glue on the plaster parts. The CA soaked in readily and the patterns became rock hard allowing me to scribe around them with no difficulties.
Wheel well wall in place and the fit was nice. Some detail added with plastic strips, guitar strings and lead wire.
Cockpit given the same treatment. Should make it more busy looking.
Thanks for looking.
Paul
This is it. The moment we should have trained for.
This is it. The moment we should have trained for.
-
iggie

- Modelling Gent and Scholar
- Posts: 23418
- Joined: July 31st, 2013, 11:04 am
- Location: North Somercotes, Lincolnshire
- Contact:
Re: Paul's Attempts
Superb detailing Paul, that is going to look the mutt's whatsits when painted!
Best wishes
Jim
If you can walk away from a landing, it's a good landing. If you use the airplane the next day, it's an outstanding landing
"Never put off till tomorrow, what you can do the day after tomorrow"
Jim
If you can walk away from a landing, it's a good landing. If you use the airplane the next day, it's an outstanding landing
"Never put off till tomorrow, what you can do the day after tomorrow"
-
ShaunW
- NOT the sheep
- Posts: 26180
- Joined: November 26th, 2011, 6:11 pm
- Location: Pontefract West Yorkshire
Re: Paul's Attempts
Top work Paul, those are very worthwhile additions to the basic kit. I have Hase's 202 in 1/48th plus some of Mike Grant's smoke ring decals. The Folgore is the only Italian subject I currently have in the stash and indeed I've never built an aircraft in Italian markings before. I can't explain why as there are some great looking Italian subjects with very interesting, to say nothing of complex, schemes.
Doing - Tamiya 1/35th Universal Carrier.
Work is the curse of the modelling classes!
IPMS#12300
Work is the curse of the modelling classes!
IPMS#12300
-
Canuck2016
- Active Participant
- Posts: 535
- Joined: March 6th, 2016, 4:03 pm
Re: Paul's Attempts
Wow, Paul, the bulkhead and other internal details look great! It's ingenious the way you got the right contour. Never seen that done before!
-
Stuart

- Raider of the Lost Ark Royal
- Posts: 19415
- Joined: February 25th, 2013, 4:55 pm
- Location: North Wales
- Contact:
Re: Paul's Attempts
Superb work!
Stuart Templeton I may not be good but I'm slow...
My Blog: https://stuartsscalemodels.blogspot.com/
My Blog: https://stuartsscalemodels.blogspot.com/
-
skypirate
- Modelling Gent and Scholar
- Posts: 7293
- Joined: May 1st, 2011, 6:13 am
- Location: Port Macquarie, Australia
Re: Paul's Attempts
Wow! Those extras in the wheel wells look very convincing!
David
David
-
TeeELL

- Modelling Gent and Scholar
- Posts: 11592
- Joined: December 28th, 2015, 4:38 pm
- Location: North Wiltshire
Re: Paul's Attempts
Paul,
I came across your posts the other day but it has taken me until today to find you again! I just wanted to remind you that, if you want to pose your aircraft on the ground the throttle needs to be in the fully FORWARD position! The Italians, for some strange reason, prefered to reverse the way the throttle works. Bet that caused confusion with other axis aircraft or captured allied aircraft?
I came across your posts the other day but it has taken me until today to find you again! I just wanted to remind you that, if you want to pose your aircraft on the ground the throttle needs to be in the fully FORWARD position! The Italians, for some strange reason, prefered to reverse the way the throttle works. Bet that caused confusion with other axis aircraft or captured allied aircraft?
Tony
The older I get the better I was!
Current build:
Airfix 1:72 Javelin FAW9
Particular modelling interests:
Cuban Airforce aircraft, 29(F) Sqn aircraft, Aircraft I’ve flown
The older I get the better I was!
Current build:
Airfix 1:72 Javelin FAW9
Particular modelling interests:
Cuban Airforce aircraft, 29(F) Sqn aircraft, Aircraft I’ve flown
-
mjatx

- Modelling Gent and Scholar
- Posts: 1396
- Joined: April 10th, 2014, 10:13 pm
- Location: Austin, Texas, USA
Re: Paul's Attempts
Excellent work, Paul. Really stunning scratch building.
-
Canuck2016
- Active Participant
- Posts: 535
- Joined: March 6th, 2016, 4:03 pm
Re: Paul's Attempts
Amazing work on the additional details, Paul! That's going to look great!
-
Sissel

- Modelling Lady and Scholar
- Posts: 4097
- Joined: October 31st, 2011, 12:39 pm
- Location: Island in Norway
Re: Paul's Attempts
Mighty impressive work, I will try to follow this build 
Confused as always, and somewhere in hiding on the Scandinavian peninsula...