Paul's Attempts
-
Sunray
- Active Participant
- Posts: 611
- Joined: March 18th, 2014, 4:01 pm
- Location: Penshaw, North East, England
- Contact:
Re: Paul's Attempts
Excellent work Paul. What I do to harden plaster off is to give it a few coats of acrylic gloss spray varnish from a spray can which I brought from my local DIY store. You get a nice shine on it as I used it to make plugs for vacuforming canopy's. It might be a bit cheaper than using CA glue. http://www.uamf.org.uk/viewtopic.php?f= ... 5&start=60 I hope this helps?
Cheers
Ian
Please click on the web link below to have a look at all my photo's.
https://www.flickr.com/photos/ecirpnai/albums
Ian
Please click on the web link below to have a look at all my photo's.
https://www.flickr.com/photos/ecirpnai/albums

Re: Paul's Attempts
Thanks Sunray. That sounds like a good idea as well. I checked what you have done with it to make canopies. Very nice work. I will have to try that later on.Sunray wrote:Excellent work Paul. What I do to harden plaster off is to give it a few coats of acrylic gloss spray varnish from a spray can which I brought from my local DIY store. You get a nice shine on it as I used it to make plugs for vacuforming canopy's. It might be a bit cheaper than using CA glue. http://www.uamf.org.uk/viewtopic.php?f= ... 5&start=60 I hope this helps?
Cheers,
Paul
This is it. The moment we should have trained for.
This is it. The moment we should have trained for.
Re: Paul's Attempts
Thank you Iggie. I will wait and see how the camo goes on. I have been practicing however My airbrush skills have not improved enough to do the smoke rings yet. Mike Grant Decals are looking like the way ahead for me.iggie wrote:Superb detailing Paul, that is going to look the mutt's whatsits when painted!
Paul
This is it. The moment we should have trained for.
This is it. The moment we should have trained for.
Re: Paul's Attempts
Thank you Shaun. I have seen the 1:48 scale kit online and it looks like a great model. It is a beautiful aircraft.ShaunW wrote:Top work Paul, those are very worthwhile additions to the basic kit. I have Hase's 202 in 1/48th plus some of Mike Grant's smoke ring decals. The Folgore is the only Italian subject I currently have in the stash and indeed I've never built an aircraft in Italian markings before. I can't explain why as there are some great looking Italian subjects with very interesting, to say nothing of complex, schemes.
Paul
This is it. The moment we should have trained for.
This is it. The moment we should have trained for.
Re: Paul's Attempts
Thank you Fred. The plaster mold has worked out pretty well.Canuck2016 wrote:Wow, Paul, the bulkhead and other internal details look great! It's ingenious the way you got the right contour. Never seen that done before!
Paul
This is it. The moment we should have trained for.
This is it. The moment we should have trained for.
Re: Paul's Attempts
Sir T wrote:Superb work!
Thanks Stu and David.skypirate wrote:Wow! Those extras in the wheel wells look very convincing!
David
Paul
This is it. The moment we should have trained for.
This is it. The moment we should have trained for.
-
billyb_imp

- Onto the Clever Stuff, Now.
- Posts: 130
- Joined: April 29th, 2017, 9:09 pm
- Location: Lincoln, UK
Re: Paul's Attempts
Wow some very intricate work shown in this thread, I will certainly be back for another look
A start on my first kit a Hawker Hurricane as been made, a spitfire awaits in the wings and thinking about models to come.
Modelling space in shed coming along nicely.
Modelling space in shed coming along nicely.
Re: Paul's Attempts
I could not tell if you were joking, so I had to google this. I can not believe throttles would be designed that way. I could not imagine flying close formation like that. I suppose like anything you would get used to it but until then I would want a QFI close by or the lead aircraft far away. Also pulling for increased power would pull you back in your seat which may result it you pulling more power. Weird. Are other Italian aircraft like this?TeeELL wrote:Paul,
I came across your posts the other day but it has taken me until today to find you again! I just wanted to remind you that, if you want to pose your aircraft on the ground the throttle needs to be in the fully FORWARD position! The Italians, for some strange reason, prefered to reverse the way the throttle works. Bet that caused confusion with other axis aircraft or captured allied aircraft?
Thanks for the info Tony.
Paul
This is it. The moment we should have trained for.
This is it. The moment we should have trained for.
Re: Paul's Attempts
mjatx wrote:Excellent work, Paul. Really stunning scratch building.
Canuck2016 wrote:Amazing work on the additional details, Paul! That's going to look great!
Thanks again. Things usually start off good but I am kind of waiting for the shoe to drop on this one. I think it will be when I try the camo.Sissel wrote:Mighty impressive work, I will try to follow this build
Cheers,
Paul
This is it. The moment we should have trained for.
This is it. The moment we should have trained for.
Re: Paul's Attempts
Well, I have finally got back to the modelling bench. Work gets in the way sometimes and it was a bear the last bit. Makes you appreciate when you do get back.
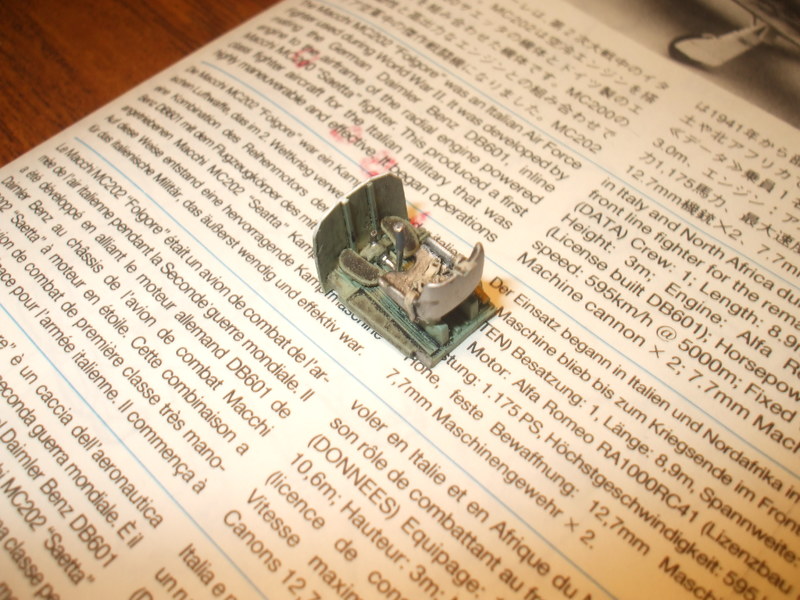
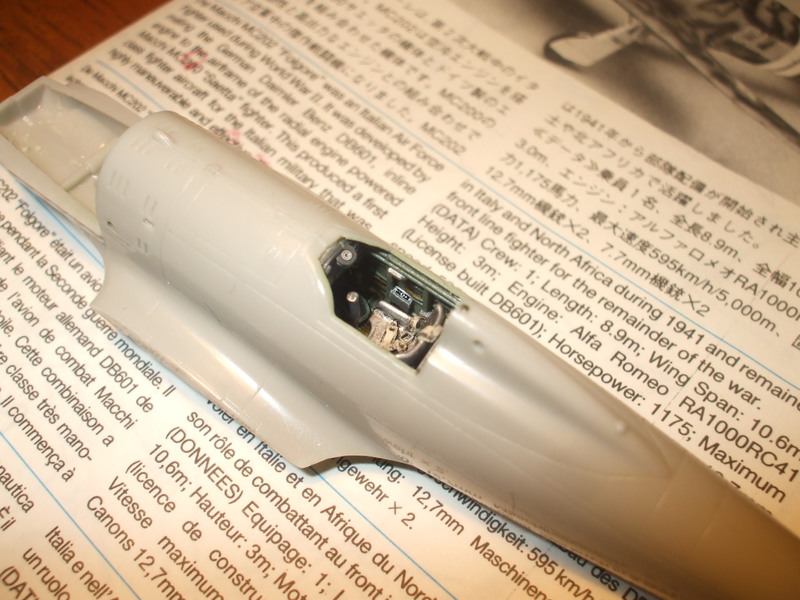
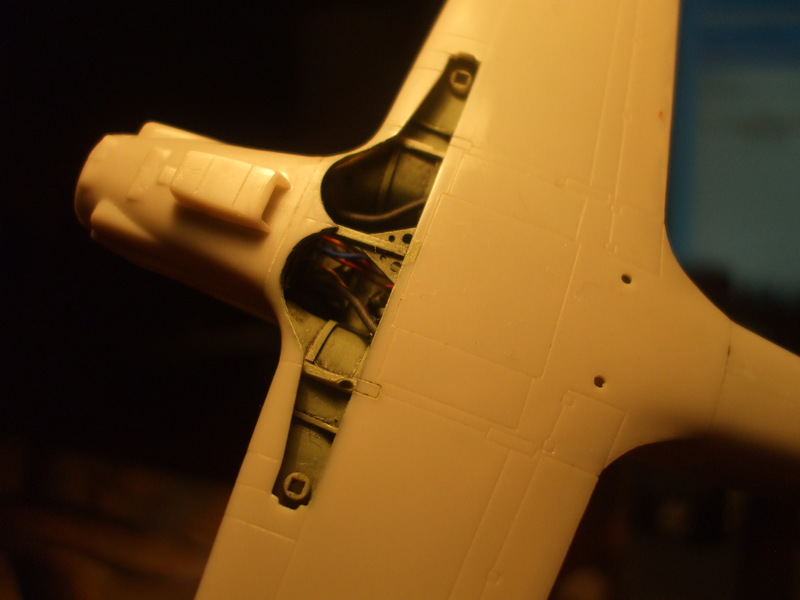
I have painted the greebels in the cockpit and wheel wells. A couple different colours for the various lines.
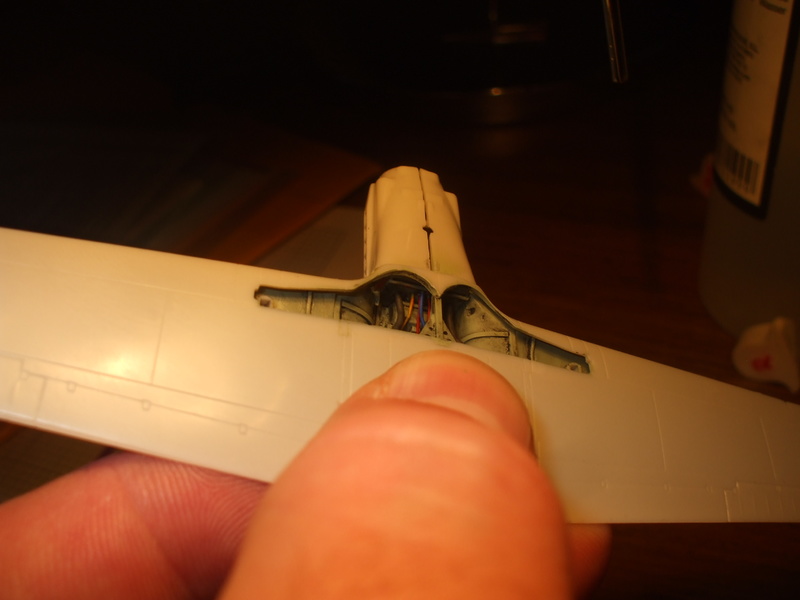
Cockpit is almost finished. I still have to paint the what I think is the armored back behind the seat and install it and that should come shortly. It is not so dirty looking in real life though.

Cheers,
I have painted the greebels in the cockpit and wheel wells. A couple different colours for the various lines.
Cockpit is almost finished. I still have to paint the what I think is the armored back behind the seat and install it and that should come shortly. It is not so dirty looking in real life though.
Cheers,
Paul
This is it. The moment we should have trained for.
This is it. The moment we should have trained for.
-
iggie

- Modelling Gent and Scholar
- Posts: 23424
- Joined: July 31st, 2013, 11:04 am
- Location: North Somercotes, Lincolnshire
- Contact:
Re: Paul's Attempts
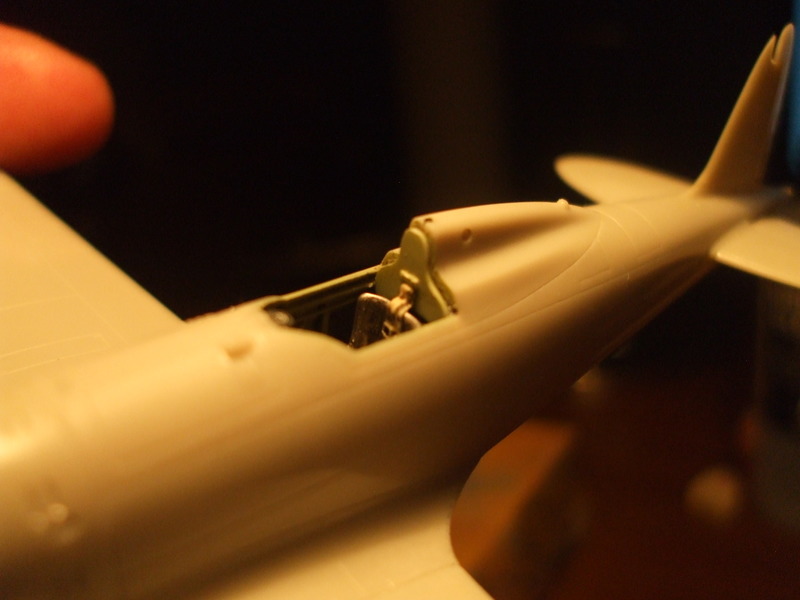
Beautiful work Paul, that cockpit is a thing of beauty
Best wishes
Jim
If you can walk away from a landing, it's a good landing. If you use the airplane the next day, it's an outstanding landing
"Never put off till tomorrow, what you can do the day after tomorrow"
Jim
If you can walk away from a landing, it's a good landing. If you use the airplane the next day, it's an outstanding landing
"Never put off till tomorrow, what you can do the day after tomorrow"
-
ShaunW
- NOT the sheep
- Posts: 26180
- Joined: November 26th, 2011, 6:11 pm
- Location: Pontefract West Yorkshire
Re: Paul's Attempts
What he saidiggie wrote:Beautiful work Paul, that cockpit is a thing of beauty
Doing - Tamiya 1/35th Universal Carrier.
Work is the curse of the modelling classes!
IPMS#12300
Work is the curse of the modelling classes!
IPMS#12300
-
dollar19
- Modelling Gent and Scholar
- Posts: 1342
- Joined: May 1st, 2011, 1:11 am
- Location: Bristol, Va. USA
Re: Paul's Attempts
That is just going to sparkle.
Re: Paul's Attempts
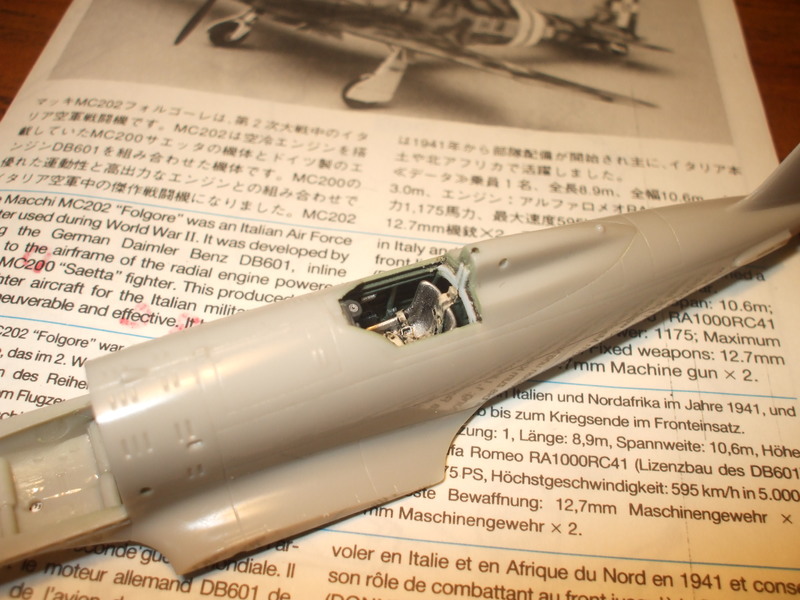
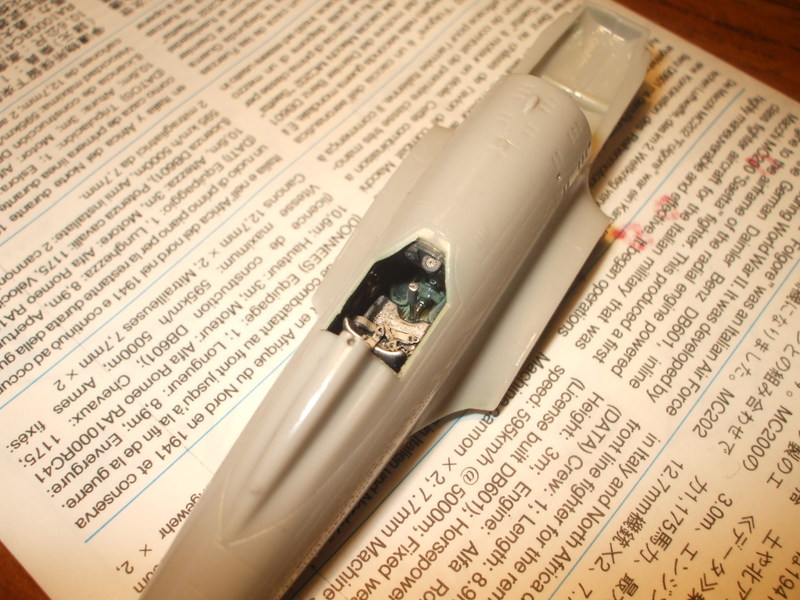
Just a little update. I had a chance to work on the Macchi on the weekend and it is starting to come together. The armored back is in the cockpit and everything is snug as a bug in there.
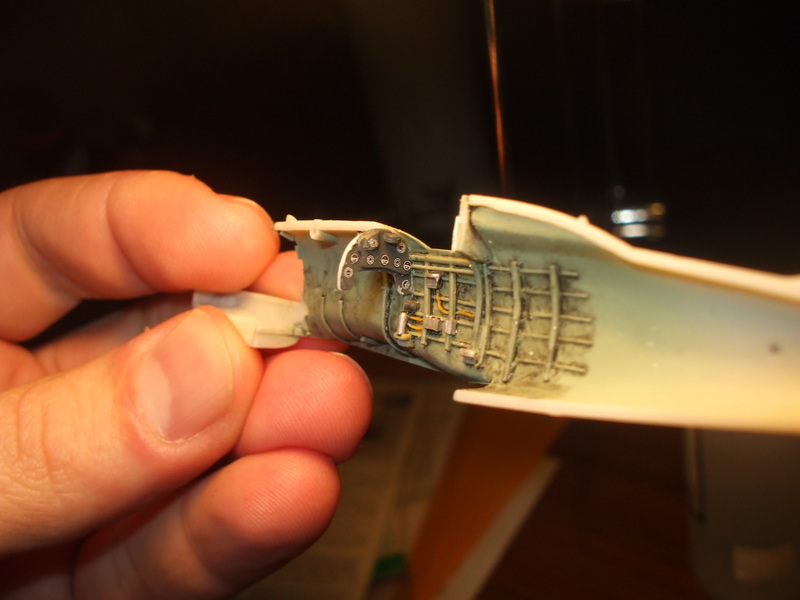
I had some trouble with the fit of the engine cowling to fuselage joint. The cowling is too narrow and not quite the right shape. I put some sprue to widen the cowling but there is still a significant step. I could not figure out a way to fix it without removing the details around it so I am just going to live with it. I used some epoxy in the fuselage to strengthen the fuselage halves so my manipulation would not split it later.

The wing fuselage joint required a little work. In all honesty it could use more work still but I am going to call it quits with some sanding to flatten it out.
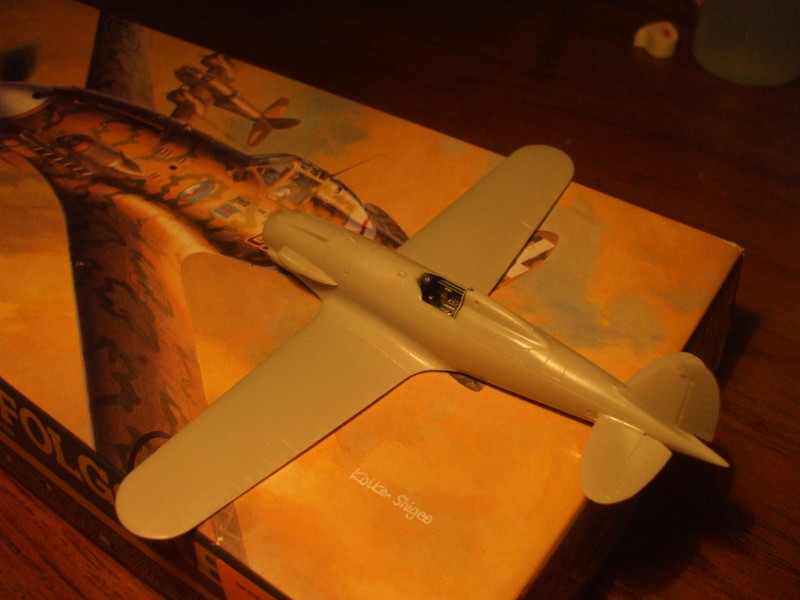
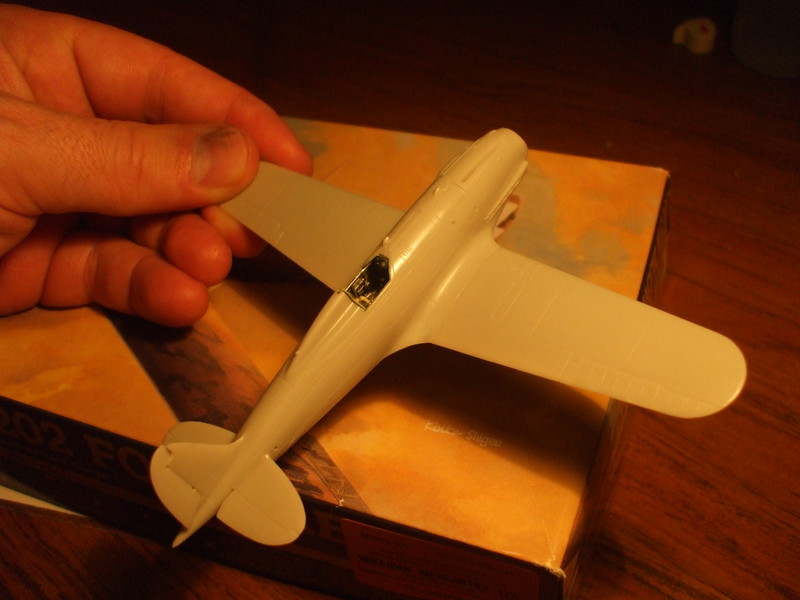
The underside fit was very nice. Everything lines up nicely and only a little CA to make the seams disappear.
Thanks for looking,
I had some trouble with the fit of the engine cowling to fuselage joint. The cowling is too narrow and not quite the right shape. I put some sprue to widen the cowling but there is still a significant step. I could not figure out a way to fix it without removing the details around it so I am just going to live with it. I used some epoxy in the fuselage to strengthen the fuselage halves so my manipulation would not split it later.
The wing fuselage joint required a little work. In all honesty it could use more work still but I am going to call it quits with some sanding to flatten it out.
The underside fit was very nice. Everything lines up nicely and only a little CA to make the seams disappear.
Thanks for looking,
Paul
This is it. The moment we should have trained for.
This is it. The moment we should have trained for.
-
skypirate

- Modelling Gent and Scholar
- Posts: 7295
- Joined: May 1st, 2011, 6:13 am
- Location: Port Macquarie, Australia
Re: Paul's Attempts
Lovely work all round that Macchi!
cheers,
David
cheers,
David