Fred's Breakfast Bar
-
mjatx

- Modelling Gent and Scholar
- Posts: 1396
- Joined: April 10th, 2014, 10:13 pm
- Location: Austin, Texas, USA
Re: Fred's Breakfast Bar
This is really excellent work. Looking forward to more updates.
-
Canuck2016

- Active Participant
- Posts: 535
- Joined: March 6th, 2016, 4:03 pm
Re: Fred's Breakfast Bar
Thanks, all!
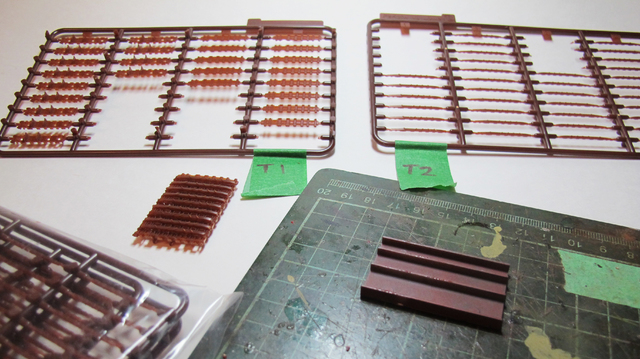
Finally started on the tracks, which consist of three different types of pieces. Slow going, but to their credit, the good people at Amusing Hobby provide us with a jig (the rectangular thing on the cutting board) which makes assembly a lot easier .
The tracks are supposed to be workable, since adjacent sections fit together with grooves and pins, which are then sandwiched against a third piece which is glued in place. This sounds good in theory, but the grooves, pins, and the mating surfaces for the glue are very tiny. I've assembled a 1.5-inch section so far (just left of centre of the photo), and am now waiting for the glue to dry. I put little dabs of vaseline on the pins, in the hope this would prevent my sloppy glue application from fusing the whole thing into a solid lump. We'll see how it goes. If it worked, I'll continue this way, although it's very tedious. If not, I'll give up and slather the lot in glue, then wrap it around the running gear and let it set, the old-fashioned way.
Again, wish me luck! Have a great weekend!
-
Canuck2016
- Active Participant
- Posts: 535
- Joined: March 6th, 2016, 4:03 pm
Re: Fred's Breakfast Bar
Complete, unmitigated failure. After allowing the glue to set, I gently tried to flex the small section of track, but it had dried completely rigid. When I used some additional gentle persuasion, the pieces just popped apart. I expect I'll try "the old-fashioned way" as I said above, but that'll be for another day.
Cheers!
Cheers!
-
ShaunW
- NOT the sheep
- Posts: 26188
- Joined: November 26th, 2011, 6:11 pm
- Location: Pontefract West Yorkshire
Re: Fred's Breakfast Bar
I've missed most of this and have just gone back for a recap. That is a masterful bit of armour painting Fred. I've never built one of these "paper panzers" and this looks very interesting, a snap shot of what might have been but, thankfully, never was. L and L tracks can be a pain to assemble but IMHO are just the thing where sagging is called for such as on models of heavy German and Soviet armour. I usually go the more old fashioned route and assemble the tracks in sections using liquid glue and then apply the sections to the wheels whilst the glue is still pliable, followed by more liquid glue to set the whole thing. It can, however, be a fiddly, teeth gnashing, bad language spouting, nightmare.......
Doing - Tamiya 1/35th Universal Carrier.
Work is the curse of the modelling classes!
IPMS#12300
Work is the curse of the modelling classes!
IPMS#12300
-
Canuck2016
- Active Participant
- Posts: 535
- Joined: March 6th, 2016, 4:03 pm
Re: Fred's Breakfast Bar
Thanks for the kind remarks, ShaunW!
I agree that individual link tracks look good once they're done, but they certainly can be frustrating. I think I'll do as you suggest: assemble them in sections and fix them with liquid glue.
I agree that individual link tracks look good once they're done, but they certainly can be frustrating. I think I'll do as you suggest: assemble them in sections and fix them with liquid glue.
-
Canuck2016
- Active Participant
- Posts: 535
- Joined: March 6th, 2016, 4:03 pm
Re: Fred's Breakfast Bar
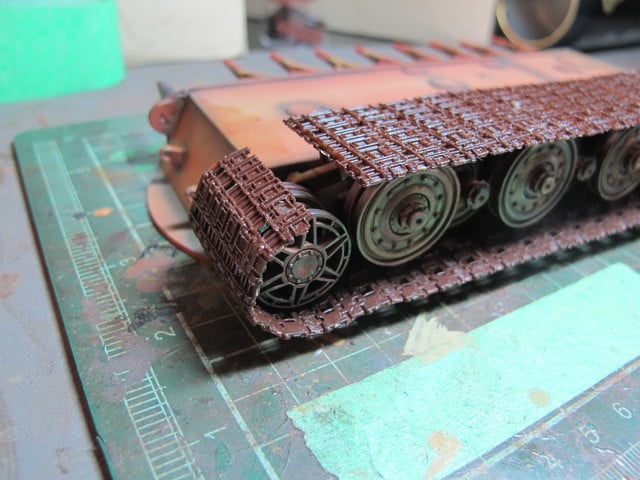
Baby steps . . .
As discussed earlier, I opted to do the tracks the traditional way. Here's one run which I assembled on a piece of masking tape, sticky side up. Then an application of Testor's Liquid Cement, then a ten-minute wait while it firmed up.
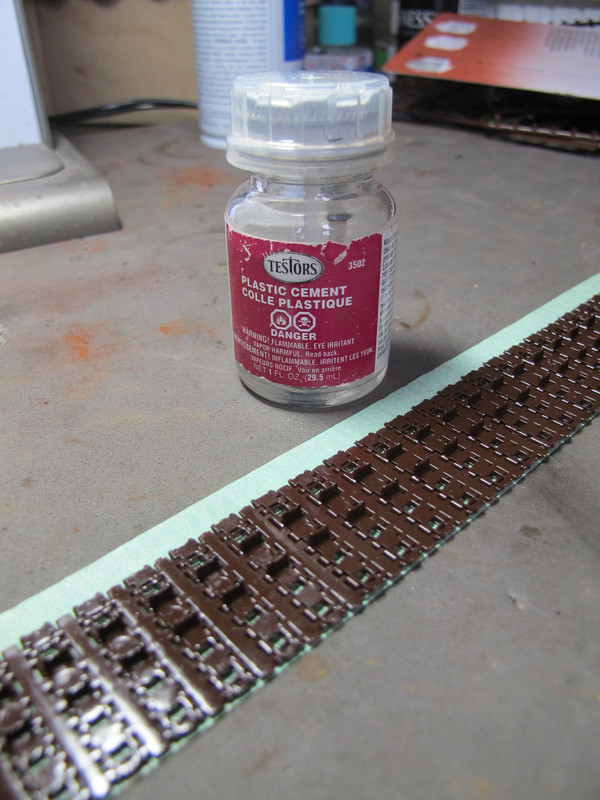
As discussed earlier, I opted to do the tracks the traditional way. Here's one run which I assembled on a piece of masking tape, sticky side up. Then an application of Testor's Liquid Cement, then a ten-minute wait while it firmed up.
-
Canuck2016
- Active Participant
- Posts: 535
- Joined: March 6th, 2016, 4:03 pm
Re: Fred's Breakfast Bar
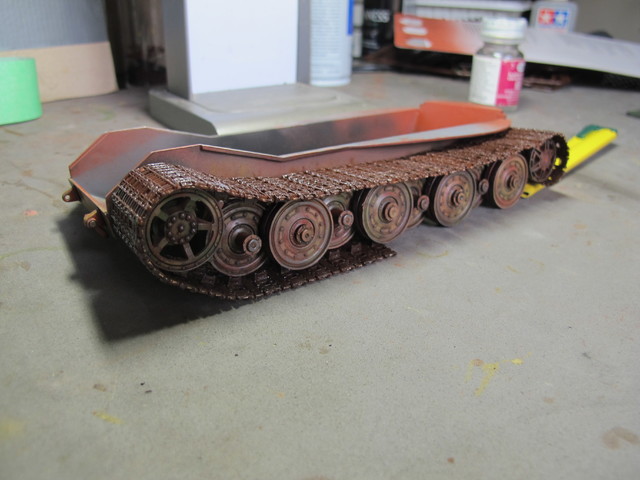
Here's one track attached to the running gear on one side. It went OK for the most part. The width of the tracks made it easy to keep them straight, and it gave the cement a lot of area to work with.
You'll notice there's a missing section at the bottom rear. It fell off while I was wrapping the track around the idler. Rather than try to re-attach it immediately, I figured I'd wait to add it once the whole thing hardens. It's just a straight section anyway. The yellow hobby knife you see at the back is to prevent the last couple of links from hanging straight down. I also have to add the cleats between each link, which promises to be tedious. :( I may leave them off the bottom, both to save time, and also because it may give the illusion that the tank has sunk into the table top!
As ShaunW mentioned, indie link tracks do give a nice-looking sag, and I'm happy with it overall.
-
Softscience

- Staring out the window
- Posts: 7488
- Joined: April 5th, 2011, 4:34 pm
- Location: Maryland, near Washington DC
Re: Fred's Breakfast Bar
Canuck2016 wrote:Small chips and blemishes in the paint were simulated by wetting the surface with thinner, then flicking on reddish-brown artist's oil paint with a toothbrush, and letting it dry.
That looks fantastic!
-
Canuck2016
- Active Participant
- Posts: 535
- Joined: March 6th, 2016, 4:03 pm
Re: Fred's Breakfast Bar
Thanks Softscience! Very kind of you to say so. It's a very easy technique!
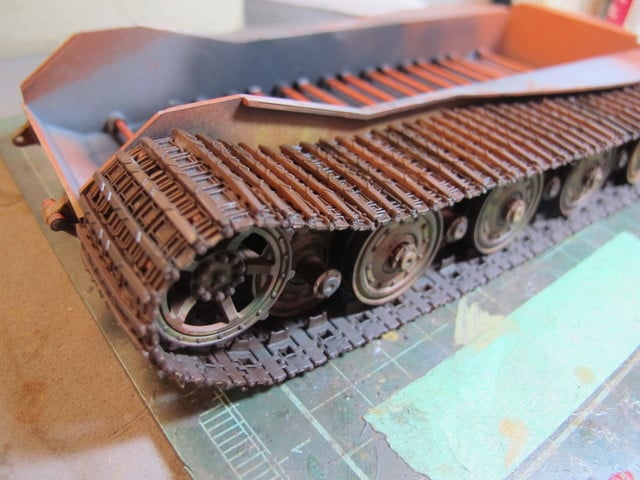
So, the missing section of track has been glued in place, but there's still about a two-link gap. I used 89 links as recommended by the instructions, but it doesn't quite reach. Fortunately the kit provides some extras!
So, the missing section of track has been glued in place, but there's still about a two-link gap. I used 89 links as recommended by the instructions, but it doesn't quite reach. Fortunately the kit provides some extras!
-
Canuck2016
- Active Participant
- Posts: 535
- Joined: March 6th, 2016, 4:03 pm
Re: Fred's Breakfast Bar
Filled the gap with an extra two links, then glued the cleats on. A little tedious, but it all went smoothly.

-
Canuck2016
- Active Participant
- Posts: 535
- Joined: March 6th, 2016, 4:03 pm
Re: Fred's Breakfast Bar
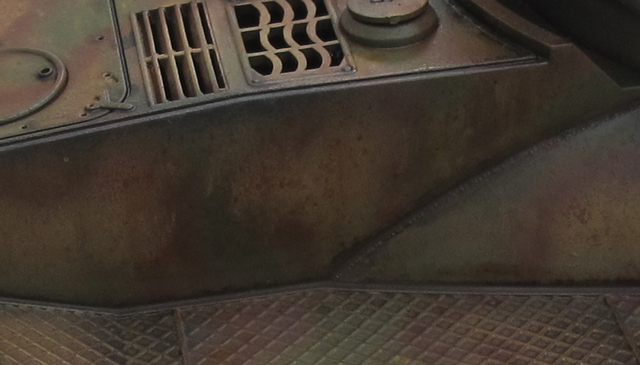
A shot of Testor's Dullcote to knock down the shine, then a wash with thinned dark brown artist's oils.
-
Canuck2016
- Active Participant
- Posts: 535
- Joined: March 6th, 2016, 4:03 pm
Re: Fred's Breakfast Bar
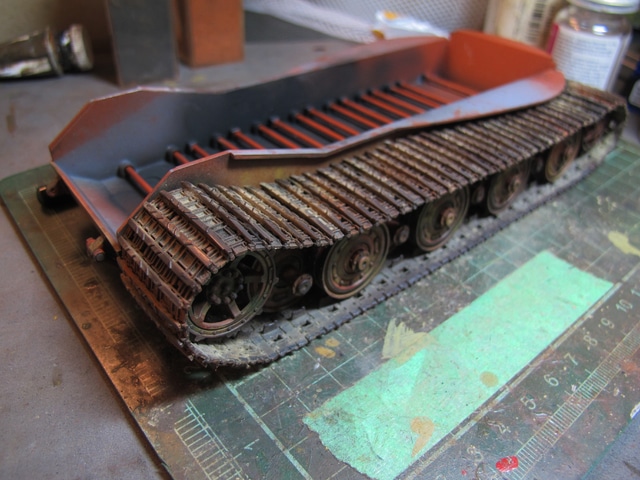
A dusting with pigments, then high points picked out with a graphite pencil to simulate worn metal. The pigments were mostly a dusty colour, with a bit of rust and black added in some spots for variety.
Now to do the other side! Aaargh!
Now to do the other side! Aaargh!
-
iggie

- Modelling Gent and Scholar
- Posts: 23437
- Joined: July 31st, 2013, 11:04 am
- Location: North Somercotes, Lincolnshire
- Contact:
Re: Fred's Breakfast Bar
Excellent work on that track!
Best wishes
Jim
If you can walk away from a landing, it's a good landing. If you use the airplane the next day, it's an outstanding landing
"Never put off till tomorrow, what you can do the day after tomorrow"
Jim
If you can walk away from a landing, it's a good landing. If you use the airplane the next day, it's an outstanding landing
"Never put off till tomorrow, what you can do the day after tomorrow"
-
TobyC

- Modelling Gent and Scholar
- Posts: 5540
- Joined: January 15th, 2013, 2:13 pm
- Location: Cobham, Surrey. Blighty
Re: Fred's Breakfast Bar
Those tracks look very real. Painting tracks I think is one of the most difficult jobs in modelling to get right and imo you're got it just right.
Enjoyment over accuracy. That's my motto
-
ShaunW
- NOT the sheep
- Posts: 26188
- Joined: November 26th, 2011, 6:11 pm
- Location: Pontefract West Yorkshire
Re: Fred's Breakfast Bar
Excellent Fred. The sag looks spot on to me and although such can be replicated with one piece rubber band type tracks and plenty of CA or two-part epoxy glue, I never think that it really ever quite matches the finesse of separate link track sets. Great painting too, the track looks very realistic.
Doing - Tamiya 1/35th Universal Carrier.
Work is the curse of the modelling classes!
IPMS#12300
Work is the curse of the modelling classes!
IPMS#12300