Thanks, David! I hope the weather's warmer in Australia than it is in Canada right now!
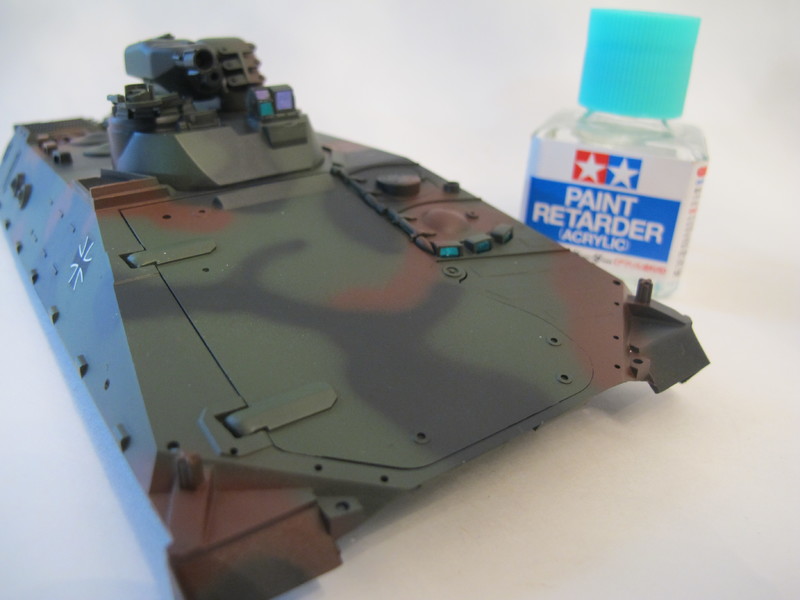
Good day, all! I wanted to show everyone a product which you may already be familiar with, but which is new to me: Tamiya Paint Retarder. I used to find that my attempts at airbrushing large areas ended up with a pebbly finish. I'm no shark at the science of this, but I tried to correct it by adjusting the amount of thinner, air pressure, distance of the airbrush, etc., and I still couldn't get it to work. Finally I bought this bottle of retarder, and tried adding just a few drops directly to the paint in the cup of the airbrush. I think it works very well, and gives a nice, satiny finish when using flat paint. As I understand it, it slows the drying of the paint, giving it a chance to smooth out before it hardens.
The photo shows the finish on Tamiya's 1:35 Marder. The base coat of green, and the brown and black splotches, all turned out with a nice, smooth, even surface. Success at last!