Sorry for the lack of updates but I had to focus on completing the model. In addition, my photo software has become corrupted which is preventing me from trimming and re-sizing photos. I am at my boat presently as I have my Boat Safety check tomorrow, but on my return home I will re-load the software.
My model was placed 3rd in its category, so I was very pleased with that!
TeeELLs kitchen crafting kit creations
-
TeeELL

- Modelling Gent and Scholar
- Posts: 11619
- Joined: December 28th, 2015, 4:38 pm
- Location: North Wiltshire
Re: TeeELLs kitchen crafting kit creations
Tony
The older I get the better I was!
Current build:
Airfix 1:72 Javelin FAW9
Particular modelling interests:
Cuban Airforce aircraft, 29(F) Sqn aircraft, Aircraft I’ve flown
The older I get the better I was!
Current build:
Airfix 1:72 Javelin FAW9
Particular modelling interests:
Cuban Airforce aircraft, 29(F) Sqn aircraft, Aircraft I’ve flown
-
TeeELL
- Modelling Gent and Scholar
- Posts: 11619
- Joined: December 28th, 2015, 4:38 pm
- Location: North Wiltshire
Re: TeeELLs kitchen crafting kit creations
Back in page 3 or 4 of my posts on this thread, I featured a Matilda tank in Caunter colours. What I don't think I mentioned was that this was the second Matilda bought because I lost half of the commanders cupola hatch doors when I razor sawed them in half. I subsequently cast a replacement using the 'new' Matilda's part. The good news is that, a year on, the carpet monster regurgitated the missing part, the bad news is that it's twin half has now gone missing!!
Tony
The older I get the better I was!
Current build:
Airfix 1:72 Javelin FAW9
Particular modelling interests:
Cuban Airforce aircraft, 29(F) Sqn aircraft, Aircraft I’ve flown
The older I get the better I was!
Current build:
Airfix 1:72 Javelin FAW9
Particular modelling interests:
Cuban Airforce aircraft, 29(F) Sqn aircraft, Aircraft I’ve flown
-
dollar19
- Modelling Gent and Scholar
- Posts: 1342
- Joined: May 1st, 2011, 1:11 am
- Location: Bristol, Va. USA
Re: TeeELLs kitchen crafting kit creations
Boy haven’t we all gone thru that scenario.
Btw good luck on the safety inspection!
Btw good luck on the safety inspection!
-
iggie

- Modelling Gent and Scholar
- Posts: 23437
- Joined: July 31st, 2013, 11:04 am
- Location: North Somercotes, Lincolnshire
- Contact:
Re: TeeELLs kitchen crafting kit creations
That does sound a fairly typical story!
Good luck with the BSS inspection; we failed ours on the water heater flue....funny how it's passed every time since the boat was built . I'm still 'debating' it with the examiner; my interpretation is that he is applying a new requirement retrospectively, but that BSS do not require retrospective application!
Good luck with the BSS inspection; we failed ours on the water heater flue....funny how it's passed every time since the boat was built
Best wishes
Jim
If you can walk away from a landing, it's a good landing. If you use the airplane the next day, it's an outstanding landing
"Never put off till tomorrow, what you can do the day after tomorrow"
Jim
If you can walk away from a landing, it's a good landing. If you use the airplane the next day, it's an outstanding landing
"Never put off till tomorrow, what you can do the day after tomorrow"
-
TeeELL
- Modelling Gent and Scholar
- Posts: 11619
- Joined: December 28th, 2015, 4:38 pm
- Location: North Wiltshire
Re: TeeELLs kitchen crafting kit creations
Oh, the boat passed despite the comedy of errors that I had to rush around sorting whilst Peter was very patient!
Tony
The older I get the better I was!
Current build:
Airfix 1:72 Javelin FAW9
Particular modelling interests:
Cuban Airforce aircraft, 29(F) Sqn aircraft, Aircraft I’ve flown
The older I get the better I was!
Current build:
Airfix 1:72 Javelin FAW9
Particular modelling interests:
Cuban Airforce aircraft, 29(F) Sqn aircraft, Aircraft I’ve flown
-
TeeELL
- Modelling Gent and Scholar
- Posts: 11619
- Joined: December 28th, 2015, 4:38 pm
- Location: North Wiltshire
Re: TeeELLs kitchen crafting kit creations
I am afraid that my need to 'get-on' with the build caused me to fail to photograph stages of the build. I have finally managed to get Photoshop to behave and have re-sized some of the work. Of course, with reasonable light available and PS working, I thought to take a few photos of the end result - camera battery dead!! I will give it half an hour and do some photos before the light goes.
Until then here are some photos I took earlier.
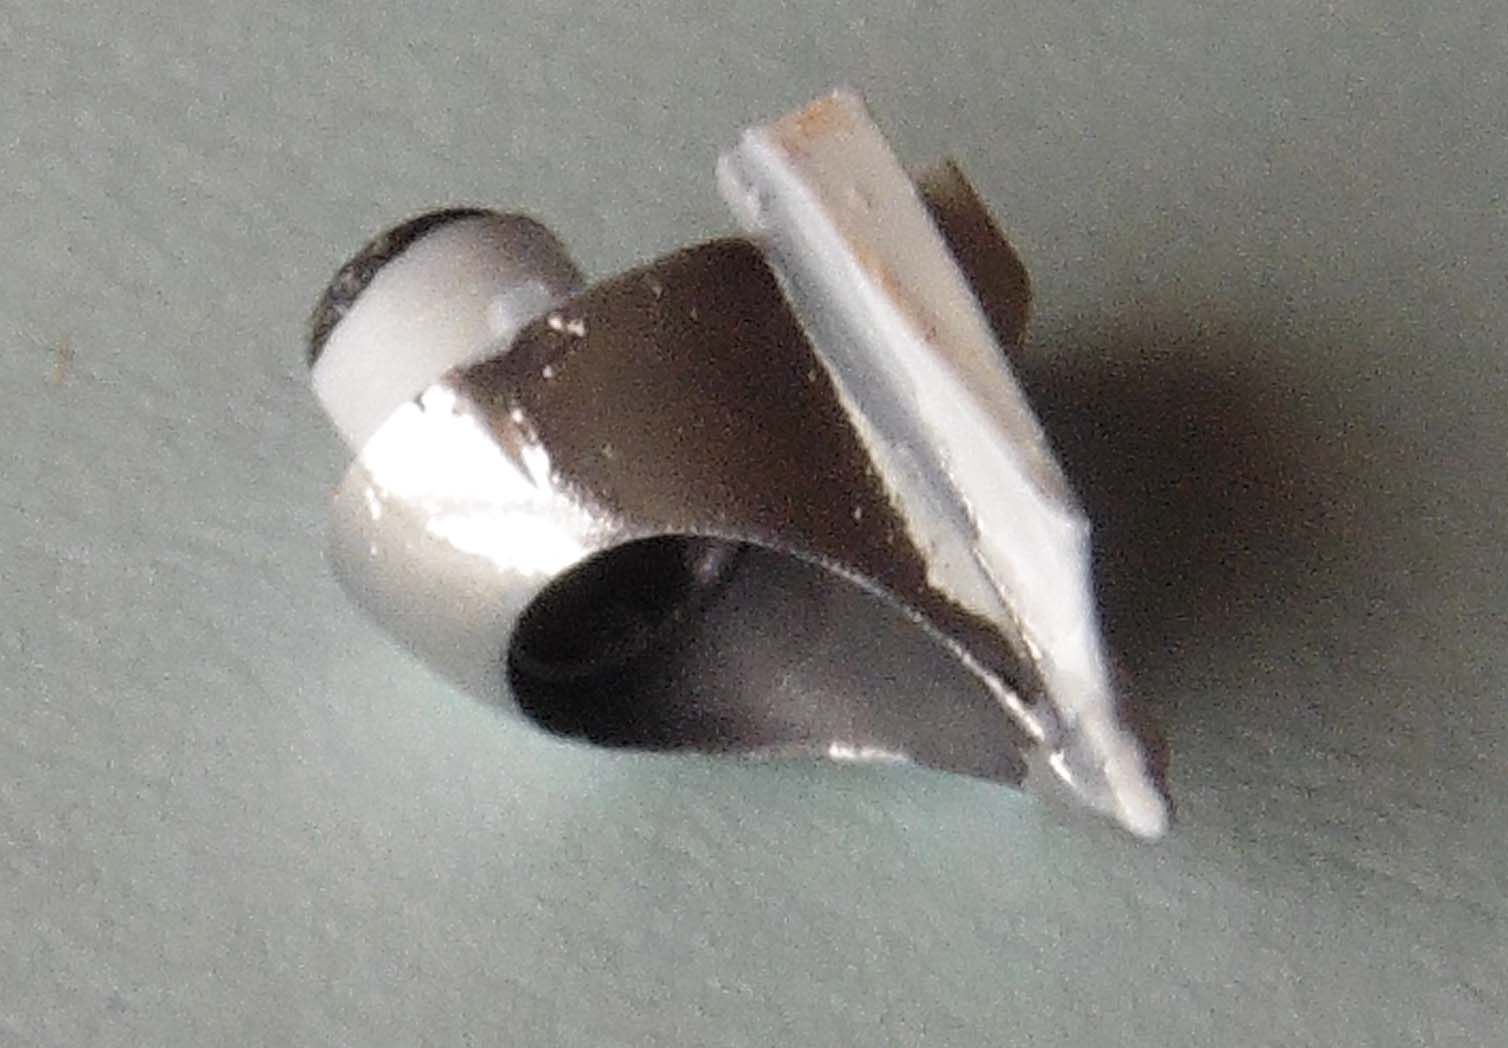
This is the outer section that surrounds the jet pipe, I am very pleased with the finish - the 'missed bit' to the right is, in fact, the reflection of the white paint from the fuselage section of that part. A jet pipe was fabricated with some depth and fitted in place of the kit component. (the Jet pipe on a JP is very long)
Until then here are some photos I took earlier.
This is the outer section that surrounds the jet pipe, I am very pleased with the finish - the 'missed bit' to the right is, in fact, the reflection of the white paint from the fuselage section of that part. A jet pipe was fabricated with some depth and fitted in place of the kit component. (the Jet pipe on a JP is very long)
Tony
The older I get the better I was!
Current build:
Airfix 1:72 Javelin FAW9
Particular modelling interests:
Cuban Airforce aircraft, 29(F) Sqn aircraft, Aircraft I’ve flown
The older I get the better I was!
Current build:
Airfix 1:72 Javelin FAW9
Particular modelling interests:
Cuban Airforce aircraft, 29(F) Sqn aircraft, Aircraft I’ve flown
-
ShaunW
- NOT the sheep
- Posts: 26188
- Joined: November 26th, 2011, 6:11 pm
- Location: Pontefract West Yorkshire
Re: TeeELLs kitchen crafting kit creations
That is a seriously good looking JP!
Doing - Tamiya 1/35th Universal Carrier.
Work is the curse of the modelling classes!
IPMS#12300
Work is the curse of the modelling classes!
IPMS#12300
-
TeeELL
- Modelling Gent and Scholar
- Posts: 11619
- Joined: December 28th, 2015, 4:38 pm
- Location: North Wiltshire
Re: TeeELLs kitchen crafting kit creations
Last November member 'GREGORS' very kindly supplied me with a Revell Airco DH2, the aircraft with which 29(Sqn) went to France in March 1916, the second 'dedicated fighter Squadron' so equipped. Well, I confess that the model has been sitting awaiting its turn and should have been superseded by a 29(F) Sqn Lightning F3, 29(F) Sqn Demon and a Cuban airforce MiG. However, I have settled on the DH2 because I am also planning on building a 1/48 scale version. I figure that if I can rig a 1/72 DH2 then the larger model will be a breeze!!!!
I have amassed photos, drawings and blue prints plus the Windsock data file. Early investigation of the dimensions reveal some 'interesting' dimensional errors. My plan is to correct as many of these errors as possible and record the work, there are several other builds on both this forum and others who have provided inspiration for this destructive construction.
I recently thought about bidding on an Eduard 1/72 version on that well know auction site, but it reached silly money!! I have a suspicion that the time required to modify the Revel kit would have made the expense worthwhile! Still nothing like a challenge.
A few early observations: the wheels are 3mm larger in diameter, the top wing sits approx. 2 mm high with the rear longitudinal struts similarly in error (not to mention one strut significantly misplaced). The undercarriage is out of proportion and the cabane struts do not fit the fuselage in the correct place. Other than that .........
Tony
The older I get the better I was!
Current build:
Airfix 1:72 Javelin FAW9
Particular modelling interests:
Cuban Airforce aircraft, 29(F) Sqn aircraft, Aircraft I’ve flown
The older I get the better I was!
Current build:
Airfix 1:72 Javelin FAW9
Particular modelling interests:
Cuban Airforce aircraft, 29(F) Sqn aircraft, Aircraft I’ve flown
-
TeeELL
- Modelling Gent and Scholar
- Posts: 11619
- Joined: December 28th, 2015, 4:38 pm
- Location: North Wiltshire
Re: TeeELLs kitchen crafting kit creations
Whilst printing out the various plans for the DH2, all scaled to 1/72, I decided to print off copies on transparent film as well as paper. This has proved to be a worth while exercise as I can lay the film over the various components and check their accuracy.
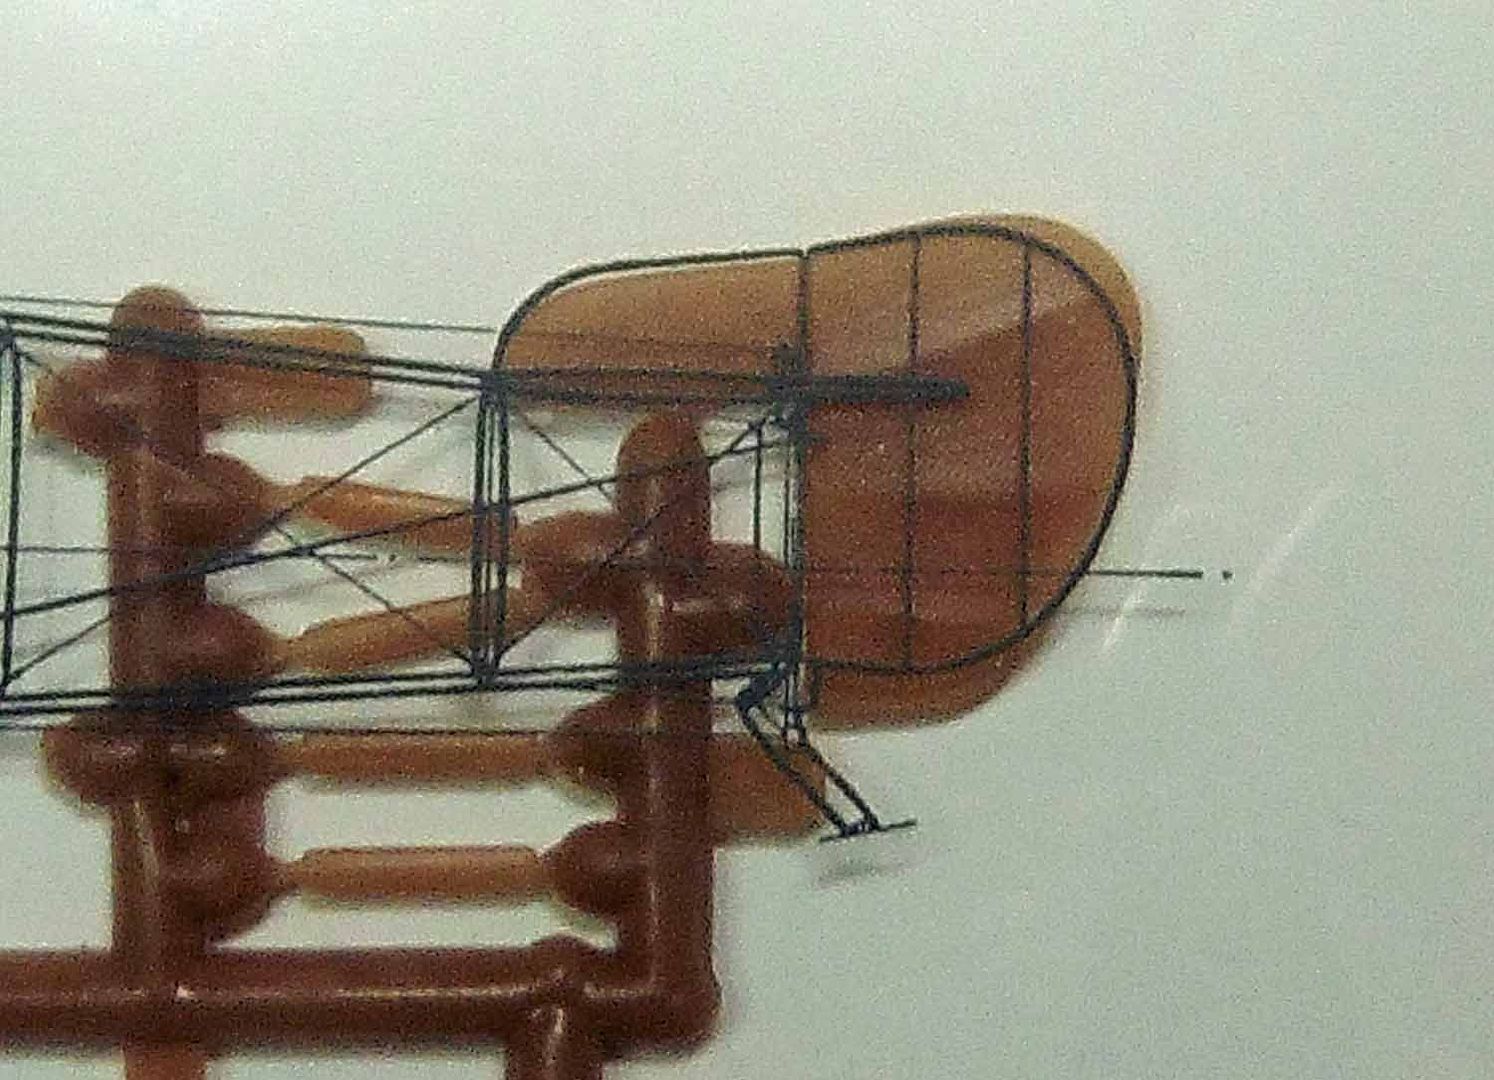
The wing chord is 1.25mm too great (approx. 4" for real) so I will need to remove that much from the trailing edge - the aileron hinge lines are in about the right place fortunately. In addition the planform of the wing tips is a bit out, but there is sufficient material to make a reasonable correction:
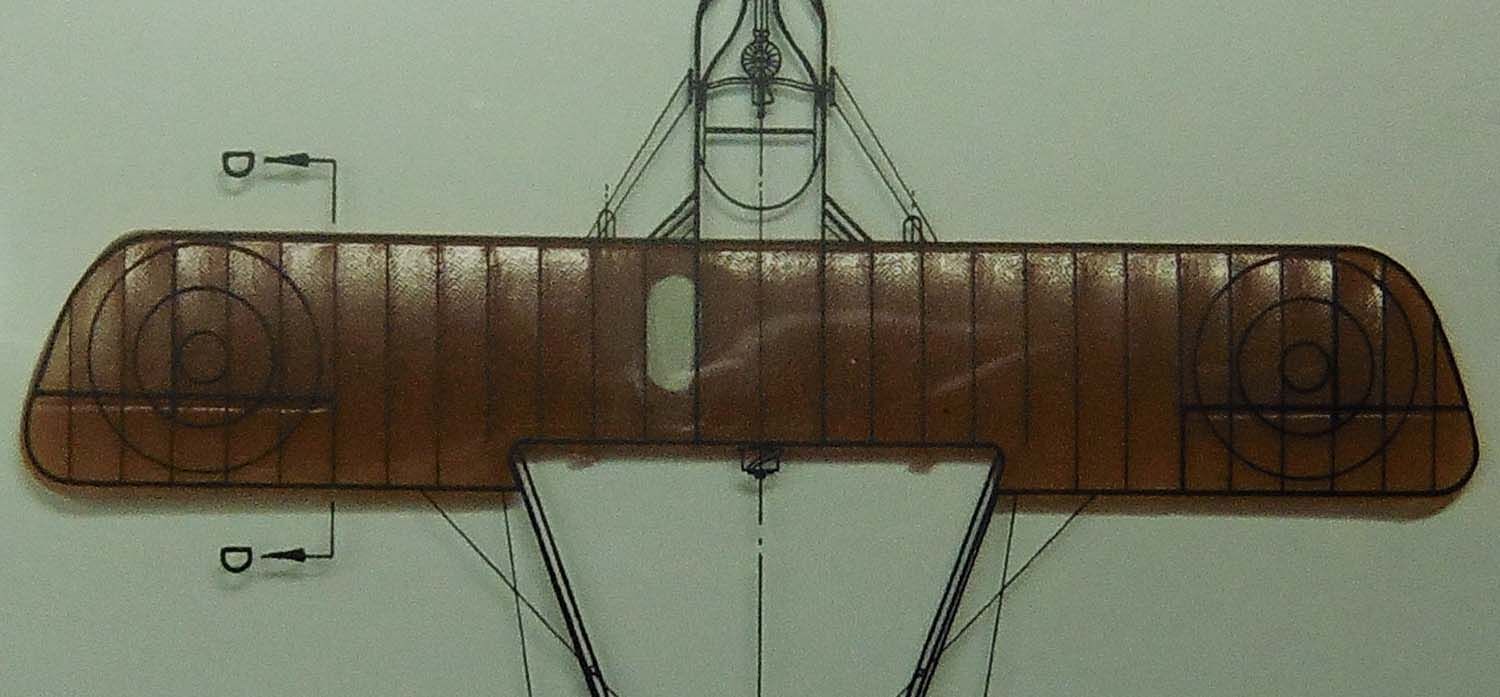
The white oval is where the kit fuel tank will not be going. The 29 Sqn aircraft had the tank mounted centrally above the wing.
I mentioned the size of wheels provided!
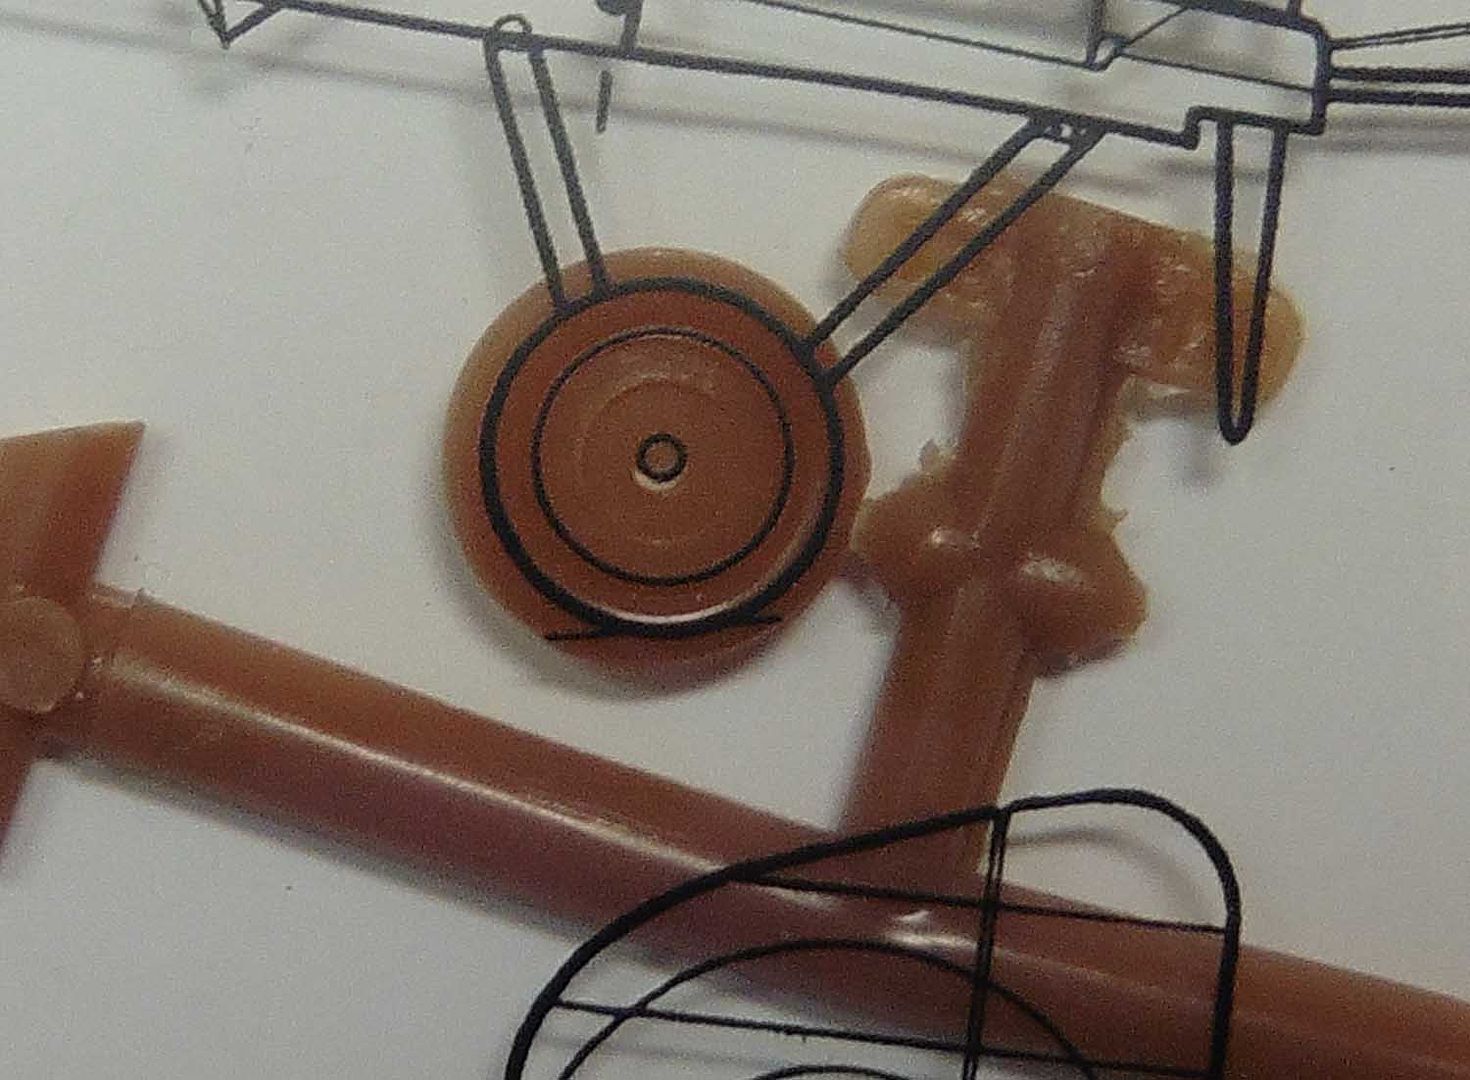
at the moment, I have set aside a pair of wheels from a surplus 'Demon' kit, they too are large, but only very slightly.
The rudder shape is all wrong although the excess at the base is a function of the incorrect spacing between the upper and lower tail booms. Oh! and the rudder balance forward of the hinge line is missing.
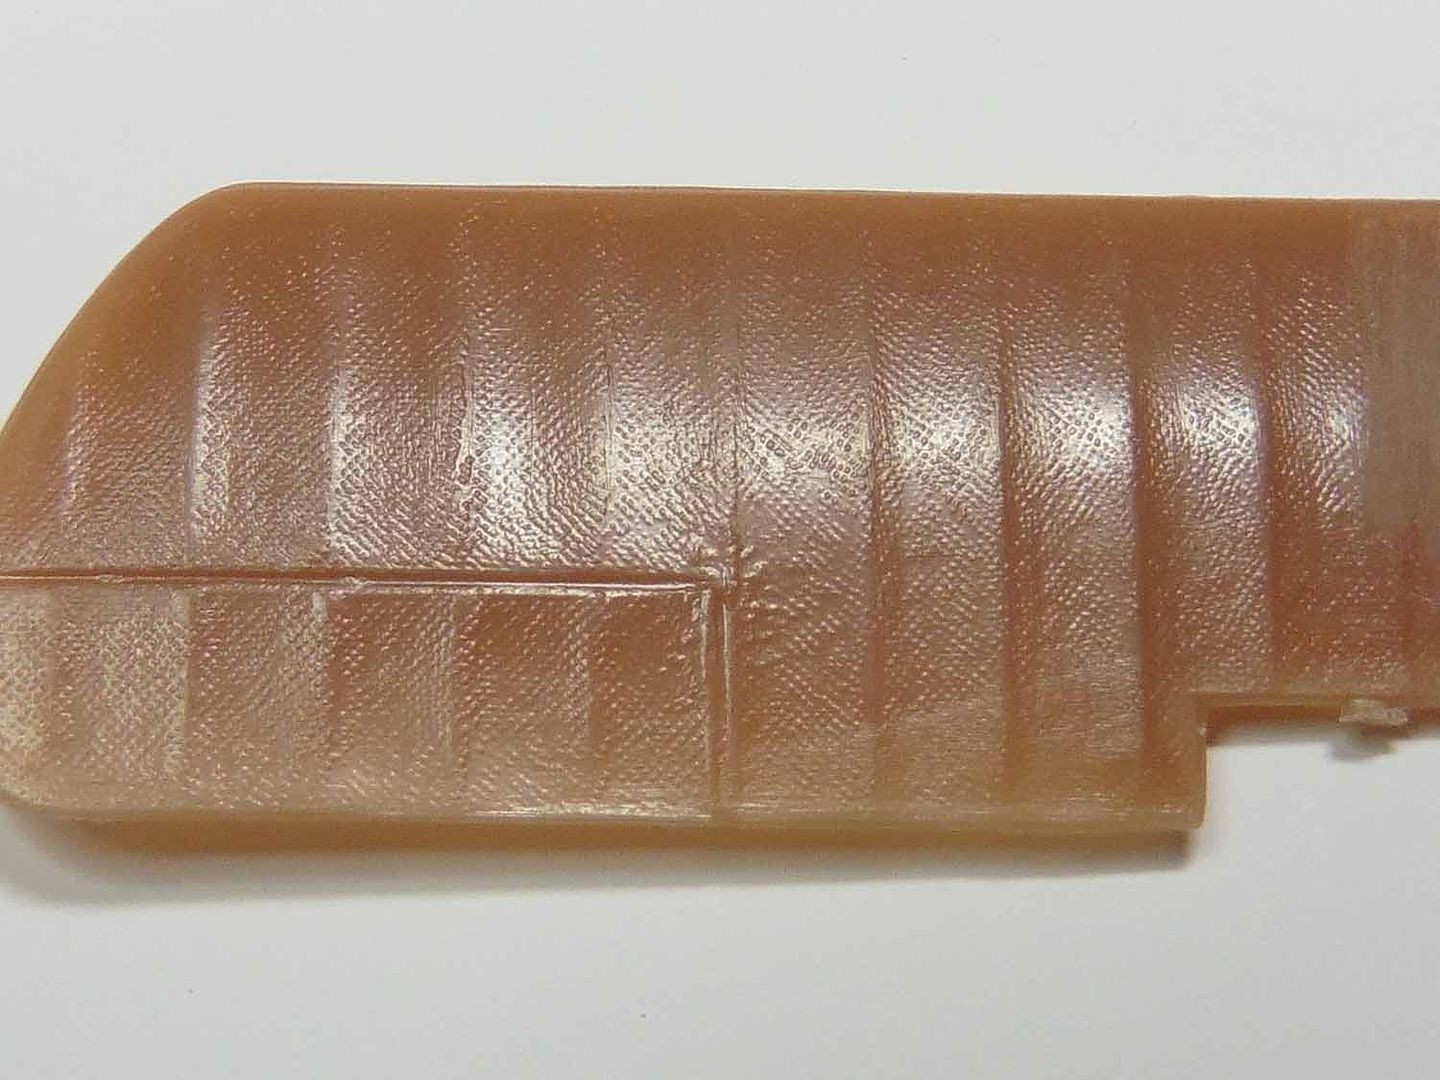
Finally, I have a photo of the 'linen material' finish on the wings! It will have to go.
Boy! Isn't this going to be fun - and you should see the rigging diagrams!!
The wing chord is 1.25mm too great (approx. 4" for real) so I will need to remove that much from the trailing edge - the aileron hinge lines are in about the right place fortunately. In addition the planform of the wing tips is a bit out, but there is sufficient material to make a reasonable correction:
The white oval is where the kit fuel tank will not be going. The 29 Sqn aircraft had the tank mounted centrally above the wing.
I mentioned the size of wheels provided!
at the moment, I have set aside a pair of wheels from a surplus 'Demon' kit, they too are large, but only very slightly.
The rudder shape is all wrong although the excess at the base is a function of the incorrect spacing between the upper and lower tail booms. Oh! and the rudder balance forward of the hinge line is missing.
Finally, I have a photo of the 'linen material' finish on the wings! It will have to go.
Boy! Isn't this going to be fun - and you should see the rigging diagrams!!
Tony
The older I get the better I was!
Current build:
Airfix 1:72 Javelin FAW9
Particular modelling interests:
Cuban Airforce aircraft, 29(F) Sqn aircraft, Aircraft I’ve flown
The older I get the better I was!
Current build:
Airfix 1:72 Javelin FAW9
Particular modelling interests:
Cuban Airforce aircraft, 29(F) Sqn aircraft, Aircraft I’ve flown
-
Clashcityrocker

- Modelling Gent and Scholar
- Posts: 10818
- Joined: May 1st, 2011, 12:31 am
- Location: Adelaide. South Australia
Re: TeeELLs kitchen crafting kit creations
Lovely looking Provost, and rather you than me with the DH2 
Nigel
Nigel
-
iggie
- Modelling Gent and Scholar
- Posts: 23437
- Joined: July 31st, 2013, 11:04 am
- Location: North Somercotes, Lincolnshire
- Contact:
Re: TeeELLs kitchen crafting kit creations
To be fair, the DH2 doors make up into a nice little model even with its inherent accuracy issues especially when you consider it's age! That said, I suspect that with your attention to detail this is going to be something remarkable!
The JP looks delightful too
The JP looks delightful too
Best wishes
Jim
If you can walk away from a landing, it's a good landing. If you use the airplane the next day, it's an outstanding landing
"Never put off till tomorrow, what you can do the day after tomorrow"
Jim
If you can walk away from a landing, it's a good landing. If you use the airplane the next day, it's an outstanding landing
"Never put off till tomorrow, what you can do the day after tomorrow"
-
TeeELL
- Modelling Gent and Scholar
- Posts: 11619
- Joined: December 28th, 2015, 4:38 pm
- Location: North Wiltshire
Re: TeeELLs kitchen crafting kit creations
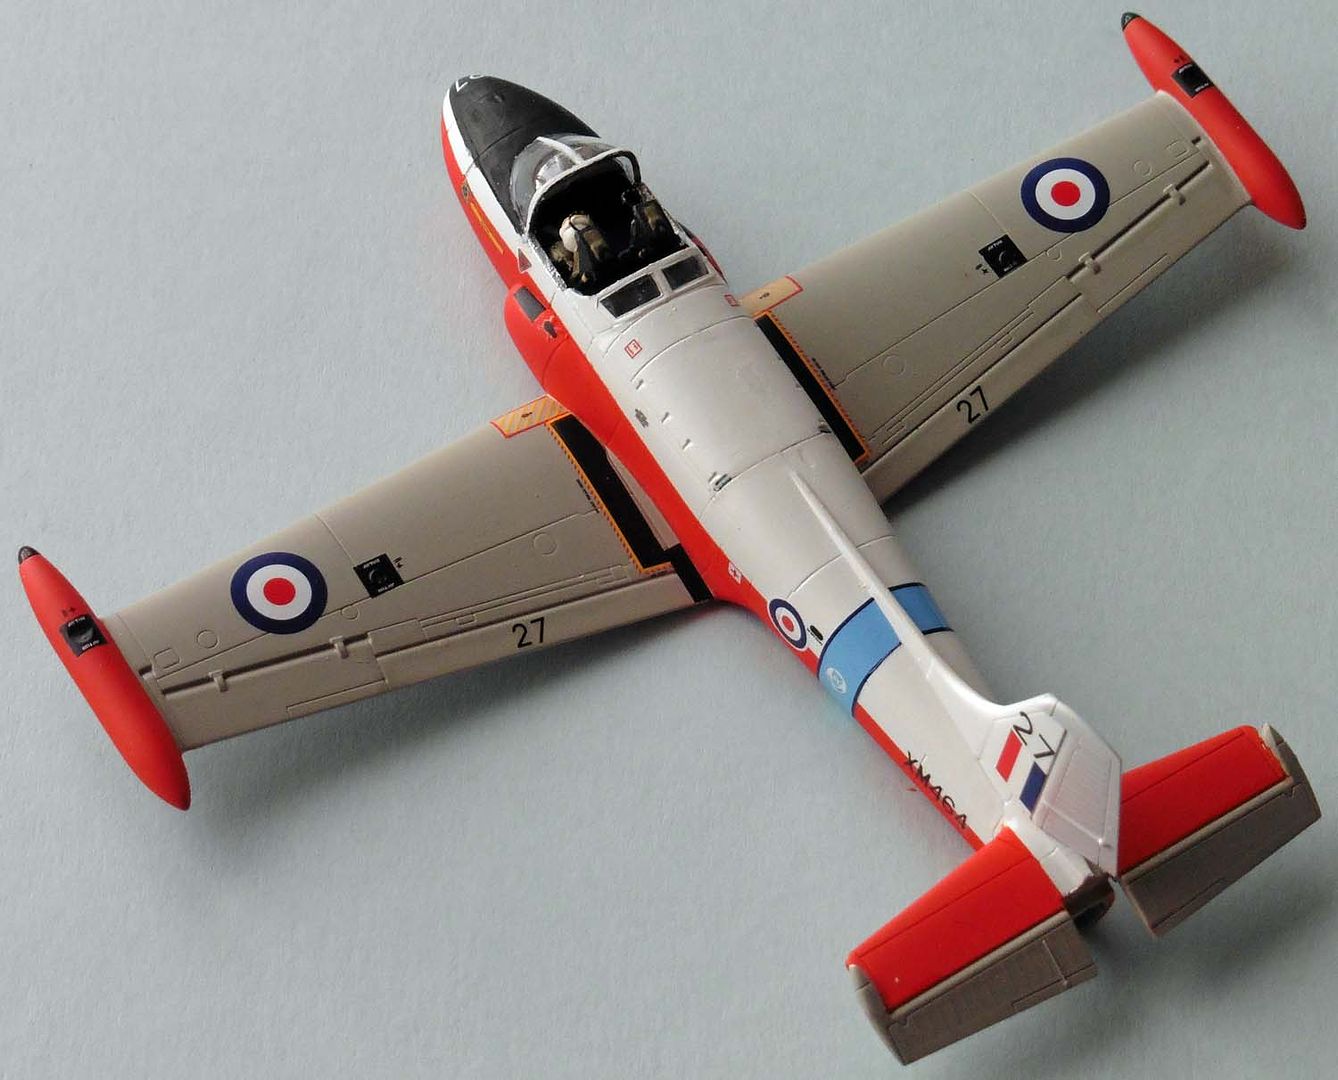
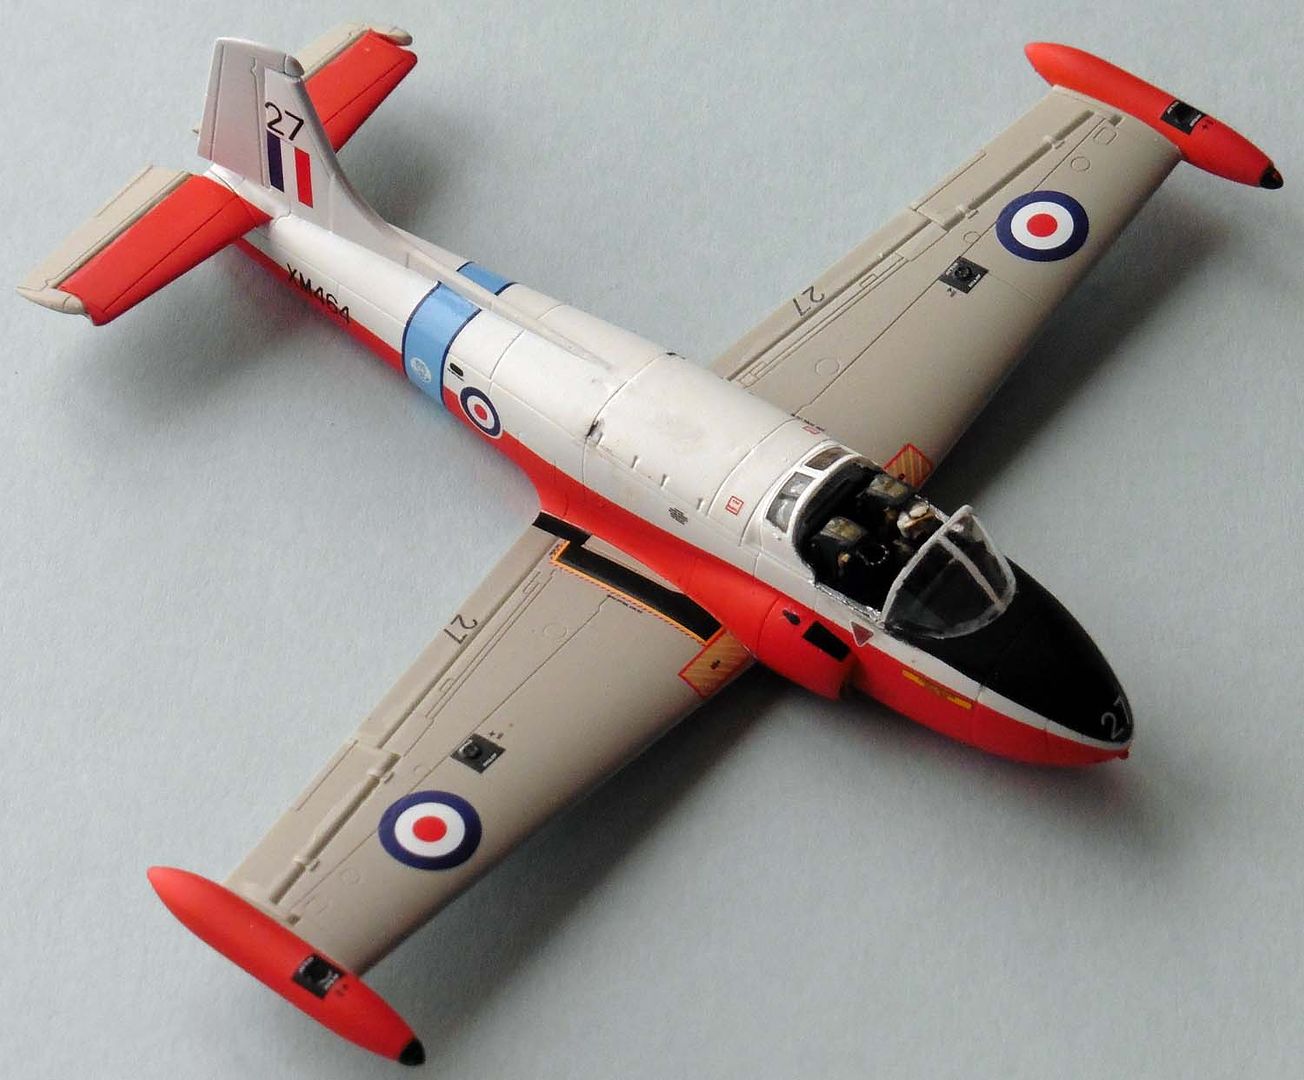
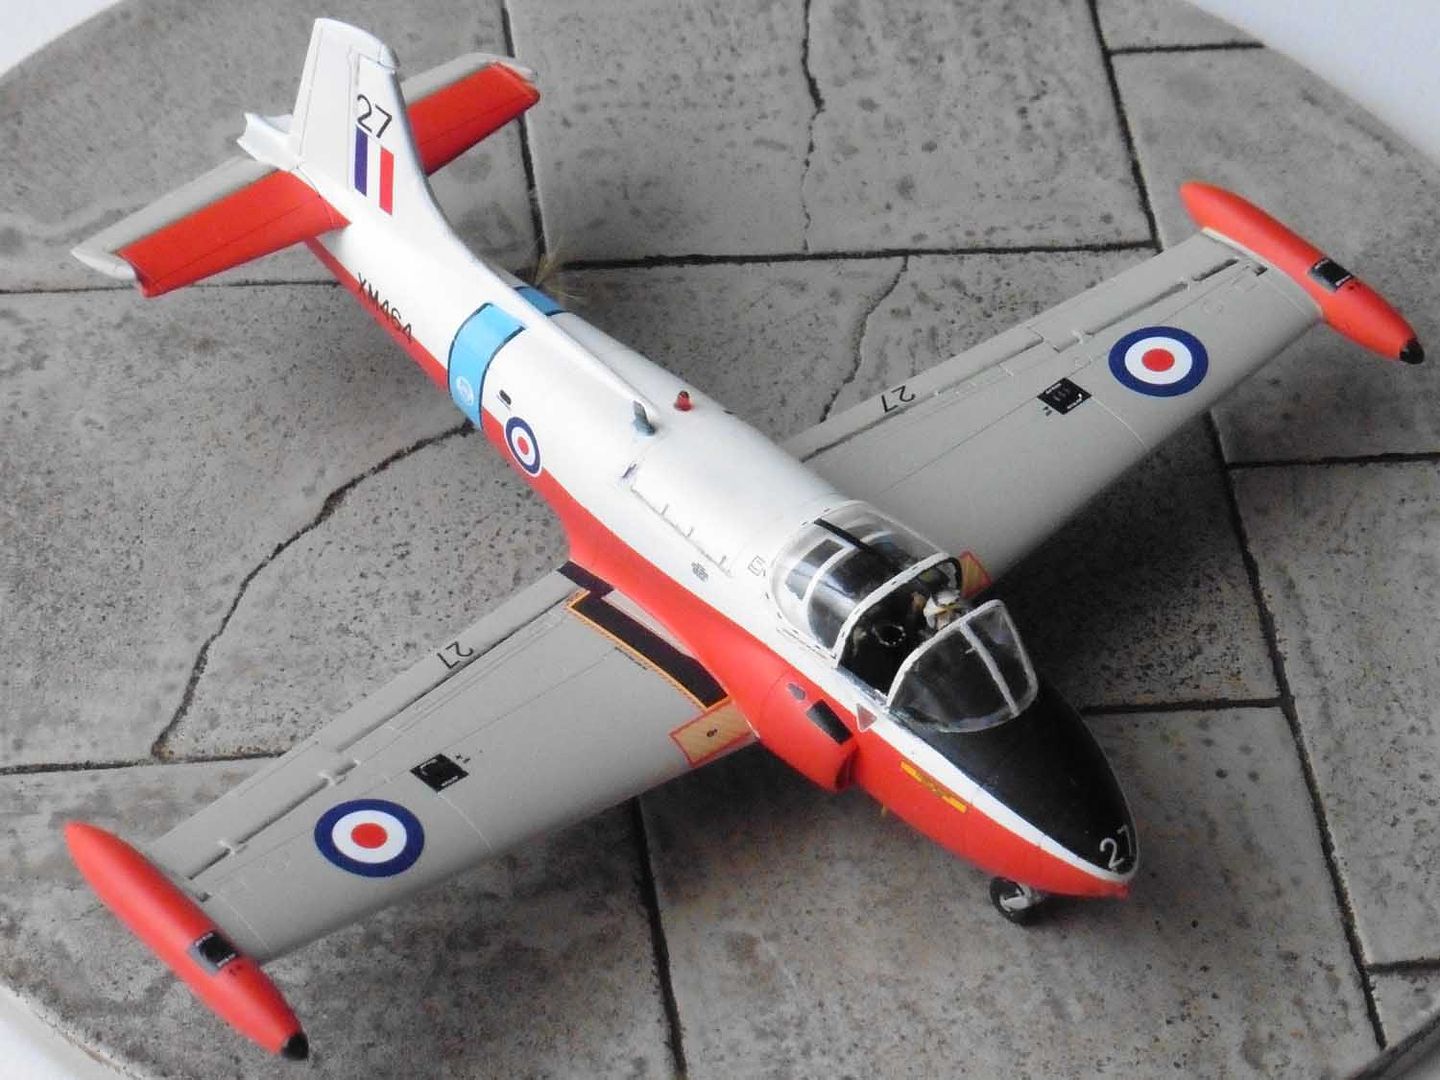
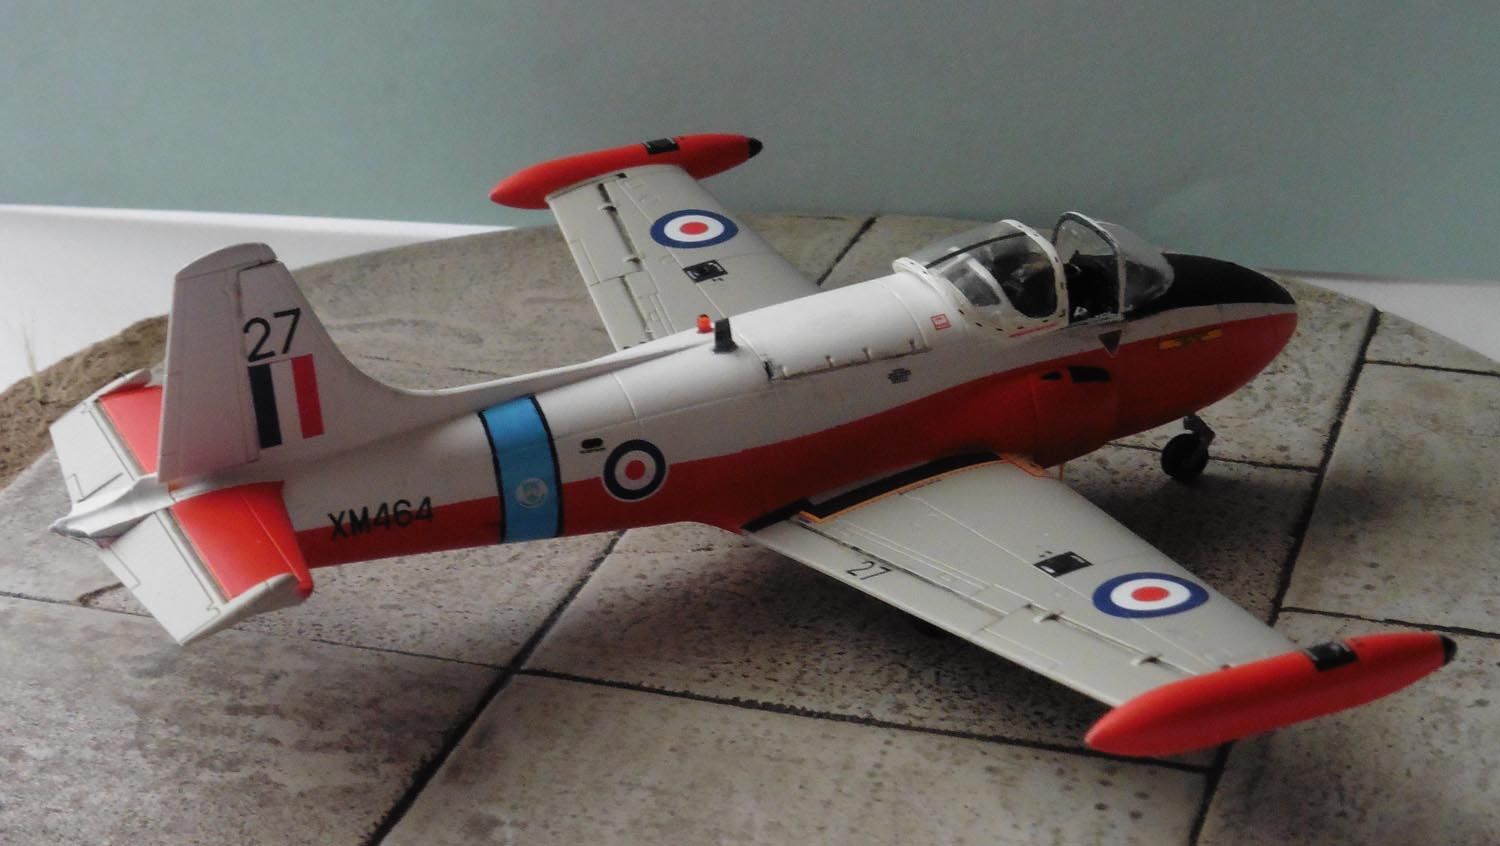
Before I press on with the DH2, here are some photos of the completed JP3 modelled as the aircraft in which I flew my 'First Solo'.
The RAF College Cranwell blue fuselage band was originally a decal from the Xtradecal sheet, but it wouldn't 'sit right' and wrap around the fuselage properly. Using microset I was able to soften and lift the decal (typical, any decal you want to remain will fall off, any decal you need to remove sticks like **** to a blanket). Masking and airbrushing gave me the replacement and fortunately, I hadn't used the Cranwell Crest decals.

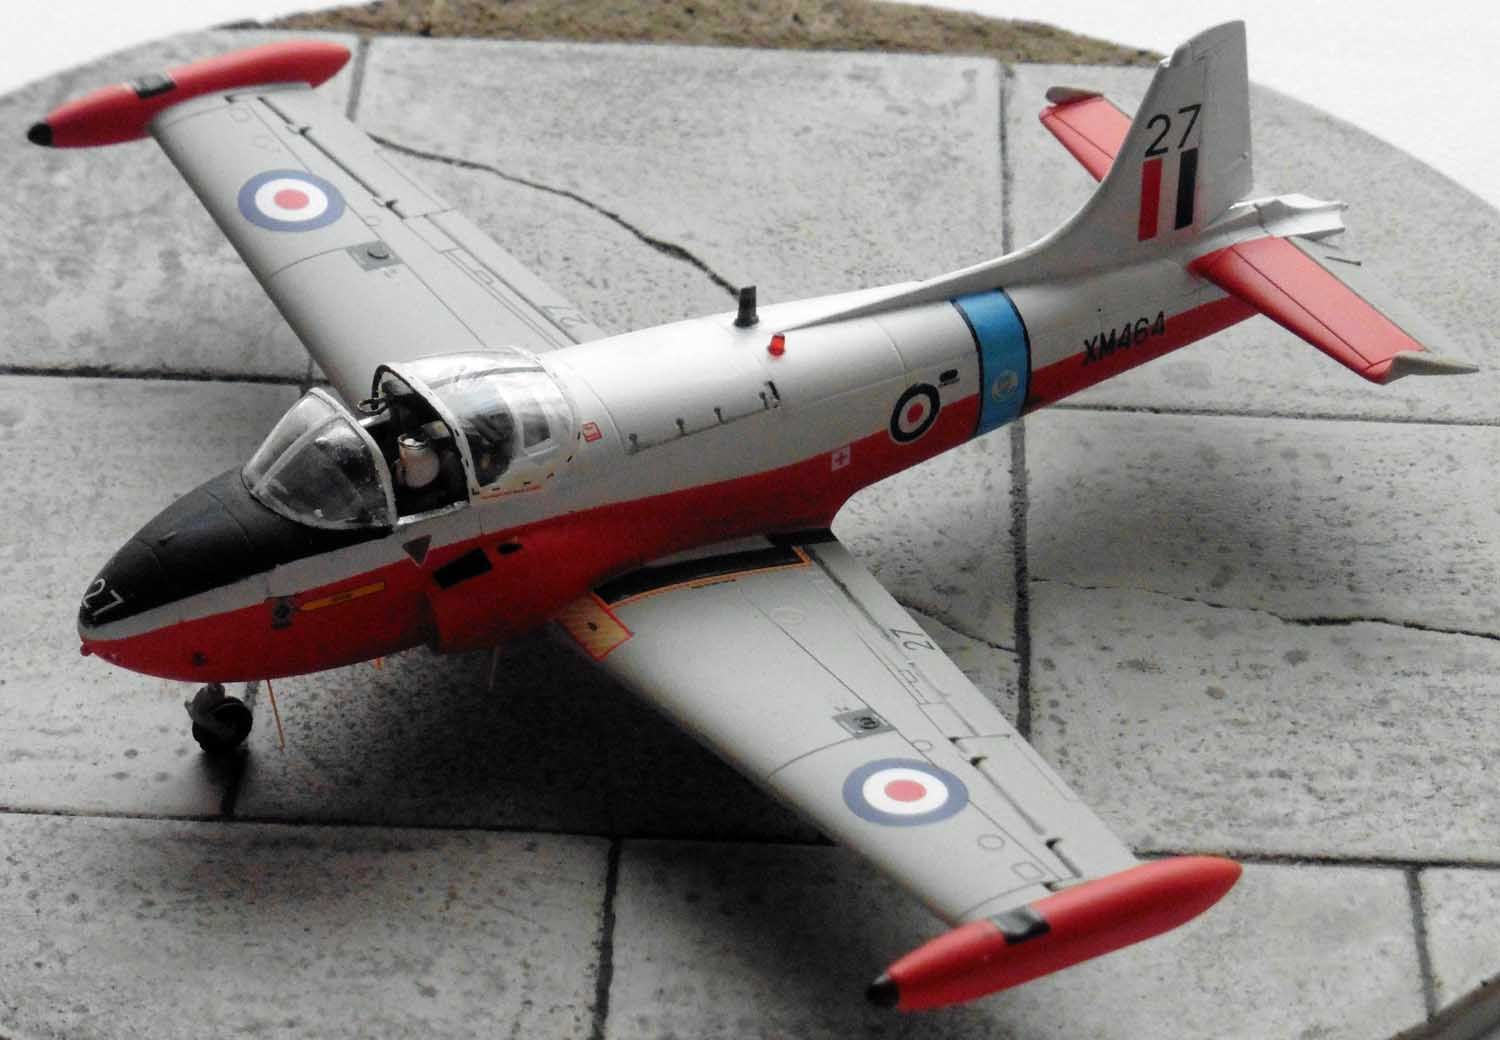
Views of the bottom surface and the various aerials. Those under the wings are for the Rebecca Mk8 (also found positioned on the upper wing surface of the Vampire) for information they are 14" long (in old money) = 35.56cm. As to the purpose of the other whip aerials, I cannot remember, although one will be the standby UHF aerial (the 2 blade aerials are for the main UHF. My Aircrew Manual only covers the JP3A with a significant (for the JP) avionics upgrade.
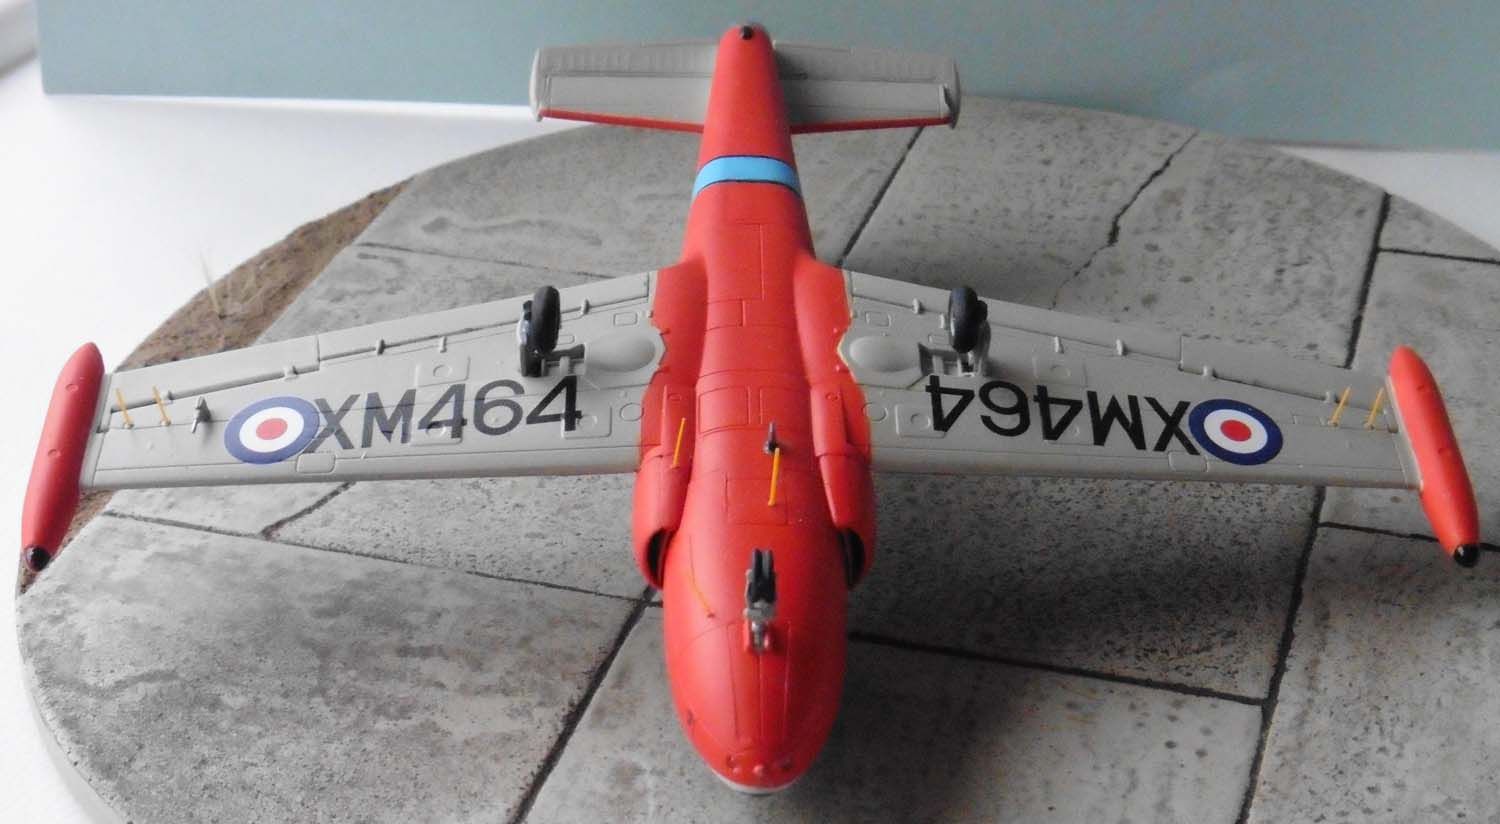
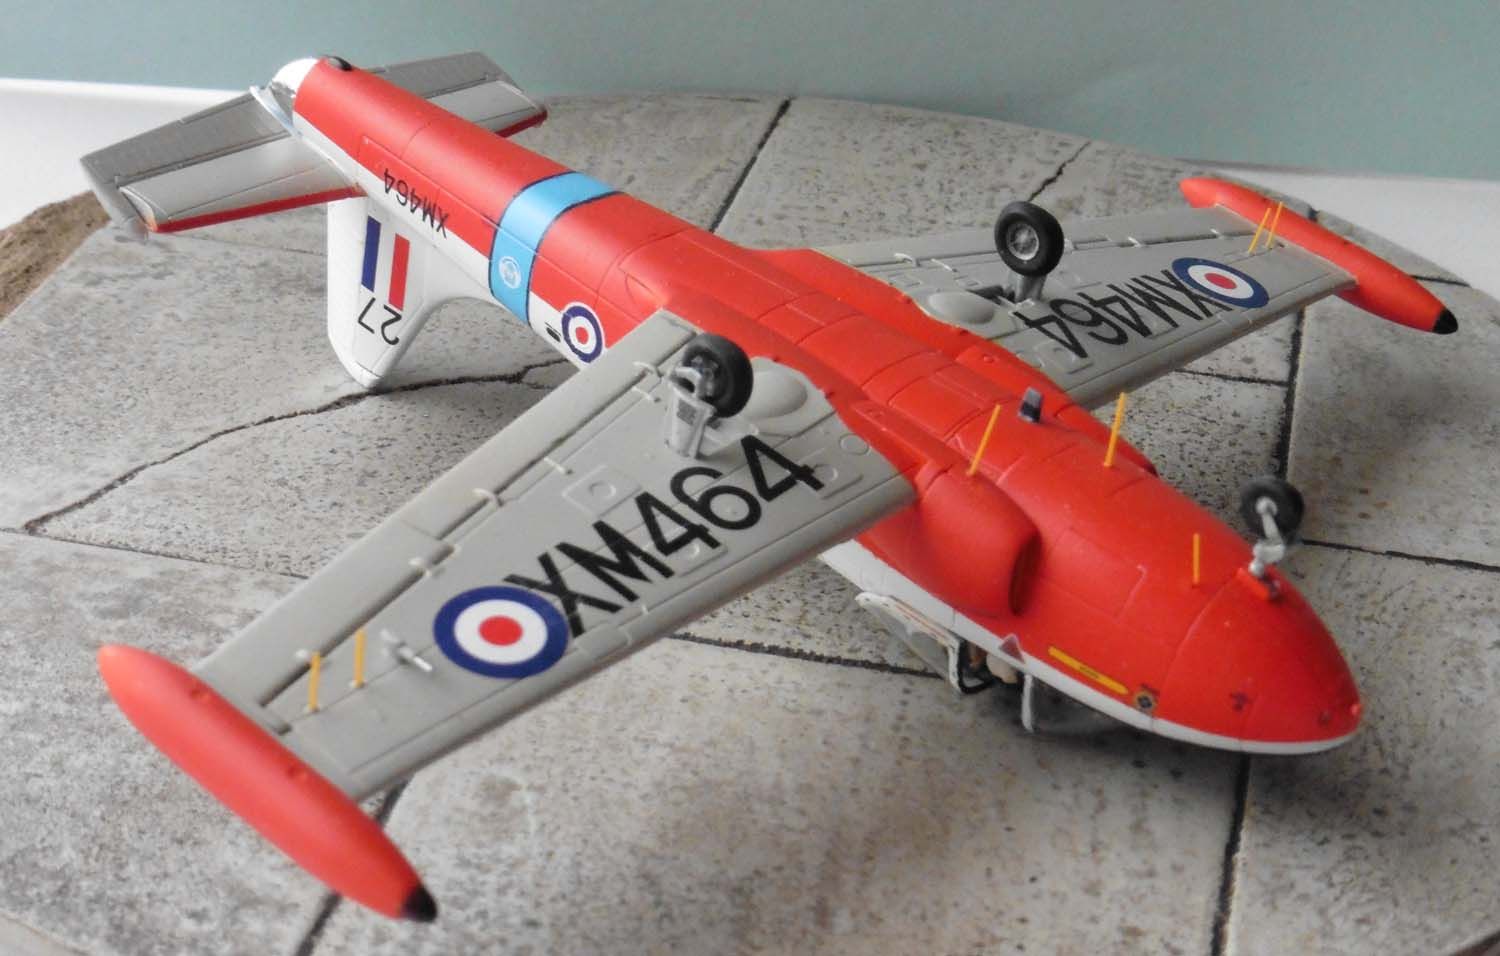
Pretty happy with the end result, and it got me a 3rd place in the open class of a competition.
The RAF College Cranwell blue fuselage band was originally a decal from the Xtradecal sheet, but it wouldn't 'sit right' and wrap around the fuselage properly. Using microset I was able to soften and lift the decal (typical, any decal you want to remain will fall off, any decal you need to remove sticks like **** to a blanket). Masking and airbrushing gave me the replacement and fortunately, I hadn't used the Cranwell Crest decals.
Views of the bottom surface and the various aerials. Those under the wings are for the Rebecca Mk8 (also found positioned on the upper wing surface of the Vampire) for information they are 14" long (in old money) = 35.56cm. As to the purpose of the other whip aerials, I cannot remember, although one will be the standby UHF aerial (the 2 blade aerials are for the main UHF. My Aircrew Manual only covers the JP3A with a significant (for the JP) avionics upgrade.
Pretty happy with the end result, and it got me a 3rd place in the open class of a competition.
Tony
The older I get the better I was!
Current build:
Airfix 1:72 Javelin FAW9
Particular modelling interests:
Cuban Airforce aircraft, 29(F) Sqn aircraft, Aircraft I’ve flown
The older I get the better I was!
Current build:
Airfix 1:72 Javelin FAW9
Particular modelling interests:
Cuban Airforce aircraft, 29(F) Sqn aircraft, Aircraft I’ve flown
-
dollar19
- Modelling Gent and Scholar
- Posts: 1342
- Joined: May 1st, 2011, 1:11 am
- Location: Bristol, Va. USA
Re: TeeELLs kitchen crafting kit creations
Remarkable PJ and a well deserved finish!
The DH appears to be an epic undertaking, one I will be watching anxiously!
The DH appears to be an epic undertaking, one I will be watching anxiously!
-
DavidWomby

- Modelling Gent and Scholar
- Posts: 11761
- Joined: May 1st, 2011, 8:09 pm
- Location: Florida, USA
Re: TeeELLs kitchen crafting kit creations
Gorgeous JP!
David
David

Re: TeeELLs kitchen crafting kit creations
Stunning JP, Very well done, and your certainly right about that jet pipe. and fixing the fire wires at the rear is a PITA.
Great to see the DH getting the treatment. Looking forward to following the build.
All the best.
Greg
Great to see the DH getting the treatment. Looking forward to following the build.
All the best.
Greg
Two things are infinite: the universe and human stupidity; and I'm not sure about the the universe.
The difference between stupidity and genius is that genius has its limits.
Albert Einstein
The difference between stupidity and genius is that genius has its limits.
Albert Einstein