TeeELLs kitchen crafting kit creations
-
TeeELL

- Modelling Gent and Scholar
- Posts: 11593
- Joined: December 28th, 2015, 4:38 pm
- Location: North Wiltshire
Re: TeeELLs kitchen crafting kit creations
Thanks Paul, I am hoping to have the initial coat of primer on this afternoon, once I have found a way to hold the brute for spraying!
Tony
The older I get the better I was!
Current build:
Airfix 1:72 Javelin FAW9
Particular modelling interests:
Cuban Airforce aircraft, 29(F) Sqn aircraft, Aircraft I’ve flown
The older I get the better I was!
Current build:
Airfix 1:72 Javelin FAW9
Particular modelling interests:
Cuban Airforce aircraft, 29(F) Sqn aircraft, Aircraft I’ve flown
-
Stuart

- Raider of the Lost Ark Royal
- Posts: 19417
- Joined: February 25th, 2013, 4:55 pm
- Location: North Wales
- Contact:
Re: TeeELLs kitchen crafting kit creations
Very nice progress Tony!
Stuart Templeton I may not be good but I'm slow...
My Blog: https://stuartsscalemodels.blogspot.com/
My Blog: https://stuartsscalemodels.blogspot.com/
-
TeeELL
- Modelling Gent and Scholar
- Posts: 11593
- Joined: December 28th, 2015, 4:38 pm
- Location: North Wiltshire
Re: TeeELLs kitchen crafting kit creations
Yesterday I had to tackle a small problem, one of the aft fuselage air intakes was missing from the box I therefor had to fabricate a replacement. After spending time trying to file a piece of sprue to suit, I decided to use some plastic rod and card:
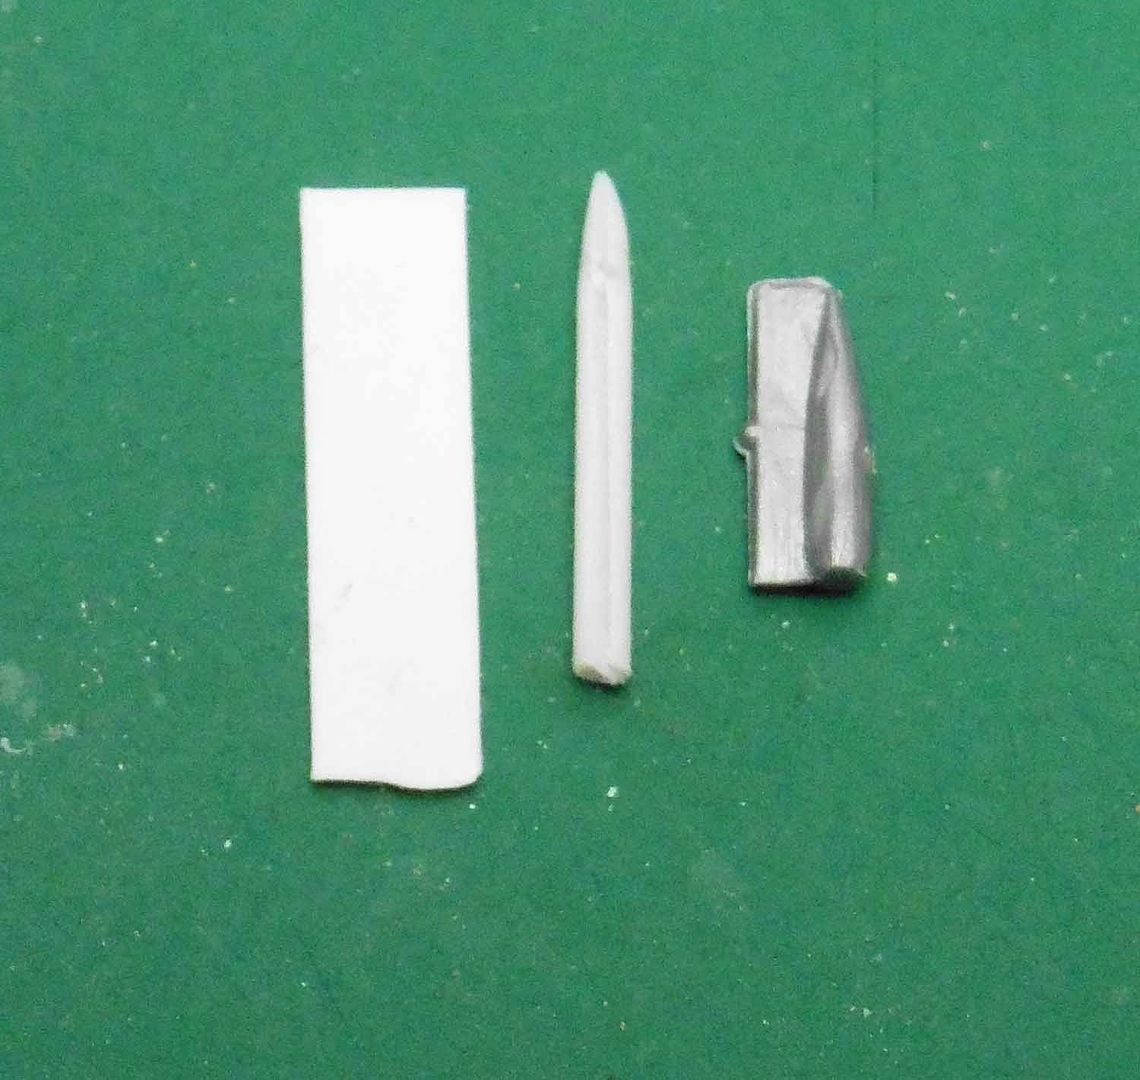
This shows the remaining part which I had to copy, along with the components I planned to use.
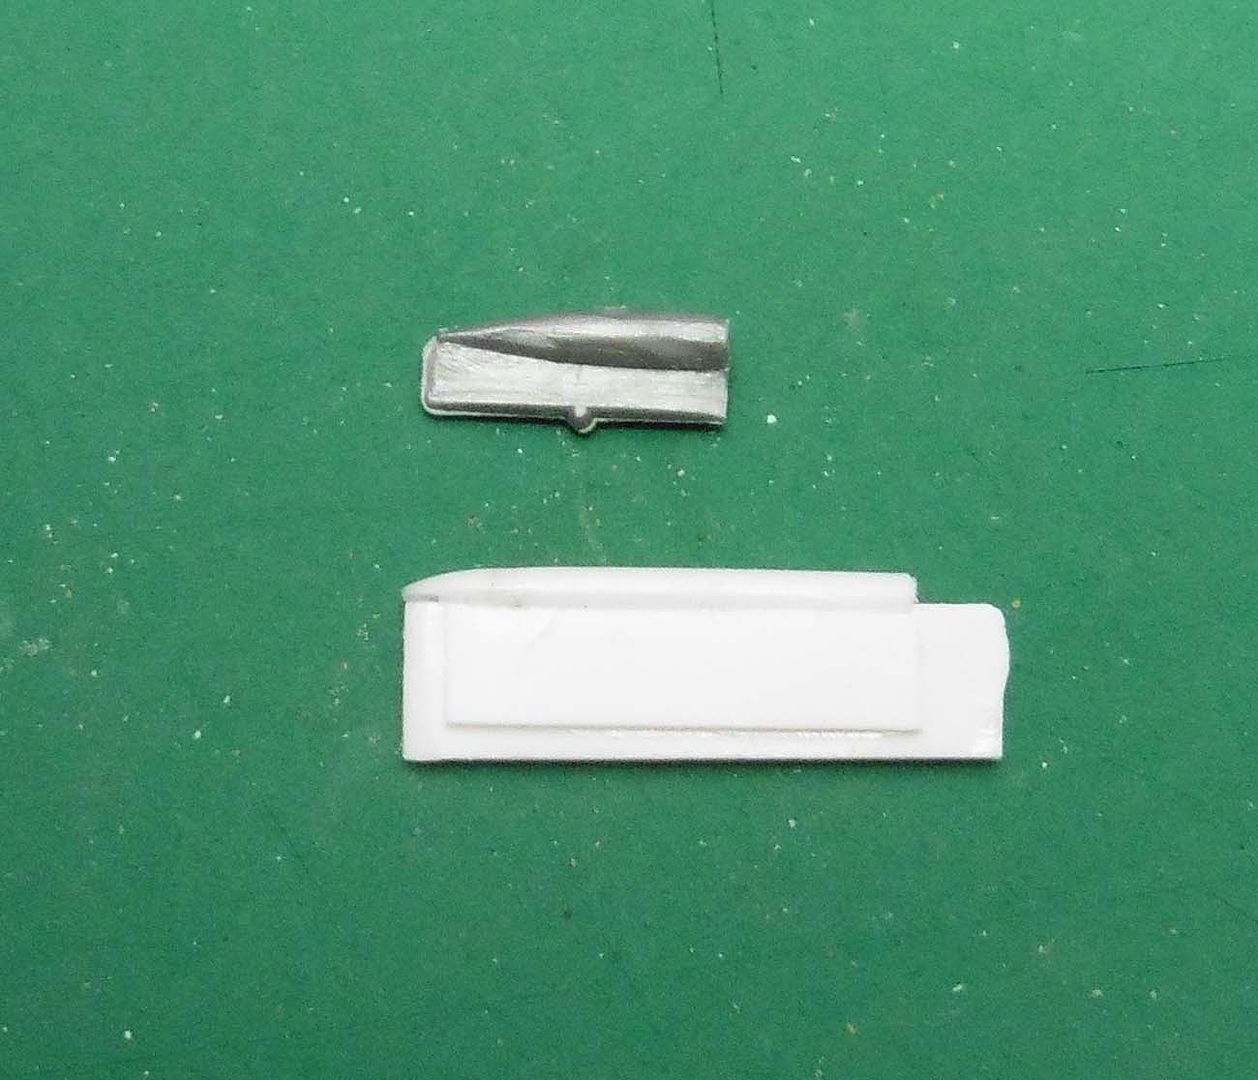
After shaping and slotting the rod I reached this stage.
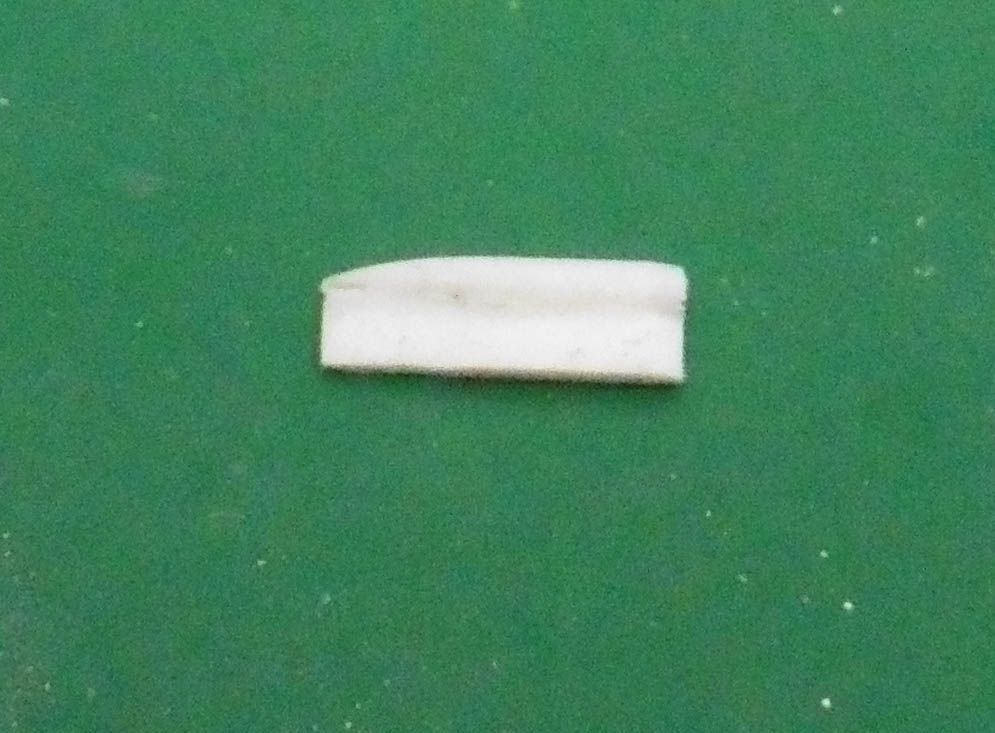
The end result. Before fixing I drilled out the inlets on both components.
A bit difficult to see, but the 'home-made' one is on the left.
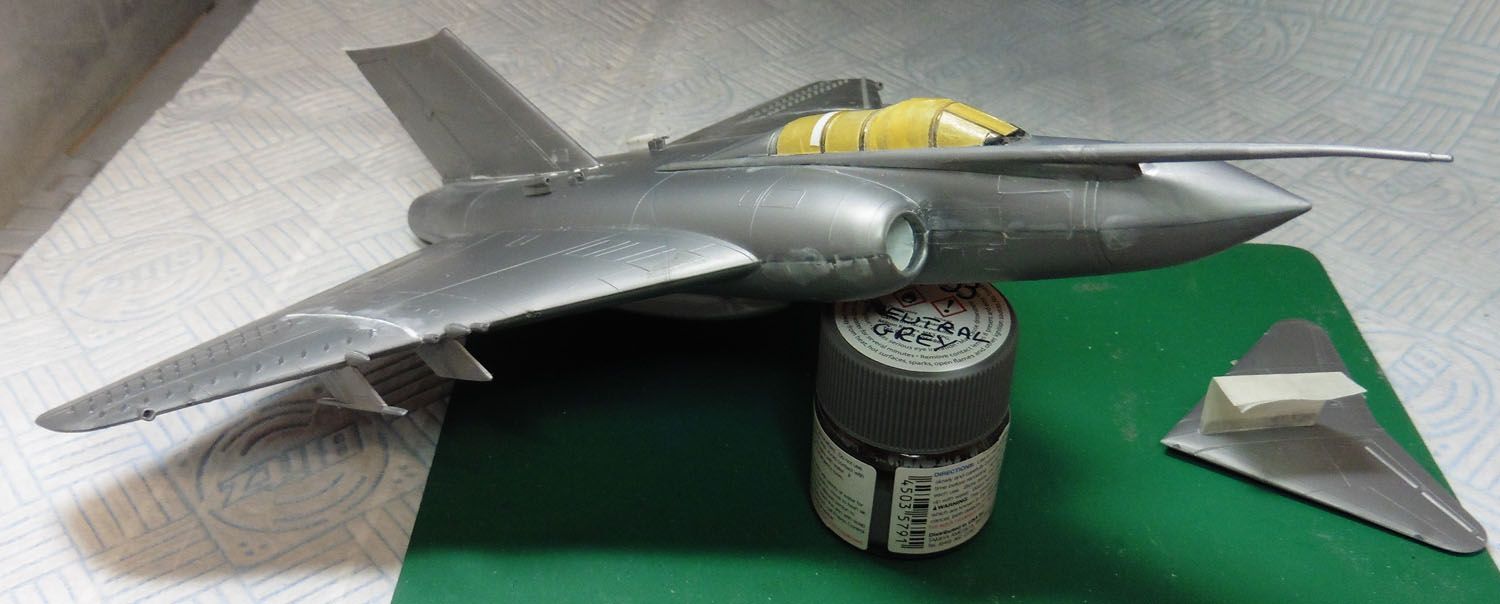
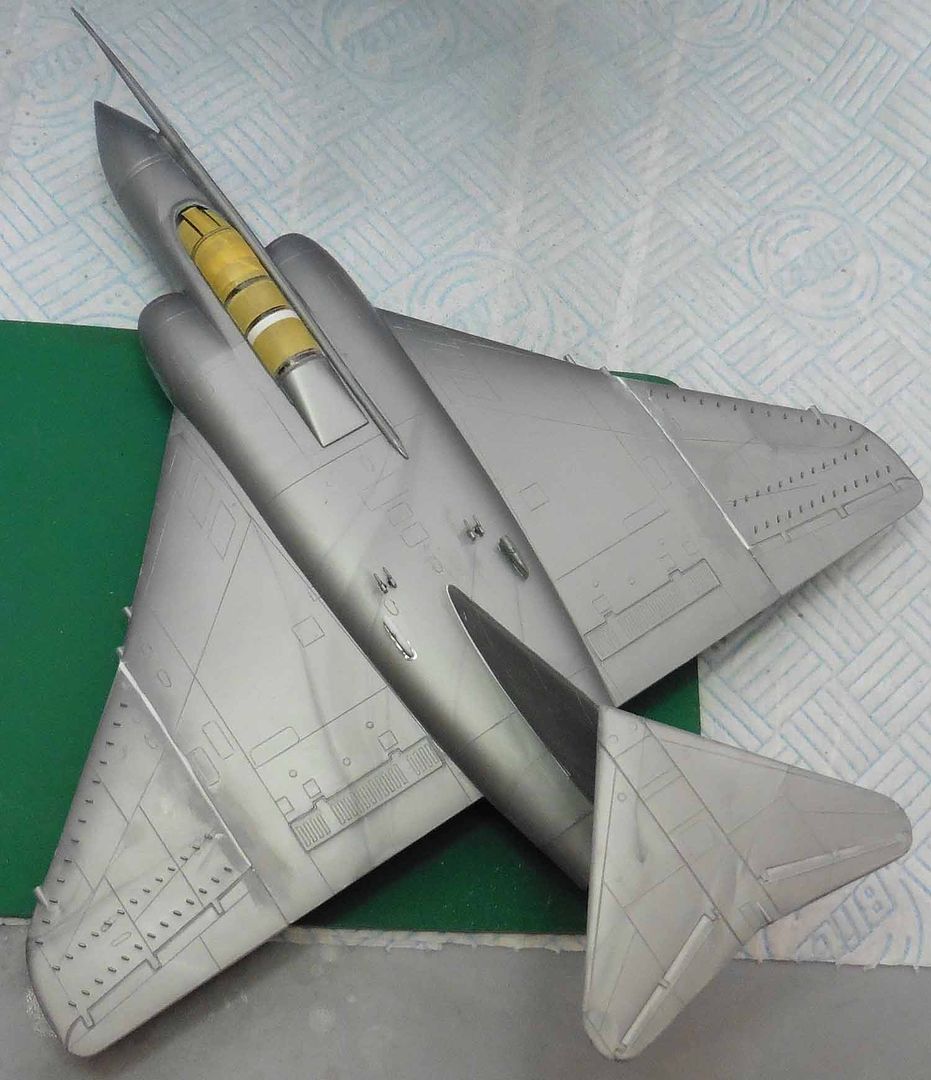
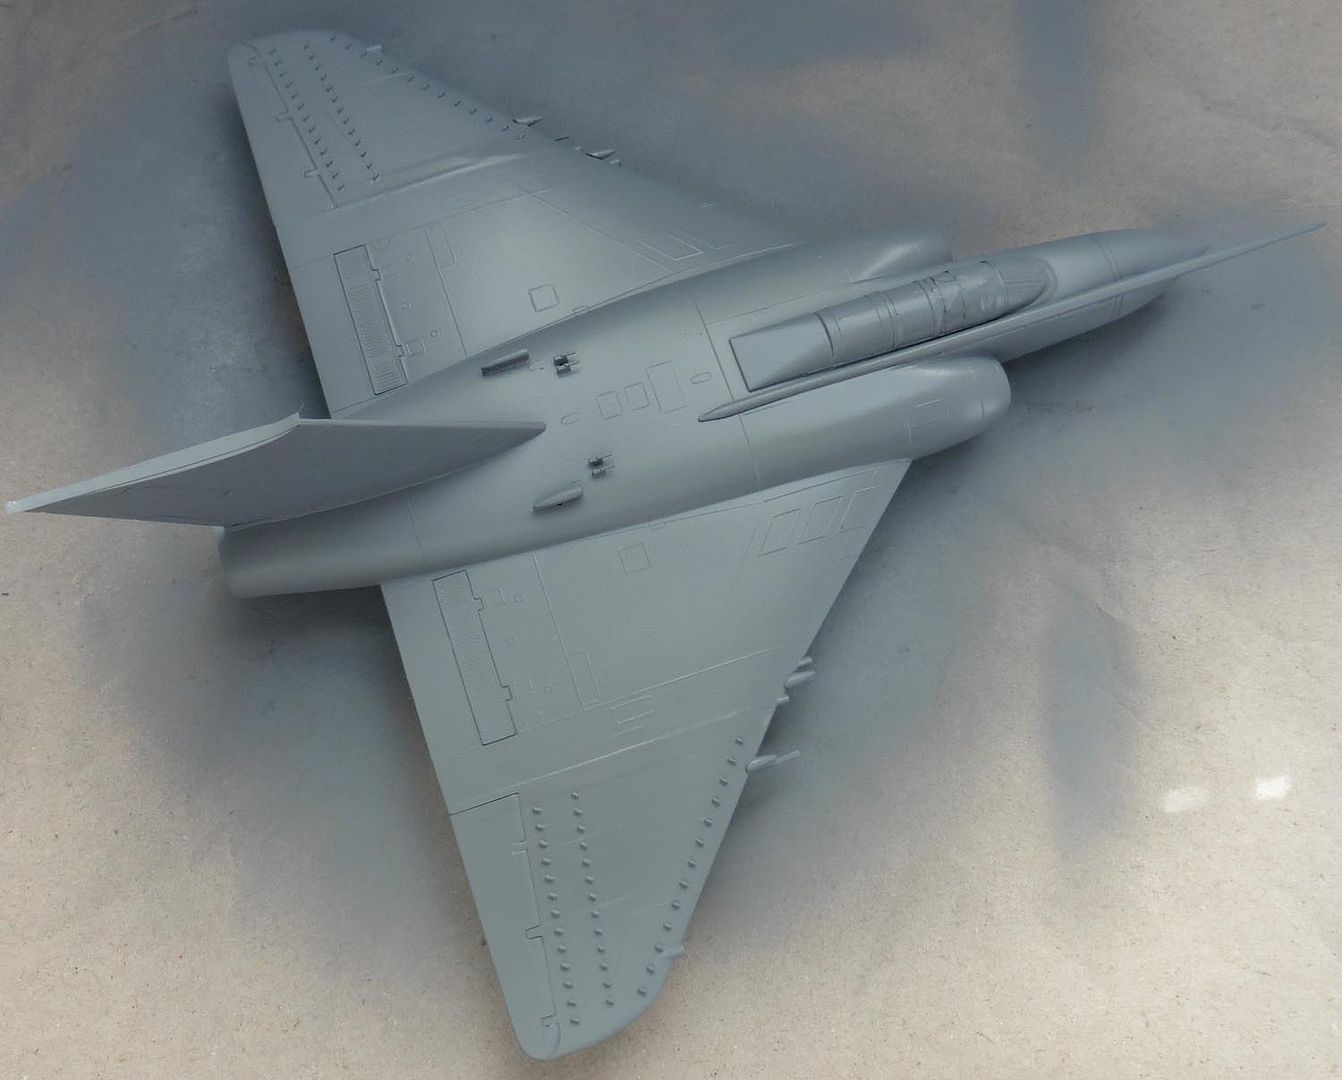
After careful consideration!!! I decided to add the pylons, the 'bullets' need to be camouflaged and be a snug fit to the wings. Although the lower surfaces will be NMF/High Speed Silver, photographic evidence indicates that the pylons themselves were white. The order of painting (using experiences with the Alclad silver on my T33) suggests: Primer, pre-shading (never tried that before!), washed out grey/faded green upper surfaces (probably Humbrol enamel), white pylons and finally the Alclad High Speed Silver. Of course I might well forget this - best laid plans ... etc!!
The tip of the refuelling probe will be removed and an after-market one added.
This shows the remaining part which I had to copy, along with the components I planned to use.
After shaping and slotting the rod I reached this stage.
The end result. Before fixing I drilled out the inlets on both components.
A bit difficult to see, but the 'home-made' one is on the left.
After careful consideration!!! I decided to add the pylons, the 'bullets' need to be camouflaged and be a snug fit to the wings. Although the lower surfaces will be NMF/High Speed Silver, photographic evidence indicates that the pylons themselves were white. The order of painting (using experiences with the Alclad silver on my T33) suggests: Primer, pre-shading (never tried that before!), washed out grey/faded green upper surfaces (probably Humbrol enamel), white pylons and finally the Alclad High Speed Silver. Of course I might well forget this - best laid plans ... etc!!
The tip of the refuelling probe will be removed and an after-market one added.
Tony
The older I get the better I was!
Current build:
Airfix 1:72 Javelin FAW9
Particular modelling interests:
Cuban Airforce aircraft, 29(F) Sqn aircraft, Aircraft I’ve flown
The older I get the better I was!
Current build:
Airfix 1:72 Javelin FAW9
Particular modelling interests:
Cuban Airforce aircraft, 29(F) Sqn aircraft, Aircraft I’ve flown
-
Stuart
- Raider of the Lost Ark Royal
- Posts: 19417
- Joined: February 25th, 2013, 4:55 pm
- Location: North Wales
- Contact:
Re: TeeELLs kitchen crafting kit creations
Lovely looking build thus far Tony! I really like the Jav - it's a great looking aircraft.
Stuart Templeton I may not be good but I'm slow...
My Blog: https://stuartsscalemodels.blogspot.com/
My Blog: https://stuartsscalemodels.blogspot.com/
-
iggie

- Modelling Gent and Scholar
- Posts: 23418
- Joined: July 31st, 2013, 11:04 am
- Location: North Somercotes, Lincolnshire
- Contact:
Re: TeeELLs kitchen crafting kit creations
The paint order sounds logical......and as such should be consigned to the bin immediately!
Nice work on the replacement intake!
Nice work on the replacement intake!
Best wishes
Jim
If you can walk away from a landing, it's a good landing. If you use the airplane the next day, it's an outstanding landing
"Never put off till tomorrow, what you can do the day after tomorrow"
Jim
If you can walk away from a landing, it's a good landing. If you use the airplane the next day, it's an outstanding landing
"Never put off till tomorrow, what you can do the day after tomorrow"
-
TeeELL
- Modelling Gent and Scholar
- Posts: 11593
- Joined: December 28th, 2015, 4:38 pm
- Location: North Wiltshire
Re: TeeELLs kitchen crafting kit creations
The Javelin has been to paint shops and, surprise, surprise the primer has revealed that a fair bit of work needs to be done, especially the inner and outer wing join, where the profiles are slightly different; the outer section having less of a camber.

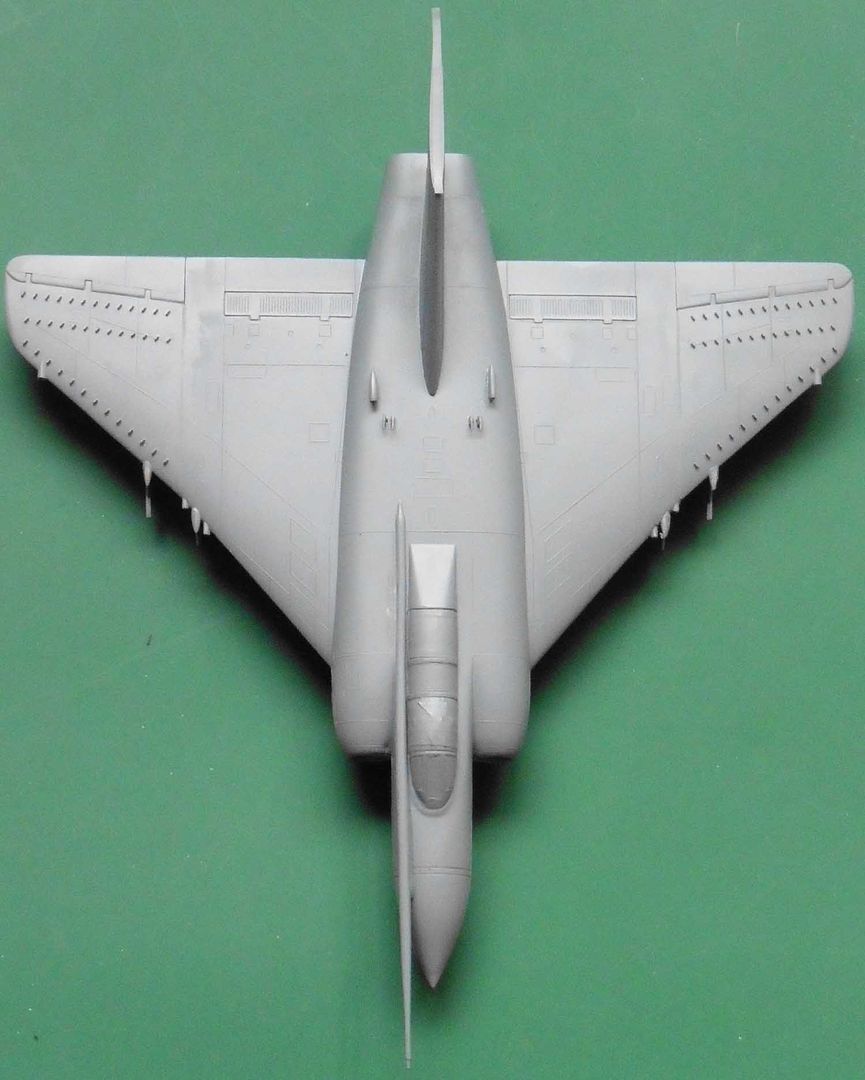
I will crack on with the 'filling and sanding' tomorrow, once the primer has fully hardened.
I will crack on with the 'filling and sanding' tomorrow, once the primer has fully hardened.
Tony
The older I get the better I was!
Current build:
Airfix 1:72 Javelin FAW9
Particular modelling interests:
Cuban Airforce aircraft, 29(F) Sqn aircraft, Aircraft I’ve flown
The older I get the better I was!
Current build:
Airfix 1:72 Javelin FAW9
Particular modelling interests:
Cuban Airforce aircraft, 29(F) Sqn aircraft, Aircraft I’ve flown
-
TeeELL
- Modelling Gent and Scholar
- Posts: 11593
- Joined: December 28th, 2015, 4:38 pm
- Location: North Wiltshire
Re: TeeELLs kitchen crafting kit creations
Prior to adding the new areas of filler, I masked either side to reduce the clean-up required. That was a mistake! On removing the masking tape, which was in position for no more than 5 mins, areas of primer came away! I do not recall encountering this previously; the model was thoroughly cleaned/de-greased with isopropyl alcohol before priming and handled wearing disposable gloves thereafter.
I am now considering the best way to resolve this - without stripping the paint off. I've micro-meshed the edges of the flaked areas but I am inclined to mask and prime those bald patches and blend the subsequent edges - I shall have to see, I am certainly going to use a different primer. I guess I will have to find a low tack masking tape for the camouflage templates etc.

I am now considering the best way to resolve this - without stripping the paint off. I've micro-meshed the edges of the flaked areas but I am inclined to mask and prime those bald patches and blend the subsequent edges - I shall have to see, I am certainly going to use a different primer. I guess I will have to find a low tack masking tape for the camouflage templates etc.
Tony
The older I get the better I was!
Current build:
Airfix 1:72 Javelin FAW9
Particular modelling interests:
Cuban Airforce aircraft, 29(F) Sqn aircraft, Aircraft I’ve flown
The older I get the better I was!
Current build:
Airfix 1:72 Javelin FAW9
Particular modelling interests:
Cuban Airforce aircraft, 29(F) Sqn aircraft, Aircraft I’ve flown
-
TeeELL
- Modelling Gent and Scholar
- Posts: 11593
- Joined: December 28th, 2015, 4:38 pm
- Location: North Wiltshire
Re: TeeELLs kitchen crafting kit creations
Following my post, I got on with the primer repair:
Some lo-tack masking either side of the wing joins and the application of 4 coats of primer:
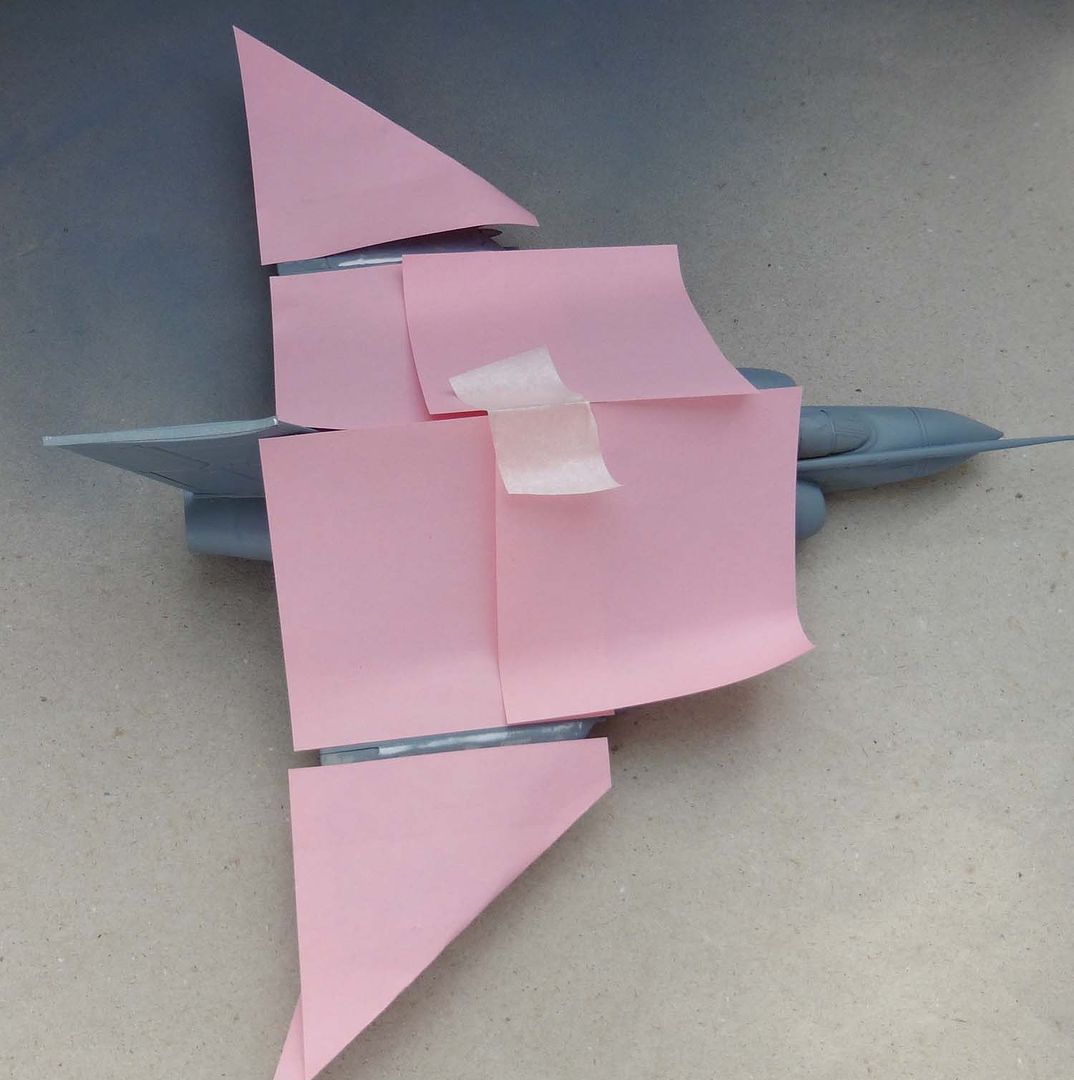
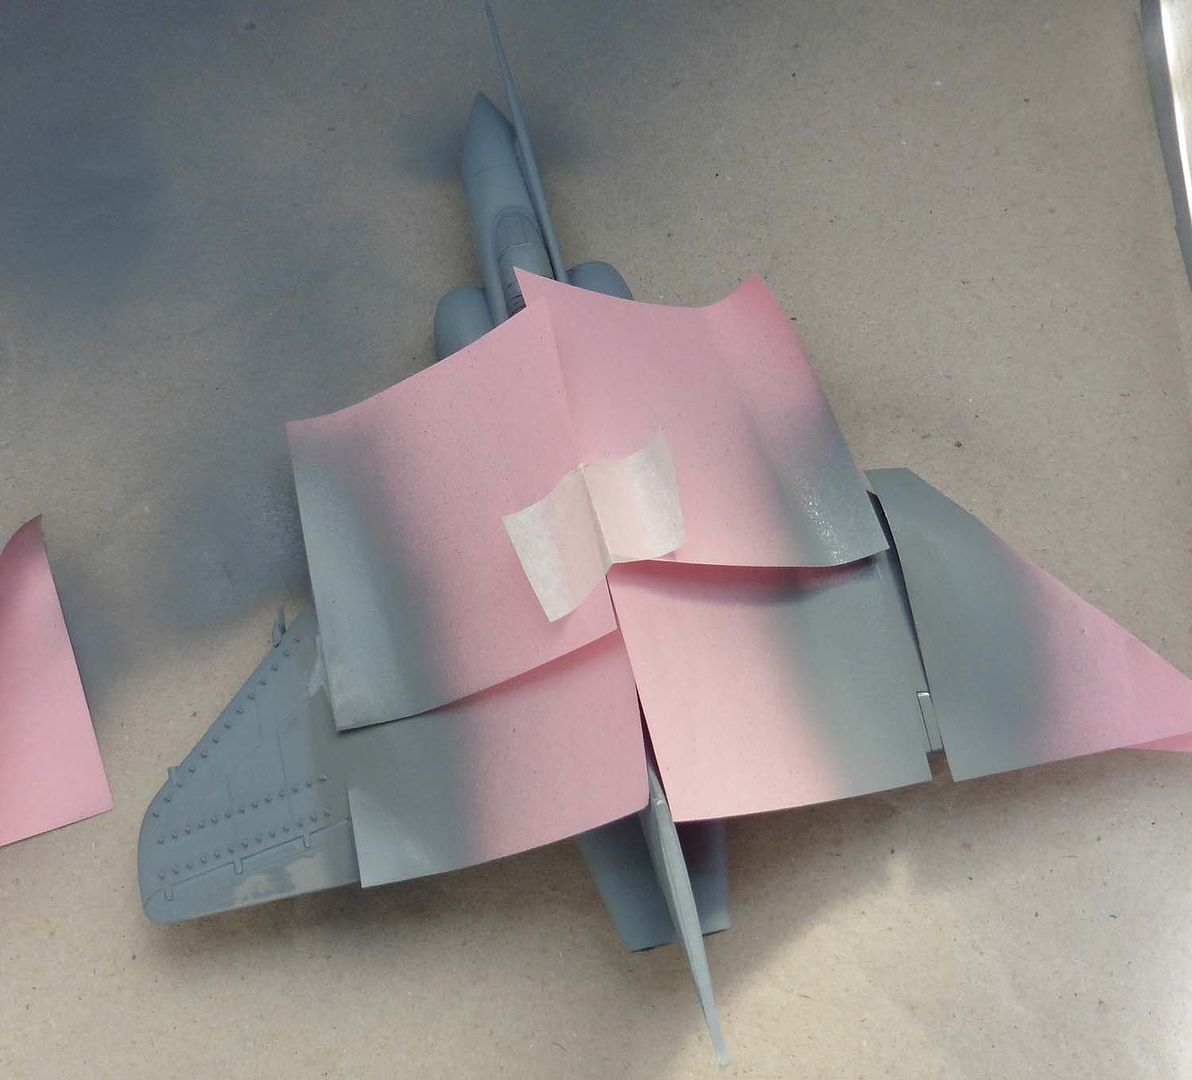
With the Post-It notes removed you can see the built-up area of primer over the join. The 'bald' areas received localised priming followed by the whole shebang. I used Hycote vehicle 'Plastic Primer' this time. The lower surface needs a coat and, once everything is thoroughly dry, the final sanding and micro-meshing will be done.
I love a challenge - but not that much!!
Some lo-tack masking either side of the wing joins and the application of 4 coats of primer:
With the Post-It notes removed you can see the built-up area of primer over the join. The 'bald' areas received localised priming followed by the whole shebang. I used Hycote vehicle 'Plastic Primer' this time. The lower surface needs a coat and, once everything is thoroughly dry, the final sanding and micro-meshing will be done.
I love a challenge - but not that much!!
Tony
The older I get the better I was!
Current build:
Airfix 1:72 Javelin FAW9
Particular modelling interests:
Cuban Airforce aircraft, 29(F) Sqn aircraft, Aircraft I’ve flown
The older I get the better I was!
Current build:
Airfix 1:72 Javelin FAW9
Particular modelling interests:
Cuban Airforce aircraft, 29(F) Sqn aircraft, Aircraft I’ve flown
-
Stuart
- Raider of the Lost Ark Royal
- Posts: 19417
- Joined: February 25th, 2013, 4:55 pm
- Location: North Wales
- Contact:
Re: TeeELLs kitchen crafting kit creations
Good recovery!
Stuart Templeton I may not be good but I'm slow...
My Blog: https://stuartsscalemodels.blogspot.com/
My Blog: https://stuartsscalemodels.blogspot.com/
-
ShaunW
- NOT the sheep
- Posts: 26180
- Joined: November 26th, 2011, 6:11 pm
- Location: Pontefract West Yorkshire
Re: TeeELLs kitchen crafting kit creations
That is indeed a great save Tony. I have gone off specific primers again after a period of using Vallejo, which in my experience is fine until there is any sanding required and then it tends to come off in chunks. I have gone back to my previous practice of using a light grey undercoat of Tamiya acrylic as a "primer" to check for any issues and which I find sands better in the event of further prep work being required - which in my case is virtually every build 
Doing - Tamiya 1/35th Universal Carrier.
Work is the curse of the modelling classes!
IPMS#12300
Work is the curse of the modelling classes!
IPMS#12300
-
TeeELL
- Modelling Gent and Scholar
- Posts: 11593
- Joined: December 28th, 2015, 4:38 pm
- Location: North Wiltshire
Re: TeeELLs kitchen crafting kit creations
Having had to rescue the primer finish after it lifted when I removed the masking tape, I have decided to practice on the tail-plane first!! Of course my careful plan to spray the 'sun faded grey' all over the upper surface was derailed when I enthusiastically blue-tack'd the cammo pattern on!! Well, I shall leave it 'as is' and tomorrow fire-up the Passche and apply the grey. I even made a mess of mixing that; I decided I would go with the satin H163 and H164 suggestion but started making the grey using H32 lightened with HX4 Sea Grey Medium - the totally different smells of the paint caused my to think they might not mix too well, at which point I realised my error. I've called it a night, in case I make any more daft mistakes.


I've never used the Blu-Tac method so shall be interested to see the outcome.
I've never used the Blu-Tac method so shall be interested to see the outcome.
Tony
The older I get the better I was!
Current build:
Airfix 1:72 Javelin FAW9
Particular modelling interests:
Cuban Airforce aircraft, 29(F) Sqn aircraft, Aircraft I’ve flown
The older I get the better I was!
Current build:
Airfix 1:72 Javelin FAW9
Particular modelling interests:
Cuban Airforce aircraft, 29(F) Sqn aircraft, Aircraft I’ve flown

Re: TeeELLs kitchen crafting kit creations
Amazing work in the JAvelin, I´m very interesting in see the camuflage step!!
-
TeeELL
- Modelling Gent and Scholar
- Posts: 11593
- Joined: December 28th, 2015, 4:38 pm
- Location: North Wiltshire
Re: TeeELLs kitchen crafting kit creations
My efforts with the camouflage finish have progressed (yes, I am as surprised as you are!). I brush painted the under leading edges with the original dark grey and then mixed a batch of the satin dark grey with approx 15ish% satin light grey; this was done in my last spare 14ml tinlet. I mixed sufficient with Humbrol thinners, to a consistency far 'wetter' than is my usual practice, and over the next hour applied some 4 coats. After an hour to dry I removed the Blu-tack and masks and the end result is most satisfactory. Nicely defined edges, no paint build-up along the edges and no paint creep. Photos will have to wait as the tail-plane is upside down drying.
In between airbrush sessions, I attached the PE components to the undercarriage legs. Once again I used my U/V activated glue, it has sufficient viscosity to 'hold' the parts in position, but if a little more 'gription' is required a momentary zap with the blue light will cause a little curing, enough to hold the PE in place while you finish the 8-second zap to fully cure the glue. This is really useful stuff!
I practiced my 'one pace forward, 2 paces back' approach to modelling once again! Having painted the undercarriage legs light grey, I then checked my references. So, off came the grey (along with the carefully applied silver of the nose wheel) and on went the Humbrol Dull aluminium.
Photos to follow.
Tony
The older I get the better I was!
Current build:
Airfix 1:72 Javelin FAW9
Particular modelling interests:
Cuban Airforce aircraft, 29(F) Sqn aircraft, Aircraft I’ve flown
The older I get the better I was!
Current build:
Airfix 1:72 Javelin FAW9
Particular modelling interests:
Cuban Airforce aircraft, 29(F) Sqn aircraft, Aircraft I’ve flown
-
ShaunW
- NOT the sheep
- Posts: 26180
- Joined: November 26th, 2011, 6:11 pm
- Location: Pontefract West Yorkshire
Re: TeeELLs kitchen crafting kit creations
Sounds promising Tony, looking forward to the pics. I've tried various paint consistencies over my 20 years or so using an airbrush and still tend to stick with the consistency of milk approach and between 1.5 and 2.0 bar of pressure, largely depending upon the paint. My airbrush is a dual action Badger 100 GXF. I have in the past tried thinner paint and lower/higher pressure but usually end up with runs and/or splats and a lot of post paint sanding
Doing - Tamiya 1/35th Universal Carrier.
Work is the curse of the modelling classes!
IPMS#12300
Work is the curse of the modelling classes!
IPMS#12300
-
TeeELL
- Modelling Gent and Scholar
- Posts: 11593
- Joined: December 28th, 2015, 4:38 pm
- Location: North Wiltshire
Re: TeeELLs kitchen crafting kit creations
Shaun,
I've been playing with an airbrush for 30 odd years, mostly with a very basic single action Passche but more recently a Passche double action and most recently a chinese trigger action and, subsequently, a Neo trigger action. I fully agree with you about the consistency of milk but decided to go thinner for this aircraft paint job. I think I wanted to ensure that the limited pre-shading I did would remain effective. I have to say I am very satisfied with the result and so I will use the dame technique for the complete aircraft.
I've been playing with an airbrush for 30 odd years, mostly with a very basic single action Passche but more recently a Passche double action and most recently a chinese trigger action and, subsequently, a Neo trigger action. I fully agree with you about the consistency of milk but decided to go thinner for this aircraft paint job. I think I wanted to ensure that the limited pre-shading I did would remain effective. I have to say I am very satisfied with the result and so I will use the dame technique for the complete aircraft.
Tony
The older I get the better I was!
Current build:
Airfix 1:72 Javelin FAW9
Particular modelling interests:
Cuban Airforce aircraft, 29(F) Sqn aircraft, Aircraft I’ve flown
The older I get the better I was!
Current build:
Airfix 1:72 Javelin FAW9
Particular modelling interests:
Cuban Airforce aircraft, 29(F) Sqn aircraft, Aircraft I’ve flown