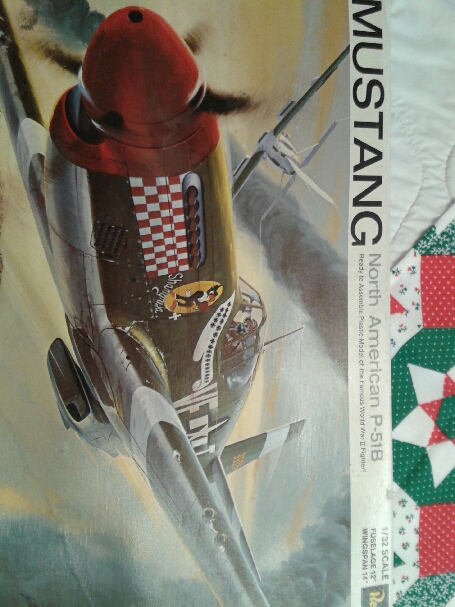
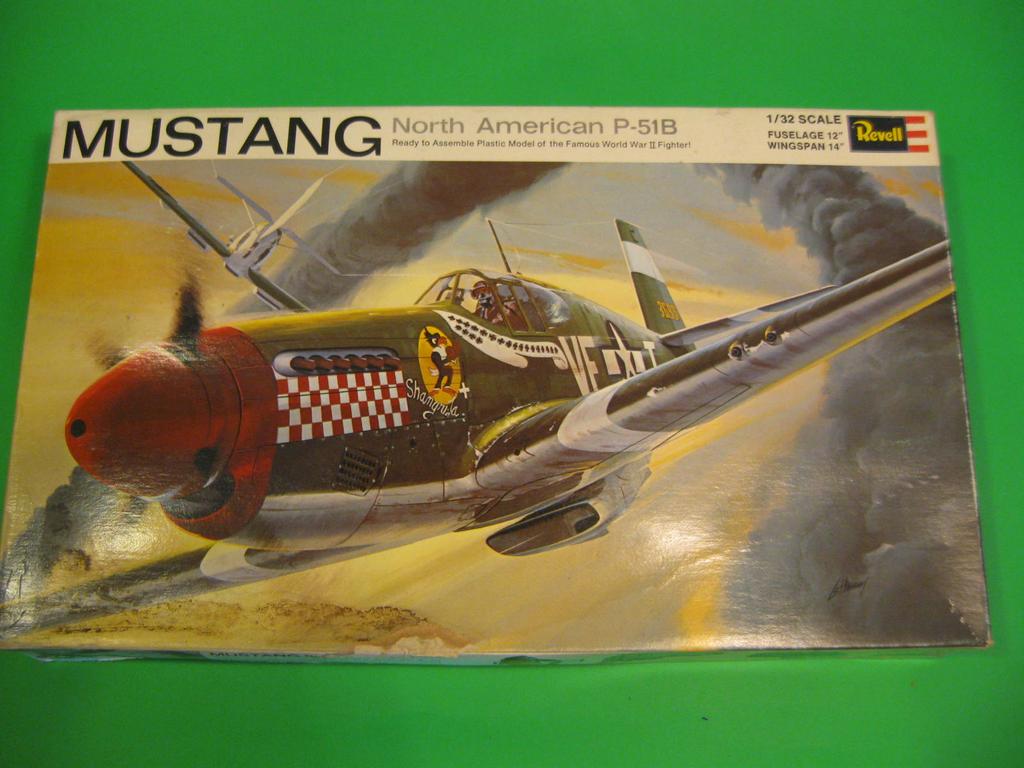
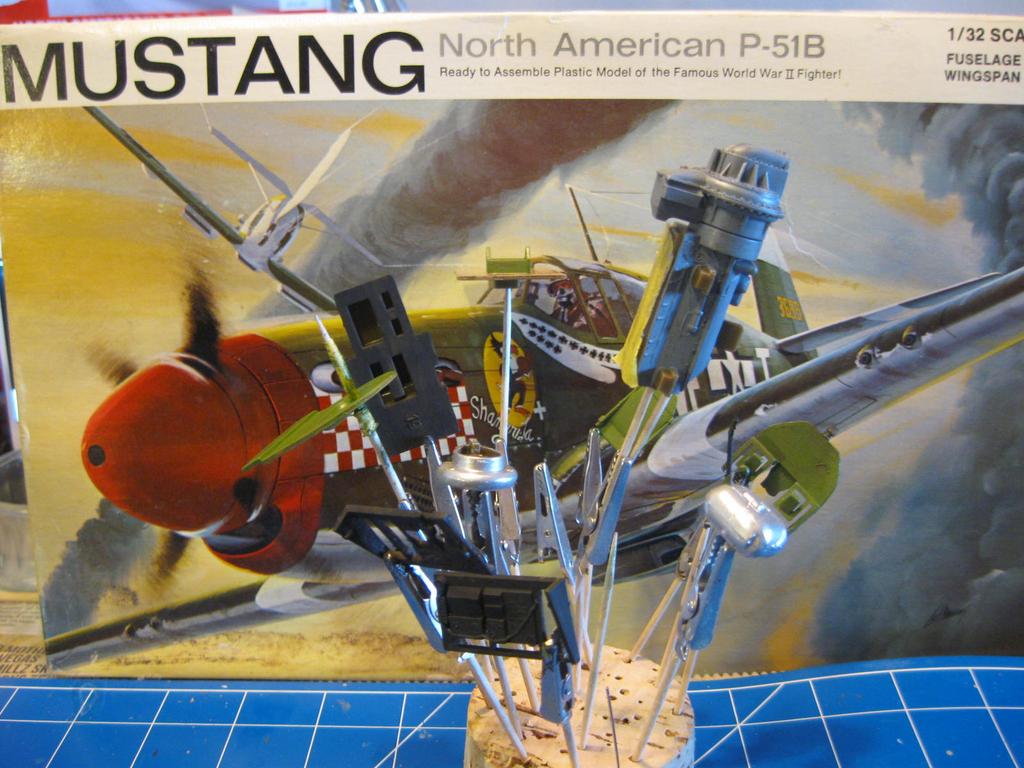
In-box review:Michael modeller 48 wrote:New addition to my stash:
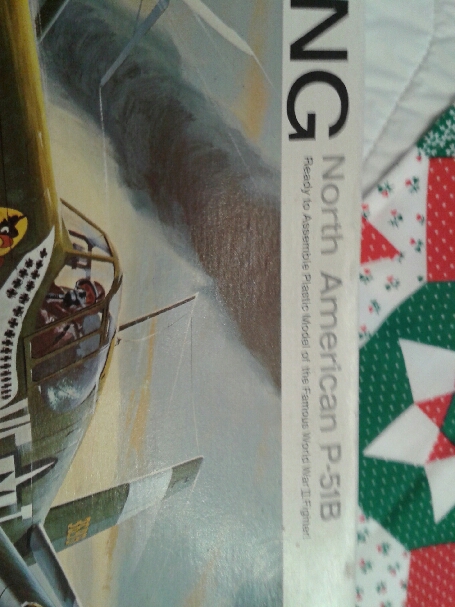
Revell's North America p-51B 1/32
A lady at church found this find at an estate sale. It is a vintage kit from the 60's?
Michael's Modellers Mucking About
-
Michael modeller 48
Re: Michael's Modellers Mucking About
I think my next build is:
-
skypirate

- Modelling Gent and Scholar
- Posts: 7278
- Joined: May 1st, 2011, 6:13 am
- Location: Port Macquarie, Australia
Re: Michael's Modellers Mucking About
Yes, definitely vintage. If not late 60s, then early 70s for sure.
Cheers,
David
Cheers,
David
-
Michael modeller 48
Re: Michael's Modellers Mucking About
1969 I did in-box review my question was before research on my part
My above post has link...
My above post has link...
-
Michael modeller 48
Re: Michael's Modellers Mucking About
it was "new" tooling for Revell in the year 1969!
-
ShaunW
- NOT the sheep
- Posts: 26180
- Joined: November 26th, 2011, 6:11 pm
- Location: Pontefract West Yorkshire
Re: Michael's Modellers Mucking About
Nice one, it's good to see a P-51B for a change to the more commonly modelled D version. It will be quite a size in 1/32nd.
Doing - Tamiya 1/35th Universal Carrier.
Work is the curse of the modelling classes!
IPMS#12300
Work is the curse of the modelling classes!
IPMS#12300
-
Michael modeller 48
Re: Michael's Modellers Mucking About
I did not known that, my review might have some history but i just copy and paste from a article i saw on www. I should read up on it...ShaunW wrote:Nice one, it's good to see a P-51B for a change to the more commonly modelled D version. It will be quite a size in 1/32nd.
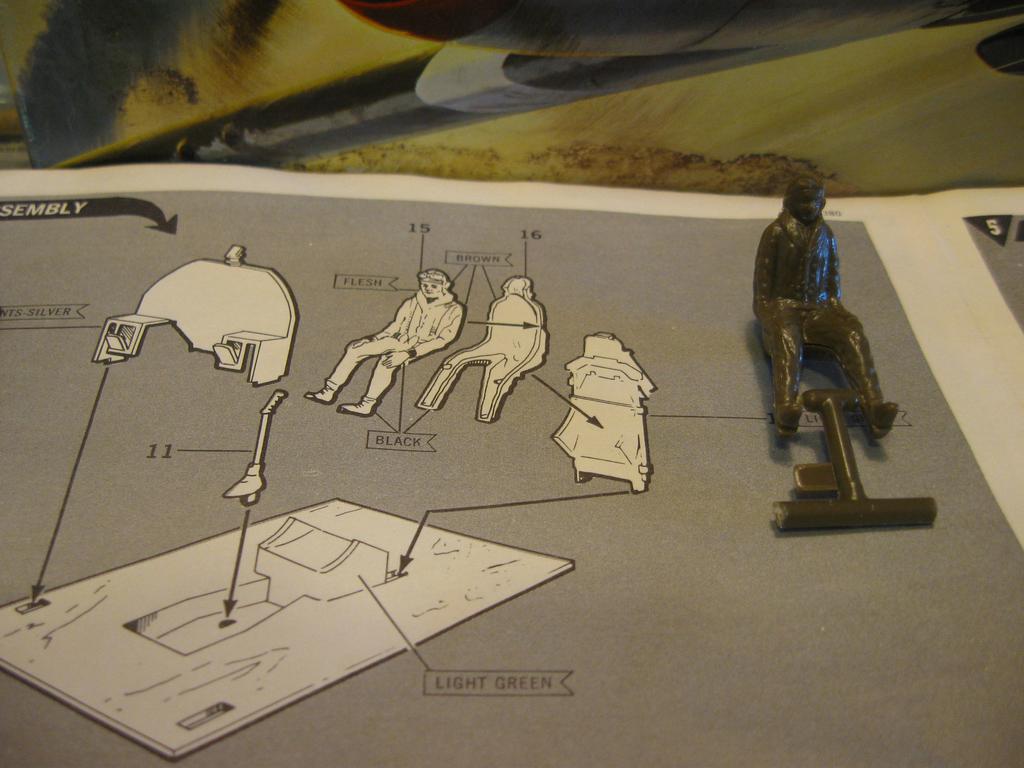
The body is about a foot and wignspan is 14" to 15" approx.
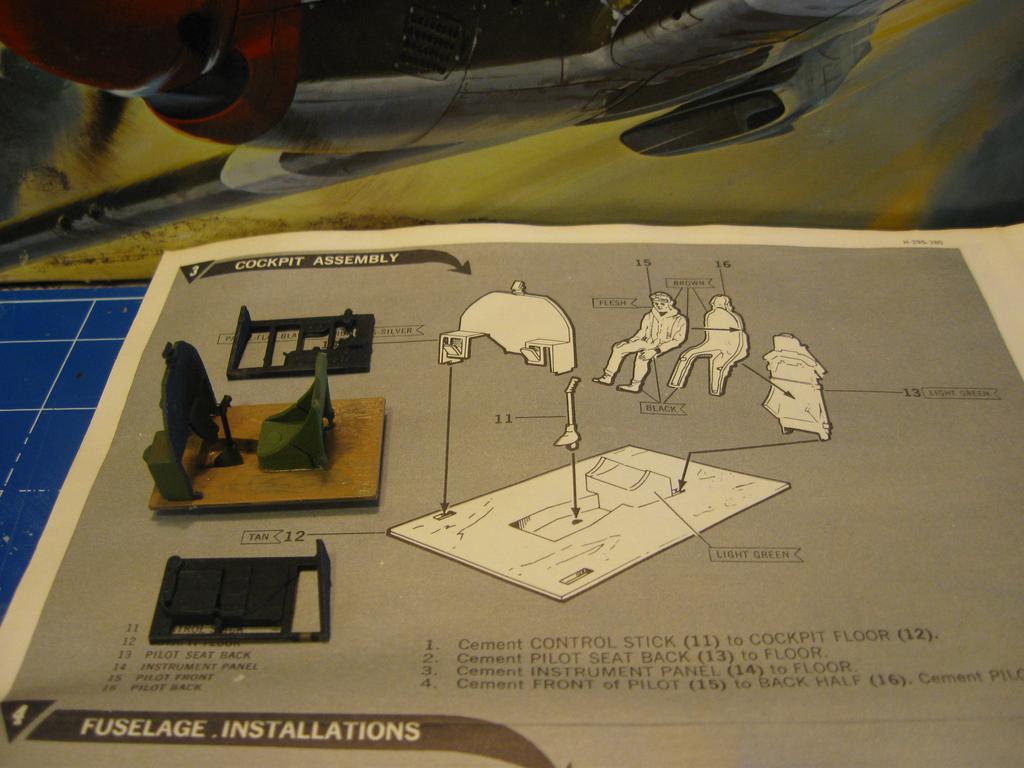
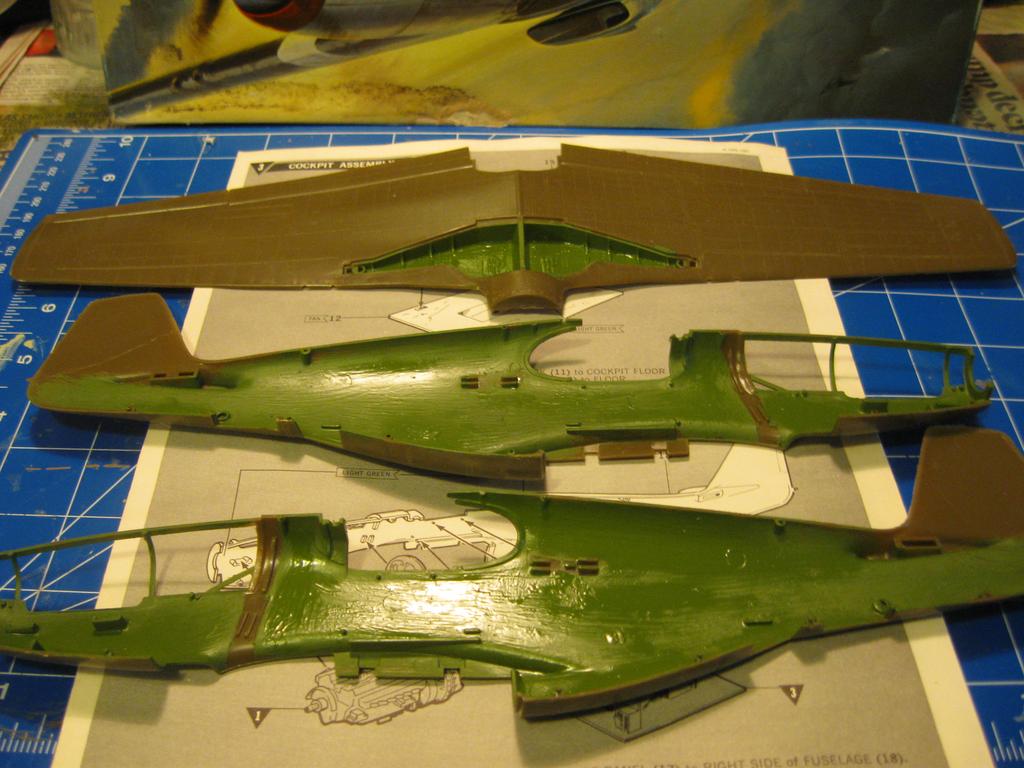
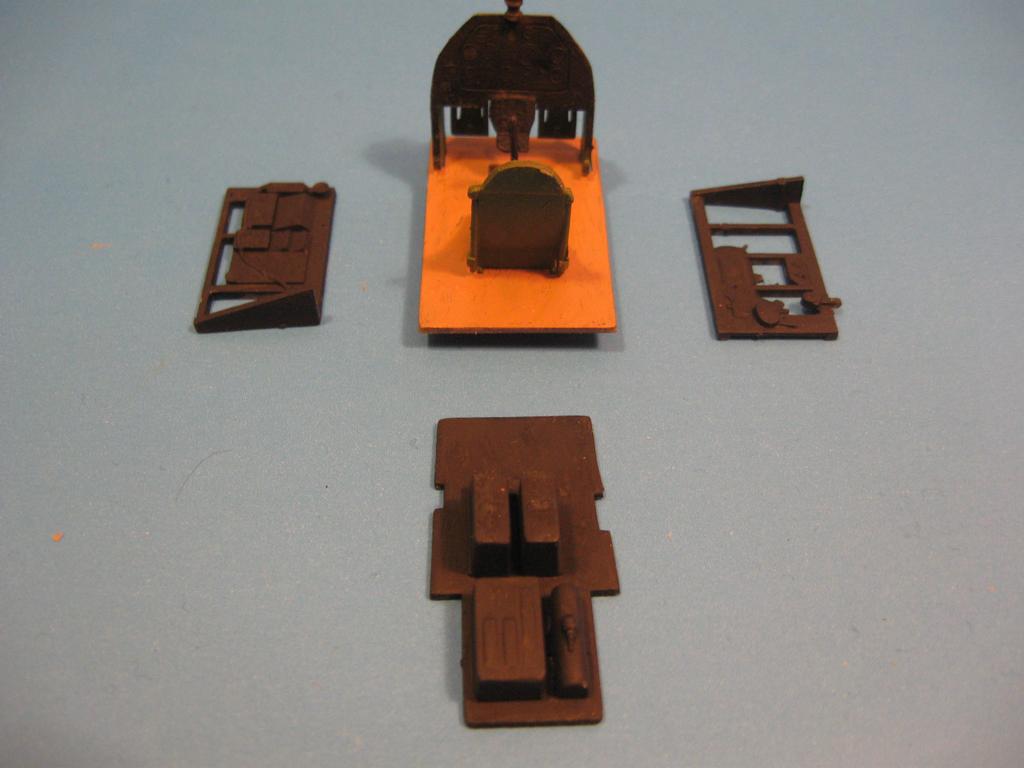
I start to glue & paint the sub assembly and the inside of fushagle and wheel wells:
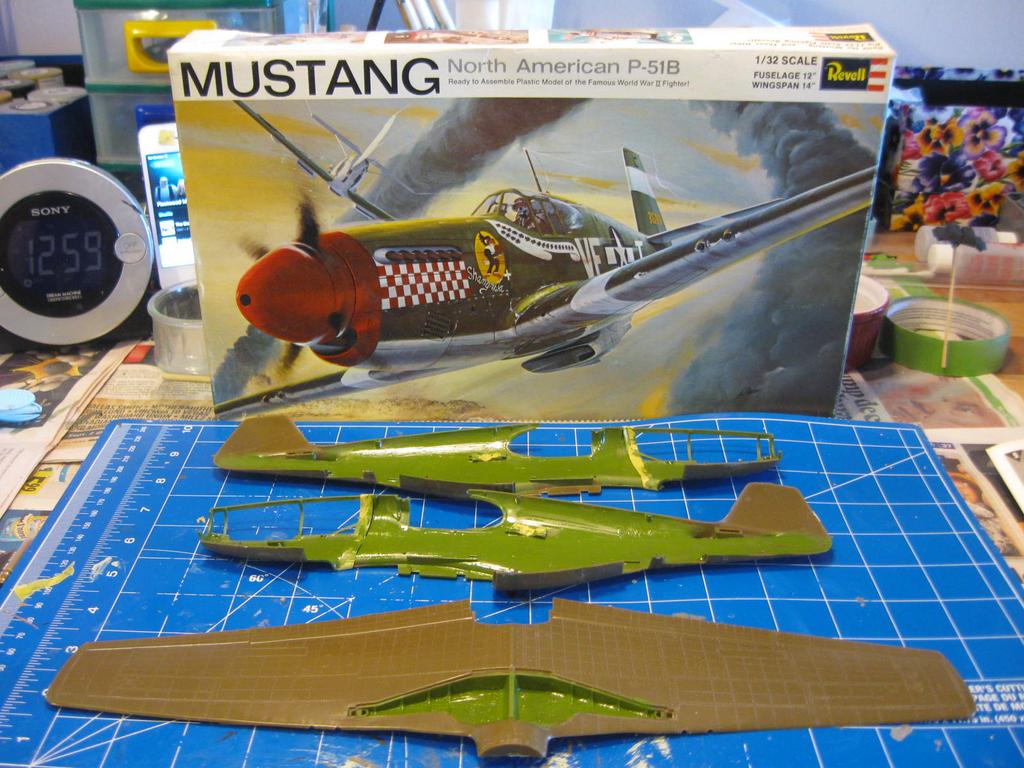
Interior parts glued and painted and drying on my homemade dry rack.
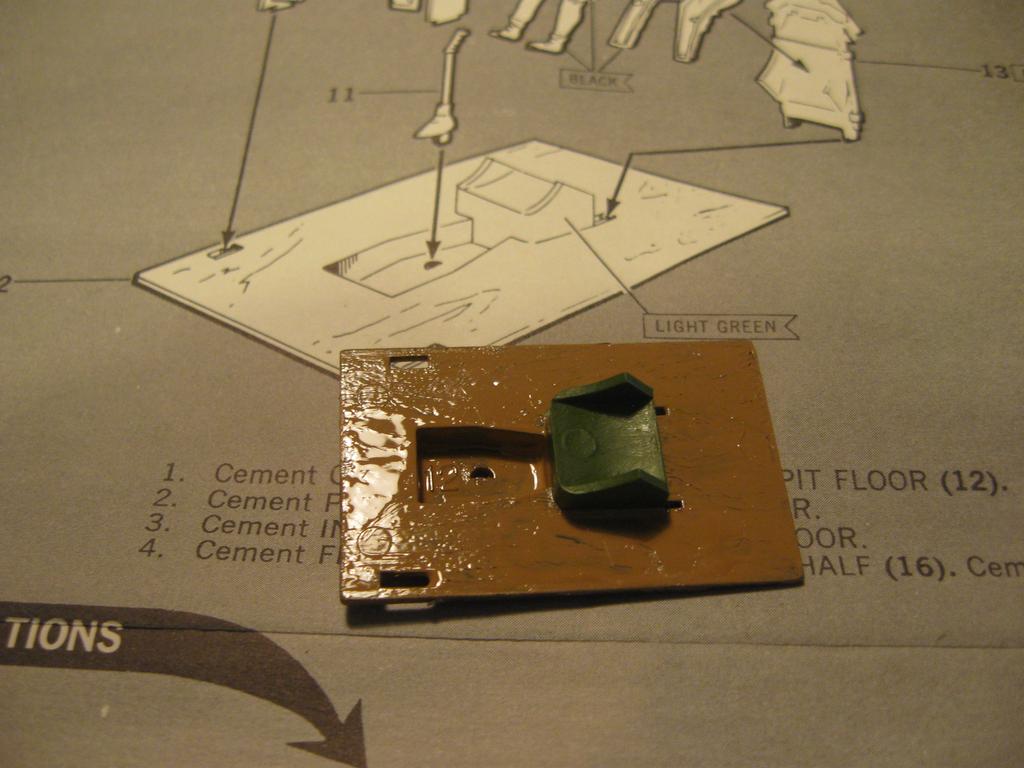
I notice the cockpit floor was molded with what looks like grain as in wood grains. ? Was the real plane use wood for the cockpit floor?
I paint it Testor "wood" instead of "tan" to try be a little more accurate; I do not know if my brush painting will make it look like real wood however...
I am using my Testor as a throw back to childhood days of modelling with Revell kits and the only brand of paints I had access to in 60's and 70's
as "amosh" to vintage nature of this kit. I was 2 when this kit came out...
Not sure what colour the control stick in the plane, so i painted black and base the cockpit colour. (instructions did list the colour).
Painting in enamals so dry time is 24 hours, might go for walk until I can start tomorrow 1:30 Mtn installing engine, cockpit assembly as well as
cockpit sides and radio and partition with coolant tank behind pilot (still not painted).
-
Michael modeller 48
Re: Michael's Modellers Mucking About
This kit has bit of flashing (thin and sparse). The prop was not properly form ( one snub prop) and i found one part broken the seat the top half was broken off
so I trimmed and sand down into a shape to make look better than a odd angle. For how long this kit has been kicking around not bad so far. Hope my luck
holds up and no more or worse yet missing pieces as I am sure I will find no replacements other than a kit i saw on ebay. Who know if it still for sale.
Knock on wood....
-
Michael modeller 48
Re: Michael's Modellers Mucking About
The body is about a foot and wignspan is 14" to 15" approx.ShaunW wrote:.... It will be quite a size in 1/32nd.
Yes, a big change from 1/72 scale. Never build in this scale as a kid but other than a tank it has all been 1/72 coming back to modelling.
I need a display cabinet to fit this plane or maybe I hang it from the ceiling as I did as kid haha....
-
Michael modeller 48
Re: Michael's Modellers Mucking About
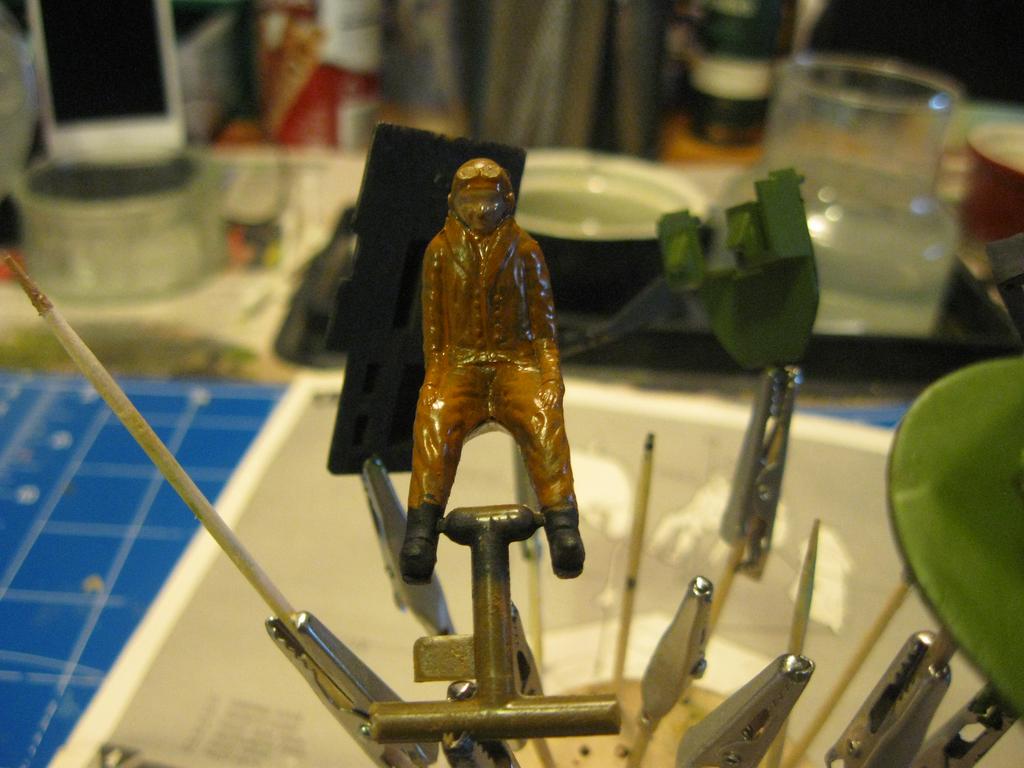
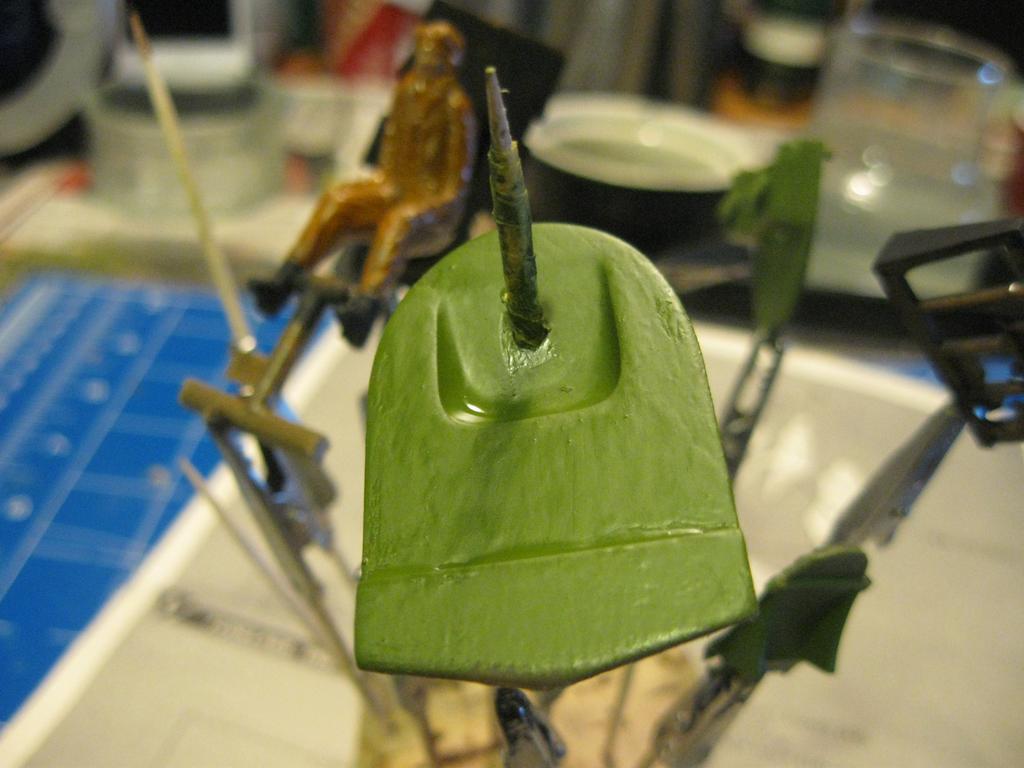
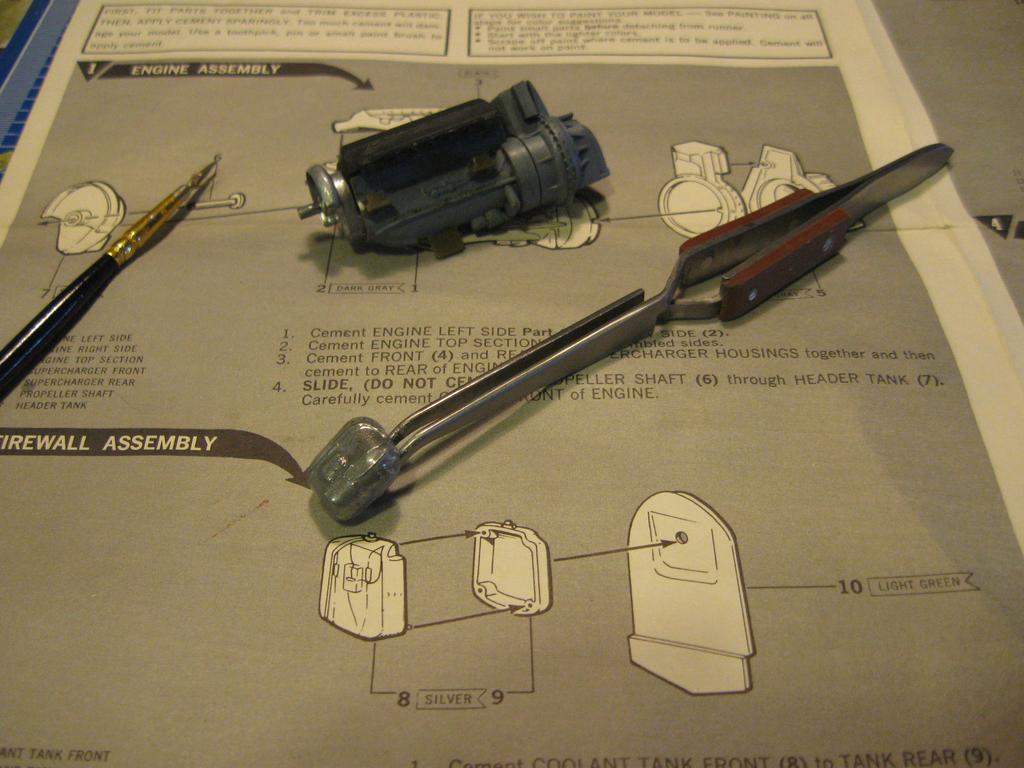
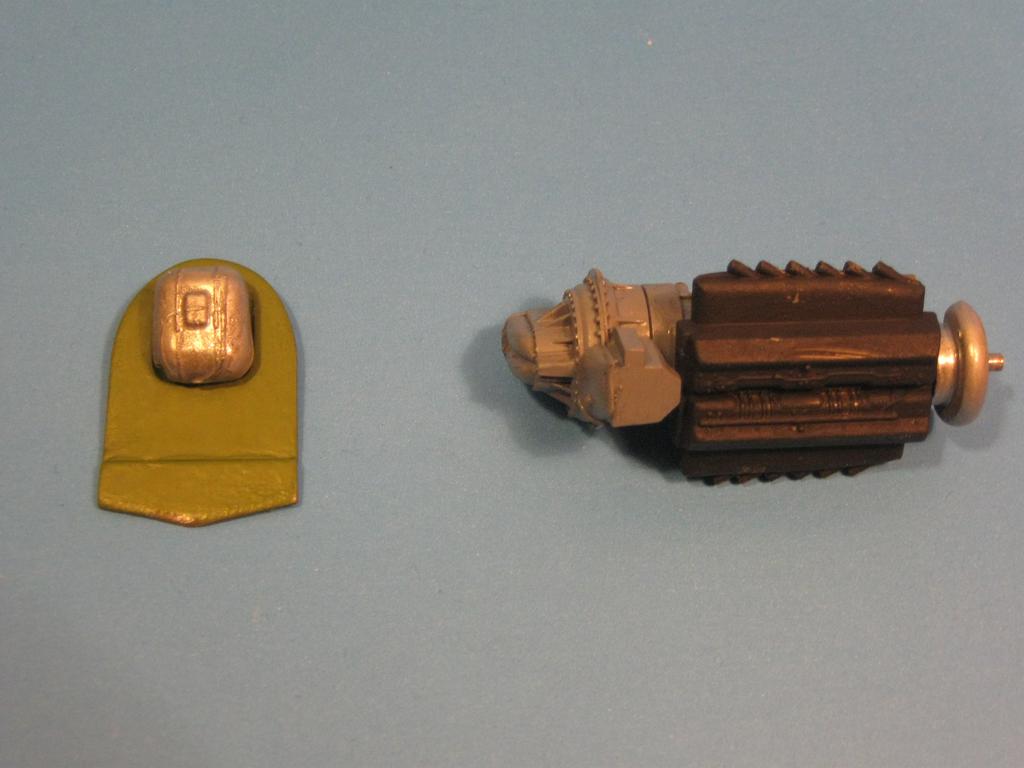
I glued the header tank/prop pin and engine top onto rest the engine (glue and painted gray beforehand).
Will add another coat/touch ups tomorrow.

The cockpit assembly is painted and i test fitted for the purpose of the picture. Will add another coat tommorow.
The radio shelf is painted black.
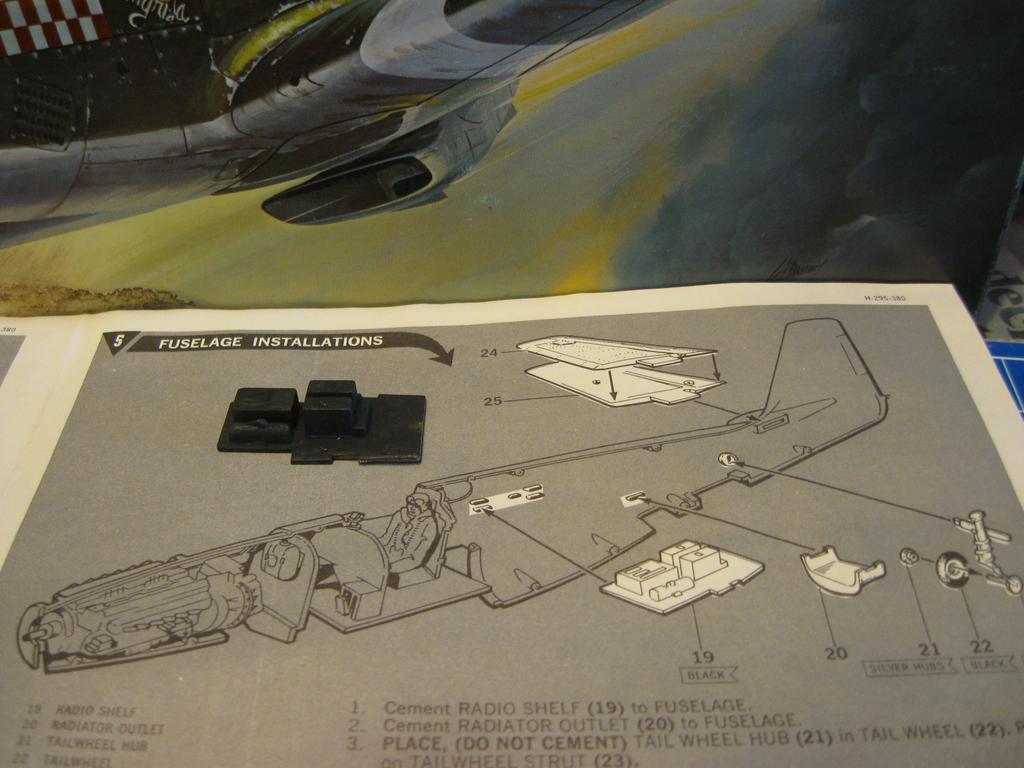
This picture shown the shape of the top half of the seat. But i found it broken so I cut and sand to round shape but it will not be at the same height
as pilot. He is not painted yet...but i glued and sanded the half together.
Will add another coat/touch ups tomorrow.
The cockpit assembly is painted and i test fitted for the purpose of the picture. Will add another coat tommorow.
The radio shelf is painted black.
This picture shown the shape of the top half of the seat. But i found it broken so I cut and sand to round shape but it will not be at the same height
as pilot. He is not painted yet...but i glued and sanded the half together.

Re: Michael's Modellers Mucking About
Hi Michael, Check your PM for options to your propeller issue.
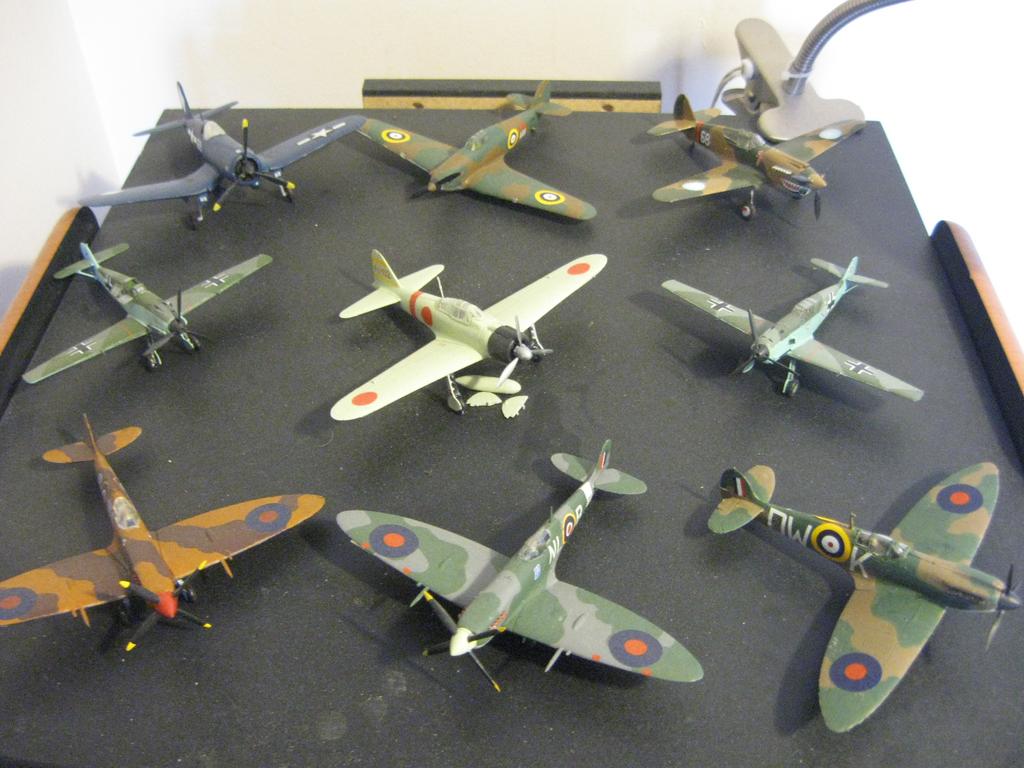
Besting 60 years of mediocre building of average kits in the stand off scale
-
Michael modeller 48
Re: Michael's Modellers Mucking About
I started to paint the pilot he will need another coat
Put another coat of paint to parts for interior
Put another coat of paint to parts for interior
-
Michael modeller 48
Re: Michael's Modellers Mucking About
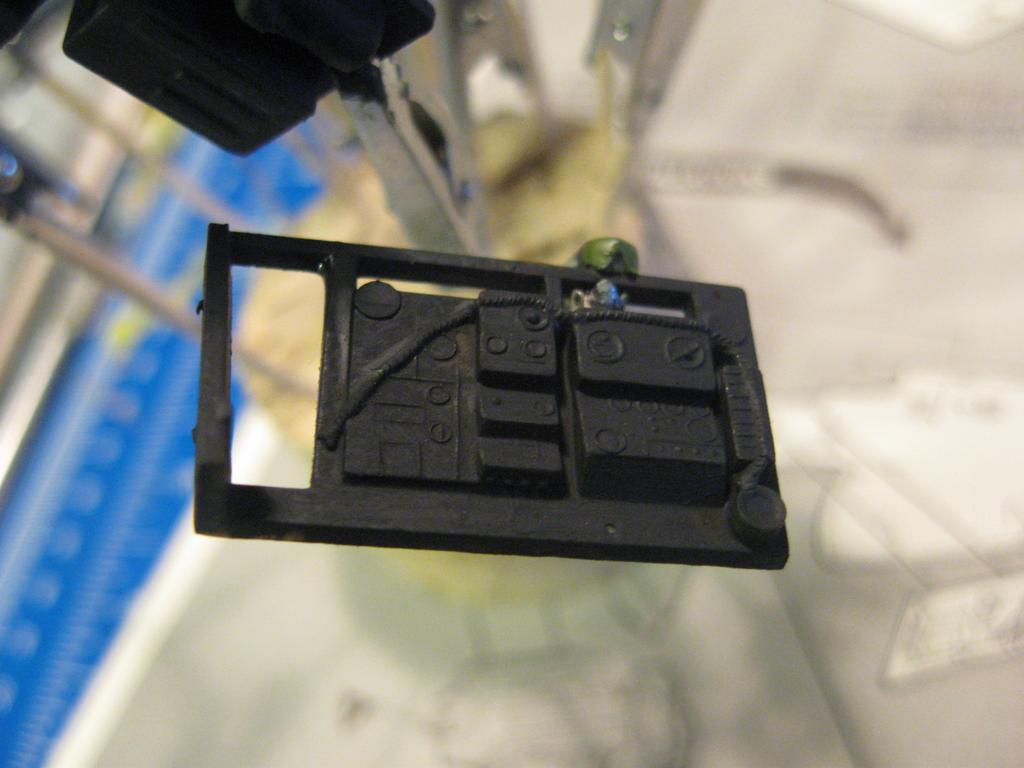
The fuselage cockpit and wheel wells has been painted Int green.
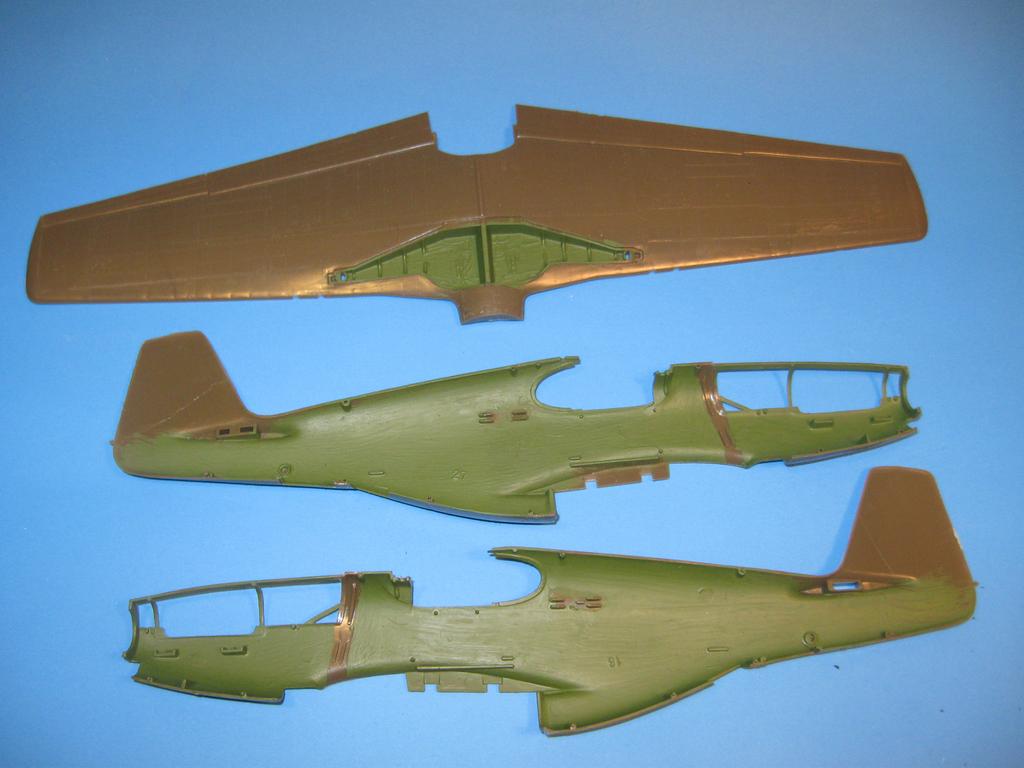
I gave the engine bulkhead/coolant tank and cockpit assembly and radio shelf a second coat this morning at 8 am.
I gave the engine bulkhead/coolant tank and cockpit assembly and radio shelf a second coat this morning at 8 am.
-
ShaunW
- NOT the sheep
- Posts: 26180
- Joined: November 26th, 2011, 6:11 pm
- Location: Pontefract West Yorkshire
Re: Michael's Modellers Mucking About
I see you've got off to a great and at times early, start to this big Mustang, Michael!
Doing - Tamiya 1/35th Universal Carrier.
Work is the curse of the modelling classes!
IPMS#12300
Work is the curse of the modelling classes!
IPMS#12300
-
Michael modeller 48
Re: Michael's Modellers Mucking About
Thanks Shawn, the two coat should be cured by now to glue the cockpit together and install the engine and bulkhead into the fushagle.
I think I need to thin this Testor paints some parts have uneven coats like the green for example.
I have some Tamiya olive drab to spray this big plane it would take forever to hand paint it.
I think I need to thin this Testor paints some parts have uneven coats like the green for example.
I have some Tamiya olive drab to spray this big plane it would take forever to hand paint it.