Page 6 of 27
Re: Chris's Cobbling Bench
Posted: February 4th, 2018, 8:29 pm
by chrism
THanks for the comments and commiserations guys.
Ratch - what I use for rigging, depends on what I am rigging .. but the Vosper and the RAF boat (and the Coastal Craft boat I did a few posts earlier in this log) were quite simply rigged with just standard black sewing cotton that is sold for everyday sewing such as buttons and putting through a sewing machine.
For most of this weekend I have been otherwise occupied, but did manage a crafty half hour after breakfast both mornings....

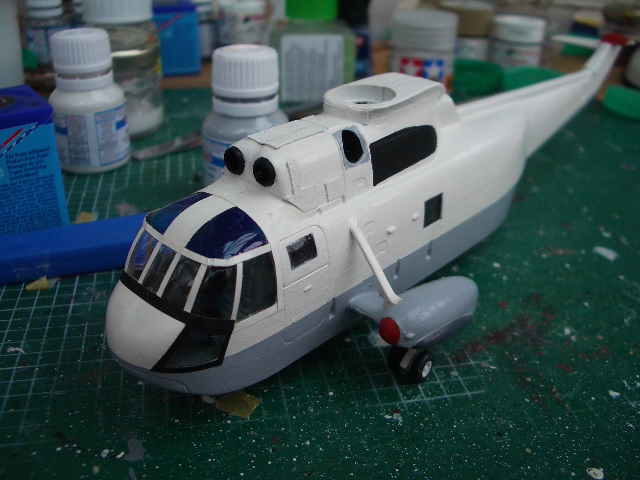
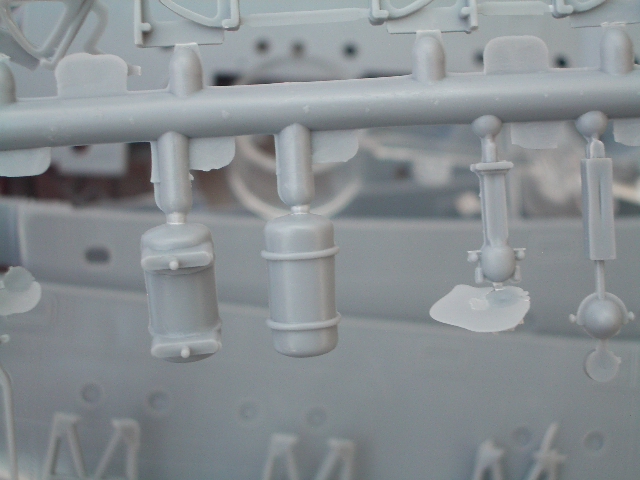
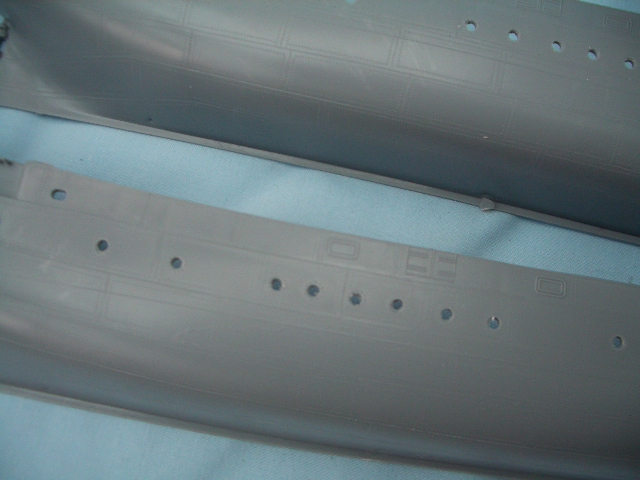
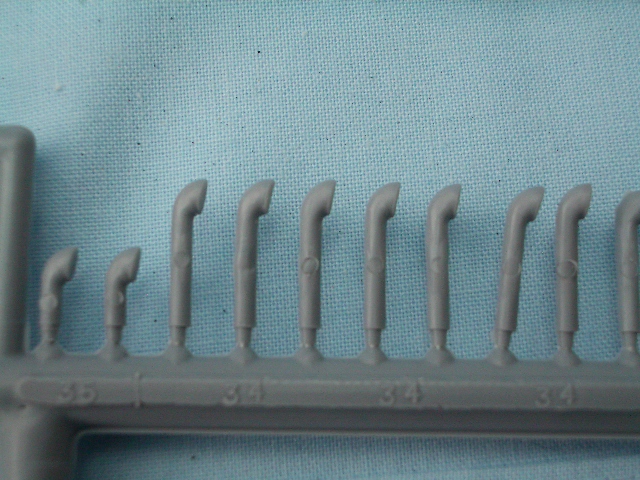
Saturday I managed to add a little more of the etch to try and add some detail on the outside of the seaking.
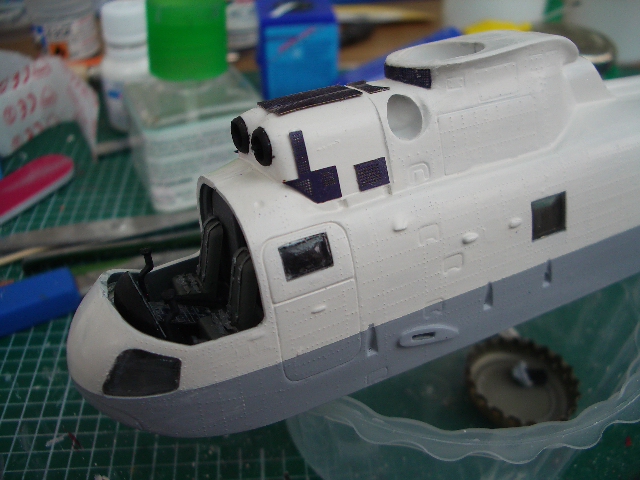
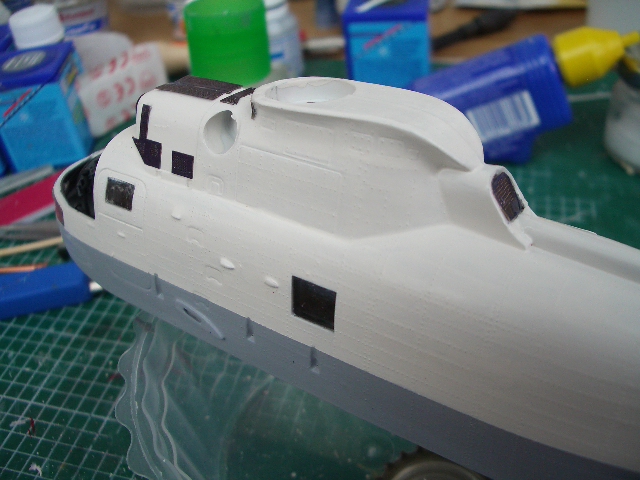
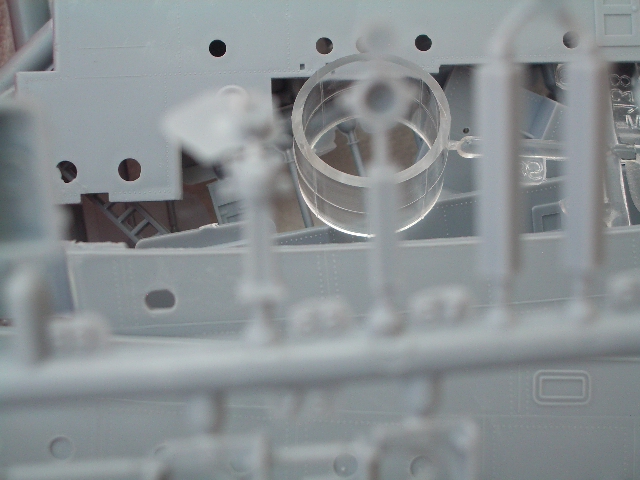
and then this morning I got the cockpit fixed ... well ... judge for yourself, but I think the term "lodged on" might be a more precise term. There is a bit of a gap to deal with

I shall be spending some time now disguising those gaps and fitting the window framing - I hope to get on with that and adding the sponsons this week.
After the fiasco with that WW1 ambulance that never got going, I can still feel the itch of a cheeky little tank or something vehicular-ish needing attending too ....

after this one gets a bit further. So staty tuned....
Re: Chris's Cobbling Bench
Posted: February 4th, 2018, 8:33 pm
by iggie
Yep, I remember that gap as well!
Re: Chris's Cobbling Bench
Posted: February 4th, 2018, 10:38 pm
by splash
The nice thing about the old Seaking kit was that it had rivets unlike the new version.
It must be one of the only Airfix kits that the infamous riveter got it close to right.
Re: Chris's Cobbling Bench
Posted: February 5th, 2018, 12:04 am
by chrism
I have been purposely trying to do as little sanding on this kit as possible so as to preserve the rivet detail and am accepting a little more seam than I ought in places
Re: Chris's Cobbling Bench
Posted: February 5th, 2018, 4:41 pm
by ShaunW
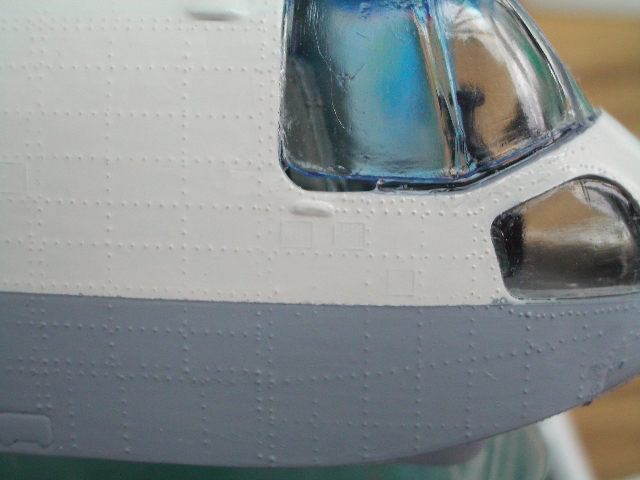
Perhaps try building up the edge of the of the glazing aperture with thin strip plastic card, Chris and then carefully sand the the glazing to fit - it might result in less gaps that are easier to fill.
Re: Chris's Cobbling Bench
Posted: February 11th, 2018, 5:11 pm
by chrism
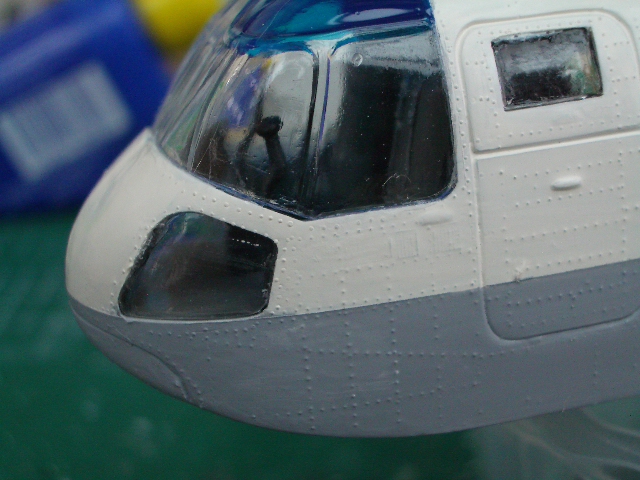
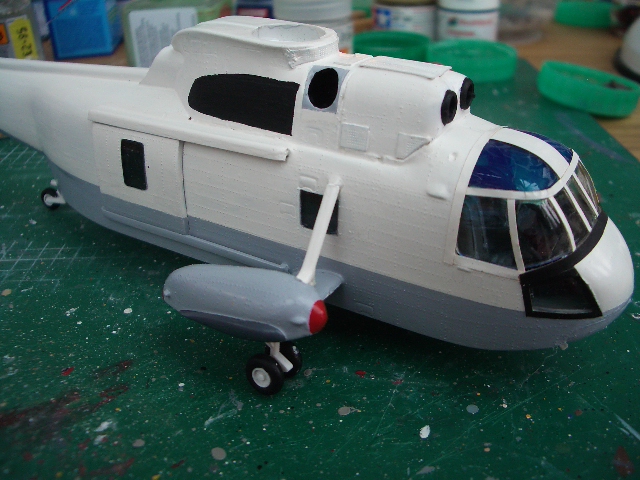
Gosh how quickly time goes when you are elsewhere ... anyhow ... back at the bench now and back to where I left off last time. Sorting out round the windscreen gap. I opted for a bit of a cheat Shaun,
and err .. ( I will say this quietly) applied some painted tamiya tape .
Anyhow I think I have bodged my way around and over the gap now ...

and after a few other touch ups here and there,
I shall be ready to move this one onto decalling next. There are quite a lot of decals so that will be a multi-session task and coats of clear stuff to seal them in between, but that is now ready now for another day.
It is time also to think about what else to get out next, and I have been starting to draw up an action plan and route of attack for the old Frog kit of the lightship. Thankfully I managed to download a set of Revell instructions from when they repopped it, as the ones Eastern Express included in the box I got were near to non-legible. There is going to have to be quite a lot of reworking and remaking of replacement parts as the kit ones are so poor, but it is going to be a fun challenge, and given the age of the kit, and lack of other kits of this topic, I am up for taking on such a challenge.
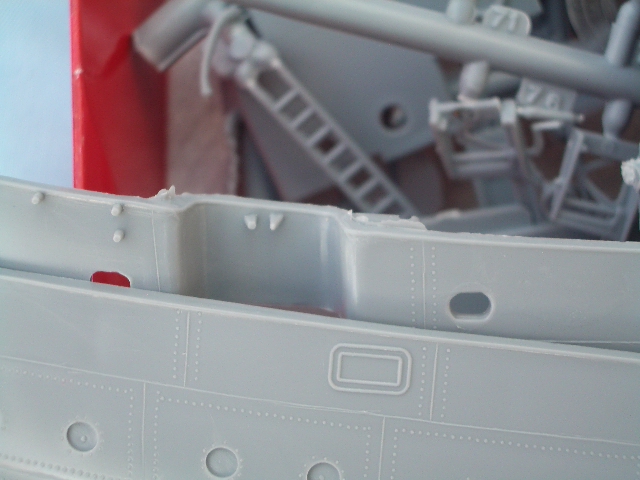
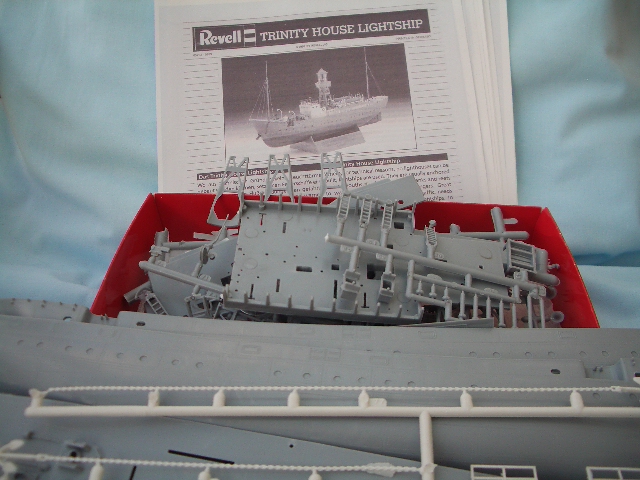
Once I re-find the instruction page that came in the box I will share it on here ... but Revell made theirs quite a lengthy one which is going to be better to use. I also have an etch upgrade set that Peter Hall sells for the kit which will help with some of the overly flashy and clogged up detail parts...

More on that in a later update too.
Re: Chris's Cobbling Bench
Posted: February 11th, 2018, 7:53 pm
by gnomemeansgnome
Cool work on the Sea King.
Re: Chris's Cobbling Bench
Posted: February 11th, 2018, 8:19 pm
by PGAS
Just went to the beginning of your thread. You dabble into a variety of subjects. Very nice. Fine work on the Sea King. Cockpit glass is always a toughie. Great ships too.
Re: Chris's Cobbling Bench
Posted: February 11th, 2018, 8:47 pm
by iggie
That's a really great save on the Sea King canopy gaps!
The lightship will be interesting to watch.....

Re: Chris's Cobbling Bench
Posted: February 19th, 2018, 5:02 pm
by chrism
Iggie, Paul and GmG thanks for looking in and commenting on progress. I like to dabble in a variety of things and seem to manage to enjoy most things except bi-planes, but do want to come back and revisit them at some point, and probably next year in my long term plan I will take a break from ships and try a couple of planes again - maybe harrier or even a phantom ... .
Anyhow this log is overdue an update: There hasnt been much happening over past 2-3 weeks for a variety of reasons. Today however:
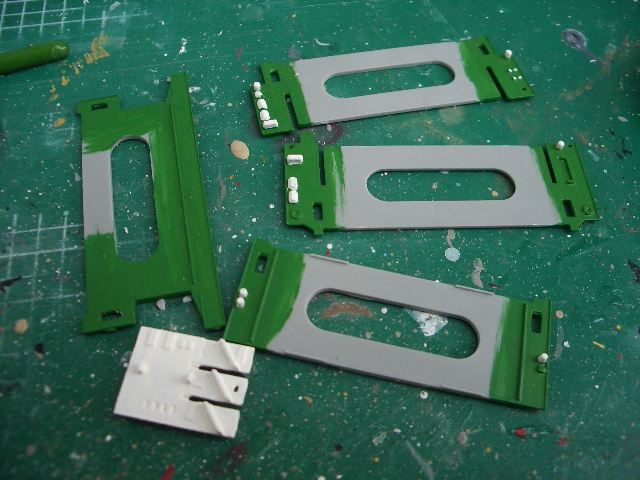
Work has started on the accommodation block that fits in on the container ship
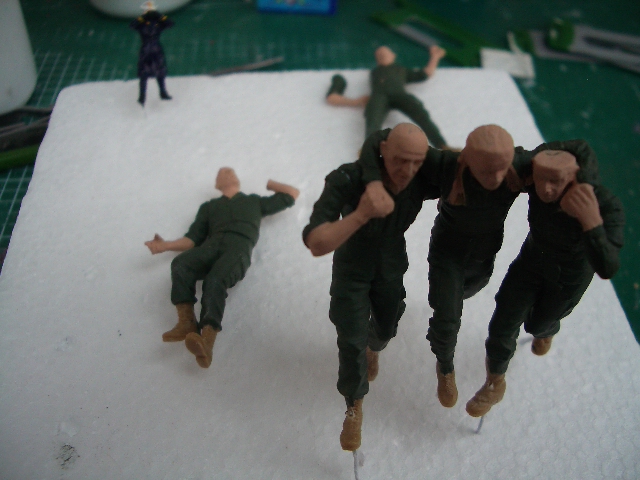
The US marines figures that I am building for the Vietnam scene I am not happy with the paint colour, so I am thinking I might soak them in dettol and start over, any guidelines on right colour of paint to use would be appreciated .... I am not planning on spending a fortune on one of those specific sets of colours, just for these though
As for the lightship....
I have drilled out the portholes, and now just need to clean those up
...and I am planning on this being a slow build with a lot of parts either needing a lot of clean up or remaking from evergreen etc.
I can foresee that I am going to have to go back to the old-school approach with this one and its gappy fit,
whereas I have tended to adapt and take a different approach with painting and assembly with many of the newer toolings from Airfix and Revell due to their more precise fit

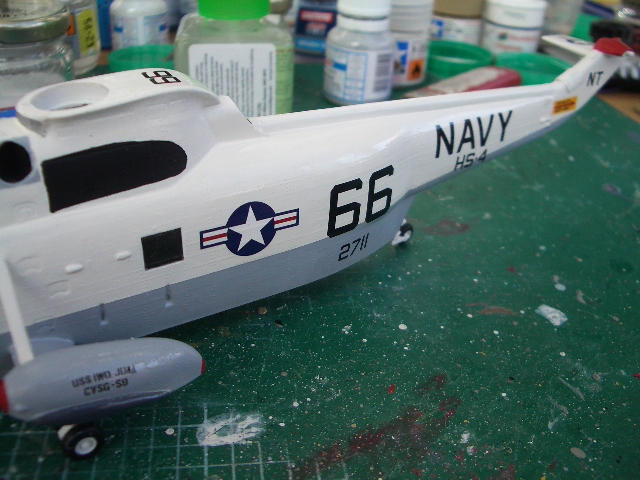
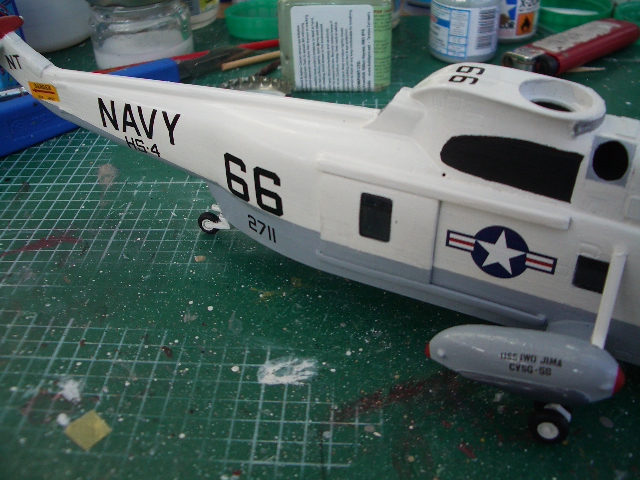
The seaking has had the first phase of decalling and these ones are now being sealed down before I add anymore, as given my hamfisted ability with decalling, I can easily handle a build in the wrong place and get them coming off and stuck onto me or lost somewhere else.
Re: Chris's Cobbling Bench
Posted: February 19th, 2018, 7:05 pm
by Ratch
Nice update Chris
Re: Chris's Cobbling Bench
Posted: February 19th, 2018, 7:59 pm
by Corricon
Love the Seaking Chris.
Re: Chris's Cobbling Bench
Posted: February 20th, 2018, 4:28 am
by Clashcityrocker
Great update. I like all I see
Nigel
Re: Chris's Cobbling Bench
Posted: February 20th, 2018, 5:49 pm
by ShaunW
Plenty of interesting stuff going on here, Chris. The Seaking looks great in those classic USN markings.
Re: Chris's Cobbling Bench
Posted: February 20th, 2018, 7:57 pm
by splash
Outstanding work on the Sea King Chris.
The old Frog Lightship was one of my favourite builds back in the mid sixties as the lightship used to come as the South Godwins light that was just along the Kent coast from where I lived.
Are you going to add a light to it? If so I could help you by making a micro LED light that would flash in the correct sequence.