Page 1 of 29
Shaun's 2018/19 Bodging Bench
Posted: January 1st, 2018, 6:35 pm
by ShaunW
Welcome to my new WW thread. As alluded to in my old thread, I've decided to start afresh for this year, partly because most of the photos in the earlier Bodging Bench were hosted on Photobucket and are no longer visible as I ain't paying them $400.00 for the privilege* and partly because I fancy a different approach and will probably renew the BB every year from now on.
OK, moving on to my current build which is Tamiya's not so new now but still very good 1/48th Bf109E and which I aim to finish as a '109E/4 Trop. The basic airframe is now complete:
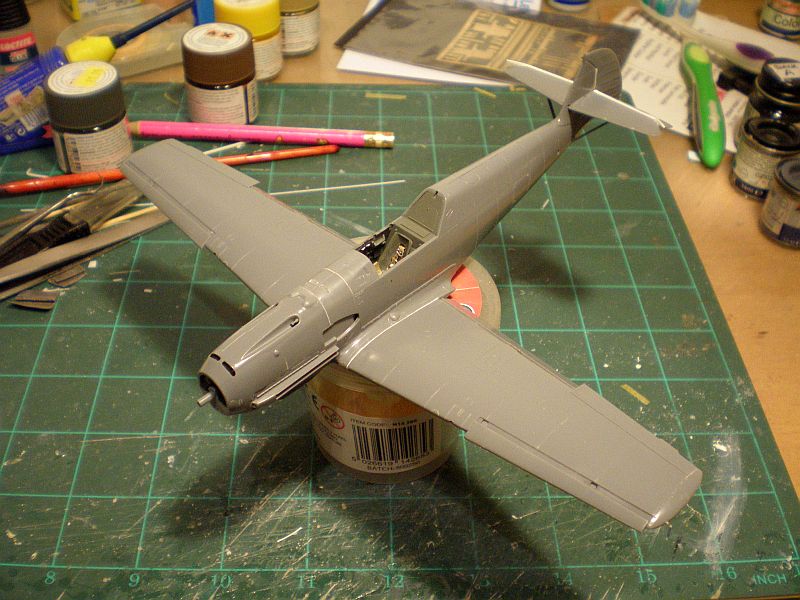
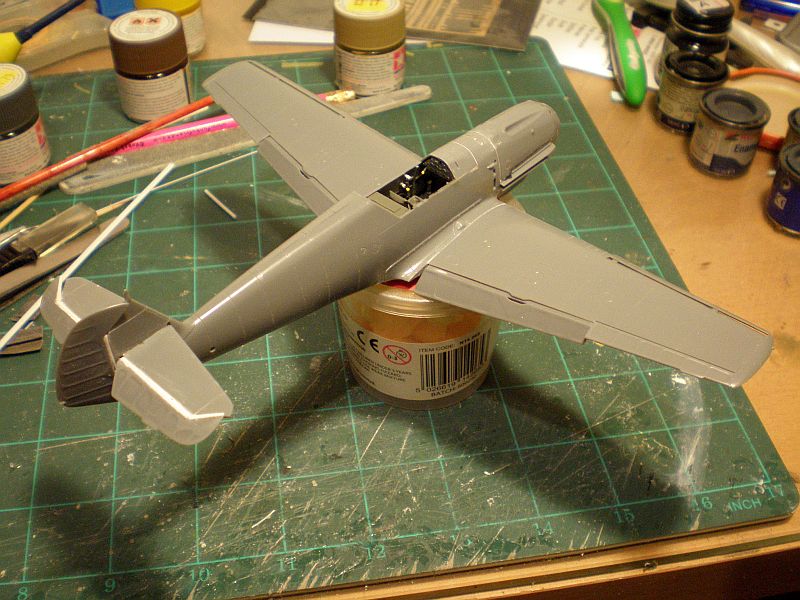
The drooped flaps and open leading edge slats are, IMHO, very welcome standard options in the kit (saves a lot of work with the Olfa cutter etc if you are also an AMS sufferer!) but I have cut off and re-positioned the elevators and rudder to hopefully give the final model a more candid look - photos of parked Emils often show aircraft with drooped flaps, open slats and deflected elevators and rudder. Re-positioning the rudder and elevators in this way did result in some additional work with plastic strip, shaped and blended in, to make them fit better and which shows up as white in the hinge lines.
I have one or two more seams to attend to and then it's on to the paint - the well known Luftwaffe desert scheme featuring irregular patches of Olive Green over Desert Yellow. I'm after a bit of a challenging scheme with my airbrush so this one should fit the bill. Hopefully it won't prove to be
too much of a challenge - I should be careful what I wish for

Thanks for looking and all the very best for 2018 to you all

* Edit - I've just had a quick look and my old photos seem to have made a return but I've made no approach to PB or tried any dodges to get around the removal of the images by them. Anyone got any ideas what all that is about or is it just a temporary reprieve? (I'm sticking with this new BB thread now - I've started so I''ll finish!)
Re: Shaun's 2018 Bodging Bench
Posted: January 1st, 2018, 6:48 pm
by Ratch
Happy New Year Shaun, looking forward to your progress with this

Re: Shaun's 2018 Bodging Bench
Posted: January 3rd, 2018, 1:39 pm
by chrism
Think you might just be lucky with your photos. Lots of threads on various forum still show the message and not the photos ... Seasons greetings to you and Mrs W
Re: Shaun's 2018 Bodging Bench
Posted: January 3rd, 2018, 5:50 pm
by ShaunW
It's odd, Chris. All of my photos had gone and had been replaced by the now standard message from PB regarding third party hosting. I haven't employed any dodges or whatever to retrieve the pics, they've just returned. I don't trust PB, however and it is probably just an anomaly that they will address in due course thereby robbing me of my pics again!
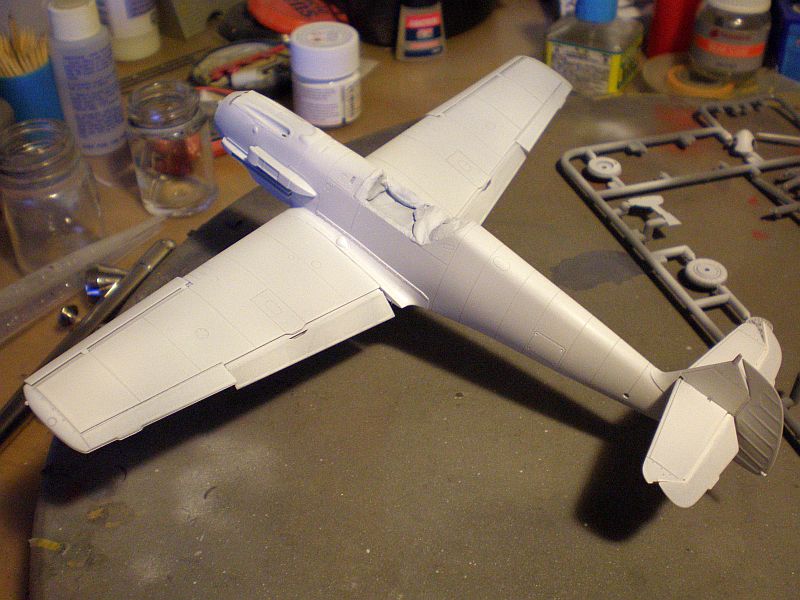
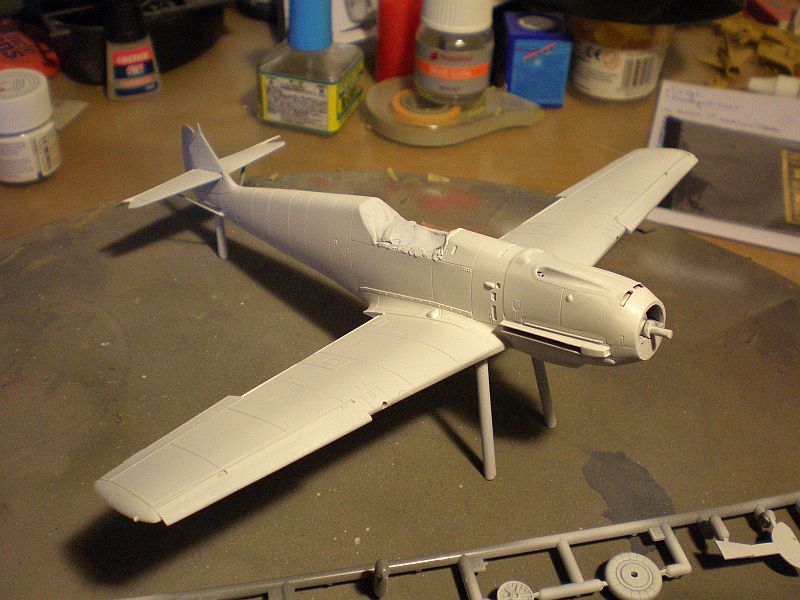
Anyway, onwards with the new Bodging Bench. After a session of tidying seams and what have you I applied an undercoat this morning. The paint chosen was Tamiya Flat White applied by airbrush and the model now looks like a refugee from the Eastern Front. I used the white as there is a white fuselage band in my chosen scheme and I prefer to paint and mask such rather than use a decal (there is one on the kit sheet), as they never seem to look right to me. Or rather, I never seem to be able to apply fuselage stripe decals very well

You will see that I have mounted the model on temporary sprue stilts to keep the underside off the surface of the turntable that I use for painting. This is something that I've done for years but is dependent upon the nature of the undercarriage bays that I normally use as attachment points for the stilts. Sometimes there isn't enough room or there is visible delicate detail that will be damaged by removal of the glued in sprue. On this occasion I managed to locate the front stilts between the main oleo mounting points and inner fuselage and the rear stilt is a tight push fit into the tail wheel bay. The paint went on nice and smoothly and was thinned using Tamiya's own X-20A thinners.
I haven't made my mind up yet whether to continue the rest of the scheme using acrylic or to switch to enamels - I'm low on acrylic Luftwaffe light blue, so it might be a combination of the two paint types although I'm always wary of applying acrylic over enamel and would normally advise less experienced modellers not to do so.
Thanks for looking.
Re: Shaun's 2018 Bodging Bench
Posted: January 3rd, 2018, 6:04 pm
by iggie
Lookin' good Shaun! (and a very useful idea about the 'stilts'; I may have to borrow that!)
Re: Shaun's 2018 Bodging Bench
Posted: January 4th, 2018, 1:36 pm
by ShaunW
iggie wrote:Lookin' good Shaun! (and a very useful idea about the 'stilts'; I may have to borrow that!)
Cheers. I borrowed the "stilts" idea myself, Iggie, but can't remember now if I saw it in a magazine or was told about it by a fellow IPMS Member back in the 90's when I used to regularly attend a branch meeting - 'twas one of the two though I'm sure(ish).
Re: Shaun's 2018 Bodging Bench
Posted: January 4th, 2018, 1:39 pm
by The Great Auk
That's shaping up to be a sharp 109!
I like the look of those leading edge slats. Gives it a pugnacious attitude.
The Great Auk
Re: Shaun's 2018 Bodging Bench
Posted: January 4th, 2018, 2:22 pm
by Corricon
Shaping up nicely Shaun
Re: Shaun's 2018 Bodging Bench
Posted: January 4th, 2018, 5:30 pm
by Softscience
What a great start to your new workbrench thread!
What is your target scheme?
Re: Shaun's 2018 Bodging Bench
Posted: January 4th, 2018, 5:40 pm
by ShaunW
Many thanks guys.
I'm aiming to complete the model in the Luftwaffe desert scheme of light blue undersides (RLM 76) with sand yellow uppers (RLM 79) topped off with irregular splotches of dark green (RLM 71 or 83), Ralph. I envisage the scheme will be quite a challenge for my airbrushing skills but is one that I've always liked for the '109E so I thought I'd give it a shot, anything could happen so watch this space

Re: Shaun's 2018 Bodging Bench
Posted: January 5th, 2018, 5:41 pm
by ShaunW
OK, as it happens I had sufficient Tamiya XF-23 Light Blue to cover fuselage and undersides, which was airbrushed on accordingly yesterday with the paint being thinned using Tamiya X-20A. The next step is the application of RLM-79 Sand Yellow for which I will be using Tamiya XF-59 Desert Yellow. The XF-59 coat covers fuselage top and the upper surfaces of the wings and tail planes and I have masked the model accordingly. To hopefully give a slightly feathered and uneven edge to the fuselage XF-59 I have masked using thin sausages of blu-tak:
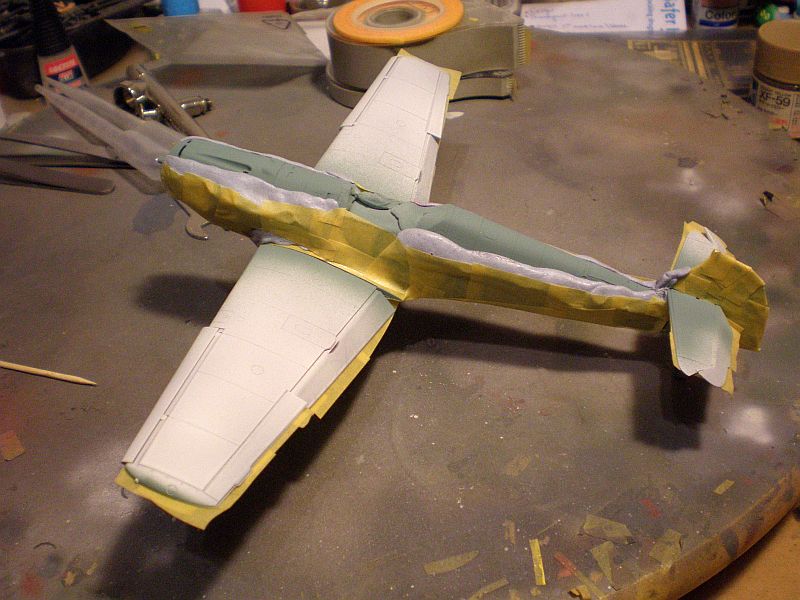
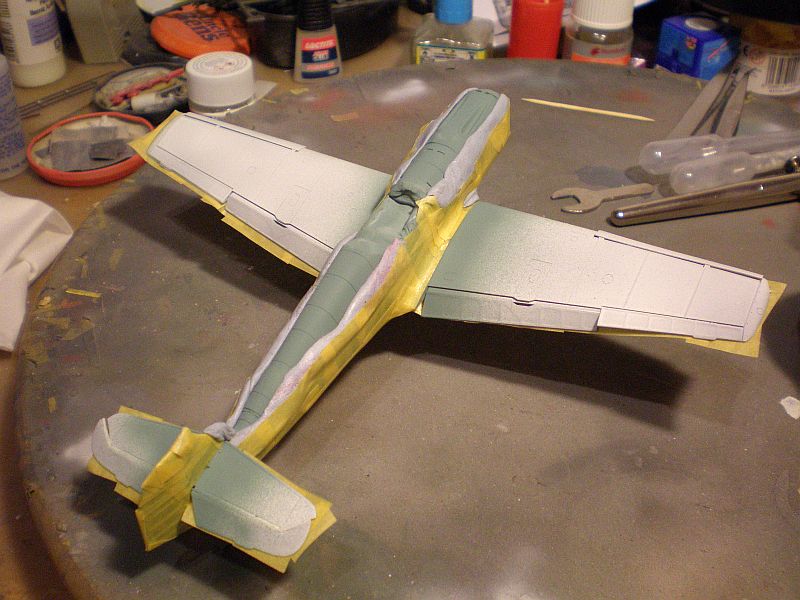
I aim to airbrush on the XF-59 tomorrow and once dry I will remove the fuselage and tail side masking in order to commence the RLM 71 mottling and I have that shade in Mr Hobby acrylic or alternatively Tamiya XF-58 Olive Green if I want to go a little lighter in shade. But I'm getting ahead of myself, let's see if the XF-59 coat looks OK first!
Thanks for looking.
Re: Shaun's 2018 Bodging Bench
Posted: January 5th, 2018, 7:16 pm
by Ratch
Looking forward to the unveiling
Re: Shaun's 2018 Bodging Bench
Posted: January 5th, 2018, 7:30 pm
by chrism
standing by with my trumpet for a fanfare
Re: Shaun's 2018 Bodging Bench
Posted: January 5th, 2018, 8:40 pm
by iggie
Hope it all goes well!
Re: Shaun's 2018 Bodging Bench
Posted: January 6th, 2018, 1:15 pm
by Lone Modeller
I admire anyone who uses an airbrush.... I am looking forward to seeing how your scheme turns out - at the moment the model looks very good with the various control surfaces in a "relaxed" position. It should look very good on a sand base.