Page 7 of 29
Re: Shaun's 2018 Bodging Bench
Posted: February 5th, 2018, 4:48 pm
by ShaunW
Thanks for your interest folks and for the offer of further info, Chris. Not much has happened at the mo as I've had some real life stuff to deal with, you know the kind of thing, boring grown up stuff, I'd sooner be sticking bits of plastic together but there you go!

Re: Shaun's 2018 Bodging Bench
Posted: February 12th, 2018, 5:34 pm
by ShaunW
OK, just to show I haven't totally gone to sleep with this build, the Crusader has some bits on:
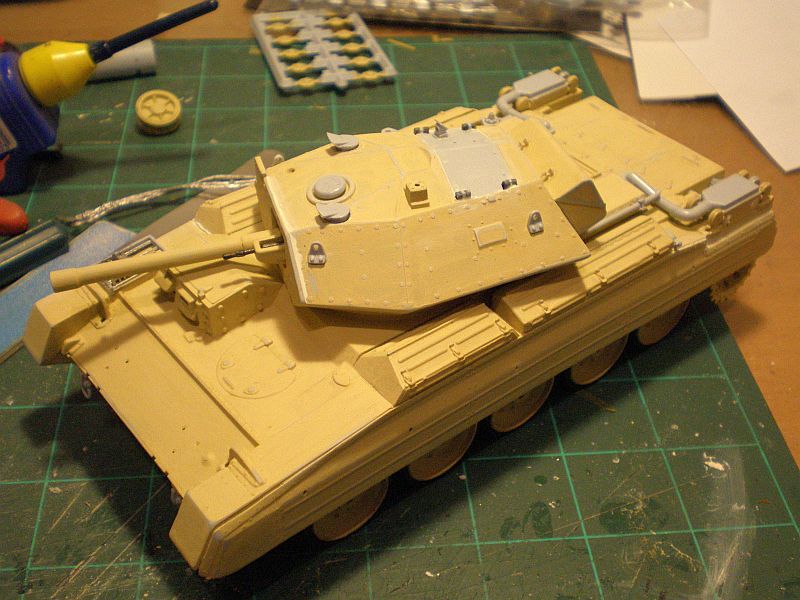
Nothing spectacular I admit as so far I'm largely working OOB and there are a few bits still to go on such as the wheel hubs. I did manage to get the turret hatch to fit better and replaced the hinges with some parts from an old 1/35th build - they were originally tie down cleats I think. Moving on I will now start to look more at photos and add to or replace some of the detail with scratch built parts. The rear fuel tank needs plumbing, the turret hatch needs a second handle plus there are other handles I will replace with wire, I might replace the headlight guards with wire although in actual fact the kit's plastic items aren't that bad and ditto the equipment bars that run along each side of the hull - the kit's are not too bad but I'm tempted to make new ones and to use stuff from my spares or scratch built to vary the stowage fit between my build of this kit and others that have been built OOB.
The sharp eyed might have noticed a front idler wheel in the background of the photos - it's the front right one and, like an inquisitive 6 year old, I noticed it was a little loose and couldn't resist prodding at it with predictable results. It's going to be a little fiddly to repair due to the proximity of the hull side skirts but, as I'm not going to use the full run of tracks, it won't have to be too strong a joint as there won't be a great deal of tension on it.
Thanks for looking
Re: Shaun's 2018 Bodging Bench
Posted: February 12th, 2018, 6:00 pm
by iggie
Liking the Crusader very much Shaun; the extra details you mention should really set it off nicely
Re: Shaun's 2018 Bodging Bench
Posted: February 12th, 2018, 9:26 pm
by PTB11
Thats looking great Shaun. Pity about the idler. I done the same with my Abrams build last year!!!
Ah well, live and learn
Re: Shaun's 2018 Bodging Bench
Posted: February 13th, 2018, 1:33 am
by PGAS
Superb Me109 Shaun. The Desert Camo looks great and I like the thinness of the canopy framing.
Nice Crusader too. Strange colour. Is it the final colour or the primer?
Re: Shaun's 2018 Bodging Bench
Posted: February 13th, 2018, 5:47 pm
by ShaunW
Many thanks for your interest guys.
Paul, the kit was a kind donation in a part started condition by chrism who applied the initial coat of paint. I'm not sure of the shade it's possibly buff or something like Hu-71 Linen, which is the shade recommended by Airfix.
Re: Shaun's 2018 Bodging Bench
Posted: February 14th, 2018, 3:33 pm
by chrism
Think it might have been a bit of 103 cream and something else. The colour suggested in the paint scheme seemed not quite right and I was not too sure either about the colour I handed it over in - but it is at least a base to work with.
Re: Shaun's 2018 Bodging Bench
Posted: February 14th, 2018, 5:35 pm
by ShaunW
When I get round to painting this vehicle, I'll use a mix of sand and brown shades to simulate a bit of sun fading. Or something like that
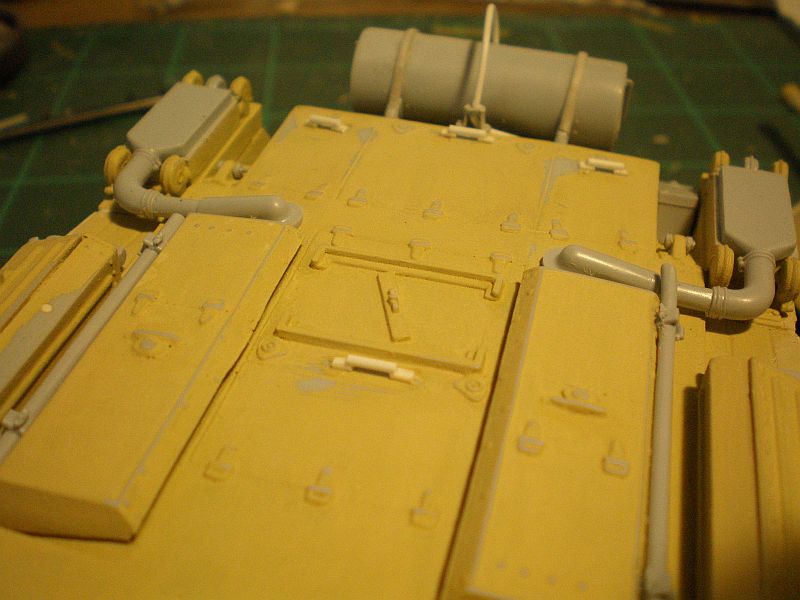
I've been dealing with the the rear external fuel tank, including doing a bit of plumbing:
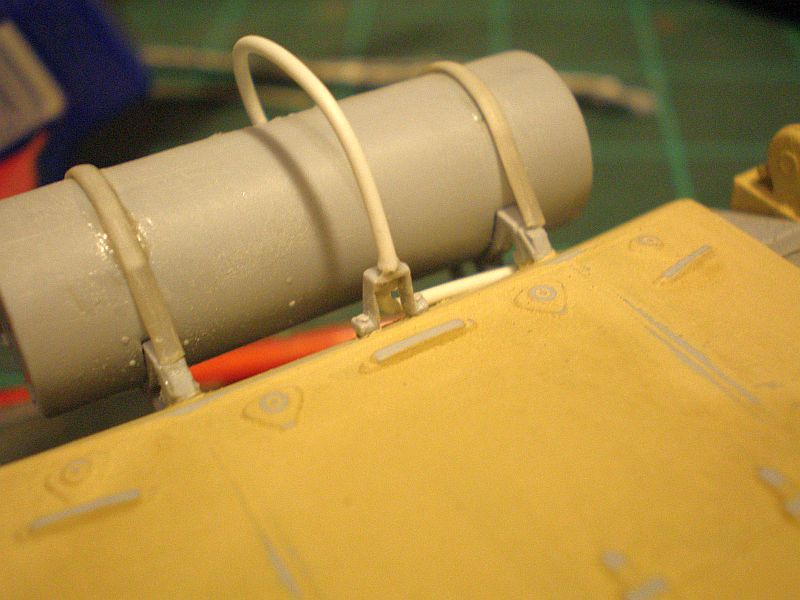
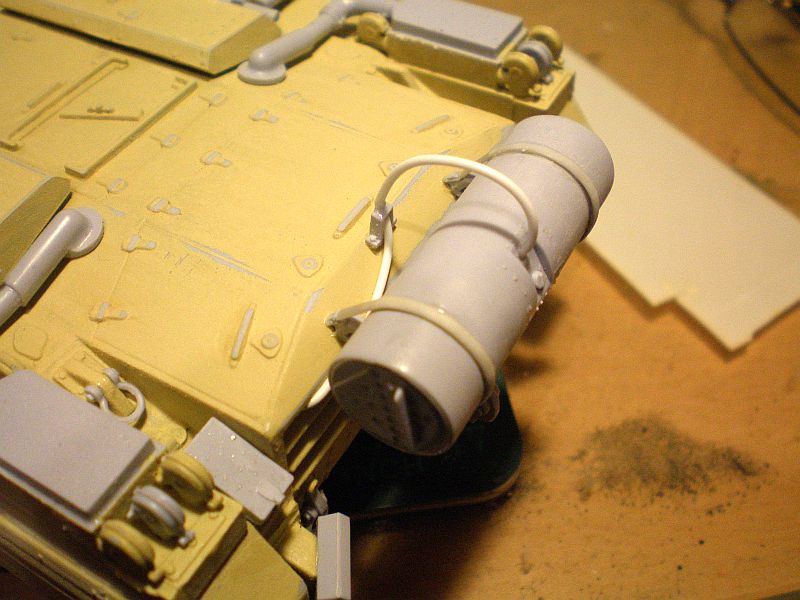
I firstly removed the moulded on straps from the body of the fuel tank as I never think such straps look convincing and I made replacements from plastic strip. The fuel lines are 0.9mm Plastruct rod bent into shape and I used the kit's receptacle device on the rear deck but carefully cut out the centre as it had been moulded solid. I'm reasonably pleased with my efforts and feel that I have made a bit of an improvement over OOB, which is all I'm after really.
Thanks for looking.
Re: Shaun's 2018 Bodging Bench
Posted: February 14th, 2018, 6:04 pm
by Kitaholic
Definitely makes a difference and well worth the effort
Re: Shaun's 2018 Bodging Bench
Posted: February 14th, 2018, 6:21 pm
by iggie
Kitaholic wrote:Definitely makes a difference and well worth the effort
Yep, I agree; well worth doing and it looks great

Re: Shaun's 2018 Bodging Bench
Posted: February 15th, 2018, 7:38 pm
by Lone Modeller
More than a bit of a difference: that is a huge improvement. Proper three dimensional parts always look very much better than moulded ones.
Re: Shaun's 2018 Bodging Bench
Posted: February 19th, 2018, 8:59 pm
by Corricon
Looking very good Shaun. Am liking the subtle modifications you are making.
Re: Shaun's 2018 Bodging Bench
Posted: February 19th, 2018, 11:45 pm
by Dazzled
Stunning extras Shaun. If all modellers were as good as you at adding detail, the aftermarket boys would give up. Good for them there's quite a lot of us ham-fisted beggars around
Re: Shaun's 2018 Bodging Bench
Posted: February 20th, 2018, 6:09 pm
by ShaunW
Many thanks boys, your comments are very much appreciated as always
I can be just as hamfisted, if not more so, as the next bloke Daz
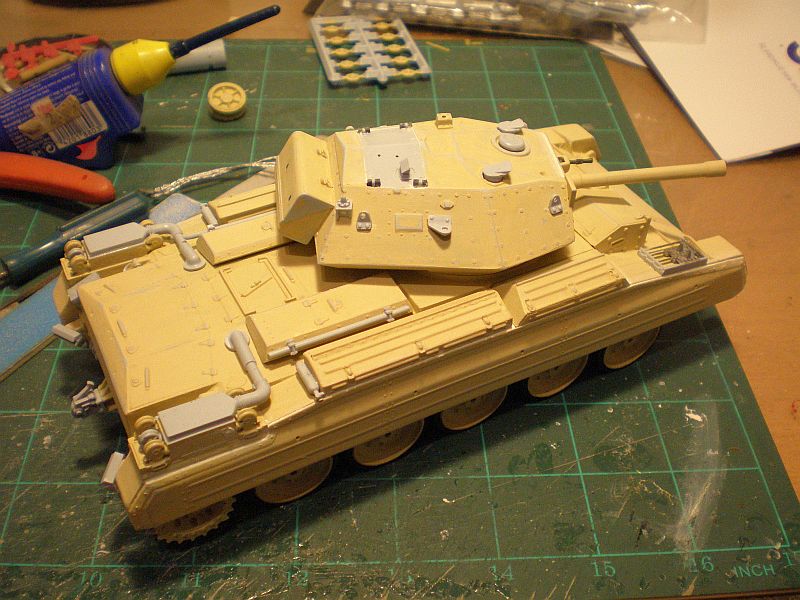
I've been adding a few more bits and pieces. Turning to the hull first, at the front I've added the kit brush guards which I felt were good enough and have replaced the moulded on forward hatch with a bit of brass wire fitted into pre-drilled holes:
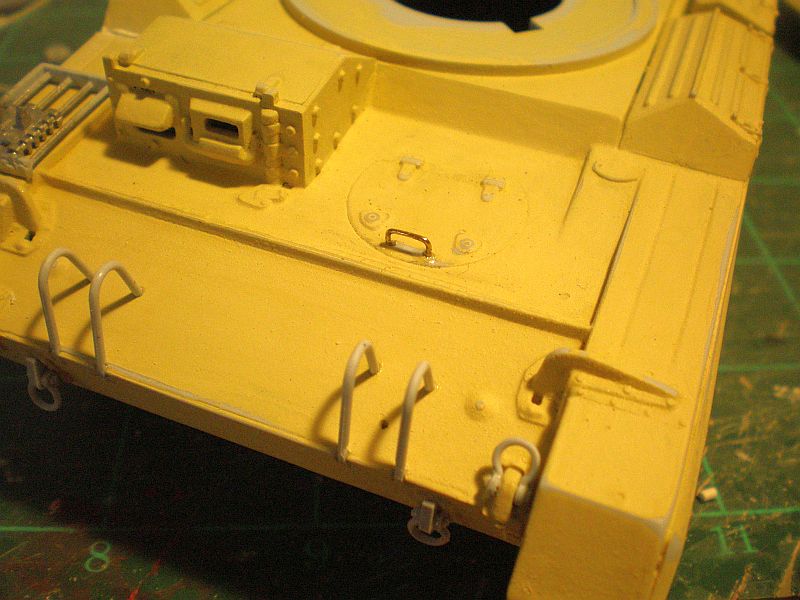
At the rear I replaced the moulded on tie-down cleats with items made from plastic strip and rod, I found this detail difficult to photograph so I apologise for the slightly blurry image:
Moving on to the turret, the hatch has received some surround detail made from 0.4mm plastic rod with the handle being OOB as I felt that it passed muster OK. I have checked photos of Crusader III tanks and can't see evidence in any of the images that I looked at of there being a second handle on the turret hatch - if anyone knows better and has a suitable pic then let me know and I'll add another handle accordingly. I rebuilt the OOB shovel using the blade and handle from a 1/35th Academy example with a new shaft made from plastic rod fitted into the Airfix brackets after the rather poor OOB shovel had been cut out:
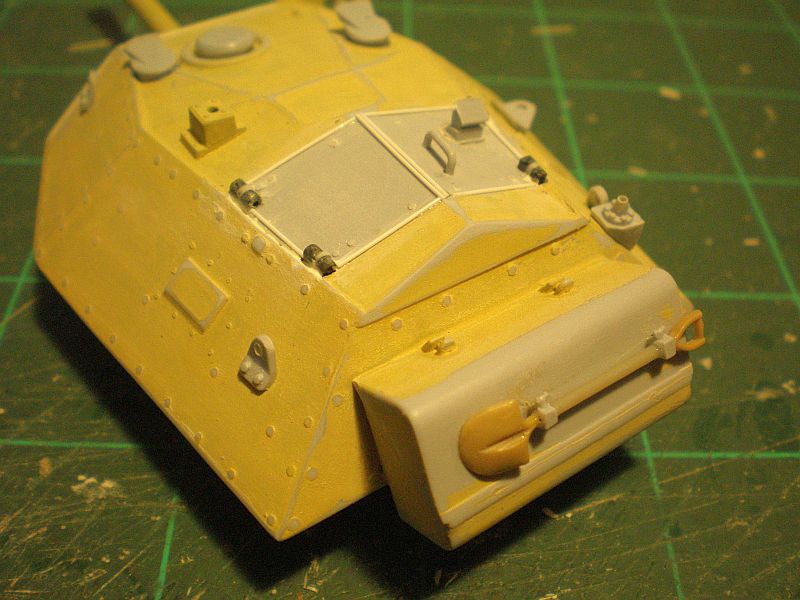
Finally at the business end of the turret I further drilled out the gun barrel and thinned out the barrel end counterweight to give a more scale appearance. I also drilled out the co-axial machine gun but managed to drill through the side of it using my natural talent for drilling off-centre holes. A repair is therefore needed.

Next up I'm going to give consideration as to whether or not to replace the side racks on the hull side shields.
Thanks for looking.
Re: Shaun's 2018 Bodging Bench
Posted: February 20th, 2018, 6:28 pm
by Ratch
Great detailing
