Page 11 of 47
Re: James' "Shed"
Posted: April 18th, 2017, 4:31 pm
by ShaunW
Nice one James. It's very annoying to suddenly find areas that require correction or further work after the main paint has been applied. All this malarky with copyright matters pertaining to certain companies is also very annoying. Some model manufacturers circumvent the issue with deliberately misspelled logos and what have you.
Re: James' "Shed"
Posted: May 3rd, 2017, 11:44 pm
by JamesPerrin
So after a few weeks with little time for modelling I've now got this far:
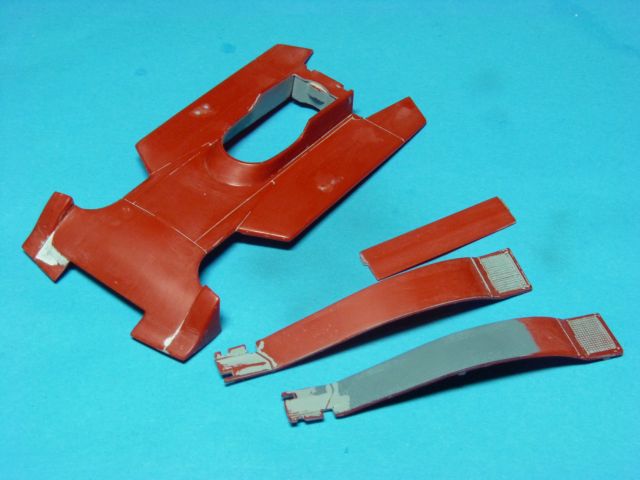
No that's the right photo, because a couple of weeks ago this happened when I sprayed the parts with Halfords Clear Lacquer as per norm for my car model builds:
The lacquer somehow dissolved the primer under white and turned it pink!

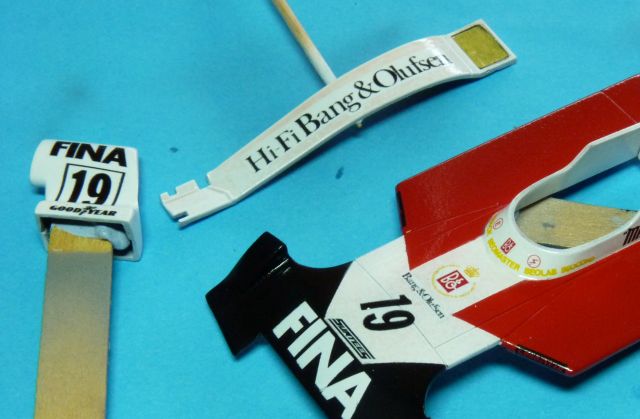
It appear to only affect the white areas that had the "super duper" Mission Models primer on not where I had touched up or redone using Aclad II lacquer primer, see the air scoop. The affect might just have not been visible under the red and black painted areas. The nose doesn't show it as much as the side pods but it was noticeable to the eye. So that's another nail in the coffin for the overpriced Mission Models primer!

After a week of not thinking about it I bagged it with some oven cleaner which ironically stripped all the acrylic paint but left both primers untouched. Most of the Mission Models primer was removed with a finger nails and only where it had been keyed to plastic on the nose did it need to be sanded off.
Apart from the airscoop I've also salvaged the black painted parts of the wing as these used kti decal that I could not replace. I will have to create new additional decals, mainly to replaced those around the cockpit. It also has allowed me to fill a couple of sink marks and treat a deep scratch that I had not noticed previous to painting.
Re: James' "Shed"
Posted: May 4th, 2017, 12:38 am
by DavidWomby
Oh dear. How frustrating that must be. Well done for persevering. I hope things start going better.
David
Re: James' "Shed"
Posted: May 4th, 2017, 8:33 am
by iggie
That's not a reaction you'd expect, and certainly not one you'd want to happen. I hope your replacement decals work out ok and you don't suffer any further setbacks on this build!
Re: James' "Shed"
Posted: May 4th, 2017, 4:45 pm
by ShaunW
Not good, James. I fear that in those circumstances I would be placing the model on the Shelf of Shame and taking a break from it for a while in order to avoid a bin/model interaction! You obviously have greater patience than I and hopefully the build will now progress much more smoothly. I don't think Mission Models primer will be going on one of my shopping lists any time soon.
Re: James' "Shed"
Posted: May 4th, 2017, 10:33 pm
by JamesPerrin
Cheers Shaun. I suspect any polyurethane primer would have suffered a similar fate when exposed to car lacquer
Re: James' "Shed"
Posted: June 24th, 2017, 10:31 pm
by JamesPerrin
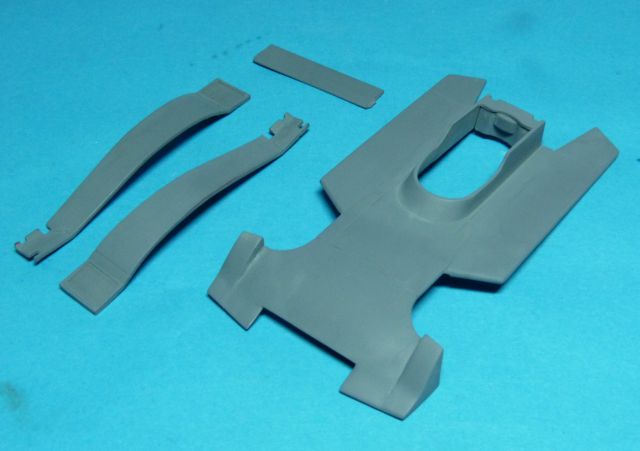
There is a modelling pulse albeit faint. After some additional sanding and filling a coat of reliable Alclad Grey rubbed down with micromesh:
Re: James' "Shed"
Posted: June 25th, 2017, 3:48 am
by Clashcityrocker
JamesPerrin wrote:There is a modelling pulse albeit faint.
"Nurse. More glue over here please"

Nigel
Re: James' "Shed"
Posted: June 25th, 2017, 6:22 pm
by dollar19
What a nice space you have there. How do you manage to keep it so tidy?
Re: James' "Shed"
Posted: June 25th, 2017, 10:03 pm
by JamesPerrin
dollar19 wrote:What a nice space you have there. How do you manage to keep it so tidy?
By doing preciously little modelling!
I built some shelves last year that are now full of shelf queens and I've a dedicated set of metal drawers to the right of the bench that hold a lot of stuff not used frequently. When not modelling it's a good time to review your bench set up and have a clear up and clear out. Get stuff your are not constantly using off the bench. But even then I hide the current state as I use a piece of A4 blue paper to take progress shots against.
Re: James' "Shed"
Posted: June 26th, 2017, 2:18 am
by PGAS
I am impressed with your work ethic, removing what you did not like and starting again. I think (I know!) I would not have the patience to go back to square one like you did, especially after so much nice work. It will be nice to see the paint and decals on again.
I have to admit, a cleanup or reorganizing once and a while is good for the mind. I like when everything has its place and the stuff I use most is handy. I have to get on with making shelves for my paints as I don't like searching through the drawer for them.
Re: James' "Shed"
Posted: June 26th, 2017, 5:46 pm
by ShaunW
And we're back ready for action. As I've said before in relation to this build, James, you are displaying great patience with it and I really hope you can now get the result you are after.
Re: James' "Shed"
Posted: December 15th, 2017, 5:53 pm
by JamesPerrin
As you may know, Chez Perrin has been undergoing a major extension, in theory, this will allow me to move quite a bit of "office" stuff out of my workroom, however, it has meant there has been little time for modelling other than completing the HP115. Ironically it has also meant that the room has become a dumping ground for all sorts as parts of the house get destroyed before being rebuilt. Now with Christmas looming, present and supplies are also fighting for room. In a word nothing much happening modelling wise.
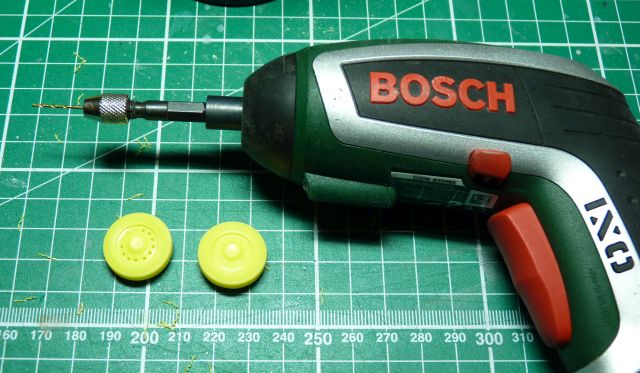
A few weeks ago I did get to the bench and spent some time on a couple of long-term car projects (they were not meant to be long-term). Here's the Lindberg 1/32 Sprite MkII. I got to finally use by micro drill adaptor for my electric screwdriver to drill out all the holes in the wheels.
I also made a template to score the distinctive upsweeping body part line (still manage to put in the wrong place on my first go!)
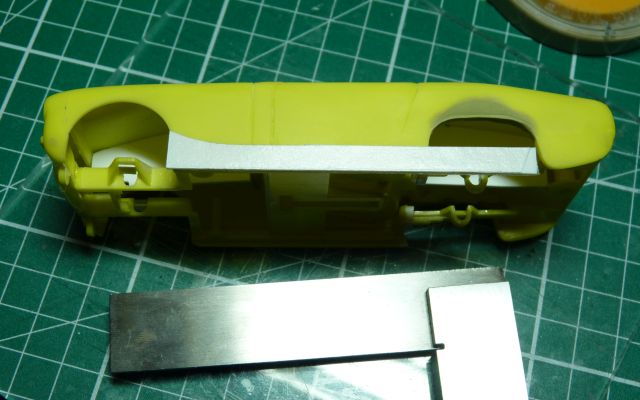
I also reshaped the front wings to meet, the headlights better - technically the headlights are too small.
The Surtees is still a go for Hudds, I finished respraying the white gloss work, but has not progressed since as they has been too much fine plaster dust to do any airbrushing.
Re: James' "Shed"
Posted: December 15th, 2017, 7:19 pm
by DavidWomby
Nice work detailing the Sprite. Good luck with the remodelling job.
David
Re: James' "Shed"
Posted: December 16th, 2017, 10:40 am
by ShaunW
Good to see you making a return to the bench, James and with a classic British sportscar to boot. That is a handy looking adaptor for your drill. I have a purpose designed electric modelling drill with variable speed, a bit like a Dremel, that I bought a number of years ago and I rarely use it despite the fact that it is actually quite useful - I always seem to default to using hand held drill chucks. Maybe if I had the electric drill set up instead of in its box.........