Shaun's Bodging Bench * replaced for 2018*
-
ShaunW
- NOT the sheep
- Posts: 26188
- Joined: November 26th, 2011, 6:11 pm
- Location: Pontefract West Yorkshire
Re: Shaun's Bodging Bench
Thanks for the kind words everybody, your interest is always appreciated. I've now chopped the flaps out of the wings ready to reconstruct them in the lowered position and I'll post more pics up at the weekend which will hopefully show good progress and not a disaster zone 
Doing - Tamiya 1/35th Universal Carrier.
Work is the curse of the modelling classes!
IPMS#12300
Work is the curse of the modelling classes!
IPMS#12300
-
ShaunW
- NOT the sheep
- Posts: 26188
- Joined: November 26th, 2011, 6:11 pm
- Location: Pontefract West Yorkshire
Re: Shaun's Bodging Bench
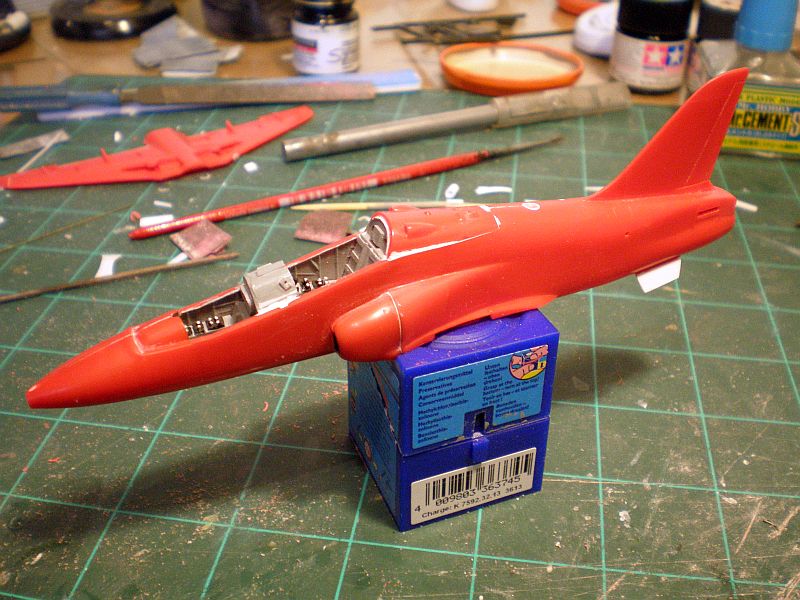
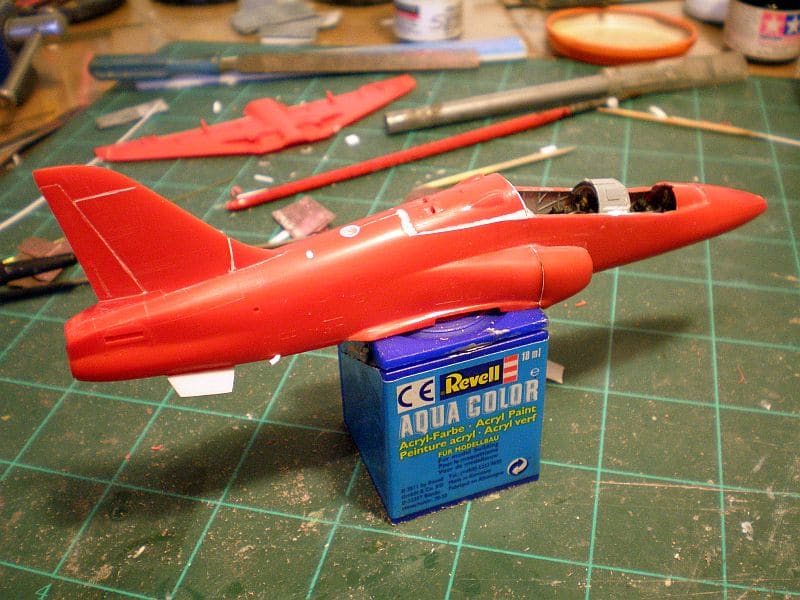
And we have more progress on the Hawk build.
The fuselage is now buttoned up together the spine "hump" which Airfix provides as a separate part. Alas the hump was a poor fit and required quite a bit of filler! The rest of the fuselage fitted together well enough although a little filler was required around the intake assemblies. At the rear underside I fitted the airbrake in the closed position, this could have been fitted opened but there is no detail in the airbrake bay or on the underside of the airbrake itself and I also thought the airbrake to be a little on the thick side. None of those issues are insurmountable but I didn't want to add more to the workload. I believe Airfix based the airbrake on the Hawk prototype or a mock up and it comes moulded with small strakes on its outer edges. This is wrong for a production aircraft. The fuselage strakes are much larger and are fitted either side of the airbrake. The OOB strakes were sanded off and replacement strakes were made from plastic card. I also chopped off the moulded on vent at the lower right rear of the fuselage and replaced it with a piece of bent plastic tubing mounted into a drilled out hole to give a better scale effect.
Talking of scale effect, I also drilled out the intakes at the front of the spine hump above the rear of the cockpit
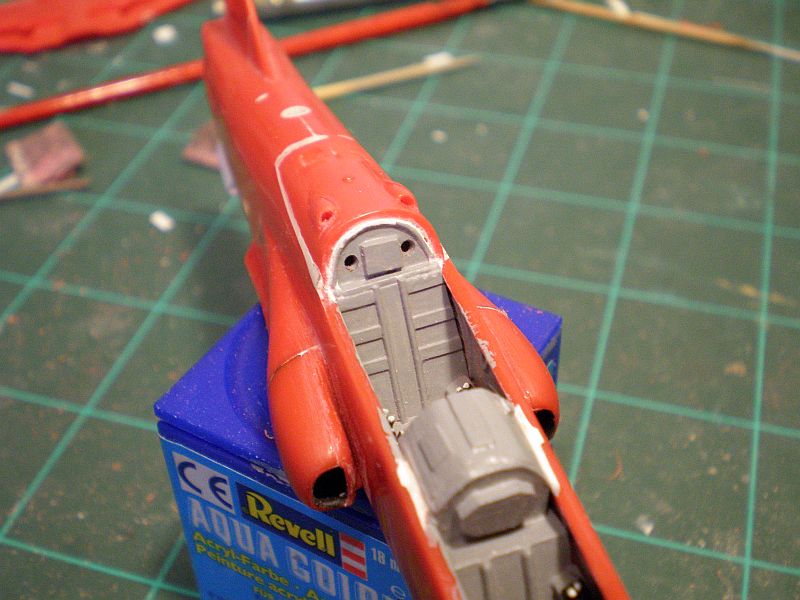
and the vents at the rear of the hump
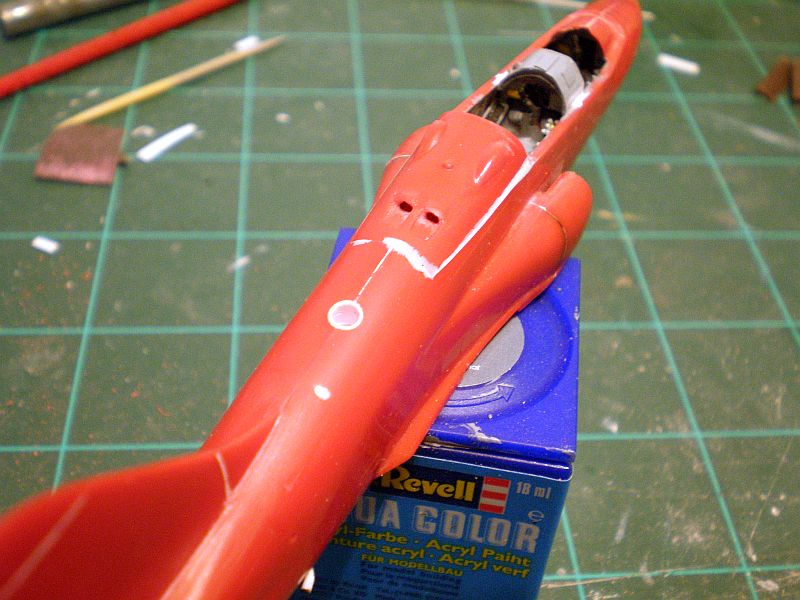
In the above photo you can also see the large hole vent on top of the rear fuselage, which is provided in the kit as a not so round hole! I tidied it up with tubing of appropriate diameter which is closed at the inside end to prevent see-through into the fuselage cavity.
As alluded to above, work has now commenced on the flaps, which look to be of an extending Fowler type design similar to those often seen on commercial airliners. This makes the construction more tricky than the flaps on the Jet Provost. I started by cutting away the moulded on flaps using an Olfa P cutter and modelling knife. Next step was to cut slots into the wing trailing edges using triangular section files to represent the bays into which the flaps extend and retract into the wings.
Finally I have started modifying the flap hinges by cutting off their rear portions to be remounted on the lowered flap sections. So far I have only dealt with the middle hinge on each side. The lowered flap sections, not shown, have been made from aerodynamically shaped strutz material that I am in the process of further shaping. As you can see, more filler was required on the wing undersides to blend everything in.
I'll now continue with the flaps and hopefully I will be able to make them look something like. All references for this work is taken from poring over pics on Google Images - the Hawk is a popular subject and there is no shortage of decent photographs.
Thanks for looking.
The fuselage is now buttoned up together the spine "hump" which Airfix provides as a separate part. Alas the hump was a poor fit and required quite a bit of filler! The rest of the fuselage fitted together well enough although a little filler was required around the intake assemblies. At the rear underside I fitted the airbrake in the closed position, this could have been fitted opened but there is no detail in the airbrake bay or on the underside of the airbrake itself and I also thought the airbrake to be a little on the thick side. None of those issues are insurmountable but I didn't want to add more to the workload. I believe Airfix based the airbrake on the Hawk prototype or a mock up and it comes moulded with small strakes on its outer edges. This is wrong for a production aircraft. The fuselage strakes are much larger and are fitted either side of the airbrake. The OOB strakes were sanded off and replacement strakes were made from plastic card. I also chopped off the moulded on vent at the lower right rear of the fuselage and replaced it with a piece of bent plastic tubing mounted into a drilled out hole to give a better scale effect.
Talking of scale effect, I also drilled out the intakes at the front of the spine hump above the rear of the cockpit
and the vents at the rear of the hump
In the above photo you can also see the large hole vent on top of the rear fuselage, which is provided in the kit as a not so round hole! I tidied it up with tubing of appropriate diameter which is closed at the inside end to prevent see-through into the fuselage cavity.
As alluded to above, work has now commenced on the flaps, which look to be of an extending Fowler type design similar to those often seen on commercial airliners. This makes the construction more tricky than the flaps on the Jet Provost. I started by cutting away the moulded on flaps using an Olfa P cutter and modelling knife. Next step was to cut slots into the wing trailing edges using triangular section files to represent the bays into which the flaps extend and retract into the wings.
Finally I have started modifying the flap hinges by cutting off their rear portions to be remounted on the lowered flap sections. So far I have only dealt with the middle hinge on each side. The lowered flap sections, not shown, have been made from aerodynamically shaped strutz material that I am in the process of further shaping. As you can see, more filler was required on the wing undersides to blend everything in.
I'll now continue with the flaps and hopefully I will be able to make them look something like. All references for this work is taken from poring over pics on Google Images - the Hawk is a popular subject and there is no shortage of decent photographs.
Thanks for looking.
Doing - Tamiya 1/35th Universal Carrier.
Work is the curse of the modelling classes!
IPMS#12300
Work is the curse of the modelling classes!
IPMS#12300
-
iggie

- Modelling Gent and Scholar
- Posts: 23438
- Joined: July 31st, 2013, 11:04 am
- Location: North Somercotes, Lincolnshire
- Contact:
Re: Shaun's Bodging Bench
Liking this a lot Shaun; great attention to detail
Best wishes
Jim
If you can walk away from a landing, it's a good landing. If you use the airplane the next day, it's an outstanding landing
"Never put off till tomorrow, what you can do the day after tomorrow"
Jim
If you can walk away from a landing, it's a good landing. If you use the airplane the next day, it's an outstanding landing
"Never put off till tomorrow, what you can do the day after tomorrow"
-
JamesPerrin

- Looks like his avatar
- Posts: 13692
- Joined: April 5th, 2011, 8:09 pm
- Location: W. Yorkshire
- Contact:
Re: Shaun's Bodging Bench
Great modelling Shaun
Classic British Kits SIG Leader Better to fettle than to fill
(2024 A:B 5:2) (2023 13:8:7) (2022 21:11) (2021 15:8) (2020 8:4:4)
(2024 A:B 5:2) (2023 13:8:7) (2022 21:11) (2021 15:8) (2020 8:4:4)
-
Marek

- Modelling Gent and Scholar
- Posts: 2455
- Joined: May 1st, 2011, 8:03 am
- Location: Madison, WI
- Contact:
Re: Shaun's Bodging Bench
You are on a roll! Looking good.

Re: Shaun's Bodging Bench
That's coming along a treat Shaun  much better than my last Hawk
All models are equal. Some models are more equal than others.
Airfix Tribute Forum
Airfix Tribute Forum
-
Stuart

- Raider of the Lost Ark Royal
- Posts: 19451
- Joined: February 25th, 2013, 4:55 pm
- Location: North Wales
- Contact:
Re: Shaun's Bodging Bench
That's really looking good Shaun! I real like what you've done with that cockpit and those flaps - that's really going to make the difference to the finished model.
What markings are you going to go with?
What markings are you going to go with?
Stuart Templeton I may not be good but I'm slow...
My Blog: https://stuartsscalemodels.blogspot.com/
My Blog: https://stuartsscalemodels.blogspot.com/
-
ShaunW
- NOT the sheep
- Posts: 26188
- Joined: November 26th, 2011, 6:11 pm
- Location: Pontefract West Yorkshire
Re: Shaun's Bodging Bench
Thanks all for your kind words, I'm now looking at ways of making a secure attachment for the flaps and feel that a little modeller's licence is in order.
I have Xtradecal set X72166 Stuart which provides a variety of markings for early Hawks in RAF service in red/white/grey, red/white/blue, green/grey and overall grey colour schemes. I am going for an early trainer in one of the red/white/grey options. I do like the Hawk and the Xtradecal sheet is really excellent so I aim to buy at least a couple more Hawk kits but possibly more modern renditions!
I have Xtradecal set X72166 Stuart which provides a variety of markings for early Hawks in RAF service in red/white/grey, red/white/blue, green/grey and overall grey colour schemes. I am going for an early trainer in one of the red/white/grey options. I do like the Hawk and the Xtradecal sheet is really excellent so I aim to buy at least a couple more Hawk kits but possibly more modern renditions!
Doing - Tamiya 1/35th Universal Carrier.
Work is the curse of the modelling classes!
IPMS#12300
Work is the curse of the modelling classes!
IPMS#12300
-
Stuart
- Raider of the Lost Ark Royal
- Posts: 19451
- Joined: February 25th, 2013, 4:55 pm
- Location: North Wales
- Contact:
Re: Shaun's Bodging Bench
lolShaunW wrote:Thanks all for your kind words, I'm now looking at ways of making a secure attachment for the flaps and feel that a little modeller's licence is in order.
I have Xtradecal set X72166 Stuart which provides a variety of markings for early Hawks in RAF service in red/white/grey, red/white/blue, green/grey and overall grey colour schemes. I am going for an early trainer in one of the red/white/grey options. I do like the Hawk and the Xtradecal sheet is really excellent so I aim to buy at least a couple more Hawk kits but possibly more modern renditions!
Stuart Templeton I may not be good but I'm slow...
My Blog: https://stuartsscalemodels.blogspot.com/
My Blog: https://stuartsscalemodels.blogspot.com/
-
ShaunW
- NOT the sheep
- Posts: 26188
- Joined: November 26th, 2011, 6:11 pm
- Location: Pontefract West Yorkshire
Re: Shaun's Bodging Bench
I'd forgotten that Airfix re-tooled the Hawk, I think back in 2009 and to little fanfare and that would probably be a good one to pick up and use.
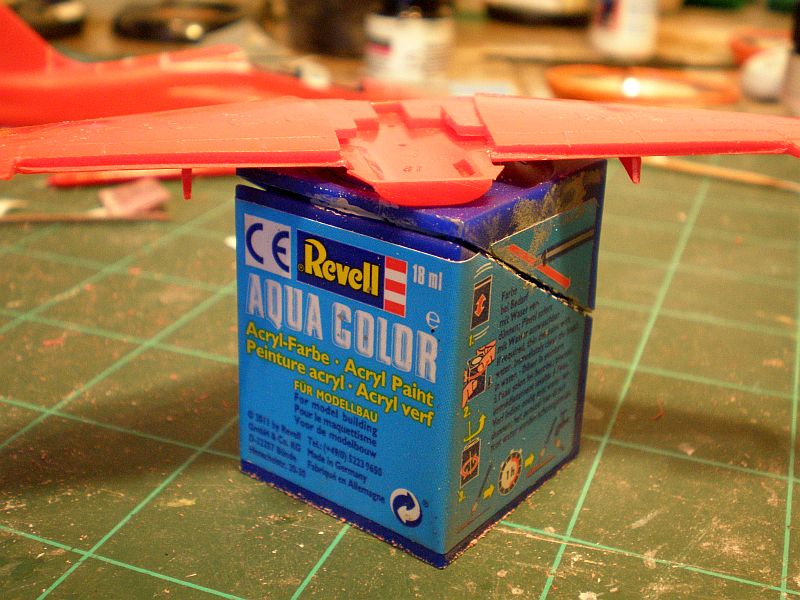
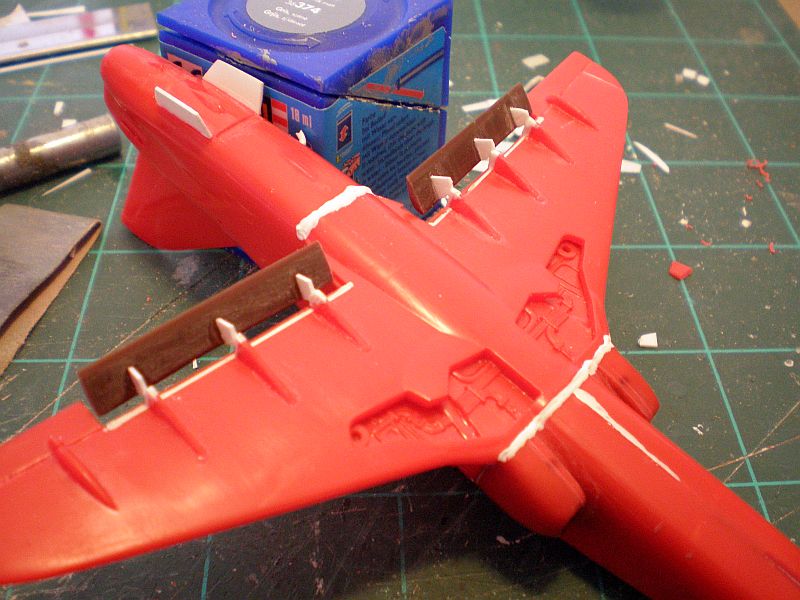
And here is the latest update. I have now attached the wings and have completed stage one of the flaps. Off-cuts of Strutz material left over from my F-111 build of a while ago has been used for the main body of the flaps:
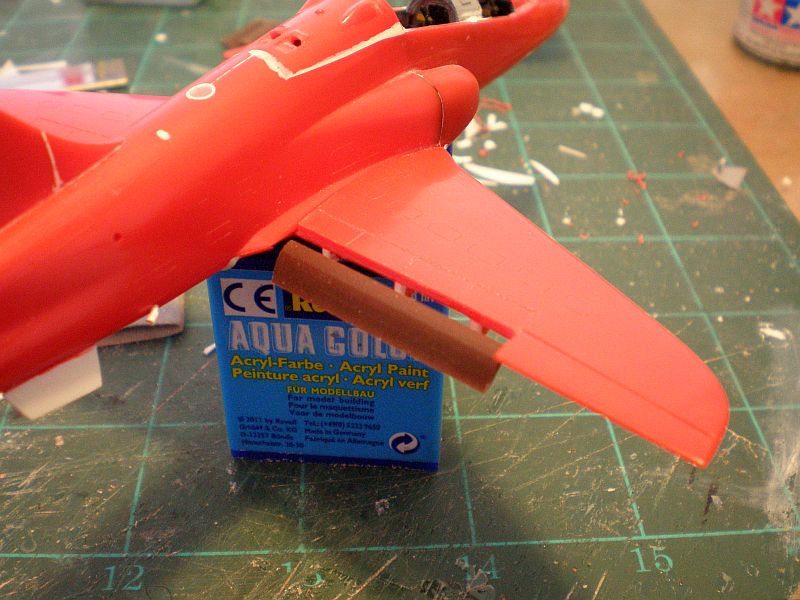
On the underside, the kit flap hinges have been cut and new rear portions made from plastic card off-cuts. This is a leeeetle bit of a bodge/modeller's licence but I'm not going to be displaying the finished model either upside down or parked on a mirror You can see from the filler waiting to be sanded that the wing assembly did not fit particularly well on the underside....
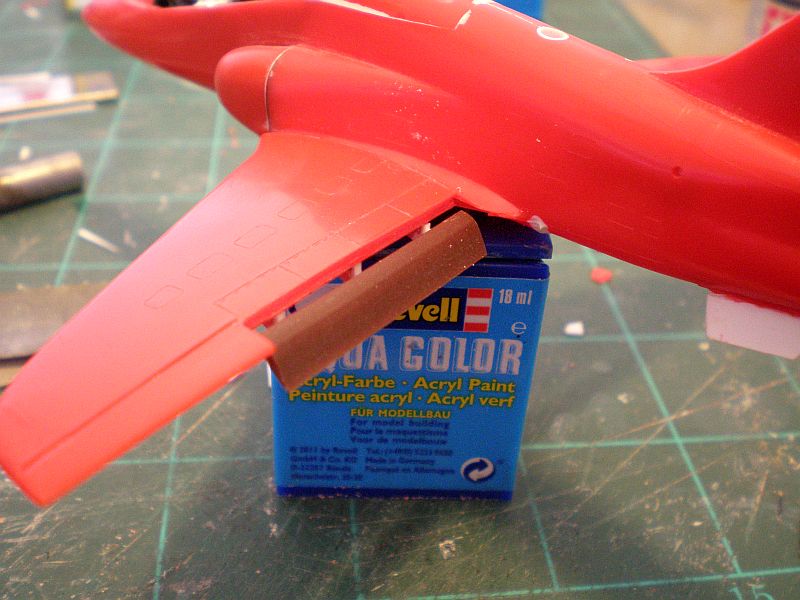
And here is a general view of the model. Unlike the underside, the topside of the wing fitted very well.
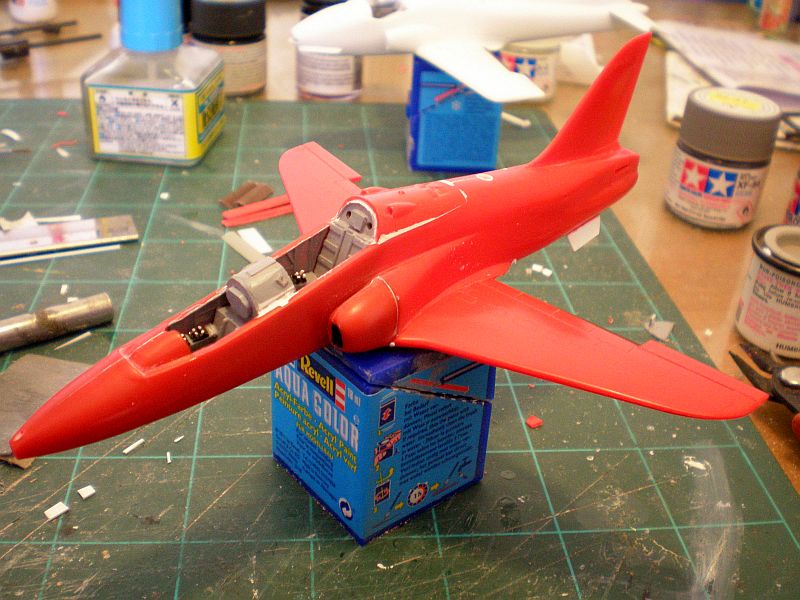
In order to finish the wings I now have to complete the flaps and make some aerodynamic fences - apparently the Airfix old tool kit was based on prototype or mock-up aircraft and therefore is bereft of some of the items that found their way onto the production models.
Thanks for looking.
And here is the latest update. I have now attached the wings and have completed stage one of the flaps. Off-cuts of Strutz material left over from my F-111 build of a while ago has been used for the main body of the flaps:
On the underside, the kit flap hinges have been cut and new rear portions made from plastic card off-cuts. This is a leeeetle bit of a bodge/modeller's licence but I'm not going to be displaying the finished model either upside down or parked on a mirror
And here is a general view of the model. Unlike the underside, the topside of the wing fitted very well.
In order to finish the wings I now have to complete the flaps and make some aerodynamic fences - apparently the Airfix old tool kit was based on prototype or mock-up aircraft and therefore is bereft of some of the items that found their way onto the production models.
Thanks for looking.
Doing - Tamiya 1/35th Universal Carrier.
Work is the curse of the modelling classes!
IPMS#12300
Work is the curse of the modelling classes!
IPMS#12300
-
JamesPerrin
- Looks like his avatar
- Posts: 13692
- Joined: April 5th, 2011, 8:09 pm
- Location: W. Yorkshire
- Contact:
Re: Shaun's Bodging Bench
Great work Shaun but I'm slightly confused by the Strutz material you are using. It looks like red plastic but the Strutz stuff I have is aerofoil shaped brass rod originating from the man behind Skybirds 86 for biplanes.
Classic British Kits SIG Leader Better to fettle than to fill
(2024 A:B 5:2) (2023 13:8:7) (2022 21:11) (2021 15:8) (2020 8:4:4)
(2024 A:B 5:2) (2023 13:8:7) (2022 21:11) (2021 15:8) (2020 8:4:4)
-
gnomemeansgnome

- Modelling Gent and Scholar
- Posts: 5269
- Joined: July 16th, 2013, 4:03 pm
- Location: No Fun City
Re: Shaun's Bodging Bench
Very nice detail work Shaun.
Ego no habeo consilium.
ICBM = Insatiable Collector and Builder of Models
ICBM = Insatiable Collector and Builder of Models
-
ShaunW
- NOT the sheep
- Posts: 26188
- Joined: November 26th, 2011, 6:11 pm
- Location: Pontefract West Yorkshire
Re: Shaun's Bodging Bench
Many thanks gents.
James - It is probably me getting all confused! I vaguely recall buying about three packs of this aerodynamically-shaped plastic material in different sizes at the IPMS Nats at Donington back in the 90's and have always believed it to be Strutz material, but it is so long ago now that I can't remember either the packaging or the vendor. Sounds like I could well be wrong as to its identity!
James - It is probably me getting all confused! I vaguely recall buying about three packs of this aerodynamically-shaped plastic material in different sizes at the IPMS Nats at Donington back in the 90's and have always believed it to be Strutz material, but it is so long ago now that I can't remember either the packaging or the vendor. Sounds like I could well be wrong as to its identity!
Doing - Tamiya 1/35th Universal Carrier.
Work is the curse of the modelling classes!
IPMS#12300
Work is the curse of the modelling classes!
IPMS#12300
-
skypirate

- Modelling Gent and Scholar
- Posts: 7301
- Joined: May 1st, 2011, 6:13 am
- Location: Port Macquarie, Australia
Re: Shaun's Bodging Bench
Great bodging going on here, Shaun!
More fun than Tamigawa for sure!
cheers,
David
More fun than Tamigawa for sure!
cheers,
David
-
ShaunW
- NOT the sheep
- Posts: 26188
- Joined: November 26th, 2011, 6:11 pm
- Location: Pontefract West Yorkshire
Re: Shaun's Bodging Bench
Cheers David. There is a lot of satisfaction to be gained by trying to improve an old kit using bits and bobs but from time to time a nice, detailed, modern kit that almost builds itself is a pleasure to have on the bench!
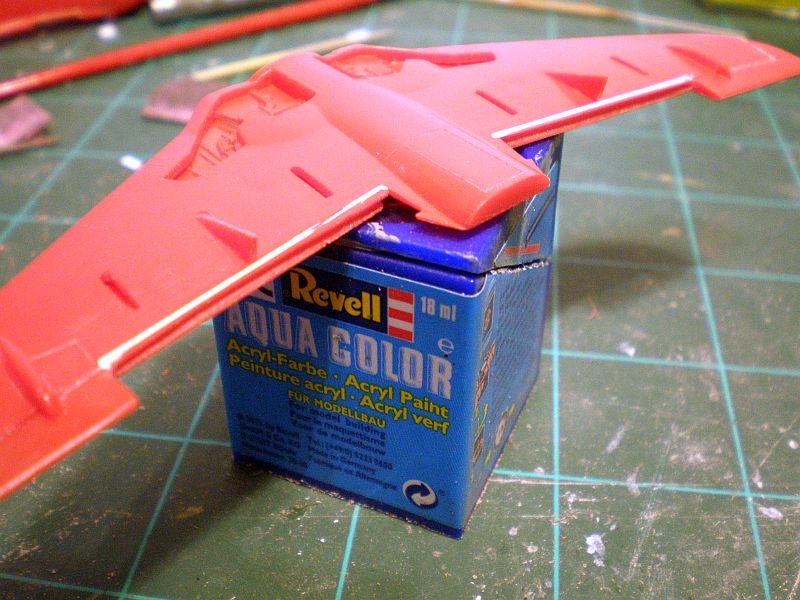
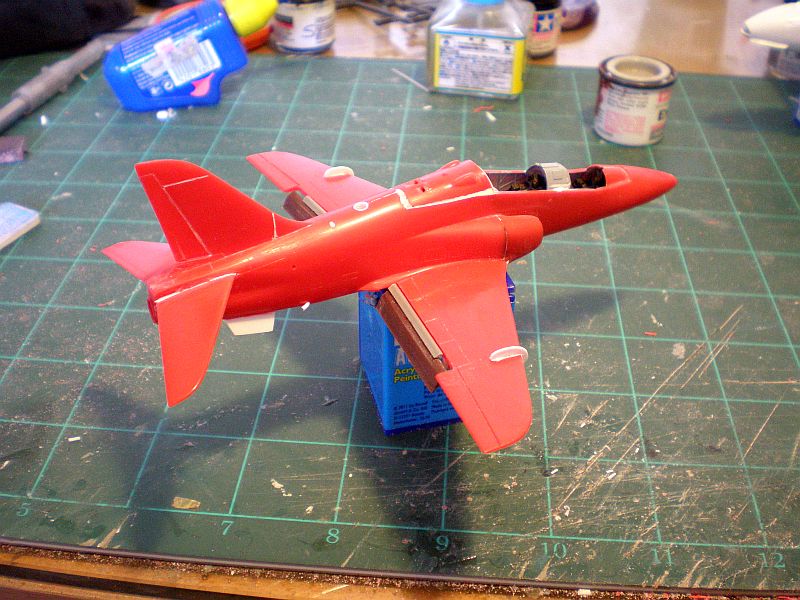
Righto, the Hawk is now just about ready for paint. Making reference to pics on Google Images I finished up the flaps by adding a smaller strip of aerodynamically shaped plastic above the main flaps, which is spaced using small pieces of scrap rod to give an effect as close to the real thing as I can manage. Wing fences were made from scrap plastic card, which was carved and sanded to shape again using pics on Google as a reference. The fences are slightly thick but in my experience plastic card that is very thin, although giving a better scale appearance, can be difficult to sand and carve and is easily damaged, therefore on occasions I compromise! After studying more pics on t'web I reached the conclusion that the tailplanes OOB are too level for a parked Hawk and would have to be "adjusted" to improve the appearance of the model. The tailplanes were separated from their alignment tabs with the tabs then being carefully glued into the tailplane slots. I then attached the tailplanes into a slight dive angle to match photos, the effect is quite subtle and it's possibly the case that once the engine is shut down, hydraulic pressure drops and the tailplanes cant backwards. Or summat like that

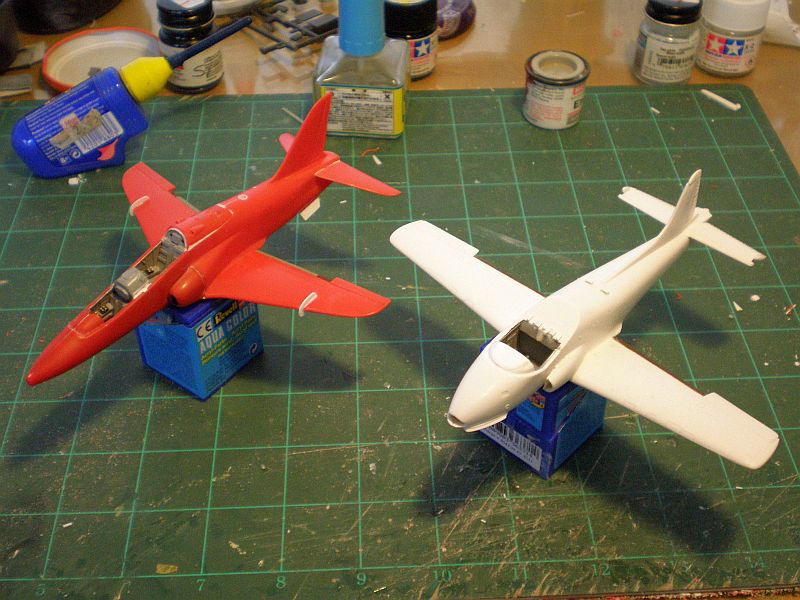
And here is the Hawk alongside the Jet Provost. Both of these models will now receive a final clean and tidy up prior to starting the painting process.
Thanks for looking.
Righto, the Hawk is now just about ready for paint. Making reference to pics on Google Images I finished up the flaps by adding a smaller strip of aerodynamically shaped plastic above the main flaps, which is spaced using small pieces of scrap rod to give an effect as close to the real thing as I can manage. Wing fences were made from scrap plastic card, which was carved and sanded to shape again using pics on Google as a reference. The fences are slightly thick but in my experience plastic card that is very thin, although giving a better scale appearance, can be difficult to sand and carve and is easily damaged, therefore on occasions I compromise! After studying more pics on t'web I reached the conclusion that the tailplanes OOB are too level for a parked Hawk and would have to be "adjusted" to improve the appearance of the model. The tailplanes were separated from their alignment tabs with the tabs then being carefully glued into the tailplane slots. I then attached the tailplanes into a slight dive angle to match photos, the effect is quite subtle and it's possibly the case that once the engine is shut down, hydraulic pressure drops and the tailplanes cant backwards. Or summat like that
And here is the Hawk alongside the Jet Provost. Both of these models will now receive a final clean and tidy up prior to starting the painting process.
Thanks for looking.
Doing - Tamiya 1/35th Universal Carrier.
Work is the curse of the modelling classes!
IPMS#12300
Work is the curse of the modelling classes!
IPMS#12300