Titan's 2012 Table Top.
- Jagewa
- Modelling Gent and Scholar
- Posts: 2752
- Joined: April 6th, 2011, 2:18 am
- Location: Christchurch, New Zealand
- Contact:
Re: Titan's 2012 Table Top.
Great work Mark. Nice to see a Mustang in something not NMF..
Cheers
Jim
Cheers
Jim
-
jelly071
- Getting well comfy!
- Posts: 88
- Joined: September 24th, 2012, 9:14 pm
- Location: Witham, Essex
Re: Titan's 2012 Table Top.
Nice pair of Mustangs
Thanks Mike
IPMS 12171 AMSIG Member
Love an old kit
IPMS 12171 AMSIG Member
Love an old kit
- bilby1968
- Modelling Gent and Scholar
- Posts: 1270
- Joined: May 1st, 2011, 12:19 am
- Location: Adelaide, South Australia
Re: Titan's 2012 Table Top.
That is one sweet looking Mustang. Those Hobby Boss quick build kits are so much fun and they live up to their name of being a quick build.
Those kits are a great way to get kids into modelling as they can be built in a matter of hours
Those kits are a great way to get kids into modelling as they can be built in a matter of hours
3 on the bench at anytime............well sometimes!!
- Titan
- Modelling Gent and Scholar
- Posts: 1835
- Joined: November 13th, 2011, 10:38 pm
- Location: The windswept Isle of Cornwall
Re: Titan's 2012 Table Top.
Thanks guys, time for an update me thinks.
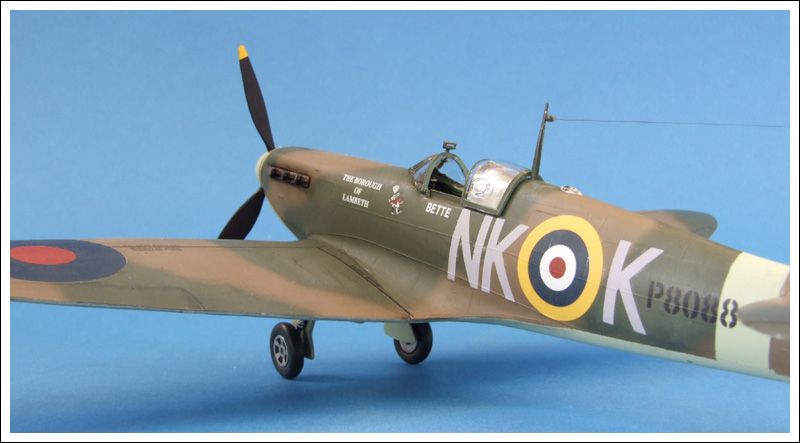
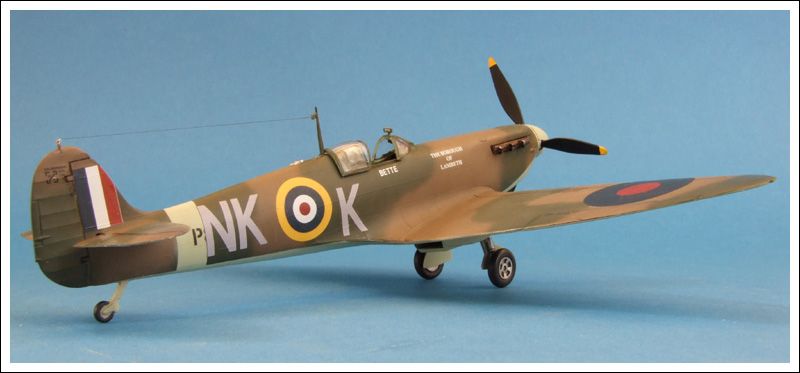
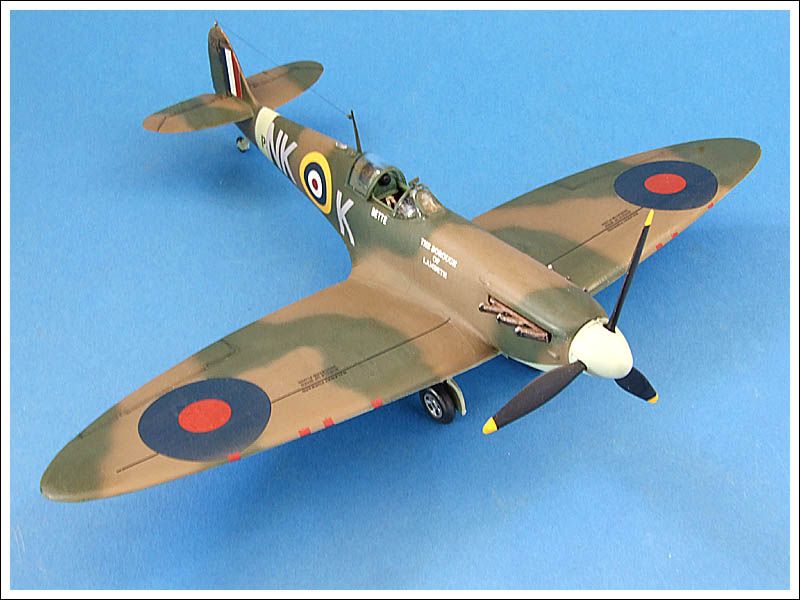
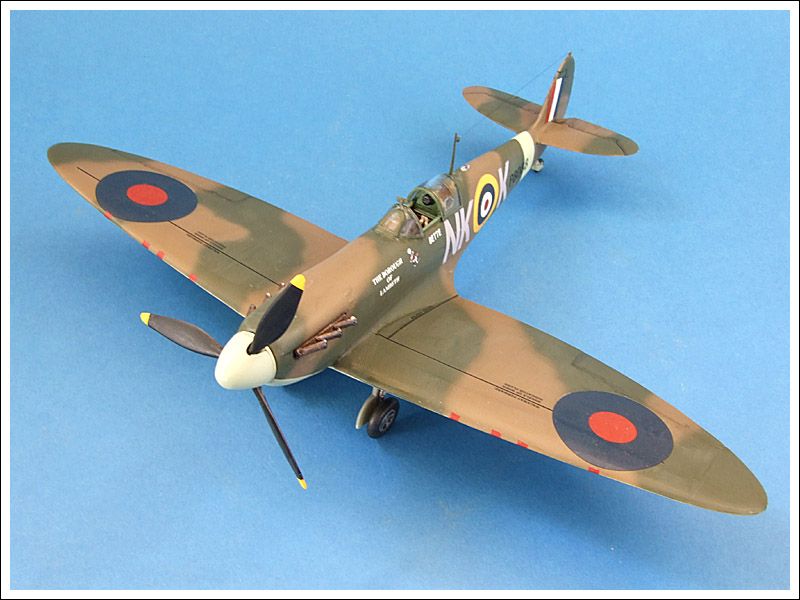
Completed this mainly in the late evenings after pulling double shifts at work so there are no progress pictures as I only like to take photos in as much natural light as possible( except for blitz builds of course)
Revell 1/48 Spitfire MkII.
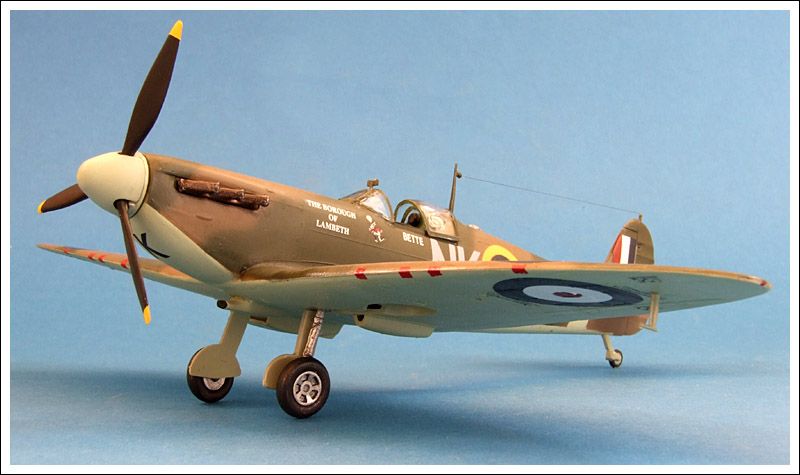
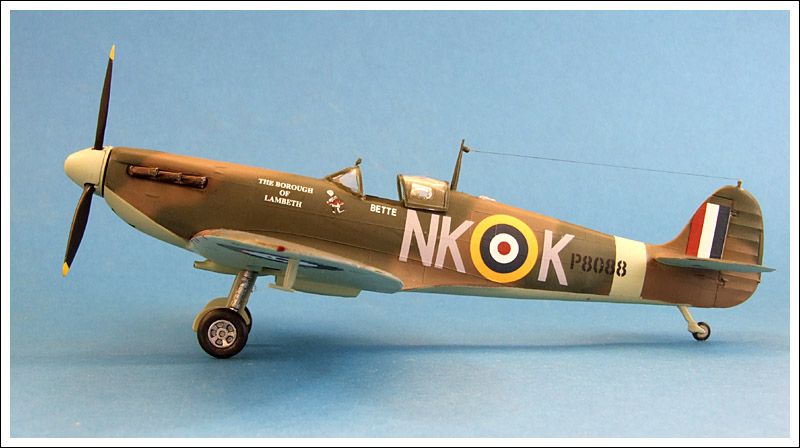
Regards
Mark
Completed this mainly in the late evenings after pulling double shifts at work so there are no progress pictures as I only like to take photos in as much natural light as possible( except for blitz builds of course)
Revell 1/48 Spitfire MkII.


Regards
Mark
Regards
Mark
_________________________________________
My models are never perfect, but I kinda like them.
Mark
_________________________________________
My models are never perfect, but I kinda like them.
- Jagewa
- Modelling Gent and Scholar
- Posts: 2752
- Joined: April 6th, 2011, 2:18 am
- Location: Christchurch, New Zealand
- Contact:
Re: Titan's 2012 Table Top.
Hmm, must get some of your "natural light" seems to make a big difference to models..
Though I really suspect its the modeller not the light ...
Lovely result Mark.
Cheers
Jim
Though I really suspect its the modeller not the light ...
Lovely result Mark.
Cheers
Jim
-
dipweed190
- Onto the Clever Stuff, Now.
- Posts: 120
- Joined: October 19th, 2012, 7:46 pm
Re: Titan's 2012 Table Top.
great selection of kits ,the 190 family is one of my favs too.
- Titan
- Modelling Gent and Scholar
- Posts: 1835
- Joined: November 13th, 2011, 10:38 pm
- Location: The windswept Isle of Cornwall
Re: Titan's 2012 Table Top.
Thanks guys.
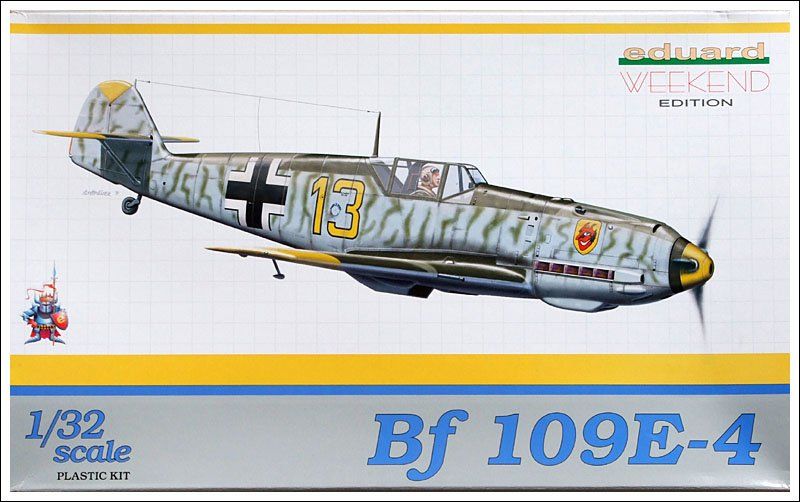
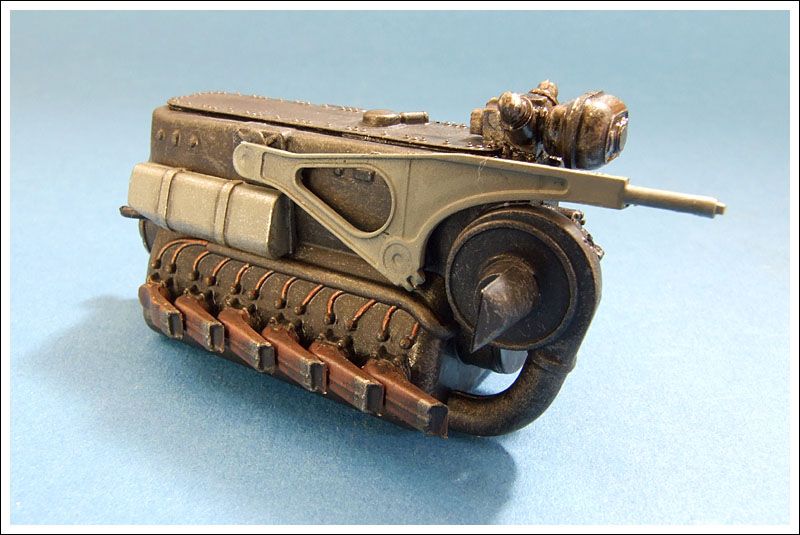
Well I have made a start the last couple of nights on this....
Mainly the engine parts as this will be displayed with the nose open...

Post shaded around the cockpit a bit...
 .
.
Regards
Mark
Well I have made a start the last couple of nights on this....

Mainly the engine parts as this will be displayed with the nose open...


Post shaded around the cockpit a bit...
 .
.Regards
Mark
Regards
Mark
_________________________________________
My models are never perfect, but I kinda like them.
Mark
_________________________________________
My models are never perfect, but I kinda like them.
- Titan
- Modelling Gent and Scholar
- Posts: 1835
- Joined: November 13th, 2011, 10:38 pm
- Location: The windswept Isle of Cornwall
Re: Titan's 2012 Table Top.
Then after a bit more drybrushing etc I added the fire wall and pipework and ended up with this...
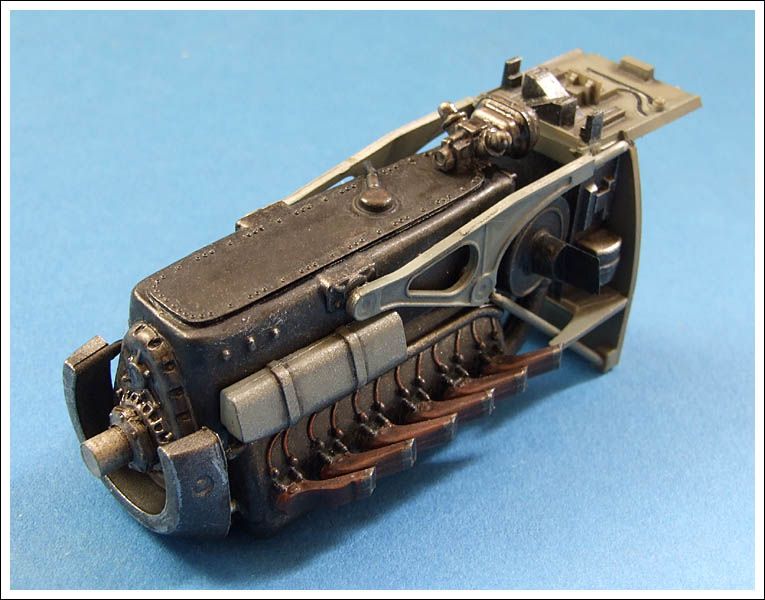
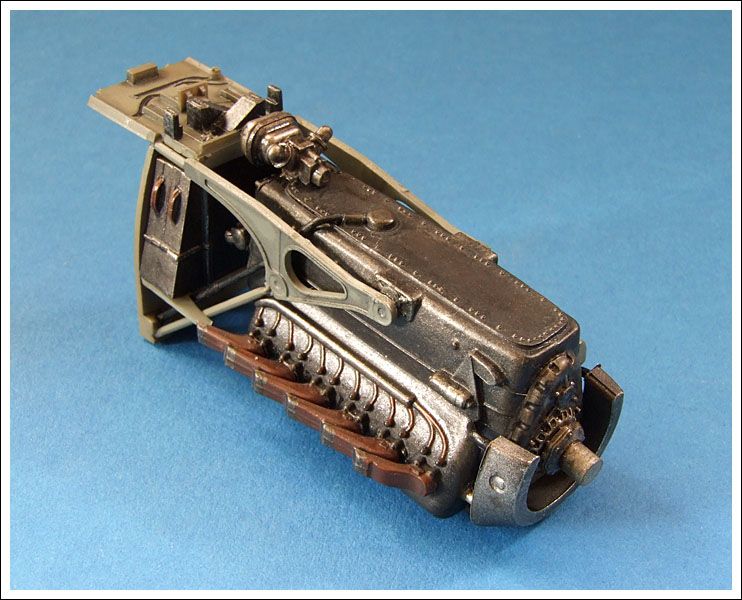
So that's the engine completed.
Regards
Mark


So that's the engine completed.
Regards
Mark
Regards
Mark
_________________________________________
My models are never perfect, but I kinda like them.
Mark
_________________________________________
My models are never perfect, but I kinda like them.
- Titan
- Modelling Gent and Scholar
- Posts: 1835
- Joined: November 13th, 2011, 10:38 pm
- Location: The windswept Isle of Cornwall
Re: Titan's 2012 Table Top.
And this is where I am with it now...
The engine and cockpit have been added and the fuselage halves have been glued together, not easy as there are no locating pins and also the exhaust stubs took a lot of persuading to fit into their respective fuselage slots( and I mean a lot)
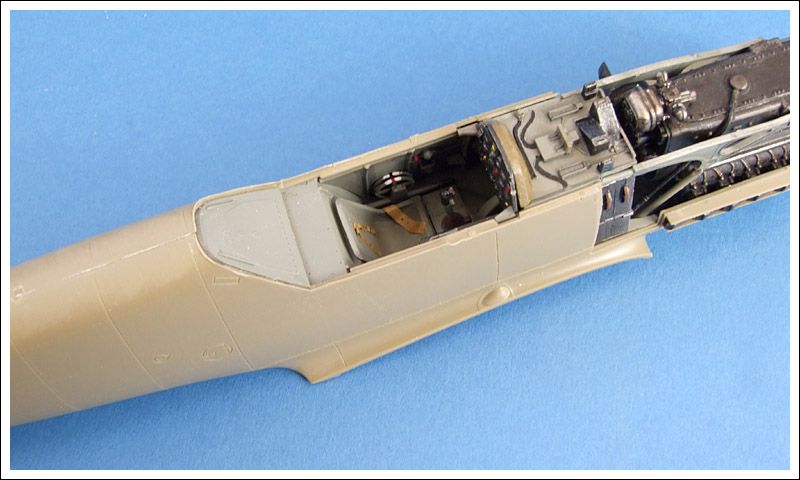
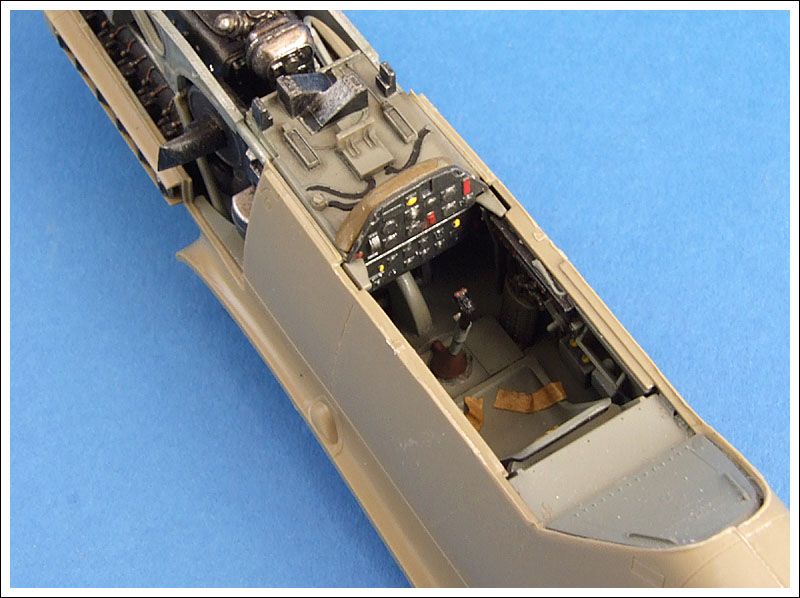
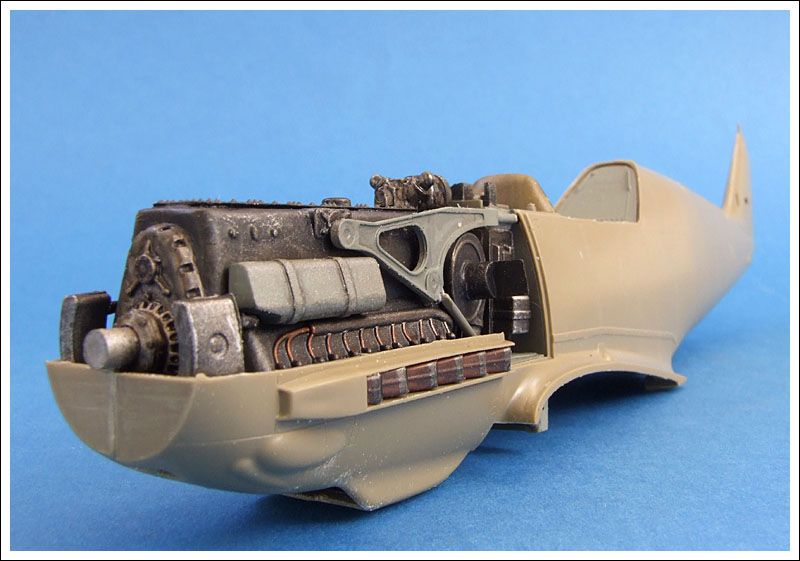
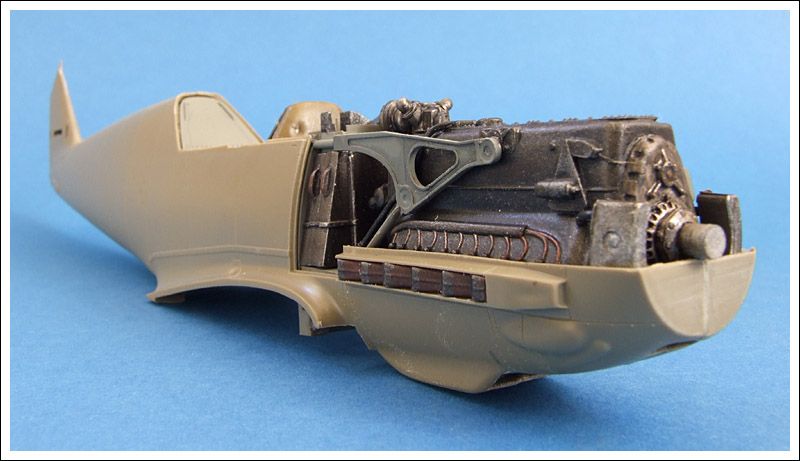

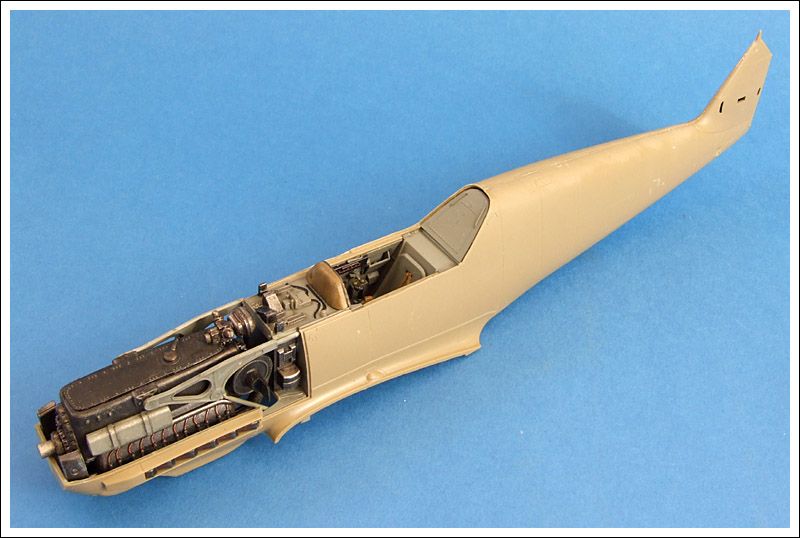
So now the next things to attack will be the wings and stabs.
Regards
Mark
The engine and cockpit have been added and the fuselage halves have been glued together, not easy as there are no locating pins and also the exhaust stubs took a lot of persuading to fit into their respective fuselage slots( and I mean a lot)


So now the next things to attack will be the wings and stabs.
Regards
Mark
Regards
Mark
_________________________________________
My models are never perfect, but I kinda like them.
Mark
_________________________________________
My models are never perfect, but I kinda like them.
-
dipweed190
- Onto the Clever Stuff, Now.
- Posts: 120
- Joined: October 19th, 2012, 7:46 pm
Re: Titan's 2012 Table Top.
quality kit and building!
- Titan
- Modelling Gent and Scholar
- Posts: 1835
- Joined: November 13th, 2011, 10:38 pm
- Location: The windswept Isle of Cornwall
Re: Titan's 2012 Table Top.
Thanks dipweed190.
Time for another update or two.
I have attached the wings , the fit topside was excellent...
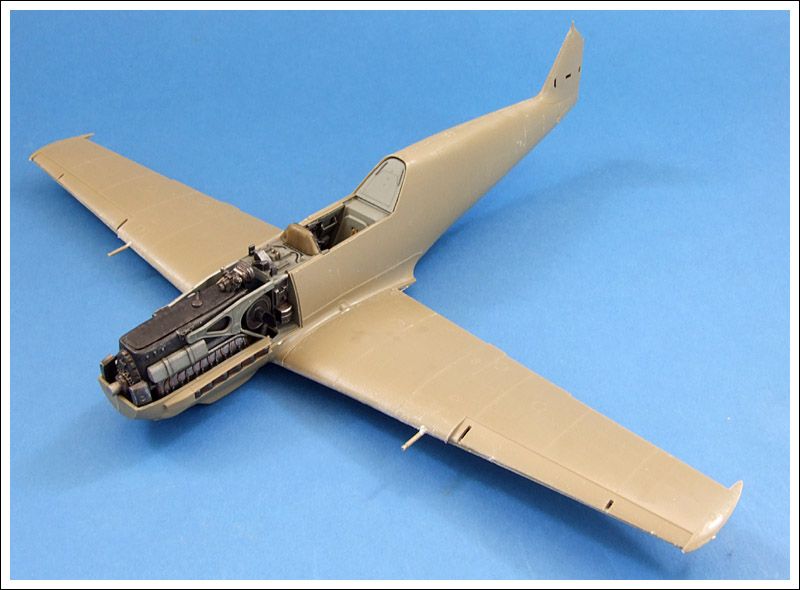
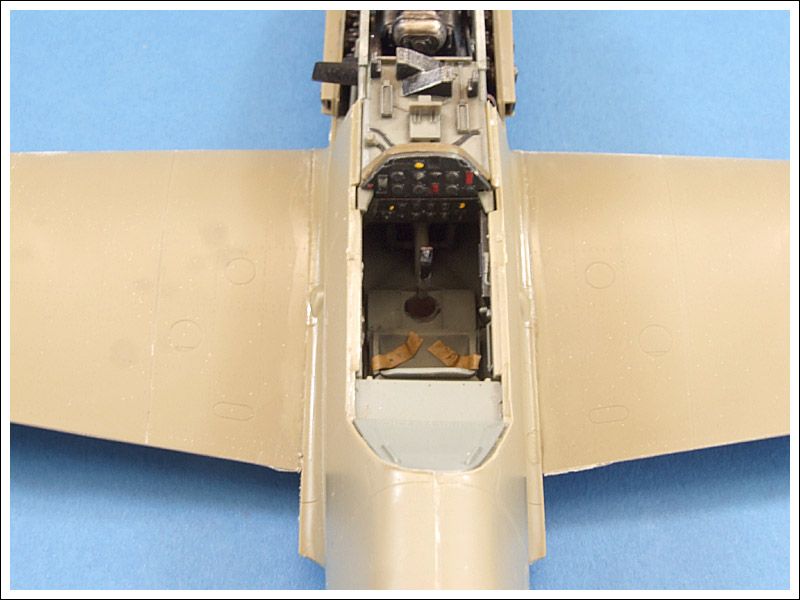
The underside fit was not so great and so I used some filler which will be sanded flush when dried....
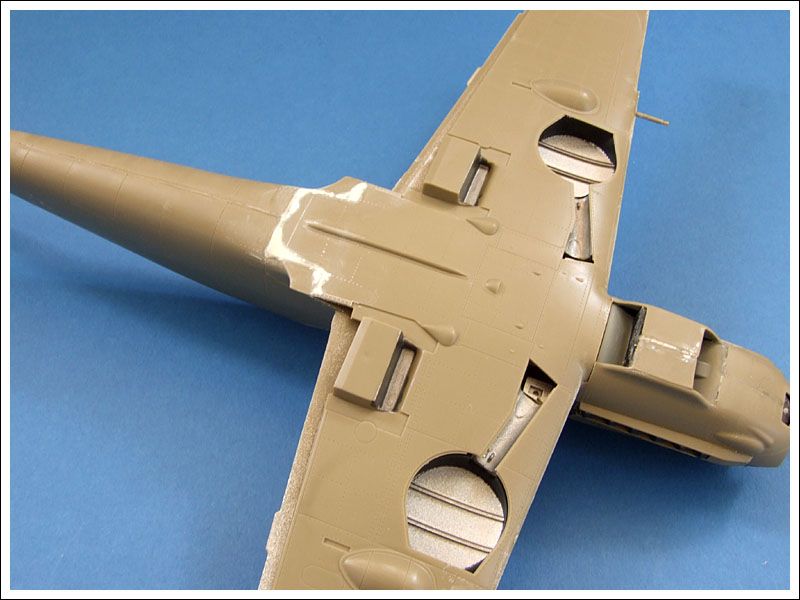
Regards
Mark
Time for another update or two.
I have attached the wings , the fit topside was excellent...


The underside fit was not so great and so I used some filler which will be sanded flush when dried....

Regards
Mark
Regards
Mark
_________________________________________
My models are never perfect, but I kinda like them.
Mark
_________________________________________
My models are never perfect, but I kinda like them.
- Titan
- Modelling Gent and Scholar
- Posts: 1835
- Joined: November 13th, 2011, 10:38 pm
- Location: The windswept Isle of Cornwall
Re: Titan's 2012 Table Top.
The stabs have been attached as have the control surfaces which were suitably deflected.
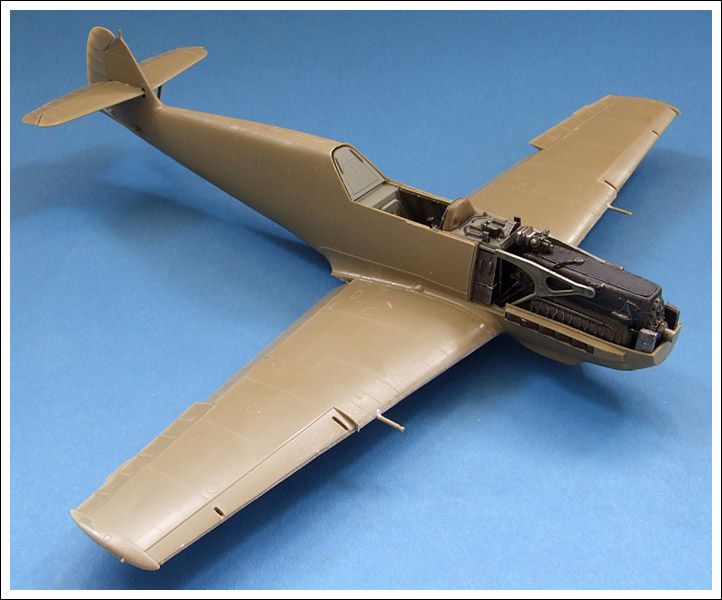
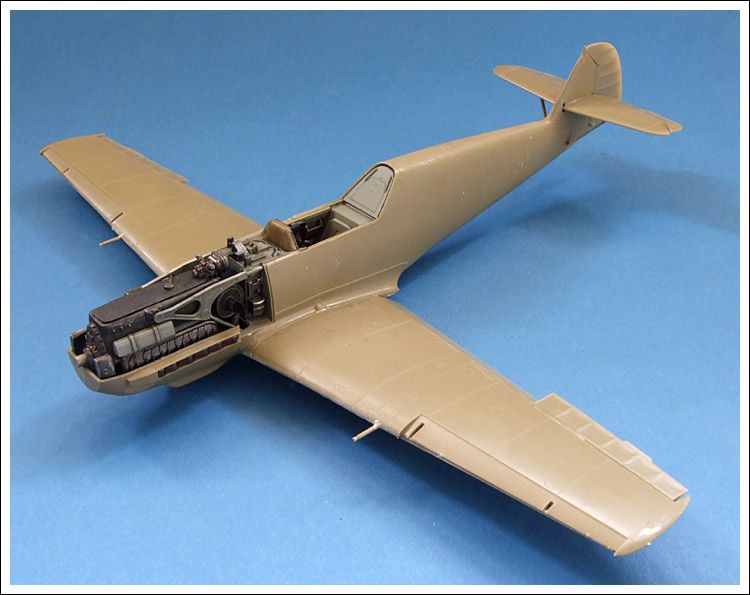
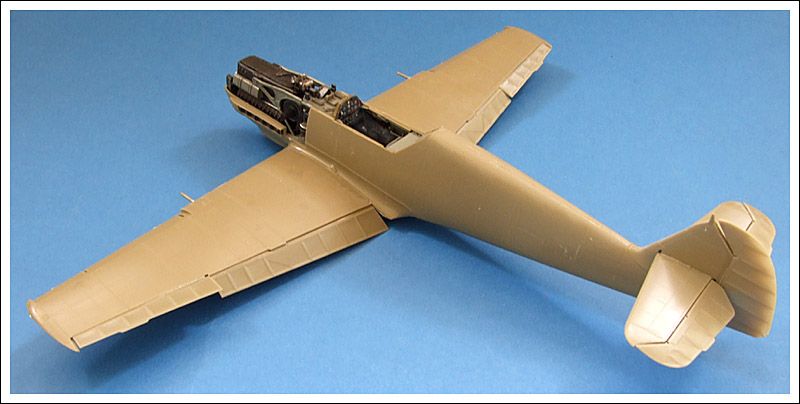
Regards
Mark


Regards
Mark
Regards
Mark
_________________________________________
My models are never perfect, but I kinda like them.
Mark
_________________________________________
My models are never perfect, but I kinda like them.
- Titan
- Modelling Gent and Scholar
- Posts: 1835
- Joined: November 13th, 2011, 10:38 pm
- Location: The windswept Isle of Cornwall
Re: Titan's 2012 Table Top.
The canopy has been masked and attached, the engine has been masked and the yellow wing tips, stabs and top of the rudder have been sprayed yellow(RLM04)
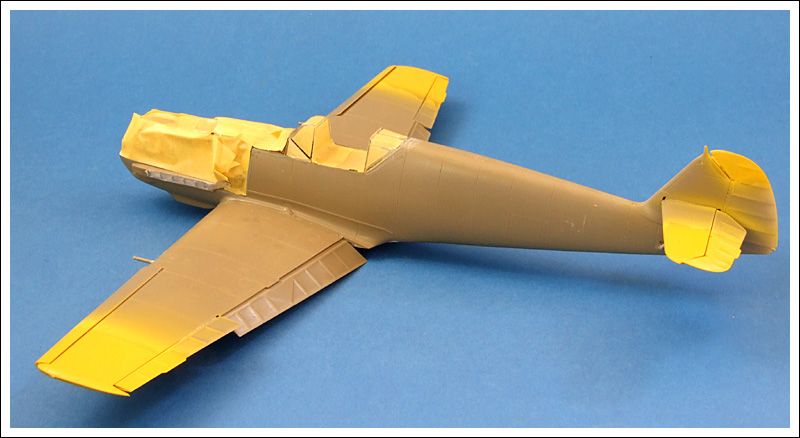
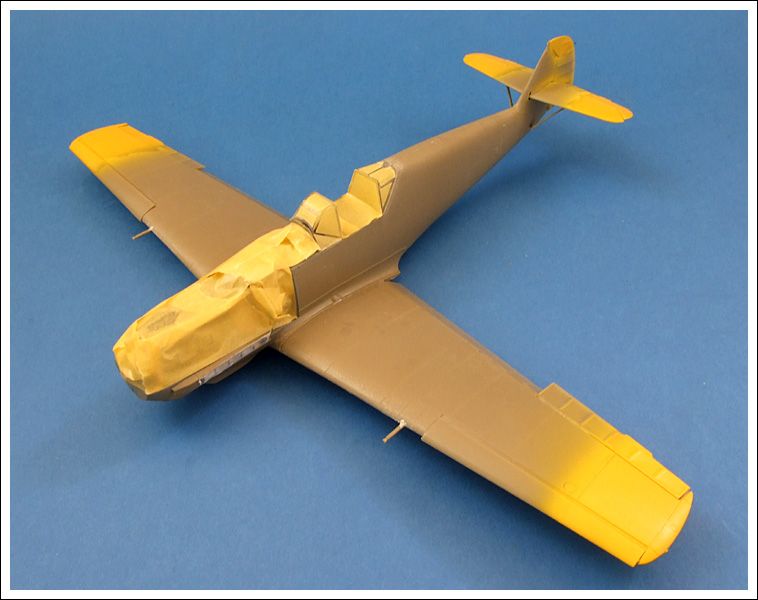
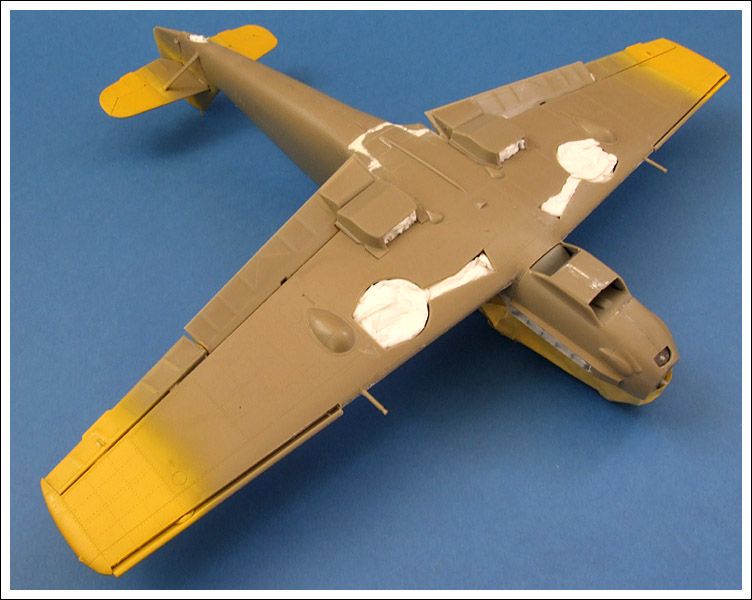
Next will be to spray the canopy RLM02 and mask off the yellow areas so that RLM76 can be sprayed to the under surface and sides of the fuselage,
Regards
Mark


Next will be to spray the canopy RLM02 and mask off the yellow areas so that RLM76 can be sprayed to the under surface and sides of the fuselage,
Regards
Mark
Regards
Mark
_________________________________________
My models are never perfect, but I kinda like them.
Mark
_________________________________________
My models are never perfect, but I kinda like them.
- Titan
- Modelling Gent and Scholar
- Posts: 1835
- Joined: November 13th, 2011, 10:38 pm
- Location: The windswept Isle of Cornwall
Re: Titan's 2012 Table Top.
Thank you Ivan but it is all about the quality of the model, I have only slapped some paint on it.... 
The bulk of the spray work has now been finished but I couldn't take any photos of the progress yesterday as the light was so poor with having downpours all day.
Having looked over it in better lighting today I am pleased with the results but will re-mask the outer Rlm71 splinter on the starboard wing to get a cleaner line either side of it and also to make the bottom slightly wider.
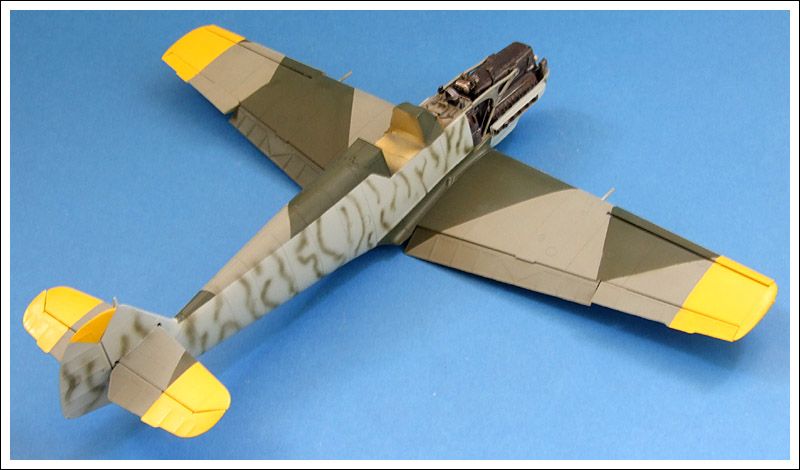
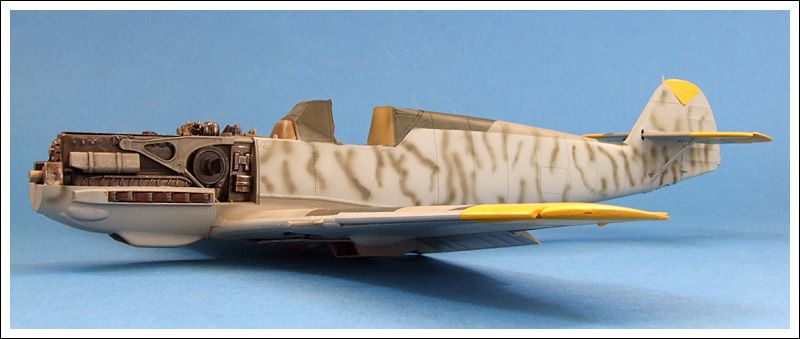
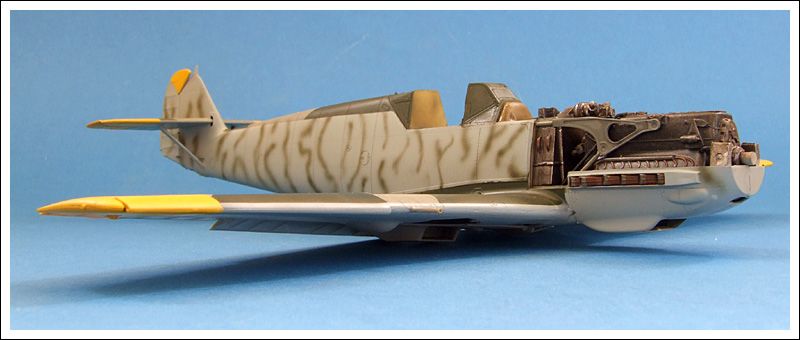
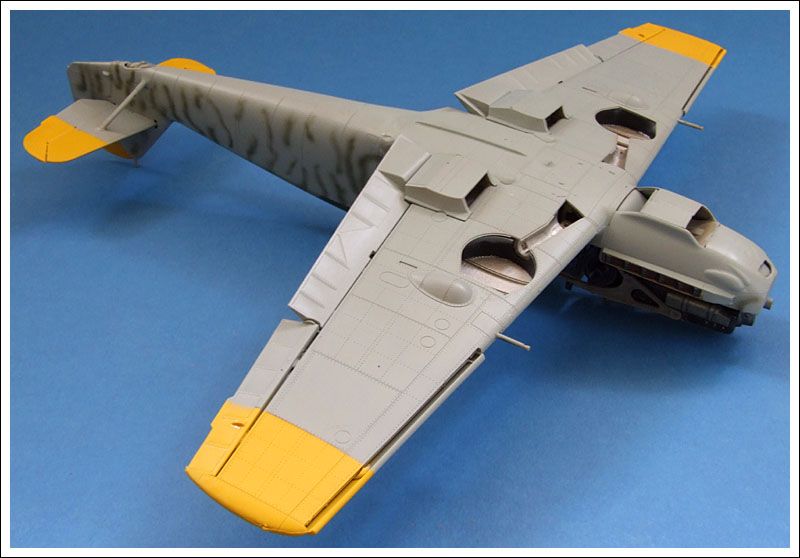
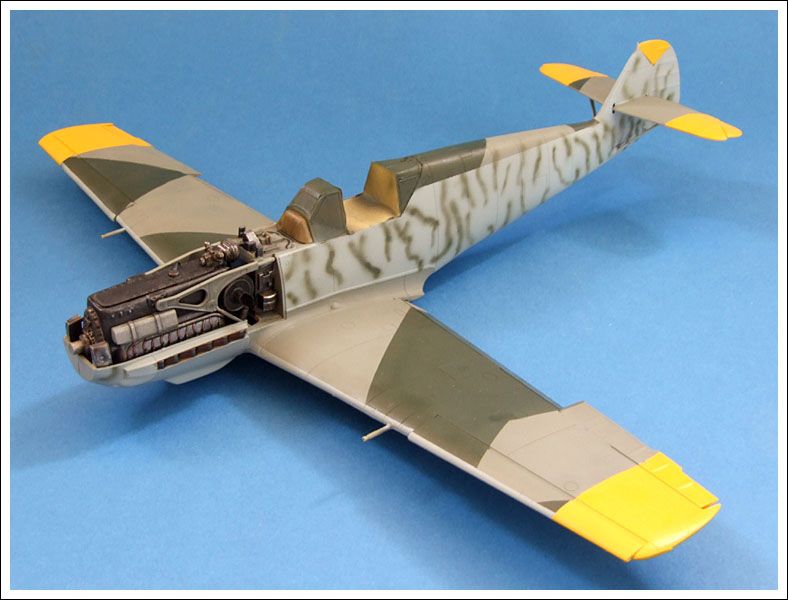
I'll mess around with the undercarriage today so that I can install them and then seal the paint in with some Klear.
Regards
Mark
The bulk of the spray work has now been finished but I couldn't take any photos of the progress yesterday as the light was so poor with having downpours all day.
Having looked over it in better lighting today I am pleased with the results but will re-mask the outer Rlm71 splinter on the starboard wing to get a cleaner line either side of it and also to make the bottom slightly wider.


I'll mess around with the undercarriage today so that I can install them and then seal the paint in with some Klear.
Regards
Mark
Regards
Mark
_________________________________________
My models are never perfect, but I kinda like them.
Mark
_________________________________________
My models are never perfect, but I kinda like them.

