Simon's Space

Show us a view of your workbench / work in progress and build reports too.
User avatar
SJPONeill
Modelling Gent and Scholar
Posts: 3524
Joined: May 1st, 2011, 12:01 am
Location: Near the Spiral, NZ.
Contact:

Re: Simon's Space

Post by SJPONeill »

Filled various small seams on the SR-71 last night - the step between the wing extension and the main wing is probably less than half a mm but just enough that it warrant doing something about. The details are all raised so they will probably disappeared in the sanding as well. I don't think that this will be any great loss and stealthy platforms tends to have a very smooth appearance...

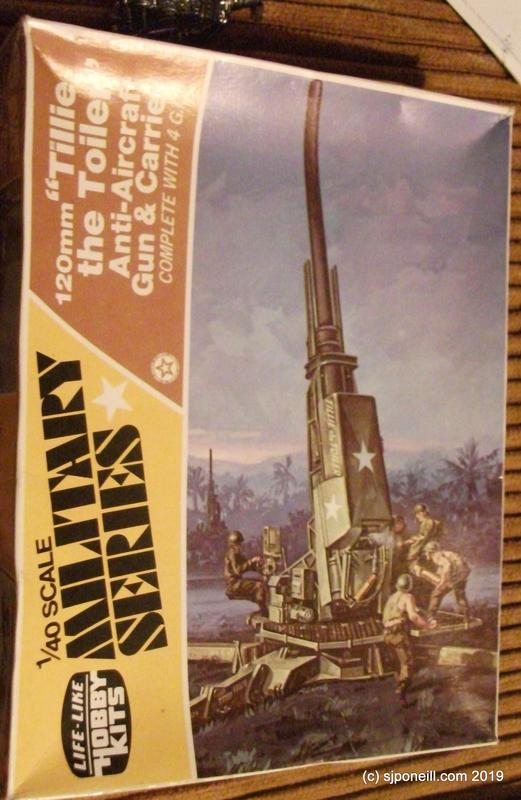
While letting the filler cure overnight, I did some other oddjobs...

Image

Used a thing worm of Milliput to fill a seam that had cracked on the Star Fury - I had originally filled this around 2000 (the year not the time!) using Tamiya putty which had dried quite brittle and popped out when the seam was flexed, possibly during one of my moves. I squeezed the worm in and smoothed it using the tip of the rubber-coating handle of my long-suffering snipping pliers - dipping the end into water made this very easy and gave me a very smooth seam that hopefully will not require any sanding...

Image

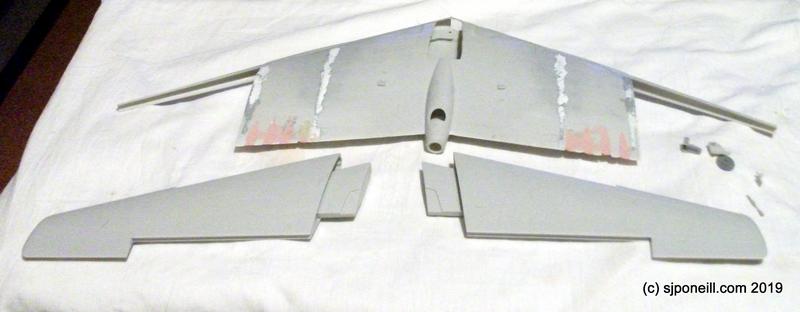
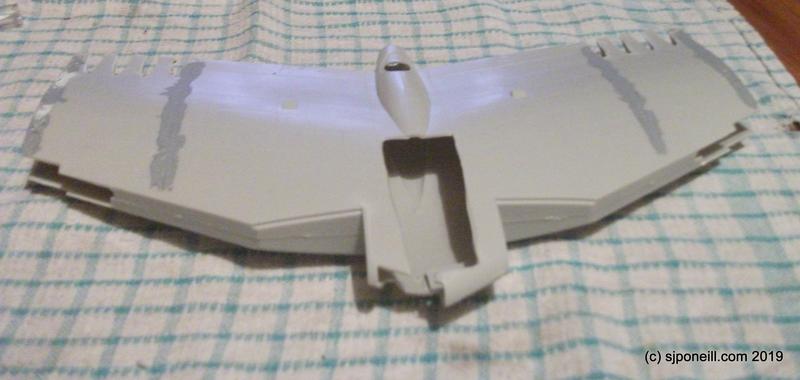
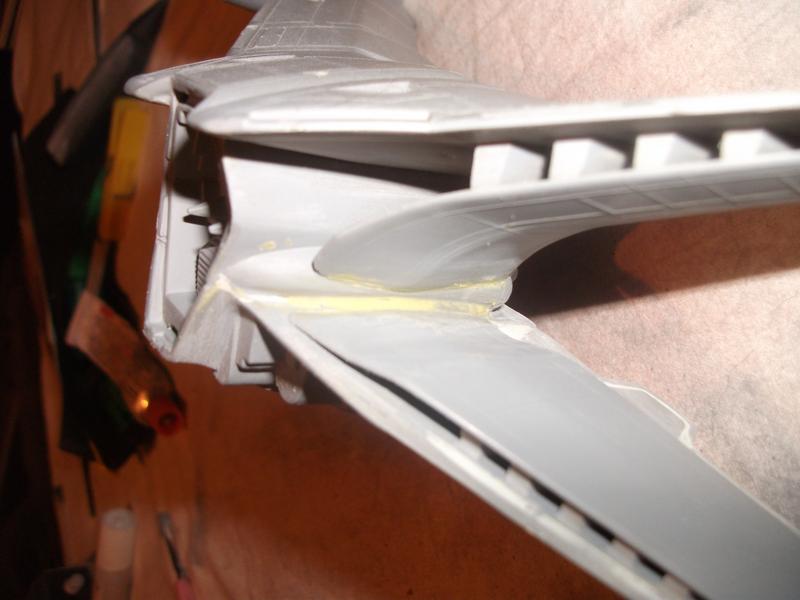
I added the clear nose part to the B-49 - this will be faired in and painted over - adding it now just adds strength to this area.

Image

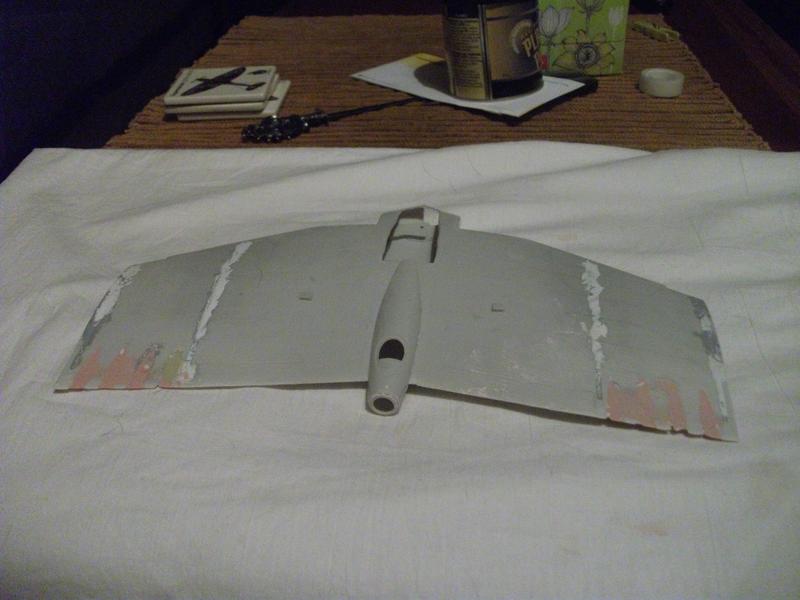
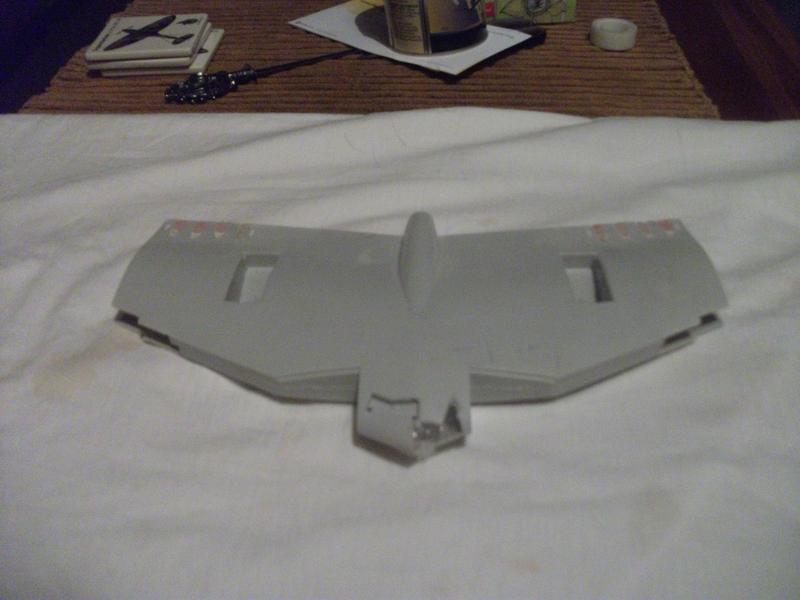
I didn't take a 'before' shot but it took me most of Transformers III to sand back the filler where the original jet pipes were. The reason that it took so long was that the filler cured before I could remove the surplus and it set like rock (not necessarily a bad thing...

Image
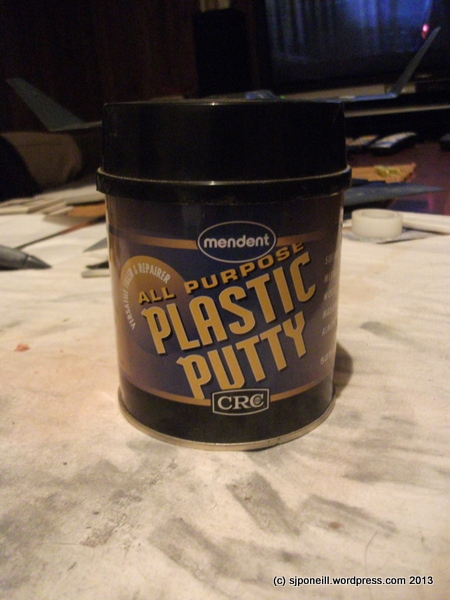
This is the filler I use for bulk filling jobs. It is a two part filler with a small bottle of hardener in the cap of the tin. The hardener is red and the filler white so the lesson that I (re)learned was that as soon as it is mixed into a uniform pink, go like crazy to get it into the target gaps as the onset of the cure is very fast: it is all nice and gooey and then, nek minnit, it's cured...very good stuff and cheap too - that tin was about $20. Very good for large areas that need filling; although it doesn't seem to heat up when curing it does shrink a bit in large quantities so I tend to apply it in layers on big jobs. I use Tamiya Grey and White putty, followed by spray filler for the final smooth surface.
Please critique my posts honestly i.e. say what you think so I can learn and improve...
The World According To Me
User avatar
BlohmWolf
Modelling Gent and Scholar
Posts: 2355
Joined: May 15th, 2013, 11:21 pm
Location: Down under, TAS.

Re: Simon's Space

Post by BlohmWolf »

This looks good, b-49's are always interesting, with their large flying wing tradition.
"Can not finish a model at all"

"You can get more of what you want, with a kind word and a wallet, than just a kind word".

Currently Building: FROG Wildcat, Fokker DR1 Red baron and some other things...
User avatar
SJPONeill
Modelling Gent and Scholar
Posts: 3524
Joined: May 1st, 2011, 12:01 am
Location: Near the Spiral, NZ.
Contact:

Re: Simon's Space

Post by SJPONeill »

Thanks, I've always toyed with the idea of getting the XB-35 and building it as an in-service version with the bomb bays loaded up and the turrets all tooled up as well - would have to play a bit fast and loose with the timeline though as I think that it would look way cooler in a non-NMF finish like the OD over grey of the early B-17s, -24s and -29s, or the scheme that the RAF applied to its early Washingtons...

Unfortunately, I am banned from further acquisitions due to the GFC and the elephant stash in the room already...
Please critique my posts honestly i.e. say what you think so I can learn and improve...
The World According To Me
User avatar
BlohmWolf
Modelling Gent and Scholar
Posts: 2355
Joined: May 15th, 2013, 11:21 pm
Location: Down under, TAS.

Re: Simon's Space

Post by BlohmWolf »

I remember it from 'War of the worlds'. That Nuke scene was quite shocking, especially when they came out with not even a scratch!
"Can not finish a model at all"

"You can get more of what you want, with a kind word and a wallet, than just a kind word".

Currently Building: FROG Wildcat, Fokker DR1 Red baron and some other things...
User avatar
SJPONeill
Modelling Gent and Scholar
Posts: 3524
Joined: May 1st, 2011, 12:01 am
Location: Near the Spiral, NZ.
Contact:

Re: Simon's Space

Post by SJPONeill »

I always thought that it was uber-cool that that they used the YB-49 clip in War of the Worlds instead of a B-36 or B-50.

I'll have to have another look at it in the movie but most likely the bomb would have been dropped from altitude and the bomber would have been caning it in the opposite direction before it went off - you can go a long way in a short time when sufficiently motivated...
Please critique my posts honestly i.e. say what you think so I can learn and improve...
The World According To Me
User avatar
SJPONeill
Modelling Gent and Scholar
Posts: 3524
Joined: May 1st, 2011, 12:01 am
Location: Near the Spiral, NZ.
Contact:

Re: Simon's Space

Post by SJPONeill »

Monday night is Castle night and I like to give this my undivided attention so not too much modelling this evening...however before Castle is Person of Interest which I can take or leave and so spent most of this pawing through my spares boxes looking for discarded parts from the rear gunner's position on the B-49. I was going to have all this controlled remotely from the cockpit proper but was having trouble integrating any rearward-facing radar radomes as there is not much (none at all really) tail to incorporate them into i.e. in more conventional aircraft these radomes generally sit at the base of the fin...+ I looked at the parts on the instructions and they looked quite cool...

I also had one attempt at hollowing out the intakes of the engines internal to the wings...you may remember that I had added foam board behind the intakes with the intention of hollowing them out to show the front of the engine fans?
Image
Yup...too hard...so my option 2 was to just forget it and take the easy way out and place intake covers over each intake...so I fixed the leading edge pieces...
Image
I also fixed the box spars that strengthem the join between the inner and outer wing pieces. It is really quite a clever system with the spars and the separate leading edges all interlocking to make the join area quite strong...
Image
Having located the rear gunner compartment parts in the spares box, I was able to slip the floor in through the gaping maw where the cockpit will eventually sit...
Image
...and slide it back to the rear gunners position where it was glued in place...the gunner will sit here, probably accessing it through a trapdoor immediately underneath, and operate 2x20mm cannon that once lived in a Revell B-36...
Please critique my posts honestly i.e. say what you think so I can learn and improve...
The World According To Me
User avatar
SJPONeill
Modelling Gent and Scholar
Posts: 3524
Joined: May 1st, 2011, 12:01 am
Location: Near the Spiral, NZ.
Contact:

Re: Simon's Space

Post by SJPONeill »

Image

Forgot to mention last night that I removed the foam inserts in which I had intended to carve out the engine intakes before I fixed the leading edge parts. Once they were in place, I noticed that, having originally removed the original plastic blocking off the intakes, I could probably still give the impression of the engine fans by slipping them in through the wings before adding the outer wing panels. This might lead to some minor issues masking the fans when I paint the exterior but nothing (hopefully) insurmountable.
Please critique my posts honestly i.e. say what you think so I can learn and improve...
The World According To Me
User avatar
SJPONeill
Modelling Gent and Scholar
Posts: 3524
Joined: May 1st, 2011, 12:01 am
Location: Near the Spiral, NZ.
Contact:

Re: Simon's Space

Post by SJPONeill »

All the filling and sanding on my two big aircraft was starting to get to me a bit so I opted for a bit of a change last night...
Image
I am allowed a little modelling corner in the lounge where I keep my modelling 'ready-use' pile - last night I noticed that these half dozen or so models were sitting on one of my plastic stash bins that I had forgotten to put back int eh garage and this was staring at me through the clear lid. It was an Ebay acquisition from around 2001-02 - I started it when I got it (sound familiar) and have no idea why I did not keep on building it - it's not like it has a cockpit which is my usual road block...I'd only joined the barrel pieces and down some preliminary seam sanding...
Image
Last night I assembled part of the barrel mounting assembly...fit of parts was quite good except for having to clean up the flash...
Image
As you can see from this typical sprue, flash is quite widespread, to a point where it is sometimes difficult to determine where the flash ends and the part starts...

When complete it should be around the same size as a 1/35 88, I think...I don't think there is a 1/40 scale prime mover available to go with this gun, but I have enough 1/40 kits now that it shouldn't be too lonely...
Please critique my posts honestly i.e. say what you think so I can learn and improve...
The World According To Me
User avatar
BlohmWolf
Modelling Gent and Scholar
Posts: 2355
Joined: May 15th, 2013, 11:21 pm
Location: Down under, TAS.

Re: Simon's Space

Post by BlohmWolf »

That certainly looks intriguing.

How about posing it with a gun crew?
"Can not finish a model at all"

"You can get more of what you want, with a kind word and a wallet, than just a kind word".

Currently Building: FROG Wildcat, Fokker DR1 Red baron and some other things...
User avatar
SJPONeill
Modelling Gent and Scholar
Posts: 3524
Joined: May 1st, 2011, 12:01 am
Location: Near the Spiral, NZ.
Contact:

Re: Simon's Space

Post by SJPONeill »

Could be tricky as the four figures that come with it are 'challenging' and there's not a great deal available in the 1/40 figure world to work with otherwise...still, they are not as bad as the ones that came with the Renwal 1/32 armour kits from the same era...will see how the figures look once I am a bit further down the track...
Please critique my posts honestly i.e. say what you think so I can learn and improve...
The World According To Me
User avatar
SJPONeill
Modelling Gent and Scholar
Posts: 3524
Joined: May 1st, 2011, 12:01 am
Location: Near the Spiral, NZ.
Contact:

Re: Simon's Space

Post by SJPONeill »

Had friends over for the snow last weekend which was really great to have the company...didn't get any modelling done though due to the enhanced numbers of small children in residence...

Have been slowly chipping away at Tillie the Toiler - the fit of the parts is pretty good: the time-consuming bit is cleaning off all the flash...

Am working on three main sub-assemblies now:

Image

The recoil mechanism (shown here with the barrel which, I guess would be a fourth sub-assembly for the counters amongst you) which (in a better picture) looks quite complex but is actually quite simple to build...

Image

The base which will soon have delightfully complex looking arms and legs coming off it; and the mount itself...
Please critique my posts honestly i.e. say what you think so I can learn and improve...
The World According To Me
User avatar
Ian
Blitzbau hero
Posts: 5137
Joined: May 4th, 2011, 10:01 am

Re: Simon's Space

Post by Ian »

NZ is somewhere I thought never got snow....
Happily we're in the high 20's, low 30's at the moment. Just thought I'd share that with you.
I'm a mostly full-time modeller put a part-time poster....
User avatar
SJPONeill
Modelling Gent and Scholar
Posts: 3524
Joined: May 1st, 2011, 12:01 am
Location: Near the Spiral, NZ.
Contact:

Re: Simon's Space

Post by SJPONeill »

We don't get it like parts of the US, Canada or Europe but we do get it...this was our front lawn not so long ago...

Image
Please critique my posts honestly i.e. say what you think so I can learn and improve...
The World According To Me
User avatar
Ian
Blitzbau hero
Posts: 5137
Joined: May 4th, 2011, 10:01 am

Re: Simon's Space

Post by Ian »

Impressive! Had that fallen here over the winter the country would have ground to a halt......
I'm a mostly full-time modeller put a part-time poster....
User avatar
SJPONeill
Modelling Gent and Scholar
Posts: 3524
Joined: May 1st, 2011, 12:01 am
Location: Near the Spiral, NZ.
Contact:

Re: Simon's Space

Post by SJPONeill »

We're quite lucky as we're right on the northern edge of the snow zone so we can usually get out driving north...in the nine years we have been here, we have yet to take our chains out of the bag let alone put them on (think I can remember how)...5 km south and another 150 metres in altitude it's often a different story...
Please critique my posts honestly i.e. say what you think so I can learn and improve...
The World According To Me
Post Reply

Return to “Workbench Window”