Dirk Pitt, The ADD Model Builders Workbench Space
-
gbrwn56
- The Bug Has Well And Truly Bitten
- Posts: 493
- Joined: June 5th, 2015, 12:29 am
- Location: Livingston, Scotland
Re: Dirk Pitt, The ADD Model Builders Workbench Space
Really nice work, thanks for sharing.
George B.

Re: Dirk Pitt, The ADD Model Builders Workbench Space
Very nice work Dirk A quick question. What kind of adhesive did you use for the flag decals? The bottle looks familiar but I can't place it in my mind.
Besting 60 years of mediocre building of average kits in the stand off scale
-
Dirkpitt289

- NUMA's Auto Mechanic
- Posts: 8724
- Joined: May 2nd, 2011, 1:55 am
- Location: New jersey USA
- Contact:
Re: Dirk Pitt, The ADD Model Builders Workbench Space
You make fun of my name and then think i'm going to answer your questions? Meh!jssel wrote:Very nice work irk. A quick question. What kind of adhesive did you use for the flag decals? The bottle looks familiar but I can't place it in my mind.
Just kidding. I'm assuming you mean to attach the flag to the pole? I use many different glues to build models but my most used glue is Model Masters

What I did was remove the pin, put the flag pole in the bottle and pulled it out. A very little bit of glue was left on the part but it was enough to make the flags stick.
I hope this helps
.... Dirk
Beware of the DOG's of WAR
My Youtube Channel
https://www.youtube.com/user/ModelingGu ... rid&view=0
Beware of the DOG's of WAR
My Youtube Channel
https://www.youtube.com/user/ModelingGu ... rid&view=0
-
Dirkpitt289
- NUMA's Auto Mechanic
- Posts: 8724
- Joined: May 2nd, 2011, 1:55 am
- Location: New jersey USA
- Contact:
Re: Dirk Pitt, The ADD Model Builders Workbench Space
Thank you Georgegbrwn56 wrote:Really nice work, thanks for sharing.
.... Dirk
Beware of the DOG's of WAR
My Youtube Channel
https://www.youtube.com/user/ModelingGu ... rid&view=0
Beware of the DOG's of WAR
My Youtube Channel
https://www.youtube.com/user/ModelingGu ... rid&view=0
-
Dirkpitt289
- NUMA's Auto Mechanic
- Posts: 8724
- Joined: May 2nd, 2011, 1:55 am
- Location: New jersey USA
- Contact:
Re: Dirk Pitt, The ADD Model Builders Workbench Space
Thank you davidskypirate wrote:Wow! New skills + enjoyment = a great result for the rusty 55 Cameo pick-up!
Beautifully done!
David
.... Dirk
Beware of the DOG's of WAR
My Youtube Channel
https://www.youtube.com/user/ModelingGu ... rid&view=0
Beware of the DOG's of WAR
My Youtube Channel
https://www.youtube.com/user/ModelingGu ... rid&view=0
-
Dirkpitt289
- NUMA's Auto Mechanic
- Posts: 8724
- Joined: May 2nd, 2011, 1:55 am
- Location: New jersey USA
- Contact:
Re: Dirk Pitt, The ADD Model Builders Workbench Space
Thanks for taking the time to comment Nigel. The Patton is a classic kit and it should be fun since I haven't built a tank since I can't remember when. And of course I love the theme. It should piss off the rivet counters to see a Patton tank decked out in German Africa Corp colors.Clashcityrocker wrote:Realistic looking rust on the rat rod Dirk, and nice start on the Patton.
Nigel
.... Dirk
Beware of the DOG's of WAR
My Youtube Channel
https://www.youtube.com/user/ModelingGu ... rid&view=0
Beware of the DOG's of WAR
My Youtube Channel
https://www.youtube.com/user/ModelingGu ... rid&view=0
-
Dirkpitt289
- NUMA's Auto Mechanic
- Posts: 8724
- Joined: May 2nd, 2011, 1:55 am
- Location: New jersey USA
- Contact:
Re: Dirk Pitt, The ADD Model Builders Workbench Space
Thanks Ralph, it was fun to do. I now have an itch to do more Rat RodsSoftscience wrote:I really like that truck. That is great modelling. The foil flags are a brilliant method.
.... Dirk
Beware of the DOG's of WAR
My Youtube Channel
https://www.youtube.com/user/ModelingGu ... rid&view=0
Beware of the DOG's of WAR
My Youtube Channel
https://www.youtube.com/user/ModelingGu ... rid&view=0
-
iggie

- Modelling Gent and Scholar
- Posts: 23435
- Joined: July 31st, 2013, 11:04 am
- Location: North Somercotes, Lincolnshire
- Contact:
Re: Dirk Pitt, The ADD Model Builders Workbench Space
Love the rust work on the pick up!
Best wishes
Jim
If you can walk away from a landing, it's a good landing. If you use the airplane the next day, it's an outstanding landing
"Never put off till tomorrow, what you can do the day after tomorrow"
Jim
If you can walk away from a landing, it's a good landing. If you use the airplane the next day, it's an outstanding landing
"Never put off till tomorrow, what you can do the day after tomorrow"
-
ShaunW
- NOT the sheep
- Posts: 26188
- Joined: November 26th, 2011, 6:11 pm
- Location: Pontefract West Yorkshire
Re: Dirk Pitt, The ADD Model Builders Workbench Space
That is a great looking pick up Dirk and I also like the way you have produced the flags, they look very realistic I must say.
Doing - Tamiya 1/35th Universal Carrier.
Work is the curse of the modelling classes!
IPMS#12300
Work is the curse of the modelling classes!
IPMS#12300
-
Dirkpitt289
- NUMA's Auto Mechanic
- Posts: 8724
- Joined: May 2nd, 2011, 1:55 am
- Location: New jersey USA
- Contact:
Re: Dirk Pitt, The ADD Model Builders Workbench Space
Thanks,Shaun and Iggie
.... Dirk
Beware of the DOG's of WAR
My Youtube Channel
https://www.youtube.com/user/ModelingGu ... rid&view=0
Beware of the DOG's of WAR
My Youtube Channel
https://www.youtube.com/user/ModelingGu ... rid&view=0
-
Dirkpitt289
- NUMA's Auto Mechanic
- Posts: 8724
- Joined: May 2nd, 2011, 1:55 am
- Location: New jersey USA
- Contact:
Re: Dirk Pitt, The ADD Model Builders Workbench Space
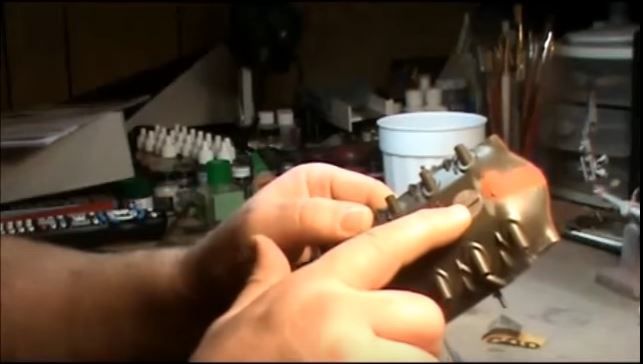
Meanwhile back at the Patton tank build....
I seem to be missing a whole lot of photos from this build so I'm taking some from the video to fill the gaps.
A lot of putty work is needed for the body tub. For this I use common body putty (Bondo) found in almost any automotive store. One huge 4.5 oz (127.5 grams) tube cost less then lets say a 32 gram tube Tamiya putty. Don't get me wrong I'm not saying there is anything wrong with modeling puttys, I own many different kinds but sometimes being frugal pays off
I have to putty the seam down the middle
Across the sides
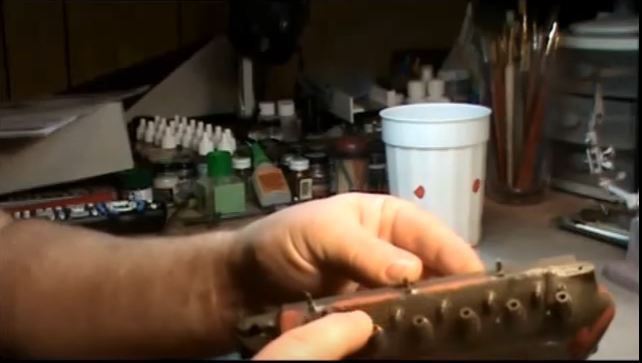
The rear (shown below) and the leading edge (not shown). The leading edge on this kit is very sharp and needs to be sanded and rounded a bit.
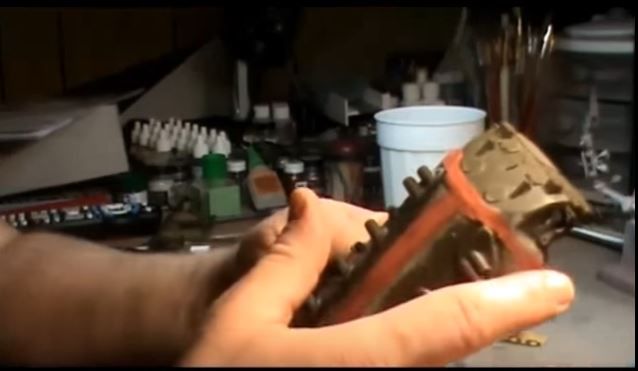
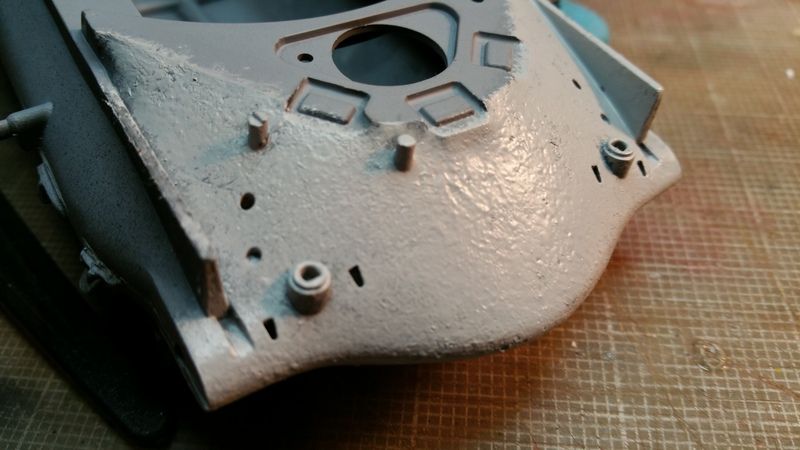
After sanding I primed the tub to get a feel for the seam lines. I noticed that the hull on this kit was smooth. The real Pattons had a forged (wrinkled) look to them along with the turret, how do I achieve that look. Heres what I did. Using Mr Surface putty 500, I stippled the putty directly onto the hull with a stiff brush. No thinning, straight out of the bottle. I did abut three coats to get the look of a real Patton
Coat one
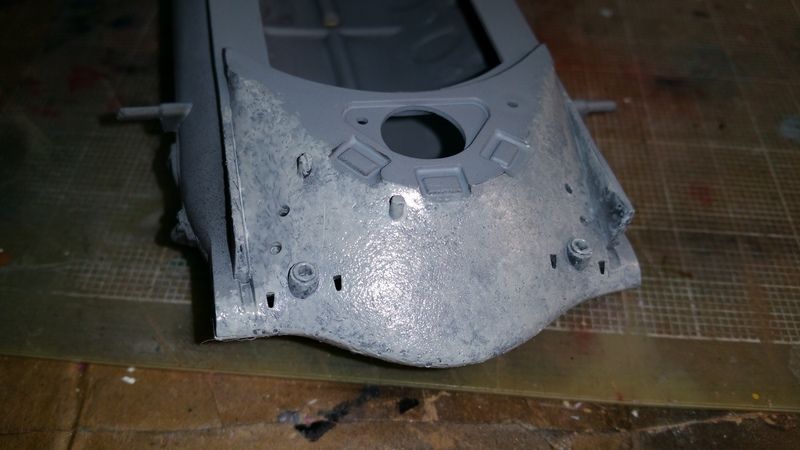
Coat 3 or 4, it now has that "Forged" look to it
Thats it for now, till next time....
B - Strong
I seem to be missing a whole lot of photos from this build so I'm taking some from the video to fill the gaps.
A lot of putty work is needed for the body tub. For this I use common body putty (Bondo) found in almost any automotive store. One huge 4.5 oz (127.5 grams) tube cost less then lets say a 32 gram tube Tamiya putty. Don't get me wrong I'm not saying there is anything wrong with modeling puttys, I own many different kinds but sometimes being frugal pays off
I have to putty the seam down the middle
Across the sides
The rear (shown below) and the leading edge (not shown). The leading edge on this kit is very sharp and needs to be sanded and rounded a bit.
After sanding I primed the tub to get a feel for the seam lines. I noticed that the hull on this kit was smooth. The real Pattons had a forged (wrinkled) look to them along with the turret, how do I achieve that look. Heres what I did. Using Mr Surface putty 500, I stippled the putty directly onto the hull with a stiff brush. No thinning, straight out of the bottle. I did abut three coats to get the look of a real Patton
Coat one
Coat 3 or 4, it now has that "Forged" look to it
Thats it for now, till next time....
B - Strong
.... Dirk
Beware of the DOG's of WAR
My Youtube Channel
https://www.youtube.com/user/ModelingGu ... rid&view=0
Beware of the DOG's of WAR
My Youtube Channel
https://www.youtube.com/user/ModelingGu ... rid&view=0
-
Canuck2016

- Active Participant
- Posts: 535
- Joined: March 6th, 2016, 4:03 pm
Re: Dirk Pitt, The ADD Model Builders Workbench Space
Very nice work on the texture. Looks very real!
-
JamesPerrin

- Looks like his avatar
- Posts: 13682
- Joined: April 5th, 2011, 8:09 pm
- Location: W. Yorkshire
- Contact:
Re: Dirk Pitt, The ADD Model Builders Workbench Space
Nice effect
Classic British Kits SIG Leader Better to fettle than to fill
(2024 A:B 5:2) (2023 13:8:7) (2022 21:11) (2021 15:8) (2020 8:4:4)
(2024 A:B 5:2) (2023 13:8:7) (2022 21:11) (2021 15:8) (2020 8:4:4)
-
Softscience

- Staring out the window
- Posts: 7473
- Joined: April 5th, 2011, 4:34 pm
- Location: Maryland, near Washington DC
Re: Dirk Pitt, The ADD Model Builders Workbench Space
Great idea.
Do you know if the bits emerging perpendicular and away from the hull were also forged as the same piece, or would they be welded on later?
Do you know if the bits emerging perpendicular and away from the hull were also forged as the same piece, or would they be welded on later?
-
iggie
- Modelling Gent and Scholar
- Posts: 23435
- Joined: July 31st, 2013, 11:04 am
- Location: North Somercotes, Lincolnshire
- Contact:
Re: Dirk Pitt, The ADD Model Builders Workbench Space
The casting texture looks good
Best wishes
Jim
If you can walk away from a landing, it's a good landing. If you use the airplane the next day, it's an outstanding landing
"Never put off till tomorrow, what you can do the day after tomorrow"
Jim
If you can walk away from a landing, it's a good landing. If you use the airplane the next day, it's an outstanding landing
"Never put off till tomorrow, what you can do the day after tomorrow"