
Very good work, I like it a lot!
I use RUST ALL from many years ago, I think it was one of the very first "systems" and works very good"!
Dirk Pitt, The ADD Model Builders Workbench Space
-
Dirkpitt289

- NUMA's Auto Mechanic
- Posts: 8724
- Joined: May 2nd, 2011, 1:55 am
- Location: New jersey USA
- Contact:
Re: Dirk Pitt, The ADD Model Builders Workbench Space
I gotta say I'm happy with the results
.... Dirk
Beware of the DOG's of WAR
My Youtube Channel
https://www.youtube.com/user/ModelingGu ... rid&view=0
Beware of the DOG's of WAR
My Youtube Channel
https://www.youtube.com/user/ModelingGu ... rid&view=0
-
shangos70
- Modelling Gent and Scholar
- Posts: 4421
- Joined: May 1st, 2011, 11:14 am
- Location: Doncaster, Socialist Republic of South Yorkshire.
Re: Dirk Pitt, The ADD Model Builders Workbench Space
You wouldn't think it was a plastic kit with that finish. Great stuff.
-
Dirkpitt289
- NUMA's Auto Mechanic
- Posts: 8724
- Joined: May 2nd, 2011, 1:55 am
- Location: New jersey USA
- Contact:
Re: Dirk Pitt, The ADD Model Builders Workbench Space
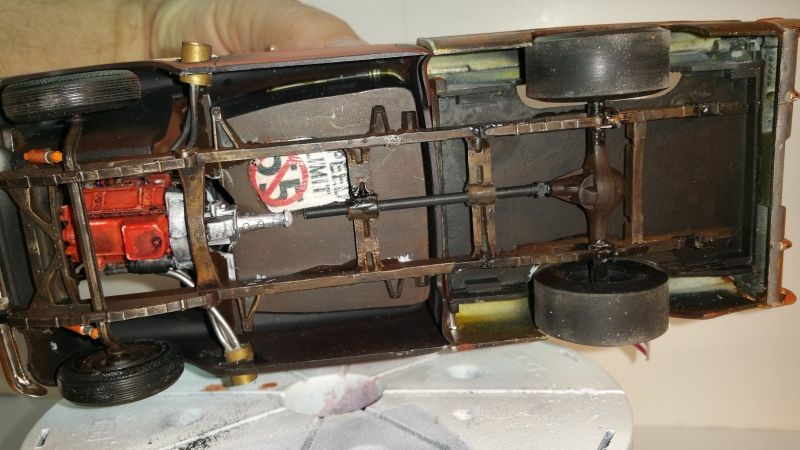
Work on the frame is just about finished. So is the primer, primer and rust on the body

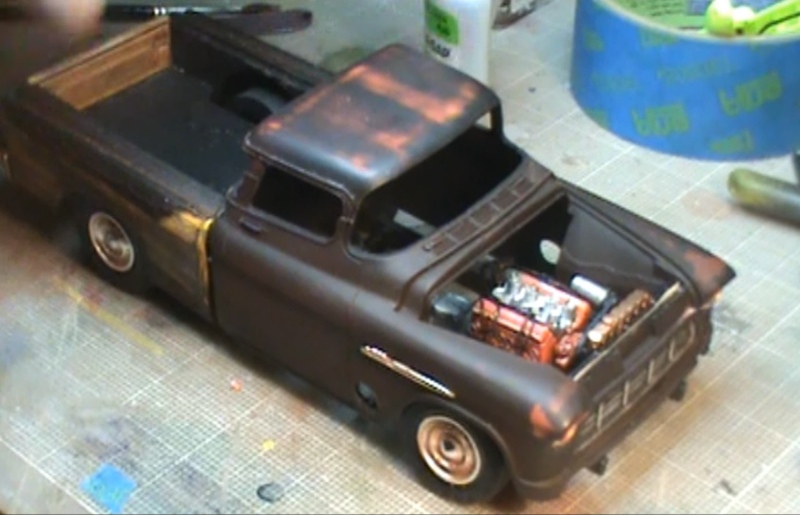
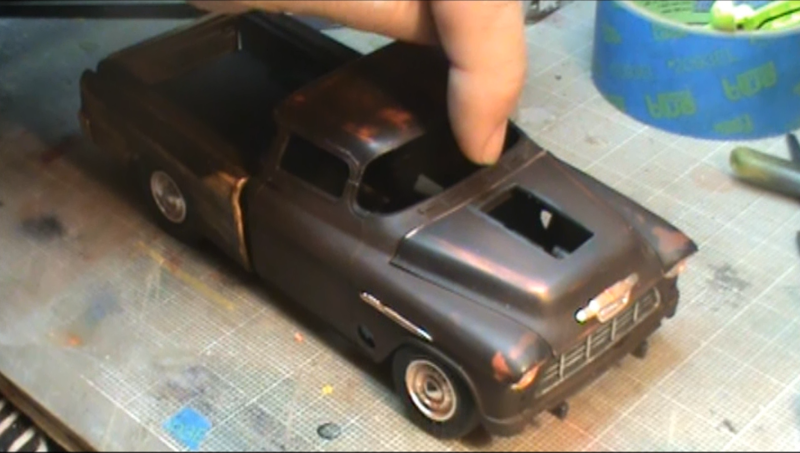
Now the problem that has developed is the curved rear part of the hood opening does not allow the back velocity stacks through the hood. I have to modify the opening some more. I had to square off the opening on the rear of the hood
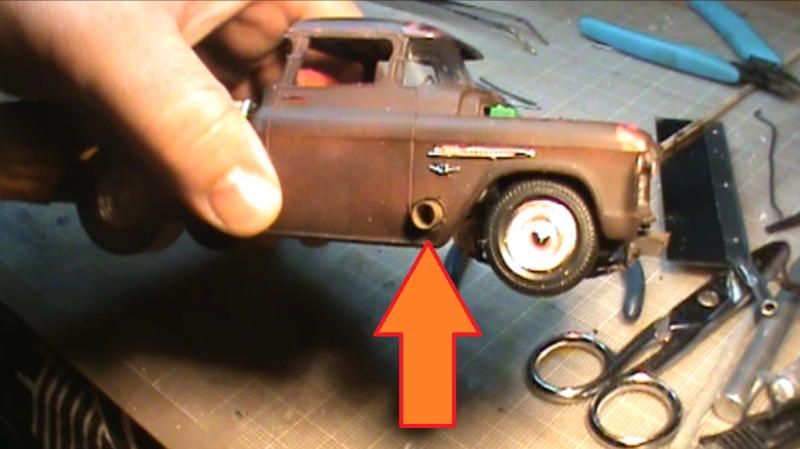
Something I should have done earlier was to cut an access hole in the fender for the trucks exhaust. ven though I did it after the truck was painted it was easy to do with little repair work
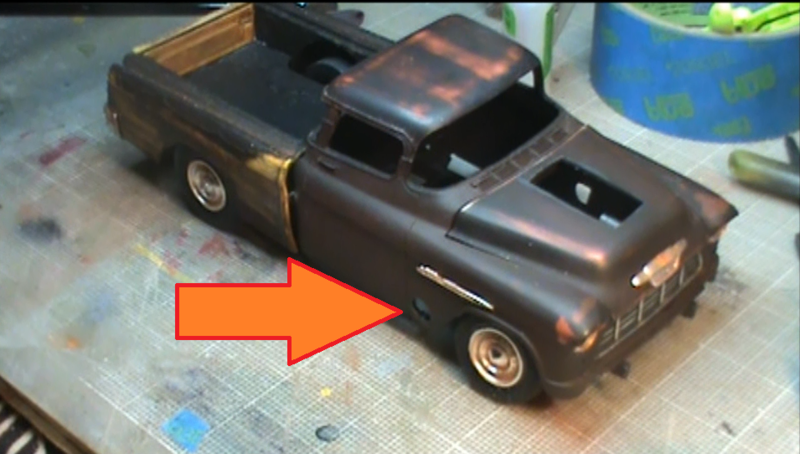
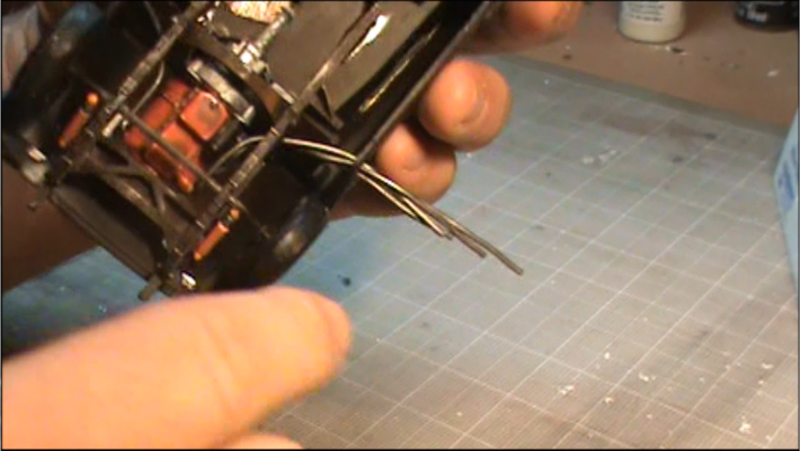
I had to make a custom exhaust from solder to get the affect I was looking for. Holes were pre-drilled in the block. I then had to fish them through the holes in the fender and into the block. It was a pain in the ass but the result is cool in my opinion. Also once the end of the solder is attached to the block the solder is soft enough for you to conform to the shape you want
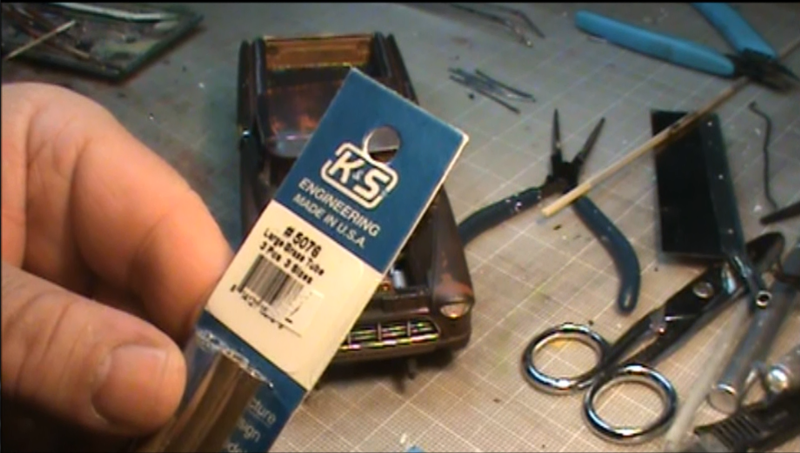
The we need an exhaust tip. For this I used brass tube
The end results
Now the problem that has developed is the curved rear part of the hood opening does not allow the back velocity stacks through the hood. I have to modify the opening some more. I had to square off the opening on the rear of the hood
Something I should have done earlier was to cut an access hole in the fender for the trucks exhaust. ven though I did it after the truck was painted it was easy to do with little repair work
I had to make a custom exhaust from solder to get the affect I was looking for. Holes were pre-drilled in the block. I then had to fish them through the holes in the fender and into the block. It was a pain in the ass but the result is cool in my opinion. Also once the end of the solder is attached to the block the solder is soft enough for you to conform to the shape you want
The we need an exhaust tip. For this I used brass tube
The end results
.... Dirk
Beware of the DOG's of WAR
My Youtube Channel
https://www.youtube.com/user/ModelingGu ... rid&view=0
Beware of the DOG's of WAR
My Youtube Channel
https://www.youtube.com/user/ModelingGu ... rid&view=0
-
Kitaholic

- Modelling Gent and Scholar
- Posts: 3765
- Joined: November 10th, 2014, 7:53 pm
- Location: 5 mins from SMW
Re: Dirk Pitt, The ADD Model Builders Workbench Space
That's a seriously big bore exhaust
Regards
Gord
Desperately trying to find his MOJO, don't know where I left it
Gord
Desperately trying to find his MOJO, don't know where I left it
-
iggie

- Modelling Gent and Scholar
- Posts: 23415
- Joined: July 31st, 2013, 11:04 am
- Location: North Somercotes, Lincolnshire
- Contact:
Re: Dirk Pitt, The ADD Model Builders Workbench Space
Great stuff Dirk..very creative
Best wishes
Jim
If you can walk away from a landing, it's a good landing. If you use the airplane the next day, it's an outstanding landing
"Never put off till tomorrow, what you can do the day after tomorrow"
Jim
If you can walk away from a landing, it's a good landing. If you use the airplane the next day, it's an outstanding landing
"Never put off till tomorrow, what you can do the day after tomorrow"
-
Dirkpitt289
- NUMA's Auto Mechanic
- Posts: 8724
- Joined: May 2nd, 2011, 1:55 am
- Location: New jersey USA
- Contact:
Re: Dirk Pitt, The ADD Model Builders Workbench Space
Thanks guys, This is a first for me trying all these new tricks and its been a blast.
.... Dirk
Beware of the DOG's of WAR
My Youtube Channel
https://www.youtube.com/user/ModelingGu ... rid&view=0
Beware of the DOG's of WAR
My Youtube Channel
https://www.youtube.com/user/ModelingGu ... rid&view=0
-
Clashcityrocker

- Modelling Gent and Scholar
- Posts: 10795
- Joined: May 1st, 2011, 12:31 am
- Location: Adelaide. South Australia
Re: Dirk Pitt, The ADD Model Builders Workbench Space
You'll need ear muffs when that motor starts! Great work.
Nigel
Nigel
-
ShaunW
- NOT the sheep
- Posts: 26180
- Joined: November 26th, 2011, 6:11 pm
- Location: Pontefract West Yorkshire
Re: Dirk Pitt, The ADD Model Builders Workbench Space
That is excellent Dirk and a great idea using the solder for the exhaust headers. A big bore pipe like that would give a seriously meaty sound to a big U.S. V8!
Doing - Tamiya 1/35th Universal Carrier.
Work is the curse of the modelling classes!
IPMS#12300
Work is the curse of the modelling classes!
IPMS#12300
-
Dirkpitt289
- NUMA's Auto Mechanic
- Posts: 8724
- Joined: May 2nd, 2011, 1:55 am
- Location: New jersey USA
- Contact:
Re: Dirk Pitt, The ADD Model Builders Workbench Space
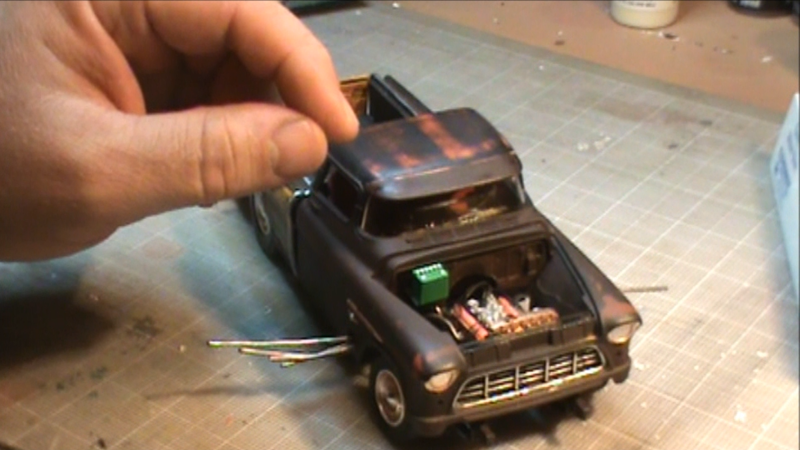
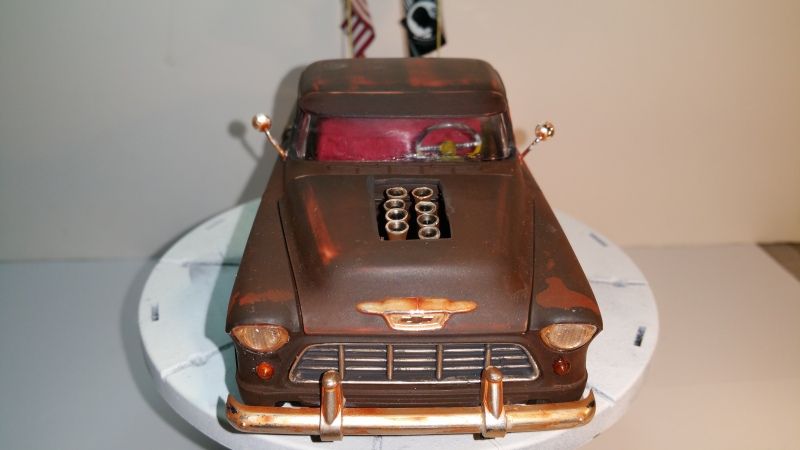
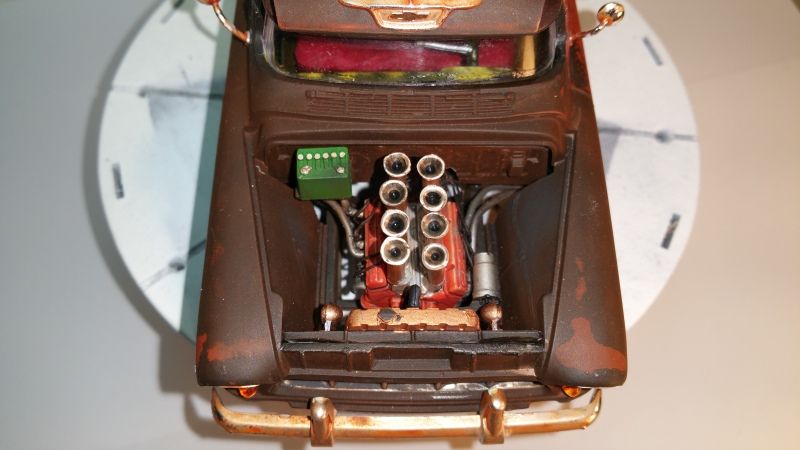
In order to the the velocity stacks to sit right on the intake I had to make a few modifications. The reason for this was because the mounting points on the intake is too shallow for a good bond. What I did was to drill out the bottom of each stack, insert a piece of safety wire and glue. I then drilled guide holes in the intake. This held the stacks in place nicely
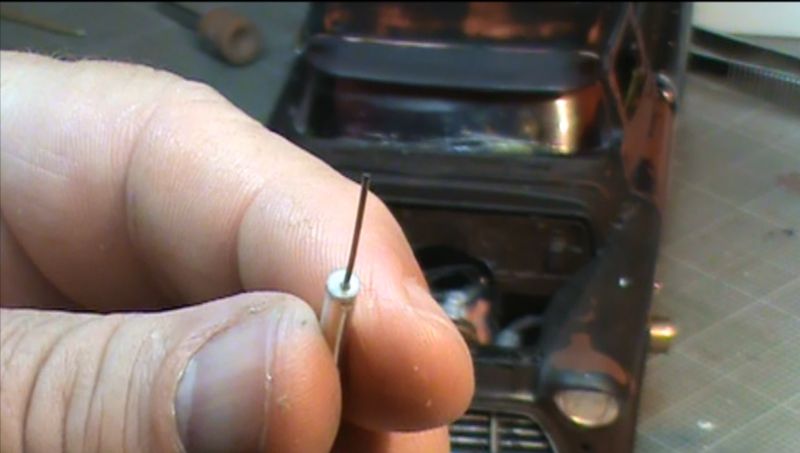
Now the stacks sit nice and tall like good little soldiers
Stacks with the hood in place

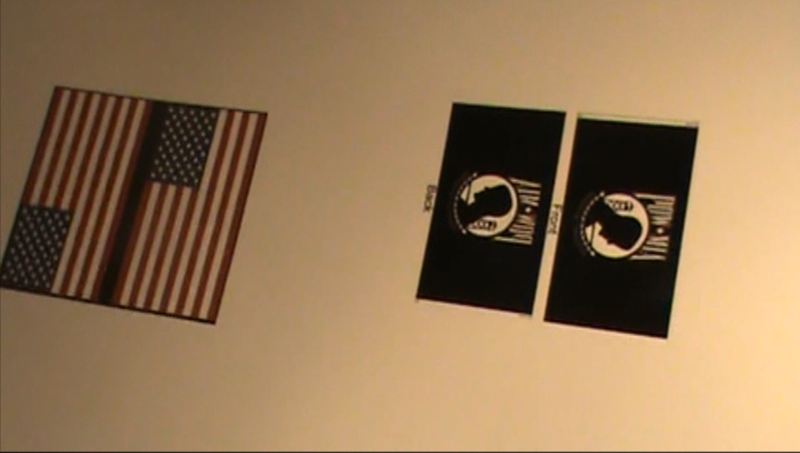
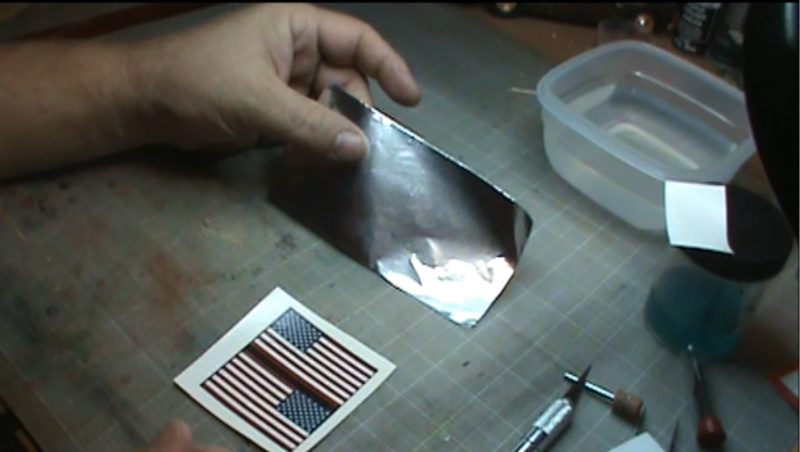
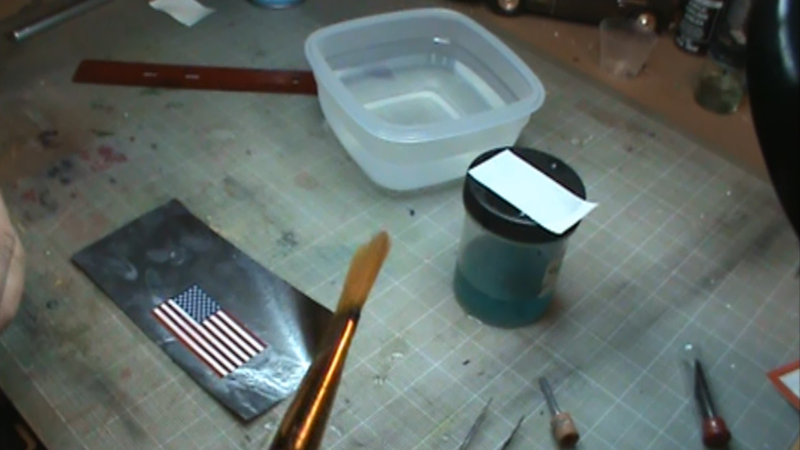
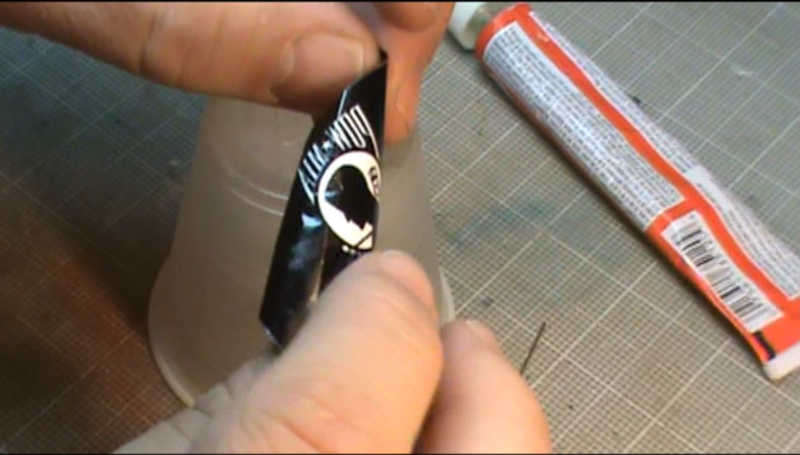
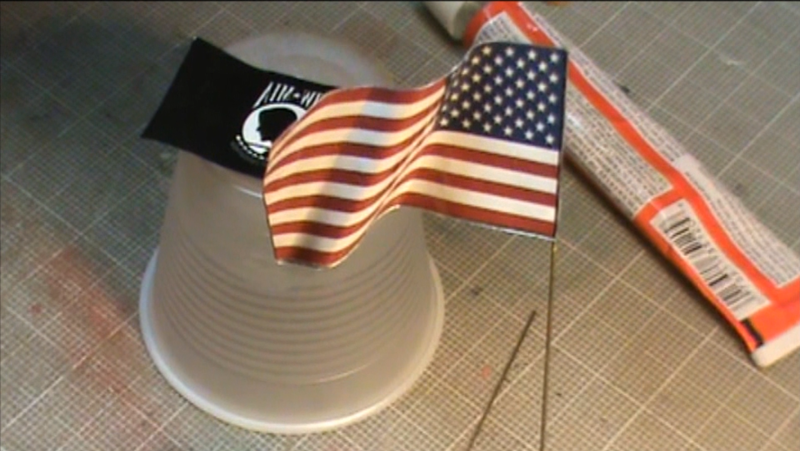
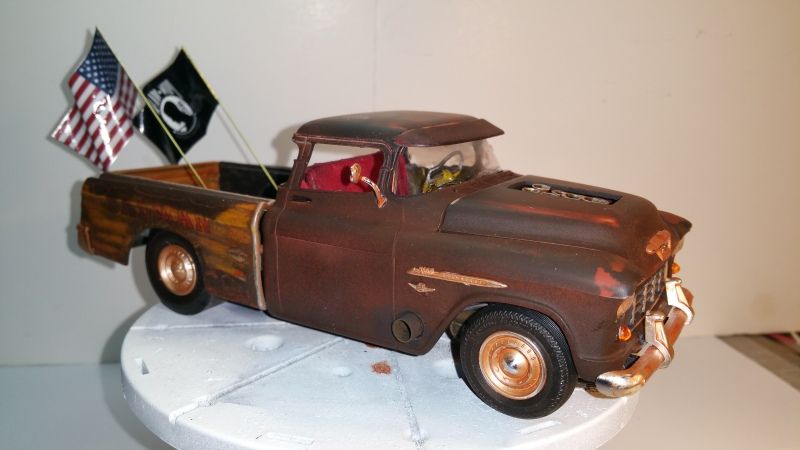
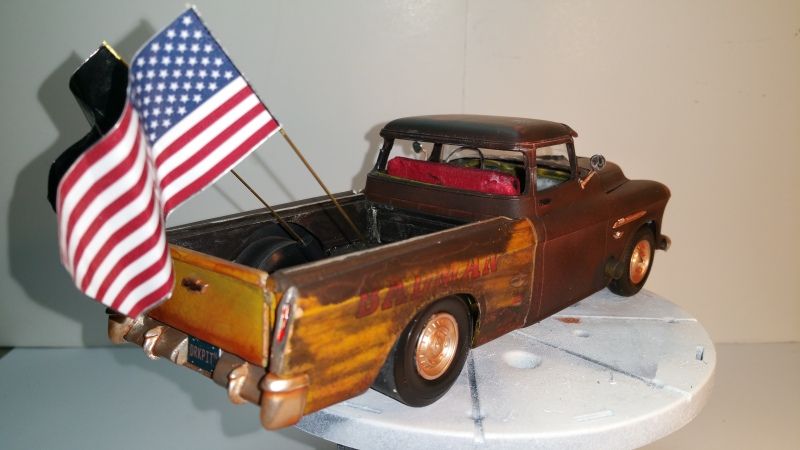
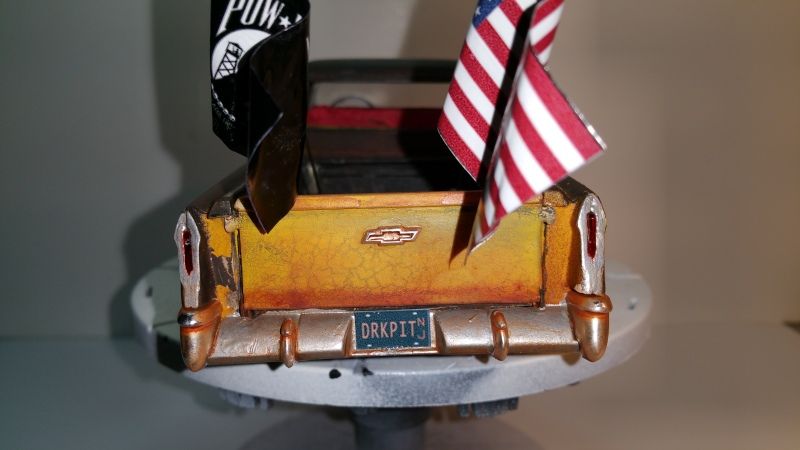
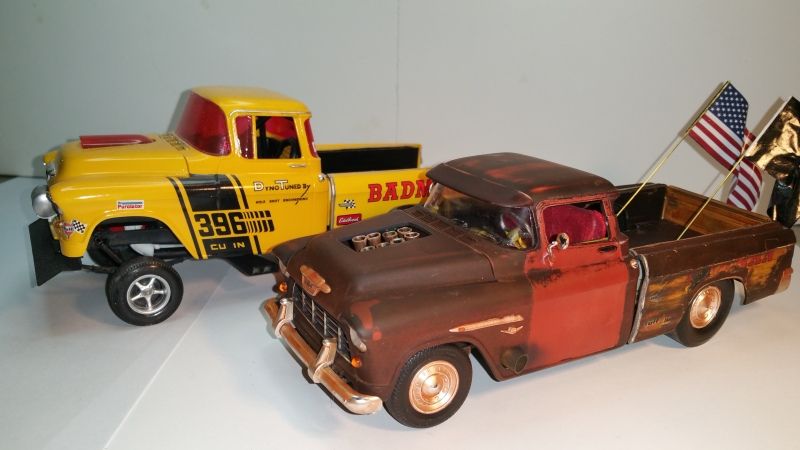
The last thing for this build was to make some flags for the back of the truck. For this I made some flag decals, and stuck them to aluminum foil. The foil allows me to wrinkle and fold the flags and they hold their shape.
Now the stacks sit nice and tall like good little soldiers
Stacks with the hood in place
The last thing for this build was to make some flags for the back of the truck. For this I made some flag decals, and stuck them to aluminum foil. The foil allows me to wrinkle and fold the flags and they hold their shape.
.... Dirk
Beware of the DOG's of WAR
My Youtube Channel
https://www.youtube.com/user/ModelingGu ... rid&view=0
Beware of the DOG's of WAR
My Youtube Channel
https://www.youtube.com/user/ModelingGu ... rid&view=0
-
Dirkpitt289
- NUMA's Auto Mechanic
- Posts: 8724
- Joined: May 2nd, 2011, 1:55 am
- Location: New jersey USA
- Contact:
Re: Dirk Pitt, The ADD Model Builders Workbench Space
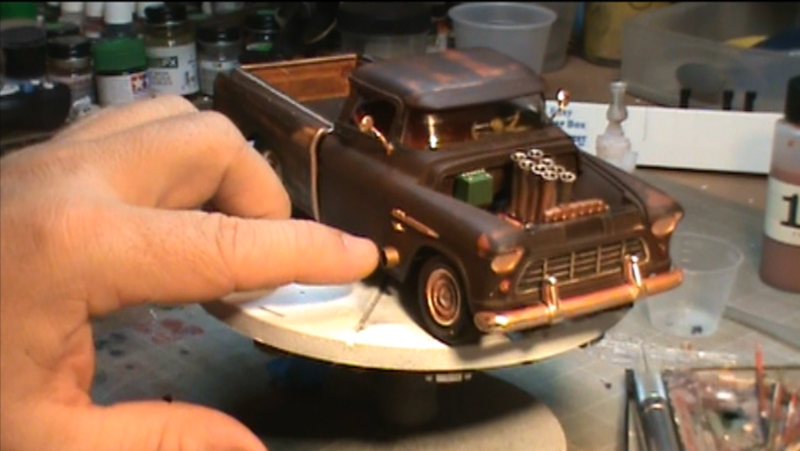
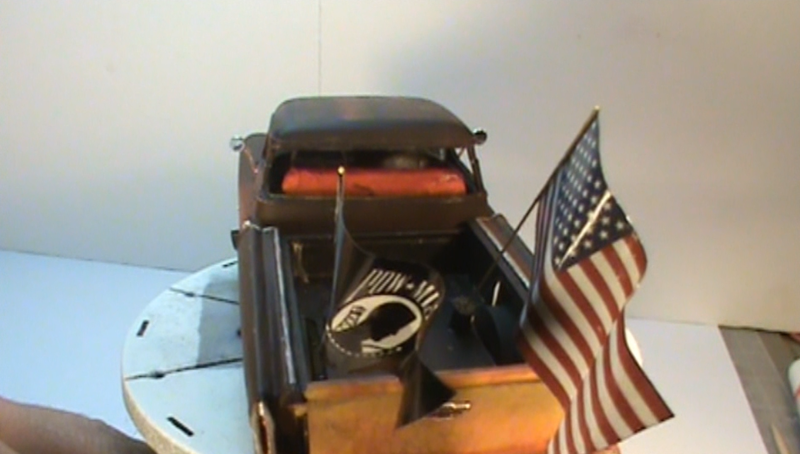
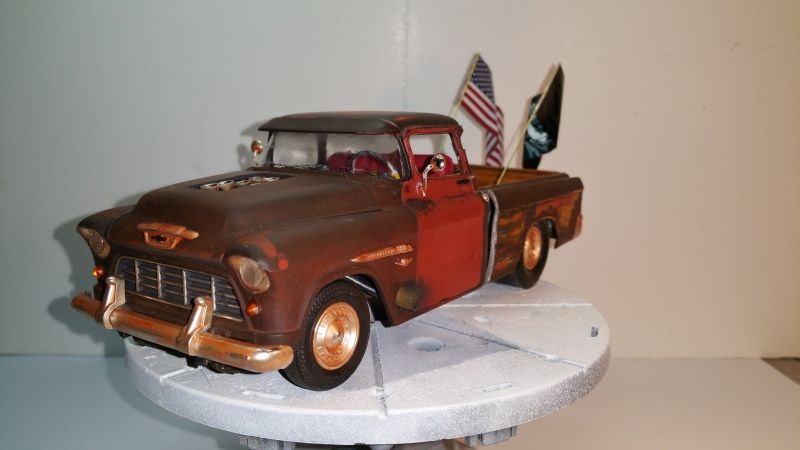
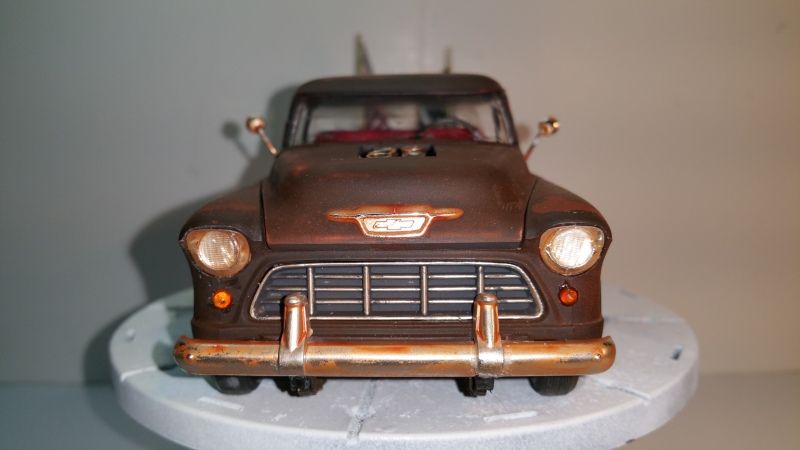
At long last my 55 Cameo pick up rat rod is complete. The weathering was completed using the rustall product and some pastels.
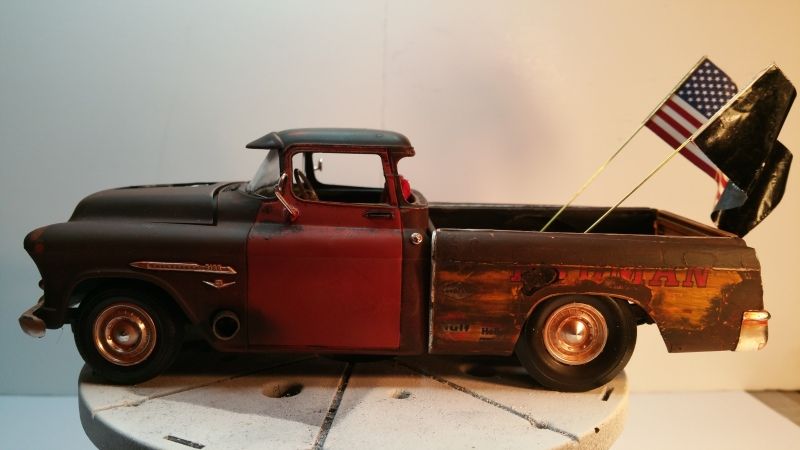
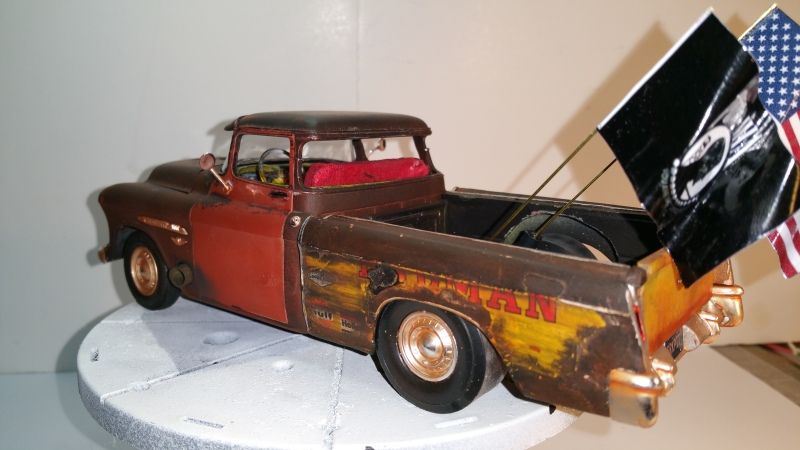
Twins, separated at birth...
Thanks for following along and commenting on this build
Till next time....
B - Strong
Twins, separated at birth...
Thanks for following along and commenting on this build
Till next time....
B - Strong
.... Dirk
Beware of the DOG's of WAR
My Youtube Channel
https://www.youtube.com/user/ModelingGu ... rid&view=0
Beware of the DOG's of WAR
My Youtube Channel
https://www.youtube.com/user/ModelingGu ... rid&view=0
-
Dirkpitt289
- NUMA's Auto Mechanic
- Posts: 8724
- Joined: May 2nd, 2011, 1:55 am
- Location: New jersey USA
- Contact:
Re: Dirk Pitt, The ADD Model Builders Workbench Space
My next project is going to be this classic old kit. Yes this is the repopped version but its not changed over all its many years in production. This will be build as a German Panzer as seen in the 60's TV series Rat Patrol and in the movie Patton.
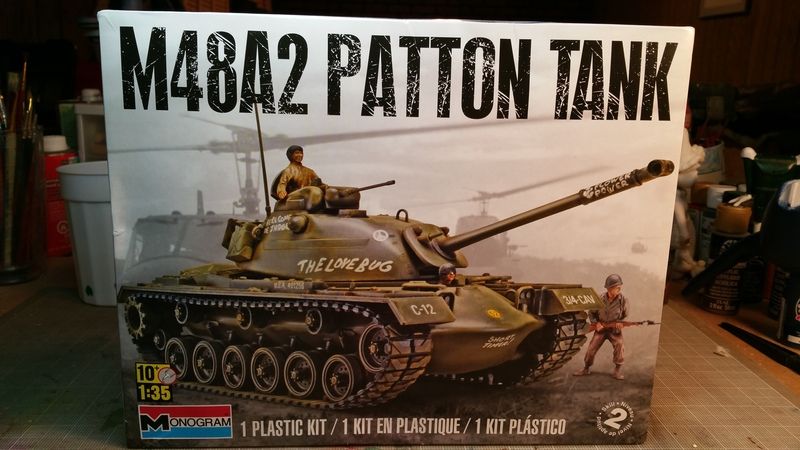
This build is for a "Out of your Comfort Zone" group build
The parts
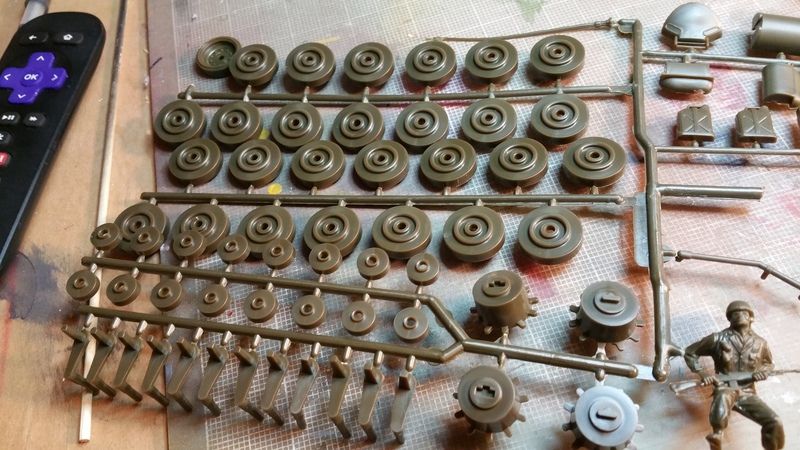
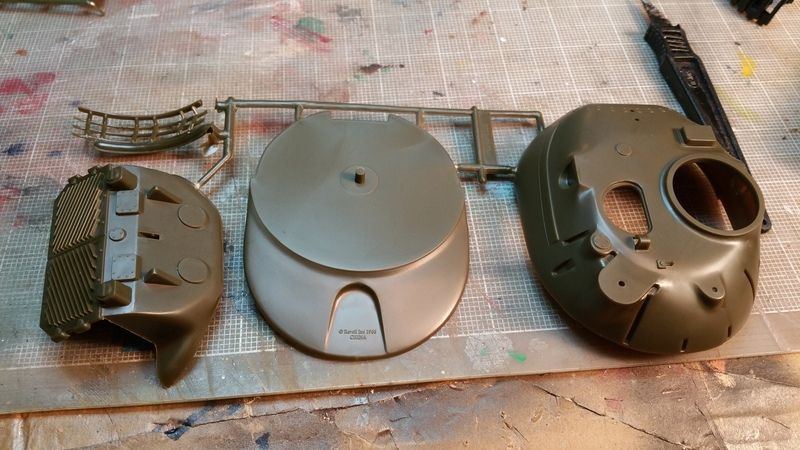
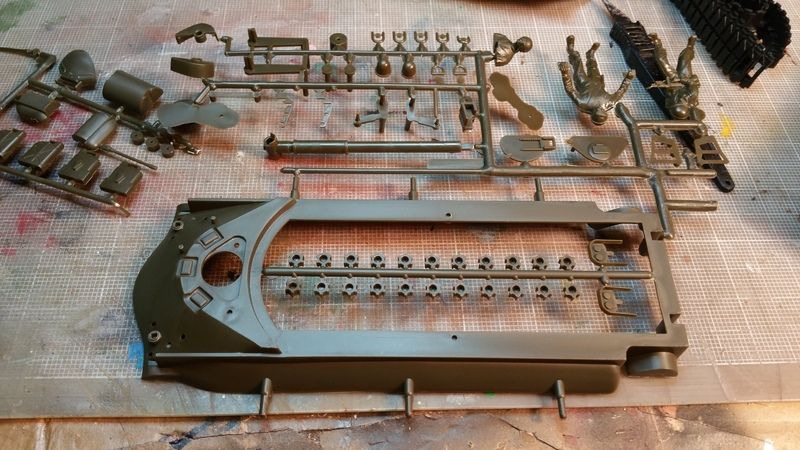
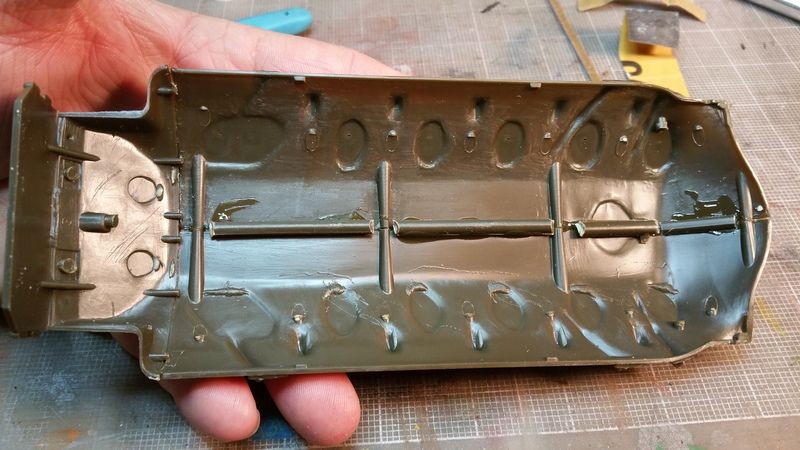
Three parts make up the base of the tank. I choose to use the old testors tube glue for this. The reason is I will apply a liberal amount of the glue and when the parts get pressed together the glue will oooze out and help fill the seams.


I added bits of sprue to strengthen the spine of the kit
Thanks for taking the time to look at my project.
Till next time....
B - Strong
This build is for a "Out of your Comfort Zone" group build
The parts
Three parts make up the base of the tank. I choose to use the old testors tube glue for this. The reason is I will apply a liberal amount of the glue and when the parts get pressed together the glue will oooze out and help fill the seams.
I added bits of sprue to strengthen the spine of the kit
Thanks for taking the time to look at my project.
Till next time....
B - Strong
.... Dirk
Beware of the DOG's of WAR
My Youtube Channel
https://www.youtube.com/user/ModelingGu ... rid&view=0
Beware of the DOG's of WAR
My Youtube Channel
https://www.youtube.com/user/ModelingGu ... rid&view=0
-
Clashcityrocker
- Modelling Gent and Scholar
- Posts: 10795
- Joined: May 1st, 2011, 12:31 am
- Location: Adelaide. South Australia
Re: Dirk Pitt, The ADD Model Builders Workbench Space
Realistic looking rust on the rat rod Dirk, and nice start on the Patton.
Nigel
Nigel
-
Softscience

- Staring out the window
- Posts: 7444
- Joined: April 5th, 2011, 4:34 pm
- Location: Maryland, near Washington DC
Re: Dirk Pitt, The ADD Model Builders Workbench Space
I really like that truck. That is great modelling. The foil flags are a brilliant method.
-
skypirate

- Modelling Gent and Scholar
- Posts: 7278
- Joined: May 1st, 2011, 6:13 am
- Location: Port Macquarie, Australia
Re: Dirk Pitt, The ADD Model Builders Workbench Space
Wow! New skills + enjoyment = a great result for the rusty 55 Cameo pick-up!
Beautifully done!
David
Beautifully done!
David