Beanys Bench
-
SJPONeill

- Modelling Gent and Scholar
- Posts: 3524
- Joined: May 1st, 2011, 12:01 am
- Location: Near the Spiral, NZ.
- Contact:
Re: Beanys Bench
Great work, Al! I have the C/D version of the Revell 110 and I know firsthand what those engines look like out of the box. You have really made a silk purse out of them...
Please critique my posts honestly i.e. say what you think so I can learn and improve...
The World According To Me
The World According To Me

Re: Beanys Bench
Lovely work on the 110, and at 1/32 that must be a big beast! 
The extended oleo problem is very common, and my guess is because the measurements have been taken off aircraft in museums which have the weight off the wheels, or have the oleos locked. (IMHO! )
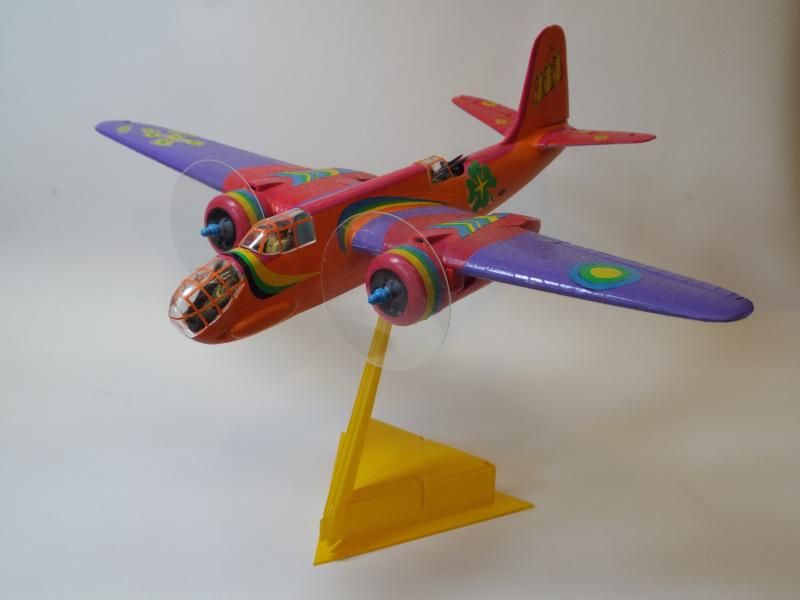
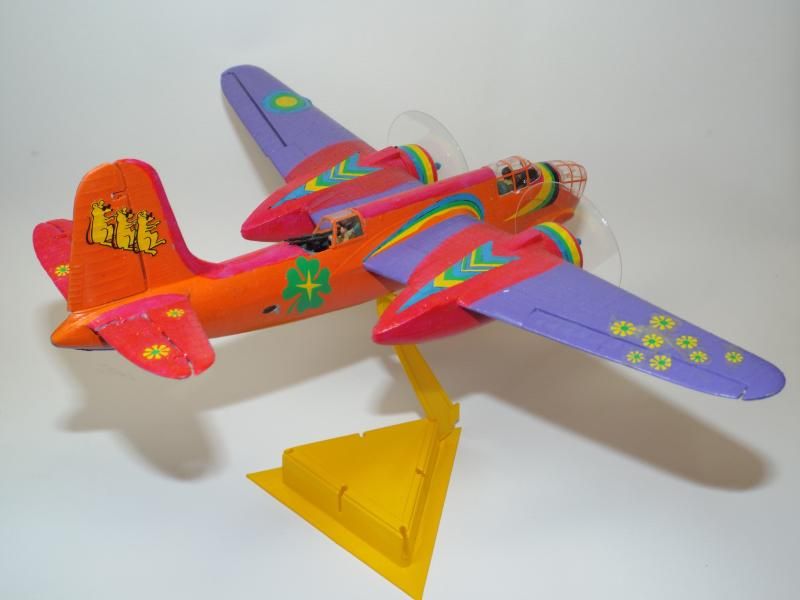
The Easter Egg Boston is fantastic! The pilot must be Hotpink Desiato, Hotblack's sister!
Cheers,
Asoka
The extended oleo problem is very common, and my guess is because the measurements have been taken off aircraft in museums which have the weight off the wheels, or have the oleos locked. (IMHO!
The Easter Egg Boston is fantastic! The pilot must be Hotpink Desiato, Hotblack's sister!
Cheers,
Asoka
Skill, Patience and Humbrol, with a hairy stick!
-
beany

- Fat git, glasses, goatie - Avoid!
- Posts: 4328
- Joined: April 6th, 2011, 11:05 am
- Location: Chellaston, Derby
Re: Beanys Bench
Thanks for that Asoka. I've just realised I've haven't posted a picture of the finished article here, so here it is:Asoka wrote: The Easter Egg Boston is fantastic! The pilot must be Hotpink Desiato, Hotblack's sister!
Cheers
Al.
2024 Acquired: 9 Built: 1
-
beany
- Fat git, glasses, goatie - Avoid!
- Posts: 4328
- Joined: April 6th, 2011, 11:05 am
- Location: Chellaston, Derby
Re: Beanys Bench
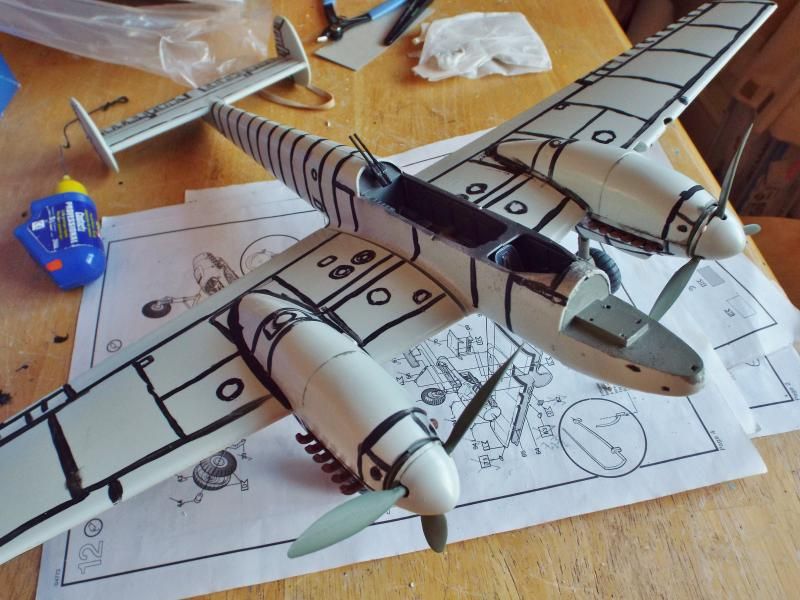
Here is today's progress. Engines fitted into nacelles = a nightmare; I managed to glue the wrong pairs of nacelle halves together in spite of the part numbers being moulded into the insides. 
Fortunately I was using Revell Contacta tube glue so managed to pries the nacelles apart - it's as well I tried a dry fit to the wings or I'd never have discovered my mistake until the glue had set properly!
As it was, the fit was not brilliant and there was a large gap that needs filling on both nacelle/wing joints.
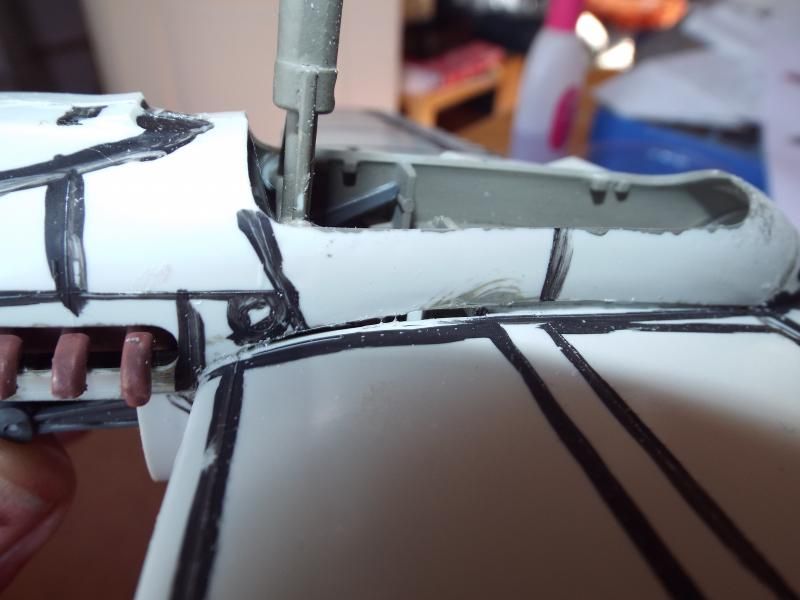
So out with the Squadron white putty...
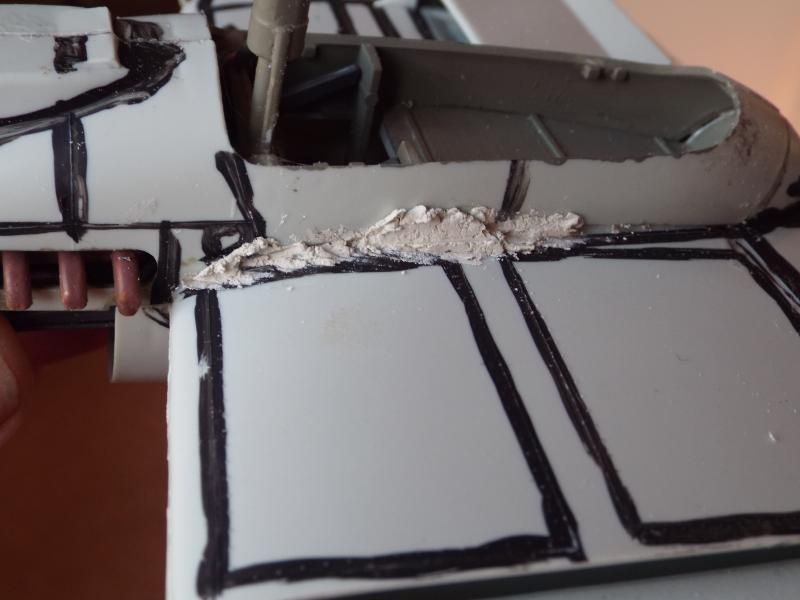
Apply magic ingredient X...
...with a cotton bud.
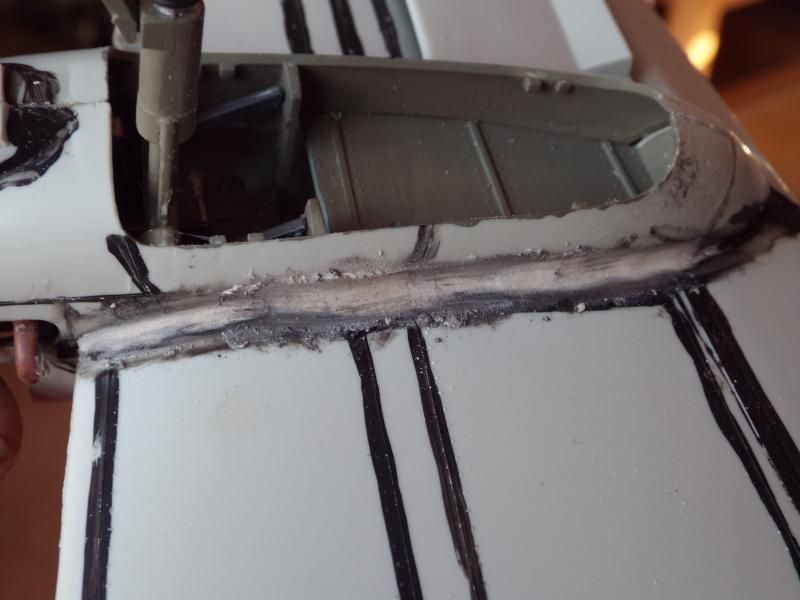
Now leave it to the morning to sand off the excess and re-apply the pre-shading etc.
Here are a couple of dry fit photos to give an idea of the final size of this plane:

Cheers
Al.
Fortunately I was using Revell Contacta tube glue so managed to pries the nacelles apart - it's as well I tried a dry fit to the wings or I'd never have discovered my mistake until the glue had set properly!
As it was, the fit was not brilliant and there was a large gap that needs filling on both nacelle/wing joints.
So out with the Squadron white putty...
Apply magic ingredient X...
...with a cotton bud.
Now leave it to the morning to sand off the excess and re-apply the pre-shading etc.
Here are a couple of dry fit photos to give an idea of the final size of this plane:
Cheers
Al.
2024 Acquired: 9 Built: 1
-
Clashcityrocker

- Modelling Gent and Scholar
- Posts: 10798
- Joined: May 1st, 2011, 12:31 am
- Location: Adelaide. South Australia
Re: Beanys Bench
Looking very good.
Nigel
Nigel
-
ShaunW
- NOT the sheep
- Posts: 26180
- Joined: November 26th, 2011, 6:11 pm
- Location: Pontefract West Yorkshire
Re: Beanys Bench
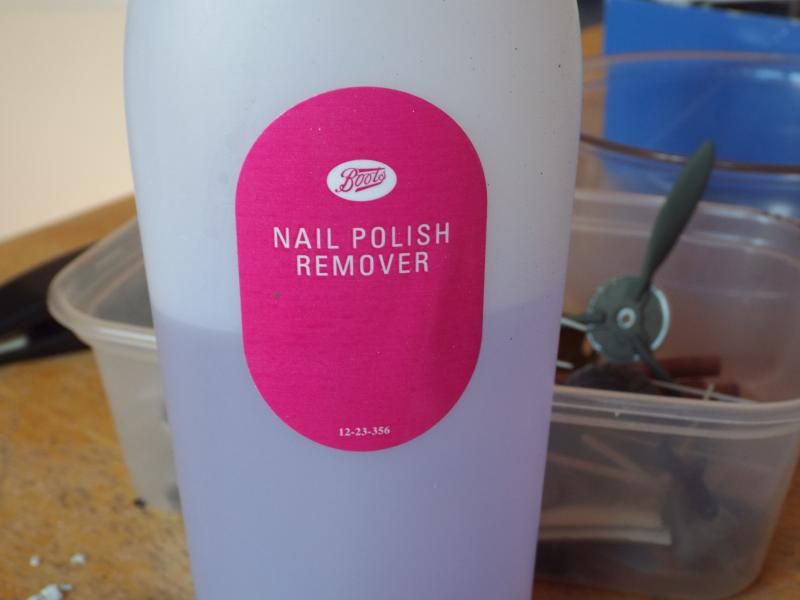
Great work Al and I'll certainly make use of the tip regarding the nail polish remover (acetone?) for smoothing off Squadron white putty. I use the white putty quite a lot (which says something either about my "skills" or the type of kits that I usually build  ) and whilst I'm generally satisfied with it, especially for filling larger gaps, the putty can dry rather roughly and take a fair bit of sanding down. This will certainly be a big and impressive beasty when it's finished.
Doing - Tamiya 1/35th Universal Carrier.
Work is the curse of the modelling classes!
IPMS#12300
Work is the curse of the modelling classes!
IPMS#12300
-
beany
- Fat git, glasses, goatie - Avoid!
- Posts: 4328
- Joined: April 6th, 2011, 11:05 am
- Location: Chellaston, Derby
Re: Beanys Bench
A long time since I posted here, but I think other folks may be interested in this project. Once again the inspiration is from the excellent Clavework Graphics site, in this instance it is the Boulton Paul Defiant in Rebel Alliance markings with RD-D2 as the turret gunner - well, as the turret itself really!
http://www.clavework-graphics.co.uk/air ... y_281.html;
I was originally going to use the older Airfix BPD with the resin nose correction I bought at SMW two years ago, but nowadays of course there is the much improved new mould, so I will use this one as the Rebel Alliance ship, and use the newer decals from the re-tool on the older black plastic kit.
The Alliance decals I printed myself, as well as some striping for the fuselage side - which is darker red as per the graphic, but does show up as such in the photo. I still have to print some stencils for the aircraft numbers yet.
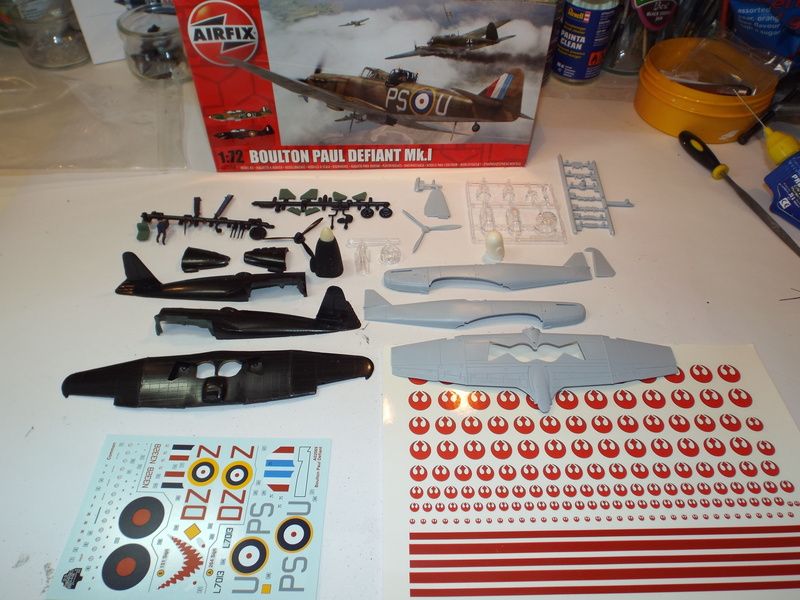
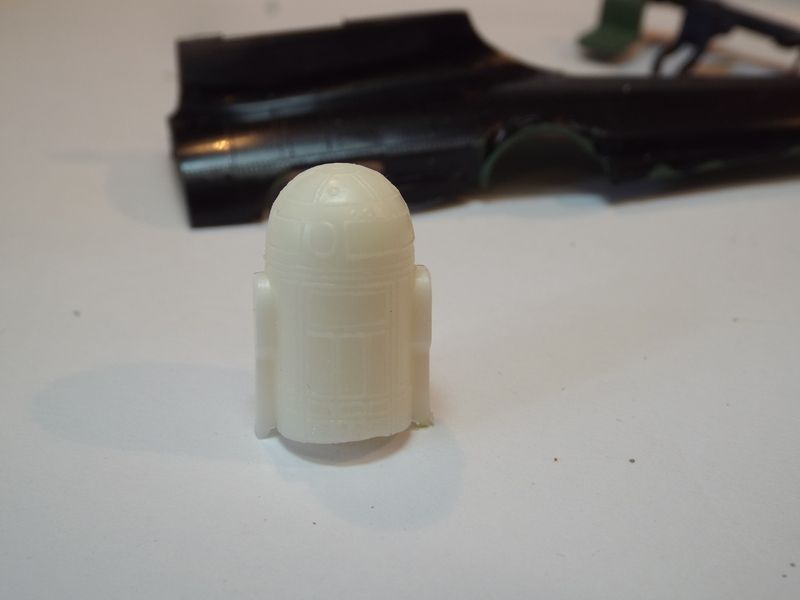
R2 was very kindly made and provided by Rob in Holland, to whom I will be sending a sheet of the Alliance decals in return.
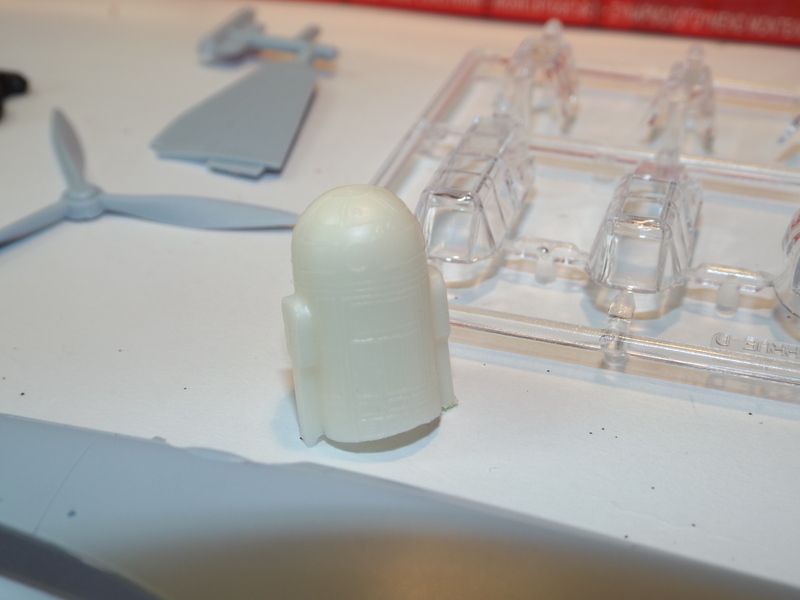
Obviously some very careful painting will be required here to do Rob's superb moulding justice.
As usual for me the aircraft will be wheels up with a prop blur acetate and mounted on a stand so I have found a spare jet pilot which I will have to modify and paint to look like young Skywalker or one of his associates.
I will also have to source a replacement exhaust like the one in the graphic and the cowling bulges for the engine - I know I have several kits in the stash - I'm thinking a Spitfire XIX maybe - which should yield the parts I require which with a little filler should do the job.
Cheers
Al.
http://www.clavework-graphics.co.uk/air ... y_281.html;
I was originally going to use the older Airfix BPD with the resin nose correction I bought at SMW two years ago, but nowadays of course there is the much improved new mould, so I will use this one as the Rebel Alliance ship, and use the newer decals from the re-tool on the older black plastic kit.
The Alliance decals I printed myself, as well as some striping for the fuselage side - which is darker red as per the graphic, but does show up as such in the photo. I still have to print some stencils for the aircraft numbers yet.

R2 was very kindly made and provided by Rob in Holland, to whom I will be sending a sheet of the Alliance decals in return.

Obviously some very careful painting will be required here to do Rob's superb moulding justice.

As usual for me the aircraft will be wheels up with a prop blur acetate and mounted on a stand so I have found a spare jet pilot which I will have to modify and paint to look like young Skywalker or one of his associates.
I will also have to source a replacement exhaust like the one in the graphic and the cowling bulges for the engine - I know I have several kits in the stash - I'm thinking a Spitfire XIX maybe - which should yield the parts I require which with a little filler should do the job.
Cheers
Al.
2024 Acquired: 9 Built: 1
-
giulio_gobbi

- Modelling Gent and Scholar
- Posts: 1971
- Joined: May 4th, 2011, 8:37 pm
- Location: Naples, Italy
- Contact:
Re: Beanys Bench
The Nail Remover (Acetone in Italy  ) works only with the white putty?
This tip can solve a lot of "problems".
This tip can solve a lot of "problems".
Sometimes the talent consists exactly in that: try five dozen times when others stop at three dozen...! (F.Labelle)
I think that modeling is a subtle mix of zen philosophy and absolute crazyness - but in my case I would not dare to specify the respective percentage of each......
I think that modeling is a subtle mix of zen philosophy and absolute crazyness - but in my case I would not dare to specify the respective percentage of each......
-
Dazzled

- Modelling Gent and Scholar
- Posts: 9592
- Joined: October 1st, 2011, 11:08 pm
- Location: Mid Glamorgan, South Wales
- Contact:
Re: Beanys Bench
This is going to be interesting indeed. 
COLD WAR S.I.G. LEADER
Wherever there's danger, wherever there's trouble, wherever there's important work to be done....I'll be somewhere else building a model!
Wherever there's danger, wherever there's trouble, wherever there's important work to be done....I'll be somewhere else building a model!
-
skypirate

- Modelling Gent and Scholar
- Posts: 7292
- Joined: May 1st, 2011, 6:13 am
- Location: Port Macquarie, Australia
Re: Beanys Bench
Let's see some more of R2-D2 in that Defiant please!
cheers,
David
cheers,
David

Re: Beanys Bench
Al, you are so bad you are good.
Besting 60 years of mediocre building of average kits in the stand off scale
-
Old_Tonto

- Modelling Gent and Scholar
- Posts: 8057
- Joined: May 1st, 2011, 7:41 pm
- Location: Middlesbrough, Peoples Republic of Teesside.
Re: Beanys Bench
This is a very cool idea. Great stuff.
May the farce be with you.
May the farce be with you.
2023 - A:0 B:0 C:0
Current Projects:
East German Air Force (1956-90)
South African Air Force (1958-93)
Current Projects:
East German Air Force (1956-90)
South African Air Force (1958-93)
-
ShaunW
- NOT the sheep
- Posts: 26180
- Joined: November 26th, 2011, 6:11 pm
- Location: Pontefract West Yorkshire
Re: Beanys Bench
Excellent, 100 and 1 ways to do something different with a Boulton Paul Defiant
Doing - Tamiya 1/35th Universal Carrier.
Work is the curse of the modelling classes!
IPMS#12300
Work is the curse of the modelling classes!
IPMS#12300
-
Dazzled
- Modelling Gent and Scholar
- Posts: 9592
- Joined: October 1st, 2011, 11:08 pm
- Location: Mid Glamorgan, South Wales
- Contact:
Re: Beanys Bench
It's a bit more original than a target tug.
COLD WAR S.I.G. LEADER
Wherever there's danger, wherever there's trouble, wherever there's important work to be done....I'll be somewhere else building a model!
Wherever there's danger, wherever there's trouble, wherever there's important work to be done....I'll be somewhere else building a model!
-
beany
- Fat git, glasses, goatie - Avoid!
- Posts: 4328
- Joined: April 6th, 2011, 11:05 am
- Location: Chellaston, Derby
Re: Beanys Bench
I'm back - severe loss of Mojo for a while there I'm afraid. 1/32 Bf110 will be re-started very soon and the Rebel Alliance Defiant was put on a back burner as the R2D2 I have is a bit too big for it so I wrote to Airfix and explained my problem and they very kindly brought out a 1/48 version as well, which was nice so I will post an update on that soon as well.
Current flurry of activity with my renewed mojo is on Revell 1/32 builds so I'll at least be able to cover the Revell Modelling SIG tables at the Farnborough show in September.
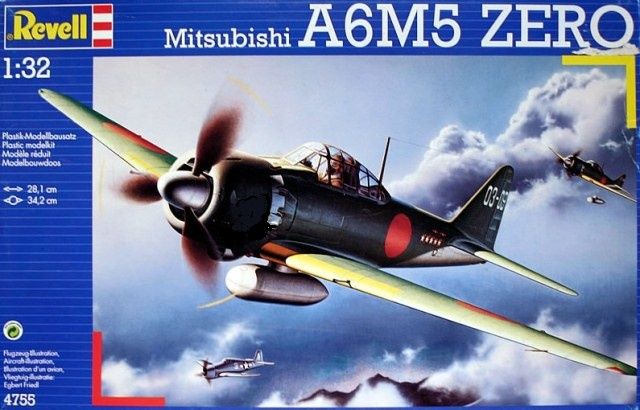
I have started with the venerable old Zero. Scalemates give a date for the boxing I have of 1993 and that is probably how long I've had it. I did not look after my kits very well I'm afraid so some parts are missing and will need scratch building or just plain filling in - e.g. smaller
u/c doors.
Revell Kit #4755 - this number is more recently been used for a 1/48 F-15 so I had to use the later boxing kit reference of 4717 when I printed off replacement instructions from the Revell.de website - a most useful place for instruction sheet as long as you know the kit number!!
My usual imaginative work on the I/P and other cockpit controls - not very authentic or accurate but I like it.
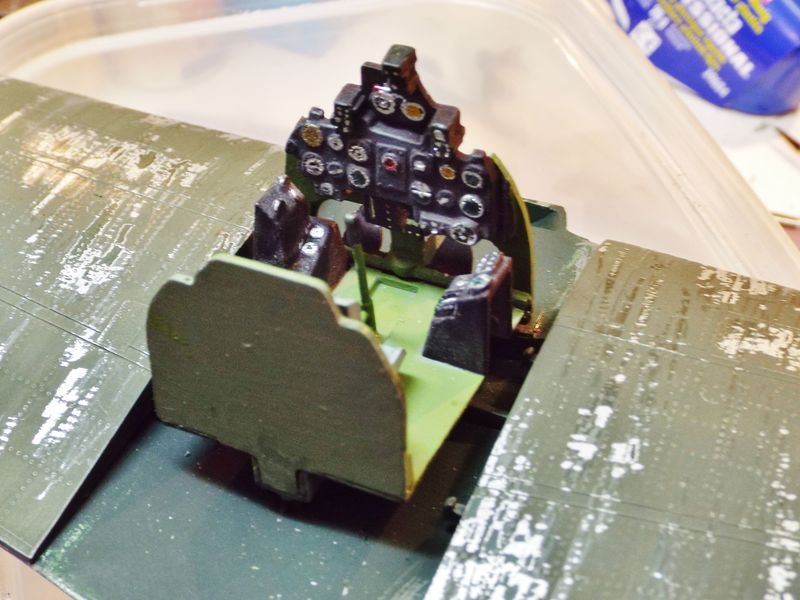
I haven't gone to town on the engine painting because very little is seen once the cover/cowl is in place.

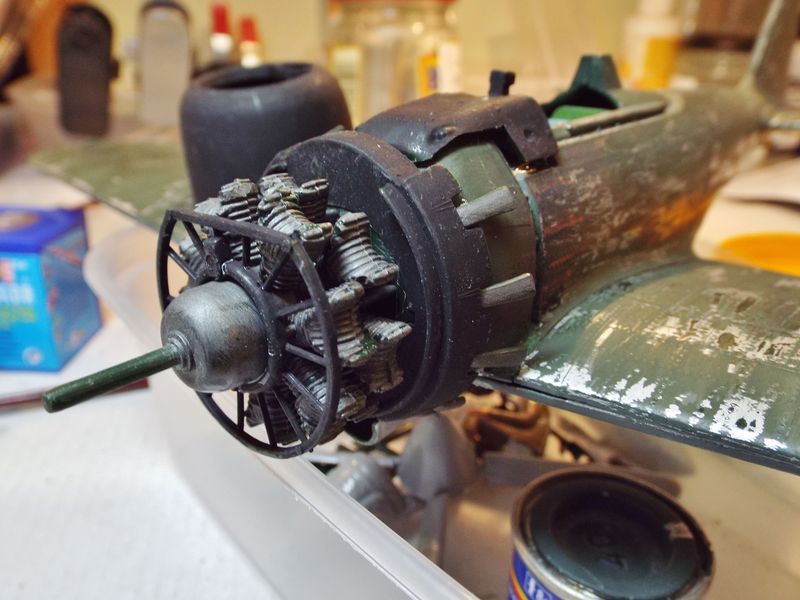
I've painted the props even though I will use a prop blur instead on this one.
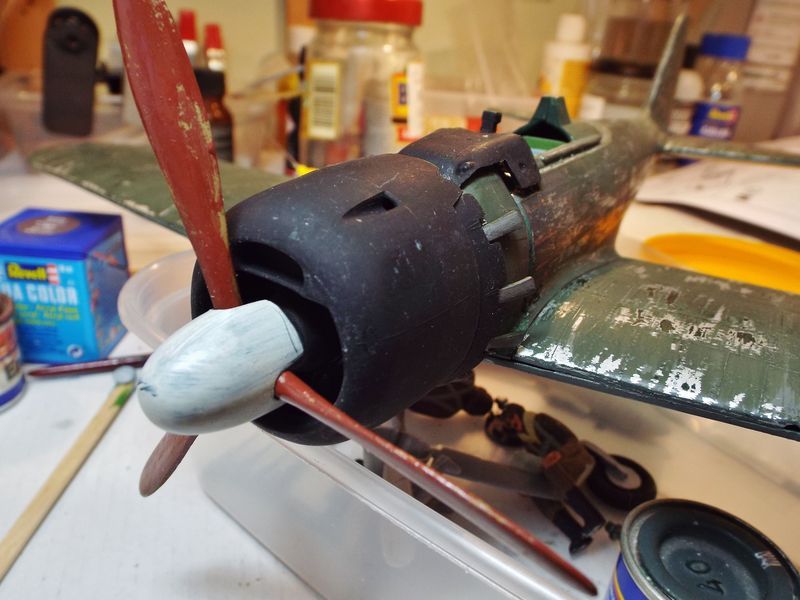
My intention is to build a shelf unit for use at model shows decorated with the SIG name on the backdrop and have a couple of "bookends". on at either end mounted on clear acrylic poles. The first pairing will be this Zero chasing the 1/32 P38-J Lightning at the other end which I hope will look dynamic, exciting and eye catching.
Cheers
Al.
Current flurry of activity with my renewed mojo is on Revell 1/32 builds so I'll at least be able to cover the Revell Modelling SIG tables at the Farnborough show in September.
I have started with the venerable old Zero. Scalemates give a date for the boxing I have of 1993 and that is probably how long I've had it. I did not look after my kits very well I'm afraid so some parts are missing and will need scratch building or just plain filling in - e.g. smaller
u/c doors.
Revell Kit #4755 - this number is more recently been used for a 1/48 F-15 so I had to use the later boxing kit reference of 4717 when I printed off replacement instructions from the Revell.de website - a most useful place for instruction sheet as long as you know the kit number!!

My usual imaginative work on the I/P and other cockpit controls - not very authentic or accurate but I like it.

I haven't gone to town on the engine painting because very little is seen once the cover/cowl is in place.


I've painted the props even though I will use a prop blur instead on this one.

My intention is to build a shelf unit for use at model shows decorated with the SIG name on the backdrop and have a couple of "bookends". on at either end mounted on clear acrylic poles. The first pairing will be this Zero chasing the 1/32 P38-J Lightning at the other end which I hope will look dynamic, exciting and eye catching.
Cheers
Al.
2024 Acquired: 9 Built: 1