
Adam's Retired Workbench
-
Migrant

- Happily Landed after Many Circuits and Bumps
- Posts: 2428
- Joined: April 5th, 2011, 8:33 pm
- Location: Calgary, Canada
Re: Maverick231's Workbench
Lovely Hawks.
-
IronMan129
- Modelling Gent and Scholar
- Posts: 4385
- Joined: November 23rd, 2012, 4:20 pm
Re: Maverick231's Workbench
Thanks guys  .
.
It turns out Il be taking alot more than just the 2 Hawks to the show.
Lightning F.3, Canberra PR.9, Hunter T.7, Jet Provost T.5, Prototype Tornado GR.1, USAF A-37B Dragonfly and a RSAF Strikemaster so there will hopefully be plenty to see.
It turns out Il be taking alot more than just the 2 Hawks to the show.
Lightning F.3, Canberra PR.9, Hunter T.7, Jet Provost T.5, Prototype Tornado GR.1, USAF A-37B Dragonfly and a RSAF Strikemaster so there will hopefully be plenty to see.
-
IronMan129
- Modelling Gent and Scholar
- Posts: 4385
- Joined: November 23rd, 2012, 4:20 pm
Re: Maverick231's Workbench
Work has commenced on the Mighty Delta!
Last night I did alot of work, added the bomb bay doors, filling and sanding so the doors dont have a huge gap and the bombs fall out :D, putting a ton of weight in the nose, adding the access hatch in the closed posision, glueing the 2 fuselarge sections together, glueing the 2 wings together and then glueing the wings to the fuselarge.
Next task is to fill and sand the wing joins as theres quite a large gap.
Then I can undercoat her and once my compressor arrives il begin maskibg for painting.
Here is the box art for a little taster:
https://www.wonderlandmodels.com/media/ ... A50005.jpg;
I cant believe how big this bird is!
Then again after seeing a number of B-52's, B-36's, an E-4B and an AN-124 in 1/72 scale at Telford this bird is about medium sized haha!
-
IronMan129
- Modelling Gent and Scholar
- Posts: 4385
- Joined: November 23rd, 2012, 4:20 pm
Re: Maverick231's Workbench
So last night saw the filler being applied and then sanding.

The tail boom has been added and other little bits too.
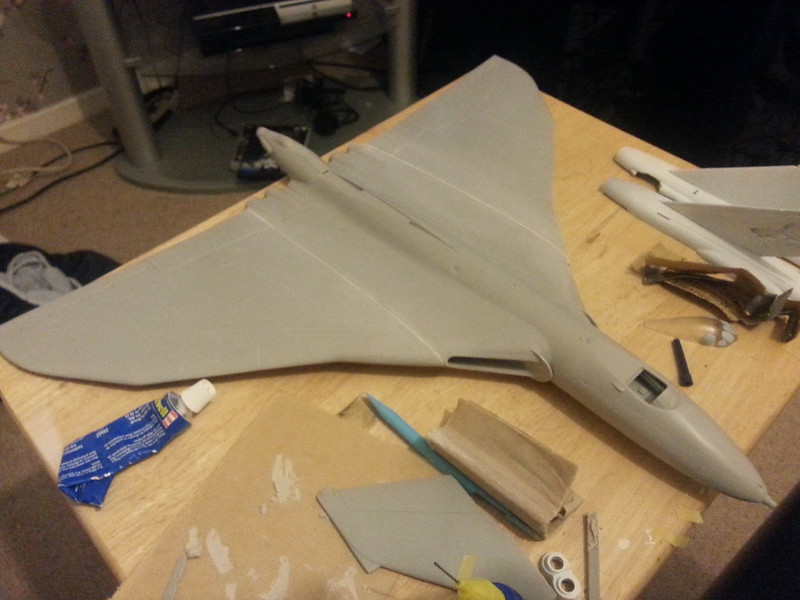
This last pic is of the test fit for the tail and cockpit windows.
Since then I have built the landing gear and they now sit dry inplace so that I can get all 3 lined up so all wheels touch the ground.
I dont know why but I am enjoying this build more than I have ever enjoyed building any other kit.
I think for me big Cold War bkmbers are the way forward.
C&c welcome as always.
The tail boom has been added and other little bits too.
This last pic is of the test fit for the tail and cockpit windows.
Since then I have built the landing gear and they now sit dry inplace so that I can get all 3 lined up so all wheels touch the ground.
I dont know why but I am enjoying this build more than I have ever enjoyed building any other kit.
I think for me big Cold War bkmbers are the way forward.
C&c welcome as always.
-
TomW

- Modelling Gent and Scholar
- Posts: 2279
- Joined: May 1st, 2011, 8:09 am
- Location: Devizes, Wiltshire
Re: Maverick231's Workbench
I think you're doing a great job on the old girl , not a lot better in the world than a V-bomber.
Regards
Tom
Regards
Tom
Veni, Venari, Vamoosi
Coastal Command SIG Leader 2012 - 2016
We'll call him Dinghy Watts...... - Paul Bradley
2016 A:B = 29:11
2015 A:B = 38:14
2014 A:B = 25:9
2013 A:B = 20:17
2012 A:B = I didn't keep score
2011 A:B = 39:11
2010 A:B = 51:10
Coastal Command SIG Leader 2012 - 2016
We'll call him Dinghy Watts...... - Paul Bradley
2016 A:B = 29:11
2015 A:B = 38:14
2014 A:B = 25:9
2013 A:B = 20:17
2012 A:B = I didn't keep score
2011 A:B = 39:11
2010 A:B = 51:10
-
ShaunW
- NOT the sheep
- Posts: 26180
- Joined: November 26th, 2011, 6:11 pm
- Location: Pontefract West Yorkshire
Re: Maverick231's Workbench
Great looking tin triangle Mav, sounds like she needed a fair bit of work. IMHO the Vulcan is a British bomber icon which is second only to the Lancaster, even though it was used in anger only the once. The ghostly howl those Olympus engines make when they're being opened up is something else!
Doing - Tamiya 1/35th Universal Carrier.
Work is the curse of the modelling classes!
IPMS#12300
Work is the curse of the modelling classes!
IPMS#12300
-
IronMan129
- Modelling Gent and Scholar
- Posts: 4385
- Joined: November 23rd, 2012, 4:20 pm
Re: Maverick231's Workbench
Thanks guys!
This model is a big model!
It dwarfs the mini table Im using!
Yeah to be homest the Vulcan to me represents true British engineering.
This model is a big model!
It dwarfs the mini table Im using!
Yeah to be homest the Vulcan to me represents true British engineering.
-
IronMan129
- Modelling Gent and Scholar
- Posts: 4385
- Joined: November 23rd, 2012, 4:20 pm
Re: Maverick231's Workbench
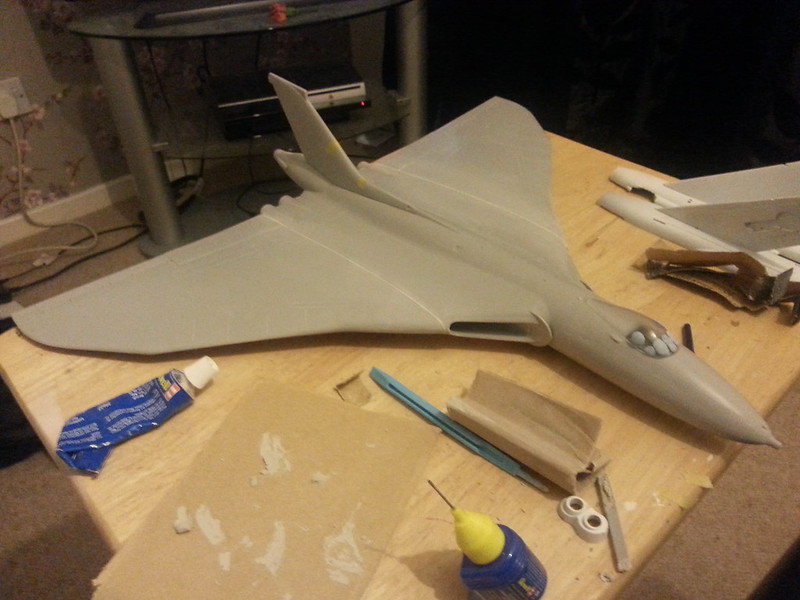
Ok folks more progress has been made.
I have sanded the top half of the tail boom and glued on the Tail.
I also did abit more filling and sanding on the nose section.
Next im going to fill in the last bits of the air intakes(not all of the air intake is possible to fill as I just cant reach it), then I need to sand down the bottom section of the tail boom as when I glued it inplace there was quite a huge step down to the fuselarge, then its onto filling and sanding the tail without losing the gab between the rudder and fuselarge.
Once all the sanding has been done and its time for an undercoat Il take and post pics.
This model is really nice, I know its abit of a challenge and some of the fittings could be a little better but I am really enjoying it and I will definitely be building another Vulcan.
On a realworld note, I hope to be joining the East Midlands Aeropark soon so Il get the climb all over a real Vulcan, Nimrod and other Cold War Jets and Props.
Exciting times ahead :D.
I have sanded the top half of the tail boom and glued on the Tail.
I also did abit more filling and sanding on the nose section.
Next im going to fill in the last bits of the air intakes(not all of the air intake is possible to fill as I just cant reach it), then I need to sand down the bottom section of the tail boom as when I glued it inplace there was quite a huge step down to the fuselarge, then its onto filling and sanding the tail without losing the gab between the rudder and fuselarge.
Once all the sanding has been done and its time for an undercoat Il take and post pics.
This model is really nice, I know its abit of a challenge and some of the fittings could be a little better but I am really enjoying it and I will definitely be building another Vulcan
On a realworld note, I hope to be joining the East Midlands Aeropark soon so Il get the climb all over a real Vulcan, Nimrod and other Cold War Jets and Props
Exciting times ahead :D.
-
IronMan129
- Modelling Gent and Scholar
- Posts: 4385
- Joined: November 23rd, 2012, 4:20 pm
Re: Maverick231's Workbench
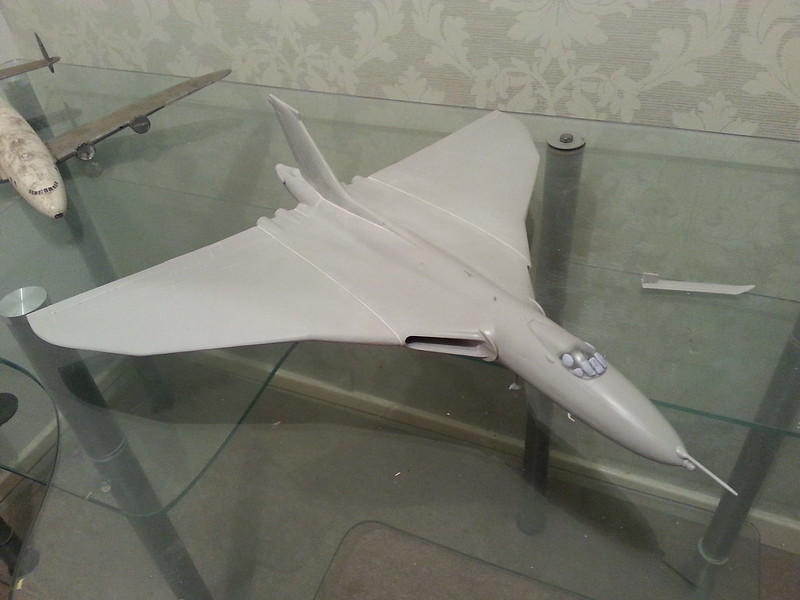
So the filling and sanding is complete for now....

Wont be long before this bird is ready.
Wont be long before this bird is ready
-
IronMan129
- Modelling Gent and Scholar
- Posts: 4385
- Joined: November 23rd, 2012, 4:20 pm
Re: Maverick231's Workbench
Well I continue to suprise myself .
I wasn't happy with the size some of the pitot tubes provided with the kit and so for the first time ever I decided to try and make my own.
I am quite happy with them.
Now all the antennae are in place including the cut down pitot tube on the top of the fuselarge.
So here is a side on view of the nose:
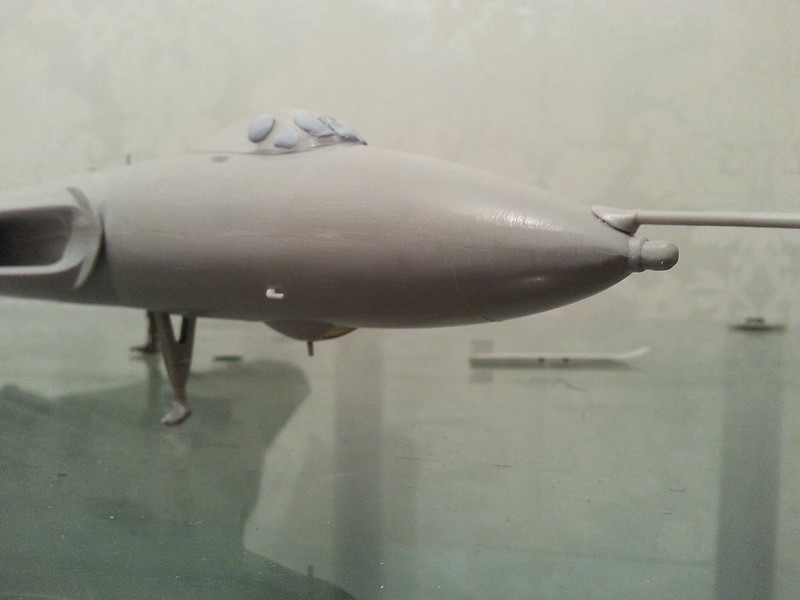
And here is an underside shot to see the 2 custom pitot tubes:

And here is an overview:
I know 1 of them is a tad longer but I will cut it down to size once the glue has dried.
Please let me know what you think as it is really new to me to make my own parts.
I wasn't happy with the size some of the pitot tubes provided with the kit and so for the first time ever I decided to try and make my own.
I am quite happy with them
Now all the antennae are in place including the cut down pitot tube on the top of the fuselarge.
So here is a side on view of the nose:
And here is an underside shot to see the 2 custom pitot tubes:
And here is an overview:
I know 1 of them is a tad longer but I will cut it down to size once the glue has dried.
Please let me know what you think as it is really new to me to make my own parts.
-
JamesPerrin

- Looks like his avatar
- Posts: 13671
- Joined: April 5th, 2011, 8:09 pm
- Location: W. Yorkshire
- Contact:
Re: Maverick231's Workbench
Replacing aerials and antennae is how it starts, soon you'll be crash moulding you own canopies 
Classic British Kits SIG Leader Better to fettle than to fill
(2024 A:B 5:2) (2023 13:8:7) (2022 21:11) (2021 15:8) (2020 8:4:4)
(2024 A:B 5:2) (2023 13:8:7) (2022 21:11) (2021 15:8) (2020 8:4:4)
-
ShaunW
- NOT the sheep
- Posts: 26180
- Joined: November 26th, 2011, 6:11 pm
- Location: Pontefract West Yorkshire
Re: Maverick231's Workbench
Excellent work Mav. Yep, Step One is antenna through to the point where you'll mould your own model 
Doing - Tamiya 1/35th Universal Carrier.
Work is the curse of the modelling classes!
IPMS#12300
Work is the curse of the modelling classes!
IPMS#12300
-
IronMan129
- Modelling Gent and Scholar
- Posts: 4385
- Joined: November 23rd, 2012, 4:20 pm
Re: Maverick231's Workbench
Thanks guys .
Oh god haha good times ahead then.
Oh god haha good times ahead then
-
shangos70
- Modelling Gent and Scholar
- Posts: 4421
- Joined: May 1st, 2011, 11:14 am
- Location: Doncaster, Socialist Republic of South Yorkshire.
Re: Maverick231's Workbench
Top work Adam, speeding along on the big V.
-
IronMan129
- Modelling Gent and Scholar
- Posts: 4385
- Joined: November 23rd, 2012, 4:20 pm
Re: Maverick231's Workbench
Thanks Shane .
I'm really happy with her so far.
The big test will be when I place her and the Valiant(If I can get her finished in time), next to your Victor.
The detail and build quality you have put into that model is awesome mate.
I'm really happy with her so far.
The big test will be when I place her and the Valiant(If I can get her finished in time), next to your Victor.
The detail and build quality you have put into that model is awesome mate