Page 23 of 38
Re: Maverick's Workbench
Posted: February 9th, 2017, 9:02 am
by gnomemeansgnome
That is one boss Badger. Well done.
Re: Maverick's Workbench
Posted: February 11th, 2017, 12:52 am
by PGAS
Lovely! What a big kit! Ditto on the NMF.
Re: Maverick's Workbench
Posted: February 12th, 2017, 1:49 am
by IronMan129
Thank you all for your kind comments.
I really do like how she's come out and I will feel happy displaying her at Telford!
Re: Maverick's Workbench
Posted: February 21st, 2017, 8:40 pm
by IronMan129
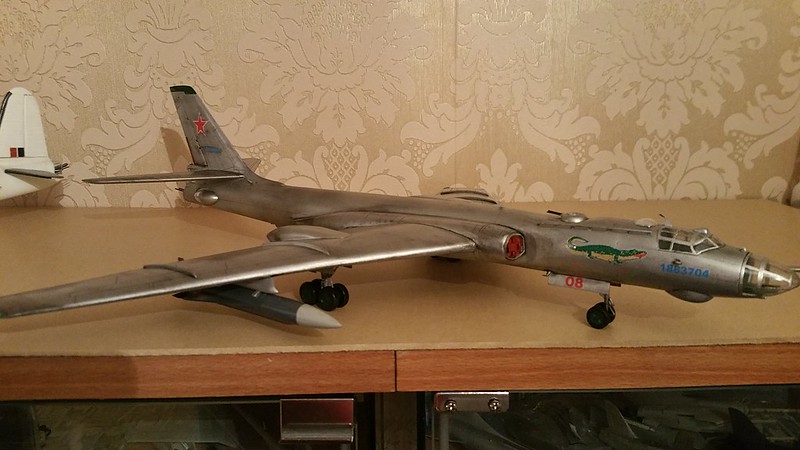
I decided to try a spot of weathering on the Badger.
It's my first time at weathering a full aircraft with Hunbrol Weathering Powders so please go easy on me.
Re: Maverick's Workbench
Posted: February 22nd, 2017, 12:49 am
by IronMan129
I'm cracking on with things tonight!
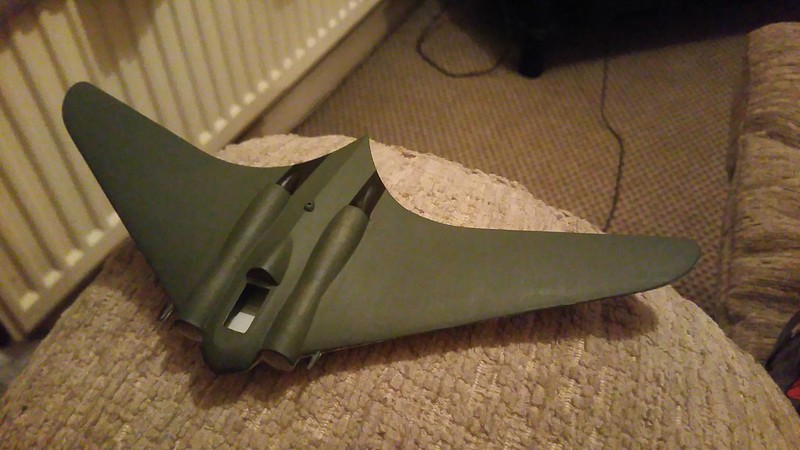
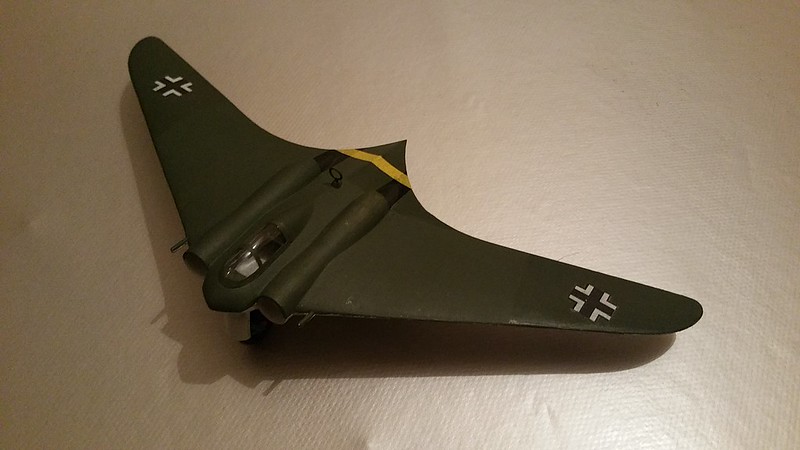
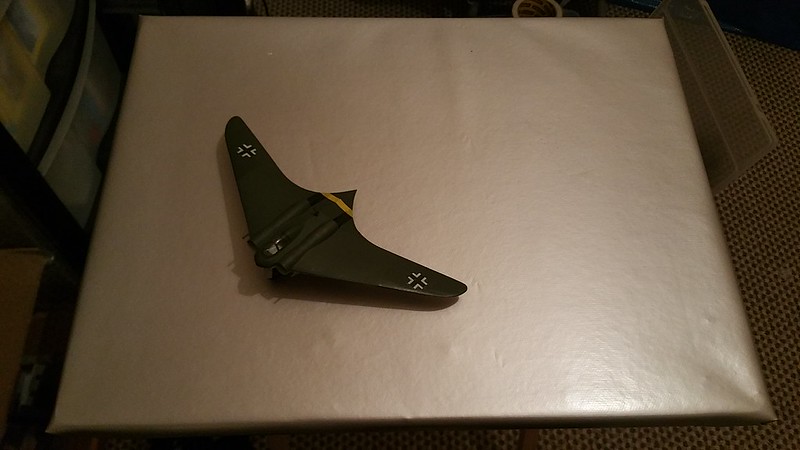
Aswell as finishing the Badger I managed to paint the Horton:
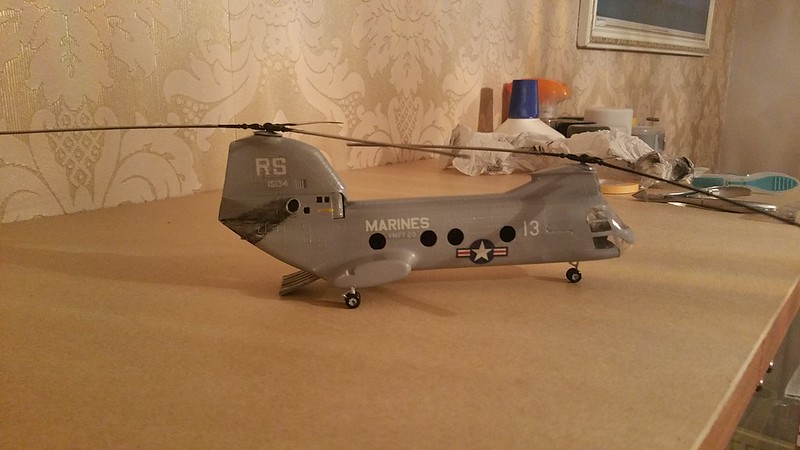
And I filled in the gap between the cockpit and fuselage aswell as giving the rota blades a drooping look:
Re: Maverick's Workbench
Posted: February 22nd, 2017, 1:32 am
by jssel
Nice goings on with this bench. Really like the droop of the blades on the Frog.
Re: Maverick's Workbench
Posted: February 22nd, 2017, 5:19 am
by Migrant
Nice work going on in this bench, the Badger especially looks superb.
Re: Maverick's Workbench
Posted: February 22nd, 2017, 10:42 am
by ShaunW
I think the Badger looks great Mav. As indeed does that chopper, what is it? a Boeing Vertol? how did you curve the rotors?
Re: Maverick's Workbench
Posted: February 22nd, 2017, 11:34 am
by IronMan129
Thanks folks!
It sure is Shaun, I used a candle at a distance and slowly manipulated the rotas so that I didn't cause any damage.
Re: Maverick's Workbench
Posted: February 22nd, 2017, 7:16 pm
by iggie
Brave man! I tried the candle trick on my first (second time around) helicopter....suffice to say I'll stick to a hair dryer in future!

Re: Maverick's Workbench
Posted: February 23rd, 2017, 7:39 pm
by IronMan129
Last night I worked a little more on the Horton.
The decals in the Pioneer 2 kit broke up on contact with the water!
Never mind, the Matchbox FW190 I'm doing for the GB is going J to RAF colours so I used that decal sheet as a backup and I have to say they worked beautifully!
And whilst were at it I've put a new cover on my little work bench:
We picked up a 1 meter stretch of material from Dunelm for £3.25 and Il get 6 lots out of it which isn't bad in my book!
Re: Maverick's Workbench
Posted: February 23rd, 2017, 10:28 pm
by shangos70
Like that Badger mate.Nice one.
Re: Maverick's Workbench
Posted: February 24th, 2017, 2:37 pm
by ShaunW
I fear I'd probably melt a set of rotors if I tried that one Mav! Great looking Horton.
Re: Maverick's Workbench
Posted: June 8th, 2017, 11:29 pm
by IronMan129
Thanks fella's!
Well if you believe it or not I've recently started the first project since my daughter was born at the end of Feb!
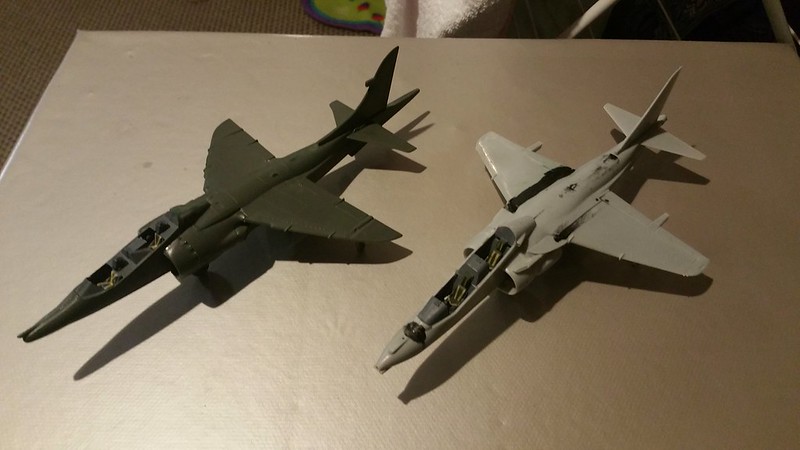
I'm doing a double twin seat Harrier build.
both of these were bought from Telford SMW.
Heller Bobcat Harrier T.4 & Italeri Harrier T.10(using the nose cone an decals from the Airfix kit kindly provided by Marky)
Re: Maverick's Workbench
Posted: June 9th, 2017, 3:54 am
by Clashcityrocker
Nice big Badger. (That sounded rude in my head)

Nigel