Dazzled's Den
-
shangos70
- Modelling Gent and Scholar
- Posts: 4422
- Joined: May 1st, 2011, 11:14 am
- Location: Doncaster, Socialist Republic of South Yorkshire.
Re: Dazzled's Den
Some great work going on here Daryl, hope you're over the worst of the sickness now. I'm hoping my Revell 1/44 Concorde doesn't need as much filling as the Airfix one.
-
ShaunW
- NOT the sheep
- Posts: 26188
- Joined: November 26th, 2011, 6:11 pm
- Location: Pontefract West Yorkshire
Re: Dazzled's Den
Good stuff Daz. Is that method of supporting Concorde just for the initial primer and what have you? I ask because in my experience of Airfix airliners, the doors might well be a very poor fit and require more filling/sanding etc, which of course you won't want to be doing after the final paint has gone on. With aircraft types such as this where there is no exhaust or inlet orifices to provide holding points, I often use sprue off cuts temporarily glued into the u/c bays to keep the underside off the bench.
Doing - Tamiya 1/35th Universal Carrier.
Work is the curse of the modelling classes!
IPMS#12300
Work is the curse of the modelling classes!
IPMS#12300
-
Dazzled

- Modelling Gent and Scholar
- Posts: 9592
- Joined: October 1st, 2011, 11:08 pm
- Location: Mid Glamorgan, South Wales
- Contact:
Re: Dazzled's Den
By all accounts the Revell Concorde is a much better kitshangos70 wrote:Some great work going on here Daryl, hope you're over the worst of the sickness now. I'm hoping my Revell 1/44 Concorde doesn't need as much filling as the Airfix one.
COLD WAR S.I.G. LEADER
Wherever there's danger, wherever there's trouble, wherever there's important work to be done....I'll be somewhere else building a model!
Wherever there's danger, wherever there's trouble, wherever there's important work to be done....I'll be somewhere else building a model!
-
Dazzled
- Modelling Gent and Scholar
- Posts: 9592
- Joined: October 1st, 2011, 11:08 pm
- Location: Mid Glamorgan, South Wales
- Contact:
Re: Dazzled's Den
Yes mate, the old paintbrush is just a means of support for an initial coat of primer so I can assess how good the seams are. I hadnt figured out how I was going to support the model for final paint but I think you've done that for me.ShaunW wrote:Good stuff Daz. Is that method of supporting Concorde just for the initial primer and what have you? I ask because in my experience of Airfix airliners, the doors might well be a very poor fit and require more filling/sanding etc, which of course you won't want to be doing after the final paint has gone on. With aircraft types such as this where there is no exhaust or inlet orifices to provide holding points, I often use sprue off cuts temporarily glued into the u/c bays to keep the underside off the bench.
Cheers
COLD WAR S.I.G. LEADER
Wherever there's danger, wherever there's trouble, wherever there's important work to be done....I'll be somewhere else building a model!
Wherever there's danger, wherever there's trouble, wherever there's important work to be done....I'll be somewhere else building a model!
-
Kitaholic

- Modelling Gent and Scholar
- Posts: 3765
- Joined: November 10th, 2014, 7:53 pm
- Location: 5 mins from SMW
Re: Dazzled's Den
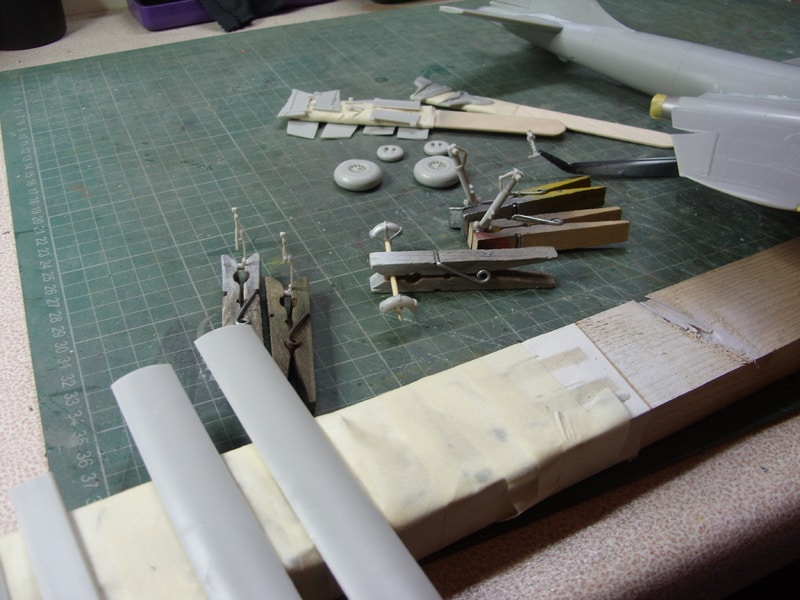
The way I do it is a piece of plastic card with three pieces of plastic rod glued to it that just slot into the u/c bays
Regards
Gord
Desperately trying to find his MOJO, don't know where I left it
Gord
Desperately trying to find his MOJO, don't know where I left it
-
Dazzled
- Modelling Gent and Scholar
- Posts: 9592
- Joined: October 1st, 2011, 11:08 pm
- Location: Mid Glamorgan, South Wales
- Contact:
Re: Dazzled's Den
Something else to try. Cheers mateKitaholic wrote:The way I do it is a piece of plastic card with three pieces of plastic rod glued to it that just slot into the u/c bays
COLD WAR S.I.G. LEADER
Wherever there's danger, wherever there's trouble, wherever there's important work to be done....I'll be somewhere else building a model!
Wherever there's danger, wherever there's trouble, wherever there's important work to be done....I'll be somewhere else building a model!
-
Marek

- Modelling Gent and Scholar
- Posts: 2455
- Joined: May 1st, 2011, 8:03 am
- Location: Madison, WI
- Contact:
Re: Dazzled's Den
Dazz One - Concorde Zero 
Some amazing guidance on this air defence brush system
Seriously though, looks like you are coming close to having fun with the concorde. I like the stage of canberra as well.
Some amazing guidance on this air defence brush system
Seriously though, looks like you are coming close to having fun with the concorde. I like the stage of canberra as well.
-
Dazzled
- Modelling Gent and Scholar
- Posts: 9592
- Joined: October 1st, 2011, 11:08 pm
- Location: Mid Glamorgan, South Wales
- Contact:
Re: Dazzled's Den
Just a quick update before I head off to bed. This week hasn't been as productive as I'd hoped  . A combination of factors has conspired to keep me from the bench and what time I have managed has been spent mostly filling and sanding.
First the Concorde.
I managed to get the doors in. They're something of a variable fit despite considerable fettling. I have a feeling filling and rescribing will be the order of the day.
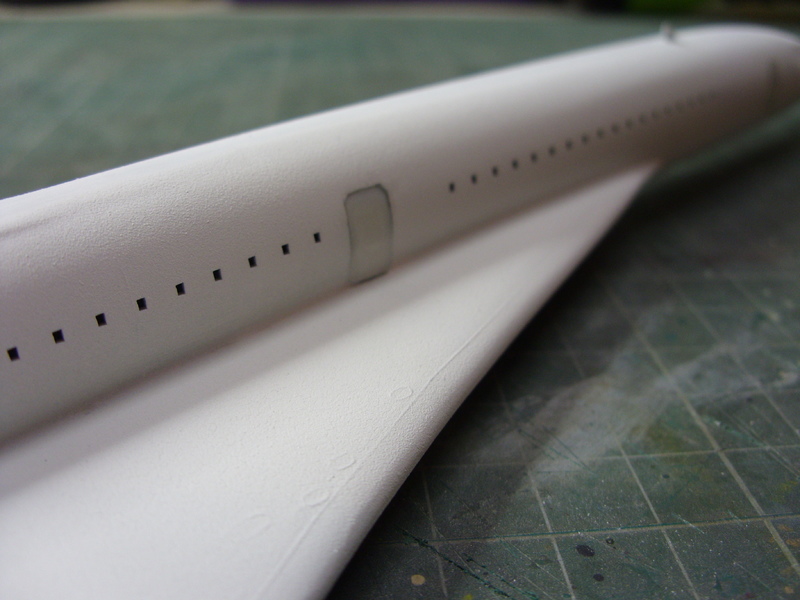
There's also this beauty.
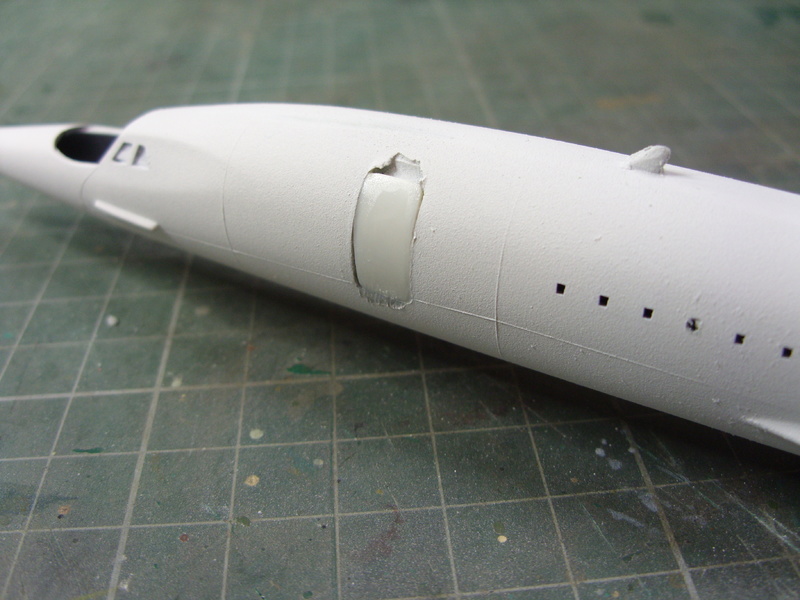
This weird gap has now been filled and I've done some more work on seams and joints.
Fortunately I bought another tube of Squadron green yesterday.
I'm going to need even more for the Canberra anyway.
I have got the engines assembled so intakes and exhausts are on as are the ailerons with some realistic droop for a parked aircraft.
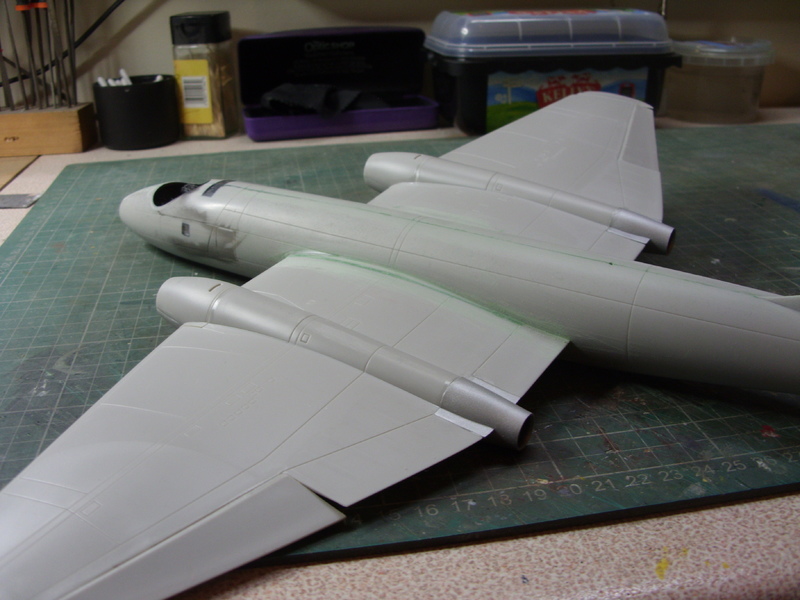
They're not a great fit
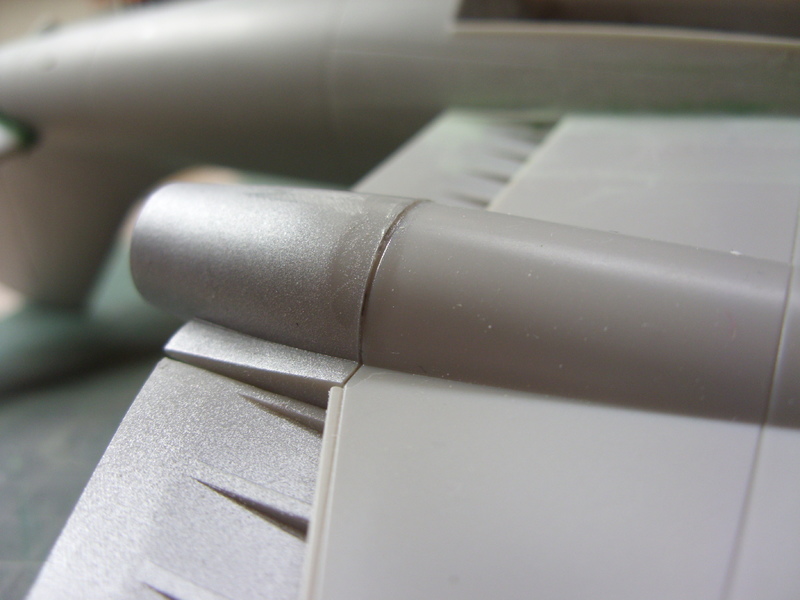
In fact they're oversized all round and needed a bit of fettling to get them to sit squarely but I got them sanded back and then embarked on another bout of filling.
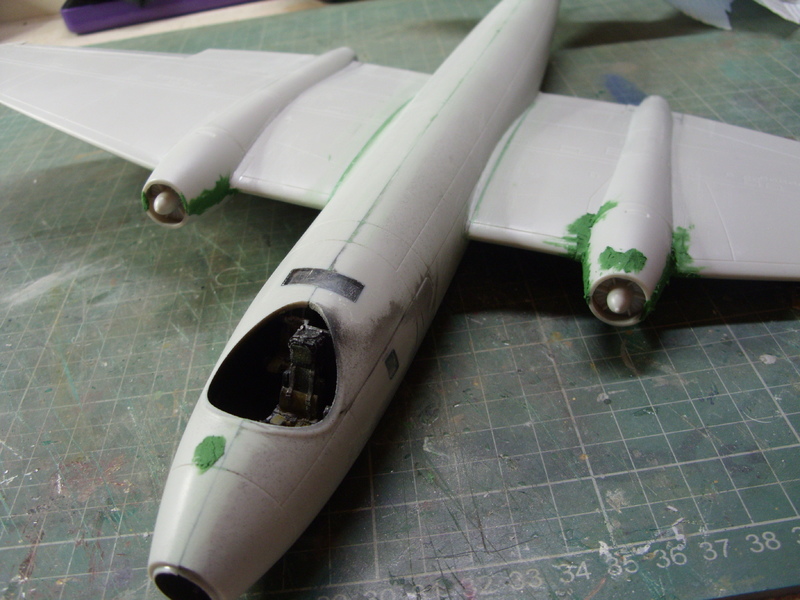
Both sides are filled around the undersides too. The filler on top of the nose and left hand engine intake is there to cover up sink marks. I have to admit that the engineering and quality evident in this kit is a little disappointing.
Finally, and on a happier note, I've made a little more progress with the Ducati. I'm going down the slow and painstaking route with this one.
First a step back. I noticed that the forward cross member of the frame wasn't straight at the joint so I sawed through it and reset it.
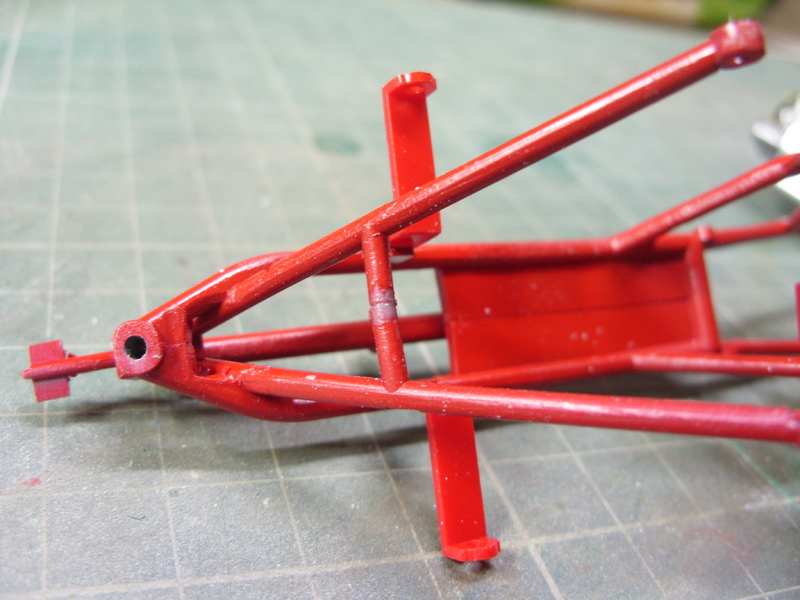
It's had some filler and, after sanding back, will be completely repainted.
However there is a significant forward step in that, apart from the plug caps and a little wiring, the engine is complete.
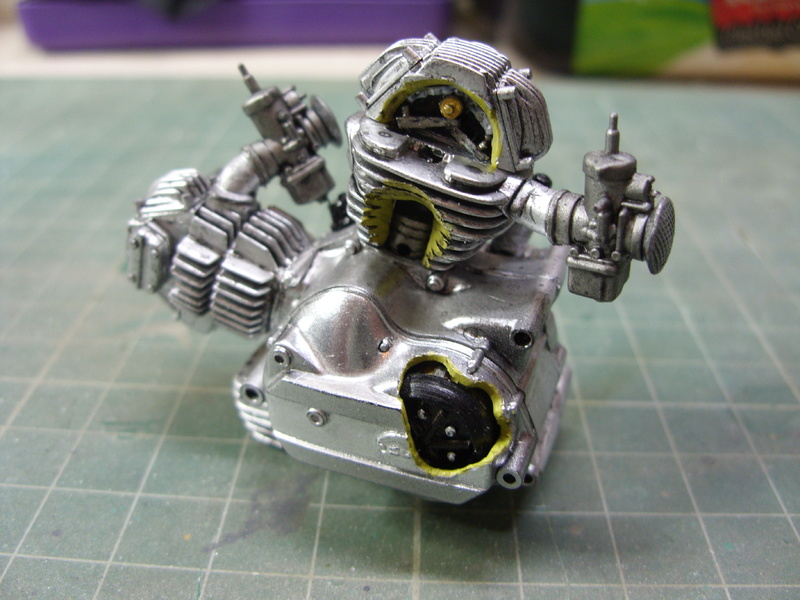
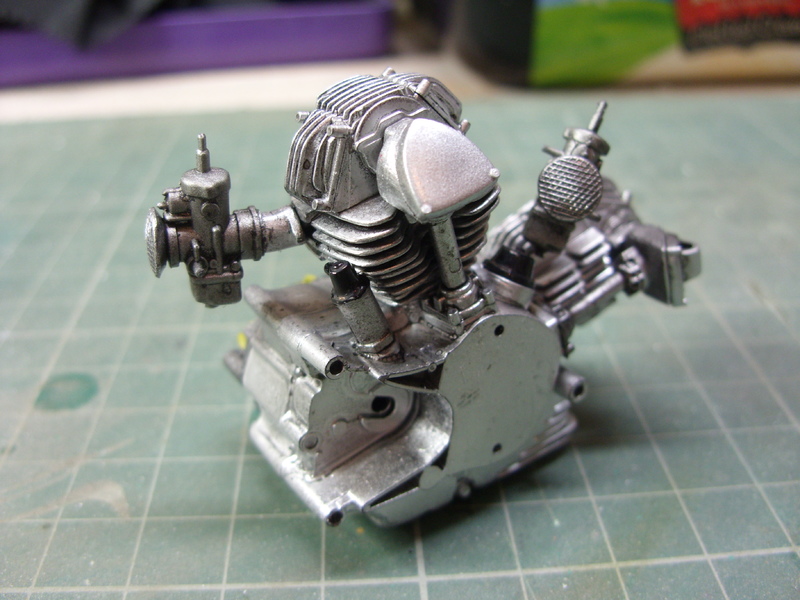
I used a number of metallic shades in different mediums followed by a delicate wash with Flory models black wash to bring up some of the detail. I'm quite pleased with it. Now I need to get on with the cycle parts.
More updates soon.
First the Concorde.
I managed to get the doors in. They're something of a variable fit despite considerable fettling. I have a feeling filling and rescribing will be the order of the day.
There's also this beauty.
This weird gap has now been filled and I've done some more work on seams and joints.
Fortunately I bought another tube of Squadron green yesterday.
I'm going to need even more for the Canberra anyway.
I have got the engines assembled so intakes and exhausts are on as are the ailerons with some realistic droop for a parked aircraft.
They're not a great fit
In fact they're oversized all round and needed a bit of fettling to get them to sit squarely but I got them sanded back and then embarked on another bout of filling.
Both sides are filled around the undersides too. The filler on top of the nose and left hand engine intake is there to cover up sink marks. I have to admit that the engineering and quality evident in this kit is a little disappointing.
Finally, and on a happier note, I've made a little more progress with the Ducati. I'm going down the slow and painstaking route with this one.
First a step back. I noticed that the forward cross member of the frame wasn't straight at the joint so I sawed through it and reset it.
It's had some filler and, after sanding back, will be completely repainted.
However there is a significant forward step in that, apart from the plug caps and a little wiring, the engine is complete.
I used a number of metallic shades in different mediums followed by a delicate wash with Flory models black wash to bring up some of the detail. I'm quite pleased with it. Now I need to get on with the cycle parts.
More updates soon.
COLD WAR S.I.G. LEADER
Wherever there's danger, wherever there's trouble, wherever there's important work to be done....I'll be somewhere else building a model!
Wherever there's danger, wherever there's trouble, wherever there's important work to be done....I'll be somewhere else building a model!
Re: Dazzled's Den
I must not laugh ... but Concorde is going to be a real test of patience
Trying to Build kits and not Buy kits
-
shangos70
- Modelling Gent and Scholar
- Posts: 4422
- Joined: May 1st, 2011, 11:14 am
- Location: Doncaster, Socialist Republic of South Yorkshire.
Re: Dazzled's Den
Plenty of filler on the Canberra, my 1/72 PR9 was the same. I was a bit surprised tbh being a new tool kit at the time.
-
skypirate

- Modelling Gent and Scholar
- Posts: 7301
- Joined: May 1st, 2011, 6:13 am
- Location: Port Macquarie, Australia
Re: Dazzled's Den
Fabulous work on the Ducati, Darryl.
I can only sympathise re the Concorde and Canberra.
Good to see you advancing on several fronts!
David
I can only sympathise re the Concorde and Canberra.
Good to see you advancing on several fronts!
David
-
IronMan129
- Modelling Gent and Scholar
- Posts: 4385
- Joined: November 23rd, 2012, 4:20 pm
Re: Dazzled's Den
Looking good Daz!
I nearly spent some time last night on the Tu-16 but something came up so Il try again tonight.
I nearly spent some time last night on the Tu-16 but something came up so Il try again tonight.
-
Dazzled
- Modelling Gent and Scholar
- Posts: 9592
- Joined: October 1st, 2011, 11:08 pm
- Location: Mid Glamorgan, South Wales
- Contact:
Re: Dazzled's Den
Long overdue time for an update but all my limited modelling for the last couple of weeks has involved the boring and mojo-killing rounds of filling and sanding. The Concorde has come somewhat closer to a smooth finish but there's still some way to go. I didn't think it was worth taking pictures though.
Other than the Concorde, the Canberra has been fought to a stage where I can consider paint. I had huge issues with the canopy fit.
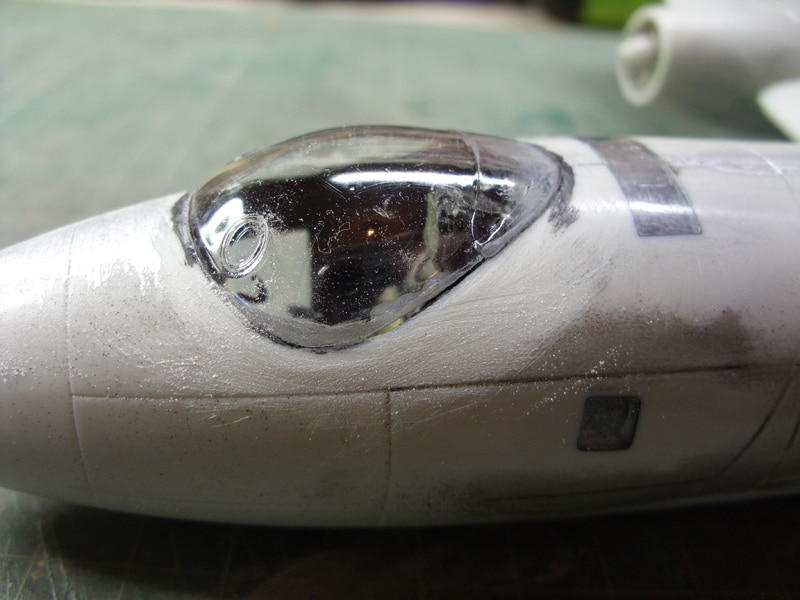
More than one go was needed to fill and sand this to an almost acceptable finish but I am getting there at last.
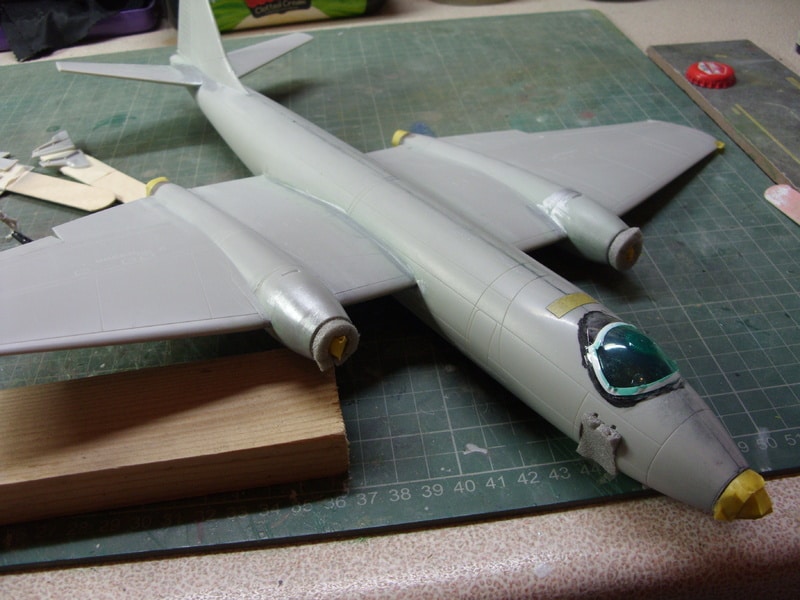
I've just put some matt black on, partially to paint the inside of the bomb bay and partially as an undercoat. I'm hoping to finish this in time for the Huddersfield show but the way it keeps throwing me curve balls I'm not holding my breath
Other than the Concorde, the Canberra has been fought to a stage where I can consider paint. I had huge issues with the canopy fit.
More than one go was needed to fill and sand this to an almost acceptable finish
I've just put some matt black on, partially to paint the inside of the bomb bay and partially as an undercoat. I'm hoping to finish this in time for the Huddersfield show but the way it keeps throwing me curve balls I'm not holding my breath
COLD WAR S.I.G. LEADER
Wherever there's danger, wherever there's trouble, wherever there's important work to be done....I'll be somewhere else building a model!
Wherever there's danger, wherever there's trouble, wherever there's important work to be done....I'll be somewhere else building a model!
-
Dazzled
- Modelling Gent and Scholar
- Posts: 9592
- Joined: October 1st, 2011, 11:08 pm
- Location: Mid Glamorgan, South Wales
- Contact:
Re: Dazzled's Den
So, with the first coat of the upper surface colour on (Tamiya XF-83), there's predictably some more work to be done. The canopy surround was always suspect but other than that it's just a few scratches to polish out.
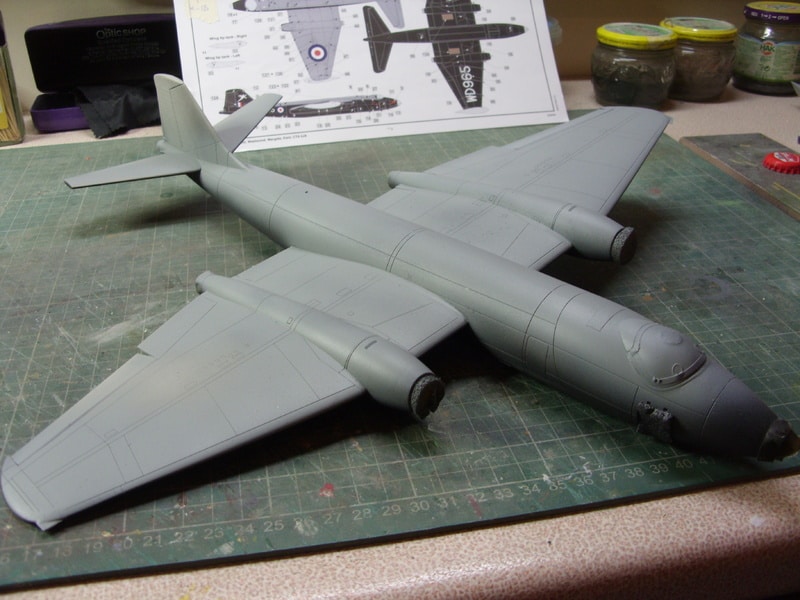
At least I got to use the airbrush which was a nice change from filling and sanding.
At least I got to use the airbrush which was a nice change from filling and sanding.
COLD WAR S.I.G. LEADER
Wherever there's danger, wherever there's trouble, wherever there's important work to be done....I'll be somewhere else building a model!
Wherever there's danger, wherever there's trouble, wherever there's important work to be done....I'll be somewhere else building a model!
-
skypirate
- Modelling Gent and Scholar
- Posts: 7301
- Joined: May 1st, 2011, 6:13 am
- Location: Port Macquarie, Australia
Re: Dazzled's Den
I know how you feel!
Great to get away from filling and sanding!
That Canberra will be a handsome beast soon enough!
cheers,
David
Great to get away from filling and sanding!
That Canberra will be a handsome beast soon enough!
cheers,
David