Dazzled's Den

Re: Dazzled's Den
Great finish! I have never seen a Harvard/Texan with hardpoints. Lovely weathering. 
Paul
This is it. The moment we should have trained for.
This is it. The moment we should have trained for.
-
ShaunW
- NOT the sheep
- Posts: 26180
- Joined: November 26th, 2011, 6:11 pm
- Location: Pontefract West Yorkshire
Re: Dazzled's Den
Wow, that looks great Daz, excellent painting and weathering. Top of the class stuff that is 
Doing - Tamiya 1/35th Universal Carrier.
Work is the curse of the modelling classes!
IPMS#12300
Work is the curse of the modelling classes!
IPMS#12300
-
Dazzled

- Modelling Gent and Scholar
- Posts: 9592
- Joined: October 1st, 2011, 11:08 pm
- Location: Mid Glamorgan, South Wales
- Contact:
Re: Dazzled's Den
And just to keep the roll going I'm about to start this.
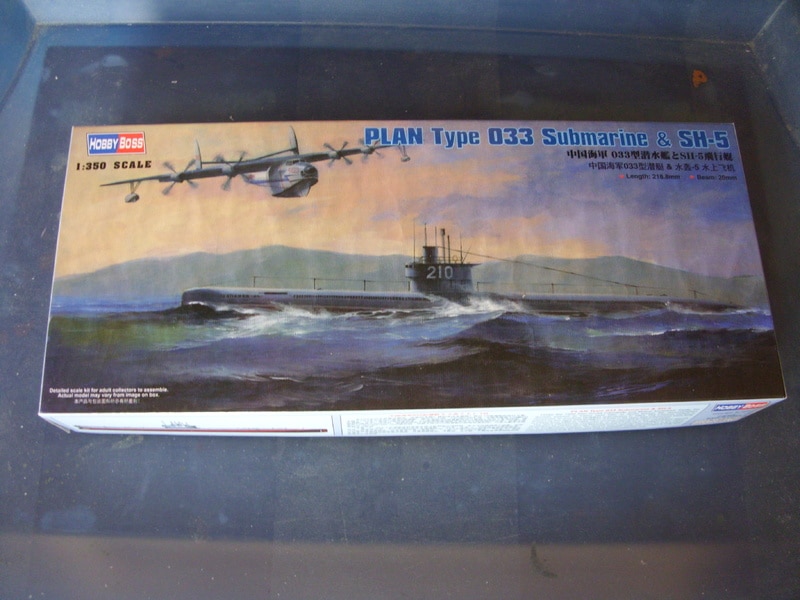
With some minor tweaking of the supplied markings it'll make a nice 1950's Soviet Navy Romeo Class sub. The SH-5 will probably be saved for another day.
Some of you may have noticed that it's not actually pictured on the bench. That's because the bench is rather full.
I thought it was time to make a start. I've got a little addition for it too.
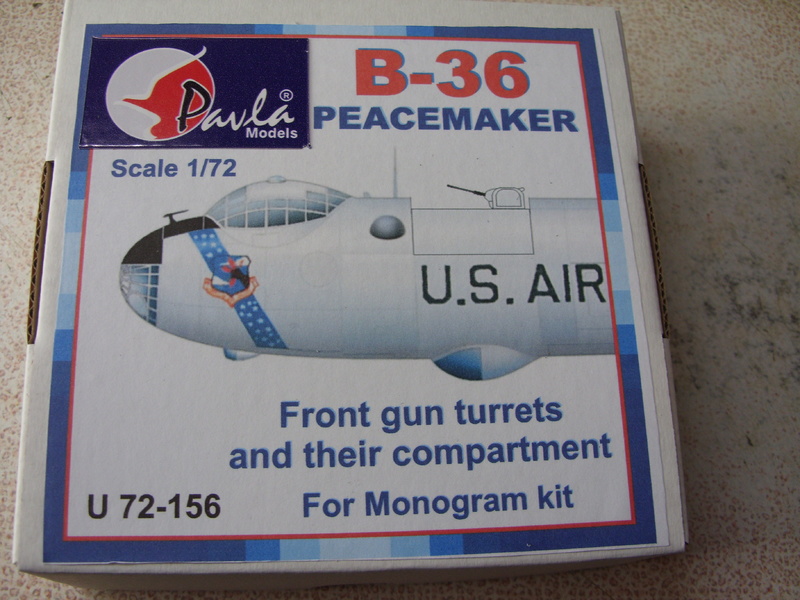
I may have to replace the gun barrels though as a couple of them haven't fared too well in the box. Pavla really should have packed them better for the price
For such an old kit the decals aren't looking too bad.
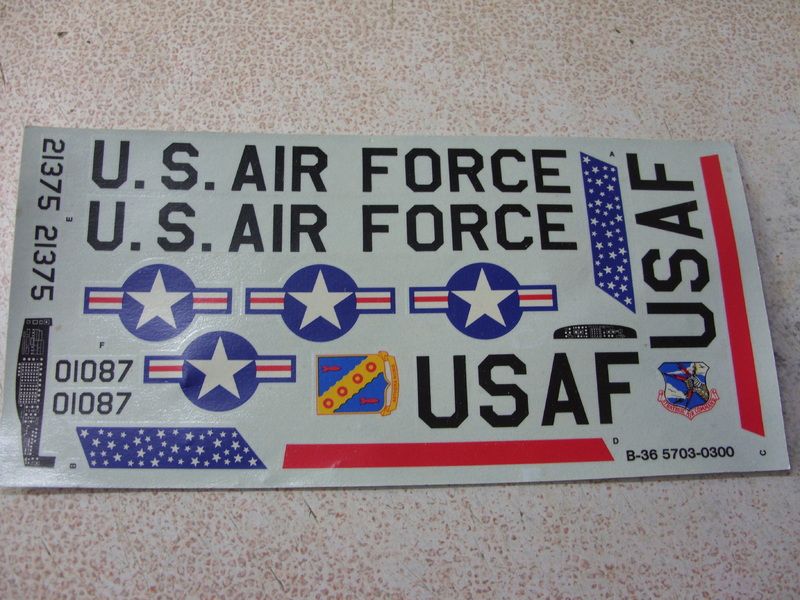
I'm not going to chance it though and I'll be ordering some a/m decals for it.
And this evening I made a tentative start.
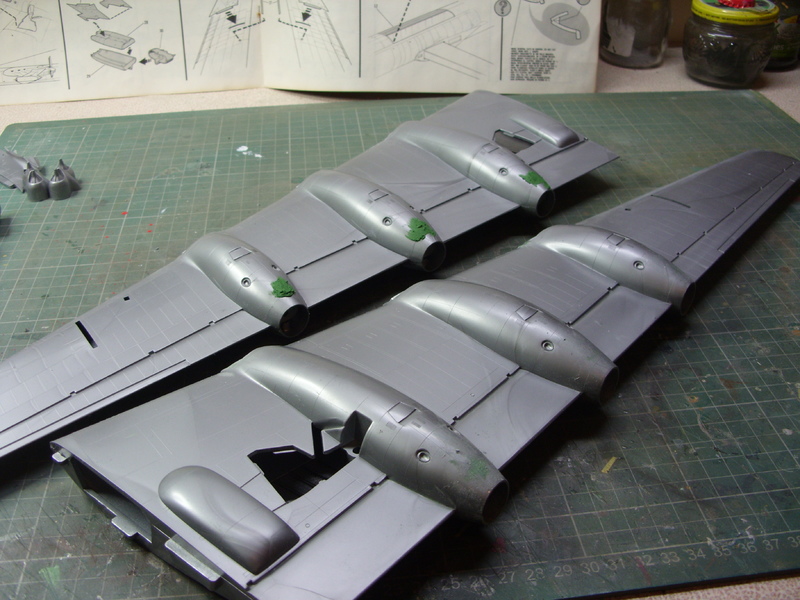
Construction starts with the wings......yes, I said wings.
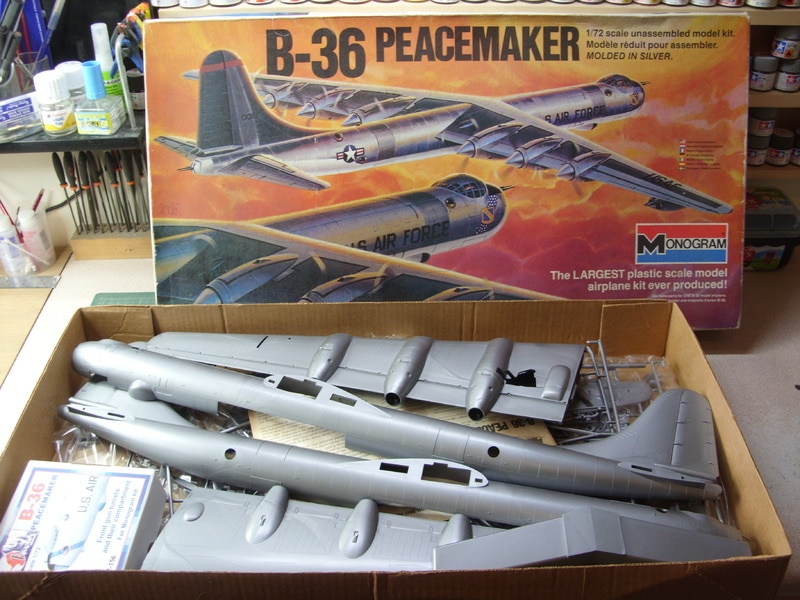
OK, according to Mr Monogram construction should start in the conventional way with cockpit, interior and fuselage but I have a build plan that has to take into account how much space is available and how much of a mojo killer this model has the potential to be, so I decided to break the kit down into manageable sub-assemblies. The wings seem a good place to start as they aren't hugely complex structures so they'll provide a bit of an enthusiasm boost early on and shouldn't be too difficult to store when completed, allowing me the full bench to work on the fuselage.
That's the theory anyway
Tonight's progress consisted of a little parts clean up, a little assembly and even some initial painting.
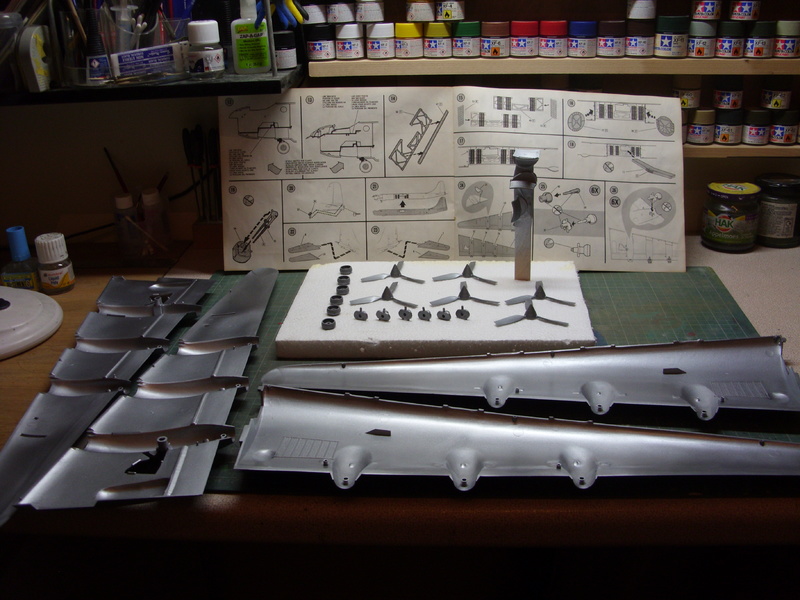
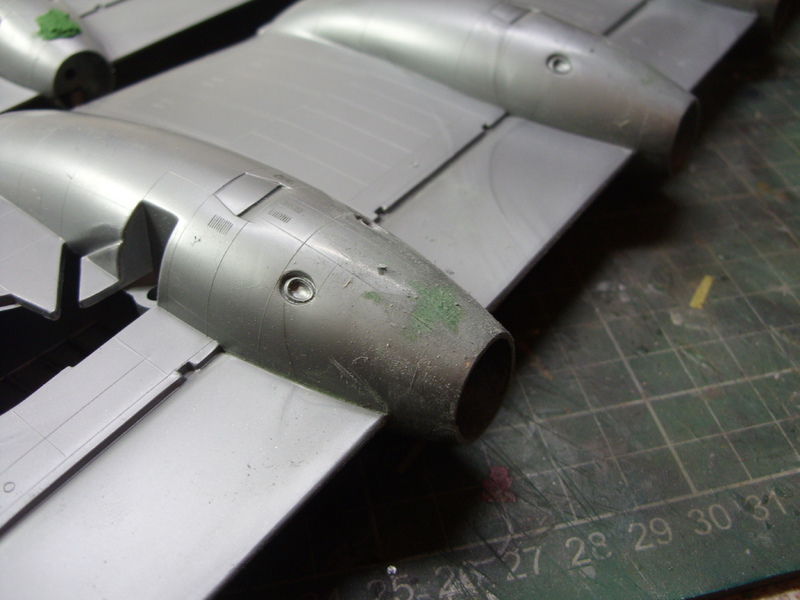
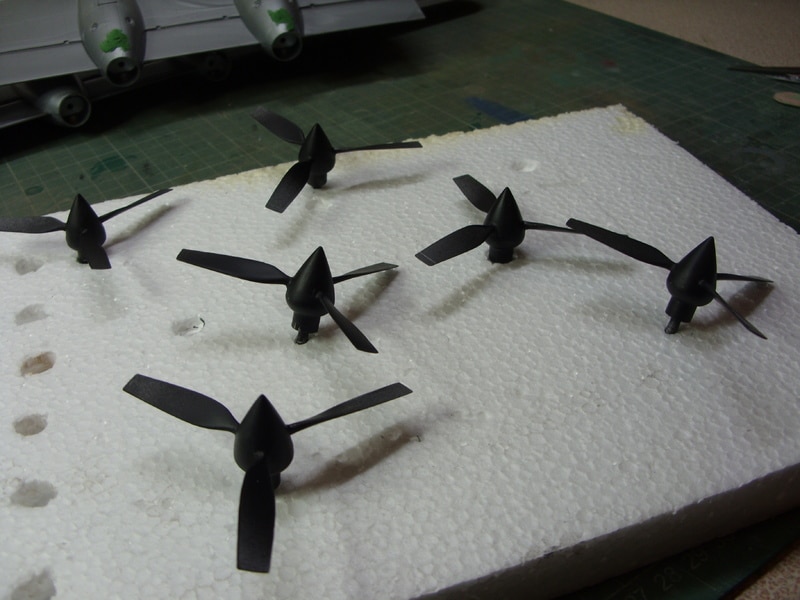
The interior of the wing halves and the intake splitters have been given a blast with some rattle can silver. The intakes do have some ejector tower marks on them but these will be invisible when assembled. The shafts have been glued inside the propellor backs and the props and mounting blocks cleaned up.
That's all I had time for tonight. The next stage will be to get the wing halves together and the props and jet pods assembled.
With some minor tweaking of the supplied markings it'll make a nice 1950's Soviet Navy Romeo Class sub. The SH-5 will probably be saved for another day.
Some of you may have noticed that it's not actually pictured on the bench. That's because the bench is rather full.
I thought it was time to make a start. I've got a little addition for it too.
I may have to replace the gun barrels though as a couple of them haven't fared too well in the box. Pavla really should have packed them better for the price
For such an old kit the decals aren't looking too bad.
I'm not going to chance it though and I'll be ordering some a/m decals for it.
And this evening I made a tentative start.
Construction starts with the wings......yes, I said wings.
OK, according to Mr Monogram construction should start in the conventional way with cockpit, interior and fuselage but I have a build plan that has to take into account how much space is available and how much of a mojo killer this model has the potential to be, so I decided to break the kit down into manageable sub-assemblies. The wings seem a good place to start as they aren't hugely complex structures so they'll provide a bit of an enthusiasm boost early on and shouldn't be too difficult to store when completed, allowing me the full bench to work on the fuselage.
That's the theory anyway
Tonight's progress consisted of a little parts clean up, a little assembly and even some initial painting.
The interior of the wing halves and the intake splitters have been given a blast with some rattle can silver. The intakes do have some ejector tower marks on them but these will be invisible when assembled. The shafts have been glued inside the propellor backs and the props and mounting blocks cleaned up.
That's all I had time for tonight. The next stage will be to get the wing halves together and the props and jet pods assembled.
COLD WAR S.I.G. LEADER
Wherever there's danger, wherever there's trouble, wherever there's important work to be done....I'll be somewhere else building a model!
Wherever there's danger, wherever there's trouble, wherever there's important work to be done....I'll be somewhere else building a model!
-
Stuart

- Raider of the Lost Ark Royal
- Posts: 19415
- Joined: February 25th, 2013, 4:55 pm
- Location: North Wales
- Contact:
Re: Dazzled's Den
You're a brave brave man!
Stuart Templeton I may not be good but I'm slow...
My Blog: https://stuartsscalemodels.blogspot.com/
My Blog: https://stuartsscalemodels.blogspot.com/
-
skypirate

- Modelling Gent and Scholar
- Posts: 7293
- Joined: May 1st, 2011, 6:13 am
- Location: Port Macquarie, Australia
Re: Dazzled's Den
That Texan is a real eye-catcher with a superb finish!
Good plan for the B-36!
cheers,
David
Good plan for the B-36!
cheers,
David
-
Clashcityrocker

- Modelling Gent and Scholar
- Posts: 10798
- Joined: May 1st, 2011, 12:31 am
- Location: Adelaide. South Australia
Re: Dazzled's Den
The first question my Dad asks when I see him is, "Have you built that B-36 yet?" This may give me the impetus to get started.
Nigel
Nigel
-
iggie

- Modelling Gent and Scholar
- Posts: 23418
- Joined: July 31st, 2013, 11:04 am
- Location: North Somercotes, Lincolnshire
- Contact:
Re: Dazzled's Den
The collective consumption of popcorn could well rise significantly during this build!
Best wishes
Jim
If you can walk away from a landing, it's a good landing. If you use the airplane the next day, it's an outstanding landing
"Never put off till tomorrow, what you can do the day after tomorrow"
Jim
If you can walk away from a landing, it's a good landing. If you use the airplane the next day, it's an outstanding landing
"Never put off till tomorrow, what you can do the day after tomorrow"
-
ShaunW
- NOT the sheep
- Posts: 26180
- Joined: November 26th, 2011, 6:11 pm
- Location: Pontefract West Yorkshire
Re: Dazzled's Den
Bloody chuff Daz, that's a biggy! Should be worth a watch!
Doing - Tamiya 1/35th Universal Carrier.
Work is the curse of the modelling classes!
IPMS#12300
Work is the curse of the modelling classes!
IPMS#12300

-
Dazzled
- Modelling Gent and Scholar
- Posts: 9592
- Joined: October 1st, 2011, 11:08 pm
- Location: Mid Glamorgan, South Wales
- Contact:
Re: Dazzled's Den
And perhaps a bigger car if I want to take it to shows.TobyC wrote:You're going to need a bigger bench
So, riding on a mojo wave I've been sitting in the relaxation room (a.k.a. The Den) as much as possible for a couple of evenings as well as keeping the household authorities happy by doing a little tray work too.
So far......
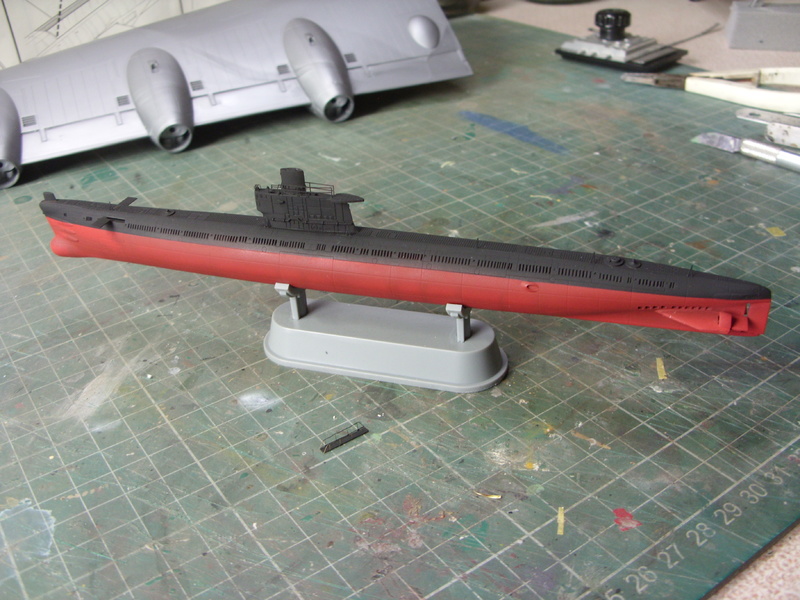
The Romeo Class has started to look submarine-like quite rapidly.
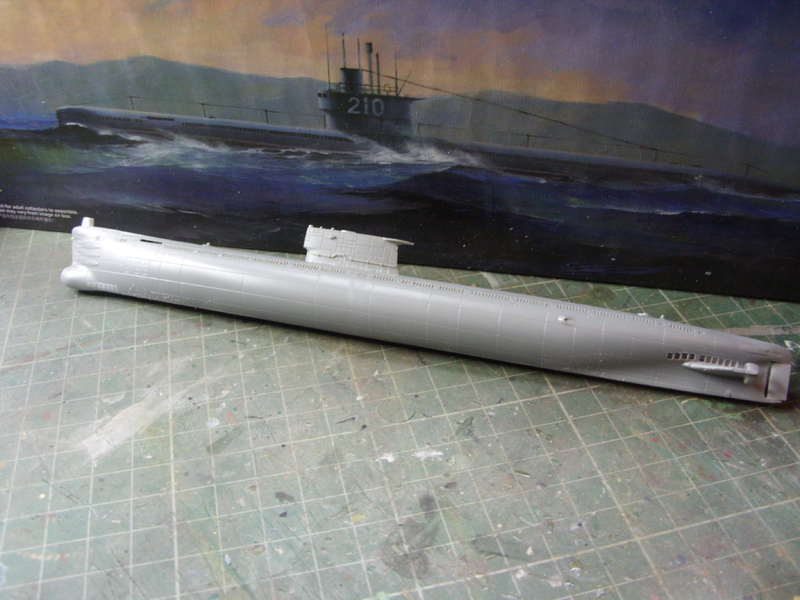
It's a lovely kit that almost clicks together and has some fantastic detail.
And, away from the tray in B-36 land;
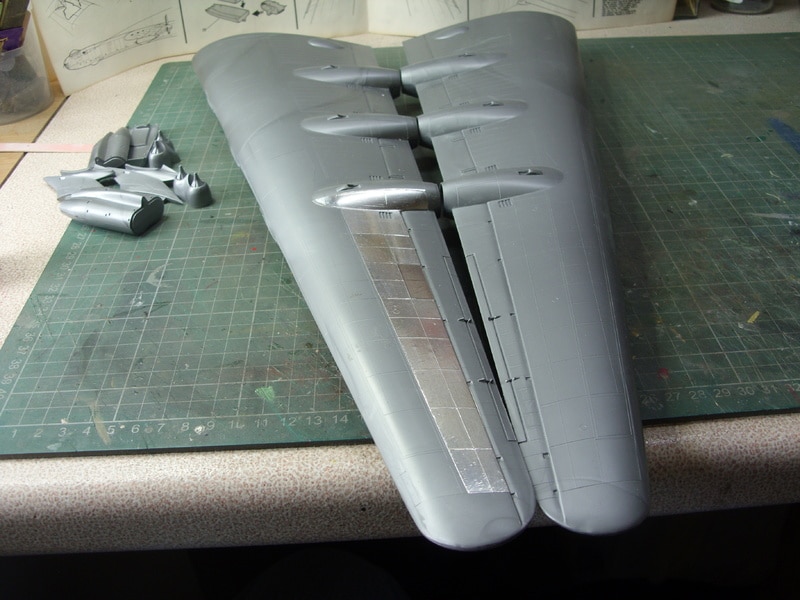
The wings had the intake splitters fitted.
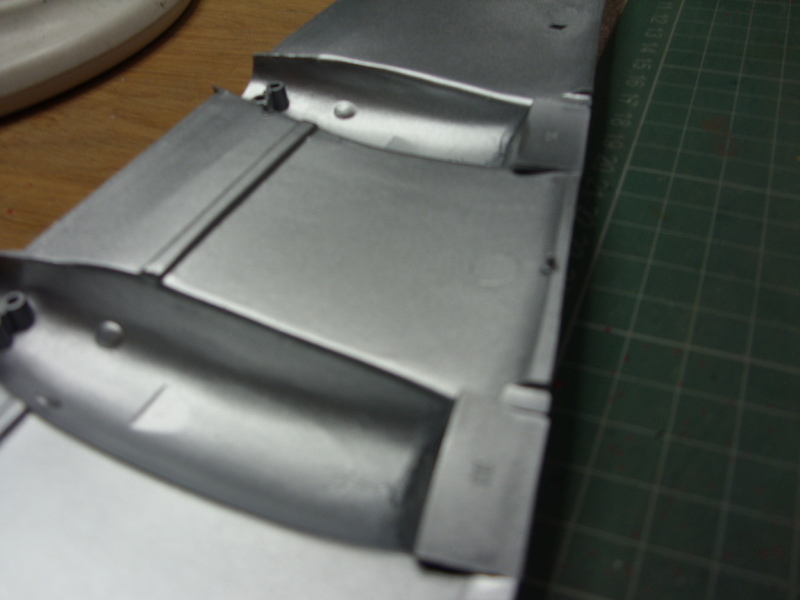
These are numbered both on the parts and inside the nacelles to avoid confusion. Somebody at Monogram must have known I was going to build one some day
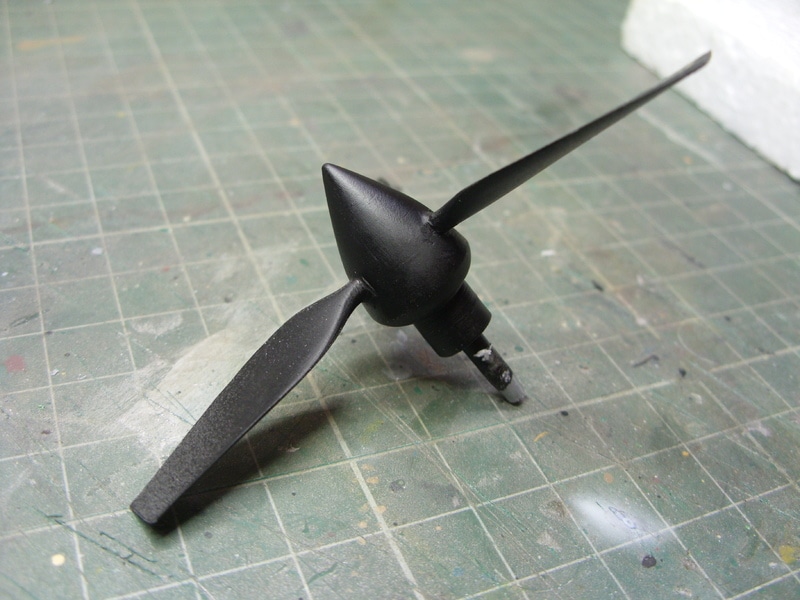
While these set I added some weathering wash to the undercarriage bays and then assembled the six propellors.

The joints on the spinners were then sealed with Zap-a-Gap. After they'd set I scraped and sanded the seams before giving them a coat of rattle can black primer.
Also in the picture are the mounting plates for the aforementioned props. These went into their positions in those big wings which were then joined together.
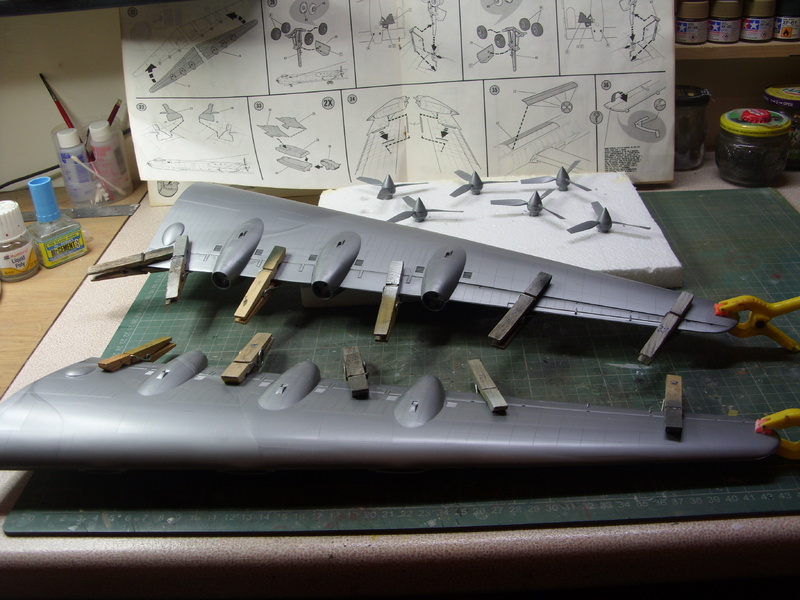
Liquid cement on the trailing edge, locating lugs and prop mounts with the leading edge sealed over with Zap-a-Gap and wiped back with a damp tissue.
Tonight's efforts were aimed at starting to deal with the seams and sink marks.
Also on the agenda are the jet pods. All the parts are off sprue and cleaned up.
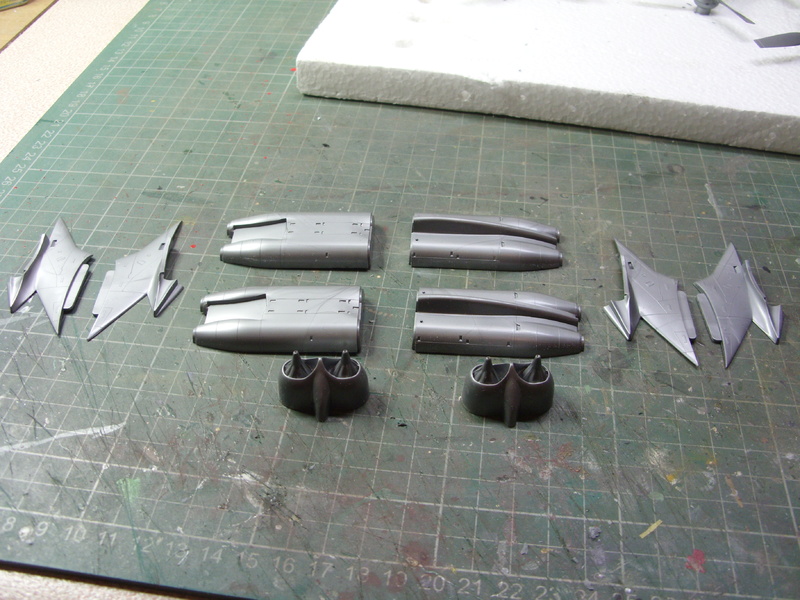
However, there is a slight issue. The pods are just empty boxes with holes in the back. I'm not keen on that arrangement so I think jet pipes are in order. I'll be casting around for some suitable materials on the weekend. At the moment everything is undergoing a little drying time.
Something that has left me feeling a little less than a happy camper though are the aftermarket decals I ordered from Hannants. Having looked around I opted for a Warbirds decal sheet with markings for four aircraft including a B-36D that I liked the look of. There's next to no conversion work and with the D variant one can be absolutely sure that it was fitted with gun turrets (Later models had turrets removed under the 3 "Featherweight" programs). When these arrived today I was pretty happy.
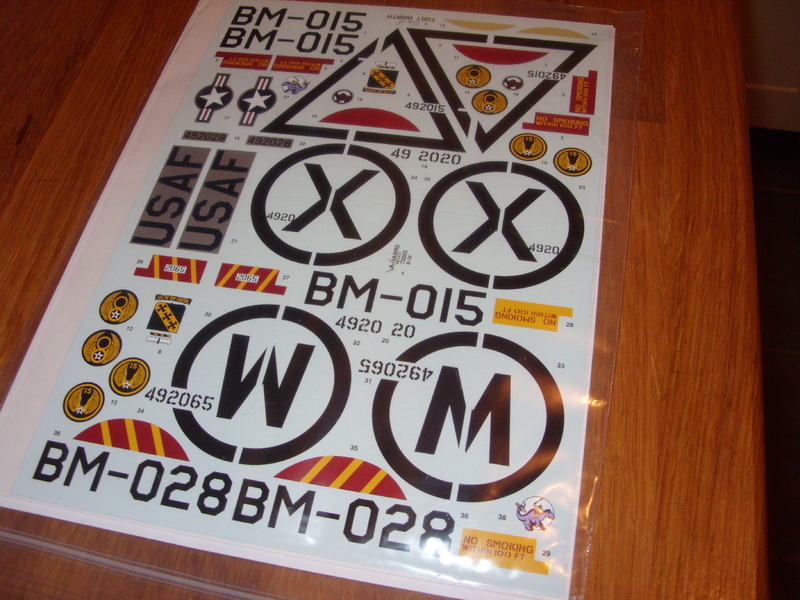
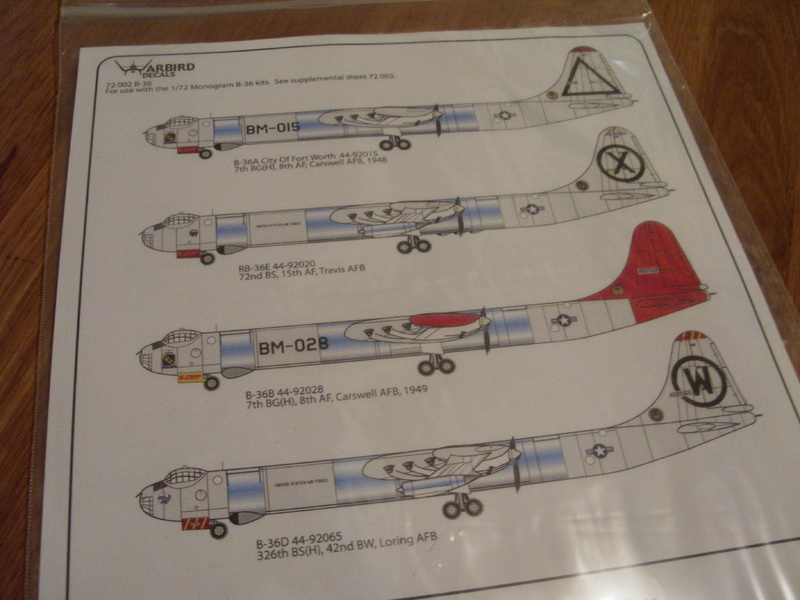
Warbirds sheet 72002 is certainly a superb piece of printing but, on closer examination, doesn't contain sufficient decals to create any of the versions illustrated . To do that you have to purchase Warbirds sheet 72003 which contains , among other things, the national insignia and correct size and font USAF labelling. Hannants neatly omit to tell the customer this when you order 72002. So, having shelled out just shy of £15 for one sheet I now find myself having to double that amount by ordering a second sheet. It's a pretty shabby trick as there are other decal sheets that would have cost less.
All I can say is that they'd better be really good decals.
COLD WAR S.I.G. LEADER
Wherever there's danger, wherever there's trouble, wherever there's important work to be done....I'll be somewhere else building a model!
Wherever there's danger, wherever there's trouble, wherever there's important work to be done....I'll be somewhere else building a model!
-
iggie
- Modelling Gent and Scholar
- Posts: 23418
- Joined: July 31st, 2013, 11:04 am
- Location: North Somercotes, Lincolnshire
- Contact:
Re: Dazzled's Den
That's a bit of a shocker on the decals; I'd be thinking of sending them back and ordering the cheaper ones!
Good progress on the monster otherwise....
Good progress on the monster otherwise....
Best wishes
Jim
If you can walk away from a landing, it's a good landing. If you use the airplane the next day, it's an outstanding landing
"Never put off till tomorrow, what you can do the day after tomorrow"
Jim
If you can walk away from a landing, it's a good landing. If you use the airplane the next day, it's an outstanding landing
"Never put off till tomorrow, what you can do the day after tomorrow"
-
Stuart
- Raider of the Lost Ark Royal
- Posts: 19415
- Joined: February 25th, 2013, 4:55 pm
- Location: North Wales
- Contact:
Re: Dazzled's Den
That Sub is looking good.
That's a bit of a bad trick with the Markings - I hate it when they do that, especially with the national markings. Perhaps what iggie suggested would be an idea - £30 for decals seems a bit steep!
That's a bit of a bad trick with the Markings - I hate it when they do that, especially with the national markings. Perhaps what iggie suggested would be an idea - £30 for decals seems a bit steep!
Stuart Templeton I may not be good but I'm slow...
My Blog: https://stuartsscalemodels.blogspot.com/
My Blog: https://stuartsscalemodels.blogspot.com/
-
ShaunW
- NOT the sheep
- Posts: 26180
- Joined: November 26th, 2011, 6:11 pm
- Location: Pontefract West Yorkshire
Re: Dazzled's Den
I wouldn't have been a very happy camper re the decals either, Daz. It would have been preferable to have had a sheet for two versions only but with sufficient decals to produce at least one of them as opposed to being forced to also purchase the "supplemental" sheet as Warbird describes it. Hannants should really make the customer aware that both sheets are required to finish even one of the schemes. £30.00 is rather a lot of coin for a set of decals methinks.
Doing - Tamiya 1/35th Universal Carrier.
Work is the curse of the modelling classes!
IPMS#12300
Work is the curse of the modelling classes!
IPMS#12300
-
planecrazyman61
- Modelling Gent and Scholar
- Posts: 1109
- Joined: November 15th, 2014, 12:43 am
Re: Dazzled's Den
wow the texan looks excellent with some top notch weathering to boot
cheers craig
cheers craig
-
Dazzled
- Modelling Gent and Scholar
- Posts: 9592
- Joined: October 1st, 2011, 11:08 pm
- Location: Mid Glamorgan, South Wales
- Contact:
Re: Dazzled's Den
Onwards and ever upwards, I've pinched a bit more time this weekend and made some more progress with both models.
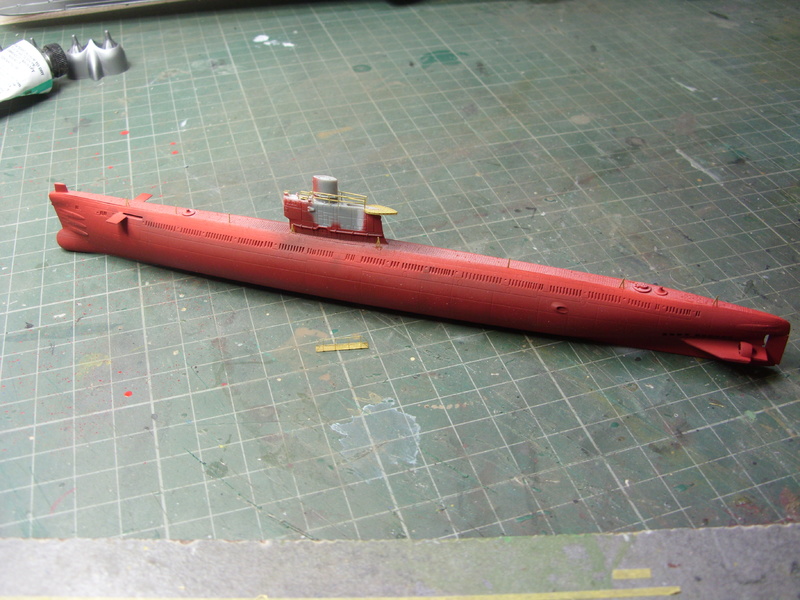
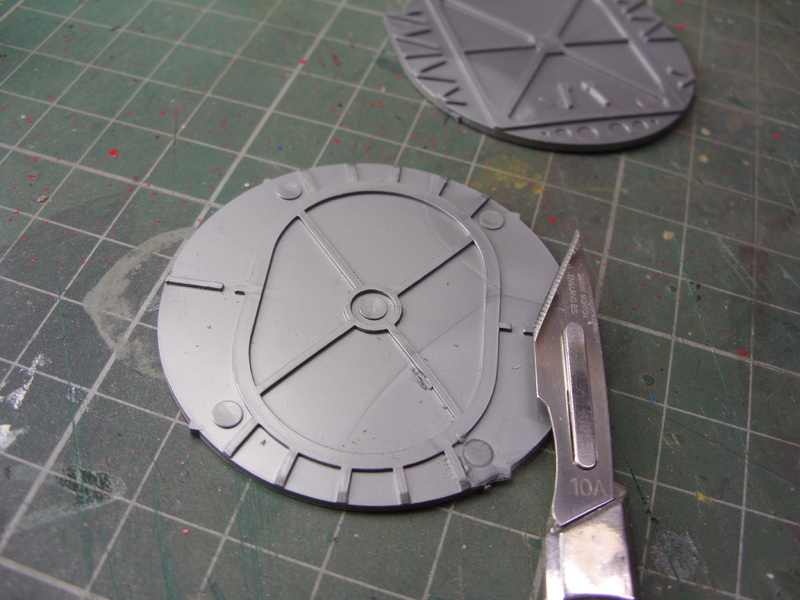
First, the Romeo Class sub is coming along rapidly.
A coat of white primer was applied to the hull.
This allowed for a little pre-shading of the plate lines on the lower half of the boat. With some hull red applied in mist coats it's quite effective. The hull red itself was mixed from Tamiya paints; an XF-7 base with a little XF-9 and a drop of white. XF-9 itself is a Japanese navy WW2 hull colour and is too dark for Soviet ships. The mixing process didn't go all that smoothly and I wasted a bit of paint trying to get it right. On the bright side I now have a couple of jars of quite nice looking red oxide coloured paint
A further complication occurred when, for some reason, my airbrush decided to have a fit. It must have been a speck of solid paint in the mix but the result was a blockage and a quite spectacular red explosion. The inside of my spray booth now looks like a scene from the TV series Dexter
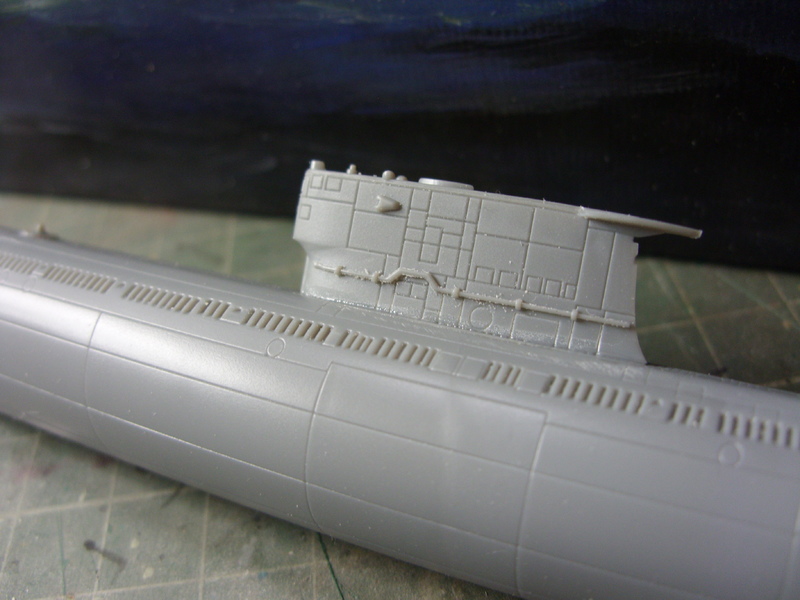
When this had dried I set about fitting the etched brass parts that are included in the kit.
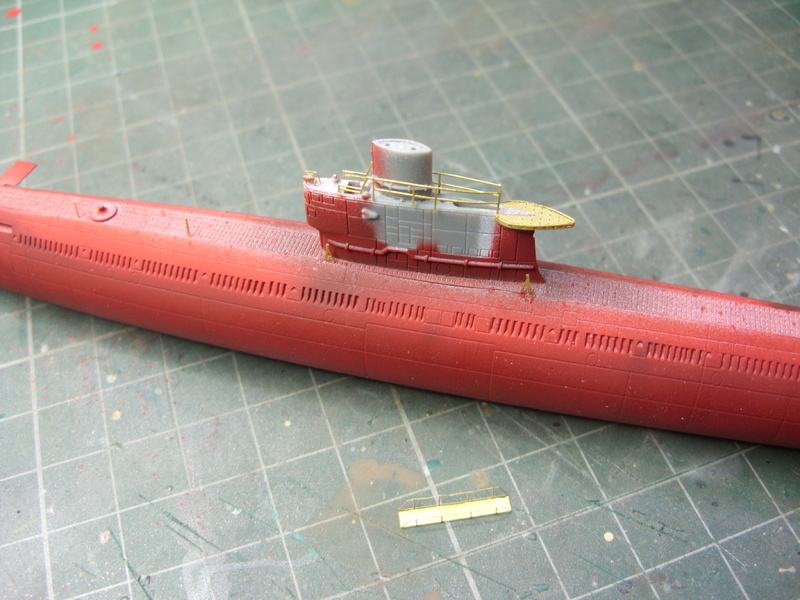
So now there were lots of delicate parts for me to knock off while masking...and I managed that quite a few times, particularly with the handrail supports on the deck.
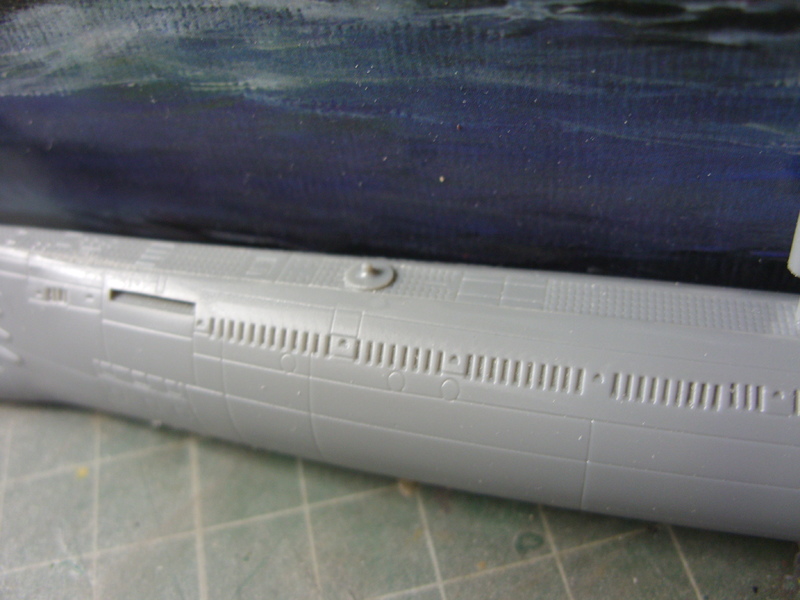
Next it was time for some black
And when that had dried I painted in the sonar array cover on the front in Flat Aluminium. At the moment it's had a coat of varnish and is waiting for a second coat in preparation for decaling.
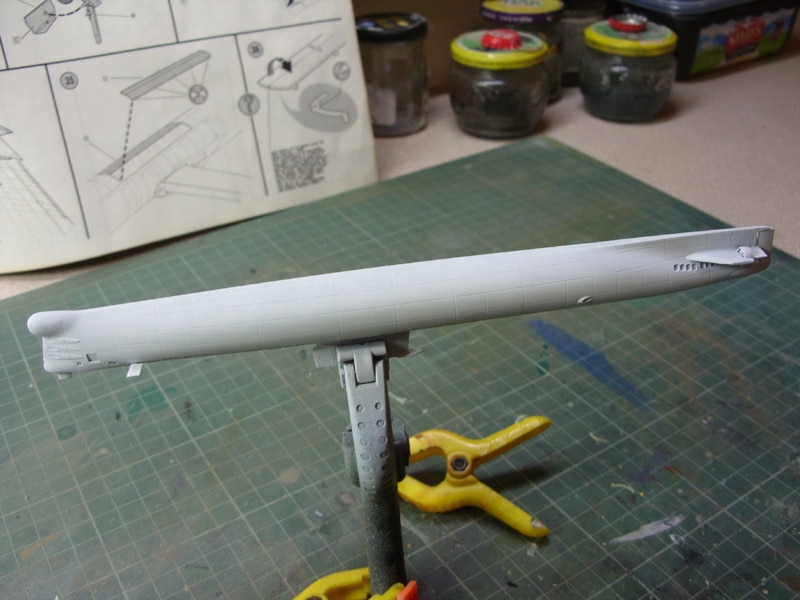
Meanwhile, the B-36 is also progressing.
The wings had a few sink marks, particularly at the lower edges of the engine nacelles corresponding to the positions of the prop mounting plates.
There were a few more here and there but nothing too onerous.
The propellors have been filled and sanded and then given a blast with some rattle can black primer to check the seams and provide a base for a metallic overcoat.
Also, I've been experimenting with a new method, to me anyway, of achieving a NMF.
At the moment there's not much more I can do with the wings. The jet pods are on hold until I can source some suitable tube for jet pipes. The Milton Keynes show is next week so I'll be scouring the trade stands there for some suitable material.
So with the wings put aside I've made a tentative start on the fuselage.
The bomb bay bulkheads feature some prominent ejector pin marks that are, irritatingly, on the visible face.
And Monogram have thoughtfully included a directional aid for any modeller who might get confused.
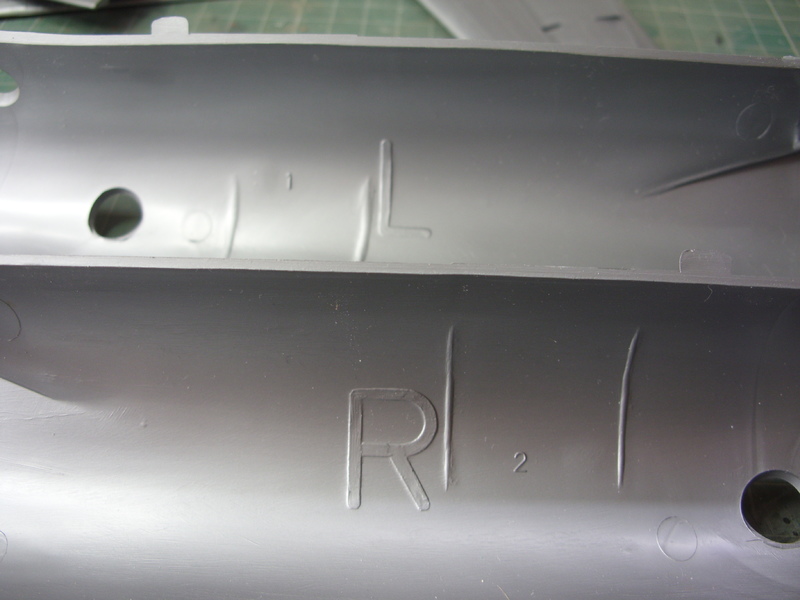
Yes, a big "L" and "R" to help identify which side is which.
It's kind of hard to imagine what they were thinking when they decided to include these
More updates soon
COLD WAR S.I.G. LEADER
Wherever there's danger, wherever there's trouble, wherever there's important work to be done....I'll be somewhere else building a model!
Wherever there's danger, wherever there's trouble, wherever there's important work to be done....I'll be somewhere else building a model!