Page 46 of 98
Re: Dazzled's Den
Posted: May 8th, 2017, 4:26 am
by PGAS
Man, that is a lot of work! Lovely job on the interior of the B-36. Now you have got me thinking about getting one of the Sabres from Airfix. They look fine!
Re: Dazzled's Den
Posted: May 8th, 2017, 5:34 am
by Dazzled
I can thoroughly recommend the Airfix Sabre Paul

Re: Dazzled's Den
Posted: May 16th, 2017, 2:43 pm
by Dazzled
Time for another update,
Things have been a little slower in the Den than I'd like recently. Family commitments and a minor accident at work that has aggravated an old shoulder injury has conspired to slow the modelling rate down to a crawl at times.
However, some things have been achieved and, with the aid of ibuprofen and physiotherapy, I hope to pick things up again asap.
Two things have been at the fore lately.
Firstly....Migs. What else?

The Dragon -17 and Mistercraft -19 have been providing quite a bit of entertainment.

The Mistercraft offering is pretty much as expected. The Dragon kit is rather disappointing; poor quality control and manufacturing being evident features. Still, it's the best there is at the moment, as is the -19 until Trumpeter extract their digits and give us their long promised kit, so if you need to fill some gaps this is what you build. There are more details in my "Big Mig Build" in the Aviation Modelling section.
The other thing on the bench right now is this......
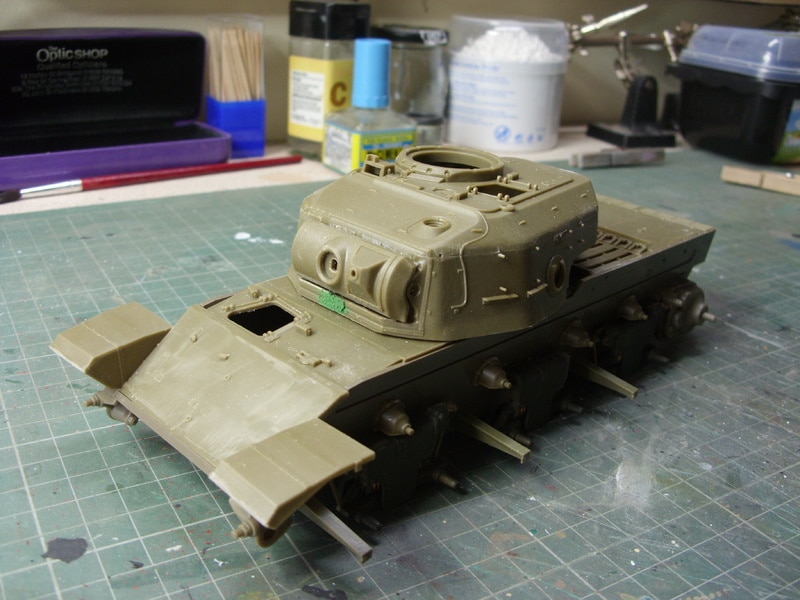
Can you see what it is yet?
Re: Dazzled's Den
Posted: May 16th, 2017, 3:27 pm
by ShaunW
Good to see the MiG pair are still going along and the tank looks like a Centurion to me.
Re: Dazzled's Den
Posted: May 17th, 2017, 4:09 pm
by Dazzled
ShaunW wrote:Good to see the MiG pair are still going along and the tank looks like a Centurion to me.
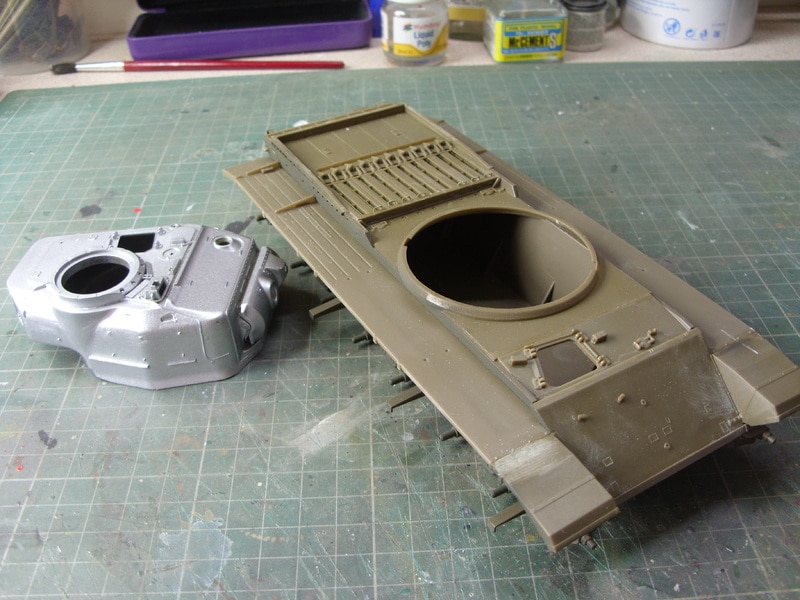
You're spot on Shaun. A 1/35th AFV Club Centurion Mk.5/2 with 105mm gun to be exact.
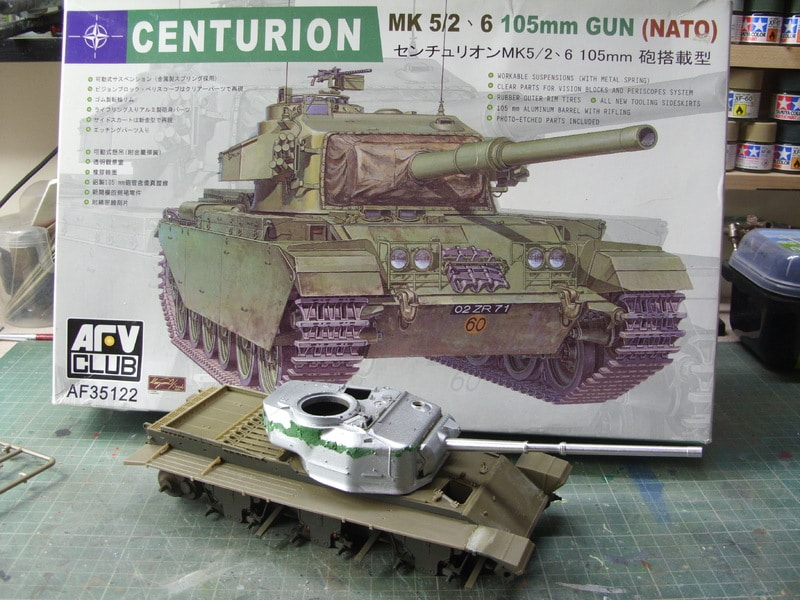
It has silver paint and filler around the turret for a reason.
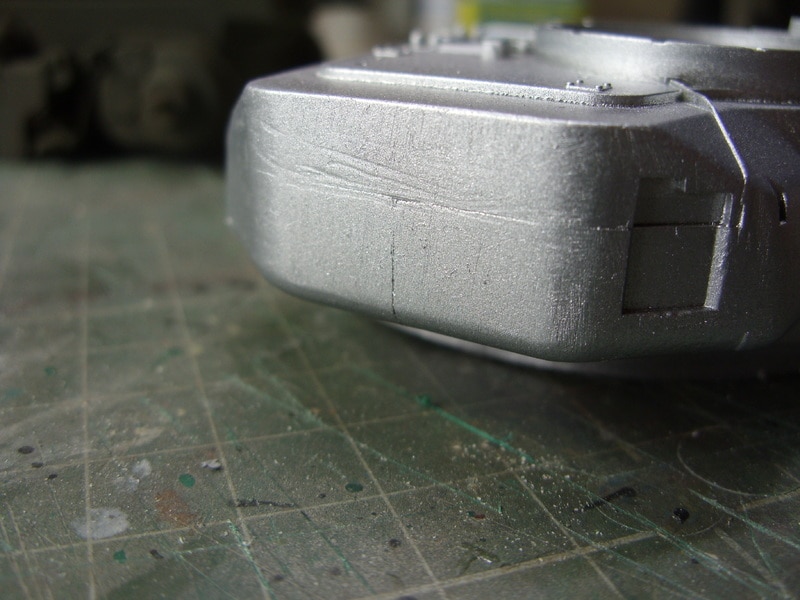
The turret splits in rather an odd way with a seam running around it just below roof height and right above a line of rivets. It has some lovely detail but how much I'll have to replace remains to be seen. I think it's likely that the top row of rivets will need replacing but I'm going to do my best to keep the casting code on the one side. This is my first AFV Club kit. I've had it in the stash for a while now and started badgering about with it a couple of weeks ago. I have to admit that it's not what I expected. The styrene is very reminiscent of the olive drab stuff seen on 1960's Revell kits and the engineering, while superbly detailed, is a bit odd for such an expensive kit. The grab handles, for example, are tiny things and individually attached but the locating holes are little more than dimples and the handles themselves are attached to the sprue in the centre rather than at one end, making them nigh on impossible to clean up and difficult to detach in one piece. There are exactly the number you need supplied with the kit.....I'm looking for some thin wire now

Also, the suspension has real metal springs in it. Brilliant. Until you discover that you have to glue linkages onto 4 of the 6 suspension units that then lock them in place ???? Absolutely pointless!
Still, it should be nice when it's finished and will give us a bit more suitable armour for the SIG display at SMW as it'll represent a tank from about 1959 on which is when the British Army began up gunning their Centurions with the 105mm gun.
Other then my efforts with the Centurion, the Migs have had a couple of rounds of filler and are coming along very nicely, just not worth taking pictures of and I have a couple of old DNFs being poked about a bit. More tomorrow perhaps although as it's my birthday I'm not sure if I'll get any peace to slip off to the Den.
Then again, who knows

Re: Dazzled's Den
Posted: May 17th, 2017, 4:19 pm
by Stuart
One of my Favourite tanks that Darryl, I'll be looking forward to seeing it come together - Does sound like an 'interesting' kit though.
Re: Dazzled's Den
Posted: May 17th, 2017, 4:20 pm
by Stuart
Oh, and happy birthday for tomorrow!
Re: Dazzled's Den
Posted: May 17th, 2017, 4:25 pm
by ShaunW
My experience of AFV Club amounts to their Scimitar kit, which I enjoyed building apart from the rubber band tracks, which were a total pig to join and a set of their T-34 individual track links, to replace the truly appalling OOB efforts in an Italeri (nee Zvezda) SU-100, which were very good and easy to assemble. On the face of it, this Centurion kit looks very promising but is obviously let down in certain areas. Perhaps AFV Club might be a bit of a mixed bag. The Scimitar also had some nice detailing but its tracks were reminiscent of something Airfix or Matchbox would have produced in the 1970's (although in fairness to AFV Club, they were better than those ghastly Italeri/Zvezda SU-100 ones

).
On a lighter note - happy birthday for tomoz from me as well!
Re: Dazzled's Den
Posted: May 17th, 2017, 5:32 pm
by iggie
'Interesting' design for the tooling as you say!
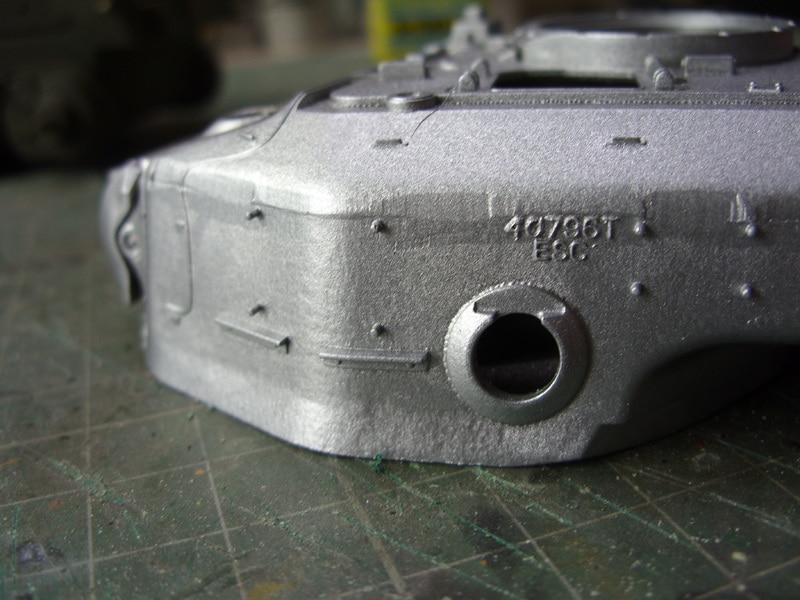
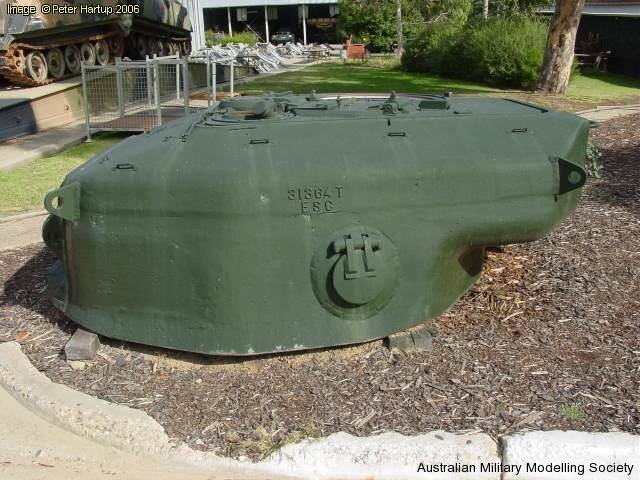
Is the number and lettering in the 2nd photo part of the moulding, or did centurions have such a code cast into the turret?
Re: Dazzled's Den
Posted: May 17th, 2017, 8:40 pm
by Ratch
iggie wrote:Is the number and lettering in the 2nd photo part of the moulding, or did centurions have such a code cast into the turret?
I was wondering that too

Re: Dazzled's Den
Posted: May 17th, 2017, 9:58 pm
by Dazzled
Ratch wrote:iggie wrote:Is the number and lettering in the 2nd photo part of the moulding, or did centurions have such a code cast into the turret?
I was wondering that too
Having an engineering background I was under the impression that it was a code cast into the turret. it would seem a bit odd for AFV Club to put a kit code in so prominent a location. A quick Googling turned up this from the Australian Military Modelling Society. It's a Mk.1 turret but there's the casting number.
Re: Dazzled's Den
Posted: May 18th, 2017, 7:45 am
by iggie
Well, you live and learn!
Re: Dazzled's Den
Posted: May 21st, 2017, 3:40 pm
by Dazzled
Having got over my birthday I thought I'd add a brief update.
Happily, the empennage is all attached to the Mig-19.
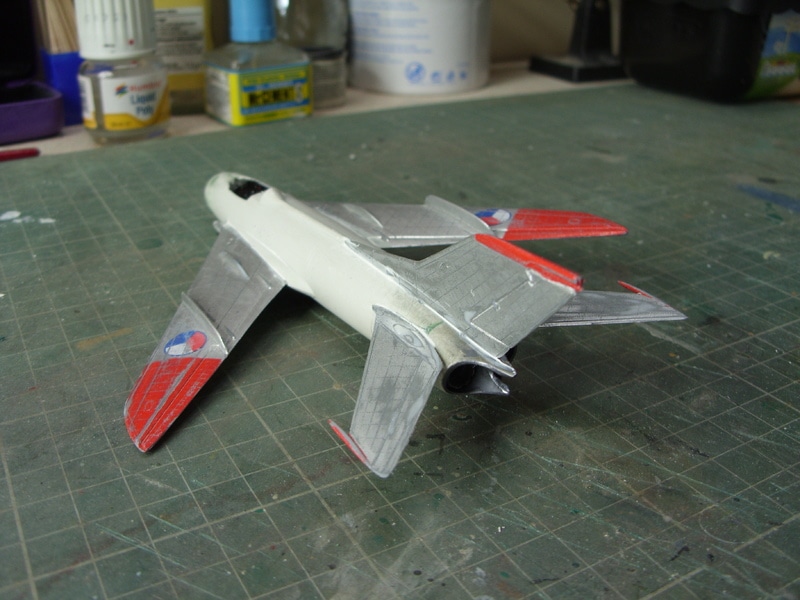
Rescribing, sanding, measuring (there are no indicators to location) and butt joints were the order of the day but I got there in the end and sealed the seams up with Vallejo Plastic putty.
Hopefully this, along with the -17 and one of the Sabres, will be going to the paint shop very soon.
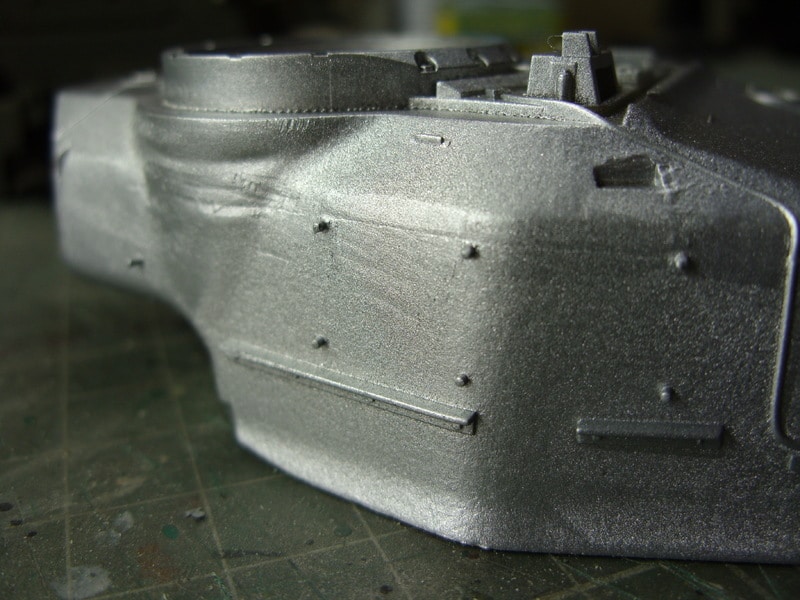
And I'm much happier with the Centurion's turret now.
I've got the seam sorted to an acceptable level and what I thought were rivets were actually locators/mounts for the side stowage boxes. Something that's continuing to cause issues are the forward fenders that don't sit straight when attached to the main parts. I think I might have to resort to a little gentle surgery to get them to look right.
Other than that I'm continuing to assemble parts. It's gradual work but the detail is certainly there. I am dithering slightly about buying new tracks for it. It's a weird anomaly. It's not a cheap kit and it comes with a little etched brass and a superb turned gun barrel that even features rifling on the inside. Then you get some nasty rubber band tracks rather than a good set of individual link tracks. It seems a little silly to me.
Re: Dazzled's Den
Posted: May 21st, 2017, 5:06 pm
by ShaunW
Great progress with these Daz. Personally in an AFV kit I'd sooner have a decent set of tracks from the manufacturer than a turned metal gun barrel. I've struggled manfully with crap tracks and been generally dissatisfied with the results on too many occasions but with careful clean up and sanding I can usually make a two-piece plastic gun barrel look good enough.
Re: Dazzled's Den
Posted: June 3rd, 2017, 3:59 pm
by PGAS
Great work Dazzled. The Mig certainly looks like a challenge but it has some nice lines and you don't see this one often.
The Centurion is coming along very nicely as well. Do you plan on doing the (sorry, not sure what it is called, I'm going to get hammered for this

), that baggy thing over the gun base? If so, how would you do it?