Thanks
Justin, your "stupid questions" line always reminds me of a sign I saw once at a big DIY store: "Don't be afraid to ask. It's a lot easier to answer a stupid question than it is to fix a stupid mistake."
Barry's P-63C King Cobra FINISHED
-
Barry
- Modelling Gent and Scholar
- Posts: 2612
- Joined: May 1st, 2011, 1:23 am
- Location: Eastvale, California, USA
Re: Barry's P-63C King Cobra
2012 A:12 B:13 C:0
-
Barry
- Modelling Gent and Scholar
- Posts: 2612
- Joined: May 1st, 2011, 1:23 am
- Location: Eastvale, California, USA
Re: Barry's P-63C King Cobra
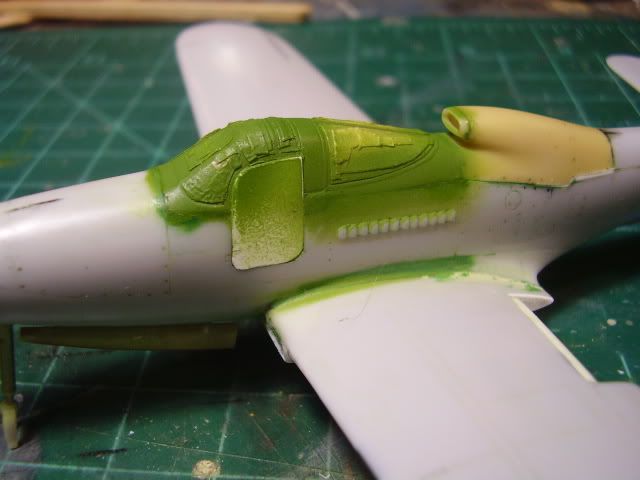
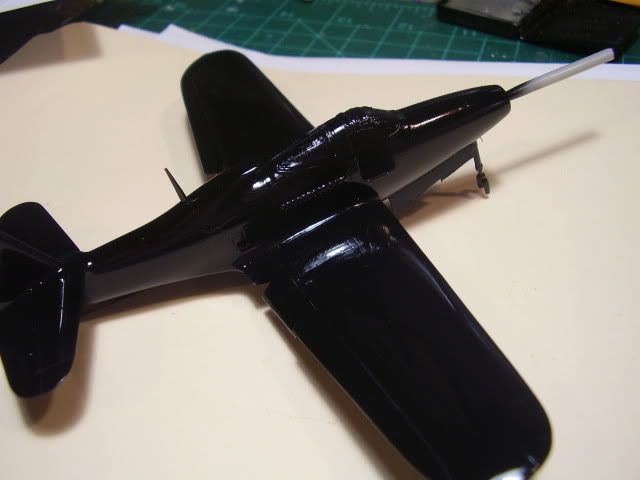
Finished up the cockpit (except for the throttle quadrant) and got the lid on. A little drama, but it worked out ok.
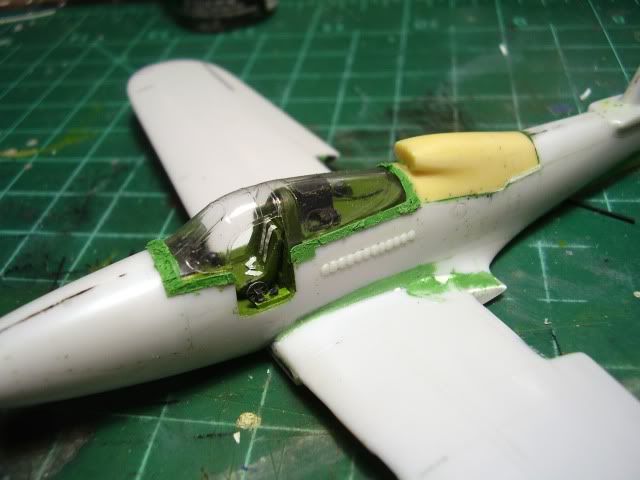
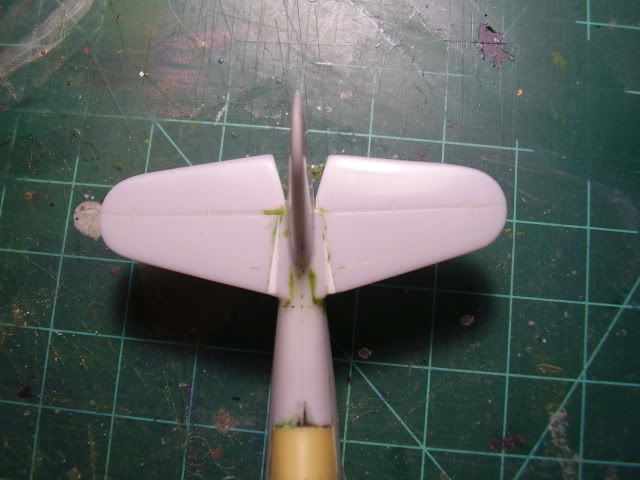
Also got the ventral fin on and shaped. A little out of focus here, but you get the idea.
There should be a couple of .50 cal in the nose, but they're not mentioned on this kit... That's the next thing up.
Also got the ventral fin on and shaped. A little out of focus here, but you get the idea.
There should be a couple of .50 cal in the nose, but they're not mentioned on this kit... That's the next thing up.
2012 A:12 B:13 C:0
-
MerlinJones
Re: Barry's P-63C King Cobra
The work done within the cockpit really pays off now. Looking well ace, Barry!
Regards,
Bruce
Regards,
Bruce
-
Molly-new

- Modelling Gent and Scholar
- Posts: 2355
- Joined: May 4th, 2011, 8:42 pm
- Location: Stoke-on-Trent, England
Re: Barry's P-63C King Cobra
Looking good Barry, can't wait to see this one finished.
Airfix WWII Aircraft Of The Aces.
Completed - 10
Building -
Pending -4
Completed - 10
Building -
Pending -4
-
Barry
- Modelling Gent and Scholar
- Posts: 2612
- Joined: May 1st, 2011, 1:23 am
- Location: Eastvale, California, USA
Re: Barry's P-63C King Cobra
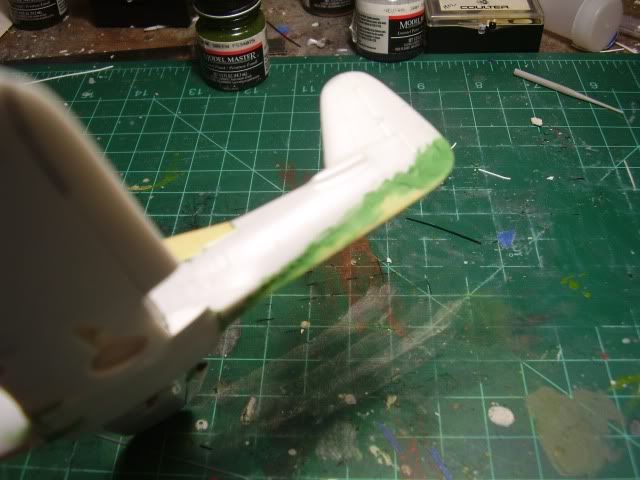
Still filling and sanding around the canopy today. Also attempting the gun troughs using a method I read about on this forum but have never tried. Make a big hole and glue into it a tube with a bore equal to the diameter of the gun barrels.
Add filler and sand to contour, whereupon the the bore is cut into and becomes the gun trough. Simple enough in theory...I'm letting the filler dry overnight before continuing
Add filler and sand to contour, whereupon the the bore is cut into and becomes the gun trough. Simple enough in theory...I'm letting the filler dry overnight before continuing
2012 A:12 B:13 C:0
-
Barry
- Modelling Gent and Scholar
- Posts: 2612
- Joined: May 1st, 2011, 1:23 am
- Location: Eastvale, California, USA
Re: Barry's P-63C King Cobra
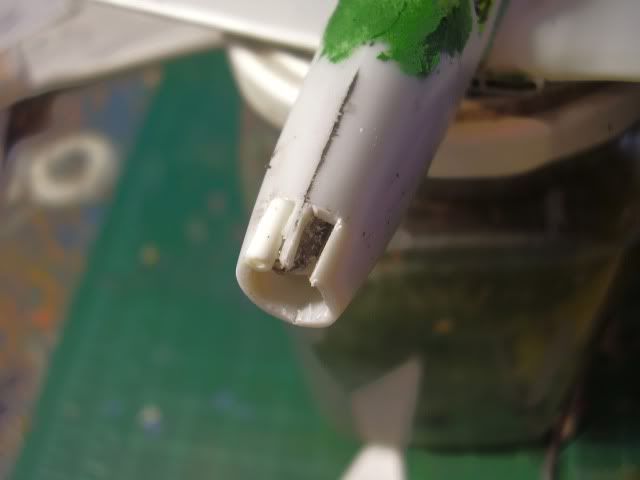
So, the guns thing worked out pretty well. It's tricky to get the tubing placed so that the 'troughs' open up just where you want them.
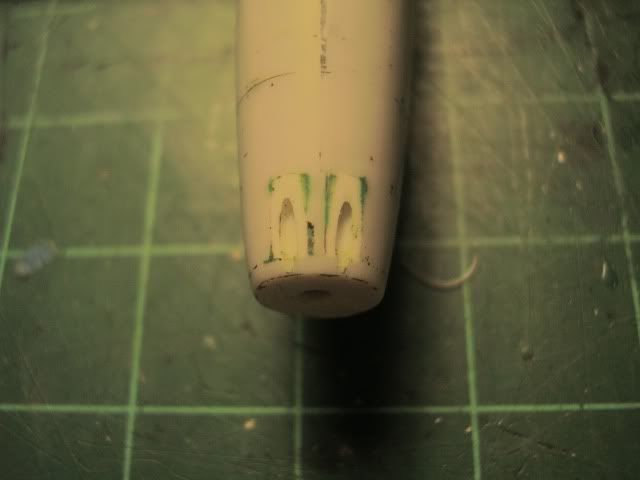
See the little white wedges? I'd forgotten about having to do that on these early MPM's
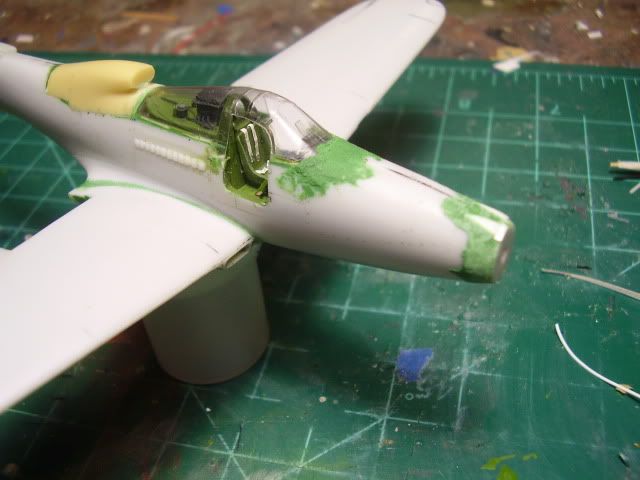
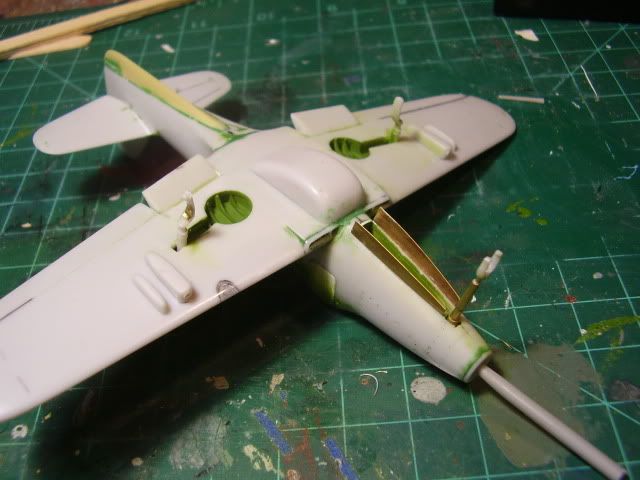
Very busy under here adding nose gear doors, under wing gun pods and hard points, centerline tank, landing light, flaps, and landing gear. Both of the main gear pieces broke at the thin curved section and , if you look real hard, you can just make out the brass I used to splint the repair.
And, finally, canopy masked and sprayed the interior color.
See the little white wedges? I'd forgotten about having to do that on these early MPM's
Very busy under here adding nose gear doors, under wing gun pods and hard points, centerline tank, landing light, flaps, and landing gear. Both of the main gear pieces broke at the thin curved section and , if you look real hard, you can just make out the brass I used to splint the repair.
And, finally, canopy masked and sprayed the interior color.
2012 A:12 B:13 C:0
-
Barry
- Modelling Gent and Scholar
- Posts: 2612
- Joined: May 1st, 2011, 1:23 am
- Location: Eastvale, California, USA
Re: Barry's P-63C King Cobra
Thanks, Bruce. I'm kinda enjoying this almost daily posting because it's keeping my attention focused on one model instead of jumping from one thing to another and not getting very much done on any of them. 
2012 A:12 B:13 C:0
-
Jagewa

- Modelling Gent and Scholar
- Posts: 2752
- Joined: April 6th, 2011, 2:18 am
- Location: Christchurch, New Zealand
- Contact:
Re: Barry's P-63C King Cobra
Nice work Barry, those guns troughs worked great and the thin brass as a split is a brilliant tip, ace.
Cheers
Jim
Cheers
Jim
-
JamesPerrin

- Looks like his avatar
- Posts: 13687
- Joined: April 5th, 2011, 8:09 pm
- Location: W. Yorkshire
- Contact:
Re: Barry's P-63C King Cobra
Great work Barry. The gun troughs worked well but as you say you need to be precise as tiny discrepancies in position show up as the troughs not looking symmetric.
Classic British Kits SIG Leader Better to fettle than to fill
(2024 A:B 5:2) (2023 13:8:7) (2022 21:11) (2021 15:8) (2020 8:4:4)
(2024 A:B 5:2) (2023 13:8:7) (2022 21:11) (2021 15:8) (2020 8:4:4)
-
Barry
- Modelling Gent and Scholar
- Posts: 2612
- Joined: May 1st, 2011, 1:23 am
- Location: Eastvale, California, USA
Re: Barry's P-63C King Cobra
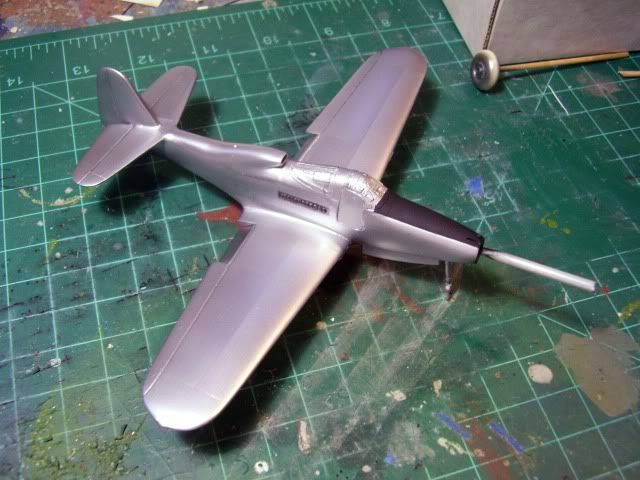
So, now I'm just watching paint dry. Then, it'll be micro mesh and polishing and Alclad .
2012 A:12 B:13 C:0
-
Old_Tonto

- Modelling Gent and Scholar
- Posts: 8063
- Joined: May 1st, 2011, 7:41 pm
- Location: Middlesbrough, Peoples Republic of Teesside.
Re: Barry's P-63C King Cobra
You are getting there, keep the images coming.
2023 - A:0 B:0 C:0
Current Projects:
East German Air Force (1956-90)
South African Air Force (1958-93)
Current Projects:
East German Air Force (1956-90)
South African Air Force (1958-93)
-
Barry
- Modelling Gent and Scholar
- Posts: 2612
- Joined: May 1st, 2011, 1:23 am
- Location: Eastvale, California, USA
Re: Barry's P-63C King Cobra
I hope we're not getting into another round of issues over the solvents in model paints...
2012 A:12 B:13 C:0
-
Molly-new
- Modelling Gent and Scholar
- Posts: 2355
- Joined: May 4th, 2011, 8:42 pm
- Location: Stoke-on-Trent, England
Re: Barry's P-63C King Cobra
Awesome job on the metalwork.
Airfix WWII Aircraft Of The Aces.
Completed - 10
Building -
Pending -4
Completed - 10
Building -
Pending -4