Ah, thanks Simon for that heads up.
Cheers
Jim
Jim's Stirling
-
bromo

- On a long, long journey
- Posts: 1249
- Joined: May 2nd, 2011, 7:05 pm
- Location: Wolverhampton,England
Re: Jim's Stirling
Nice tip with the filler Jim,cant help with the under cart issue sorry,when i built mine wheels up aged 10 i was more interested in blowing up me nan's fish pond, with all those bombs in the bomb bay 
BEEN A WHILE

Re: Jim's Stirling
Very nice. A suggestion on the sink marks. Drill them out, then take sprue or a plastic dowel and coat it with liquid cement and shove it into the hole and cut it off flush.
-
Jagewa

- Modelling Gent and Scholar
- Posts: 2752
- Joined: April 6th, 2011, 2:18 am
- Location: Christchurch, New Zealand
- Contact:
Re: Jim's Stirling
Thanks for that dknights.
Well did not get much time on this, the dinner table was taken over as a sewing table yesterday, so mainly fill'n sanding. Though did some cutting as well, cut out the midupper fairing, and have cemented some plasticard in, with a few strips across the back as support.

Joints plastered with the sprue gloop, I thought it might flex and be less likely to crack, with the sanding to follow. We'll see..
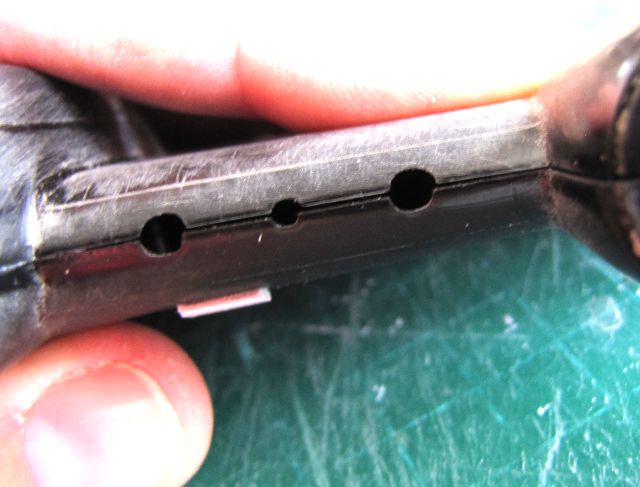
While working on the wing halves I noticed this..
on one nacelle half it's very thinly moulded.
Cheers
Jim
Well did not get much time on this, the dinner table was taken over as a sewing table yesterday, so mainly fill'n sanding. Though did some cutting as well, cut out the midupper fairing, and have cemented some plasticard in, with a few strips across the back as support.
Joints plastered with the sprue gloop, I thought it might flex and be less likely to crack, with the sanding to follow. We'll see..
While working on the wing halves I noticed this..
on one nacelle half it's very thinly moulded.
Cheers
Jim
-
Jagewa
- Modelling Gent and Scholar
- Posts: 2752
- Joined: April 6th, 2011, 2:18 am
- Location: Christchurch, New Zealand
- Contact:
Re: Jim's Stirling
More sanding last night, though I did slice some sections off a wheel, so I can pop them in after everything is painted. I think I'm dodging the cockpit, I'm sure of it...
-
Jagewa
- Modelling Gent and Scholar
- Posts: 2752
- Joined: April 6th, 2011, 2:18 am
- Location: Christchurch, New Zealand
- Contact:
Re: Jim's Stirling
Wow, it's a lot of plastic, and needs a lot of clamps...
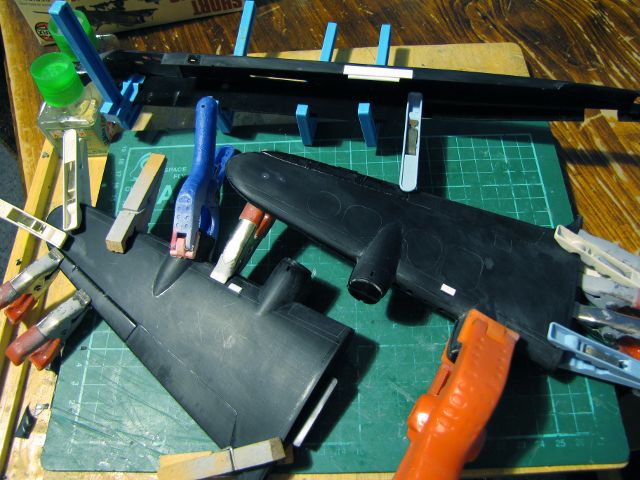
used up all my large clamps here.
The wings seemed to have a bit of a bow, so I decided to cement in two stages, the root and inner naccelle first, letting that dry before cementing the rest.
Cheers
Jim
used up all my large clamps here.
The wings seemed to have a bit of a bow, so I decided to cement in two stages, the root and inner naccelle first, letting that dry before cementing the rest.
Cheers
Jim
-
Jagewa
- Modelling Gent and Scholar
- Posts: 2752
- Joined: April 6th, 2011, 2:18 am
- Location: Christchurch, New Zealand
- Contact:
Re: Jim's Stirling
Yes the wings are needing some 'gentle' persuasion.bromo wrote:Some serious clamping there Jim, how do you make "sprue gloop" ?
Dissolved about 75-100mm length of sprue in about 3mm of tamiya extra thin I had left in a bottle...
http://uamf.org.uk/viewtopic.php?f=182&t=2857&start=13
Cheers
Jim
-
bromo
- On a long, long journey
- Posts: 1249
- Joined: May 2nd, 2011, 7:05 pm
- Location: Wolverhampton,England
Re: Jim's Stirling
Cheers for that Jim,will have to give that a try next time i need to do some filling.
BEEN A WHILE
-
Jagewa
- Modelling Gent and Scholar
- Posts: 2752
- Joined: April 6th, 2011, 2:18 am
- Location: Christchurch, New Zealand
- Contact:
Re: Jim's Stirling
Its working quite well for me, fills the sink marks well, and has sanded nicely too, the only issues I struck was trying it on big gaps and piling it on, it seems to stay soft for a long time. For the sink marks works well.
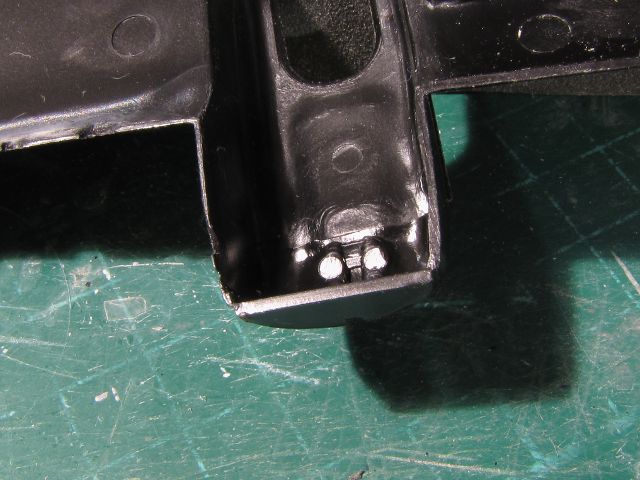
Heres one of the wings after I cemented the root and inner nacelle, and the reson why I did them in stages..
the bit of a step can be forced to line up with a clamp. Can also see the alignment being out on these inlets..
again I can line them up when the rest of the wing is cemented.
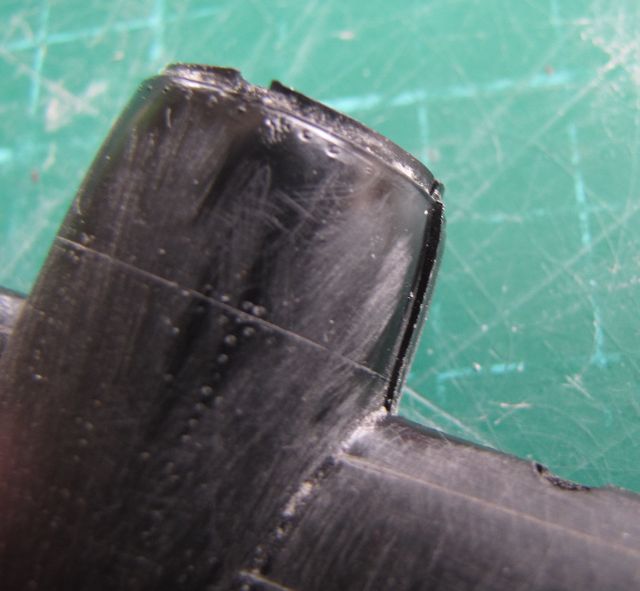
Looking towards the cockpit, it looks like the windows need to be placed before I start adding some detail, but the windows not the best, big dimples in the middle, and bright edges, with big flanges. So they had a klear application, then black painted on the edges, then test fitted in the fuselage..
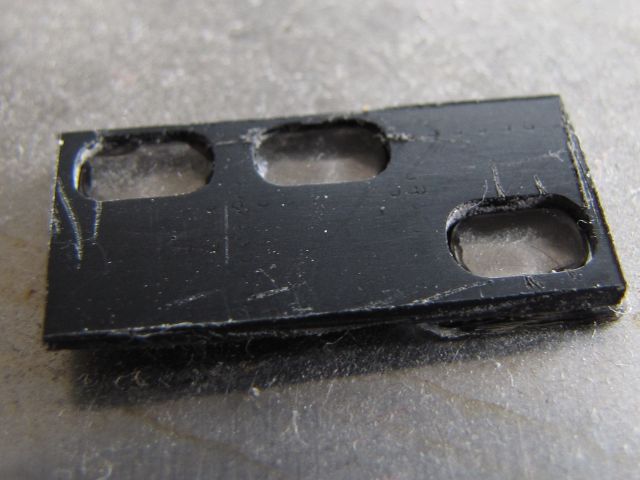
ah poo, they don't fit flush to the outside, now windows and canopies are something that I really notice on kits, and have to do something about if I don't like the look of them. So out with the razor saw and CD case...
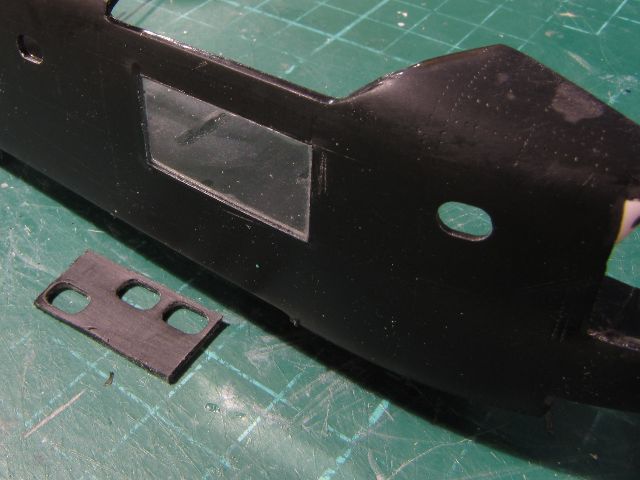
The section of CD case is cemented in slightly proud, so I'll sand it smooth and then mask the windows off.
I'll replace the rear fuselage windows with a couple of sections of cd case as well.
Cheers
Jim
Heres one of the wings after I cemented the root and inner nacelle, and the reson why I did them in stages..
the bit of a step can be forced to line up with a clamp. Can also see the alignment being out on these inlets..
again I can line them up when the rest of the wing is cemented.
Looking towards the cockpit, it looks like the windows need to be placed before I start adding some detail, but the windows not the best, big dimples in the middle, and bright edges, with big flanges. So they had a klear application, then black painted on the edges, then test fitted in the fuselage..
ah poo, they don't fit flush to the outside, now windows and canopies are something that I really notice on kits, and have to do something about if I don't like the look of them. So out with the razor saw and CD case...
The section of CD case is cemented in slightly proud, so I'll sand it smooth and then mask the windows off.
I'll replace the rear fuselage windows with a couple of sections of cd case as well.
Cheers
Jim
-
JamesPerrin

- Looks like his avatar
- Posts: 13694
- Joined: April 5th, 2011, 8:09 pm
- Location: W. Yorkshire
- Contact:
Re: Jim's Stirling
You seem to be doing well knocking this old beast into shape. Look forward to seeing further progress.
Classic British Kits SIG Leader Better to fettle than to fill
(2024 A:B 5:2) (2023 13:8:7) (2022 21:11) (2021 15:8) (2020 8:4:4)
(2024 A:B 5:2) (2023 13:8:7) (2022 21:11) (2021 15:8) (2020 8:4:4)
-
shangos70
- Modelling Gent and Scholar
- Posts: 4422
- Joined: May 1st, 2011, 11:14 am
- Location: Doncaster, Socialist Republic of South Yorkshire.
Re: Jim's Stirling
Nice tip with the cd case , my B-17 upper canopy is just the same but its all part of one large piece including the front screen .
-
bromo
- On a long, long journey
- Posts: 1249
- Joined: May 2nd, 2011, 7:05 pm
- Location: Wolverhampton,England
Re: Jim's Stirling
Nice tip regards the window issue Jim, you sure are beating the old girl into shape,look forward to more.
BEEN A WHILE
-
Jagewa
- Modelling Gent and Scholar
- Posts: 2752
- Joined: April 6th, 2011, 2:18 am
- Location: Christchurch, New Zealand
- Contact:
Re: Jim's Stirling
Phew, finally got all the windows replaced...
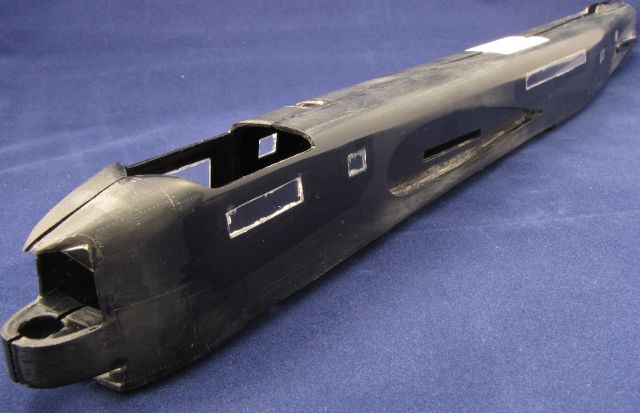
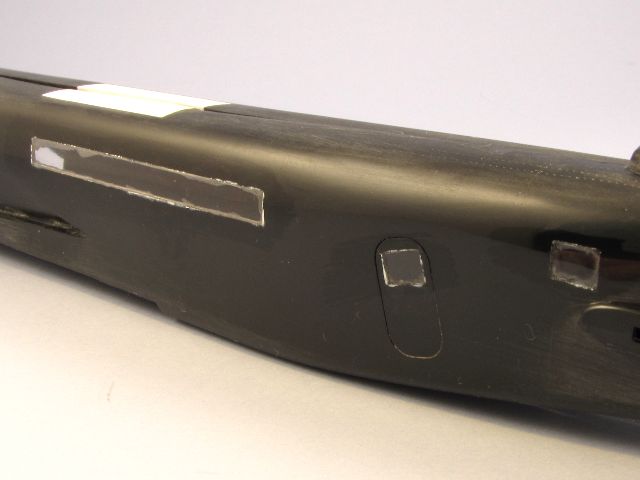
now I've just got to work out how to cut the masks... Don't things sound easier, 'I'll pop in CD case windows and mask the windows off'
Also been working on the wings, lots of sanding, those trailing edges are very thick. In fact good time to buy shares in 3M, I believe the sandpaper division has had a surge in demand.......
Cheers
Jim
-
Jagewa
- Modelling Gent and Scholar
- Posts: 2752
- Joined: April 6th, 2011, 2:18 am
- Location: Christchurch, New Zealand
- Contact:
Re: Jim's Stirling
Yes, but once its done the rest,should be fairly straight forward. I'm looking forward to less sanding....