SeaKing Stupidity or Utter Madness

Re: SeaKing Stupidity or Utter Madness
That does sound infuriating!!.
Hoping to return to modelling sometime this year!! 
Owner of Marky's Model Emporium since 2013!.
Owner of Marky's Model Emporium since 2013!.
Re: SeaKing Stupidity or Utter Madness
Yes Mark, absolutely frustrating.
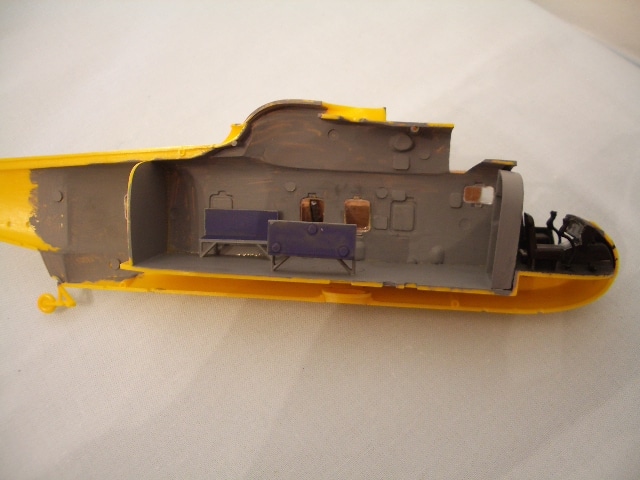
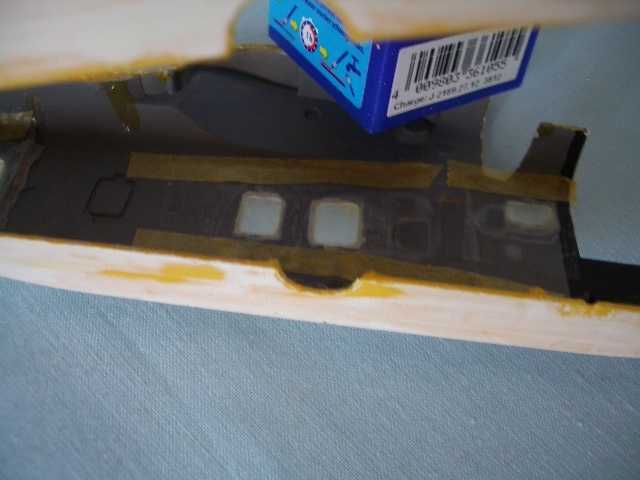
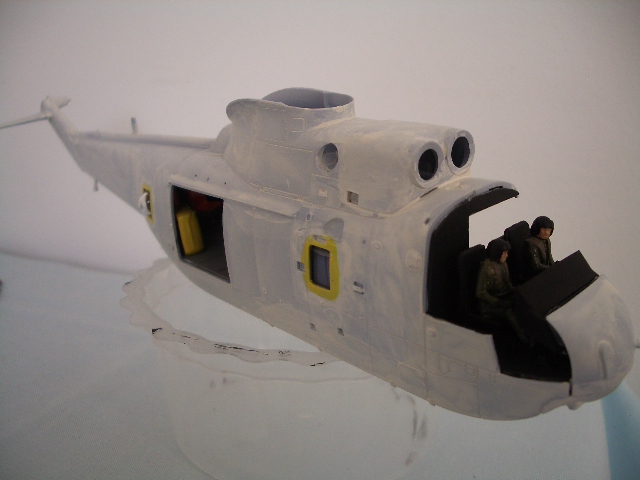
This next image, which I took before closing up the fuselage last week shows the back panel, and while not very clear, the bubble window is behind there, and when they fall out, they have sometimes then fallen in, and on one occasion went under the floor into that small internal void....
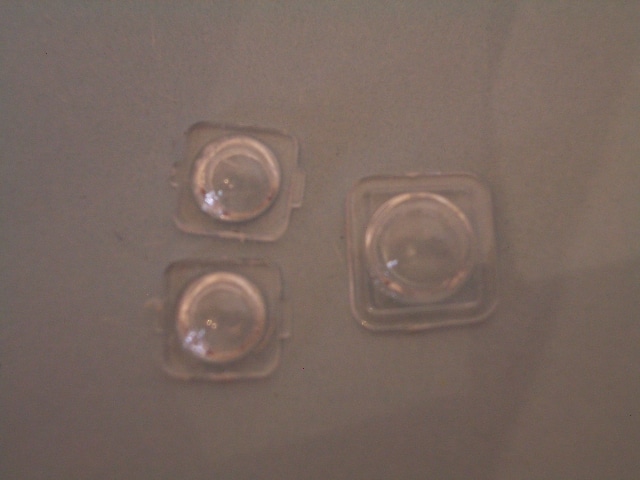
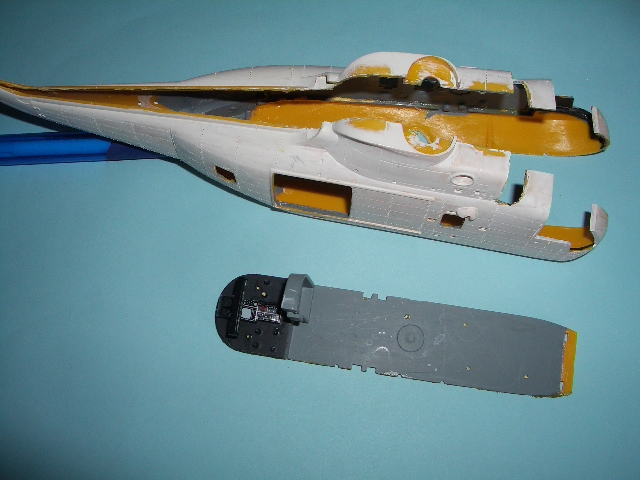
This one shows the offending Fujimi widows, and one bubble from the new tool that was leftover (spare from the 2 previous HC4 kits)
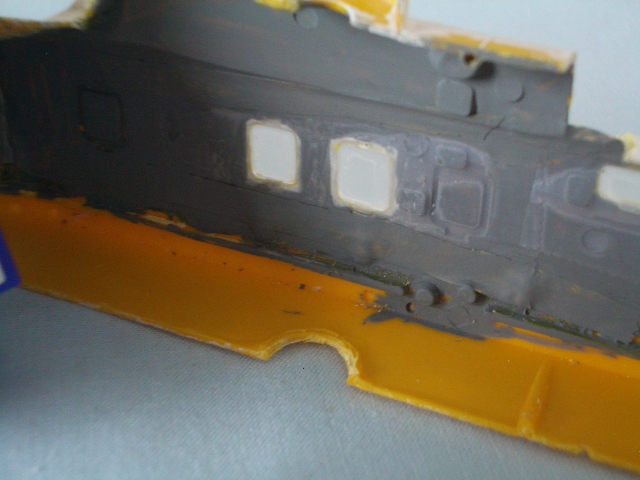
This morning, this is the state of play with the Fujimi. She has taken a bit of battle damage, and "shaking" her to get the windows out did not help either! However, most of the seats and the cockpit seating and joysticks will go back in, but I am going to leave off that rear-cabin plate.
My current line of thinking, is to take all the glazing out, as most of it is very fragile, and insert it back in once it is all painted, and leave the sliding door until as late as possible to fit, so can get fingers in to fit windows.
I plan to leave this one alone for a few days, and am hoping meanwhile someone more expert on planes etc will offer some guidance... There will be no more modelling progress updates for a few days now as other matters have priority this week.
Sorry Alan not what you expected to come home from holiday to find I had achieved...
Trying to make a positive out of the mess .... If nothing else, though I could have highlighted an area for anyone else in future with this kit to take belt-brace action on, before they seal up fuselage
I knew from past experience, that the old-Airfix one could put up a fight, but this one is up there with it too.
This next image, which I took before closing up the fuselage last week shows the back panel, and while not very clear, the bubble window is behind there, and when they fall out, they have sometimes then fallen in, and on one occasion went under the floor into that small internal void....
This one shows the offending Fujimi widows, and one bubble from the new tool that was leftover (spare from the 2 previous HC4 kits)
This morning, this is the state of play with the Fujimi. She has taken a bit of battle damage, and "shaking" her to get the windows out did not help either! However, most of the seats and the cockpit seating and joysticks will go back in, but I am going to leave off that rear-cabin plate.
My current line of thinking, is to take all the glazing out, as most of it is very fragile, and insert it back in once it is all painted, and leave the sliding door until as late as possible to fit, so can get fingers in to fit windows.
I plan to leave this one alone for a few days, and am hoping meanwhile someone more expert on planes etc will offer some guidance... There will be no more modelling progress updates for a few days now as other matters have priority this week.
Sorry Alan not what you expected to come home from holiday to find I had achieved...
Trying to make a positive out of the mess .... If nothing else, though I could have highlighted an area for anyone else in future with this kit to take belt-brace action on, before they seal up fuselage
I knew from past experience, that the old-Airfix one could put up a fight, but this one is up there with it too.
Trying to Build kits and not Buy kits
-
Old_Tonto

- Modelling Gent and Scholar
- Posts: 8063
- Joined: May 1st, 2011, 7:41 pm
- Location: Middlesbrough, Peoples Republic of Teesside.
Re: SeaKing Stupidity or Utter Madness
What a pain Chris. I guess the dome pieces must have shrunken over the years.
The only thing I can think of os building up the edge of the glazing with plastic card or something. You could do that with the piece outside of the fuselage then fit it in once you are sure it is strong enough.
Good luck with what ever you try.
The only thing I can think of os building up the edge of the glazing with plastic card or something. You could do that with the piece outside of the fuselage then fit it in once you are sure it is strong enough.
Good luck with what ever you try.
2023 - A:0 B:0 C:0
Current Projects:
East German Air Force (1956-90)
South African Air Force (1958-93)
Current Projects:
East German Air Force (1956-90)
South African Air Force (1958-93)
-
Marek

- Modelling Gent and Scholar
- Posts: 2455
- Joined: May 1st, 2011, 8:03 am
- Location: Madison, WI
- Contact:
Re: SeaKing Stupidity or Utter Madness
Holy, that is some battle you fought. Thank You for sticking to the build, it is both entertaining and informative.
-
splash

- Senior Service Rotorhead
- Posts: 13828
- Joined: May 1st, 2011, 11:02 am
- Location: Somerset England
Re: SeaKing Stupidity or Utter Madness
I disappear for four days and miss all the fun  it looks like the Fuji kit has put up a real struggle, this is an example of a manufacturer updating a kit on the cheap, the early Seaking's had the rear bulkhead just behind the rear cargo door, the later versions it moved towards the rear and the extra windows were added on some versions , so It looks like the manufacturer has cut corners and not updated the cabin floor or moved the bulkhead.
The issue of rivets is always going to be an issue on any kit, I sometimes feel sorry for the manufacturers if they add rivets they get criticised and if the don't they get criticised, so they can't win, I personally like the fine rivet detail on the Revell kit but also like the extra detail on the Airfix kit for example the strengthening panels on the tail and the tie-down rings.
Keep up the hard work Chris this is a great thread to follow, you are doing a grand job.
My work bench is starting to look like Portsmouth Naval Dockyard.
-
philp

- Modelling Gent and Scholar
- Posts: 1279
- Joined: May 1st, 2011, 12:14 am
- Location: Kearns, Utah
- Contact:
Re: SeaKing Stupidity or Utter Madness
I agree with OT on this, a little plastic strip along the top and bottom or the sides should help keep those pesky windows in place.
-
JamesPerrin

- Looks like his avatar
- Posts: 13687
- Joined: April 5th, 2011, 8:09 pm
- Location: W. Yorkshire
- Contact:
Re: SeaKing Stupidity or Utter Madness
Rivets make decalling difficult even if an expert armed with all the potions of the trade. The vast majority of these kits will be sold to kids in starter sets and therefore the smooth surface makes them easier to finish. There may be other reasons cf Airfix Shackleton
I'll be testing my new rivet wheel when I build mine as I feel it needs surface texture even if the rivets are inverted cf revell Shackleton
I'll be testing my new rivet wheel when I build mine as I feel it needs surface texture even if the rivets are inverted cf revell Shackleton
Classic British Kits SIG Leader Better to fettle than to fill
(2024 A:B 5:2) (2023 13:8:7) (2022 21:11) (2021 15:8) (2020 8:4:4)
(2024 A:B 5:2) (2023 13:8:7) (2022 21:11) (2021 15:8) (2020 8:4:4)
-
splash
- Senior Service Rotorhead
- Posts: 13828
- Joined: May 1st, 2011, 11:02 am
- Location: Somerset England
Re: SeaKing Stupidity or Utter Madness
James you make a good point about the problems with adding decals to a kit with rivet detail, I think Airfix made the right decision not to add them, when I built the Mk4 version the only part I found lacking detail was the air intake sand filter, Airfix decision to use decals to represent the air intakes falls short of the other excellent detail on the kit.
My work bench is starting to look like Portsmouth Naval Dockyard.
Re: SeaKing Stupidity or Utter Madness
Being the bodger of a builder that I am .... I left you all last time, at the point where a masterpiece of bodgery was about to be invoked on the Fujimi kit.
I was absolutely frustrated with it, so it had to come apart and a few days were allowed to lapse before I got back on to it.
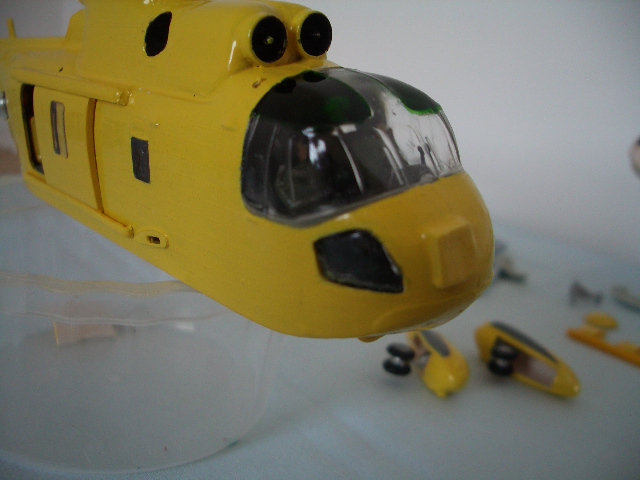
I was grateful for the ideas put forward, and infact went for a major bodge. I painted all around the window frames with the yellow, which given that I use a brush and put it on thick, helped to thicken up the frames and helped a little, but once the glue had set, I then got out some Scotch Tape and stuck that on, and burnished it down on the clear parts inside. It has helped and is doing what I need it to do!
Meanwhile paint was also slowly going on the old Airfix one .... (so much for my "plan" to now only work on one at a time )
)
With the cockpit seats and instruments back in place, the fuselage was sealed up YET AGAIN! (5th time!)
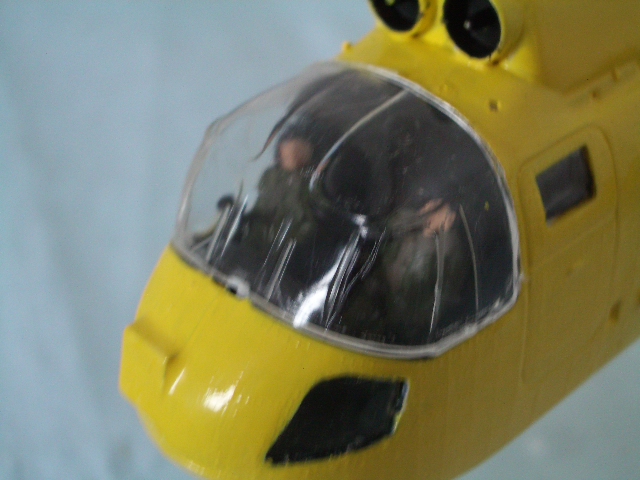
The old Airfix, was now ready for the front window... which as you can see fitted wonderfully well - but it is a better fit than I encountered the last time I built this kit, and then had to do a very ingenious piece of work with tamiya tape as window framing, said trick is due to be performed again alas...
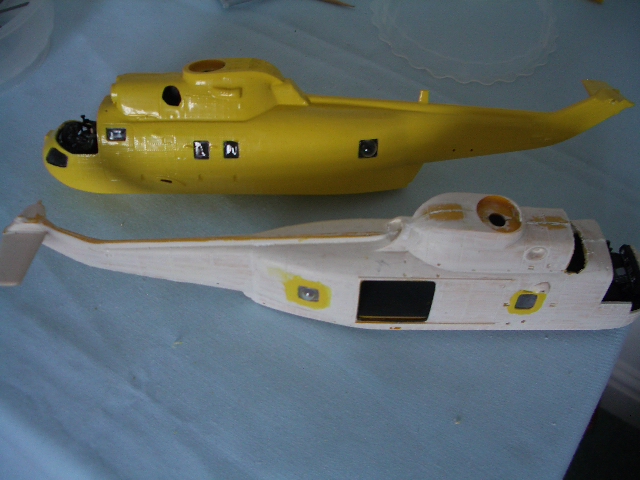
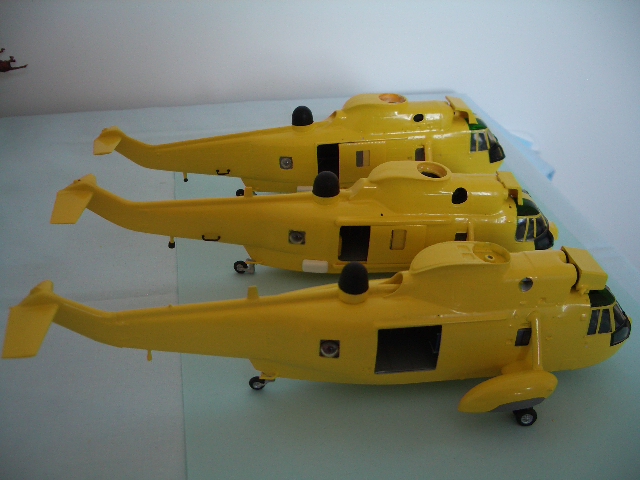
State of play on the three of them now: Airfix old tool at the bottom of the photo has sponsons and rear wheel on, and is standing on her own feet, Fujimi in the middle has recovered well from her ordeal, and is coming together OK.
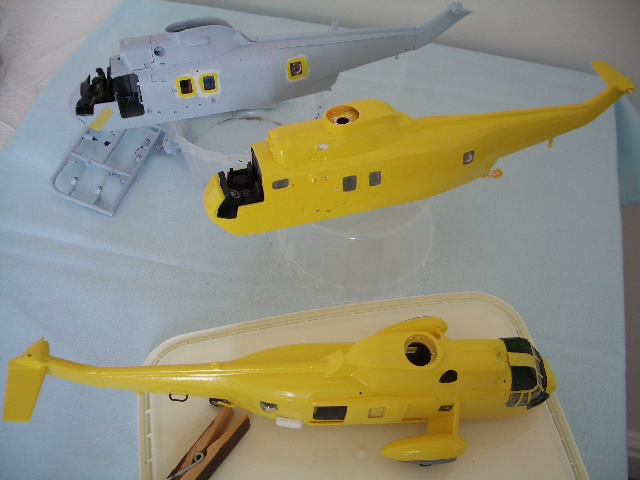
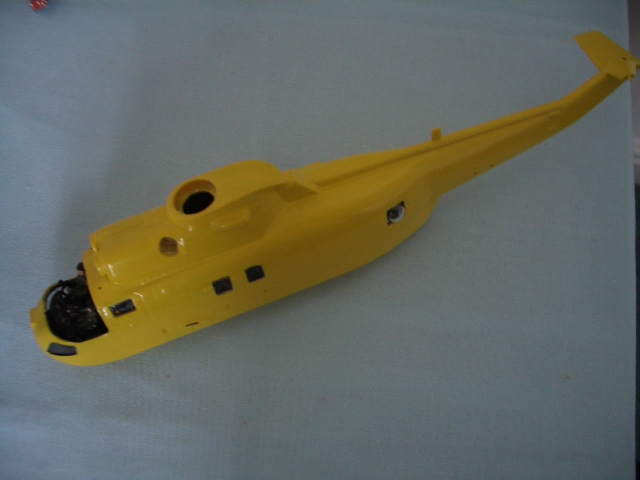
Here I am, late today at this stage, with the new tool Airfix ready and waiting for a bit of yellow paint. As you can see from these last two photos, this one has a crew door which has yet to be fitted, and can be modelled open.... I ought to mention too, that the tail can be modelled as I have done, or with the end folded back
That is all for now. I will be back with another update in a week or so, once there is something to show. (brush painting with the yellow for a good finish is a slow steady process!),
I was absolutely frustrated with it, so it had to come apart and a few days were allowed to lapse before I got back on to it.
I was grateful for the ideas put forward, and infact went for a major bodge. I painted all around the window frames with the yellow, which given that I use a brush and put it on thick, helped to thicken up the frames and helped a little, but once the glue had set, I then got out some Scotch Tape and stuck that on, and burnished it down on the clear parts inside. It has helped and is doing what I need it to do!
Meanwhile paint was also slowly going on the old Airfix one .... (so much for my "plan" to now only work on one at a time
With the cockpit seats and instruments back in place, the fuselage was sealed up YET AGAIN! (5th time!)
The old Airfix, was now ready for the front window... which as you can see fitted wonderfully well - but it is a better fit than I encountered the last time I built this kit, and then had to do a very ingenious piece of work with tamiya tape as window framing, said trick is due to be performed again alas...
State of play on the three of them now: Airfix old tool at the bottom of the photo has sponsons and rear wheel on, and is standing on her own feet, Fujimi in the middle has recovered well from her ordeal, and is coming together OK.
Here I am, late today at this stage, with the new tool Airfix ready and waiting for a bit of yellow paint. As you can see from these last two photos, this one has a crew door which has yet to be fitted, and can be modelled open.... I ought to mention too, that the tail can be modelled as I have done, or with the end folded back
That is all for now. I will be back with another update in a week or so, once there is something to show. (brush painting with the yellow for a good finish is a slow steady process!),
Trying to Build kits and not Buy kits
-
iggie

- Modelling Gent and Scholar
- Posts: 23437
- Joined: July 31st, 2013, 11:04 am
- Location: North Somercotes, Lincolnshire
- Contact:
Re: SeaKing Stupidity or Utter Madness
Lots of good work going on Chris! I get confused building two different kits at the same time, let alone several of the same thing! 

Best wishes
Jim
If you can walk away from a landing, it's a good landing. If you use the airplane the next day, it's an outstanding landing
"Never put off till tomorrow, what you can do the day after tomorrow"
Jim
If you can walk away from a landing, it's a good landing. If you use the airplane the next day, it's an outstanding landing
"Never put off till tomorrow, what you can do the day after tomorrow"
Re: SeaKing Stupidity or Utter Madness
I will do a comparison of the various parts Airfix give, versus the Revell kit and another I have in a future update.splash wrote:..... the air intake sand filter, Airfix decision to use decals to represent the air intakes falls short of the other excellent detail on the kit.
BTW - Airfix did have a sandbox that they put on the "extra" sprue that was released when they did the AEW release and a HAR5 Navy issue in the Red/grey scheme... I haven't got the new parts sprue from either of those releases to show it, but will see if can track images of sprue down on internet somewhere. It was a better detailed representation of the item in question
Trying to Build kits and not Buy kits
-
splash
- Senior Service Rotorhead
- Posts: 13828
- Joined: May 1st, 2011, 11:02 am
- Location: Somerset England
Re: SeaKing Stupidity or Utter Madness
That was a cunning plan with the clear tape, well done.
My work bench is starting to look like Portsmouth Naval Dockyard.
-
skypirate

- Modelling Gent and Scholar
- Posts: 7301
- Joined: May 1st, 2011, 6:13 am
- Location: Port Macquarie, Australia
Re: SeaKing Stupidity or Utter Madness
You are responding to these challenges very well, and you will be proud of the results, I am sure.
cheers,
David
cheers,
David
-
Old_Tonto
- Modelling Gent and Scholar
- Posts: 8063
- Joined: May 1st, 2011, 7:41 pm
- Location: Middlesbrough, Peoples Republic of Teesside.
Re: SeaKing Stupidity or Utter Madness
Very cool production line on the go here mate.
2023 - A:0 B:0 C:0
Current Projects:
East German Air Force (1956-90)
South African Air Force (1958-93)
Current Projects:
East German Air Force (1956-90)
South African Air Force (1958-93)
Re: SeaKing Stupidity or Utter Madness
As regards my cunning plan regarding the 3M magic tape,.... I was happy with it, and it has worked well. I nearly had to do it again with the Revell kit ...
I have just about coped OK building 3 of the same, as the base kit plastic of each has all been a different shade which has helped a lot. Progress since the last update has been to add a few bits and bobs onto the previous two, but primarily I had been painting and getting the windscreen in and framed on the new tool.
This is where I am now with those three. They are ready for decalling and the fiddly bits and pieces.
One aspect I have noted, is that with the new-tool, there are no "handles" to fix on the tail - as are in the images of the other two... I have noticed that in all the photos I can find of real-machines, they are on them, even later made frames. If anyone knows better, on what really happened, do please advise.
It was time then to progress on with the Revell one. The original plan WAS with this one to build a HAR5, and I realised my error once I had fitted the bubble windows and joined up the fuselage.
I do have another Revell kit so I can start over at a later stage, (the said kit is in a packing crate at present, and it is staying there for another 8-10 weeks yet), so, as I have a spare set of suitable decals, I will be finishing this Revell one off in yellow too. (more progress on that next time.
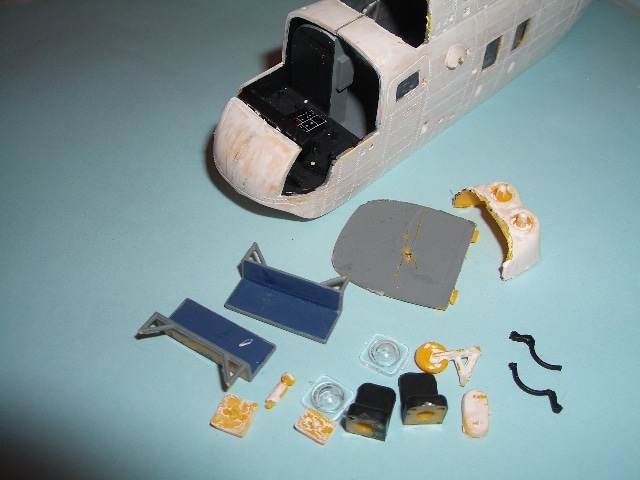
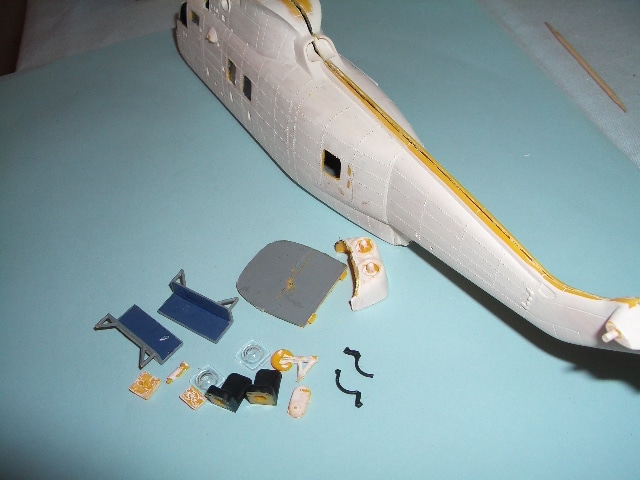
Back to a few more comparison shots of aspects of the different kits:
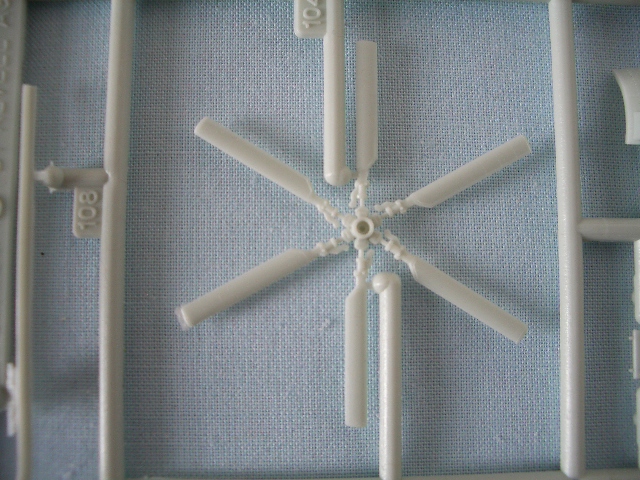
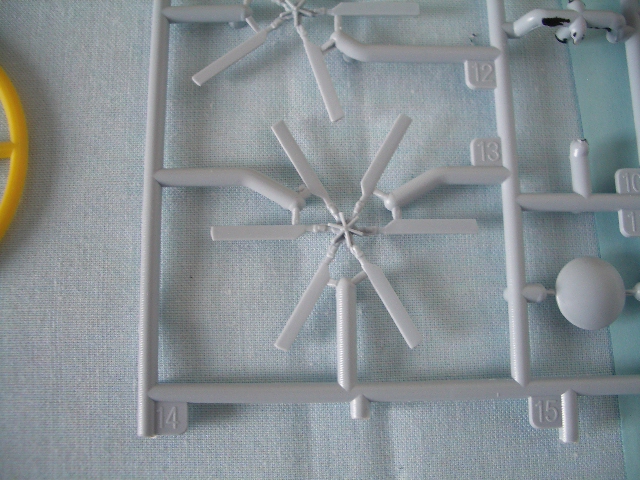
Firstly the rotor mechanisms for 3 kits. (L to R: OT Airfix, Fujmi, and Revell)
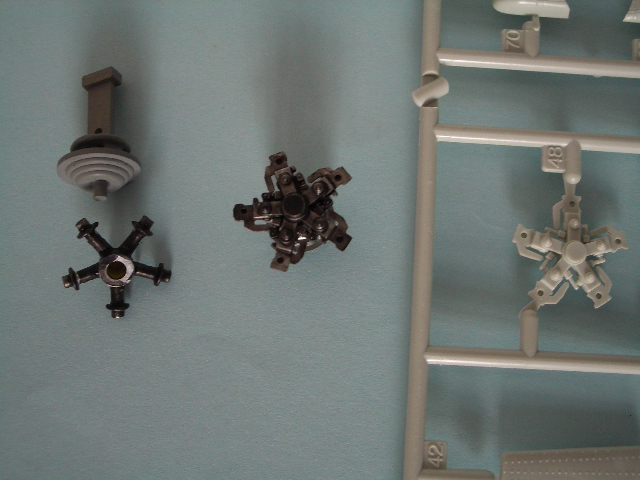
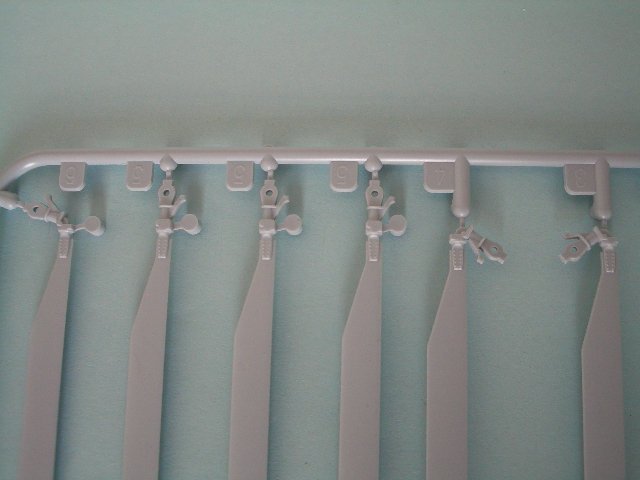
The NT Airfix, has a much simpler pair of rings, to hold the blades, but each rotor blade has more detail at the head end instead:
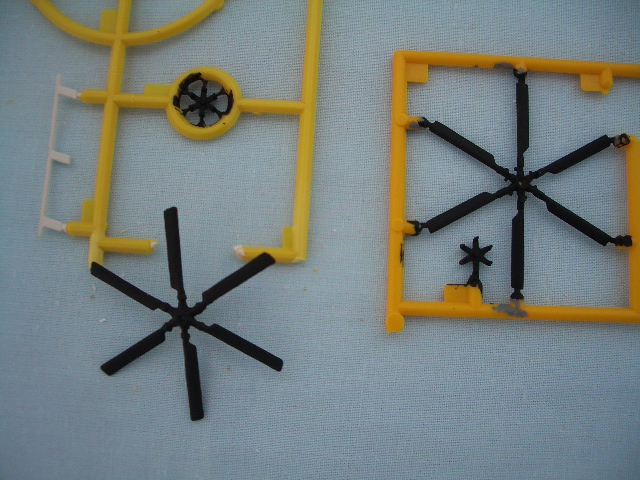
Tail Rotors:
This is the Revell offering which is a 2-piece affair, with a small spider like piece which fits over the centre
These are the offerings from Fujimi and OT Airfix
This is NT Airfix, and it comes as an all-in-one piece.
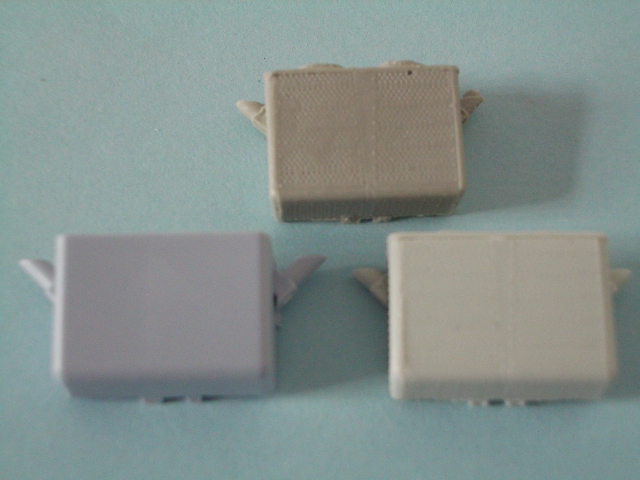
Only the Revell and new-tool Airfix come with a sandbox. The top item in the image, is a resin one I had,

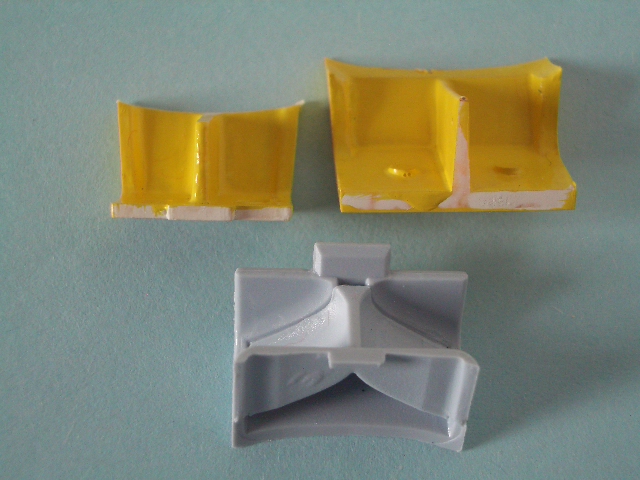
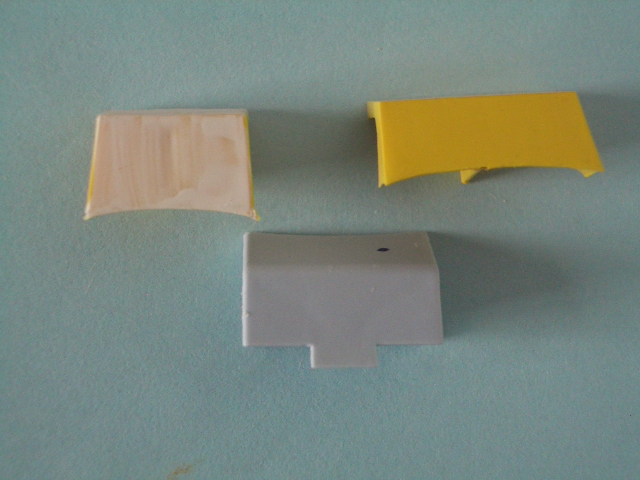
All 4 kits come with a barn-door cover: Fujimi and OT Airfix offer a single piece offering, whereas the NT Airfix and Revell offer a 2-piece affair; I have shown the NTA one, which is pretty identical to Revell.
That is all for now.
I have just about coped OK building 3 of the same, as the base kit plastic of each has all been a different shade which has helped a lot. Progress since the last update has been to add a few bits and bobs onto the previous two, but primarily I had been painting and getting the windscreen in and framed on the new tool.
This is where I am now with those three. They are ready for decalling and the fiddly bits and pieces.
One aspect I have noted, is that with the new-tool, there are no "handles" to fix on the tail - as are in the images of the other two... I have noticed that in all the photos I can find of real-machines, they are on them, even later made frames. If anyone knows better, on what really happened, do please advise.
It was time then to progress on with the Revell one. The original plan WAS with this one to build a HAR5, and I realised my error once I had fitted the bubble windows and joined up the fuselage.
I do have another Revell kit so I can start over at a later stage, (the said kit is in a packing crate at present, and it is staying there for another 8-10 weeks yet), so, as I have a spare set of suitable decals, I will be finishing this Revell one off in yellow too. (more progress on that next time.
Back to a few more comparison shots of aspects of the different kits:
Firstly the rotor mechanisms for 3 kits. (L to R: OT Airfix, Fujmi, and Revell)
The NT Airfix, has a much simpler pair of rings, to hold the blades, but each rotor blade has more detail at the head end instead:
Tail Rotors:
This is the Revell offering which is a 2-piece affair, with a small spider like piece which fits over the centre
These are the offerings from Fujimi and OT Airfix
This is NT Airfix, and it comes as an all-in-one piece.
Only the Revell and new-tool Airfix come with a sandbox. The top item in the image, is a resin one I had,
All 4 kits come with a barn-door cover: Fujimi and OT Airfix offer a single piece offering, whereas the NT Airfix and Revell offer a 2-piece affair; I have shown the NTA one, which is pretty identical to Revell.
That is all for now.
Trying to Build kits and not Buy kits