1/72 Airfix Pucara
-
gnomemeansgnome

- Modelling Gent and Scholar
- Posts: 5269
- Joined: July 16th, 2013, 4:03 pm
- Location: No Fun City
Re: 1/72 Airfix Pucara
Nice. I want to get my mitts on a Pucara now.
Ego no habeo consilium.
ICBM = Insatiable Collector and Builder of Models
ICBM = Insatiable Collector and Builder of Models
-
dollar19
- Modelling Gent and Scholar
- Posts: 1342
- Joined: May 1st, 2011, 1:11 am
- Location: Bristol, Va. USA
Re: 1/72 Airfix Pucara
Very impressive build. Great work on the cockpit and crew.
-
Sunray
- Active Participant
- Posts: 611
- Joined: March 18th, 2014, 4:01 pm
- Location: Penshaw, North East, England
- Contact:
Re: 1/72 Airfix Pucara
Thanks chaps. Next I masked the canopy with masking tape and masking fluid.
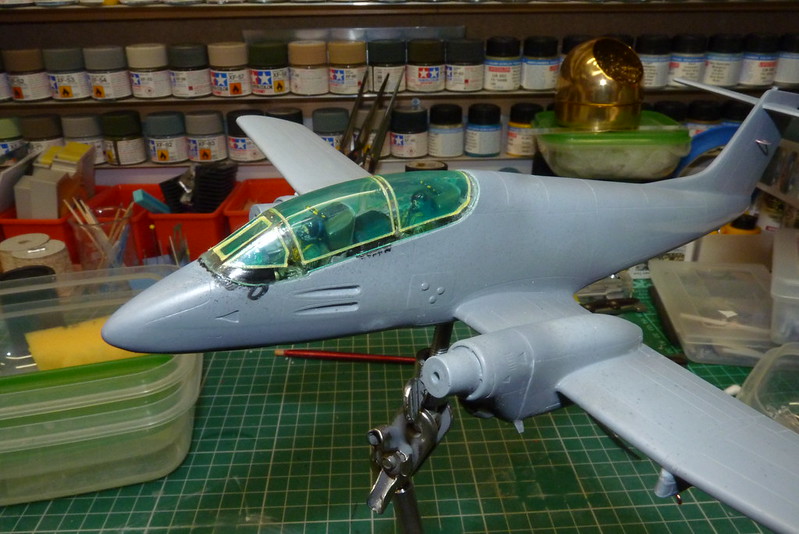
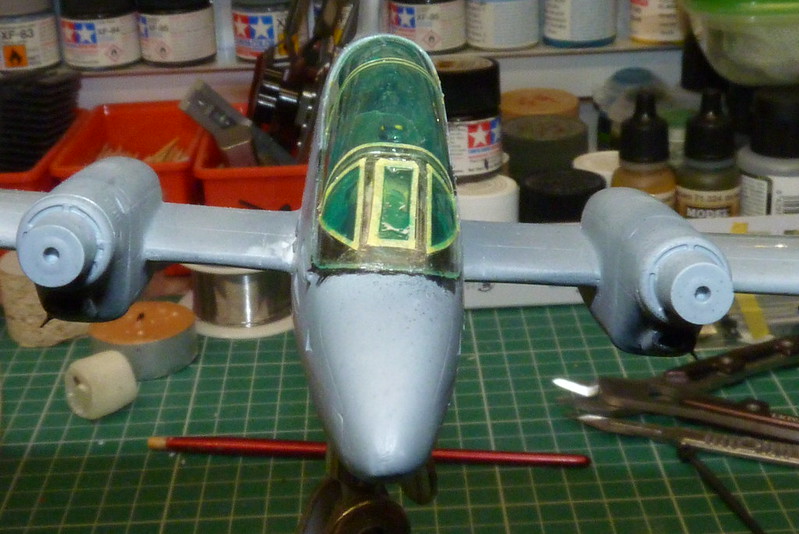
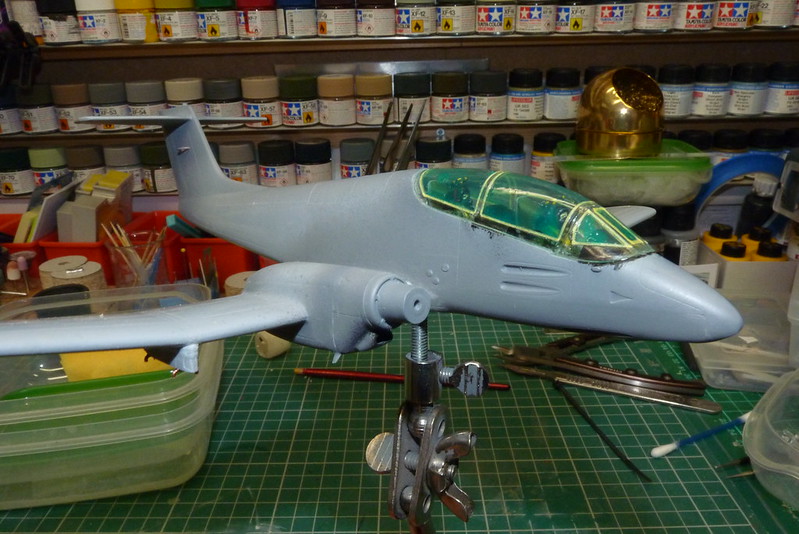
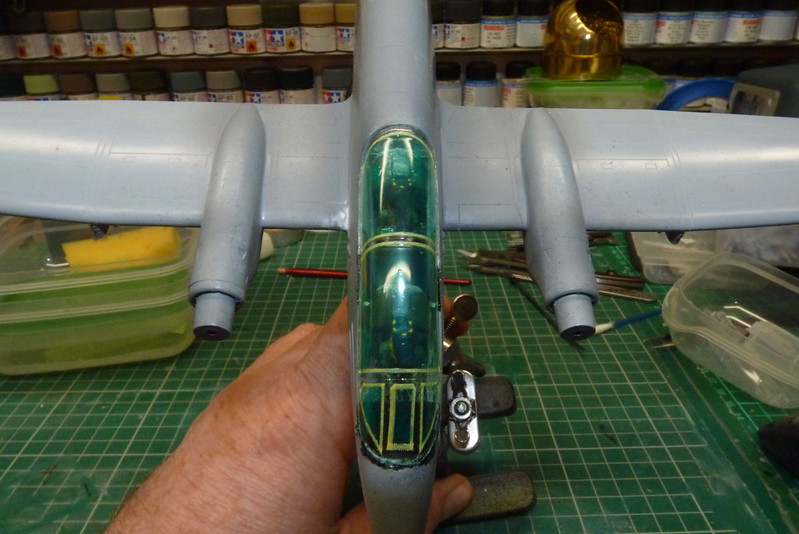
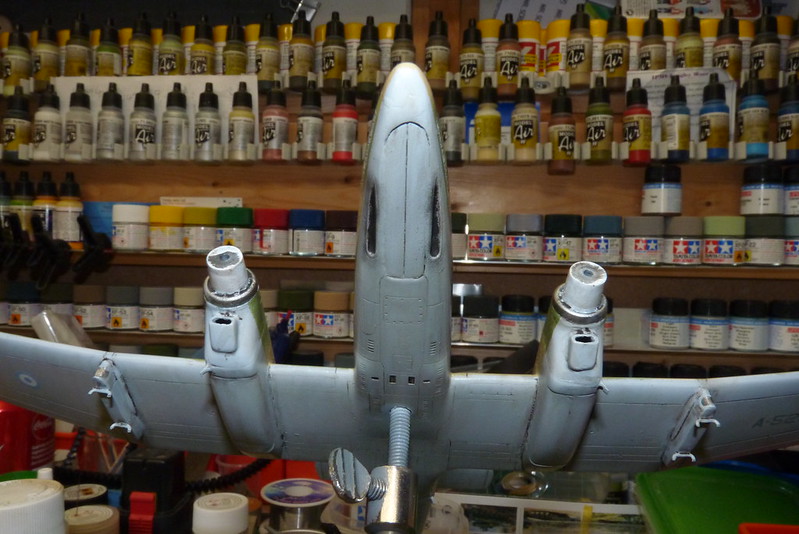
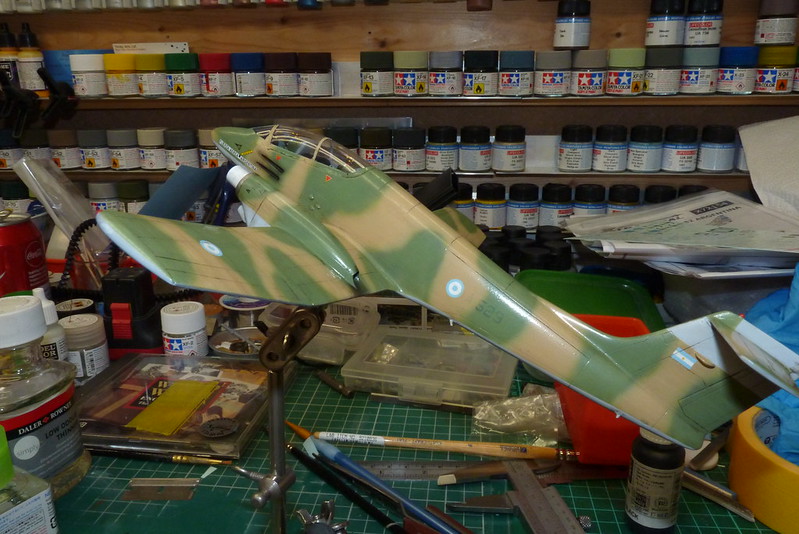
Once the fluid had cured I could start adding the paint. As always I primed, then sanded down and then I added some pre-shading.
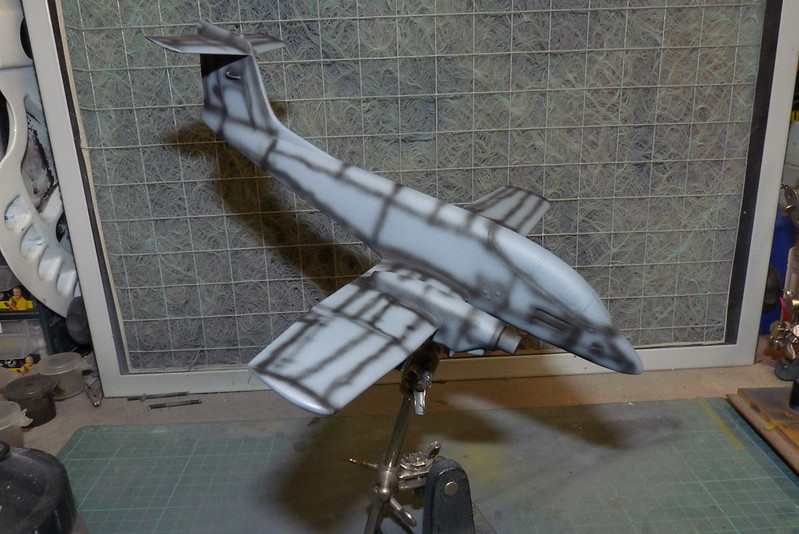
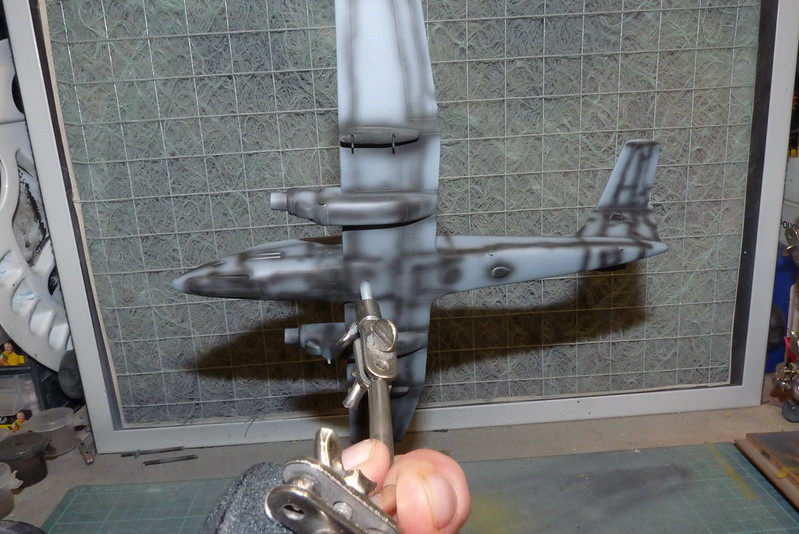
For the base coats all the references I could find mentioned that you needed 20% of this and 40% of another to get the right shade of brown, green and anodised metal. So I took my time and found matches for the colours I wanted already in my paint rack. They weren't exact matches but for me they were close enough and here they are.

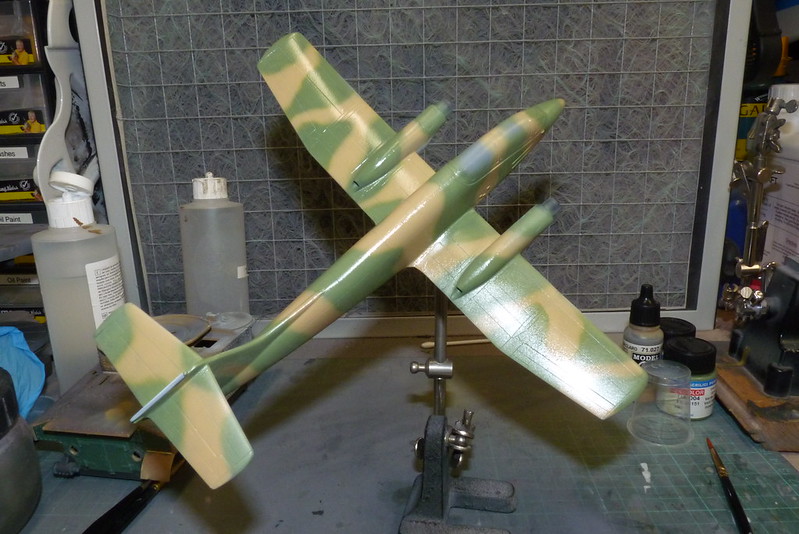
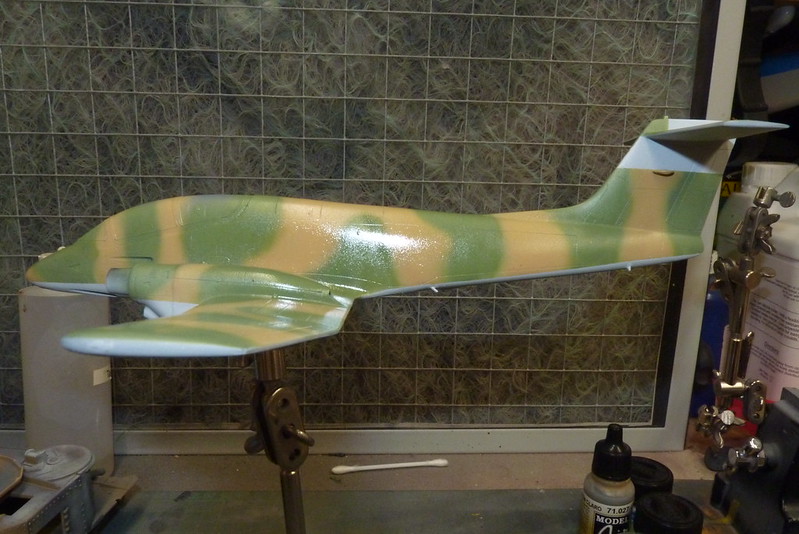
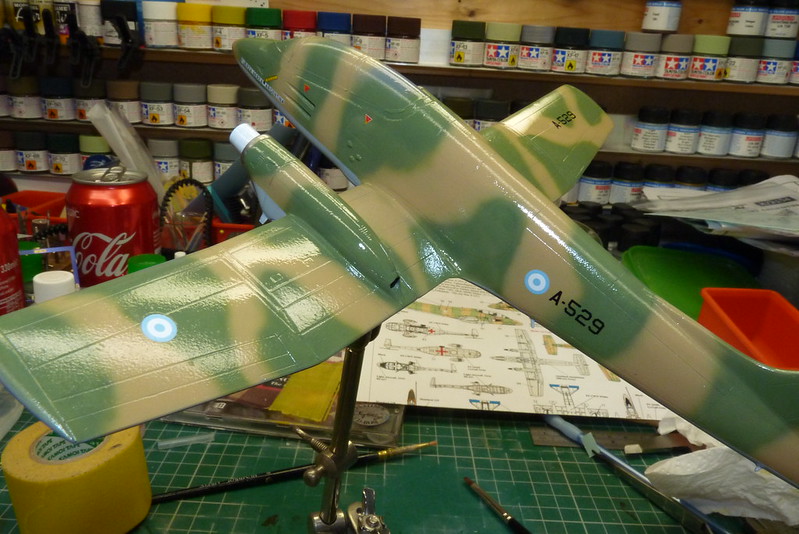
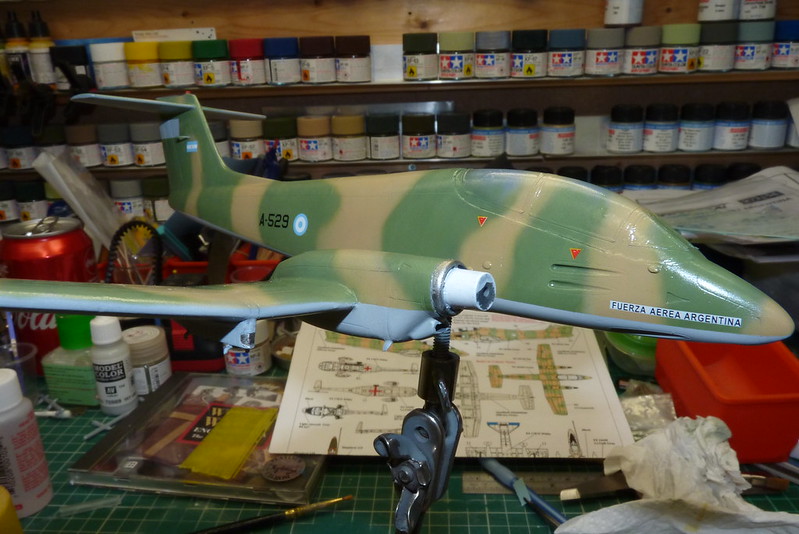
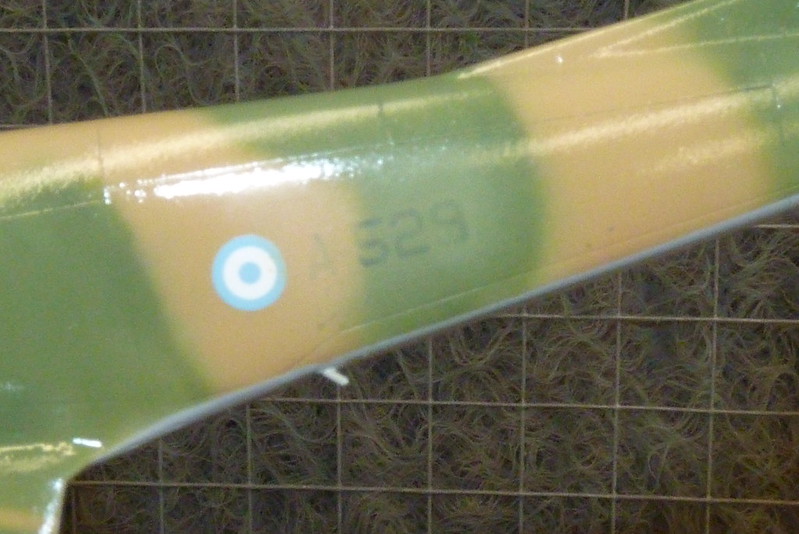
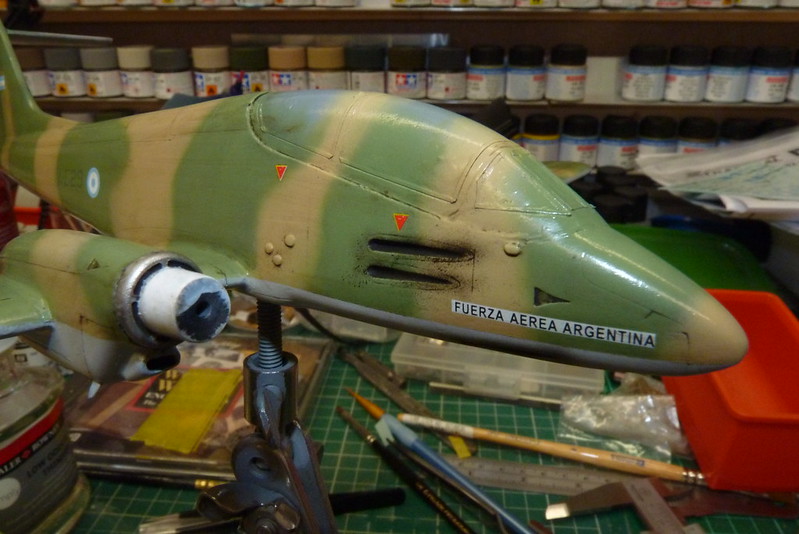
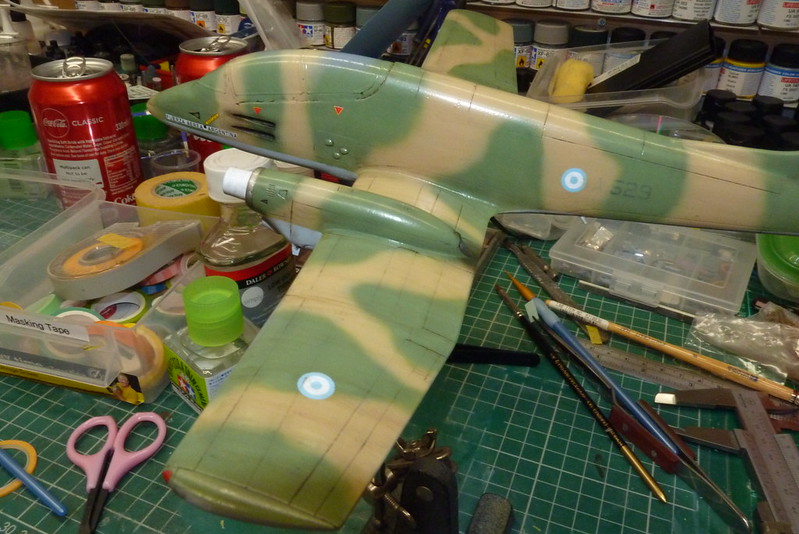
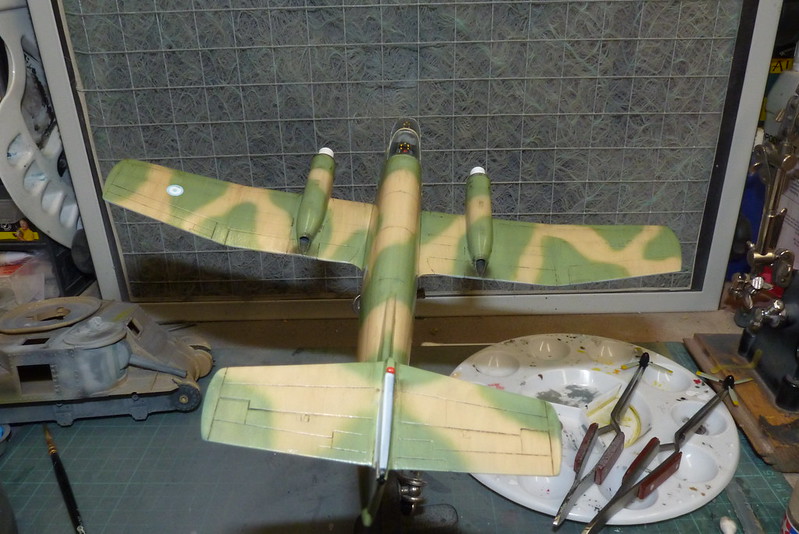
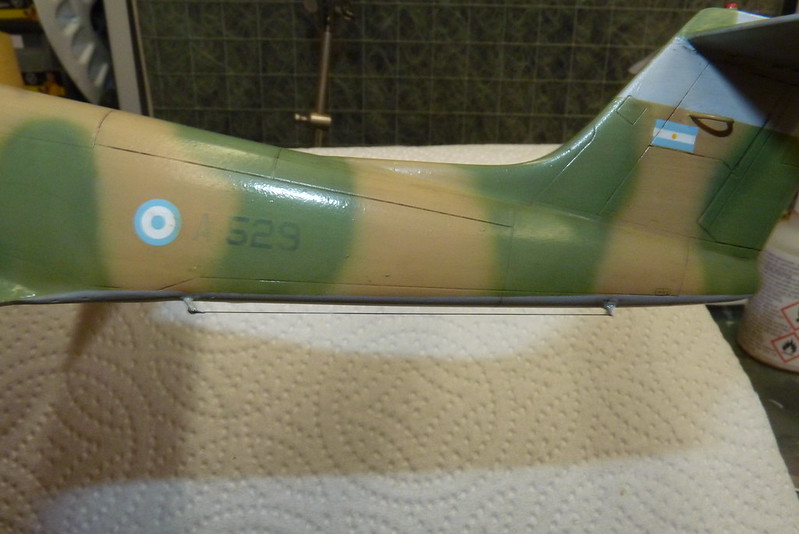
The colour scheme I am using is for a Pucara used in the Falklands War (A-529) and I am using Xtradecals from Hannants. Anyway once I had decided on the colours on went the paint. I was going to mask the camouflage but for speed I did it freehand. Once dry I added a coat of Tamiya X-22 varnish ready for the decals.
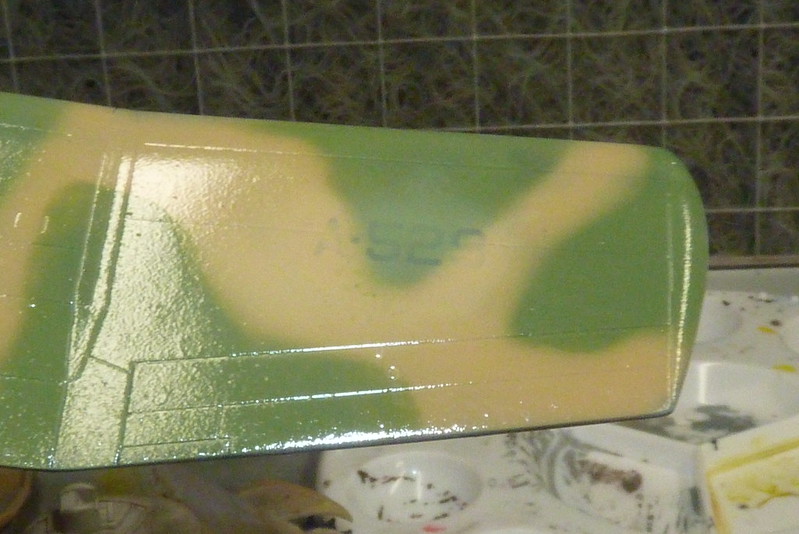
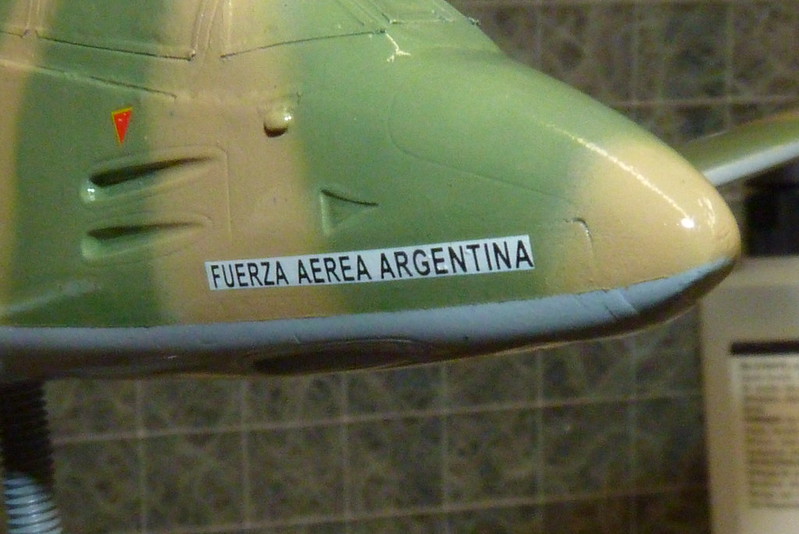
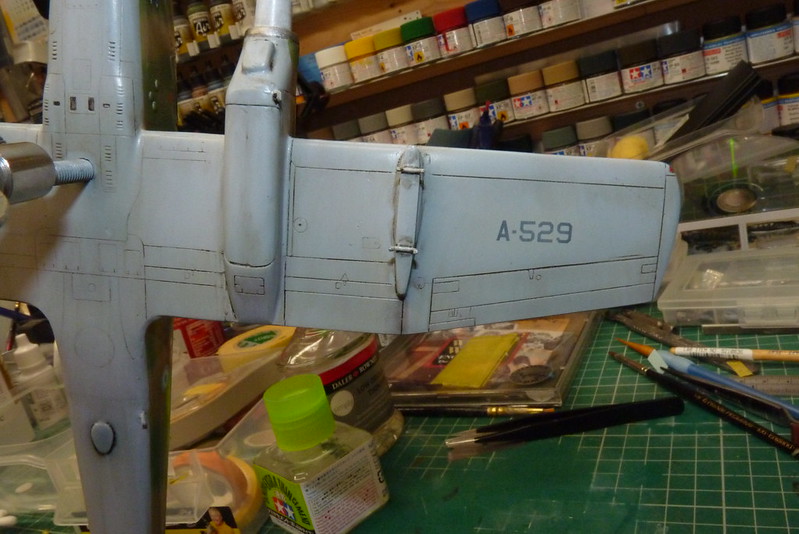
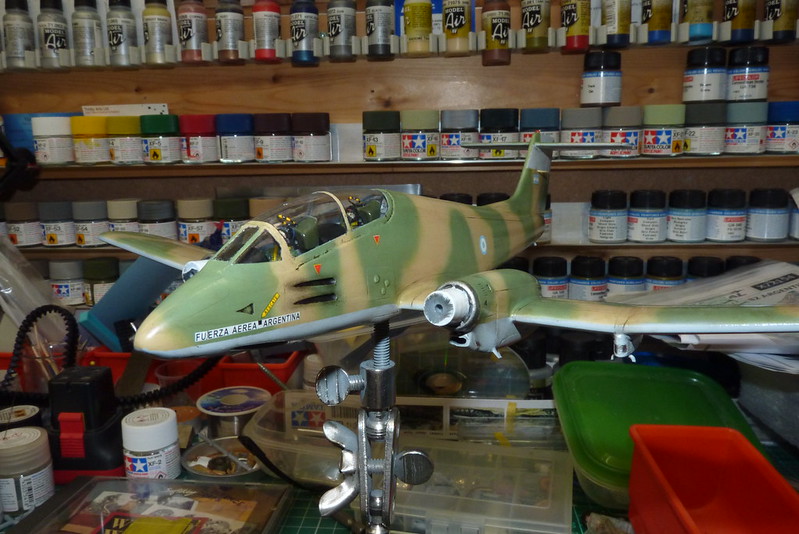
There aren't a great deal of decals to go on but reading up about the Pucara as you do I found out the Argentine Air Force painted the camouflage on the aircraft once it arrived in the Falklands. To help show this I followed the instructions on the Xtradecal sheet to fade out the aircraft serial number. So I added the decals as normal.
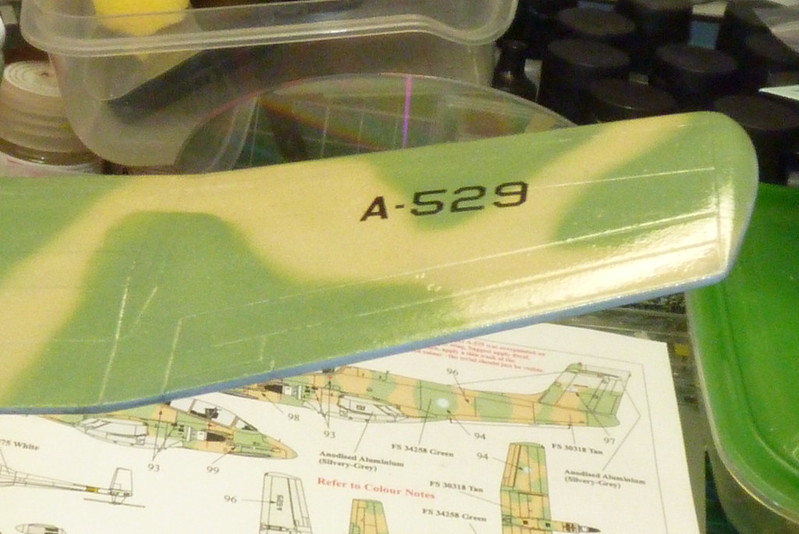
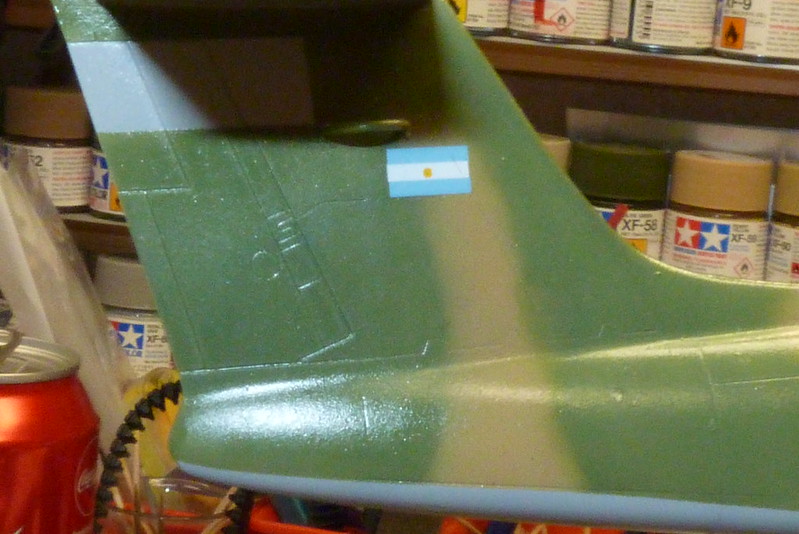

I didn't need to use any Micro-Sol as they went down a treat. I waited until they were all dry and I made washes of the camouflage colours so I could fade out the serial numbers as per the decal instructions using my airbrush. Then I just sprayed over the numbers.

When I was happy with the affect I sprayed another coat of varnish to seal in the decals.
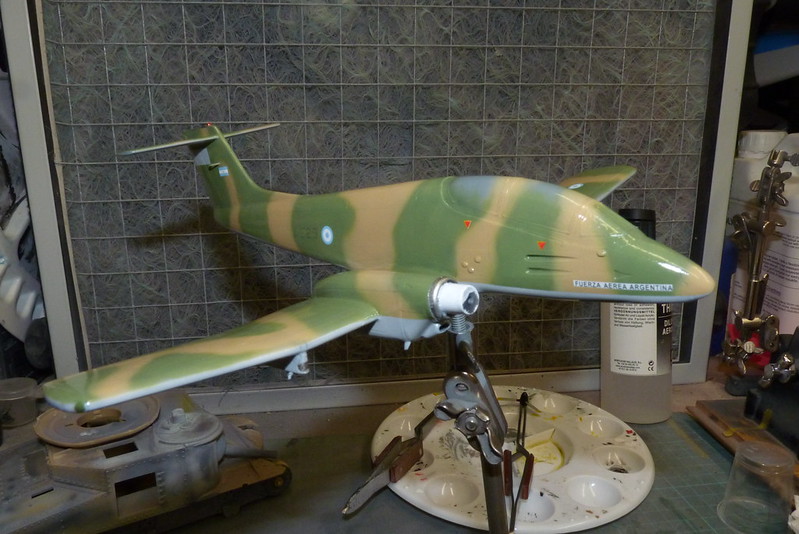
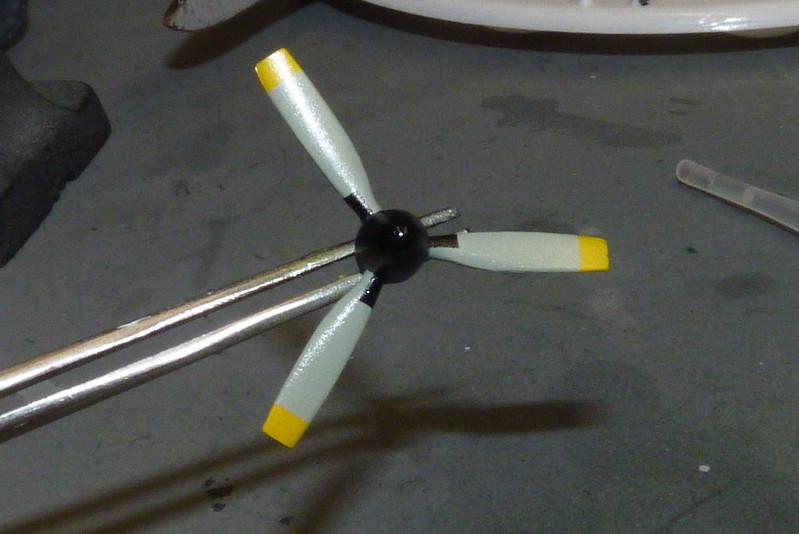
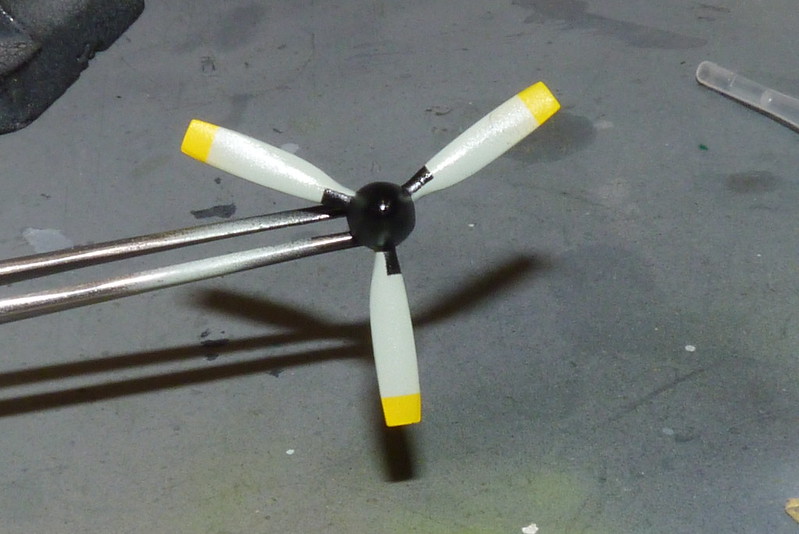
While this was drying I turned my attention to the props. I masked them with tape and sprayed them.
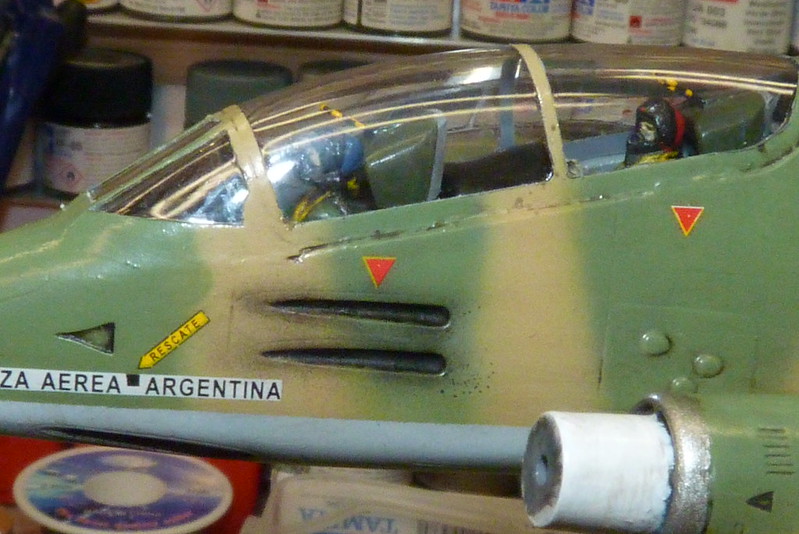
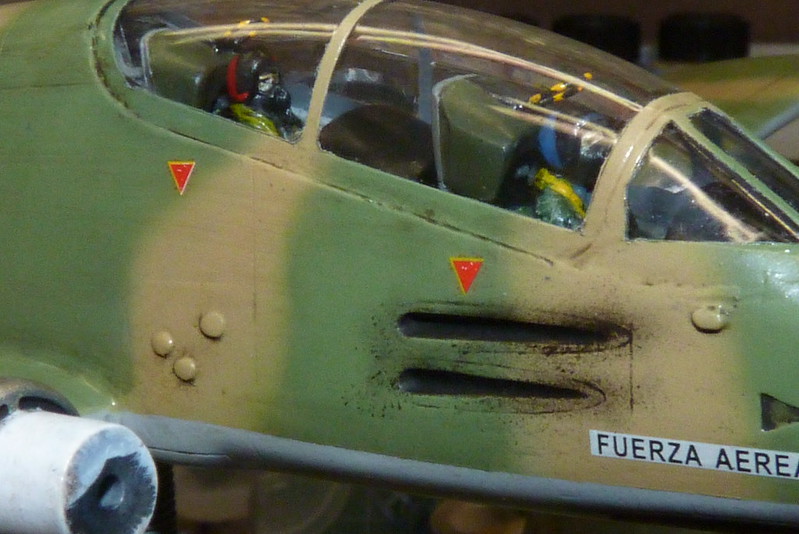
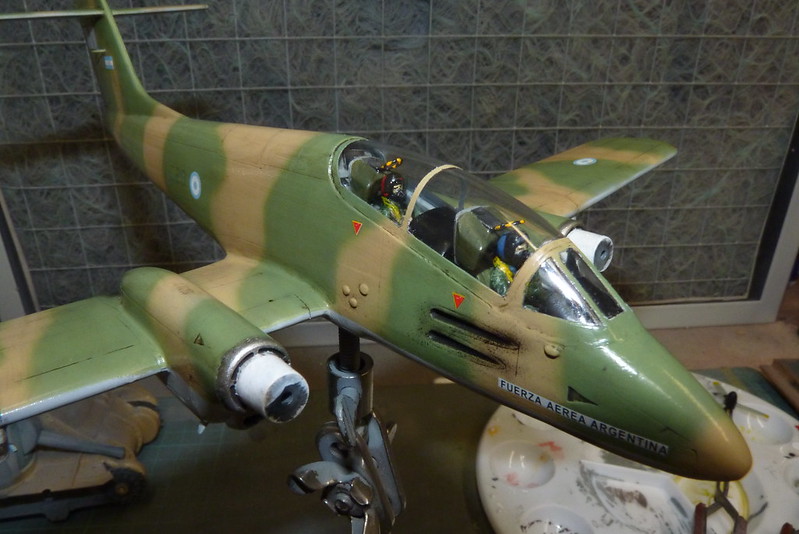
For the weathering I made up a wash from cheap oil paint and on it went.

I then gave it a coat of satin varnish to seal in the weathering and tone the gloss down. Then off came the canopy mask.
Just a few more jobs and it with be done.
Once the fluid had cured I could start adding the paint. As always I primed, then sanded down and then I added some pre-shading.
For the base coats all the references I could find mentioned that you needed 20% of this and 40% of another to get the right shade of brown, green and anodised metal. So I took my time and found matches for the colours I wanted already in my paint rack. They weren't exact matches but for me they were close enough and here they are.
The colour scheme I am using is for a Pucara used in the Falklands War (A-529) and I am using Xtradecals from Hannants. Anyway once I had decided on the colours on went the paint. I was going to mask the camouflage but for speed I did it freehand. Once dry I added a coat of Tamiya X-22 varnish ready for the decals.
There aren't a great deal of decals to go on but reading up about the Pucara as you do I found out the Argentine Air Force painted the camouflage on the aircraft once it arrived in the Falklands. To help show this I followed the instructions on the Xtradecal sheet to fade out the aircraft serial number. So I added the decals as normal.
I didn't need to use any Micro-Sol as they went down a treat. I waited until they were all dry and I made washes of the camouflage colours so I could fade out the serial numbers as per the decal instructions using my airbrush. Then I just sprayed over the numbers.
When I was happy with the affect I sprayed another coat of varnish to seal in the decals.
While this was drying I turned my attention to the props. I masked them with tape and sprayed them.
For the weathering I made up a wash from cheap oil paint and on it went.
I then gave it a coat of satin varnish to seal in the weathering and tone the gloss down. Then off came the canopy mask.
Just a few more jobs and it with be done.
Cheers
Ian
Please click on the web link below to have a look at all my photo's.
https://www.flickr.com/photos/ecirpnai/albums
Ian
Please click on the web link below to have a look at all my photo's.
https://www.flickr.com/photos/ecirpnai/albums
-
dollar19
- Modelling Gent and Scholar
- Posts: 1342
- Joined: May 1st, 2011, 1:11 am
- Location: Bristol, Va. USA
Re: 1/72 Airfix Pucara
That is looking so good! Really excellent paintwork!!
-
Sunray
- Active Participant
- Posts: 611
- Joined: March 18th, 2014, 4:01 pm
- Location: Penshaw, North East, England
- Contact:
Re: 1/72 Airfix Pucara
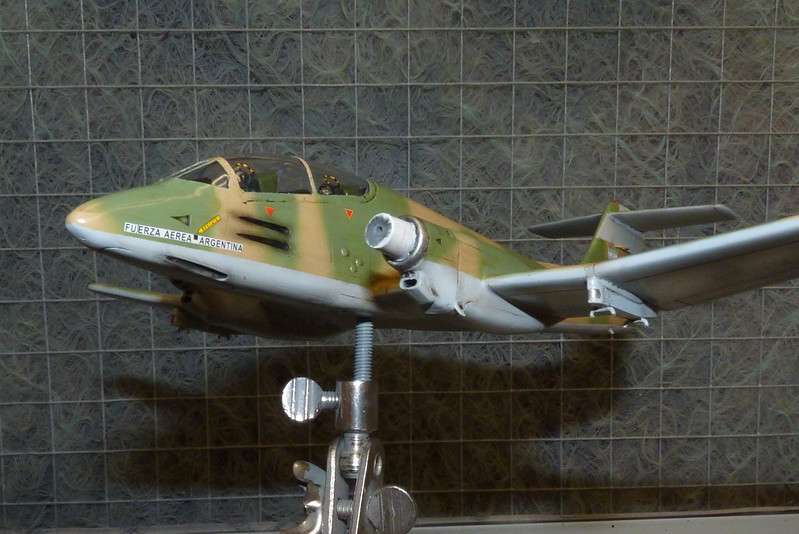
I have been going like the clappers to finish this today. One of the last jobs was to attach the antenna. To hold the model safely I used a car sponge with a few modifications.
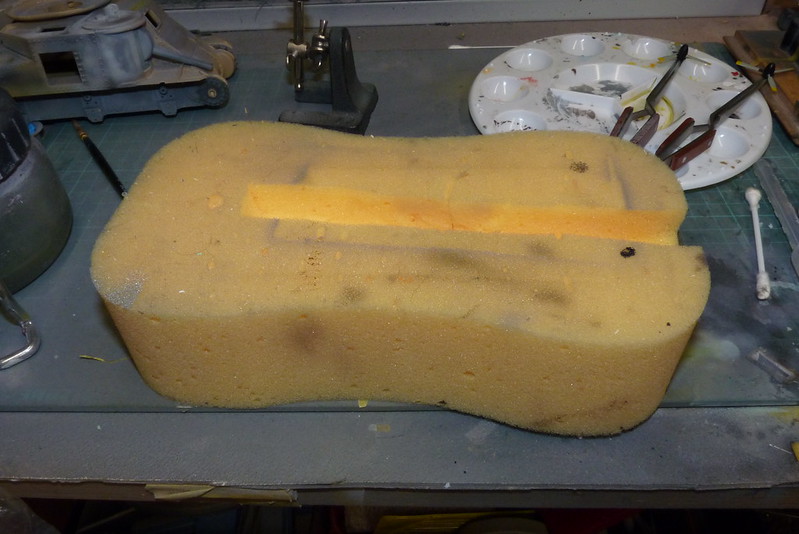
This did the job.

Then using EZ Line I attached the antenna using CA glue.
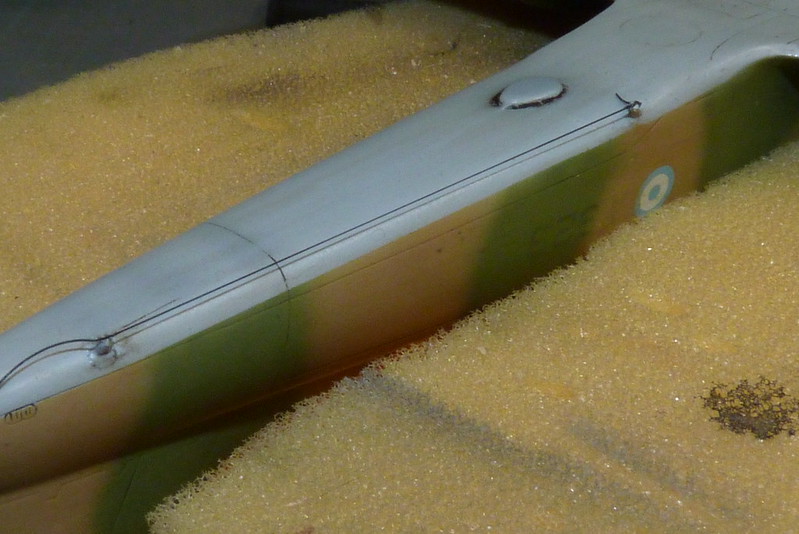
Then I just cut of the excess.
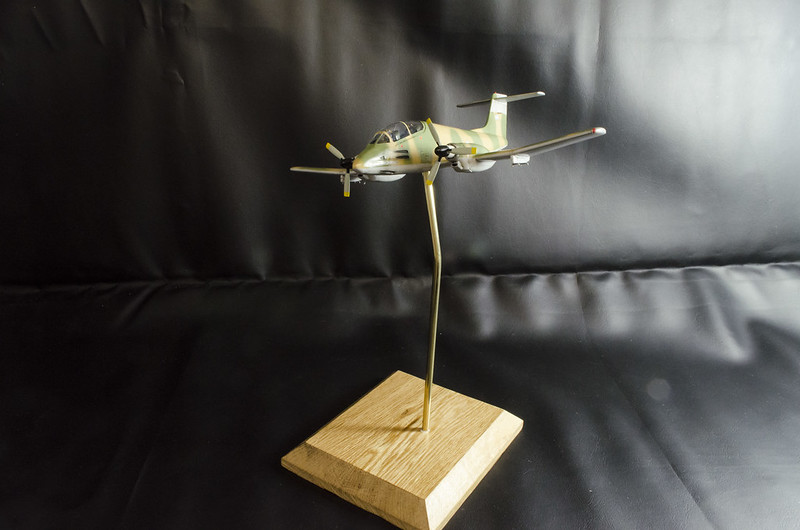
I then made the stand as I have done a few times before from oak flooring and brass tube with a slight bend added. I joined everything together with CA glue and finally I added the props. Finished.
This did the job.
Then using EZ Line I attached the antenna using CA glue.
Then I just cut of the excess.
I then made the stand as I have done a few times before from oak flooring and brass tube with a slight bend added. I joined everything together with CA glue and finally I added the props. Finished.
Cheers
Ian
Please click on the web link below to have a look at all my photo's.
https://www.flickr.com/photos/ecirpnai/albums
Ian
Please click on the web link below to have a look at all my photo's.
https://www.flickr.com/photos/ecirpnai/albums
-
dollar19
- Modelling Gent and Scholar
- Posts: 1342
- Joined: May 1st, 2011, 1:11 am
- Location: Bristol, Va. USA
Re: 1/72 Airfix Pucara
That is looking so good! Really excellent paintwork!!
-
Sunray
- Active Participant
- Posts: 611
- Joined: March 18th, 2014, 4:01 pm
- Location: Penshaw, North East, England
- Contact:
Re: 1/72 Airfix Pucara
Thanks mate. I have just posted all the finished photo up at http://www.uamf.org.uk/viewtopic.php?f=19&t=15573dollar19 wrote:That is looking so good! Really excellent paintwork!!
Cheers
Ian
Please click on the web link below to have a look at all my photo's.
https://www.flickr.com/photos/ecirpnai/albums
Ian
Please click on the web link below to have a look at all my photo's.
https://www.flickr.com/photos/ecirpnai/albums