Airfix 1/72 Boulton Paul Defiant (old tool, with resin nose)
Posted: October 26th, 2017, 10:40 pm
Hi all,
This is a real Golden Oldie that dates back to around 1960 and has since been replaced by Airfix's new tooling that appears to be superior in every way and also, so I am told, far more accurate.
But in the interest of CBKers like me, here's the original simple old kit but with the Valiant Models resin replacement nose and spinner. Although there are other minor inaccuracies with this kit (that didn't really worry me) the nose shape is the most glaring and it jars a bit, so the resin correction set was most welcome.
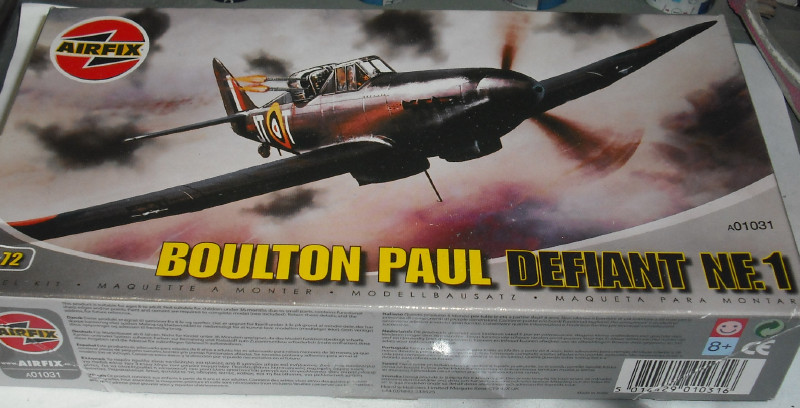
Here's my boxing which (I believe) dates from as recently as 2008. Airfix certainly got their money's worth out of this one!
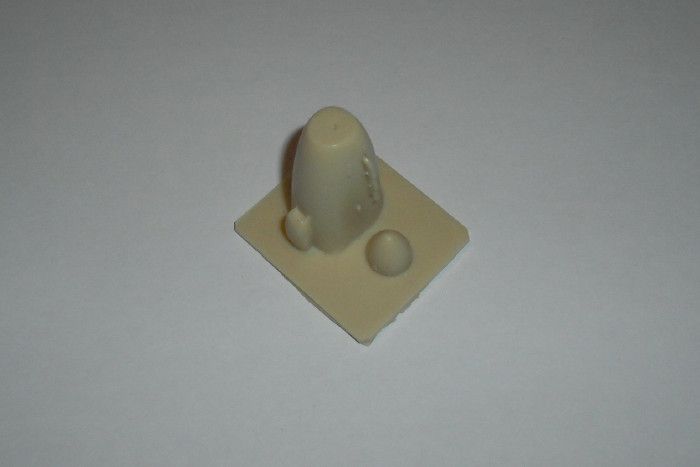
This is the resin parts as supplied by Valiant Models. They also supply, as part of the package, a small piece of plasticard to make a cockpit floor (or else you can see out of the canopy from the U/C bays!). Their instruction sheet that comes with it is also very informative.
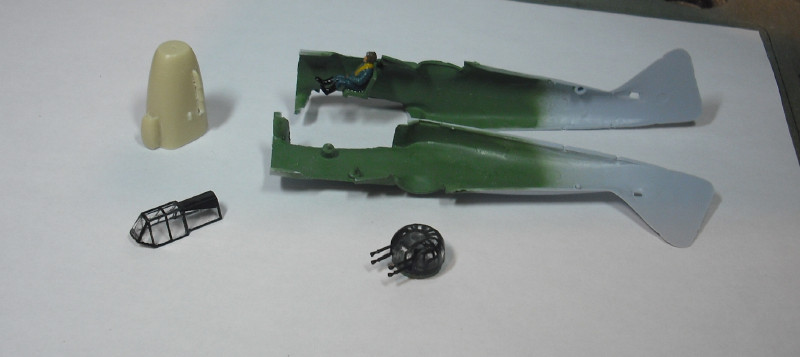
I did the canopy framing. The main canopy came out fairly neat but I got impatient and heavy-handed with the turret and it looks a bit of a mess.
Next job was to saw the kit nose off where the Valiant Models instructions said to do so and assemble and paint the rather crude and rudimentary interior. At this stage I also separated the resin parts from their casting block, I did this with a cutting disc in a miniature drill, it seemed the easiest way (I had never worked with resin before).
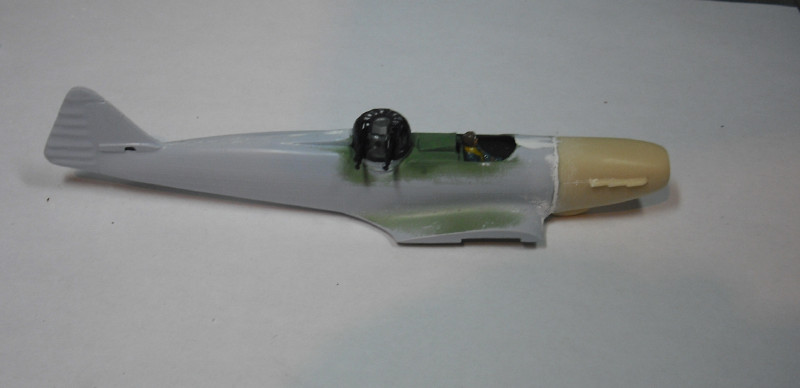
The fuselage was closed up and the resin nose added. I am please to report that it fitted perfectly and just needed a tiny bit of filler to blend it in, it really was very good. In fact it's the rest of the parts supplied by Airfix that were a bad fit! At this stage I also added the cockpit floor supplied by Valiant.
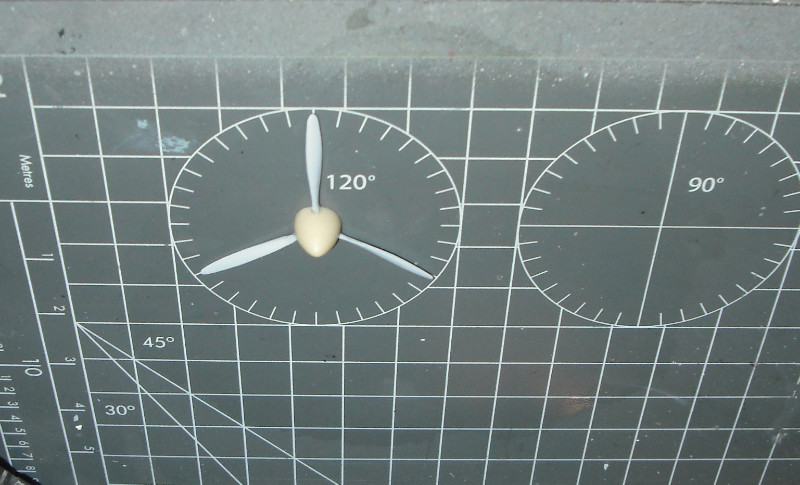
The Valiant Models instructions tell you to cut the propeller blades off of the kit supplied prop and glue them into small holes in their resin spinner. This, thankfully, wasn't as hard as I thought it was going to be because I could use the guide on the Humbrol cutting mat to get the angles right, plus I made a small wedge that I temporarily slid under each blade as the glue dried to keep the pitch angle consistent.
The new spinner is substantially larger than the kit supplied part.
Anyway, painted and decaled, here it is. The decals were very good, very opaque. I feel the new resin parts do improve the overall look of the plane even if it still doesn't measure up to the newer tooling. I 'dummied' the lights in the wing leading edge with silver paint (yeah, I know, I'm a lazy bodger). I hope you like it. As always, comments welcome.
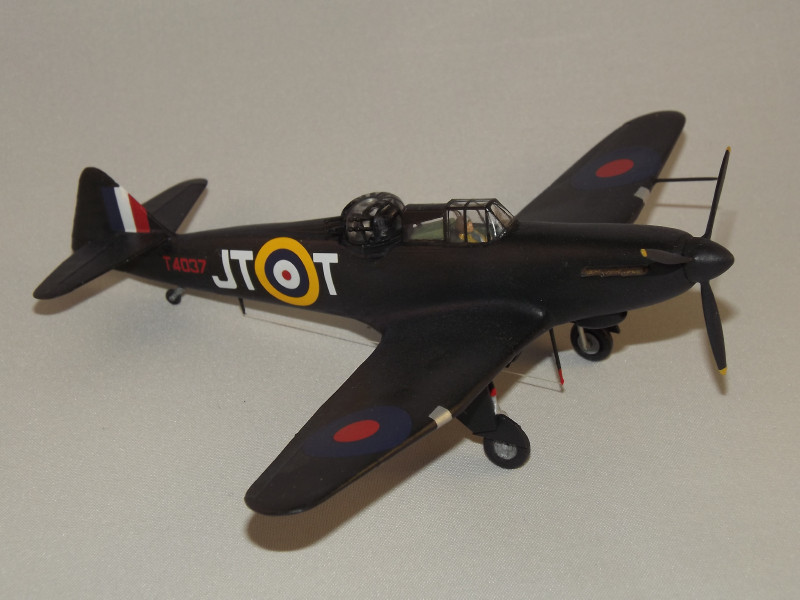
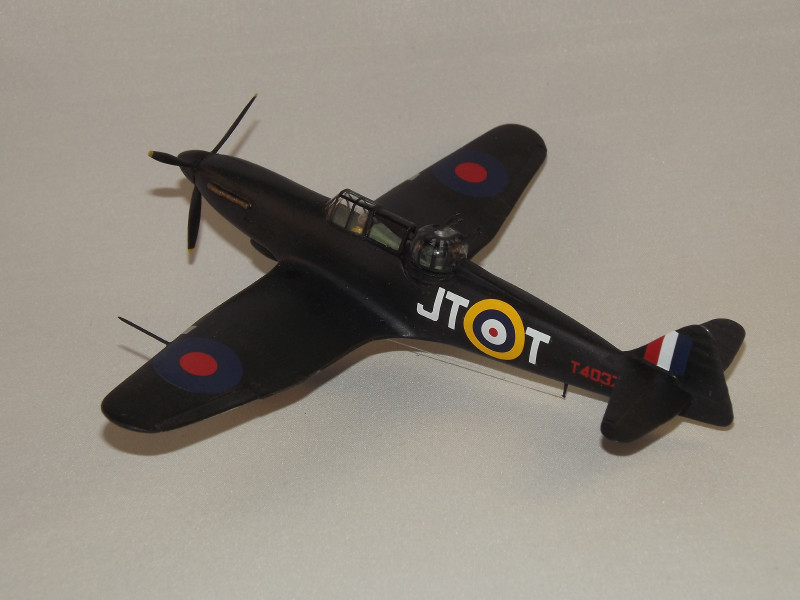
Finish is Humbrol enamels and Mattcote.
Regards,
Zee28
This is a real Golden Oldie that dates back to around 1960 and has since been replaced by Airfix's new tooling that appears to be superior in every way and also, so I am told, far more accurate.
But in the interest of CBKers like me, here's the original simple old kit but with the Valiant Models resin replacement nose and spinner. Although there are other minor inaccuracies with this kit (that didn't really worry me) the nose shape is the most glaring and it jars a bit, so the resin correction set was most welcome.
Here's my boxing which (I believe) dates from as recently as 2008. Airfix certainly got their money's worth out of this one!
This is the resin parts as supplied by Valiant Models. They also supply, as part of the package, a small piece of plasticard to make a cockpit floor (or else you can see out of the canopy from the U/C bays!). Their instruction sheet that comes with it is also very informative.
I did the canopy framing. The main canopy came out fairly neat but I got impatient and heavy-handed with the turret and it looks a bit of a mess.
Next job was to saw the kit nose off where the Valiant Models instructions said to do so and assemble and paint the rather crude and rudimentary interior. At this stage I also separated the resin parts from their casting block, I did this with a cutting disc in a miniature drill, it seemed the easiest way (I had never worked with resin before).
The fuselage was closed up and the resin nose added. I am please to report that it fitted perfectly and just needed a tiny bit of filler to blend it in, it really was very good. In fact it's the rest of the parts supplied by Airfix that were a bad fit! At this stage I also added the cockpit floor supplied by Valiant.
The Valiant Models instructions tell you to cut the propeller blades off of the kit supplied prop and glue them into small holes in their resin spinner. This, thankfully, wasn't as hard as I thought it was going to be because I could use the guide on the Humbrol cutting mat to get the angles right, plus I made a small wedge that I temporarily slid under each blade as the glue dried to keep the pitch angle consistent.
The new spinner is substantially larger than the kit supplied part.
Anyway, painted and decaled, here it is. The decals were very good, very opaque. I feel the new resin parts do improve the overall look of the plane even if it still doesn't measure up to the newer tooling. I 'dummied' the lights in the wing leading edge with silver paint (yeah, I know, I'm a lazy bodger). I hope you like it. As always, comments welcome.
Finish is Humbrol enamels and Mattcote.
Regards,
Zee28