MPC 1/72: Republic F-84F Thunderstreak
Posted: December 3rd, 2017, 6:37 am
The Aircraft
The Republic F-84F Thunderstreak is the swept-wing version of the Republic F-84 Thunderjet. It was developed with the desire to increase the performance of its straight-wing predecessor. Ordered into production in 1950, the aircraft ran into production problems, and was not operational until 1954. Even though it had a more powerful engine, the F-84F did not meet expectations for improved performance. It would equip the US Air Force until removed from service in 1964. It was also used by many NATO member nations.
The F-84F had a maximum speed of nearly 700 mph at sea level. Its maximum service ceiling was 46,000 feet. It was armed with six .50 caliber machine guns and could carry external ordnance (not exceeding 6000 pounds) of rockets and / or bombs, as well as a single Mk. VII nuclear bomb.
The Kit
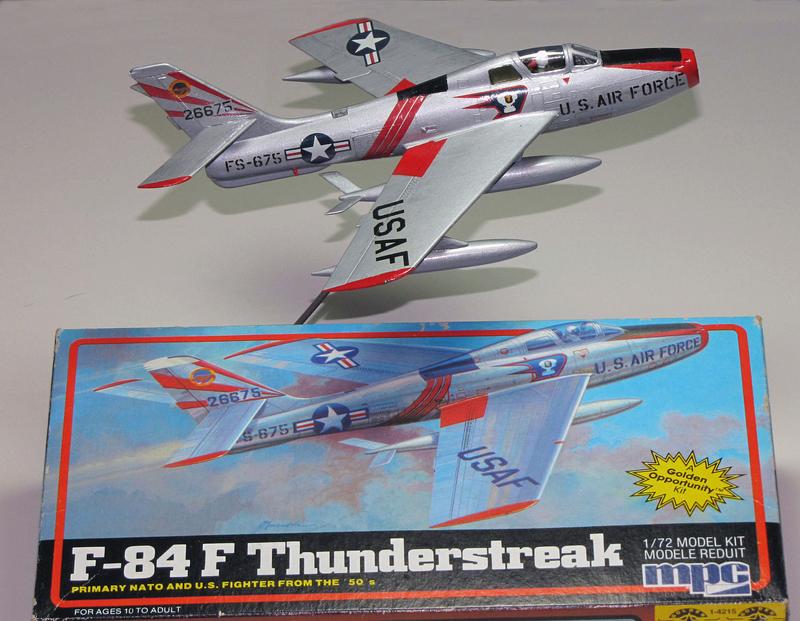
This kit is a re-box of the kit originally issued by Airfix. The model is stamped with 1974, while the box has an issue date of 1983. Purchased on Ebay for approx $11.00 USD (including shipping).
I really like the early jets and so it was natural to want one for my collection. I saw this on Ebay and thought all looked fine in the pics. The decals looked to be in good condition as did all the parts. When it arrived I gave it a going-over and thought it looked pretty good for a quick weekend build (always a bad thought to have). Keeping in mind it was a thirty-year-old kit, I wasn't expecting much, the good gray plastic had raised panel lines and details were minimal. Even the pilot was missing his legs below the knees!
The instructions were adequate for the simplicity of the build. However, the paint and decal instructions were very poor. Good thing there are lots of pics of this aircraft online.
The Build
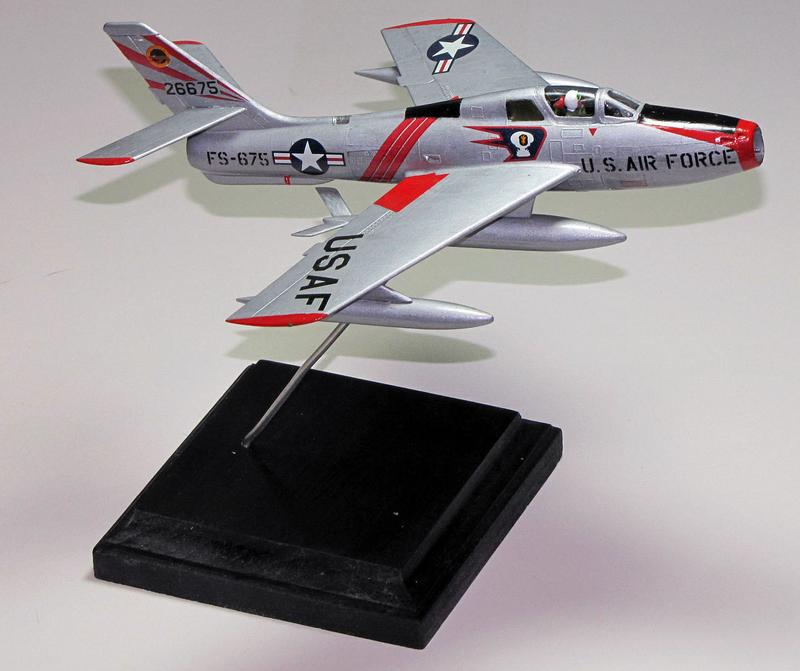
Okay, it took a week to finish. Since there was little detail for the wheels / wheel wells, I opted for a wheels-up build. Also, I thought it had a cool profile that begged for that.
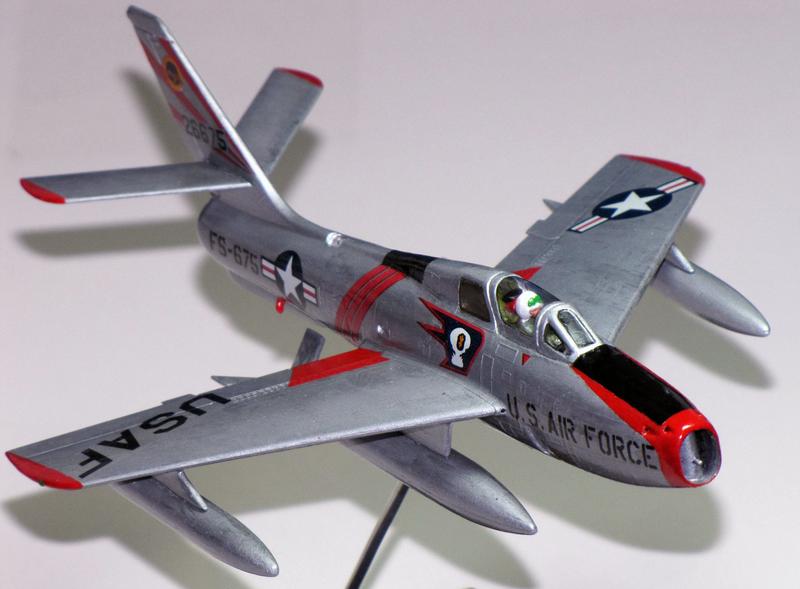
The cockpit was where I face my first big problem. The cockpit itself consists of a tub and seat for the pilot and a rudimentary control panel. Nothing else. It isn't to big a deal since, because of the curved fuselage, you cannot see anything on the sides of the cockpit. But you can the side controls on the tub so I painted "controls" to have something to look at. Disaster struck when I was trying to paint the dials on the control panel. I was holding them in tweezers which slipped while I was painting. The slip caused the piece to fly someplace in my office - never to be seen again. After much searching (and cursing), I gave in to the realization I would have to build something to replace it. Off to my spare parts bin I go! As luck would have it, I found an extra structure from one of my ship builds would work great with just a little trimming. Happy days! Back to building.
I joined the fuselage halves together and found a problem. One part of the cockpit, the part behind the pilot's seat, was supposed to extend to the top of the fuselage (all the way to become part of the external skin of the fuselage). It didn't and was to short, so I had to cut a piece of plastic and glue, file, and form in into place. In fact, I did a lot of filling and filing on this kit too. Other than that, there was no further drama assembling the model.
That comes later during the painting and decal phase of the build.
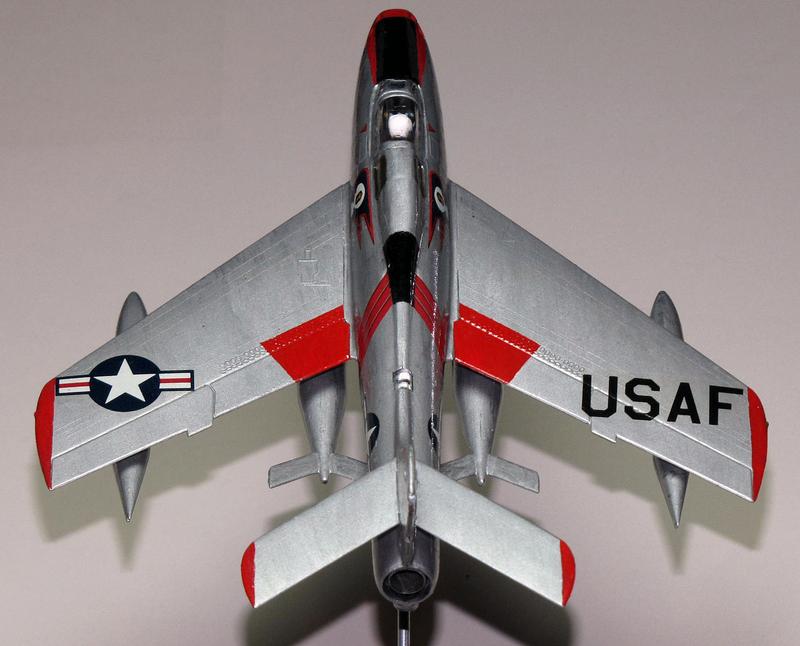
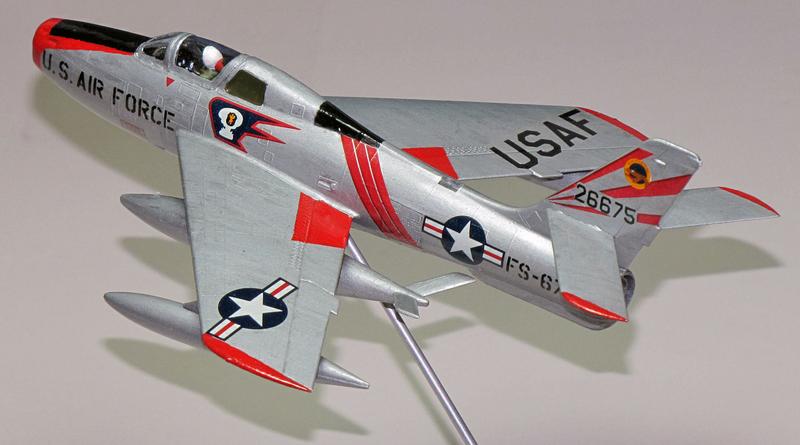
There is a lot of confusion with how to paint and mark this model. The box-art shows a rendition of what the plane should look like. The built example on the sides shows the model missing the red nose markings and decals not in the kit. Then you get to the instructions which are way off as well. The placement of the wing markings are incorrect. The decals require lots of trimming as they are too large (especially the tail markings). The red nose decal is useless (I had to paint mine). And the black area behind the cockpit is in the wrong place which, as an added bonus, will throw off the placement of the striped fuselage-band. Do yourself a favor and look online for this information.
The windows behind the canopy are supposed to be tinted dark (they are clear in the kit). I tried a nifty little trick I read about on the forum, of mixing a bit of wash with the clear floor polish and applying it to the clear piece. Awesome, that worked great (and thanks to who came up with that!). So I mounted it to a stand I built and finished today.
Btw, the markings are for aircraft of the 81st Tactical Fighter Wing, 78th Tactical Fighter Squadron, USAF, stationed at RAF Bentwaters in the late 1950's.
Conclusions
If you want an F-84F Thunderstreak, I would probably buy a different, and modernized, kit rather than an old one like this.
The Republic F-84F Thunderstreak is the swept-wing version of the Republic F-84 Thunderjet. It was developed with the desire to increase the performance of its straight-wing predecessor. Ordered into production in 1950, the aircraft ran into production problems, and was not operational until 1954. Even though it had a more powerful engine, the F-84F did not meet expectations for improved performance. It would equip the US Air Force until removed from service in 1964. It was also used by many NATO member nations.
The F-84F had a maximum speed of nearly 700 mph at sea level. Its maximum service ceiling was 46,000 feet. It was armed with six .50 caliber machine guns and could carry external ordnance (not exceeding 6000 pounds) of rockets and / or bombs, as well as a single Mk. VII nuclear bomb.
The Kit
This kit is a re-box of the kit originally issued by Airfix. The model is stamped with 1974, while the box has an issue date of 1983. Purchased on Ebay for approx $11.00 USD (including shipping).
I really like the early jets and so it was natural to want one for my collection. I saw this on Ebay and thought all looked fine in the pics. The decals looked to be in good condition as did all the parts. When it arrived I gave it a going-over and thought it looked pretty good for a quick weekend build (always a bad thought to have). Keeping in mind it was a thirty-year-old kit, I wasn't expecting much, the good gray plastic had raised panel lines and details were minimal. Even the pilot was missing his legs below the knees!
The instructions were adequate for the simplicity of the build. However, the paint and decal instructions were very poor. Good thing there are lots of pics of this aircraft online.
The Build
Okay, it took a week to finish. Since there was little detail for the wheels / wheel wells, I opted for a wheels-up build. Also, I thought it had a cool profile that begged for that.
The cockpit was where I face my first big problem. The cockpit itself consists of a tub and seat for the pilot and a rudimentary control panel. Nothing else. It isn't to big a deal since, because of the curved fuselage, you cannot see anything on the sides of the cockpit. But you can the side controls on the tub so I painted "controls" to have something to look at. Disaster struck when I was trying to paint the dials on the control panel. I was holding them in tweezers which slipped while I was painting. The slip caused the piece to fly someplace in my office - never to be seen again. After much searching (and cursing), I gave in to the realization I would have to build something to replace it. Off to my spare parts bin I go! As luck would have it, I found an extra structure from one of my ship builds would work great with just a little trimming. Happy days! Back to building.
I joined the fuselage halves together and found a problem. One part of the cockpit, the part behind the pilot's seat, was supposed to extend to the top of the fuselage (all the way to become part of the external skin of the fuselage). It didn't and was to short, so I had to cut a piece of plastic and glue, file, and form in into place. In fact, I did a lot of filling and filing on this kit too. Other than that, there was no further drama assembling the model.
That comes later during the painting and decal phase of the build.
There is a lot of confusion with how to paint and mark this model. The box-art shows a rendition of what the plane should look like. The built example on the sides shows the model missing the red nose markings and decals not in the kit. Then you get to the instructions which are way off as well. The placement of the wing markings are incorrect. The decals require lots of trimming as they are too large (especially the tail markings). The red nose decal is useless (I had to paint mine). And the black area behind the cockpit is in the wrong place which, as an added bonus, will throw off the placement of the striped fuselage-band. Do yourself a favor and look online for this information.
The windows behind the canopy are supposed to be tinted dark (they are clear in the kit). I tried a nifty little trick I read about on the forum, of mixing a bit of wash with the clear floor polish and applying it to the clear piece. Awesome, that worked great (and thanks to who came up with that!). So I mounted it to a stand I built and finished today.
Btw, the markings are for aircraft of the 81st Tactical Fighter Wing, 78th Tactical Fighter Squadron, USAF, stationed at RAF Bentwaters in the late 1950's.
Conclusions
If you want an F-84F Thunderstreak, I would probably buy a different, and modernized, kit rather than an old one like this.