As I've posted elsewhere on the site, I've had this idea of building a single manufacturer series of models and, also of building aircraft represesnting different countries from the limited number among my large collection of models. I gave these two ideas some thought before realising that the two could be mutually combined in one manufacturer, namely Mikoyan Gurevich.
I reasoned that Mig aircraft have a long history during which time they have been operated by a large percentage of the worlds air forces so some judicious decal selection could result in an interesting and colourful variety of models. Furthermore, there are lots of Mig kits around and, importantly for us with limited shelf space, Mig only produced fighter types so a collection in 1/72nd should be fairly manageable (YES, I know about the Mig 31). With all this in mind I've decided to embark on a project to build a model of every Mig fighter type with, ideally, each representing a different nation.
This will be an ongoing project that will be worked around other commitments and this thread will be dedicated to it for as long as it runs even if that is in fits and starts.
Dazzled's Big Mig Build
-
Dazzled

- Modelling Gent and Scholar
- Posts: 9592
- Joined: October 1st, 2011, 11:08 pm
- Location: Mid Glamorgan, South Wales
- Contact:
Dazzled's Big Mig Build
COLD WAR S.I.G. LEADER
Wherever there's danger, wherever there's trouble, wherever there's important work to be done....I'll be somewhere else building a model!
Wherever there's danger, wherever there's trouble, wherever there's important work to be done....I'll be somewhere else building a model!
-
Dazzled
- Modelling Gent and Scholar
- Posts: 9592
- Joined: October 1st, 2011, 11:08 pm
- Location: Mid Glamorgan, South Wales
- Contact:
Re: Dazzled's Big Mig Build
Being indecisive about which model to build first, I asked my daughter to pick one, so first up in the Big Mig Build is the Italeri Mig-29 Fulcrum-A.
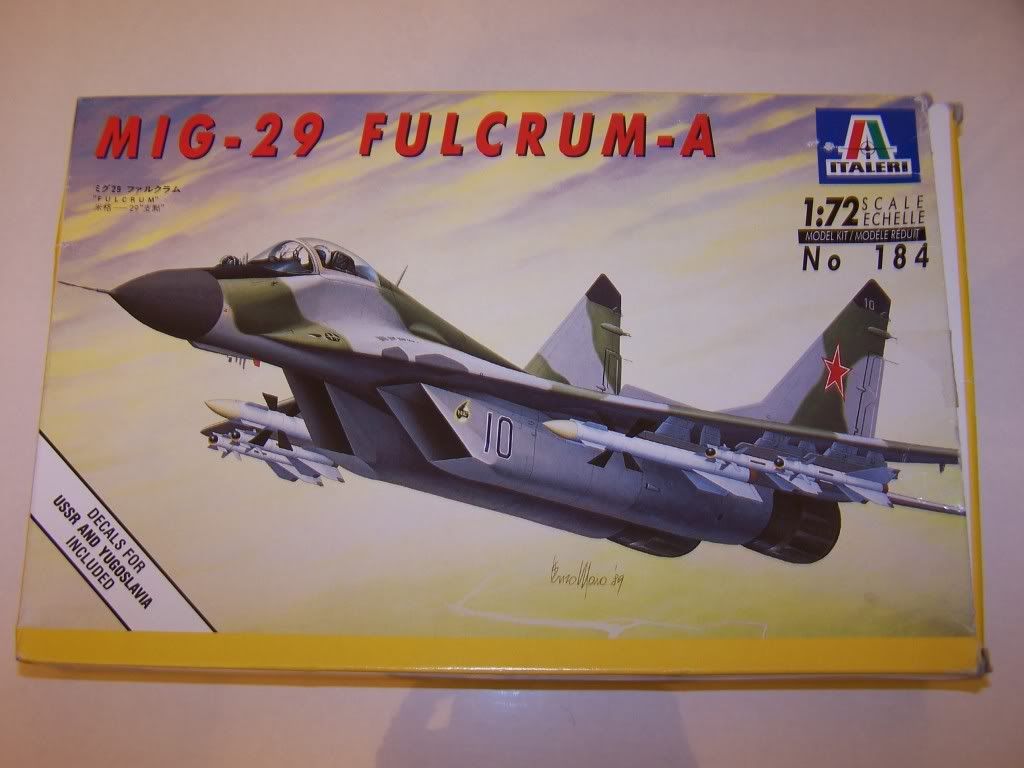
The kit offers two decal options. One for a VVS aircraft as depicted on the box top and one for...
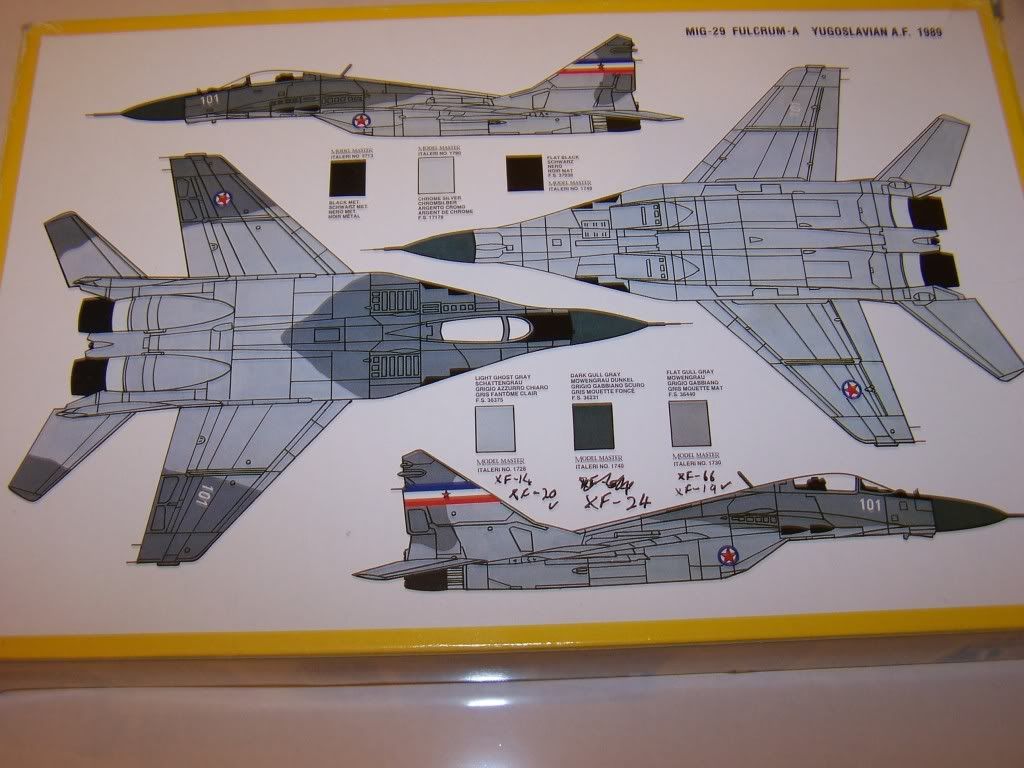
A Yugoslavian machine from 1989. This is the version I intend to build, which is just as well really as the kit doesn't contain any paint or marking instructions for the other version. As I bought the kit from Ebay, I'm not sure if this was something Italeri left out or if there was meant to be another sheet of instructions. Anyhow, it's not important.
One thing that is important though is Italeri's idea of the colour scheme for this aircraft. The instructions give Model Master and FS paints that are way out for the correct colours ,so a bit of online sleuthing tracked down some more appropriate paint numbers. The camoflage scheme is also interesting but, as my researches showed, it is accurate for Yugoslav Mig-29s of this period with the only doubt being the dark camo colour on the fins with some aircraft having the "blobs" on the forward part and some on the aft half. Another omission is the fintop aerials which should be the same colour as the radome.
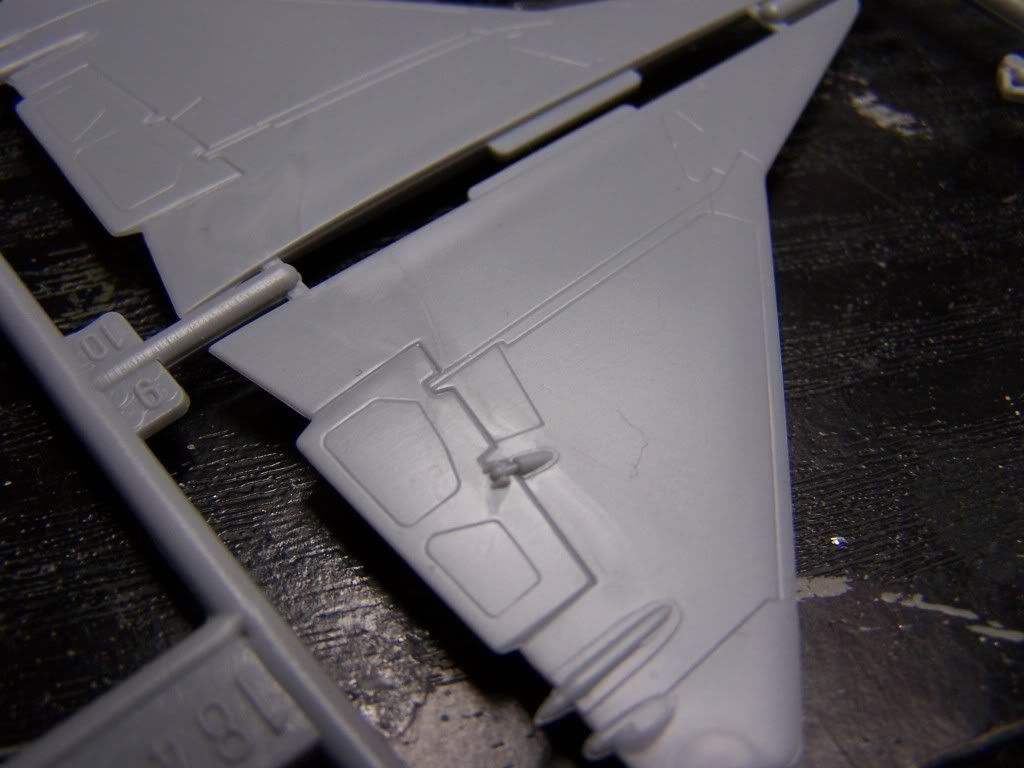
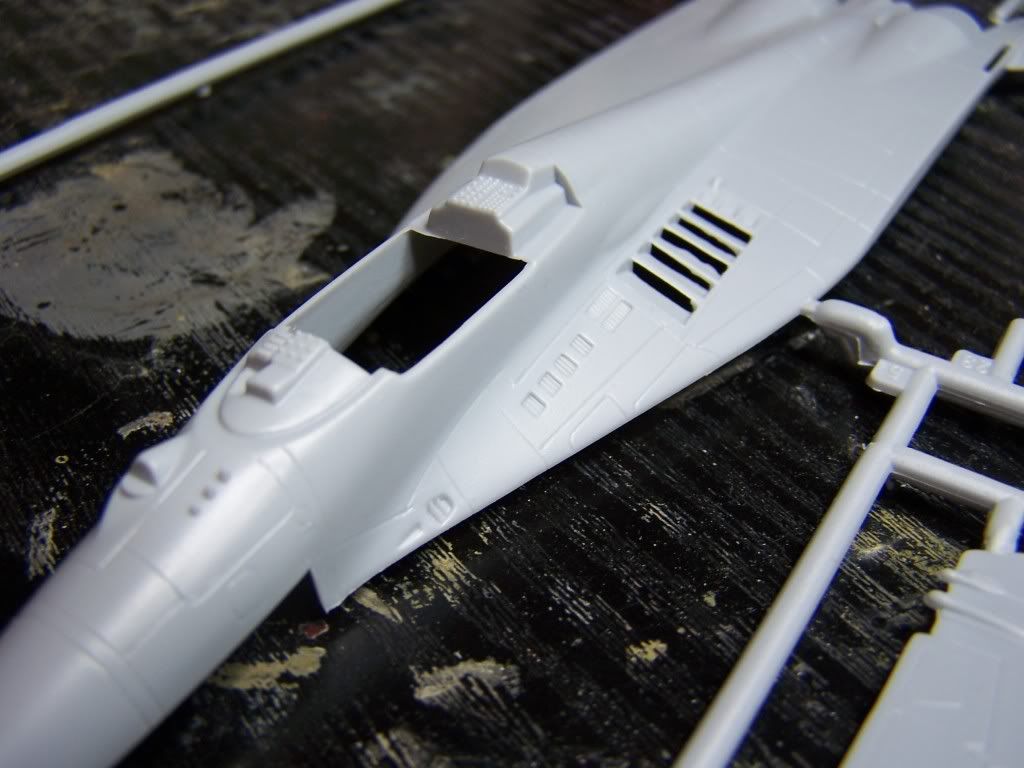
The contents of the kit seem quite basic at first glance.
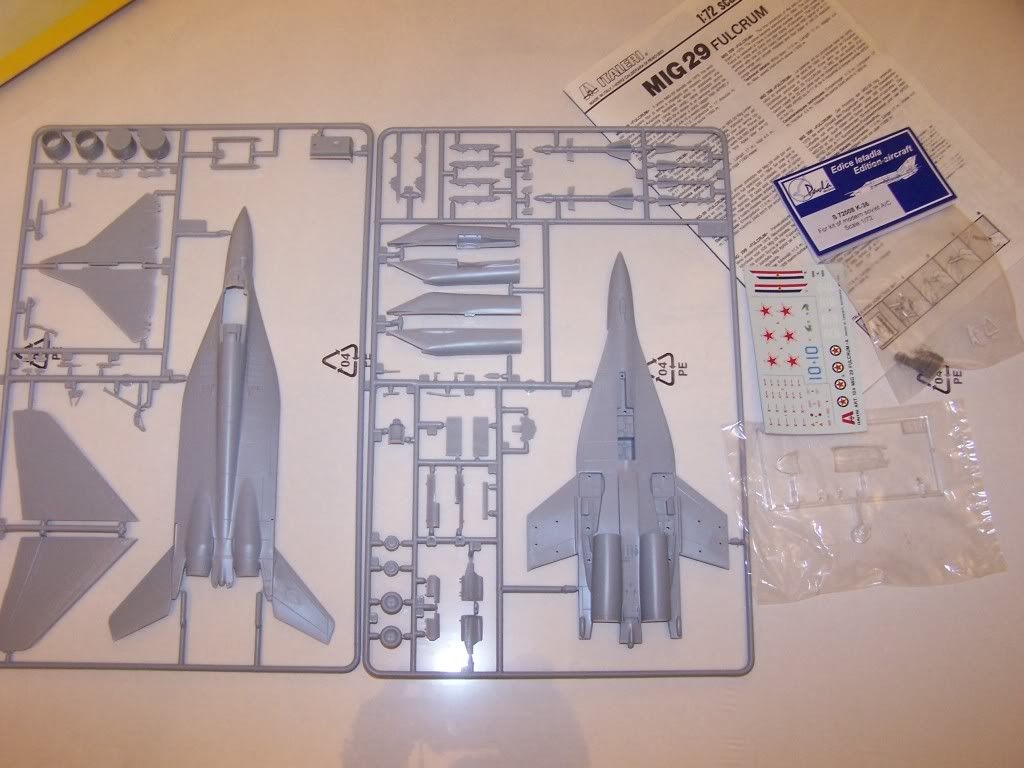
But the detail is very good indeed.
However, one thing I did see fit to enhance was the ejector seat, so I bought this...
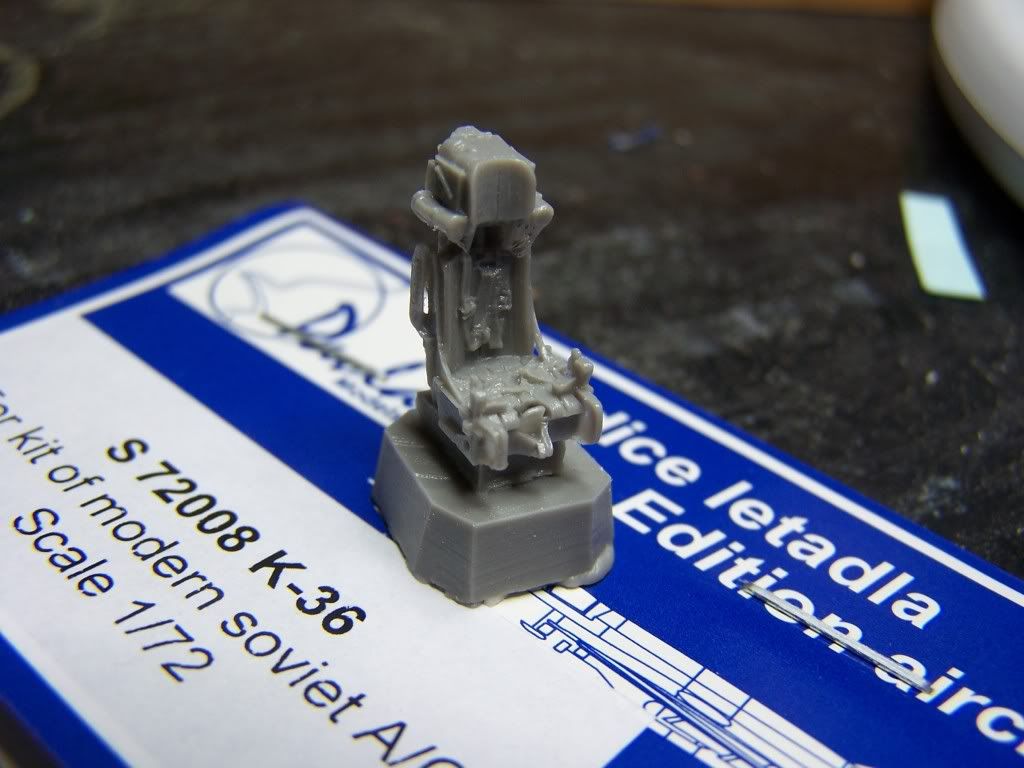
A resin K-36 ejector seat by Pavla, far superior to the kit item and some encouragement to bulid the model with the canopy open.
On to assembly.
The kit offers two decal options. One for a VVS aircraft as depicted on the box top and one for...
A Yugoslavian machine from 1989. This is the version I intend to build, which is just as well really as the kit doesn't contain any paint or marking instructions for the other version. As I bought the kit from Ebay, I'm not sure if this was something Italeri left out or if there was meant to be another sheet of instructions. Anyhow, it's not important.
One thing that is important though is Italeri's idea of the colour scheme for this aircraft. The instructions give Model Master and FS paints that are way out for the correct colours ,so a bit of online sleuthing tracked down some more appropriate paint numbers. The camoflage scheme is also interesting but, as my researches showed, it is accurate for Yugoslav Mig-29s of this period with the only doubt being the dark camo colour on the fins with some aircraft having the "blobs" on the forward part and some on the aft half. Another omission is the fintop aerials which should be the same colour as the radome.
The contents of the kit seem quite basic at first glance.
But the detail is very good indeed.
However, one thing I did see fit to enhance was the ejector seat, so I bought this...
A resin K-36 ejector seat by Pavla, far superior to the kit item and some encouragement to bulid the model with the canopy open.
On to assembly.
COLD WAR S.I.G. LEADER
Wherever there's danger, wherever there's trouble, wherever there's important work to be done....I'll be somewhere else building a model!
Wherever there's danger, wherever there's trouble, wherever there's important work to be done....I'll be somewhere else building a model!
-
Softscience

- Staring out the window
- Posts: 7458
- Joined: April 5th, 2011, 4:34 pm
- Location: Maryland, near Washington DC
Re: Dazzled's Big Mig Build
Good call on the ejection seat. I think the wheel wells might be a bit shallow as well, but that isn't such a big deal.
One thing I'm not convinced of is your Tamiya color mix call outs you wrote on the box. The lighter gray would have you mixing silver and grey. That seems odd. The darker shade should also have a hint of aqua in it. To be perfectly honest, you might be better off going with medium sea gray mixed with just a few drops of an intermediate blue for the light gray, and then go with neutral gray mixed with a very little bit of a medium green shade for the darker gray.
That's just my two rubles.
-
Dazzled
- Modelling Gent and Scholar
- Posts: 9592
- Joined: October 1st, 2011, 11:08 pm
- Location: Mid Glamorgan, South Wales
- Contact:
Re: Dazzled's Big Mig Build
I forgot to mention the scribbled notes on the box. I found these suggestions on a couple of different forums and they seem pretty close from photos I found on the net. They don't represent mixes but colour suggestions(XF-14, J.A. Grey and XF-20, Medium Grey/XF-66, Light Grey and XF-19, Sky Grey). The ones with the ticks are the favourites for the camo scheme. They're not, by any means, the final word and I know, from said forums, that debate over Eastern bloc aircraft colours is quite lively. I would go for paints from a specialised manufactureer but Mrs dazzled is keeping a close eye on my modelling spend at the moment 
So, I may go with these colours or maybe not.
So, I may go with these colours or maybe not.
COLD WAR S.I.G. LEADER
Wherever there's danger, wherever there's trouble, wherever there's important work to be done....I'll be somewhere else building a model!
Wherever there's danger, wherever there's trouble, wherever there's important work to be done....I'll be somewhere else building a model!

Re: Dazzled's Big Mig Build
Model Master enamels do spersific paints for Soviet aircraft,including Mig colourers , i can highley recomend them, 
THE COSMIC JESTER IS WATCHING !!!
-
ShaunW
- NOT the sheep
- Posts: 26180
- Joined: November 26th, 2011, 6:11 pm
- Location: Pontefract West Yorkshire
Re: Dazzled's Big Mig Build
I built this very kit back in 1999 and used some decals from Blue Rider IIRC for, I think, a Mongolian machine (can't remember exactly). I agree that the kit seat leaves something to be desired and IIRC at the time reviews said the wheels were a little on the small side. I enjoyed the build though and it's nice to see one on here.
Doing - Tamiya 1/35th Universal Carrier.
Work is the curse of the modelling classes!
IPMS#12300
Work is the curse of the modelling classes!
IPMS#12300
-
Old_Tonto

- Modelling Gent and Scholar
- Posts: 8061
- Joined: May 1st, 2011, 7:41 pm
- Location: Middlesbrough, Peoples Republic of Teesside.
Re: Dazzled's Big Mig Build
That sounds like an interesting project Dazzled. I will keep my eye on this thread, hope to see at least one East German Mig on display. 
2023 - A:0 B:0 C:0
Current Projects:
East German Air Force (1956-90)
South African Air Force (1958-93)
Current Projects:
East German Air Force (1956-90)
South African Air Force (1958-93)

Re: Dazzled's Big Mig Build
Hi Dazzled, this is a great little kit. I've already built the other option so it will be nice to see your yugoslavian version!
All the best
Stu
All the best
Stu
Old fashioned paint brush user.
-
Dazzled
- Modelling Gent and Scholar
- Posts: 9592
- Joined: October 1st, 2011, 11:08 pm
- Location: Mid Glamorgan, South Wales
- Contact:
Re: Dazzled's Big Mig Build
Already got that planned for the Fujimi Mig 29 in the pileOld_Tonto wrote:That sounds like an interesting project Dazzled. I will keep my eye on this thread, hope to see at least one East German Mig on display.
COLD WAR S.I.G. LEADER
Wherever there's danger, wherever there's trouble, wherever there's important work to be done....I'll be somewhere else building a model!
Wherever there's danger, wherever there's trouble, wherever there's important work to be done....I'll be somewhere else building a model!
-
Old_Tonto
- Modelling Gent and Scholar
- Posts: 8061
- Joined: May 1st, 2011, 7:41 pm
- Location: Middlesbrough, Peoples Republic of Teesside.
Re: Dazzled's Big Mig Build
Glad to hear it. I have built up quite a stash of spare decals so if you need anything for you big mig build let me know.Dazzled wrote:
Already got that planned for the Fujimi Mig 29 in the pile
Actually this would be a good theme for a group build.
2023 - A:0 B:0 C:0
Current Projects:
East German Air Force (1956-90)
South African Air Force (1958-93)
Current Projects:
East German Air Force (1956-90)
South African Air Force (1958-93)
-
Dazzled
- Modelling Gent and Scholar
- Posts: 9592
- Joined: October 1st, 2011, 11:08 pm
- Location: Mid Glamorgan, South Wales
- Contact:
Re: Dazzled's Big Mig Build
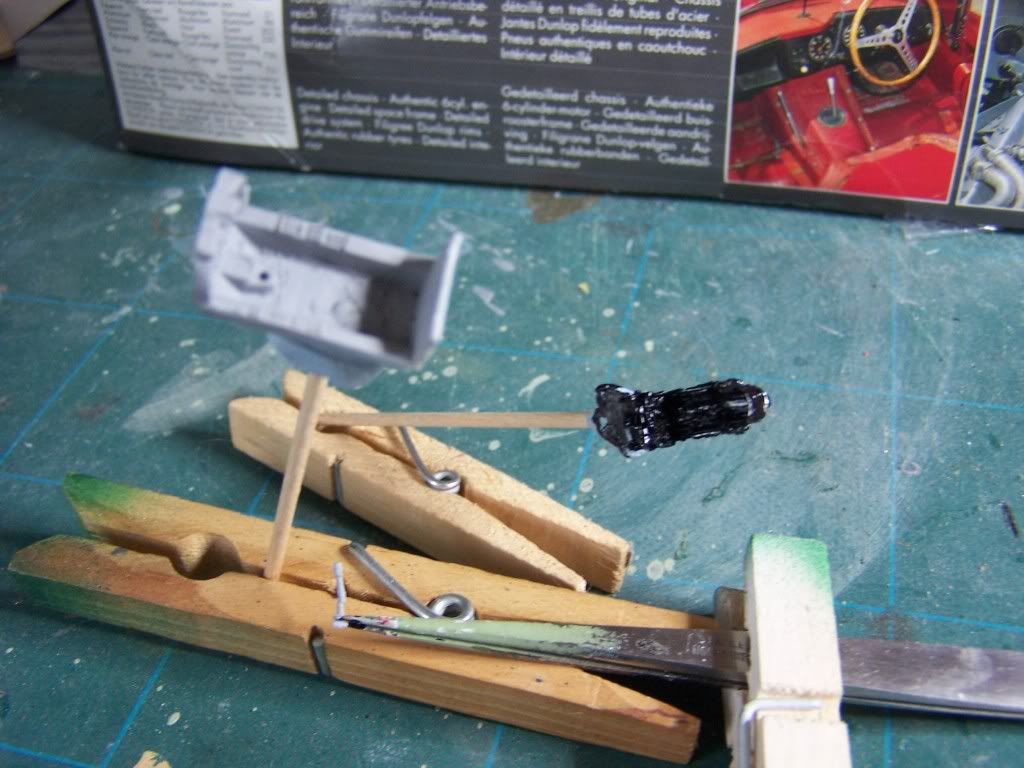
Work began with the cockpit (original eh?). The components were given an undercoat. Gloss black for the seat and light grey for the tub and panel.
Coamings, front and rear, also got an initial paint. Games workshop "chaos black and light grey respectively.
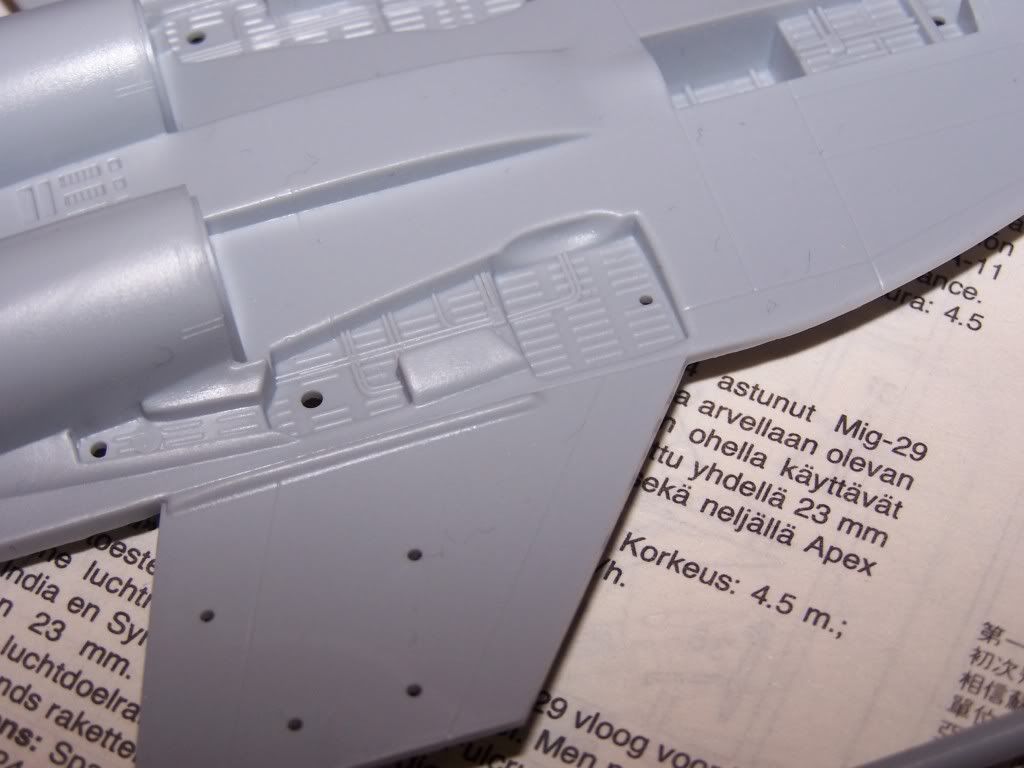
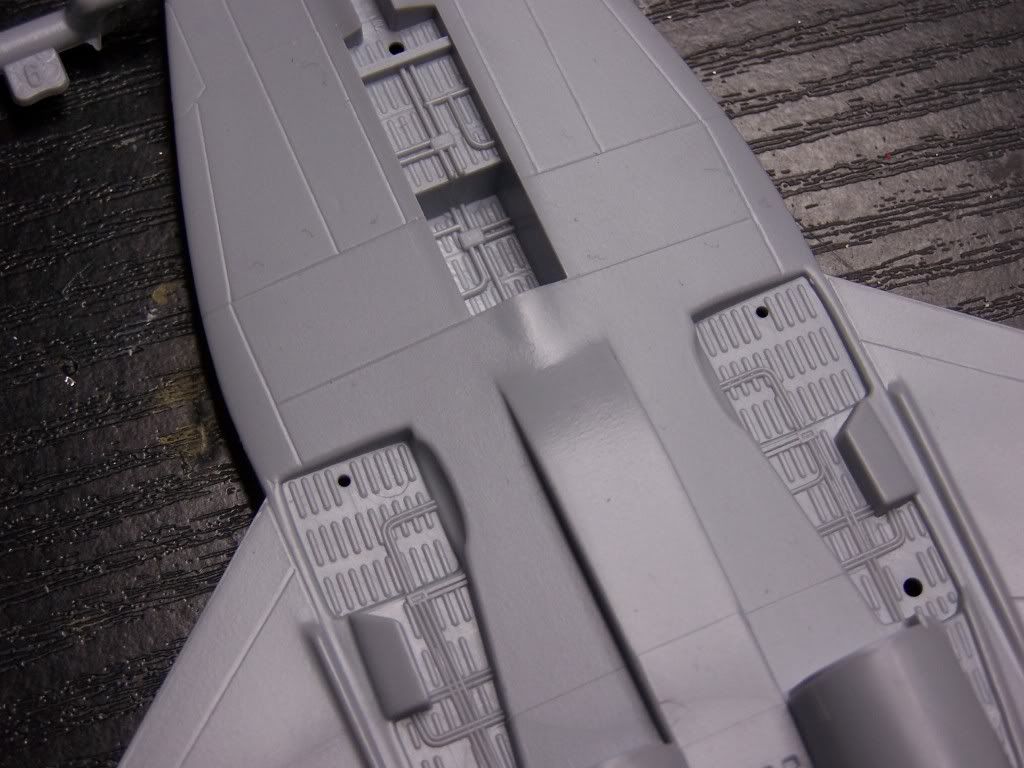
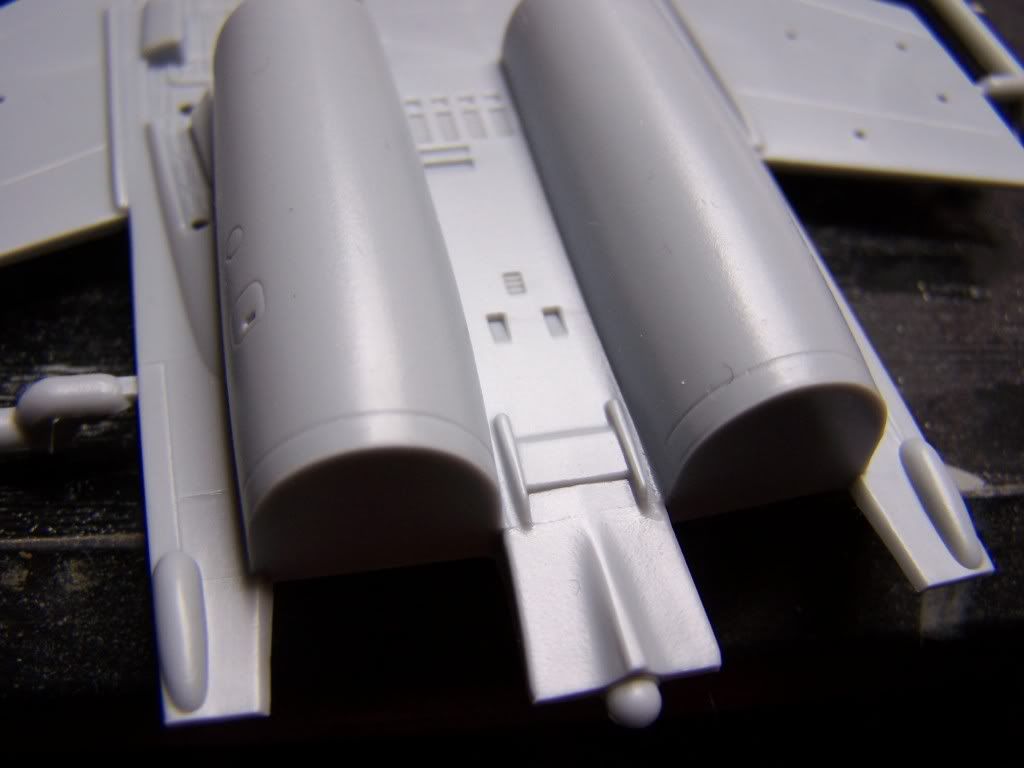
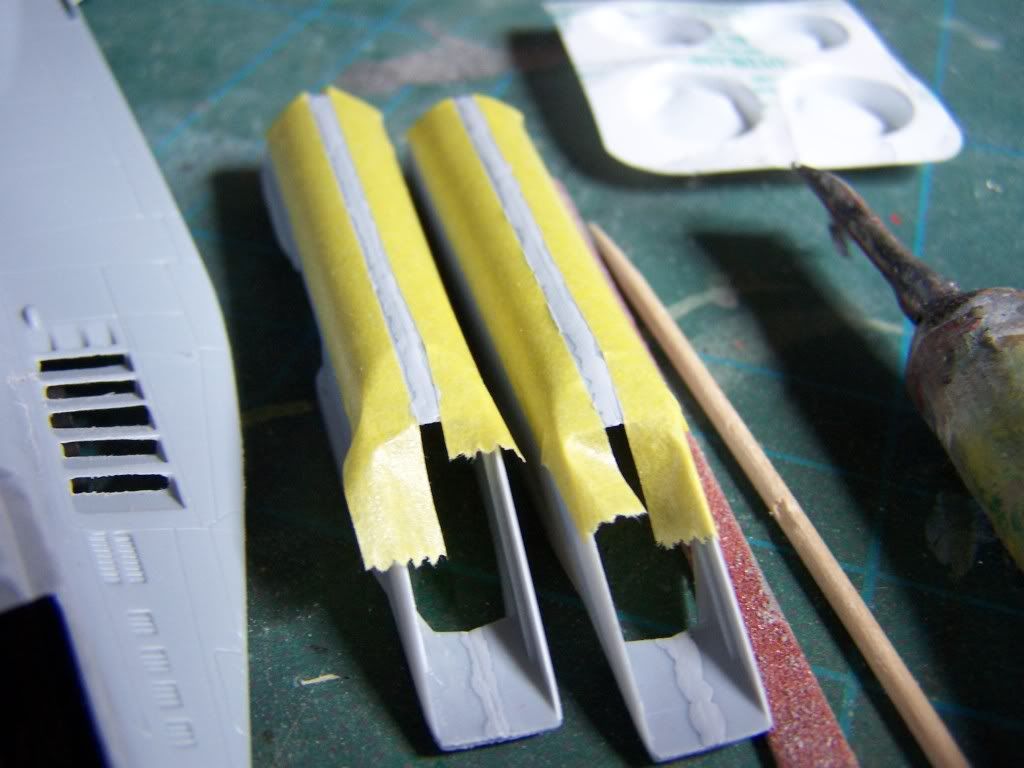
Flash on the auxilliary intakes was cleaned off using a nail sanding stick cut in half lontitudinally.
And the seams in the intakes were filled with Mr Surfacer 500.
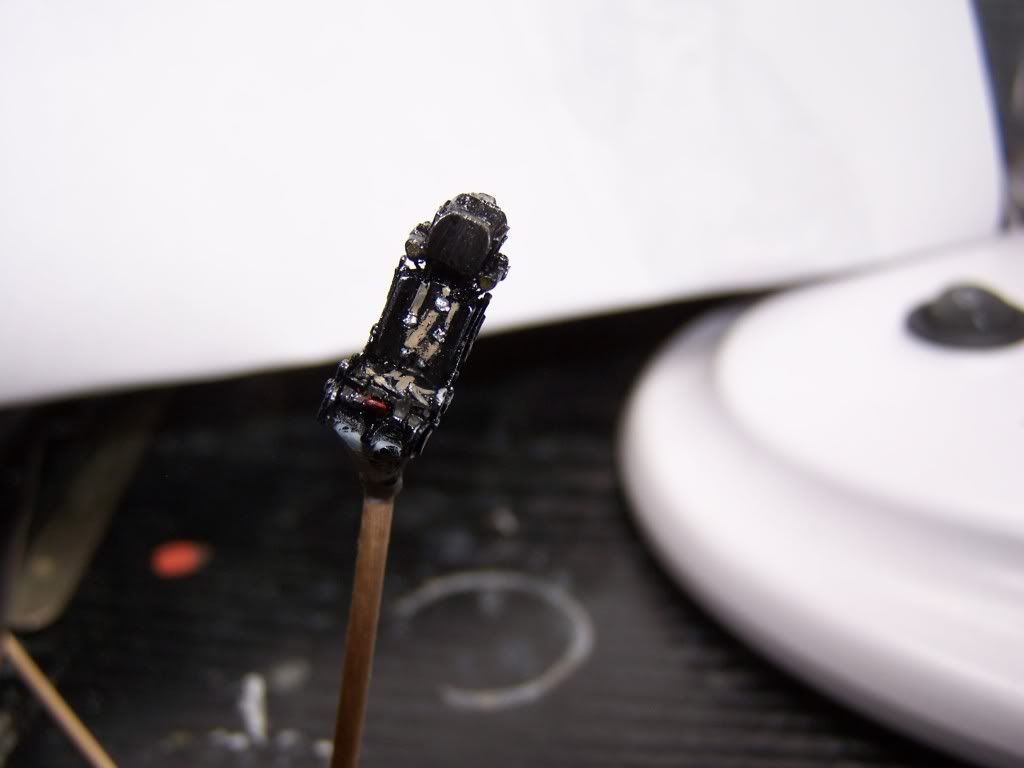
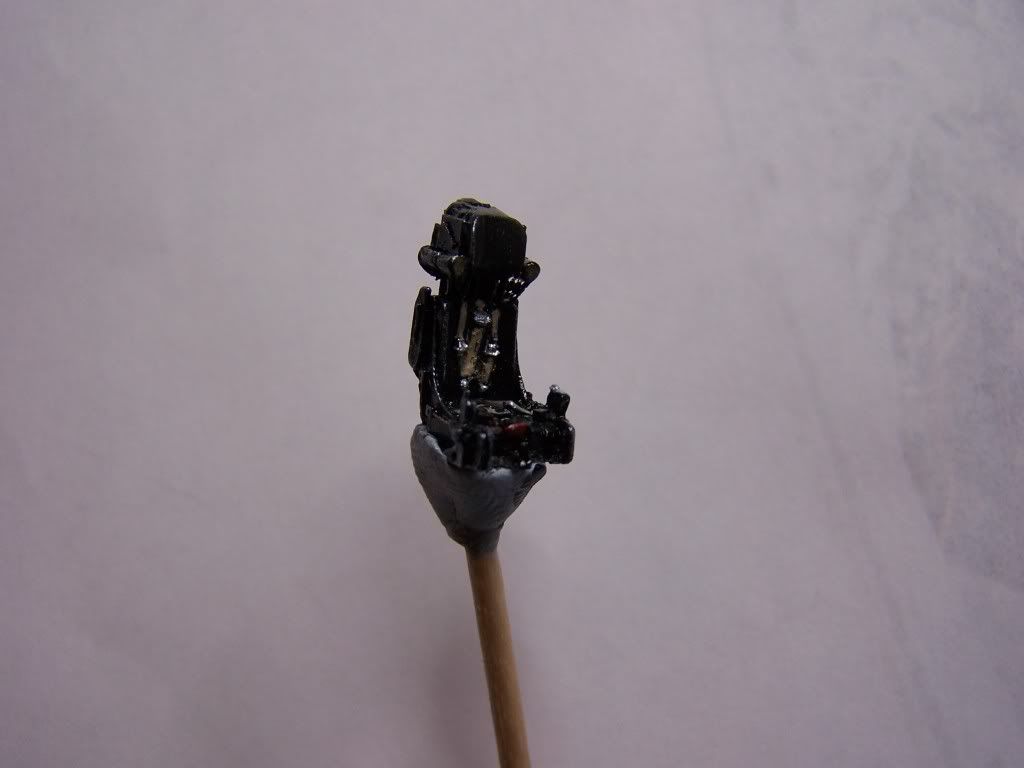
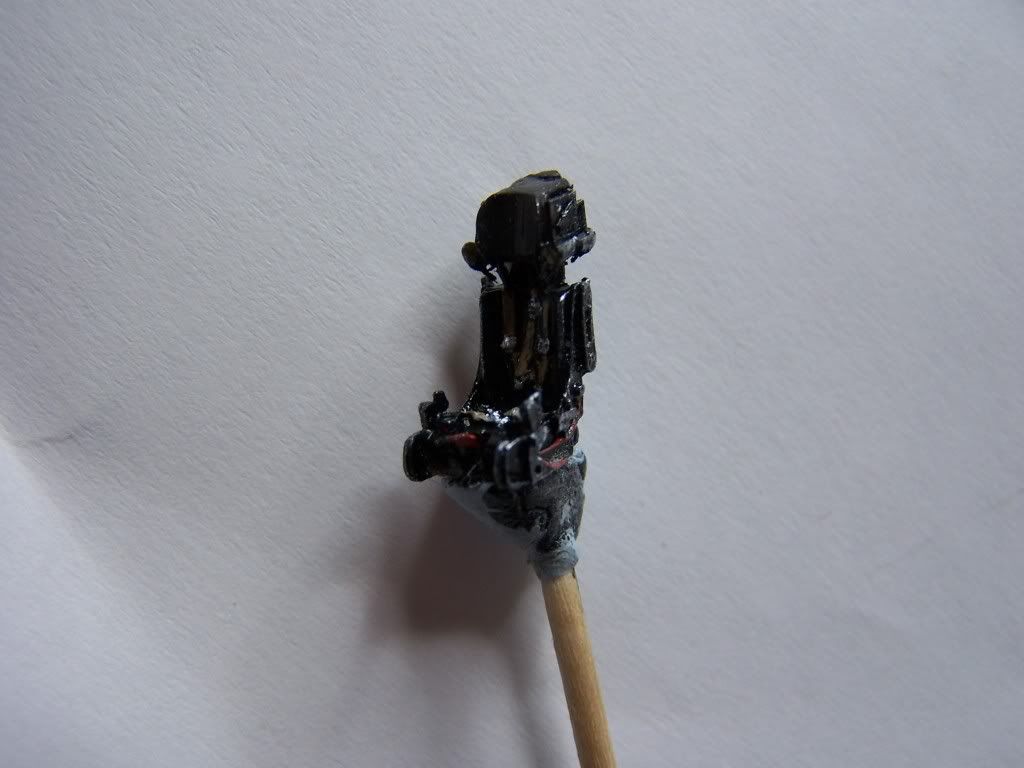
Then I got down to work on the seat. Pavla's moulding is absolutely gorgeous and, luckily, I was able to find some excellent reference pictures on the web. This site is particularly good http://www.hunavia.hu/. The tablet bister pack makes a very good mixing palatte for small quantities of paint or little puddles of adhesive.
I pasted a few pictures onto a word document, then printed it off, keeping it on my lap as a reference while I painted the seat under a magnifying daylight lamp. This is the result.
The instrument panel got similar treatment. The panel supplied in the kit is OK but it represents a prototype panel so it's not accurate for this version. In fact my research showed that prototype Mig 29s had their panels painted in light blue/green too but I did the best I could with what I was supplied with and produced a pretty reasonable panel. Thank heavens for magnifiers.
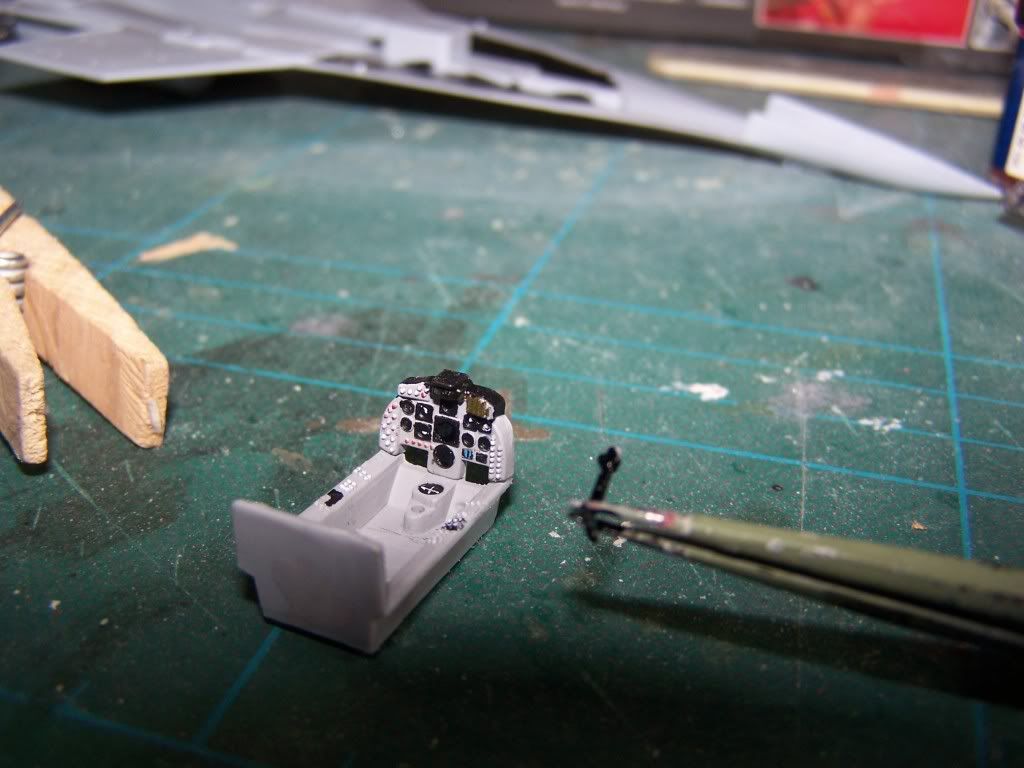
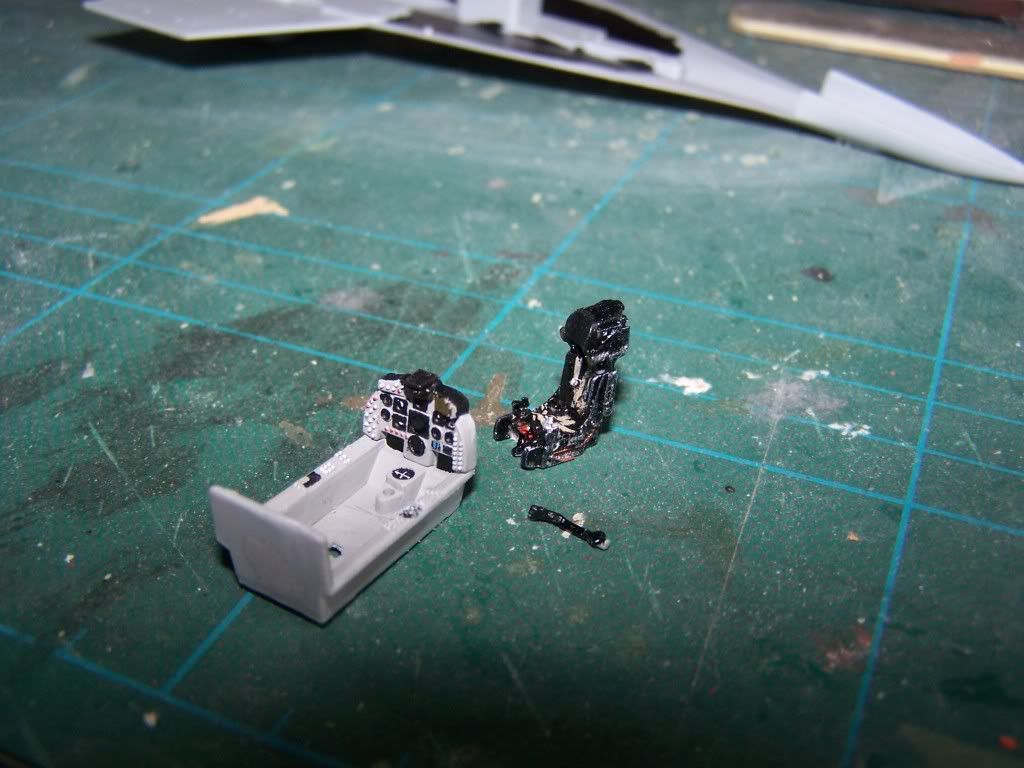
In hindsight, I think I should have gone for a full cockpit set instead of just a seat.
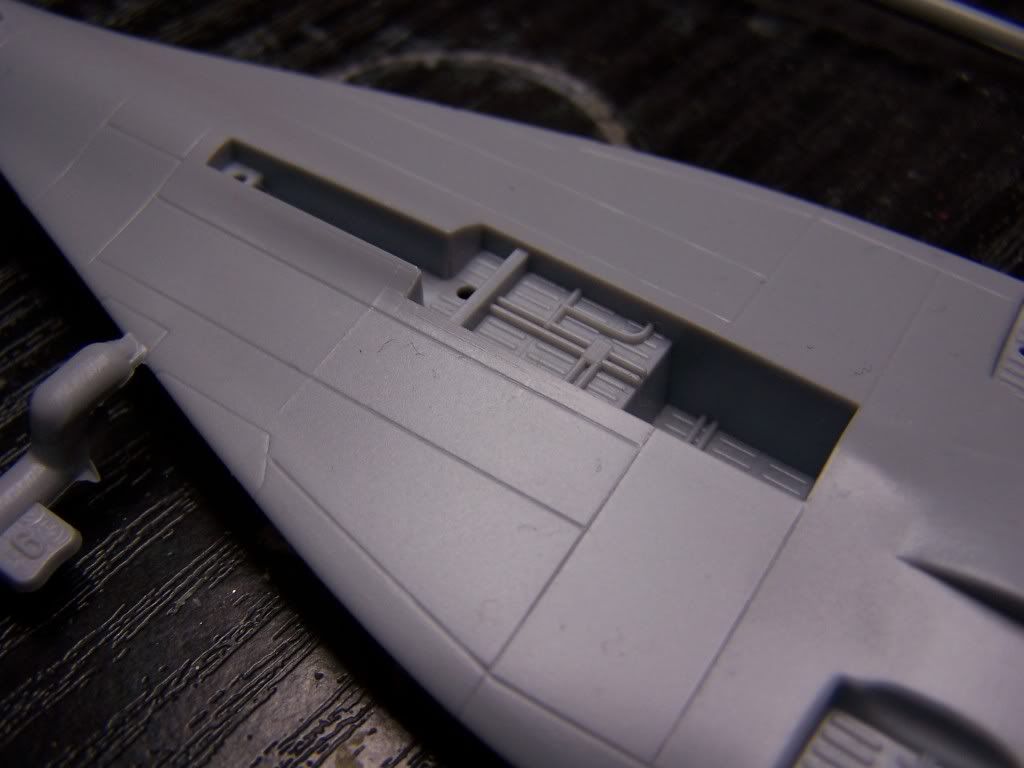
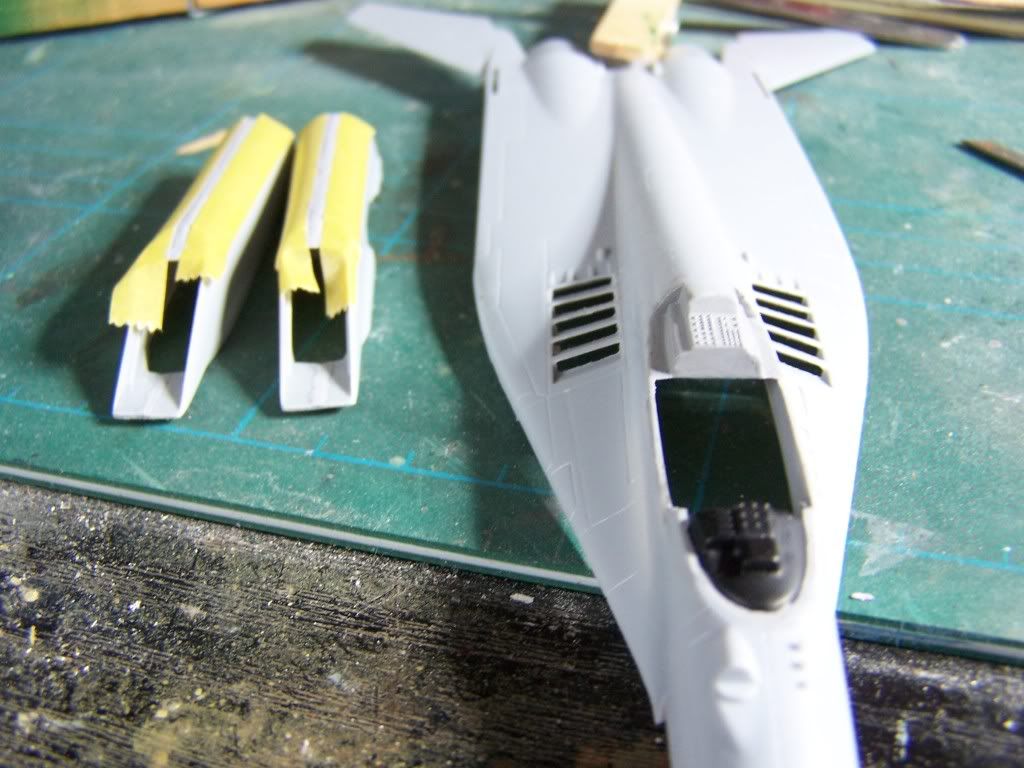
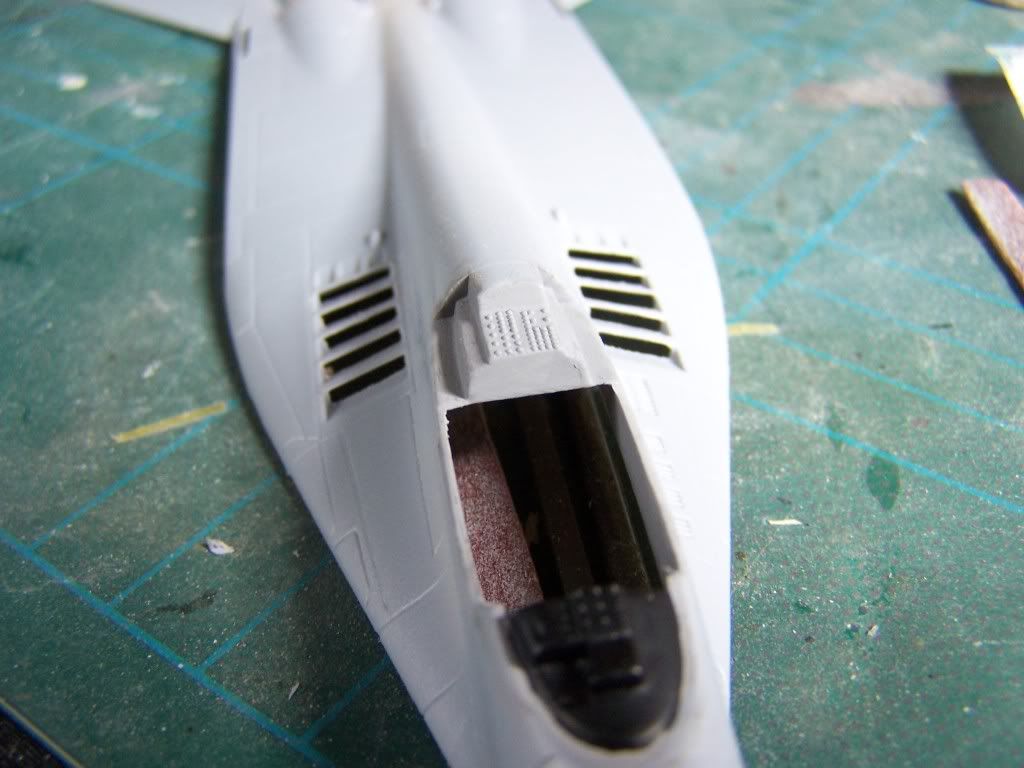
All fitted in to the upper fuselage it looks like this.
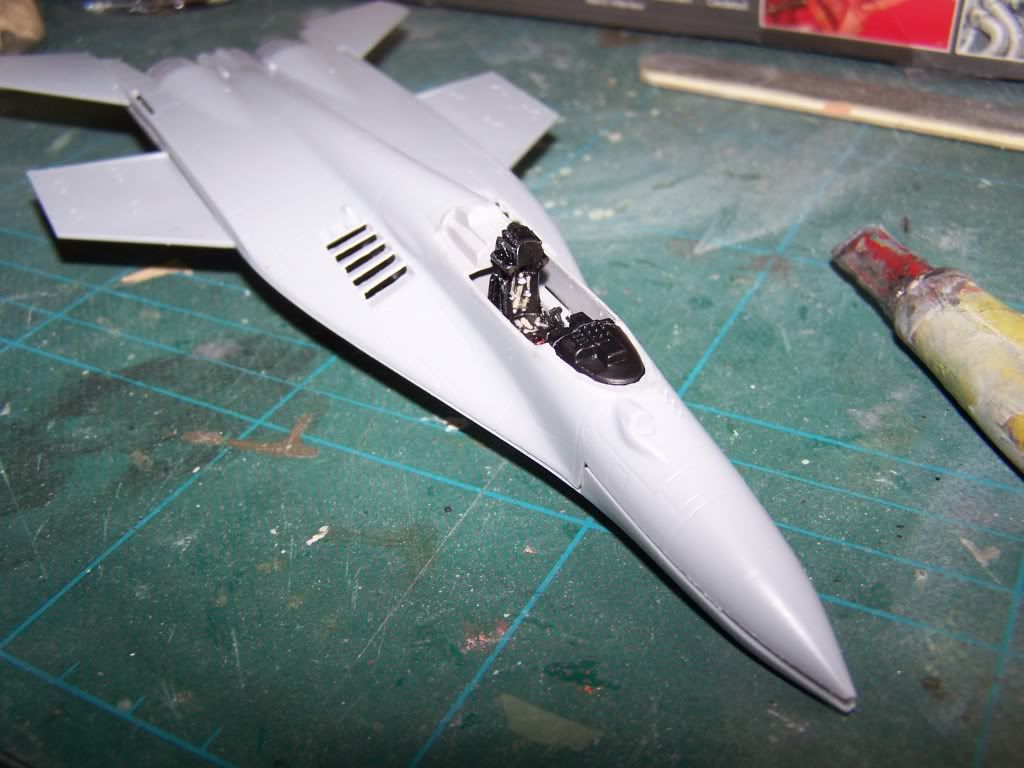
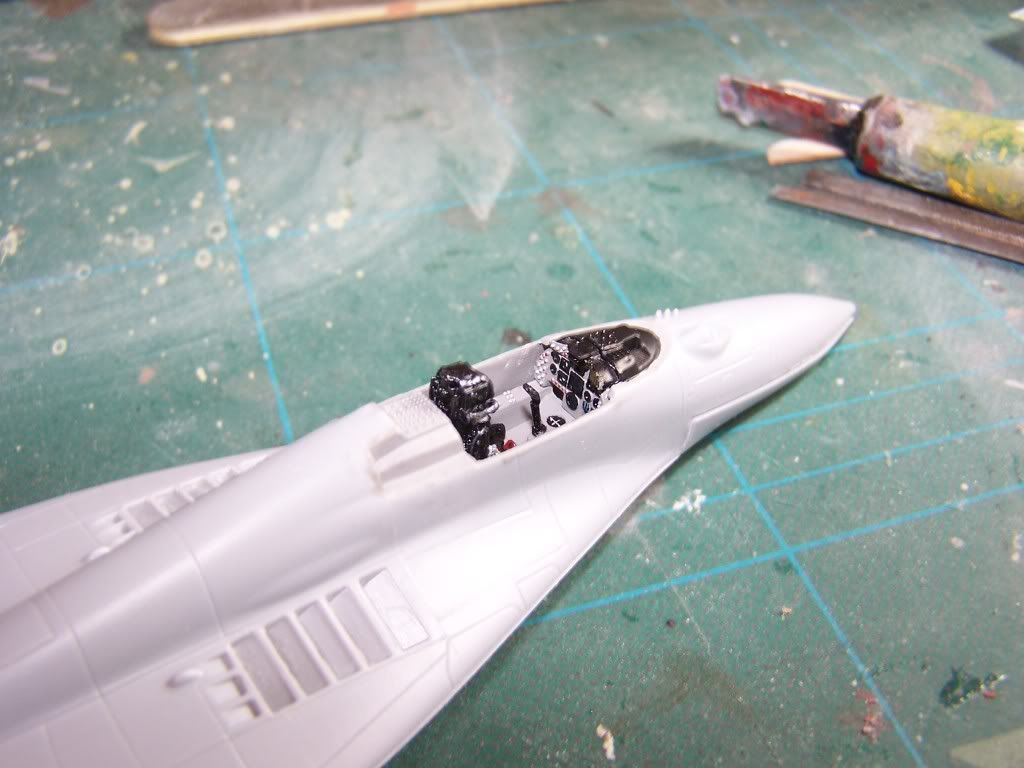
There is a bit of a big gap where the panel joins the coaming. Something to deal with later. At this stage I also touched in the circuit breakers fore and aft of the cockpit.
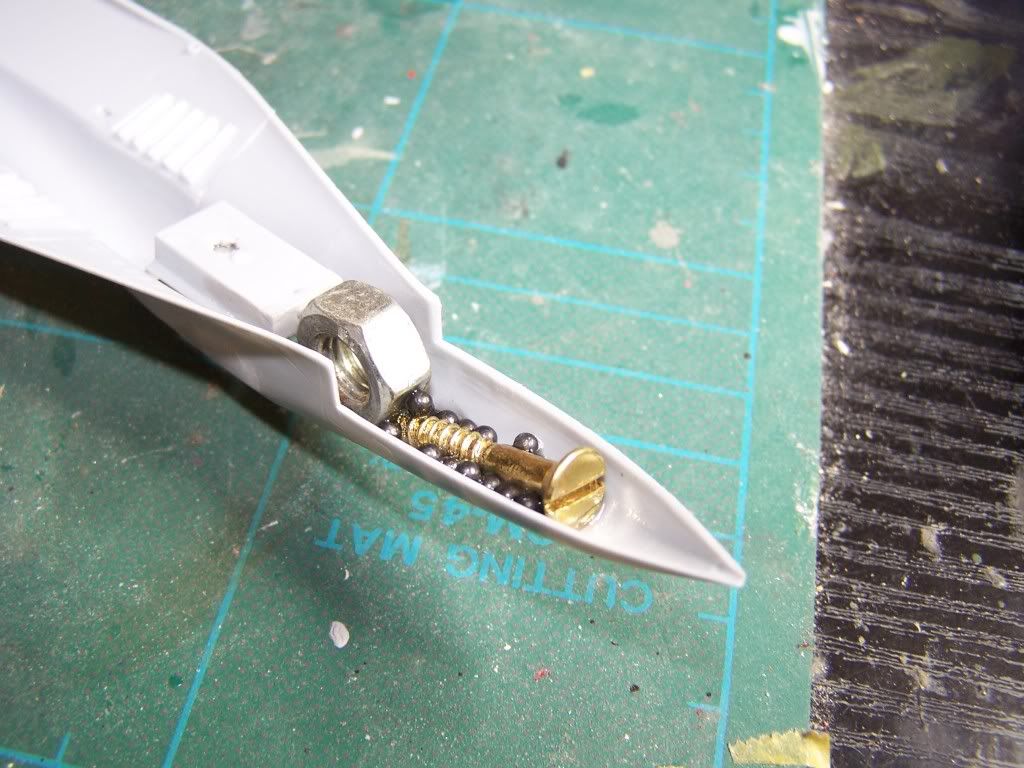
I wasn't sure if the Mig would be a tail sitter. The instructions don't offer any help in this department so, not wanting to take a chance, I glued in a bit of metalwork just in case.
With that done it was time to join the fuselage halves together. Before that, though, I ran some Mr Surfacer into the gap between coaming and panel from the inside. Then it was out with the liquid poly and clamps.
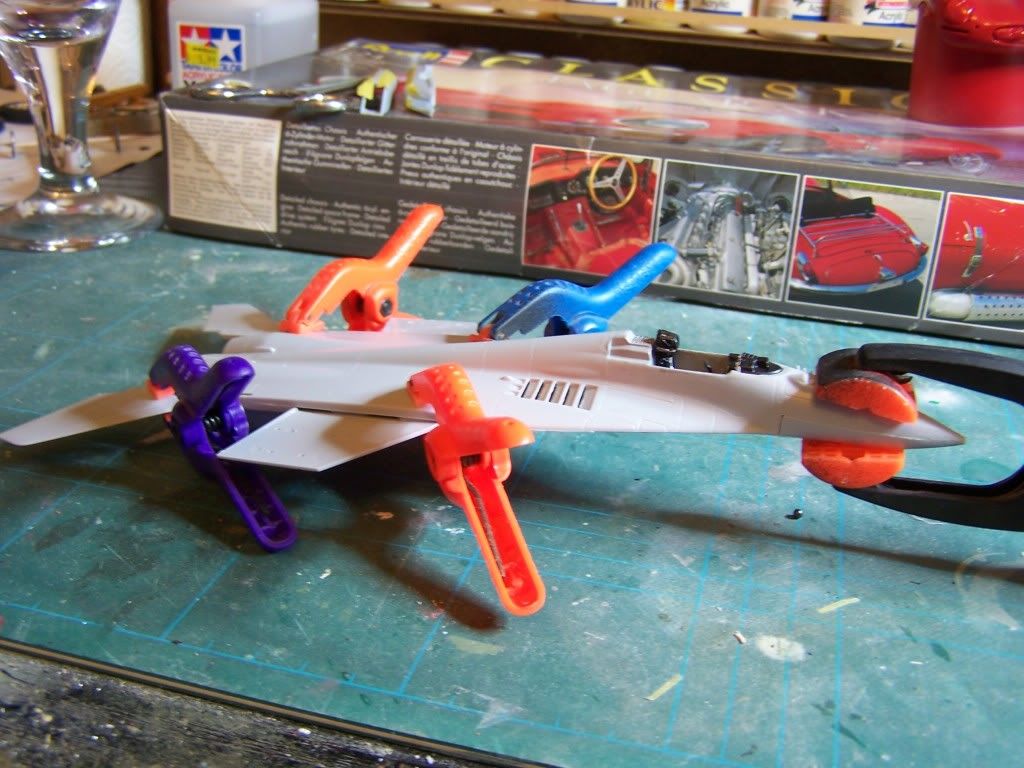
The kit was left overnight to dry. Having the tailplanes moulded in to the fuselage will save me a fiddly job later on and, right now, it's sitting on my bench waiting for me to find a little more time.
More updates soon, I hope
Coamings, front and rear, also got an initial paint. Games workshop "chaos black and light grey respectively.
Flash on the auxilliary intakes was cleaned off using a nail sanding stick cut in half lontitudinally.
And the seams in the intakes were filled with Mr Surfacer 500.
Then I got down to work on the seat. Pavla's moulding is absolutely gorgeous and, luckily, I was able to find some excellent reference pictures on the web. This site is particularly good http://www.hunavia.hu/. The tablet bister pack makes a very good mixing palatte for small quantities of paint or little puddles of adhesive.
I pasted a few pictures onto a word document, then printed it off, keeping it on my lap as a reference while I painted the seat under a magnifying daylight lamp. This is the result.
The instrument panel got similar treatment. The panel supplied in the kit is OK but it represents a prototype panel so it's not accurate for this version. In fact my research showed that prototype Mig 29s had their panels painted in light blue/green too but I did the best I could with what I was supplied with and produced a pretty reasonable panel. Thank heavens for magnifiers.
In hindsight, I think I should have gone for a full cockpit set instead of just a seat.
All fitted in to the upper fuselage it looks like this.
There is a bit of a big gap where the panel joins the coaming. Something to deal with later. At this stage I also touched in the circuit breakers fore and aft of the cockpit.
I wasn't sure if the Mig would be a tail sitter. The instructions don't offer any help in this department so, not wanting to take a chance, I glued in a bit of metalwork just in case.
With that done it was time to join the fuselage halves together. Before that, though, I ran some Mr Surfacer into the gap between coaming and panel from the inside. Then it was out with the liquid poly and clamps.
The kit was left overnight to dry. Having the tailplanes moulded in to the fuselage will save me a fiddly job later on and, right now, it's sitting on my bench waiting for me to find a little more time.
More updates soon, I hope
COLD WAR S.I.G. LEADER
Wherever there's danger, wherever there's trouble, wherever there's important work to be done....I'll be somewhere else building a model!
Wherever there's danger, wherever there's trouble, wherever there's important work to be done....I'll be somewhere else building a model!
-
Dazzled
- Modelling Gent and Scholar
- Posts: 9592
- Joined: October 1st, 2011, 11:08 pm
- Location: Mid Glamorgan, South Wales
- Contact:
Re: Dazzled's Big Mig Build
Thanks OT. I'll bear that in mindOld_Tonto wrote:Glad to hear it. I have built up quite a stash of spare decals so if you need anything for you big mig build let me know.Dazzled wrote:
Already got that planned for the Fujimi Mig 29 in the pile
Actually this would be a good theme for a group build.
As for a GB, I'd certainly be up for an "exotic Mig" build. I wonder if there's room in the GB calendar?
COLD WAR S.I.G. LEADER
Wherever there's danger, wherever there's trouble, wherever there's important work to be done....I'll be somewhere else building a model!
Wherever there's danger, wherever there's trouble, wherever there's important work to be done....I'll be somewhere else building a model!
-
ShaunW
- NOT the sheep
- Posts: 26180
- Joined: November 26th, 2011, 6:11 pm
- Location: Pontefract West Yorkshire
Re: Dazzled's Big Mig Build
Nice work and plenty of metal in the front - I hope the landing gear can take it! Just a point and I could be wrong, but I think I read somewhere that the auxillary doors on top of the intakes should be closed when the engines aren't running.
Doing - Tamiya 1/35th Universal Carrier.
Work is the curse of the modelling classes!
IPMS#12300
Work is the curse of the modelling classes!
IPMS#12300
-
Dazzled
- Modelling Gent and Scholar
- Posts: 9592
- Joined: October 1st, 2011, 11:08 pm
- Location: Mid Glamorgan, South Wales
- Contact:
Re: Dazzled's Big Mig Build
I'm afraid that the doors only come in this position. I could fabricate some covers, I suppose, but it doesn't bother me that much. There must be a means of having them open on the ground for maintenance purposes anyway.
That's my excuse and I'm sticking to it
That's my excuse and I'm sticking to it
COLD WAR S.I.G. LEADER
Wherever there's danger, wherever there's trouble, wherever there's important work to be done....I'll be somewhere else building a model!
Wherever there's danger, wherever there's trouble, wherever there's important work to be done....I'll be somewhere else building a model!
-
ShaunW
- NOT the sheep
- Posts: 26180
- Joined: November 26th, 2011, 6:11 pm
- Location: Pontefract West Yorkshire
Re: Dazzled's Big Mig Build
A man after my own heart. I have plenty of excuses and stick to them like glue 
Doing - Tamiya 1/35th Universal Carrier.
Work is the curse of the modelling classes!
IPMS#12300
Work is the curse of the modelling classes!
IPMS#12300