Hi,
The condor build is progressing well.
I'll post up some photos in a different thread to save hijacking this one.
Cheers
Gadfly
Dazzled's Big Mig Build
-
Dazzled

- Modelling Gent and Scholar
- Posts: 9592
- Joined: October 1st, 2011, 11:08 pm
- Location: Mid Glamorgan, South Wales
- Contact:
Re: Dazzled's Big Mig Build
Gadfly wrote:Hi,
The condor build is progressing well.
I'll post up some photos in a different thread to save hijacking this one.
Cheers
Gadfly
And a very nice build it is too
I hope mine can offer suitable competition.
It has progressed a little. Much of the seam work has been done and a good bit of assembly too.

As you can see, the wings are on and so is the forward fuselage. Again the fit could have been a lot better. Gaps in the upper wing root were filled using Vallejo putty and it seems to have done a good job. The forward fuselage really did test my patience though. A plain butt joint probably isn't the best way to attach this sub-assembly and it did cause a few problems, firstly with alignment and secondly with strength. It actually took 3 attempts and combined cyano and Liquid Poly cements to get the thing to stay on. Happily, it's pretty solid now.
Less good is the fit. The spine on the forward section is a little bigger than the aft spine, hence the filler. Similar misalignment was present on the underside. So, more sanding is required and Squadron White Putty has gone on my Telford shopping list
More from the Mig factory soon
COLD WAR S.I.G. LEADER
Wherever there's danger, wherever there's trouble, wherever there's important work to be done....I'll be somewhere else building a model!
Wherever there's danger, wherever there's trouble, wherever there's important work to be done....I'll be somewhere else building a model!
-
Old_Tonto

- Modelling Gent and Scholar
- Posts: 8063
- Joined: May 1st, 2011, 7:41 pm
- Location: Middlesbrough, Peoples Republic of Teesside.
Re: Dazzled's Big Mig Build
Great work mate. Gotta love the angular look of this beast. 
2023 - A:0 B:0 C:0
Current Projects:
East German Air Force (1956-90)
South African Air Force (1958-93)
Current Projects:
East German Air Force (1956-90)
South African Air Force (1958-93)
-
Stuart

- Raider of the Lost Ark Royal
- Posts: 19447
- Joined: February 25th, 2013, 4:55 pm
- Location: North Wales
- Contact:
Re: Dazzled's Big Mig Build
Looking very smart that - nice work!
Stuart Templeton I may not be good but I'm slow...
My Blog: https://stuartsscalemodels.blogspot.com/
My Blog: https://stuartsscalemodels.blogspot.com/
-
Dazzled
- Modelling Gent and Scholar
- Posts: 9592
- Joined: October 1st, 2011, 11:08 pm
- Location: Mid Glamorgan, South Wales
- Contact:
Re: Dazzled's Big Mig Build
Thanks guys. 
And the Foxbat wrestling match continues, although I think my opponent is using quite a few dirty tricks
First the tailplanes. How do they fit?
You drill your own holes, that's how. On the bright side they are a good fit now and I'll be able to add them at the end which will make painting easier.
And the filler around the forward fuselage has been sanded back.

And this seems quite good even after I'd taken it out to the paint shop and applied some Tamiya XF-19 around the area. It was also a good time to get some on around the splitter plate area as that would be awkward to do once the intakes are on.
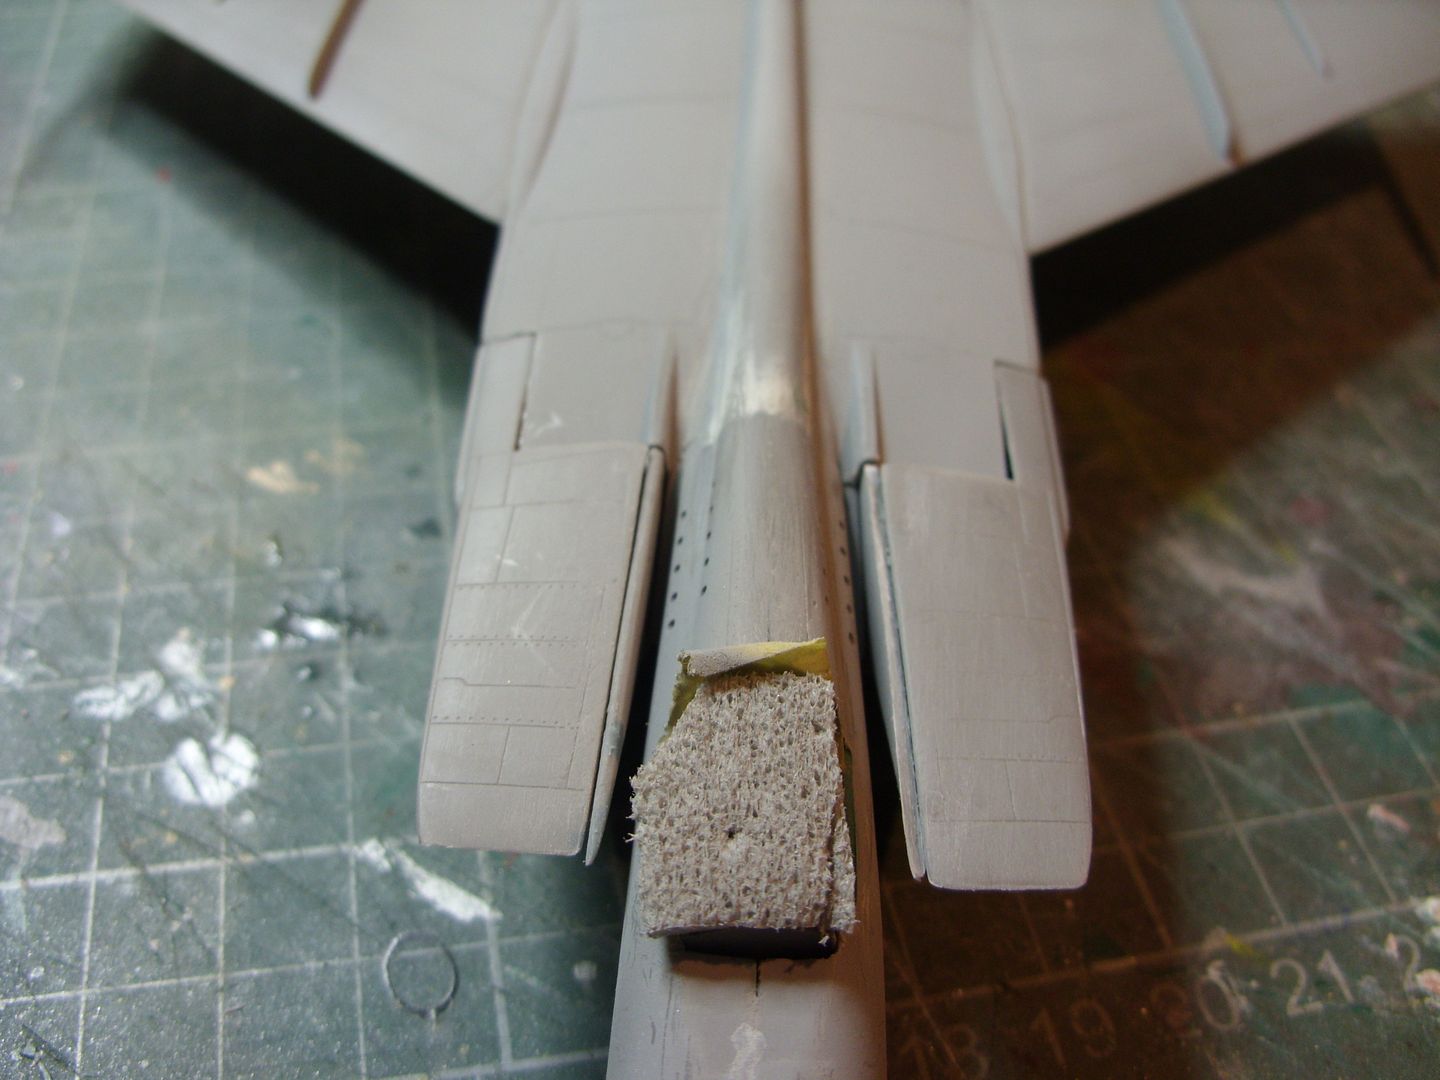
Then it was on to the intakes and the tailcone. The tailcone is an interesting "fit".
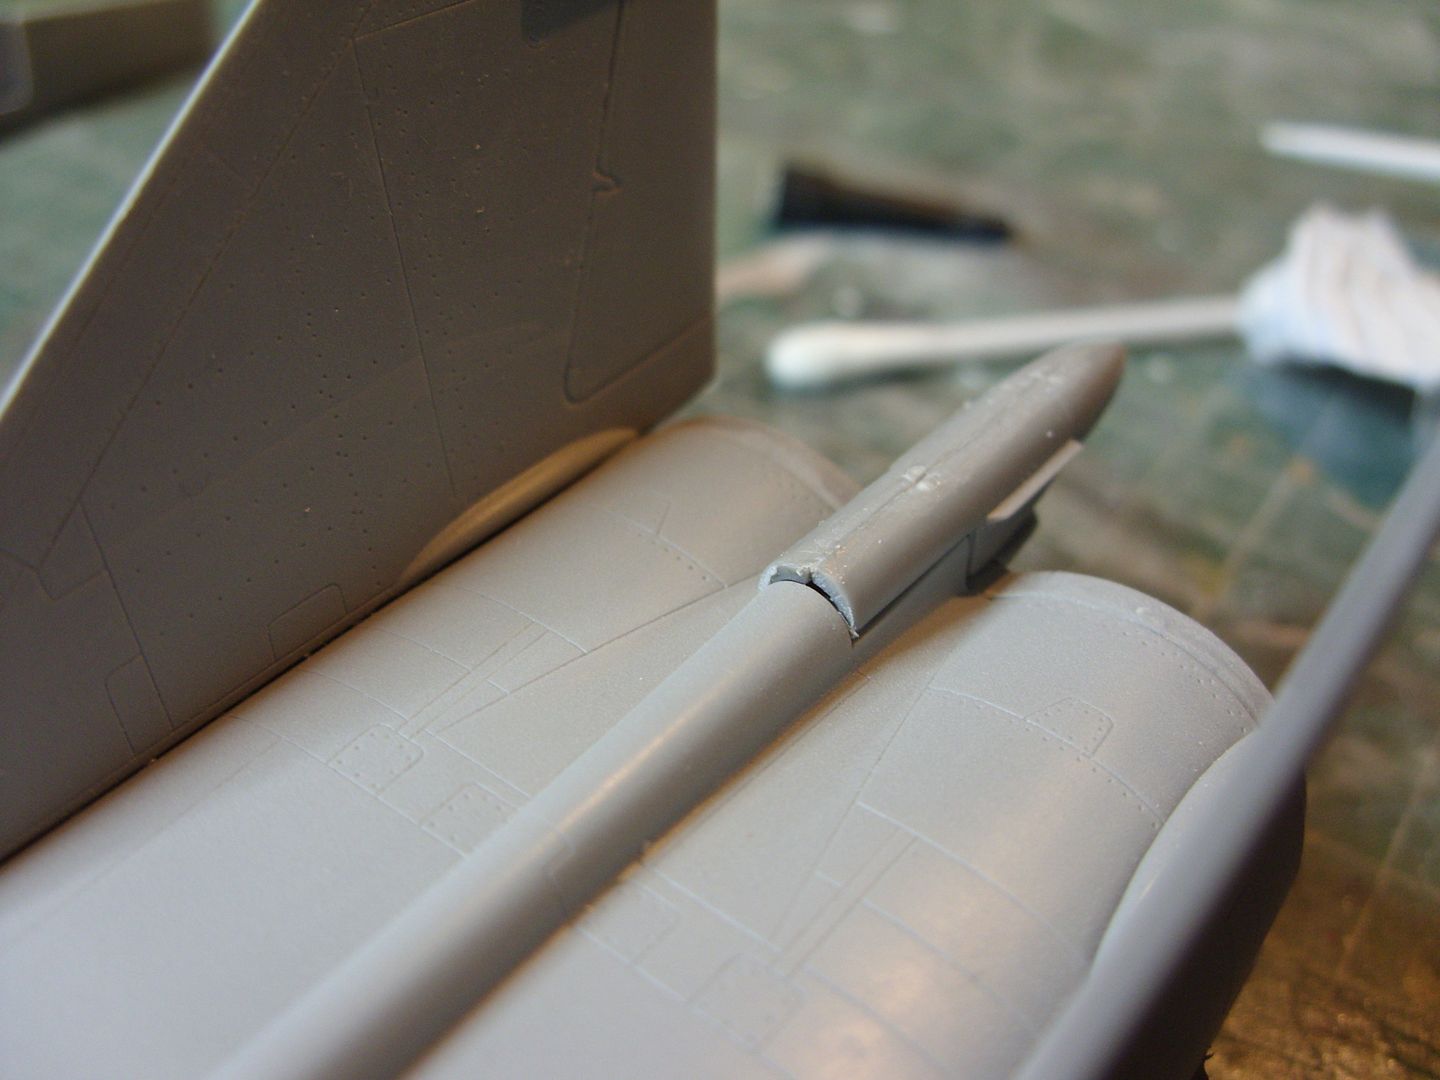
It took a fair bit of fettling to get it down to size but I got there in the end. Then it was on to the intakes.
First the splitter plates and the engine fronts.
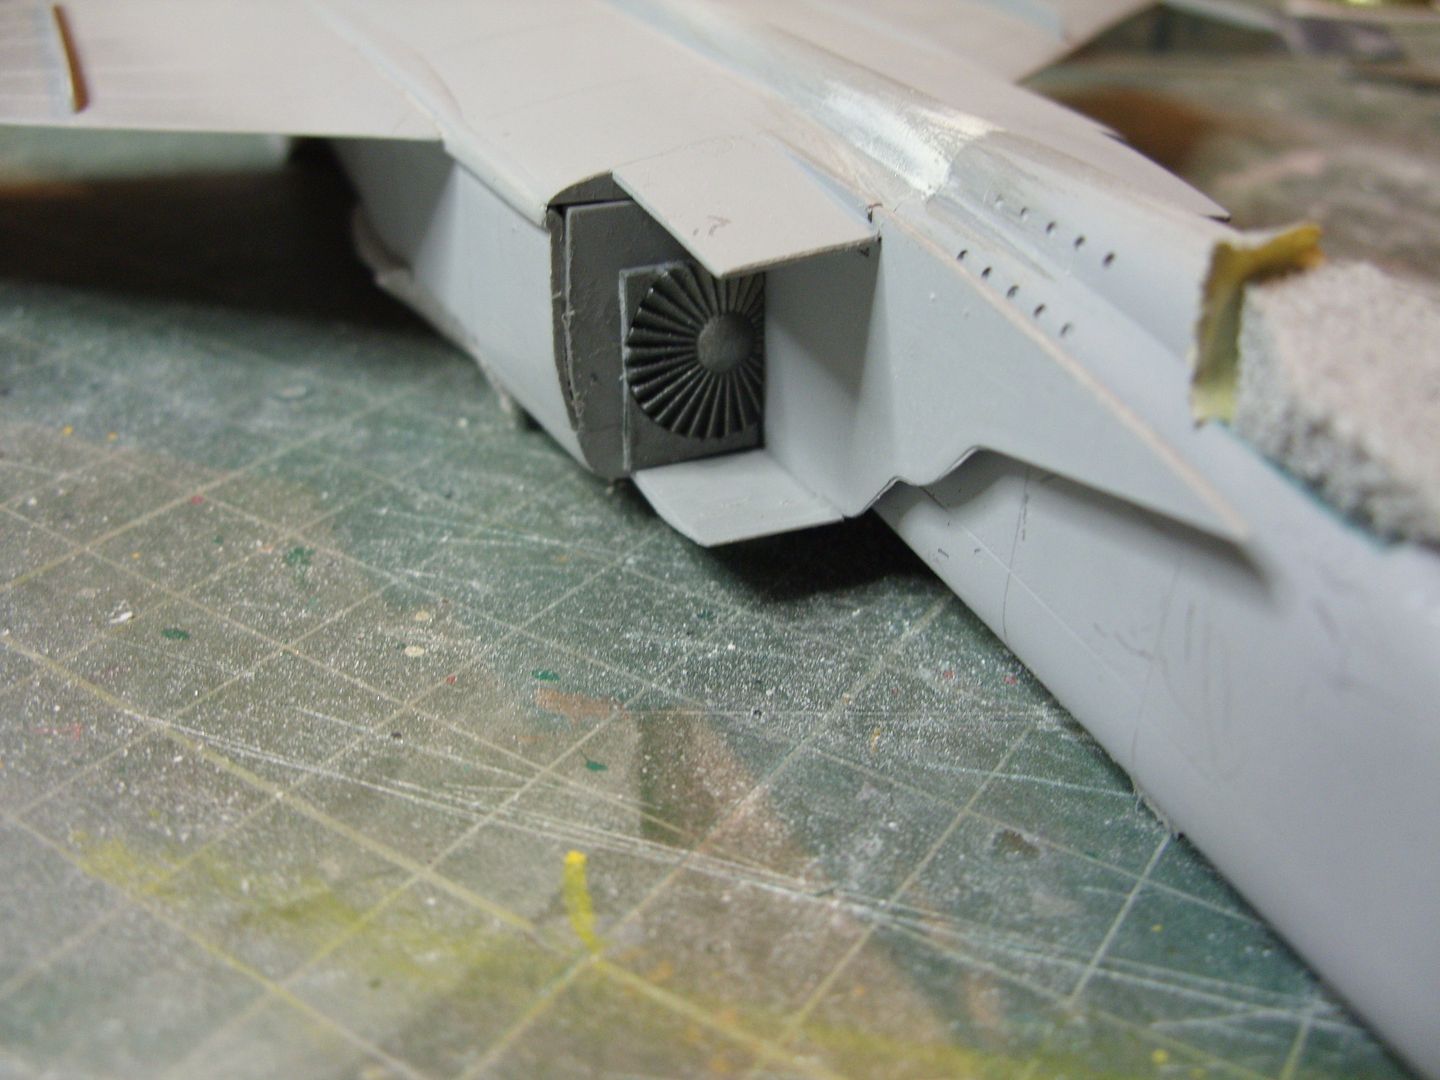
The engine fronts had a coat of XF-56 and the splitters were sprayed with XF-19 like the fuselage. I'm still tweaking my spray set-up at the moment but this part, at least, went well. The splitter plates didn't fit all that well though so I trimmed a little from the top of the upper fuselage at each side and they slid right in.
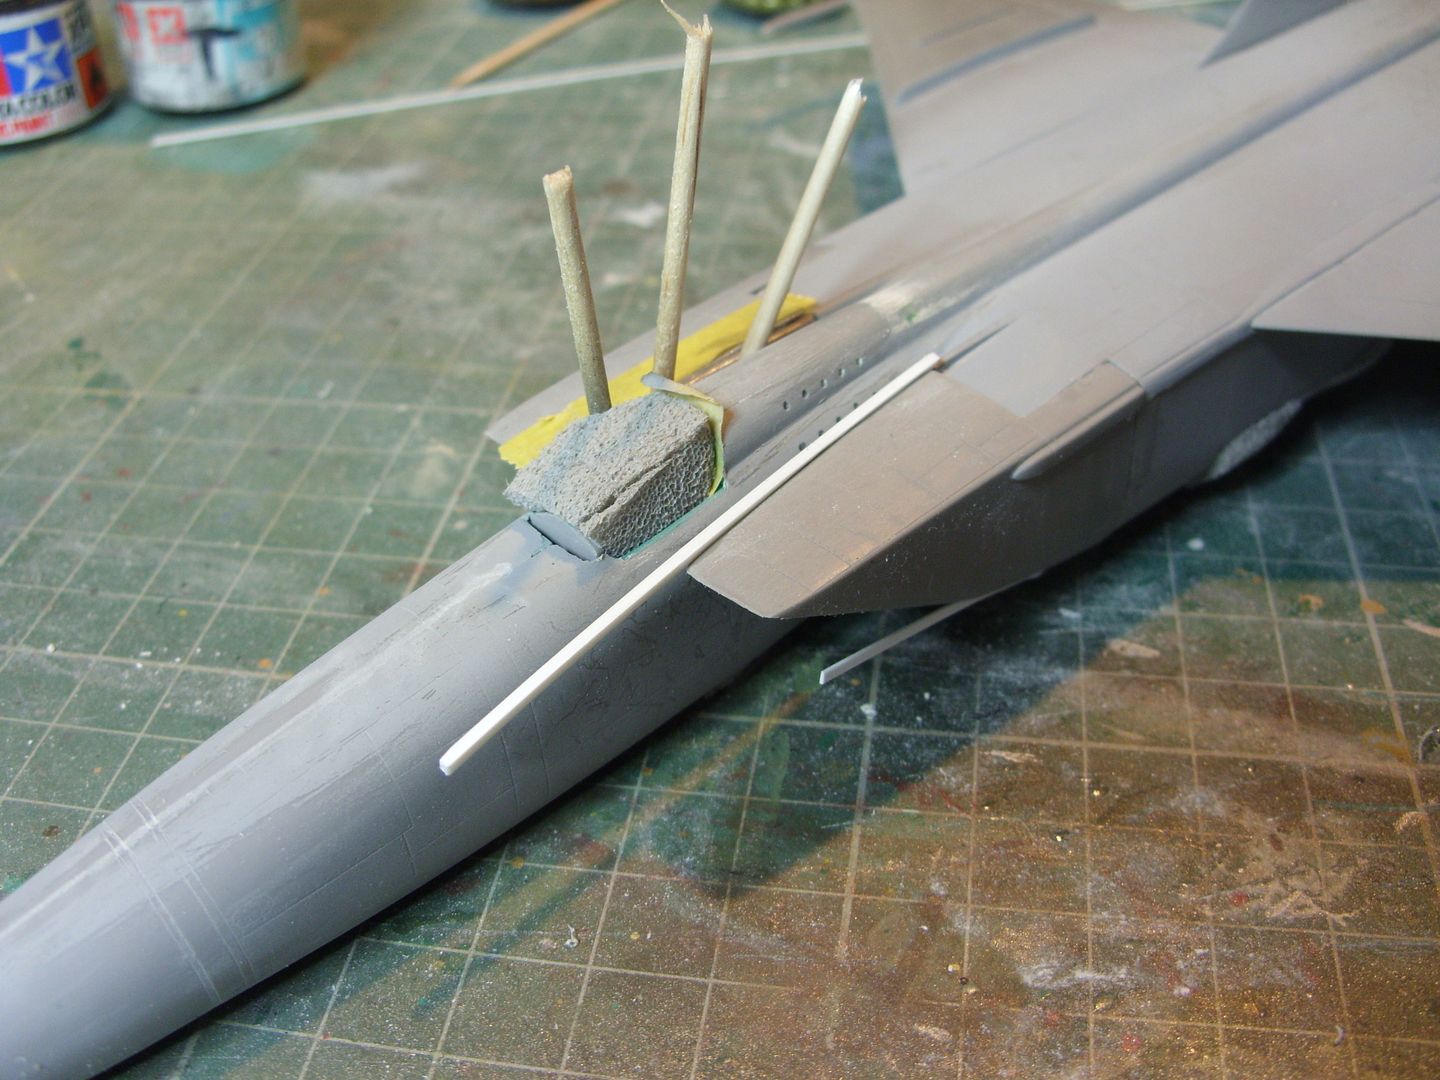
Then it was time for the intakes themselves. Dry fitting had revealed that there may be some issues here.
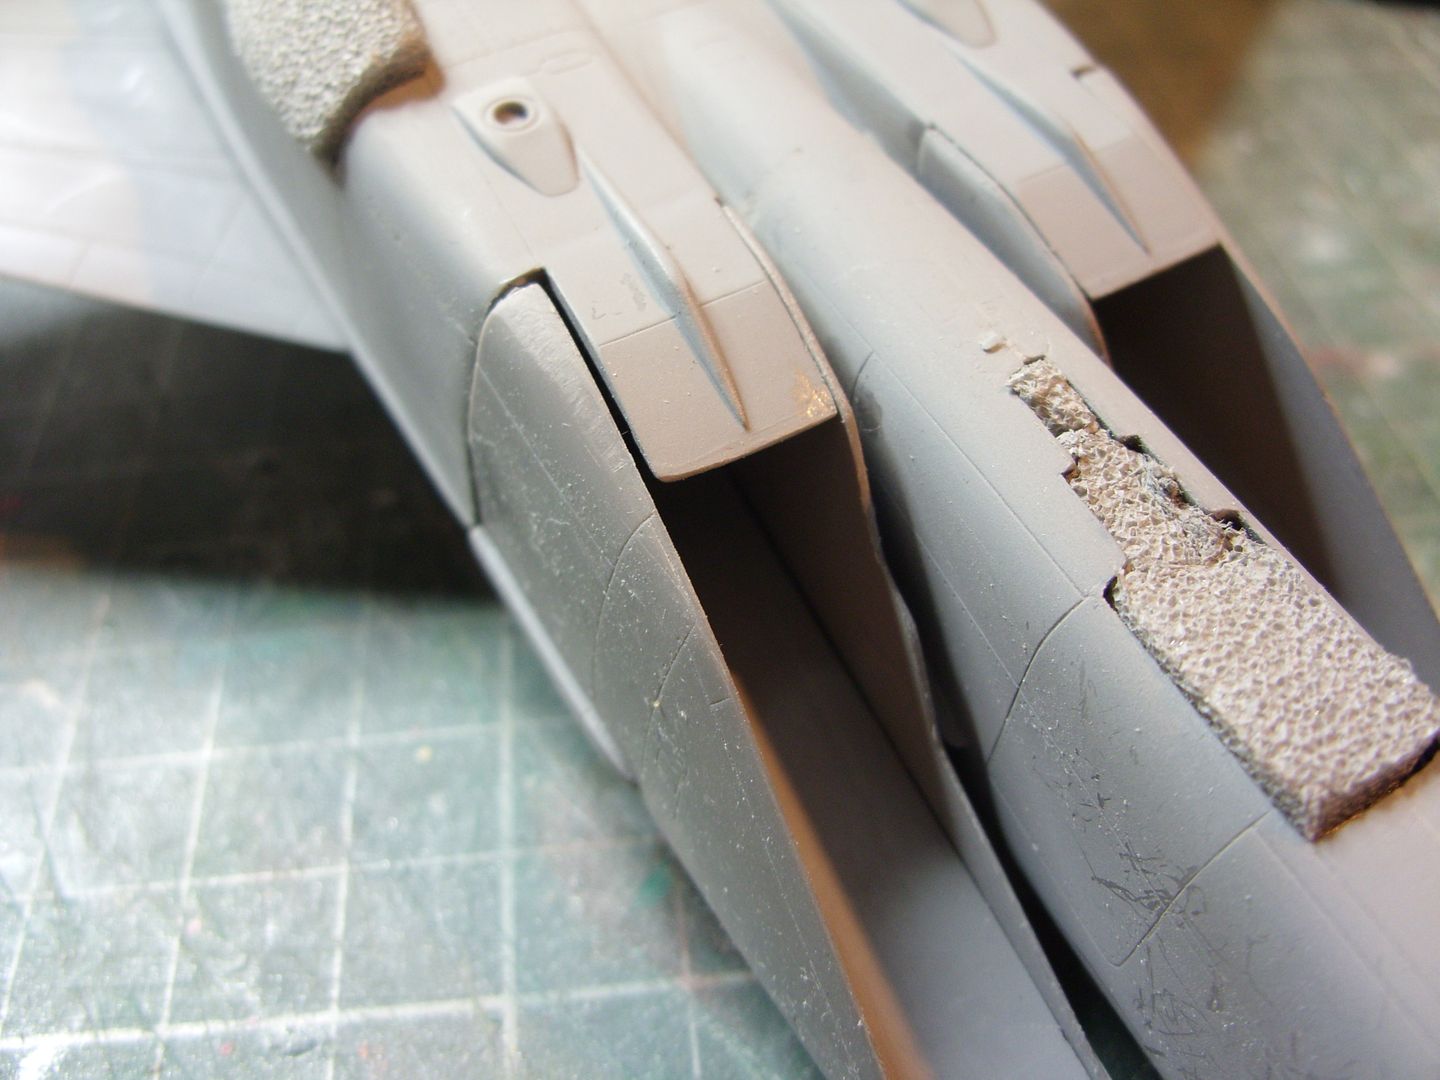
Although I wasn't expecting the sort of issue you could fly another aircraft through. The top wasn't much better either.
Erk!!!
OK, some of it was my own doing. A little over eager sanding reduced the left hand splitter a little too much but, blimey, look at the rest of it
It was time to call upon years of modelling experience and try all the tricks I know....both of them
Actually, and seriously for a change, I needed to employ a few different methods to get the intakes on and solid. The upper right side was tack glued using precision superglue before having it's seam capillary filled using Liquid Poly. The biggish gaps at both sides were masked and filled with Zap-a-Gap cyano then set up using spray activator. Finally, the inner corner of the left intake was built up with a strip cut from plasticard and the massive gap on the lower left side filled with evergreen strip. This was put in with Liquid Poly and the whole lot put aside to dry.
While that's having a little rest I've made a start on the undercarriage and painted the engine exhausts in a base colour of Gunze Burnt Iron. I've also made a decision regarding final colour scheme. The name Viktor Belenko crops up a lot when reading about Mig-25s and my Begemot sheet includes markings for the aircraft that Belenko used to defect in 1976. It'll mean backdating the kit from a -PD to a -P variant but that only seems to entail leaving off the sensor housing under the nose. It also means that I won't need to add weapons as Belenko was on a training flight at the time and his aircraft was unarmed.
Time for a regroup before another assault on the Foxbat later I think
And the Foxbat wrestling match continues, although I think my opponent is using quite a few dirty tricks
First the tailplanes. How do they fit?

You drill your own holes, that's how. On the bright side they are a good fit now and I'll be able to add them at the end which will make painting easier.
And the filler around the forward fuselage has been sanded back.

And this seems quite good even after I'd taken it out to the paint shop and applied some Tamiya XF-19 around the area. It was also a good time to get some on around the splitter plate area as that would be awkward to do once the intakes are on.
Then it was on to the intakes and the tailcone. The tailcone is an interesting "fit".

It took a fair bit of fettling to get it down to size but I got there in the end. Then it was on to the intakes.
First the splitter plates and the engine fronts.

The engine fronts had a coat of XF-56 and the splitters were sprayed with XF-19 like the fuselage. I'm still tweaking my spray set-up at the moment but this part, at least, went well. The splitter plates didn't fit all that well though so I trimmed a little from the top of the upper fuselage at each side and they slid right in.
Then it was time for the intakes themselves. Dry fitting had revealed that there may be some issues here.

Although I wasn't expecting the sort of issue you could fly another aircraft through. The top wasn't much better either.

Erk!!!
OK, some of it was my own doing. A little over eager sanding reduced the left hand splitter a little too much but, blimey, look at the rest of it
It was time to call upon years of modelling experience and try all the tricks I know....both of them
Actually, and seriously for a change, I needed to employ a few different methods to get the intakes on and solid. The upper right side was tack glued using precision superglue before having it's seam capillary filled using Liquid Poly. The biggish gaps at both sides were masked and filled with Zap-a-Gap cyano then set up using spray activator. Finally, the inner corner of the left intake was built up with a strip cut from plasticard and the massive gap on the lower left side filled with evergreen strip. This was put in with Liquid Poly and the whole lot put aside to dry.

While that's having a little rest I've made a start on the undercarriage and painted the engine exhausts in a base colour of Gunze Burnt Iron. I've also made a decision regarding final colour scheme. The name Viktor Belenko crops up a lot when reading about Mig-25s and my Begemot sheet includes markings for the aircraft that Belenko used to defect in 1976. It'll mean backdating the kit from a -PD to a -P variant but that only seems to entail leaving off the sensor housing under the nose. It also means that I won't need to add weapons as Belenko was on a training flight at the time and his aircraft was unarmed.
Time for a regroup before another assault on the Foxbat later I think
COLD WAR S.I.G. LEADER
Wherever there's danger, wherever there's trouble, wherever there's important work to be done....I'll be somewhere else building a model!
Wherever there's danger, wherever there's trouble, wherever there's important work to be done....I'll be somewhere else building a model!
-
skypirate

- Modelling Gent and Scholar
- Posts: 7300
- Joined: May 1st, 2011, 6:13 am
- Location: Port Macquarie, Australia
Re: Dazzled's Big Mig Build
You are going to be very pleased with the result after so much fettling.
Those intakes are a disgrace.
cheers,
David
Those intakes are a disgrace.
cheers,
David
-
Stuart
- Raider of the Lost Ark Royal
- Posts: 19447
- Joined: February 25th, 2013, 4:55 pm
- Location: North Wales
- Contact:
Re: Dazzled's Big Mig Build
It's the new 'punk' mig - great work on getting those together Darryl!
Stuart Templeton I may not be good but I'm slow...
My Blog: https://stuartsscalemodels.blogspot.com/
My Blog: https://stuartsscalemodels.blogspot.com/
-
Dazzled
- Modelling Gent and Scholar
- Posts: 9592
- Joined: October 1st, 2011, 11:08 pm
- Location: Mid Glamorgan, South Wales
- Contact:
Re: Dazzled's Big Mig Build
Another round of shifts over and I'm back to the Den for more Foxbat shenanigans.
I did manage to get some more filler on. Squadron Green this time to correct some misalignment of the intakes. I sanded it down this morning.
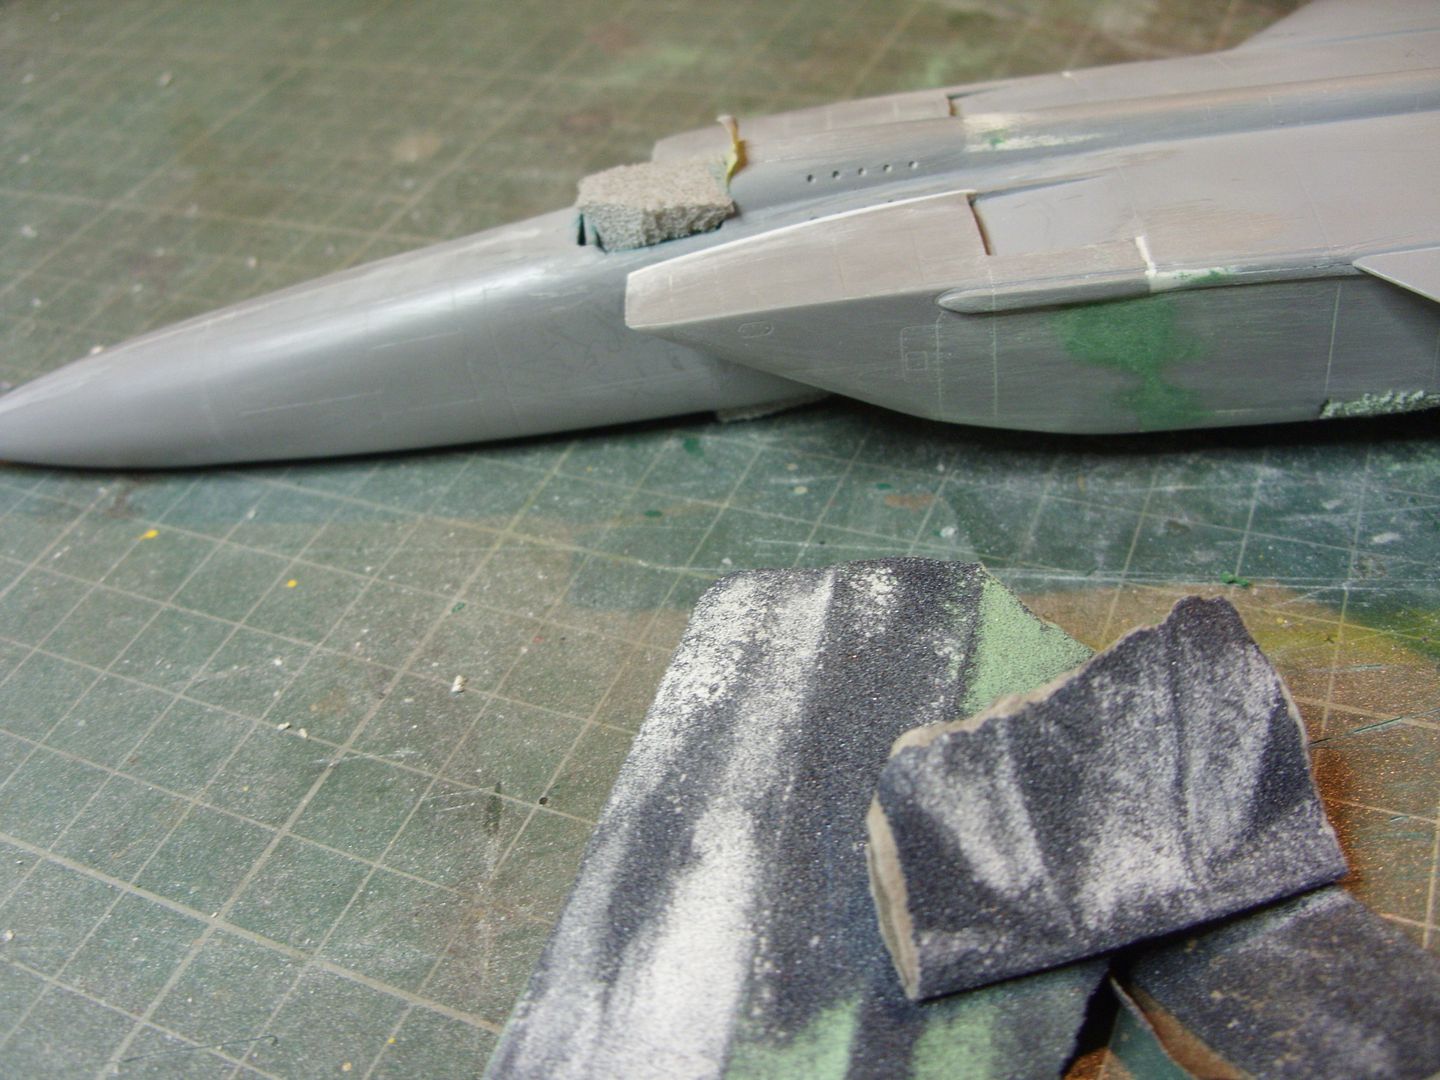
I've just given it a coat of the base colour and this has revealed a couple of small issues to tidy up so it's back on the bench at the moment. I'm slowly backing these intakes into a corner
COLD WAR S.I.G. LEADER
Wherever there's danger, wherever there's trouble, wherever there's important work to be done....I'll be somewhere else building a model!
Wherever there's danger, wherever there's trouble, wherever there's important work to be done....I'll be somewhere else building a model!
-
Kitaholic

- Modelling Gent and Scholar
- Posts: 3765
- Joined: November 10th, 2014, 7:53 pm
- Location: 5 mins from SMW
Re: Dazzled's Big Mig Build
Really want a Foxbat but think I may just stick to the Hasegawa antique one. Am well and truly doffing my hat to you for your tenacity with this kit. Well and truly beating it into shape. Great work
Regards
Gord
Desperately trying to find his MOJO, don't know where I left it
Gord
Desperately trying to find his MOJO, don't know where I left it
-
shangos70
- Modelling Gent and Scholar
- Posts: 4422
- Joined: May 1st, 2011, 11:14 am
- Location: Doncaster, Socialist Republic of South Yorkshire.
Re: Dazzled's Big Mig Build
This is really fighting you, I would have thrown it back in the box of shame by now. I often wonder if they ever test build them before releasing them into the wild.
-
Old_Tonto
- Modelling Gent and Scholar
- Posts: 8063
- Joined: May 1st, 2011, 7:41 pm
- Location: Middlesbrough, Peoples Republic of Teesside.
Re: Dazzled's Big Mig Build
Respect for sticking with this one Daz. It would have ended up in the 'round file' if it was mine.
2023 - A:0 B:0 C:0
Current Projects:
East German Air Force (1956-90)
South African Air Force (1958-93)
Current Projects:
East German Air Force (1956-90)
South African Air Force (1958-93)

Re: Dazzled's Big Mig Build
A fighter that seems intent upon fighting you every step of the way! I would assume however that the feeling of satisfaction you will get when you finish this kit will more than make up for the issues faced. I have heard it said that kits like these make us better modellers, and you are certainly coming through the test with flying colours (if you will excuse the pun)! So 10/10 for tenacity and skill. I am really looking forward to seeing this one finished 
My modelling Facebook page: https://www.facebook.com/mattscalemodels/
-
ShaunW
- NOT the sheep
- Posts: 26188
- Joined: November 26th, 2011, 6:11 pm
- Location: Pontefract West Yorkshire
Re: Dazzled's Big Mig Build
Excellent Darryl, you're showing that recalcitrant Foxbat who is the daddy!
Doing - Tamiya 1/35th Universal Carrier.
Work is the curse of the modelling classes!
IPMS#12300
Work is the curse of the modelling classes!
IPMS#12300
-
Dazzled
- Modelling Gent and Scholar
- Posts: 9592
- Joined: October 1st, 2011, 11:08 pm
- Location: Mid Glamorgan, South Wales
- Contact:
Re: Dazzled's Big Mig Build
Thanks guys. It's certainly driving me batty!
Getting even the basic bits done is quite a fight with this kit. I give it a coat of paint and seem to discover some other small irregularity every time. No matter how carefully I go over it there always seems to be a minor hint of flash or small indentation that I've missed. Never mind, I'll stick to inspecting the full sized ones from now on
Troubles aside, I do seem to have got a reasonable base to work from now.
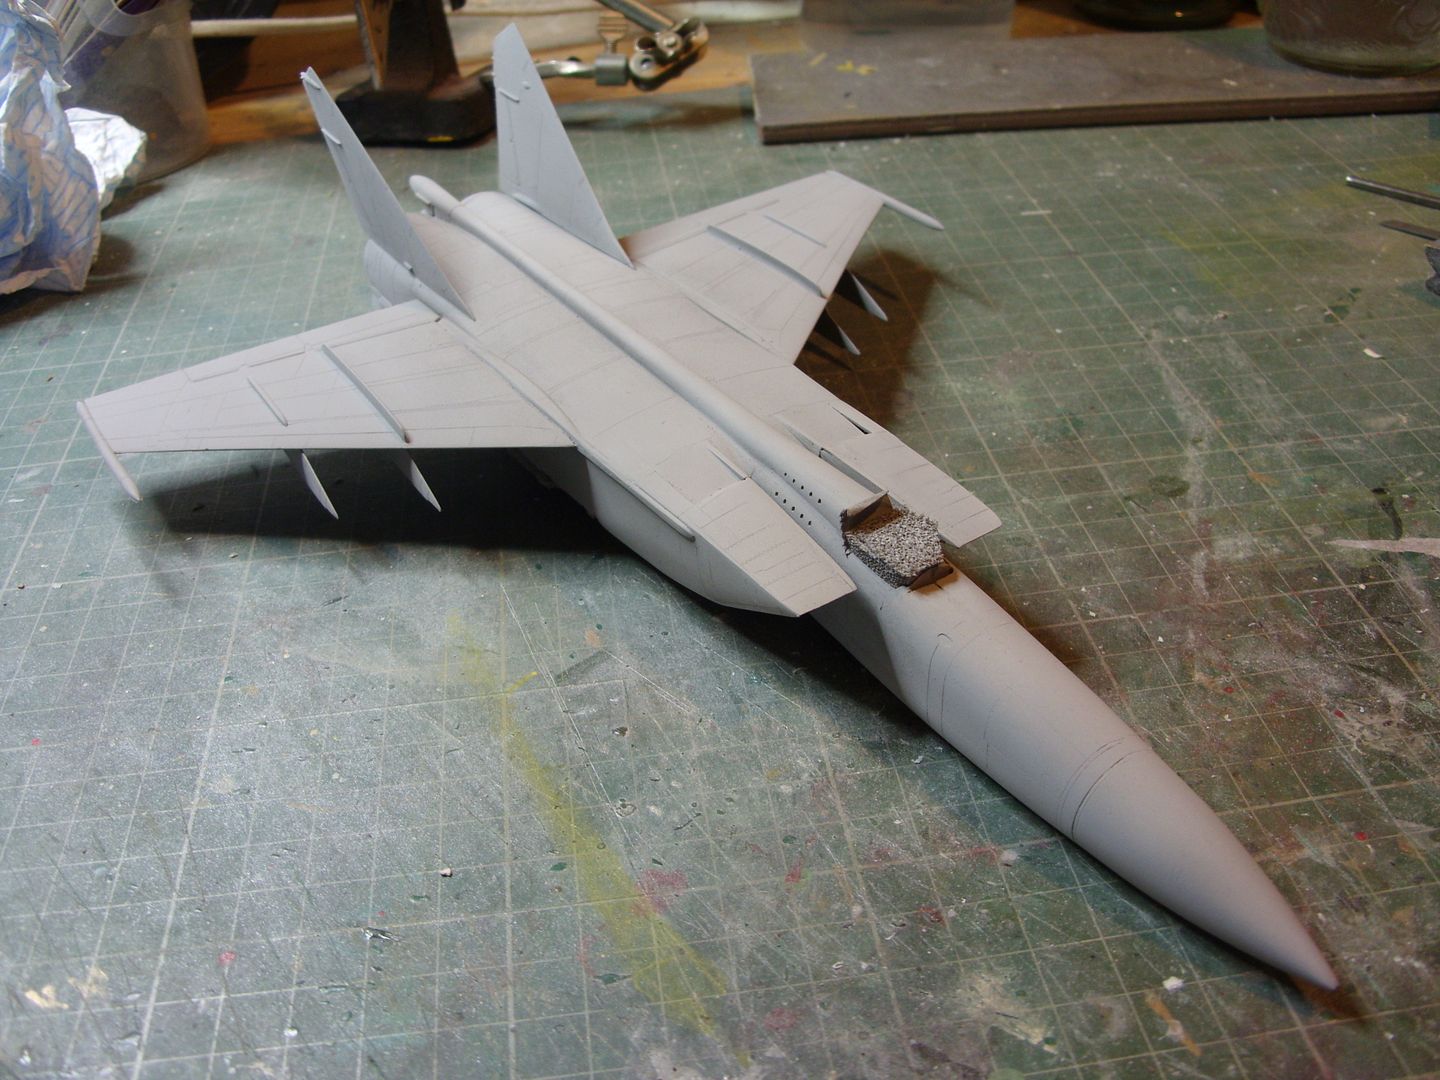
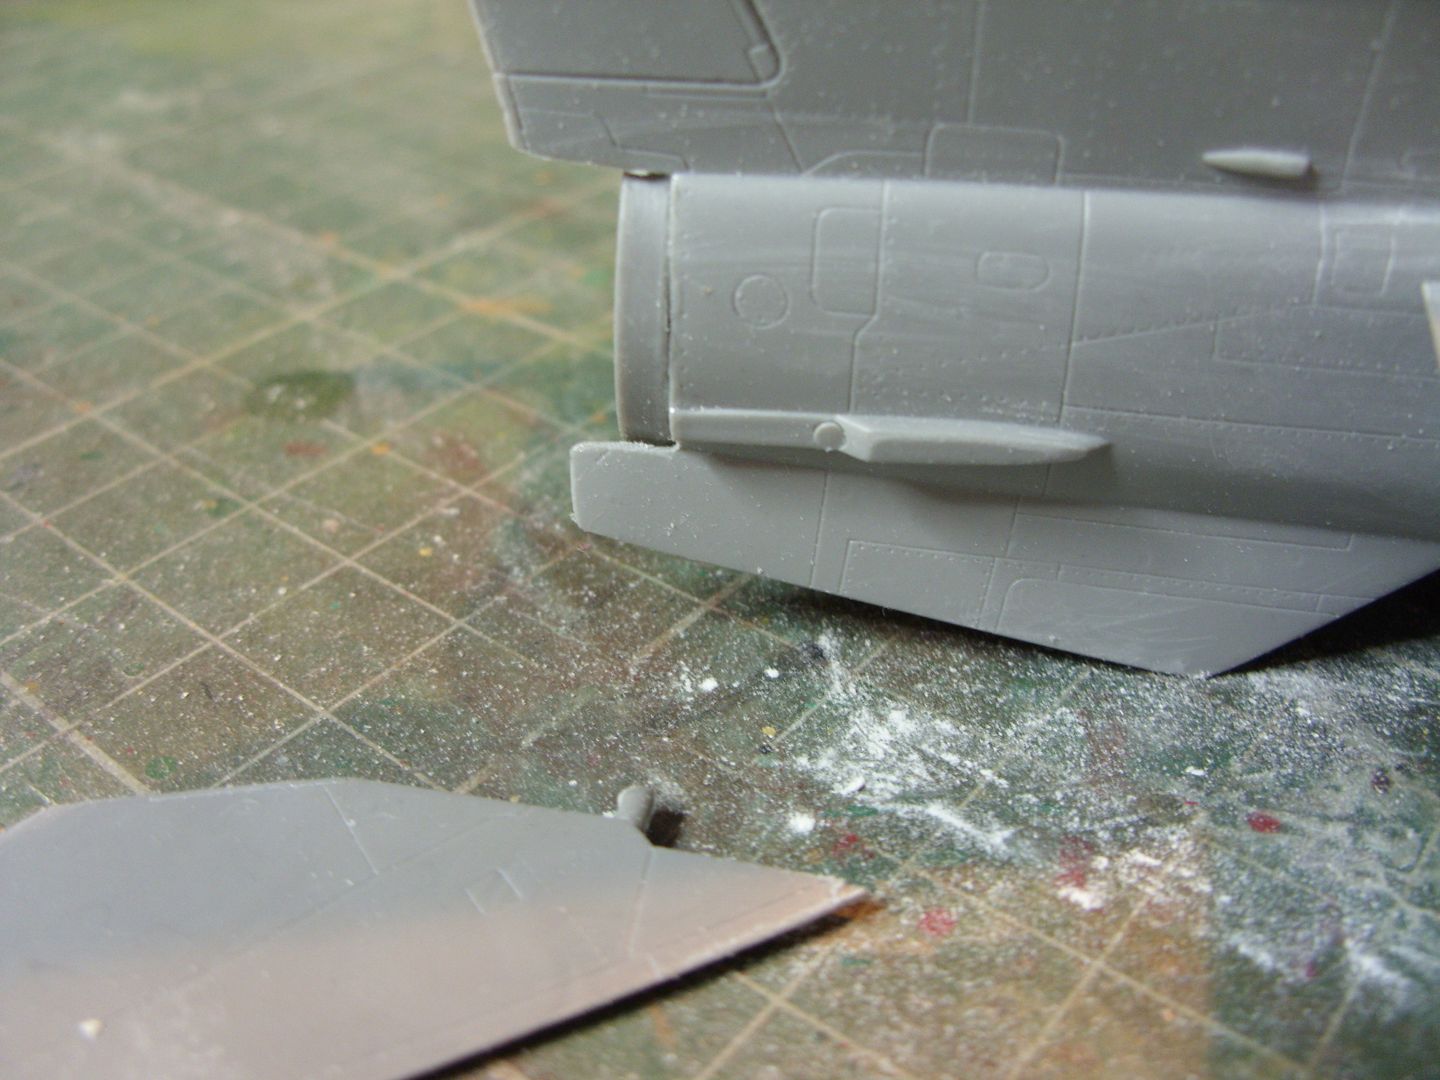
I just need another dusting of base colour then I'll be ready to pre-shade. before I get there though I have to ready other parts such as the tailplanes and undercarriage doors. Should be simple....not with this kit.
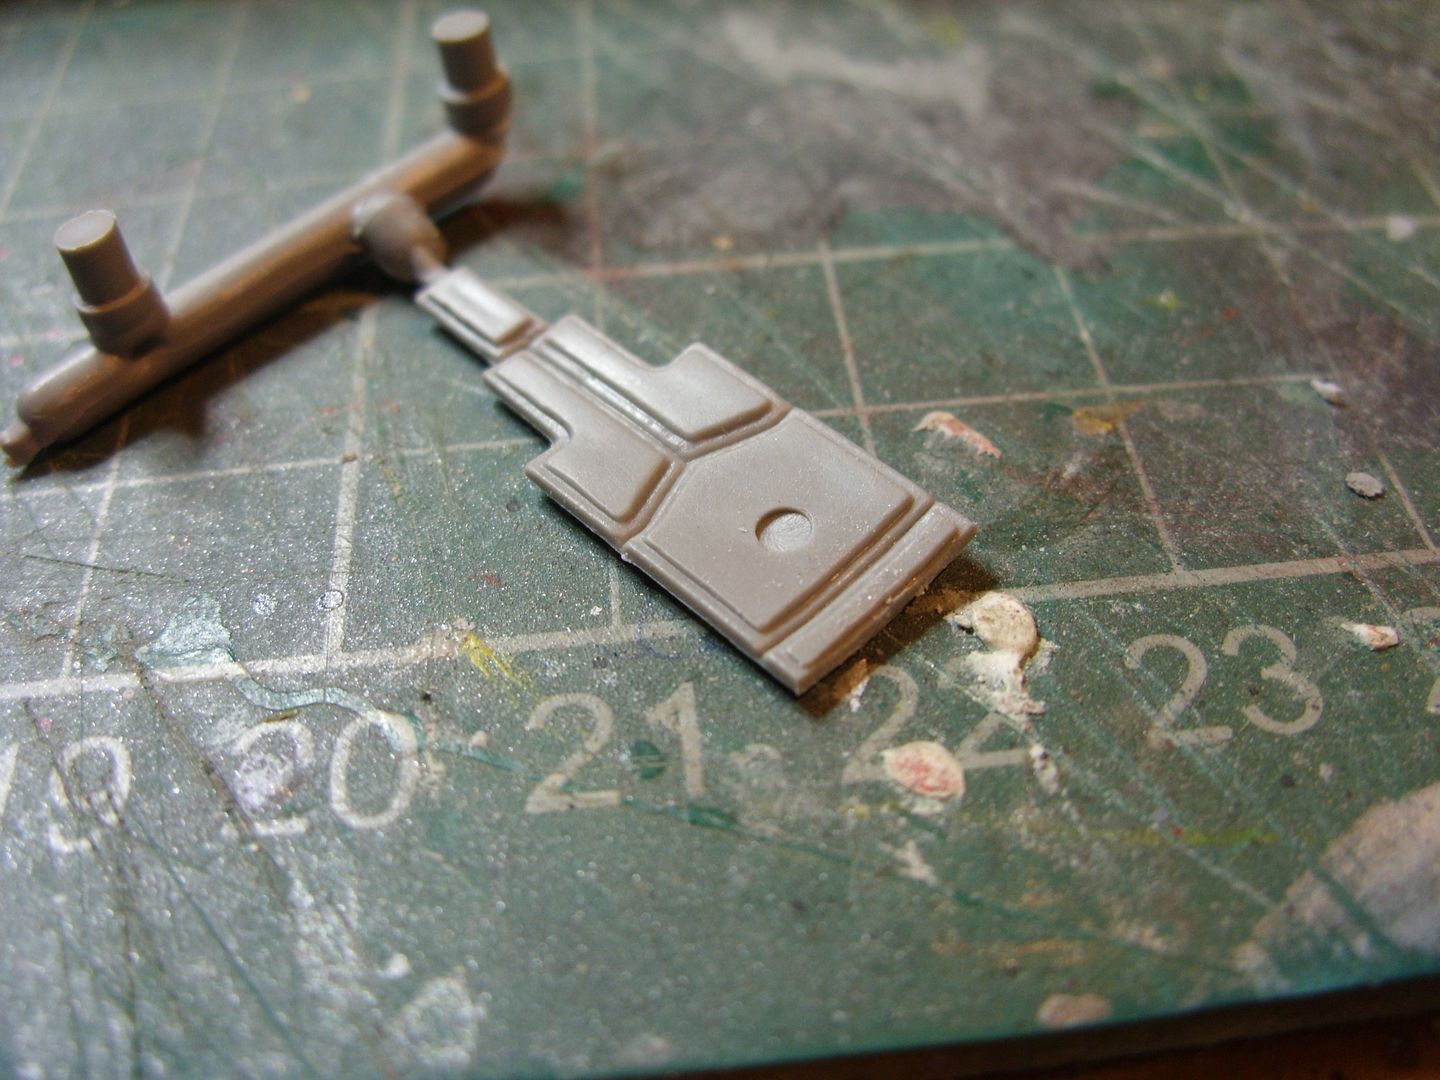
The above picture is the nose undercarriage door. It's designed to slot in for a wheels up option (although you don't get a pilot). I haven't tried it for fit in this configuration so I can't comment on that aspect but what I can confirm is that it has to be cut into 5 separate pieces if you want the wheels down. It's not an easy cut, particularly the cranked line in the middle, and the plastic has a tendency to delaminate, which is a new one on me . Basically, instead of snapping at a score line like normal styrene it starts to peel away a layer from the unscored edge. Don't ask how I found that out To cap it all there's a honking great ejector pin mark slap bang in the middle of the main door.
It's all sent to try us
Getting even the basic bits done is quite a fight with this kit. I give it a coat of paint and seem to discover some other small irregularity every time. No matter how carefully I go over it there always seems to be a minor hint of flash or small indentation that I've missed. Never mind, I'll stick to inspecting the full sized ones from now on
Troubles aside, I do seem to have got a reasonable base to work from now.

I just need another dusting of base colour then I'll be ready to pre-shade. before I get there though I have to ready other parts such as the tailplanes and undercarriage doors. Should be simple....not with this kit.

The above picture is the nose undercarriage door. It's designed to slot in for a wheels up option (although you don't get a pilot). I haven't tried it for fit in this configuration so I can't comment on that aspect but what I can confirm is that it has to be cut into 5 separate pieces if you want the wheels down. It's not an easy cut, particularly the cranked line in the middle, and the plastic has a tendency to delaminate, which is a new one on me
It's all sent to try us
COLD WAR S.I.G. LEADER
Wherever there's danger, wherever there's trouble, wherever there's important work to be done....I'll be somewhere else building a model!
Wherever there's danger, wherever there's trouble, wherever there's important work to be done....I'll be somewhere else building a model!
-
Purplethistle

- Delusional Miniature Killer
- Posts: 4680
- Joined: July 10th, 2014, 1:03 am
- Location: Glasgow
Re: Dazzled's Big Mig Build
Will you be changing your name to Frazzled after this? Kudos on the Silk pursery 
"Spits, SLUFS and Rock 'n' Roll"