Cheers Daz. I want to get on with a bit more quarter scale modelling as I've been building more or less only in the gentleman's scale since I've been on here.Dazzled wrote:ShaunW wrote:Great improvement work Daz. These two kits have their faults but fill that gap in a line up of MiGs 15 to 29! Anybody kitted a 17 or 19 in 1/48th?
HobbyBoss and Trumpeter respectively Shaun, both gunfighter and missile armed versions. I've built the -17PFU missile interceptor and have just acquired the Trumpeter -19S gunfighter to plug a gap in my 1/48th line up.
Dazzled's Big Mig Build
-
ShaunW
- NOT the sheep
- Posts: 26188
- Joined: November 26th, 2011, 6:11 pm
- Location: Pontefract West Yorkshire
Re: Dazzled's Big Mig Build
Doing - Tamiya 1/35th Universal Carrier.
Work is the curse of the modelling classes!
IPMS#12300
Work is the curse of the modelling classes!
IPMS#12300
Re: Dazzled's Big Mig Build
Marvellous Mig Mayhem,well tidy mun.
-
billyb_imp

- Onto the Clever Stuff, Now.
- Posts: 130
- Joined: April 29th, 2017, 9:09 pm
- Location: Lincoln, UK
Re: Dazzled's Big Mig Build
Some great looking work here, I didnt know there were that many MIG's about, much to learn, I will be a regular viewer on this thread
A start on my first kit a Hawker Hurricane as been made, a spitfire awaits in the wings and thinking about models to come.
Modelling space in shed coming along nicely.
Modelling space in shed coming along nicely.
-
Dazzled

- Modelling Gent and Scholar
- Posts: 9592
- Joined: October 1st, 2011, 11:08 pm
- Location: Mid Glamorgan, South Wales
- Contact:
Re: Dazzled's Big Mig Build
Thanks guys 
Just a small update as I've been hampered by my birthday this week Hic.
Hic.
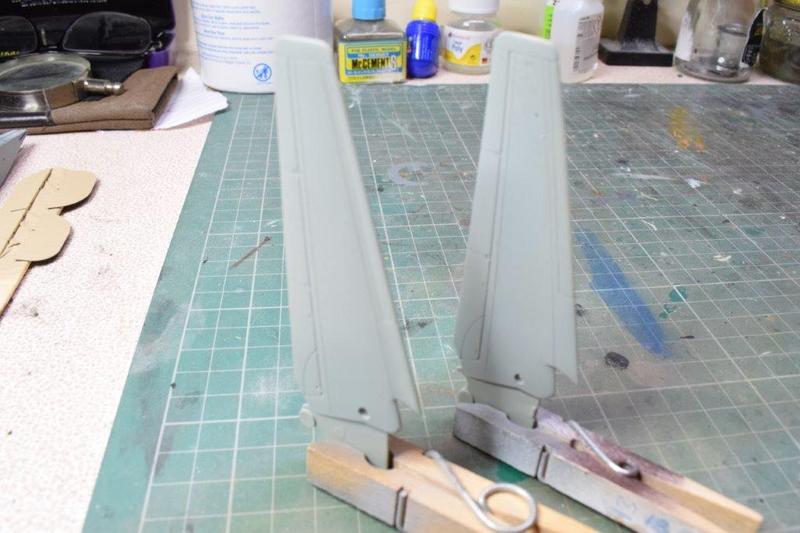
It doesn't seem like much but getting the rescribed KP fin and tailplanes onto the -19 seemed like a minor victory.
They're just butt jointed but Mr Cement S does give a nice solid join. The seams are filled with Vallejo putty. A little tidying up and then it's on to the small fuselage intakes before, hopefully, paint
Just a small update as I've been hampered by my birthday this week
It doesn't seem like much but getting the rescribed KP fin and tailplanes onto the -19 seemed like a minor victory.
They're just butt jointed but Mr Cement S does give a nice solid join. The seams are filled with Vallejo putty. A little tidying up and then it's on to the small fuselage intakes before, hopefully, paint
COLD WAR S.I.G. LEADER
Wherever there's danger, wherever there's trouble, wherever there's important work to be done....I'll be somewhere else building a model!
Wherever there's danger, wherever there's trouble, wherever there's important work to be done....I'll be somewhere else building a model!
-
dollar19
- Modelling Gent and Scholar
- Posts: 1342
- Joined: May 1st, 2011, 1:11 am
- Location: Bristol, Va. USA
Re: Dazzled's Big Mig Build
A lot of work there but well worth the effort!
-
Dazzled
- Modelling Gent and Scholar
- Posts: 9592
- Joined: October 1st, 2011, 11:08 pm
- Location: Mid Glamorgan, South Wales
- Contact:
Re: Dazzled's Big Mig Build
Wow, nearly 11 months Migless! High time to throw open the doors of the Mig factory and feed my addiction.
And I'd nearly kicked the habit too
Every time we're at a show with the SIG display, I notice that there are a few gaps in the line up of Migs, the most noticeable of which is that there isn't a -23. So I think it's time to rectify this.
I had bought this some time ago thinking that it would be perfect.
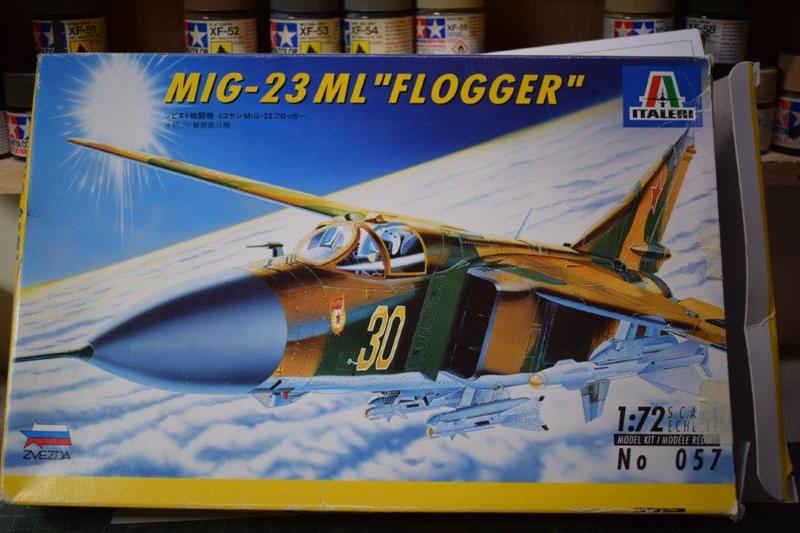
It's the Zvesda kit in an Italeri box. I had heard very good things about this kit so I was pretty pleased to pick this up quite cheaply on eBay. People raved about the fine detail and how it was head and shoulders above anything else on the market. However, when I took a close look at mine I was less than impressed. The detail is quite superficial and soft and the kit is replete with sink marks and poor moulding including some wide sink marks in the wings, which would remove all the surface detail, and a pearler in the middle of one of the main wheels which is impossible to fill. So this kit langusihed on the shelf while I considered what to do.
And it languished for a long time.
During that time I kept looking at this.
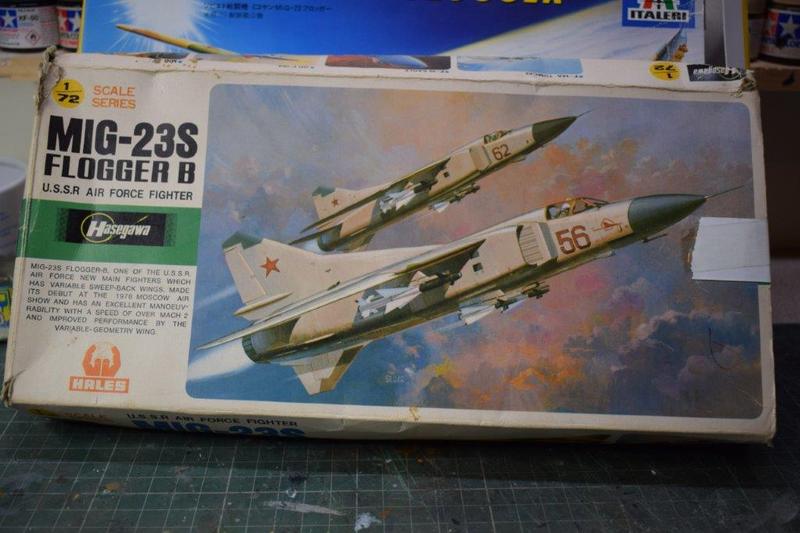
Another cheap eBay pick up with a battered end opening box indicating that it was a very early edition. This is actually rather a nice kit. The cockpit is sparsely detailed and it has raised panel lines but I know from experience that it goes together very well indeed. The thing to get past is that it's, allegedly, about 2mm too short.
While these were sitting on the shelf I kept taking them out, looking at them and putting them back, all the while considering whether I could kitbash the two together to make a decent model. Then, a few months ago, a chance link from Scalemates while looking for something else led me to an article by a fellow modeller who'd done just that. I've been waiting for an opportunity ever since and, in preparation split the kits into needed and unneeded parts.
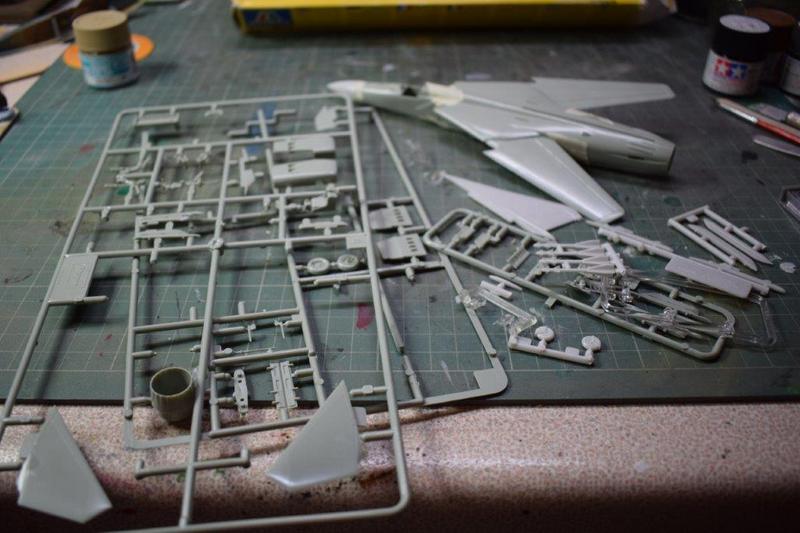
It's mostly the Hasegawa kit, which I'll rescribe, and a few choice parts from the Zvesda/Italeri kit to make an ML out of it. One thing to note is that the much maligned Hasegawa kit fuselage is exactly the same length without the radome as the Zvesda offering. So the Zvesda nose gets used and it improves the lines immediately. I'm also keeping the tail, nose u/c and chaff/flare dispensers among other small bits.
And just to help things along.
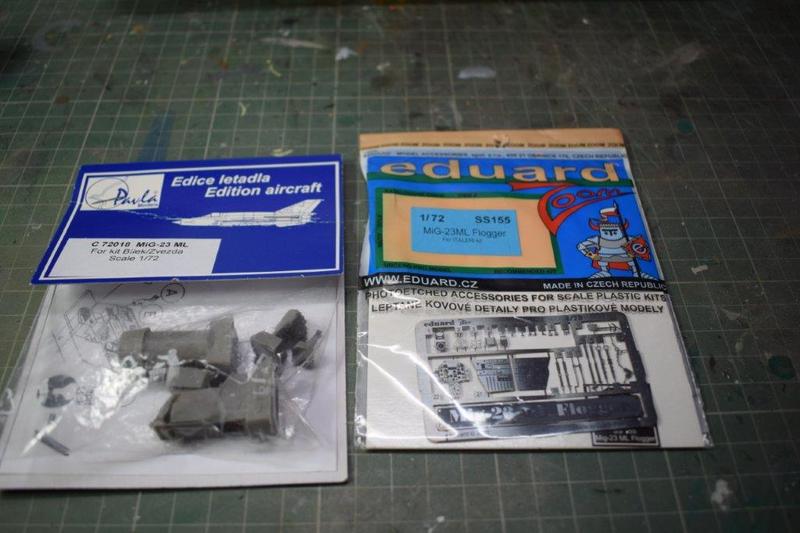
Again purchased when I saw them cheaply.
The only thing I may want to acquire are some a/m decals. I have the Italeri ones but there's no harm in looking for something perhaps a little more interesting
And I'd nearly kicked the habit too
Every time we're at a show with the SIG display, I notice that there are a few gaps in the line up of Migs, the most noticeable of which is that there isn't a -23. So I think it's time to rectify this.
I had bought this some time ago thinking that it would be perfect.
It's the Zvesda kit in an Italeri box. I had heard very good things about this kit so I was pretty pleased to pick this up quite cheaply on eBay. People raved about the fine detail and how it was head and shoulders above anything else on the market. However, when I took a close look at mine I was less than impressed. The detail is quite superficial and soft and the kit is replete with sink marks and poor moulding including some wide sink marks in the wings, which would remove all the surface detail, and a pearler in the middle of one of the main wheels which is impossible to fill. So this kit langusihed on the shelf while I considered what to do.
And it languished for a long time.
During that time I kept looking at this.
Another cheap eBay pick up with a battered end opening box indicating that it was a very early edition. This is actually rather a nice kit. The cockpit is sparsely detailed and it has raised panel lines but I know from experience that it goes together very well indeed. The thing to get past is that it's, allegedly, about 2mm too short.
While these were sitting on the shelf I kept taking them out, looking at them and putting them back, all the while considering whether I could kitbash the two together to make a decent model. Then, a few months ago, a chance link from Scalemates while looking for something else led me to an article by a fellow modeller who'd done just that. I've been waiting for an opportunity ever since and, in preparation split the kits into needed and unneeded parts.
It's mostly the Hasegawa kit, which I'll rescribe, and a few choice parts from the Zvesda/Italeri kit to make an ML out of it. One thing to note is that the much maligned Hasegawa kit fuselage is exactly the same length without the radome as the Zvesda offering. So the Zvesda nose gets used and it improves the lines immediately. I'm also keeping the tail, nose u/c and chaff/flare dispensers among other small bits.
And just to help things along.
Again purchased when I saw them cheaply.
The only thing I may want to acquire are some a/m decals. I have the Italeri ones but there's no harm in looking for something perhaps a little more interesting
COLD WAR S.I.G. LEADER
Wherever there's danger, wherever there's trouble, wherever there's important work to be done....I'll be somewhere else building a model!
Wherever there's danger, wherever there's trouble, wherever there's important work to be done....I'll be somewhere else building a model!
-
The Great Auk

- Modelling Gent and Scholar
- Posts: 2041
- Joined: August 16th, 2014, 12:35 pm
- Location: Extinction Isle
Re: Dazzled's Big Mig Build
Will watch with interest as your work is always a delight.
The Great Auk
The Great Auk
-
skypirate

- Modelling Gent and Scholar
- Posts: 7303
- Joined: May 1st, 2011, 6:13 am
- Location: Port Macquarie, Australia
Re: Dazzled's Big Mig Build
I think this will be worth the wait!
David
David
-
dollar19
- Modelling Gent and Scholar
- Posts: 1342
- Joined: May 1st, 2011, 1:11 am
- Location: Bristol, Va. USA
Re: Dazzled's Big Mig Build
I’m holding out for a 1:32 Flogger! But I’ll watch this as it going to be amazing!
-
Tarkas

- Active Participant
- Posts: 623
- Joined: August 9th, 2012, 6:24 pm
- Location: Geosynchronous orbit, but at a very low altitude
Re: Dazzled's Big Mig Build
So does that mean that the "missing" 2 mm of the Hasegawa kit is all in the radome? That would be very useful if it's the case, as I have both those kits (picked up at shows, including two MLs, one from the SIG stand at CosfordDazzled wrote:
Another cheap eBay pick up with a battered end opening box indicating that it was a very early edition. This is actually rather a nice kit. The cockpit is sparsely detailed and it has raised panel lines but I know from experience that it goes together very well indeed. The thing to get past is that it's, allegedly, about 2mm too short.
[Snip...]
One thing to note is that the much maligned Hasegawa kit fuselage is exactly the same length without the radome as the Zvesda offering. So the Zvesda nose gets used and it improves the lines immediately.
Ping! Ping!! Ping!!! -- Mother Box
She's such a chatterbox, sometimes...
She's such a chatterbox, sometimes...
-
Dazzled
- Modelling Gent and Scholar
- Posts: 9592
- Joined: October 1st, 2011, 11:08 pm
- Location: Mid Glamorgan, South Wales
- Contact:
Re: Dazzled's Big Mig Build
The radome is about 1mm short and a bit too skinny to look convincing. The problem with measuring the kit is finding out definitively what length the Mig-23 actually is. Internet sources give anywhere from 15.7 to 17.1 metres. Going by the Mig OKB book by Yefim Gordon the -ML should be 16.7 metres including the pitot. When it's more together I'll try and measure the model properly.
COLD WAR S.I.G. LEADER
Wherever there's danger, wherever there's trouble, wherever there's important work to be done....I'll be somewhere else building a model!
Wherever there's danger, wherever there's trouble, wherever there's important work to be done....I'll be somewhere else building a model!
-
ShaunW
- NOT the sheep
- Posts: 26188
- Joined: November 26th, 2011, 6:11 pm
- Location: Pontefract West Yorkshire
Re: Dazzled's Big Mig Build
It's good to see the MiG plant has reopened after a lengthy layoff Daz. Nice to see a bit of Floggery and that Hase MiG-23 isn't a bad old kit - when I built mine a number of years ago all I did was replace the seat with a Neomega resin item and was blissfully ignorant as to any issues with the dimensions.
Doing - Tamiya 1/35th Universal Carrier.
Work is the curse of the modelling classes!
IPMS#12300
Work is the curse of the modelling classes!
IPMS#12300
-
Dazzled
- Modelling Gent and Scholar
- Posts: 9592
- Joined: October 1st, 2011, 11:08 pm
- Location: Mid Glamorgan, South Wales
- Contact:
Re: Dazzled's Big Mig Build
I don't think the dimensions are that far out Shaun, although it's difficult to measure accurately when it's in bits. One thing's for sure is that the nose from the Zvesda kit does wonders for the profile.
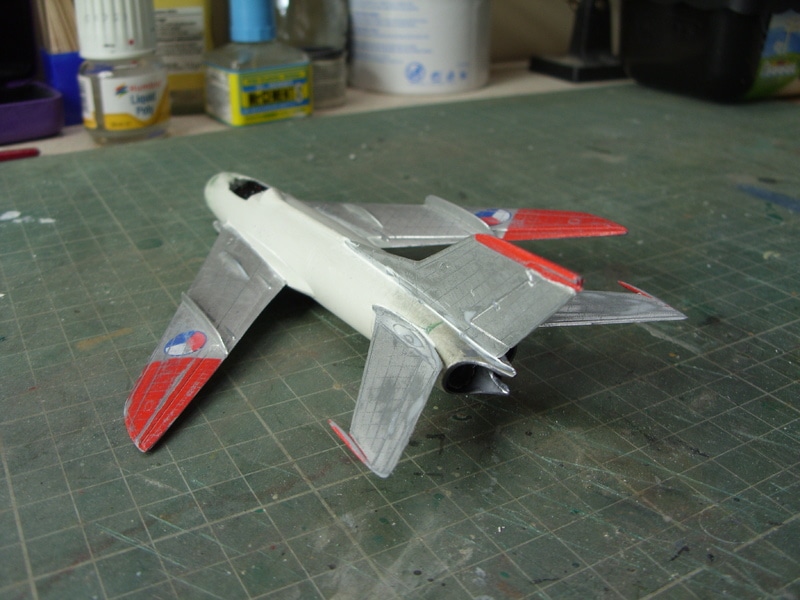
I've managed a start with it too. Not spectacular or speedy, but I wasn't expecting that from a kit that's, essentially, a "bitsa". So:
A coat of primer. Actually second attempt as I forgot to wash the resin bits first time around.
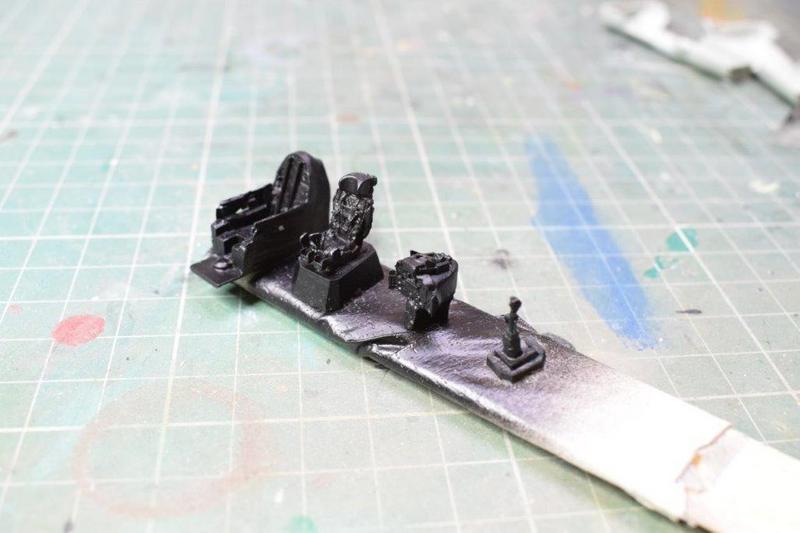
And, as you might have noticed from the rear of the cockpit tub, there's been a fair amount of grinding. In the case of the resin bits this took place in the spray booth, filter running and wearing a full filter mask. Nasty stuff resin dust
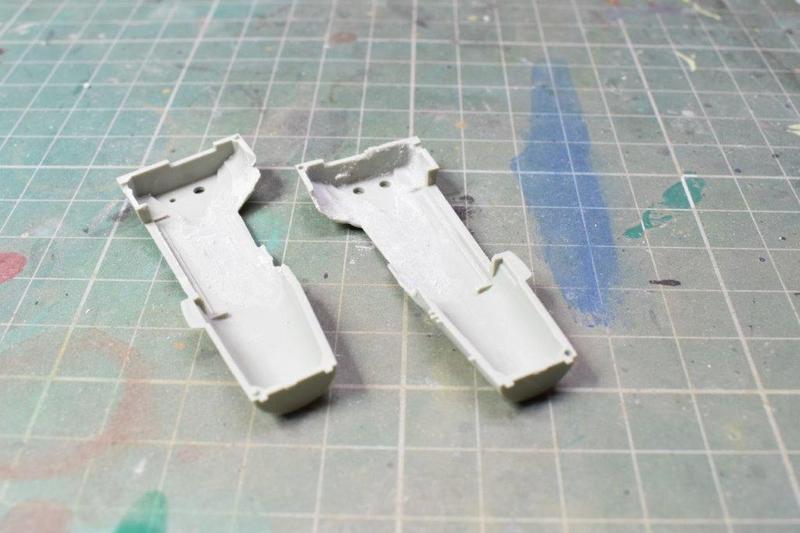
And the insides of the nose halves were given a serious dose of grinding out.
The fin on the ML is smaller than that on earlier models and it shows.
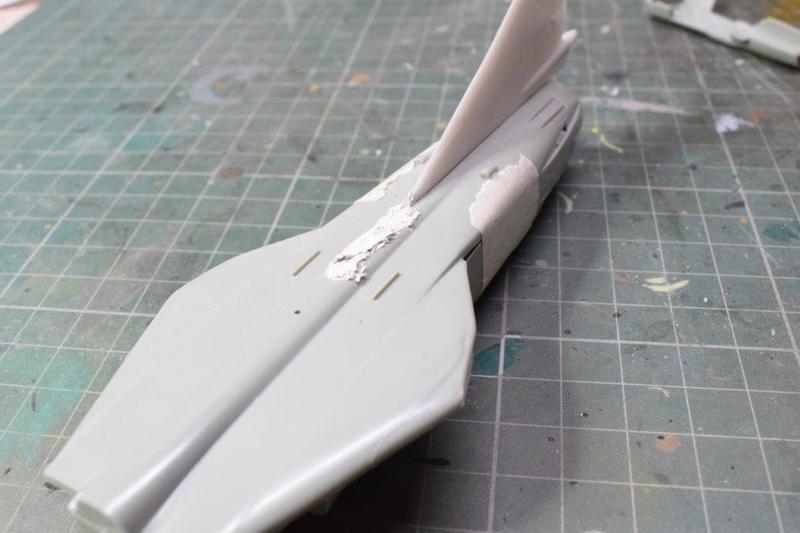
It's a big gap to fill but I'm sure that the fin won't get in the way if it's attached now.
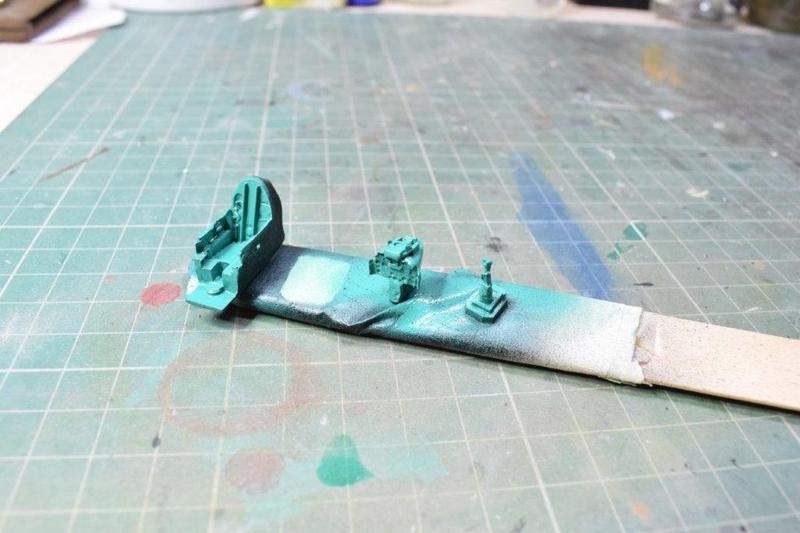
And, as with all swing-wing a/c models it's important to get the wings sorted out asap, so these have been rescribed and given a coat of Akan Soviet blue/grey as an undercoat.
Then more Akan paint. This time the ever-popular "Barf Turquoise"
And finally, the first surprise and, I have to say, disappointment so far. The Pavla resin jet pipe looks lovely...
......right up until I cut it from it's mounting block
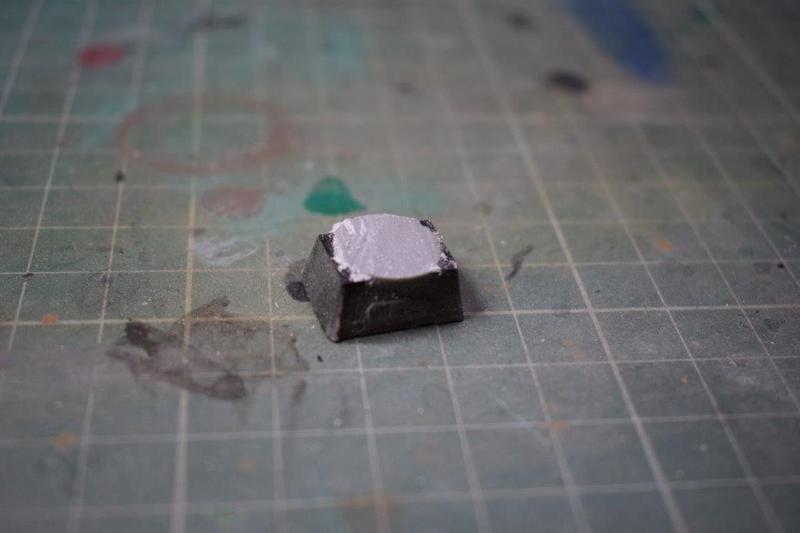
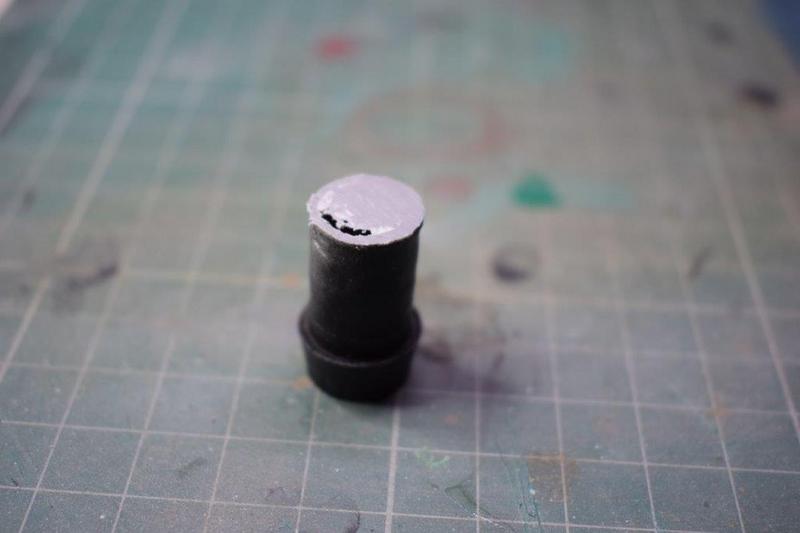
I cut it flush but still turned the afterburner ring in to a see-through doily. Like I said, a bit disappointing and something I wouldn't have expected from Pavla.
So it's out with the plasticard again
More miggery soon
I've managed a start with it too. Not spectacular or speedy, but I wasn't expecting that from a kit that's, essentially, a "bitsa". So:
A coat of primer. Actually second attempt as I forgot to wash the resin bits first time around.
And, as you might have noticed from the rear of the cockpit tub, there's been a fair amount of grinding. In the case of the resin bits this took place in the spray booth, filter running and wearing a full filter mask. Nasty stuff resin dust
And the insides of the nose halves were given a serious dose of grinding out.
The fin on the ML is smaller than that on earlier models and it shows.
It's a big gap to fill but I'm sure that the fin won't get in the way if it's attached now.
And, as with all swing-wing a/c models it's important to get the wings sorted out asap, so these have been rescribed and given a coat of Akan Soviet blue/grey as an undercoat.
Then more Akan paint. This time the ever-popular "Barf Turquoise"
And finally, the first surprise and, I have to say, disappointment so far. The Pavla resin jet pipe looks lovely...
......right up until I cut it from it's mounting block
I cut it flush but still turned the afterburner ring in to a see-through doily. Like I said, a bit disappointing and something I wouldn't have expected from Pavla.
So it's out with the plasticard again
More miggery soon
COLD WAR S.I.G. LEADER
Wherever there's danger, wherever there's trouble, wherever there's important work to be done....I'll be somewhere else building a model!
Wherever there's danger, wherever there's trouble, wherever there's important work to be done....I'll be somewhere else building a model!
-
dollar19
- Modelling Gent and Scholar
- Posts: 1342
- Joined: May 1st, 2011, 1:11 am
- Location: Bristol, Va. USA
Re: Dazzled's Big Mig Build
Man that looks good! I’m going to have to get a couple Soviet jets.
-
Old_Tonto

- Modelling Gent and Scholar
- Posts: 8063
- Joined: May 1st, 2011, 7:41 pm
- Location: Middlesbrough, Peoples Republic of Teesside.
Re: Dazzled's Big Mig Build
Good luck with your Flogger Daz, will be watching with interest. I've got a couple of the Kopro re-boxing of the R.V. kit around here somewhere.
Maybe you will inspire me to get cracking on them.
Maybe you will inspire me to get cracking on them.
2023 - A:0 B:0 C:0
Current Projects:
East German Air Force (1956-90)
South African Air Force (1958-93)
Current Projects:
East German Air Force (1956-90)
South African Air Force (1958-93)