1/48th Minicraft Beechcraft Bonanza V35
-
ShaunW
- NOT the sheep
- Posts: 26188
- Joined: November 26th, 2011, 6:11 pm
- Location: Pontefract West Yorkshire
Re: 1/48th Minicraft Beechcraft Bonanza V35
Oh heck! I best consider a custom window tint 
Doing - Tamiya 1/35th Universal Carrier.
Work is the curse of the modelling classes!
IPMS#12300
Work is the curse of the modelling classes!
IPMS#12300
-
ShaunW
- NOT the sheep
- Posts: 26188
- Joined: November 26th, 2011, 6:11 pm
- Location: Pontefract West Yorkshire
Re: 1/48th Minicraft Beechcraft Bonanza V35
Bit of a disaster at chez W as Mrs W has done her back in, the doc says that it's probably a muscle strain but there's a chance it could be a disc problem, either way the upshot is that she is off her feet and yours truly has been busy with all of the household chores. Use the washing machine? you might as well sit me in the Space Shuttle and say "fly this dude!" I did, however, manage a bit of modelling today.
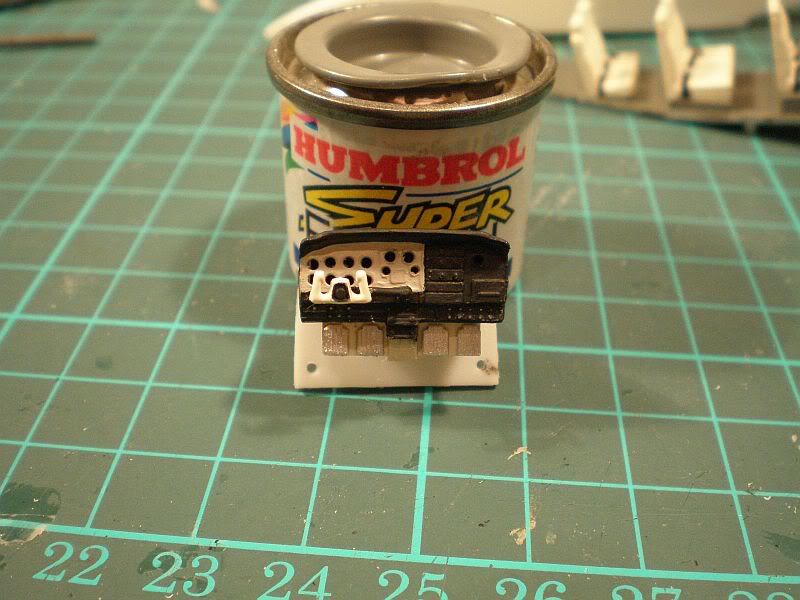
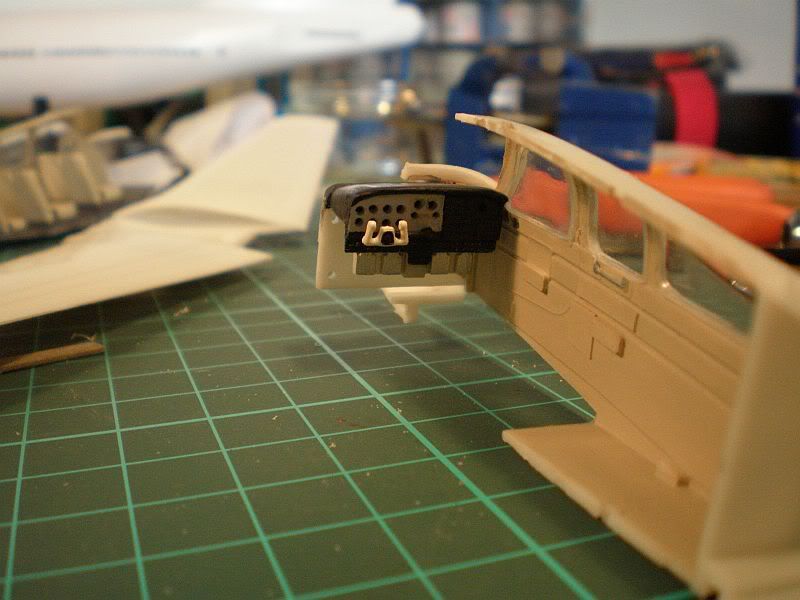
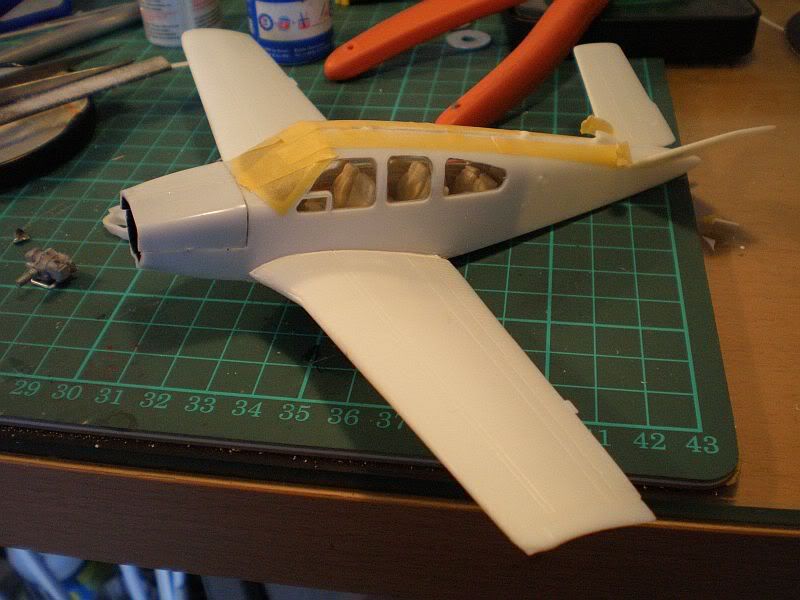
First up I completed the IP, not entirely to my satisfaction but it's as good as I can get it.
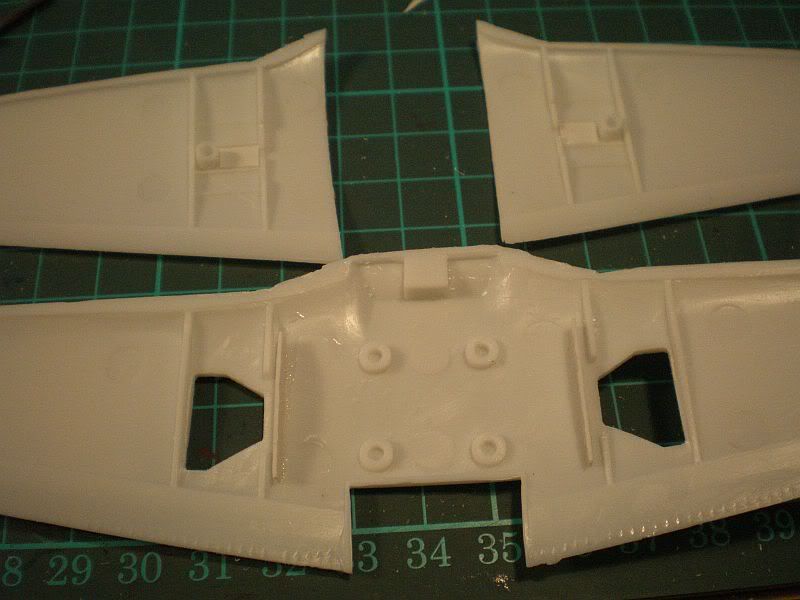
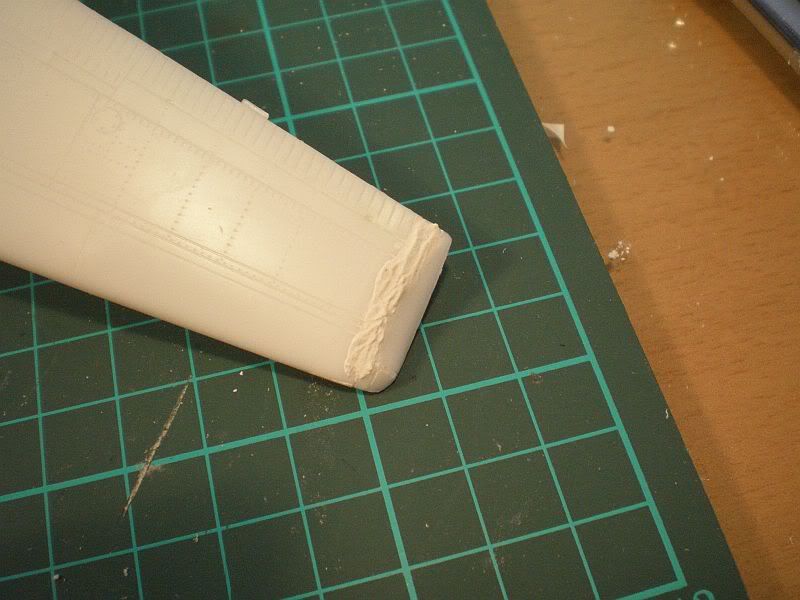
Then I dealt with the wings. Oh dear, the mouldings at the leading edge were a bit rough and required attention with the files before I could start joining the top and bottom of the wings. As a last minute addition I made up two rough additional bulkheads out of scrap plastic card to prevent a see through effect that I noticed when dry fitting the wings, seen here in the main wing section at the bottom of the pic. The port bulkhead was subsequently moved to match the starboard after perusing the photos made the difference jump out at me. Funny how sometimes you don't notice these things until you look at the pics - usually when it's too late to correct the fault! You might also have noticed the plastic card inserts in the undercarriage bays of the upper wing halves. The purpose of those inserts is to cover bad ejector pin marks - easy bit of gizmology to save on filling and sanding. The fit of the two wing halves leaves a bit to be desired on both sides and will require sanding and filling. Nothing new there then
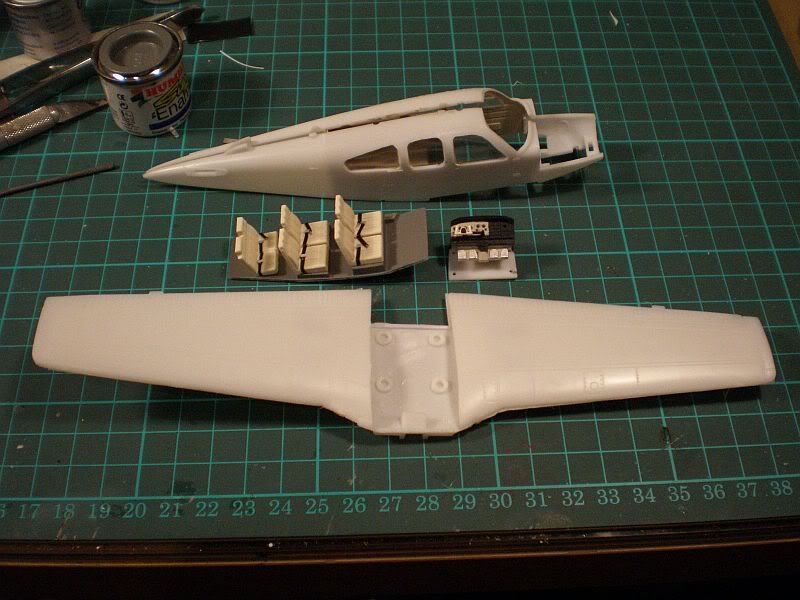
And here's the collection of main components that hopefully I will be joining together tomorrow.
Thanks for your time.
First up I completed the IP, not entirely to my satisfaction but it's as good as I can get it.
Then I dealt with the wings. Oh dear, the mouldings at the leading edge were a bit rough and required attention with the files before I could start joining the top and bottom of the wings. As a last minute addition I made up two rough additional bulkheads out of scrap plastic card to prevent a see through effect that I noticed when dry fitting the wings, seen here in the main wing section at the bottom of the pic. The port bulkhead was subsequently moved to match the starboard after perusing the photos made the difference jump out at me. Funny how sometimes you don't notice these things until you look at the pics - usually when it's too late to correct the fault! You might also have noticed the plastic card inserts in the undercarriage bays of the upper wing halves. The purpose of those inserts is to cover bad ejector pin marks - easy bit of gizmology to save on filling and sanding. The fit of the two wing halves leaves a bit to be desired on both sides and will require sanding and filling. Nothing new there then
And here's the collection of main components that hopefully I will be joining together tomorrow.
Thanks for your time.
Doing - Tamiya 1/35th Universal Carrier.
Work is the curse of the modelling classes!
IPMS#12300
Work is the curse of the modelling classes!
IPMS#12300
-
MerlinJones
Re: 1/48th Minicraft Beechcraft Bonanza V35
Panel looks good.
I always leave main sanding until after the thing is built.
Is that aerial in the right place and is that fuselage seam secure?
Regards,
Bruce
I always leave main sanding until after the thing is built.
Is that aerial in the right place and is that fuselage seam secure?
Regards,
Bruce
-
ShaunW
- NOT the sheep
- Posts: 26188
- Joined: November 26th, 2011, 6:11 pm
- Location: Pontefract West Yorkshire
Re: 1/48th Minicraft Beechcraft Bonanza V35
In a word Bruce...no...the fuselage join is not secure the picture was taken before I started final assembly just to illustrate where I had got to with the main components. This afternoon however, I got out the glue proper like.
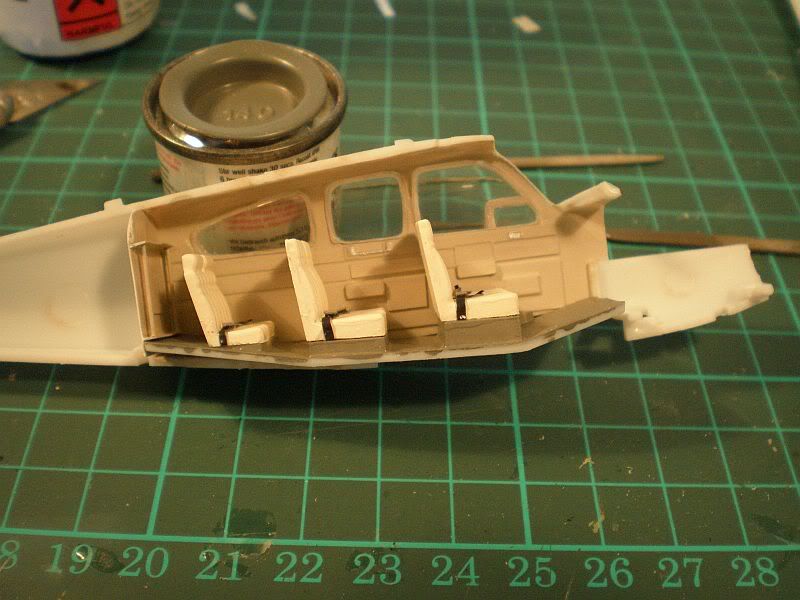
The instructions advise attaching the row of seats to the lower wing and then to use your best endeavours to attach the said wing/seat combination to the completed fuselage, in other words to mount the seats through the floor. No fear! I had already worked out that the fit of this kit was going to present some challenges - I was not to be disappointed! Therefore, instead of following the instructions I elected to attach the seats to the port side of the fuselage and thereafter had to fiddle about to ensure that they were at the right height and were level in the cabin, by dry fitting the fuselage halves around the seats and making various adjustments until I was satisfied with the fit.
I then fitted the IP to the other side, again having to dry fit the fuselage halves to make adjustments.
Then it was on with joining the fuselage halves. Oh dear, what a struggle as the halves did not want to align properly and the tapering shape of the fuselage did not lend itself to being gripped by my clamps. I persevered however (remember we are modellers on here, not just assemblers ) and finally got a decent join and thereafter on went the wings.
Here's Zen and the art of gentle pursuasion....
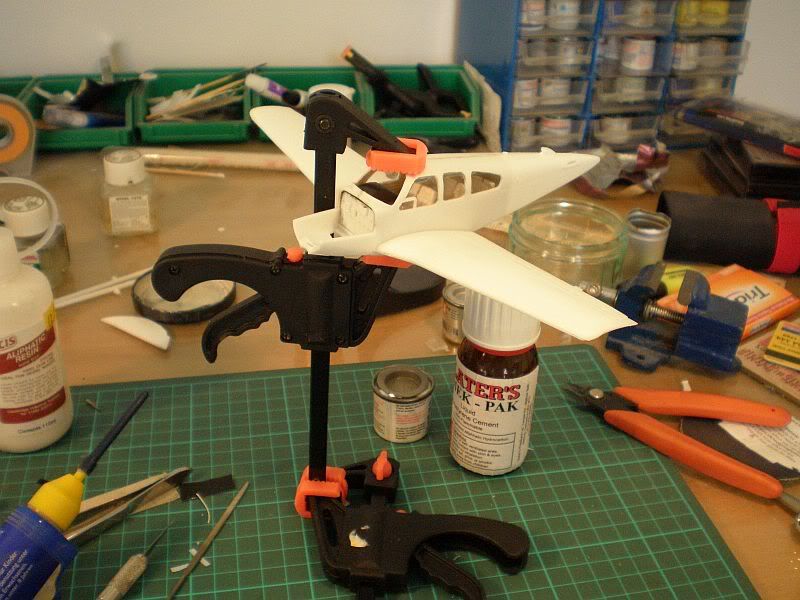
I had to be careful not to apply too much pressure for fear of popping in the windows, we don't want that to happen, no siree.
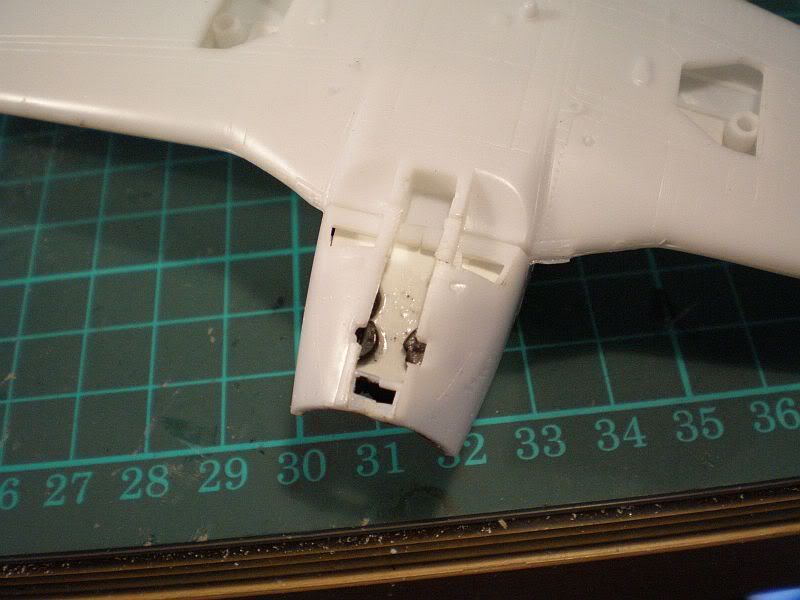
So there we have it Bruce, the wings are on
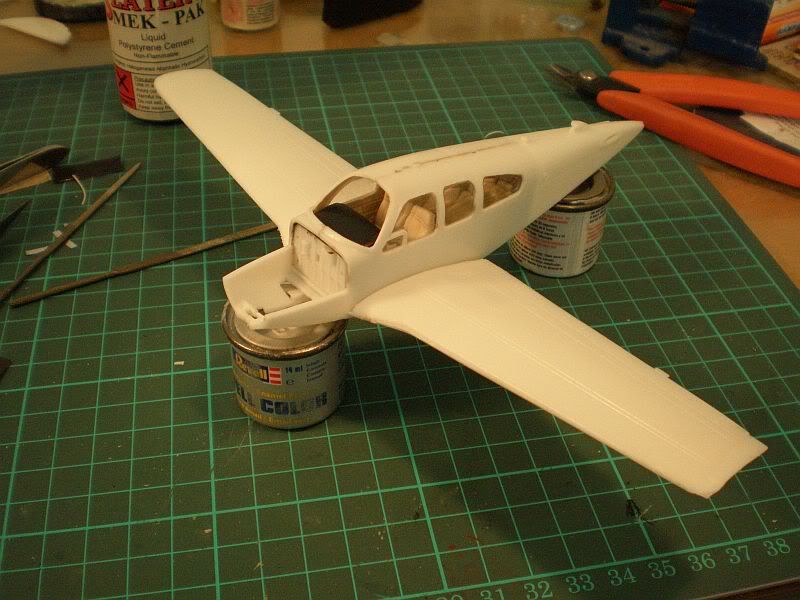
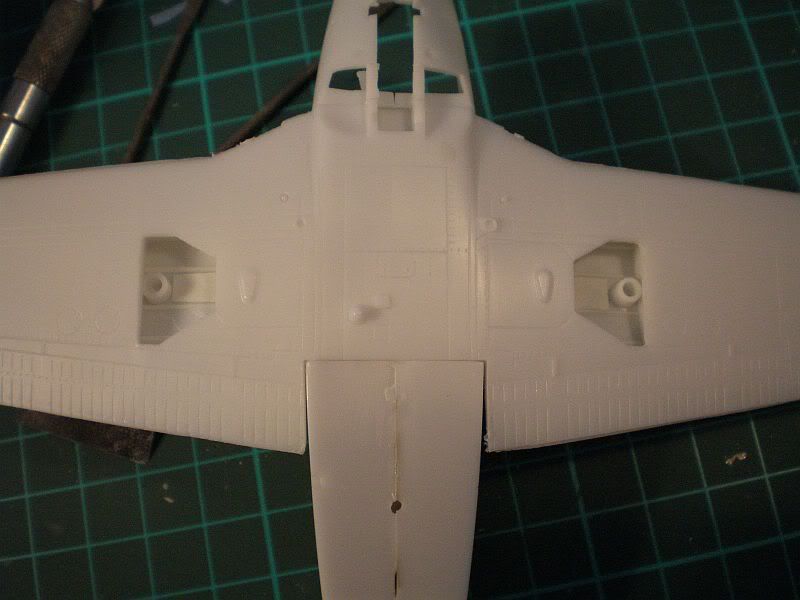
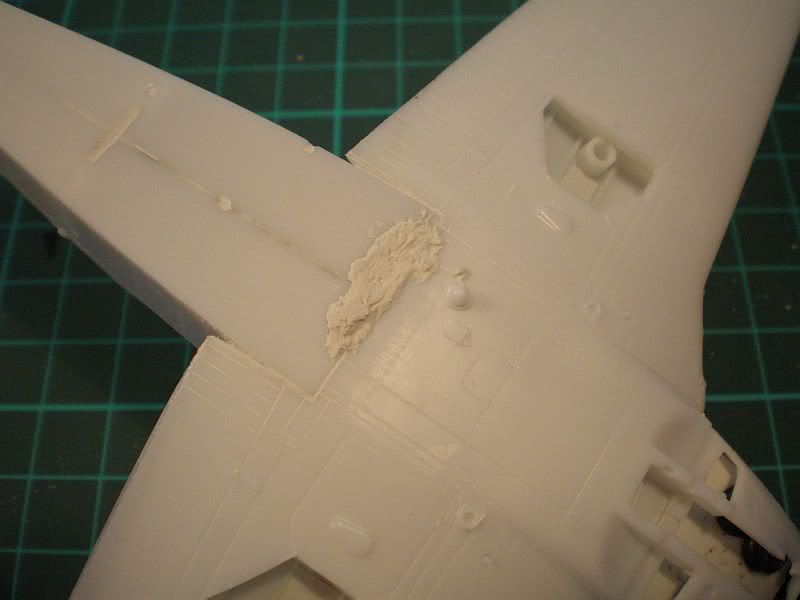
but there's now plenty of sanding and filling. Check out the underside join twixt fuselage and wings. Bugger, looks like some shimming will also be required and as you can see, that hole for one of the ariels is not properly round although the panel lines do match up.
Thanks for looking.....
The instructions advise attaching the row of seats to the lower wing and then to use your best endeavours to attach the said wing/seat combination to the completed fuselage, in other words to mount the seats through the floor. No fear! I had already worked out that the fit of this kit was going to present some challenges - I was not to be disappointed! Therefore, instead of following the instructions I elected to attach the seats to the port side of the fuselage and thereafter had to fiddle about to ensure that they were at the right height and were level in the cabin, by dry fitting the fuselage halves around the seats and making various adjustments until I was satisfied with the fit.
I then fitted the IP to the other side, again having to dry fit the fuselage halves to make adjustments.
Then it was on with joining the fuselage halves. Oh dear, what a struggle as the halves did not want to align properly and the tapering shape of the fuselage did not lend itself to being gripped by my clamps. I persevered however (remember we are modellers on here, not just assemblers
Here's Zen and the art of gentle pursuasion....
I had to be careful not to apply too much pressure for fear of popping in the windows, we don't want that to happen, no siree.
So there we have it Bruce, the wings are on
but there's now plenty of sanding and filling. Check out the underside join twixt fuselage and wings. Bugger, looks like some shimming will also be required and as you can see, that hole for one of the ariels is not properly round although the panel lines do match up.
Thanks for looking.....
Doing - Tamiya 1/35th Universal Carrier.
Work is the curse of the modelling classes!
IPMS#12300
Work is the curse of the modelling classes!
IPMS#12300
-
MerlinJones
Re: 1/48th Minicraft Beechcraft Bonanza V35
NOTE: A gap between flaps and fuselage IS permitted! 
Regards,
Bruce
Regards,
Bruce
-
ShaunW
- NOT the sheep
- Posts: 26188
- Joined: November 26th, 2011, 6:11 pm
- Location: Pontefract West Yorkshire
Re: 1/48th Minicraft Beechcraft Bonanza V35
Yes I know, but it's bigger on one side than t'other I don't intend to fill the gaps in entirely but, on the port side in particular, a bit of width reduction is called for, ooeer madam.
Doing - Tamiya 1/35th Universal Carrier.
Work is the curse of the modelling classes!
IPMS#12300
Work is the curse of the modelling classes!
IPMS#12300
-
ShaunW
- NOT the sheep
- Posts: 26188
- Joined: November 26th, 2011, 6:11 pm
- Location: Pontefract West Yorkshire
Re: 1/48th Minicraft Beechcraft Bonanza V35
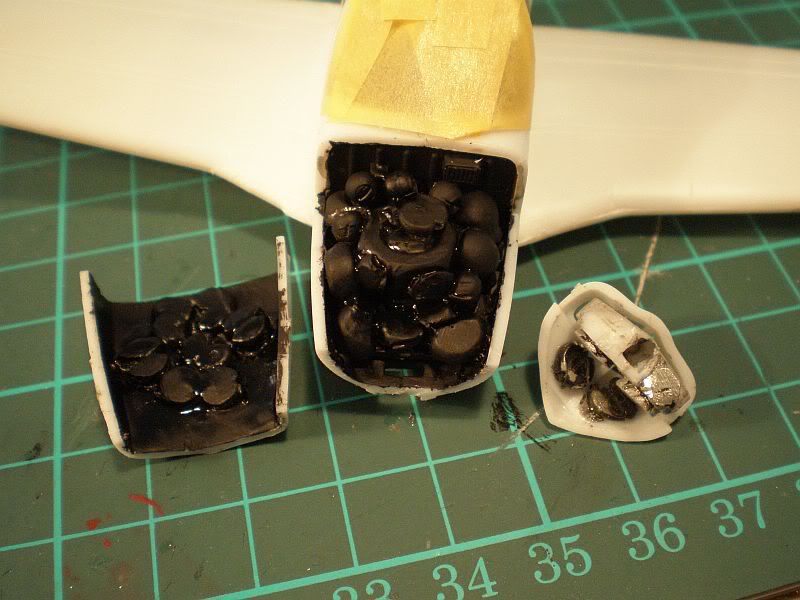
Now the fuselage is together and the wings are on, time to turn my attention to the front end and partucularly the question of nose weight. Although a nice amount of detail is provided for the engine bay, IMHO it is impossible to pose the model with the engine bay open and still get enough weight in to prevent tail sitting. No doubt someone will prove me wrong on that point! Tail props never look right to me, even if done with clear acrylic rod and I'm not going down the route of gluing the model to a display base due to space restrictions in my cabinets. Posing the model on the stand which is provided with the engine bay open would just look odd to me. So a compromise was needed and I started out by fitting a floor to the engine bay out of plastic card in order to have a platform for the nose weights.
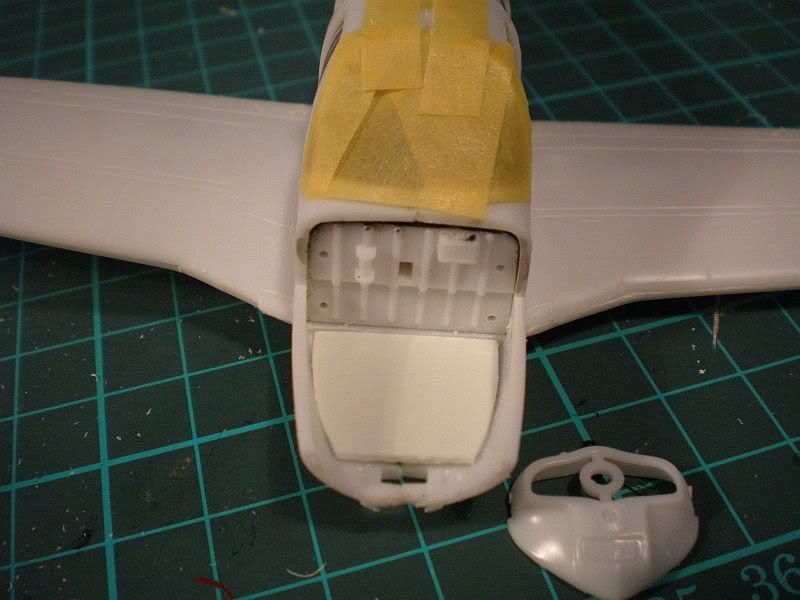
At the side of the model you will note the nose front piece. This shows rather more into the engine bay than I had anticipated and therefore I realised that I would have to use the engine to give enough gizmology behind the propeller as I don't think using a black painted strip of card to fill the intake gap from behind would cut it in this scale.
I then set to with a pair of pliers and flattened out some lead fishing weights and this amount seemed to be enough to make the thing feel reasonably weighty (yes, those weights are glued to the underside of the engine bay covers, space is at a premium on this build!).

However, I thought I'd better check the balance and did so by using cocktail sticks cut to the same length as the main gear oleos and mounted into the oleo location holes (luckily the sticks were the correct diameter so no temporary gluing was required). Oh dear! the model sat straight back onto its tail and it was obvious that more weight was needed. Much more. This is how much it takes to ensure that a Minicraft Bonanza balances onto its nose wheel.
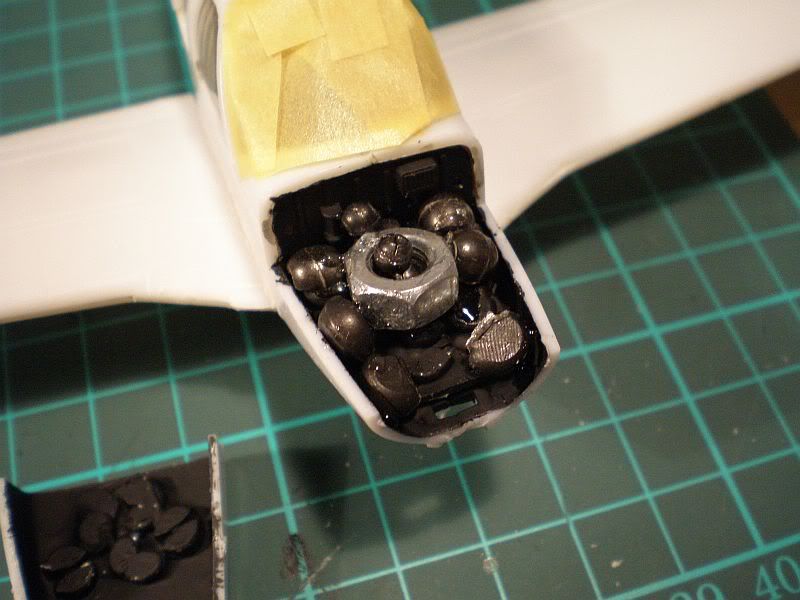
Almost twice the amount of weight that I'd originally fitted but at least the desired effect has been achieved (BTW the engine bay cowling has not been glued at this point, hence the loose look).
Of course, now there was no room to fit the engine as I originally intended. The only way forward was to shorten the engine and therefore instead of the correct flat six I now have a flat twin! However, there's enough vestigial engine left there to give the effect of more when viewed from the front, which is what I was after.
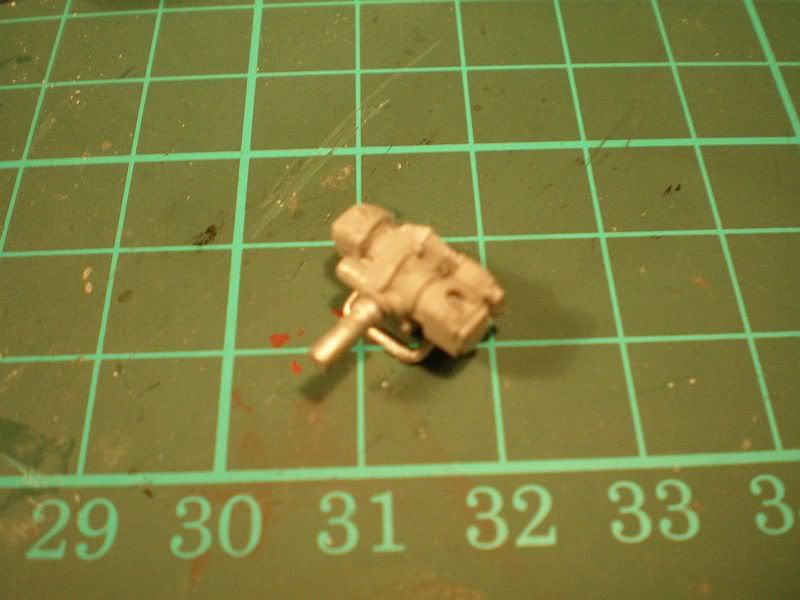
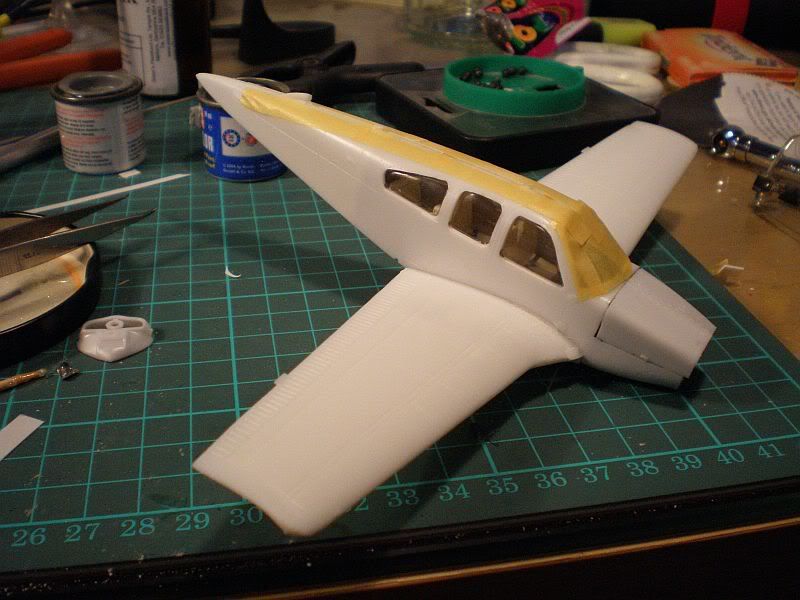
Sorry but that pic is a bit out of focus. The engine will be mounted directly to the rear of nose front plate. I will now apply more matt black to the engine bay and close the whole lot up in readiness for the usual sanding and filling cycle. The masking tape that you can see on the model is there in an effort to keep dust out of the cabin and to reduce damage to the surrounding areas of the fuselage spine when I start to sand.
Thanks for your time.
At the side of the model you will note the nose front piece. This shows rather more into the engine bay than I had anticipated and therefore I realised that I would have to use the engine to give enough gizmology behind the propeller as I don't think using a black painted strip of card to fill the intake gap from behind would cut it in this scale.
I then set to with a pair of pliers and flattened out some lead fishing weights and this amount seemed to be enough to make the thing feel reasonably weighty (yes, those weights are glued to the underside of the engine bay covers, space is at a premium on this build!).
However, I thought I'd better check the balance and did so by using cocktail sticks cut to the same length as the main gear oleos and mounted into the oleo location holes (luckily the sticks were the correct diameter so no temporary gluing was required). Oh dear! the model sat straight back onto its tail and it was obvious that more weight was needed. Much more. This is how much it takes to ensure that a Minicraft Bonanza balances onto its nose wheel.
Almost twice the amount of weight that I'd originally fitted but at least the desired effect has been achieved (BTW the engine bay cowling has not been glued at this point, hence the loose look).
Of course, now there was no room to fit the engine as I originally intended. The only way forward was to shorten the engine and therefore instead of the correct flat six I now have a flat twin! However, there's enough vestigial engine left there to give the effect of more when viewed from the front, which is what I was after.
Sorry but that pic is a bit out of focus. The engine will be mounted directly to the rear of nose front plate. I will now apply more matt black to the engine bay and close the whole lot up in readiness for the usual sanding and filling cycle. The masking tape that you can see on the model is there in an effort to keep dust out of the cabin and to reduce damage to the surrounding areas of the fuselage spine when I start to sand.
Thanks for your time.
Doing - Tamiya 1/35th Universal Carrier.
Work is the curse of the modelling classes!
IPMS#12300
Work is the curse of the modelling classes!
IPMS#12300

Re: 1/48th Minicraft Beechcraft Bonanza V35
Just a thought. You have allowed for the extra weight of the vee tail haven't you? I know from experience that this one wants to sit on it's rear at the slightest provocation.
Great build so far btw.
All the best.
Grreg
Great build so far btw.
All the best.
Grreg
Two things are infinite: the universe and human stupidity; and I'm not sure about the the universe.
The difference between stupidity and genius is that genius has its limits.
Albert Einstein
The difference between stupidity and genius is that genius has its limits.
Albert Einstein
-
ShaunW
- NOT the sheep
- Posts: 26188
- Joined: November 26th, 2011, 6:11 pm
- Location: Pontefract West Yorkshire
Re: 1/48th Minicraft Beechcraft Bonanza V35
Thanks Greg. I did think about the v-tail and so when I got her to tip forward I added a bit more weight, so hopefully that will suffice and I want the nose gear to be able to take it (I have a MiG 21 in my cabinets that just about holds up due to me being over enthusiastic with the nose weight). The v-tail has been left off to aid masking for the colour scheme later on. That said, you've got me thinking now and tomorrow I'll see if I can temporarily attach the tail and give it all a proper test
Doing - Tamiya 1/35th Universal Carrier.
Work is the curse of the modelling classes!
IPMS#12300
Work is the curse of the modelling classes!
IPMS#12300
-
MerlinJones
Re: 1/48th Minicraft Beechcraft Bonanza V35
Greg beat me to it, but he's absolutely spot on re the tail.
Also, be very, very careful when fitting the tail. It seems ideally placed to make you split the fuselage.
Regards,
Bruce
Also, be very, very careful when fitting the tail. It seems ideally placed to make you split the fuselage.
Regards,
Bruce
-
bromo

- On a long, long journey
- Posts: 1249
- Joined: May 2nd, 2011, 7:05 pm
- Location: Wolverhampton,England
Re: 1/48th Minicraft Beechcraft Bonanza V35
Thats looking very nice Shaun,nice tip regards clear packaging as well,will have to keep an eye out for whats going in the bin,dont think Mrs B would take kindly to me emptying the rubbish out to check.How's Mrs W's back?,
BEEN A WHILE
-
ShaunW
- NOT the sheep
- Posts: 26188
- Joined: November 26th, 2011, 6:11 pm
- Location: Pontefract West Yorkshire
Re: 1/48th Minicraft Beechcraft Bonanza V35
Thanks Bromo, this is turning into yet another challenging build, I could do with an easy one for a change . Mrs W's back is slowly getting better with a lot of rest and a goodly quantity of painkillers. The doc diagnosed sciatica, which is a pretty unpleasant condition and one which I have experience of as well. Hopefully she will be back in action (so to speak) before I have to learn the workings of the washing machine!
Bruce - if ever there was a chance of splitting the fuselage with the tail, I'd be the man to do it
Bruce - if ever there was a chance of splitting the fuselage with the tail, I'd be the man to do it
Doing - Tamiya 1/35th Universal Carrier.
Work is the curse of the modelling classes!
IPMS#12300
Work is the curse of the modelling classes!
IPMS#12300
-
bromo
- On a long, long journey
- Posts: 1249
- Joined: May 2nd, 2011, 7:05 pm
- Location: Wolverhampton,England
Re: 1/48th Minicraft Beechcraft Bonanza V35
Sciatica, i know that very well,been suffering with it on and off for over two years now,manage to keep it under control with 8 ibuprofen every day if i dont take them within a couple of days im in agony.
BEEN A WHILE
-
ShaunW
- NOT the sheep
- Posts: 26188
- Joined: November 26th, 2011, 6:11 pm
- Location: Pontefract West Yorkshire
Re: 1/48th Minicraft Beechcraft Bonanza V35
That's bad news Bromo. I suffered with it about 12 years ago for the first time and I've had twinges on and off ever since, but not to the stage where I've had to constantly take painkillers.
On with the build and today, after finishing up my multiple chores, I've been sorting out the balancing of the model. If anyone has built a more tail-sittery model than this bonkers Beech, with its insatiable appetite for my fishing weights, then let me know so that I can avoid After receiving words of wisdom last night from Greg and Bruce I mocked up the tail section since I had added extra weight previously and wanted to make a final check before cementing everything up permanently. Was it enough...err...no. There must be a law of physics that governs this, but if you know it then please spare me the explanation, I'll take your word for it Adding 2 grams of v-tail at the rear required the addition of six metric tonnes of lead weight in the front to achieve a nose down attitude. OK so I'm exaggerating a little. But it did require rather more of an increase in the nose weight than I was expecting. This aircraft must be in the top 10 of tail sitters.
Here's what happened initially after adding the tail
Now the fishing weights, painted matt black but to be honest and thankfully, surprisingly little can be seen of this madness past what remains of the engine (the paint was still wet when the pic was taken, it is matt, honest!). You will note that in addition to the weights attached to the engine bay covers, the engine also has weights attached.
In addition I also managed to sneak some into the nose wheel bay, which hopefully will not be visible at the end.
Finally, the little sod balanced nose down but now weighs more than my car. Here's hoping the nose gear will take it!
Special thanks to Greg and Bruce for the timely warning!
As always, thanks for looking........
On with the build and today, after finishing up my multiple chores, I've been sorting out the balancing of the model. If anyone has built a more tail-sittery model than this bonkers Beech, with its insatiable appetite for my fishing weights, then let me know so that I can avoid
Here's what happened initially after adding the tail
Now the fishing weights, painted matt black but to be honest and thankfully, surprisingly little can be seen of this madness past what remains of the engine (the paint was still wet when the pic was taken, it is matt, honest!). You will note that in addition to the weights attached to the engine bay covers, the engine also has weights attached.
In addition I also managed to sneak some into the nose wheel bay, which hopefully will not be visible at the end.
Finally, the little sod balanced nose down but now weighs more than my car. Here's hoping the nose gear will take it!
Special thanks to Greg and Bruce for the timely warning!
As always, thanks for looking........
Doing - Tamiya 1/35th Universal Carrier.
Work is the curse of the modelling classes!
IPMS#12300
Work is the curse of the modelling classes!
IPMS#12300
-
ShaunW
- NOT the sheep
- Posts: 26188
- Joined: November 26th, 2011, 6:11 pm
- Location: Pontefract West Yorkshire
Re: 1/48th Minicraft Beechcraft Bonanza V35
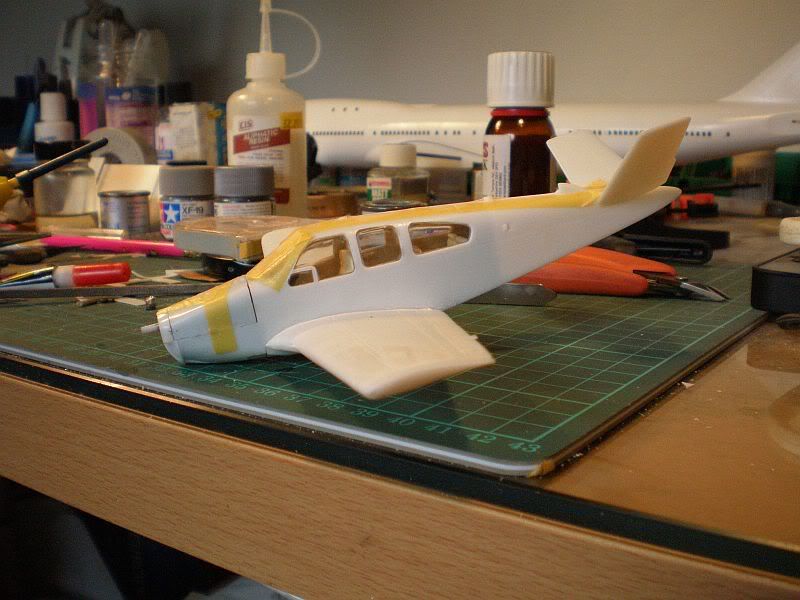
Let's have a bit more GA action for those of you who may be interested and I know I'm in a minority here, but not to worry
After the nose weight episode last week I've now joined up the front end, although the fit is not brilliant
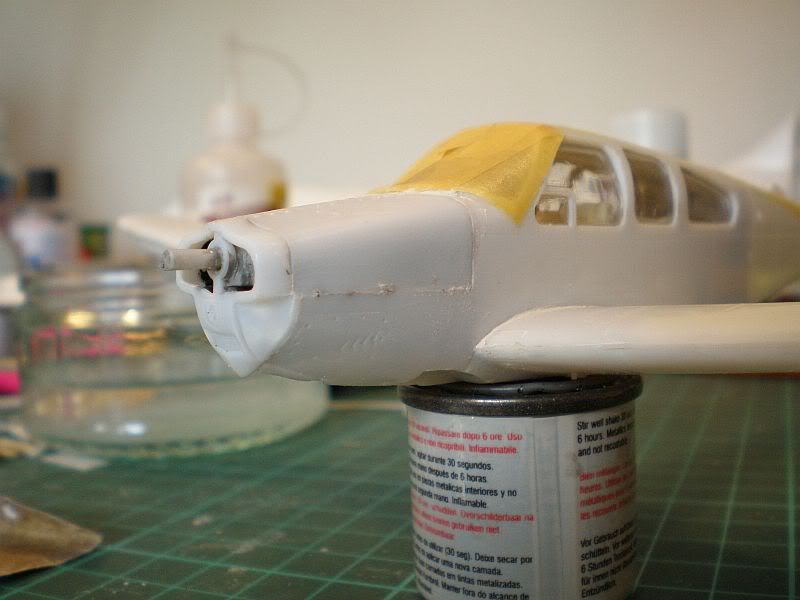
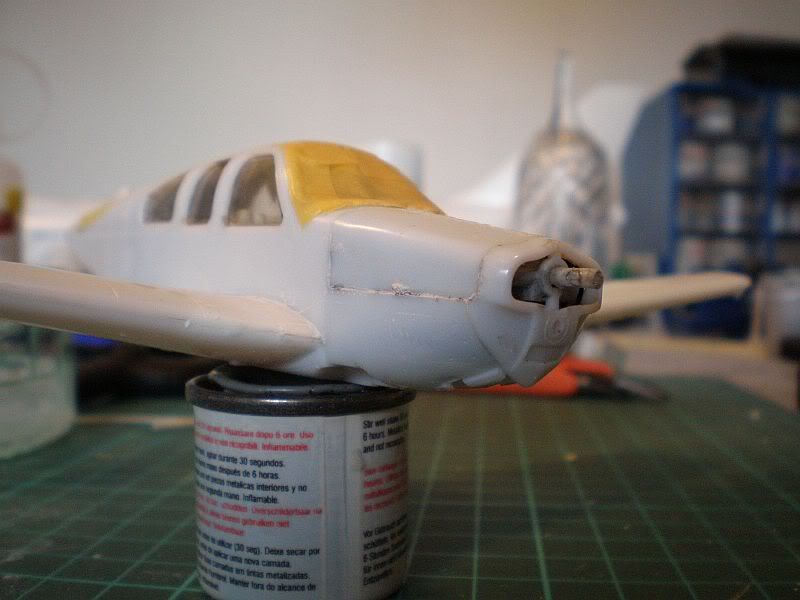
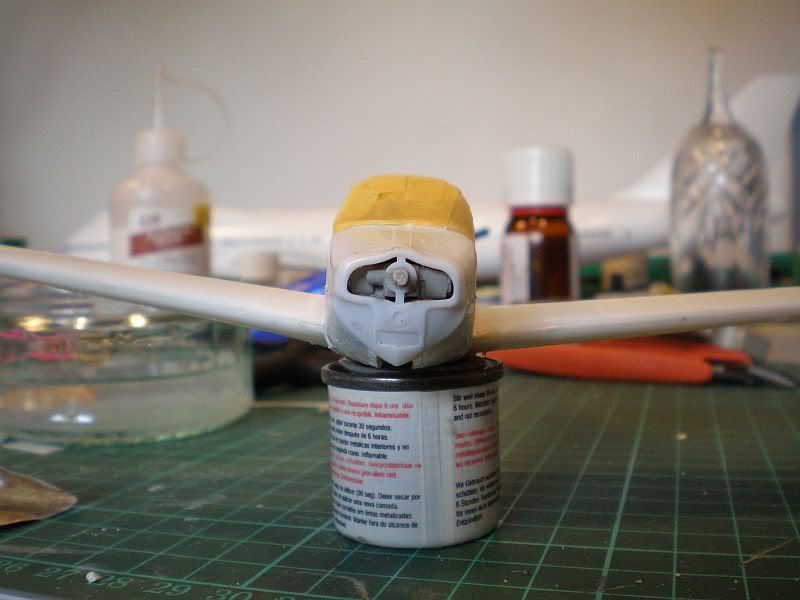
From the front, you can now see how the engine gizmology hides the mass of weight in the engine compartment, although the latter has also been painted matt black.
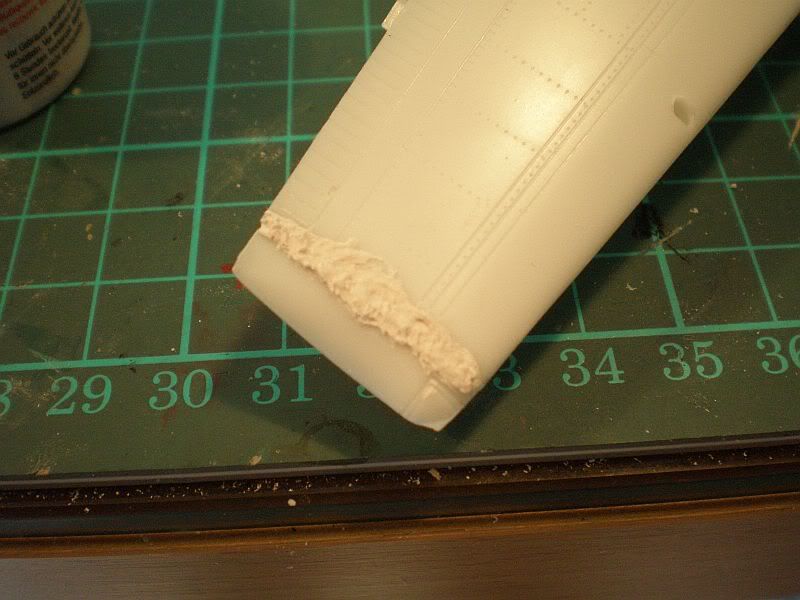
I'm now on to the usual sanding and filler cycle, there are areas under the wing and fuselage centre section that have required building up with filler, rather a lot of filler in fact! I've had kits with worse fit problems however.
Thanks for looking.
After the nose weight episode last week I've now joined up the front end, although the fit is not brilliant
From the front, you can now see how the engine gizmology hides the mass of weight in the engine compartment, although the latter has also been painted matt black.
I'm now on to the usual sanding and filler cycle, there are areas under the wing and fuselage centre section that have required building up with filler, rather a lot of filler in fact! I've had kits with worse fit problems however.
Thanks for looking.
Doing - Tamiya 1/35th Universal Carrier.
Work is the curse of the modelling classes!
IPMS#12300
Work is the curse of the modelling classes!
IPMS#12300