1-48 RAF Curtiss Mohawk IV from HobbyCraft

Military or civil, triplanes, biplanes or monoplanes, props, jets or helicopters...models in here.
User avatar
Boldman
The Bug Has Well And Truly Bitten
Posts: 310
Joined: November 18th, 2011, 10:31 pm

1-48 RAF Curtiss Mohawk IV from HobbyCraft

Post by Boldman »

You may remember a couple of months ago I posted about my researches into my father's RAF service and my plans to build a model of the aircraft he worked on. (Link here)

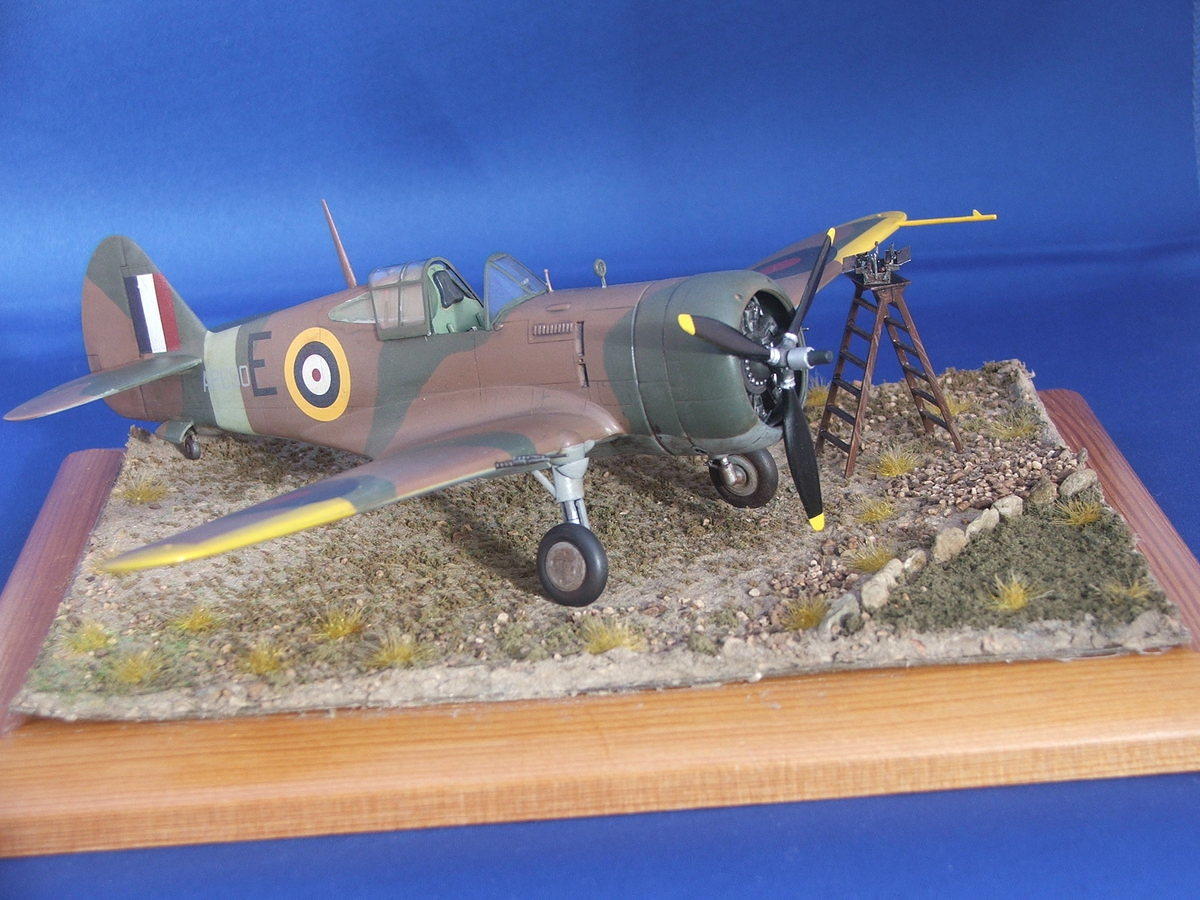
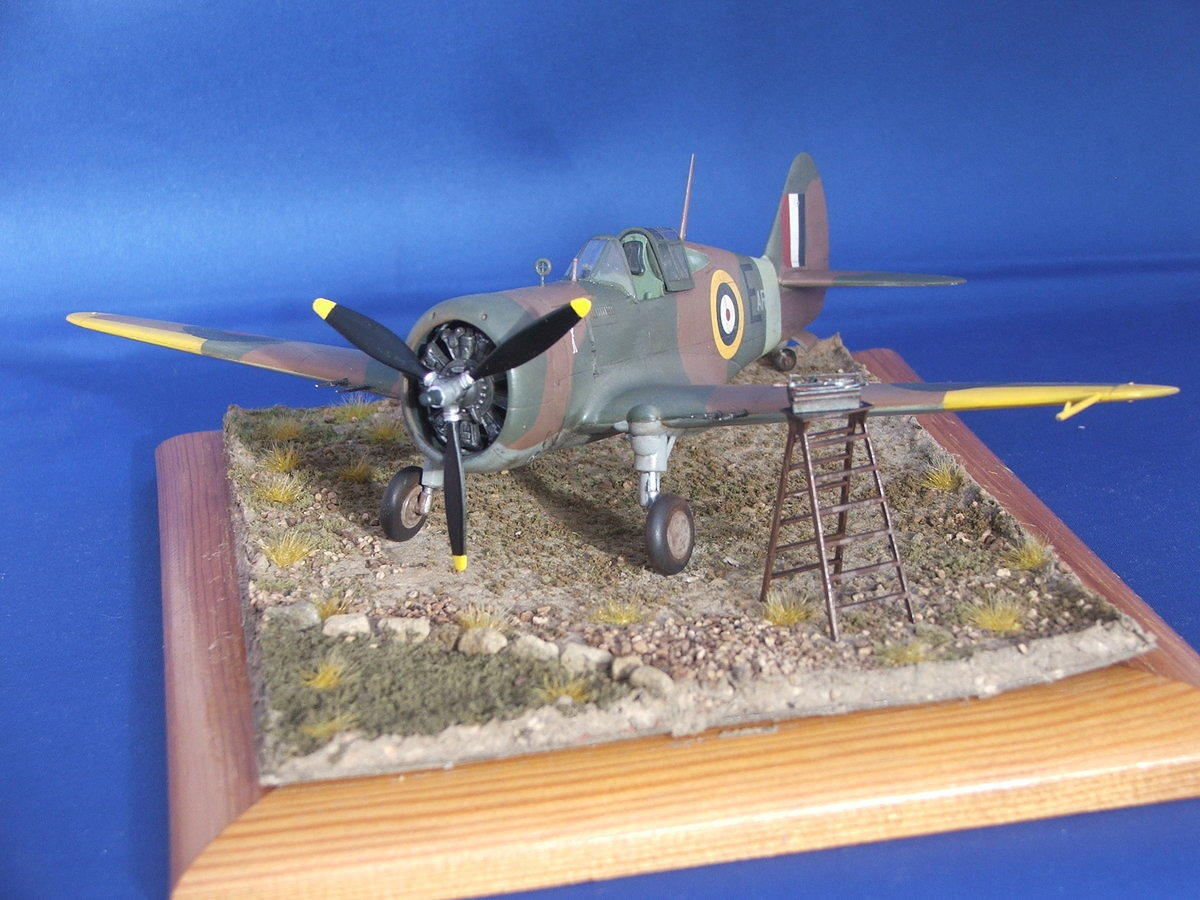
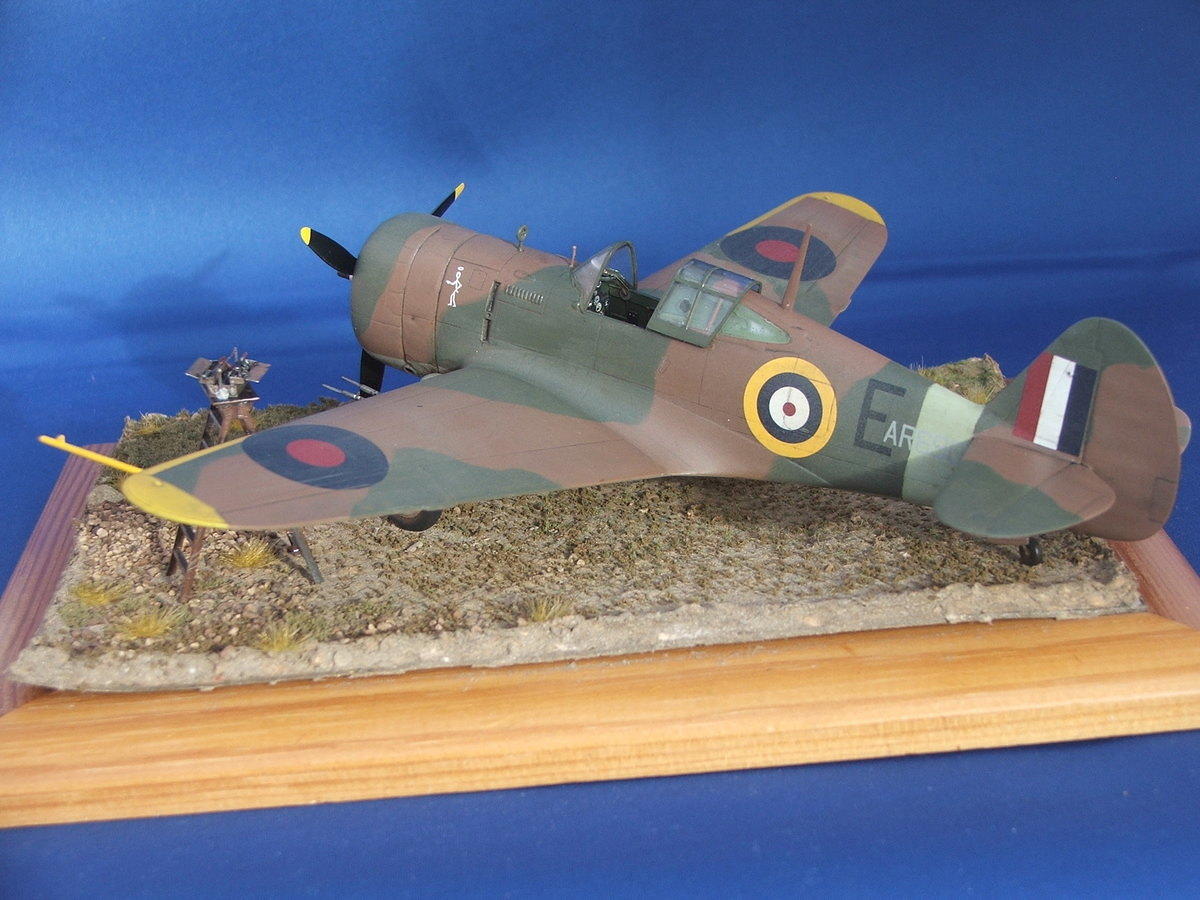
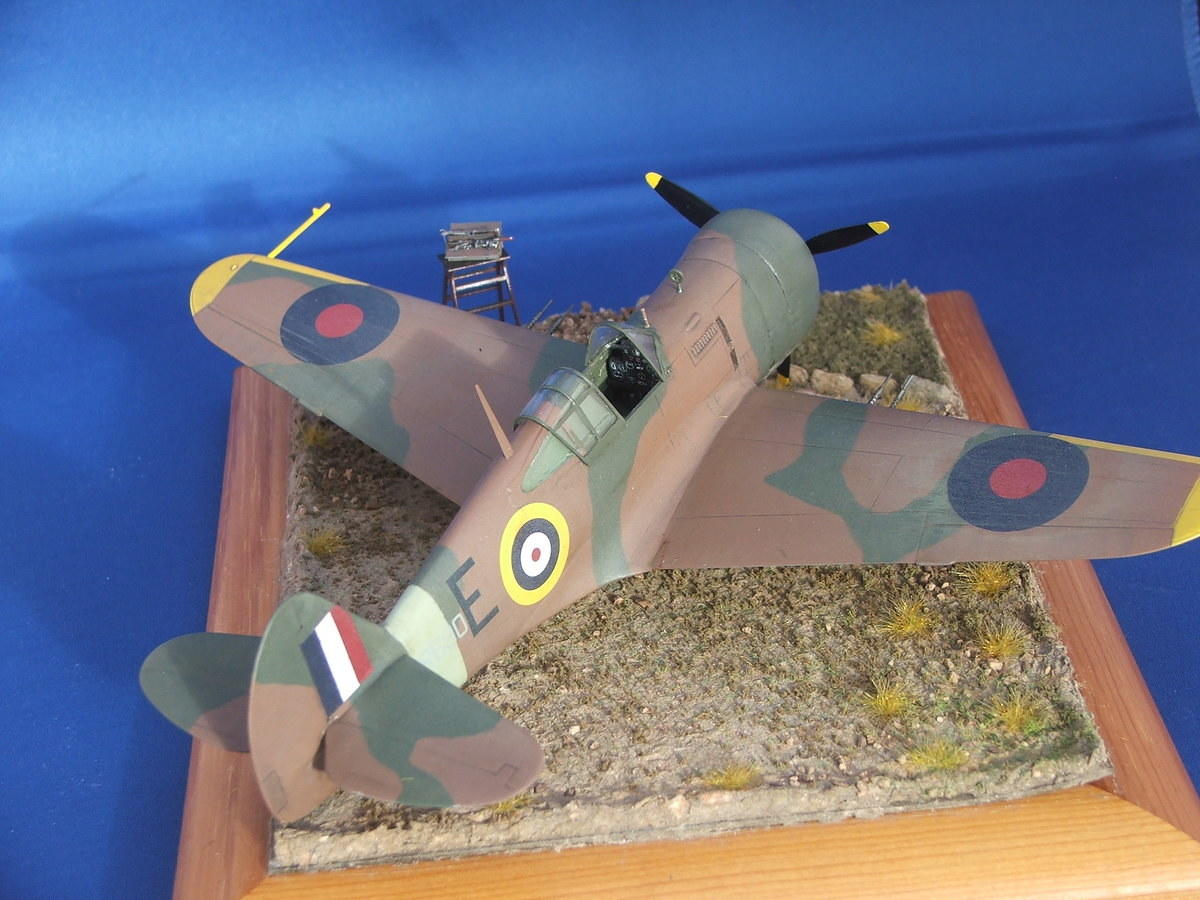
This build will act as a preliminary to that project as it involves a plane that was used by 5 Squadron in India/Burma in the end of 1941 until it was replaced by Hurricane IIc and IId in June 43 after which in Nov 43 my father was posted there from his time with 81 Sqn in North Africa and Sicily (more on that time period later).

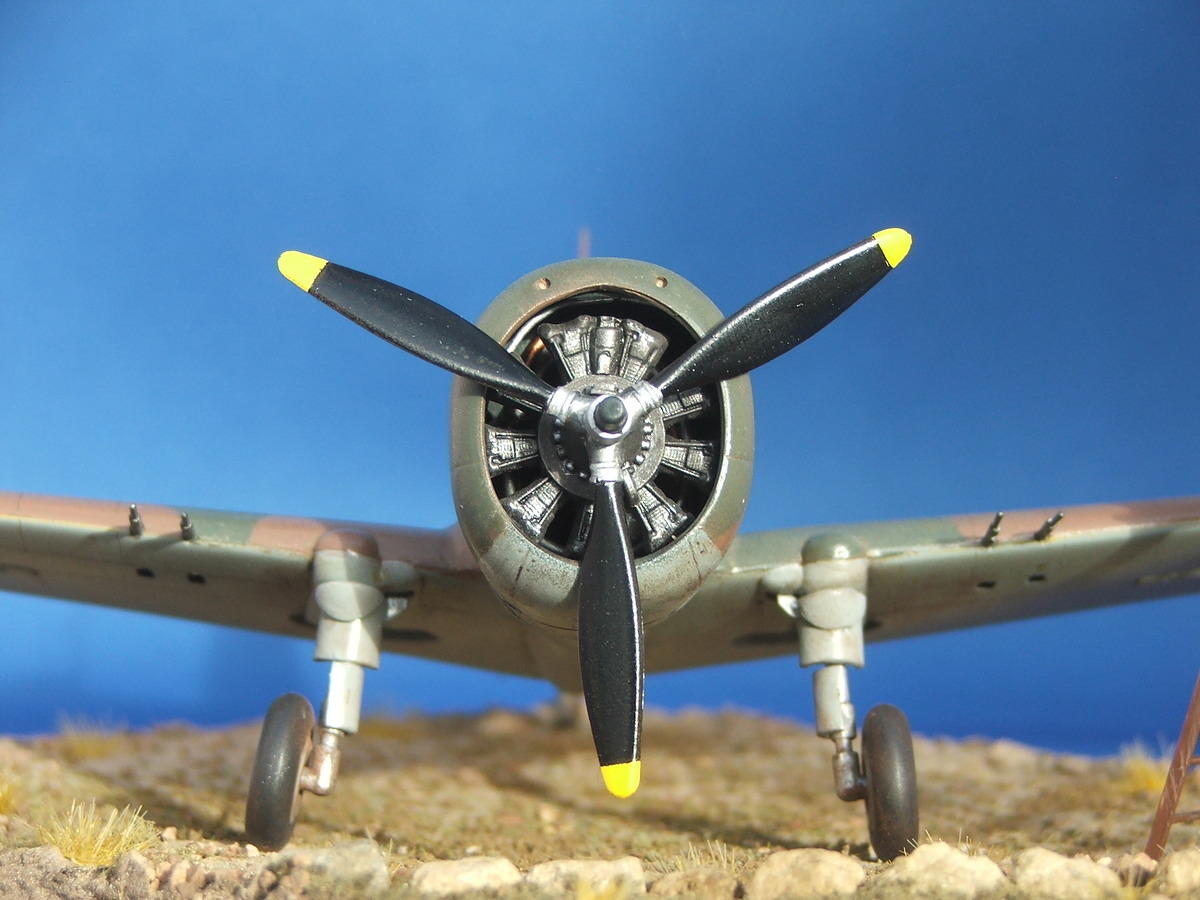
The Curtiss Mohawk IV (also designated Curtiss P-36 Model 75) was considered a formidable fighter in close dogfighting by the Japanese air forces. The RAF's Mohawk IVs came from at least three different sources. The majority of them were part of a French order for 795 Hawk H75A-4s. These were powered by a 1,200hp Wright R-1820-G205A Cyclone engine, replacing the Pratt & Whitney engines of the earlier French aircraft and the Mohawk I, II and III. They were armed with six 7.5mm guns, two in the nose and four in the wings.

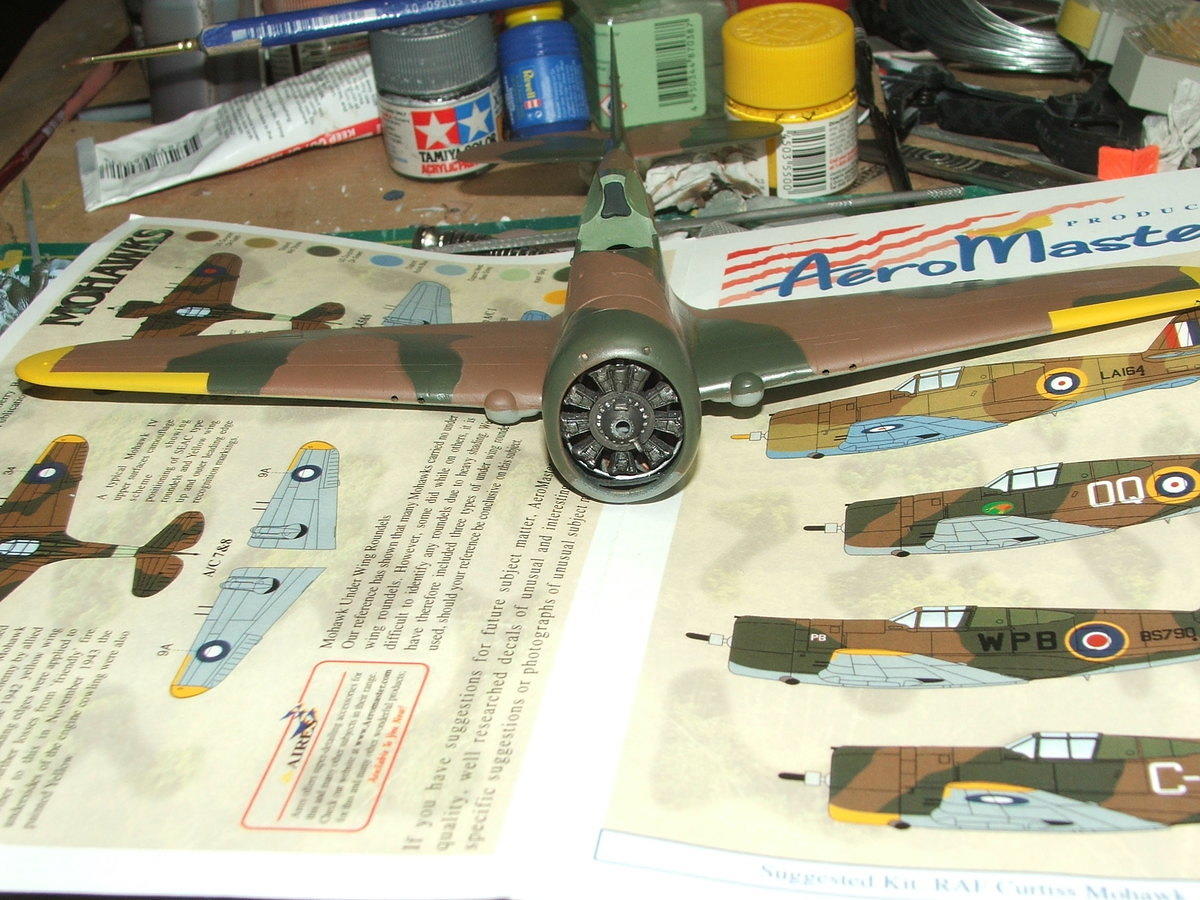
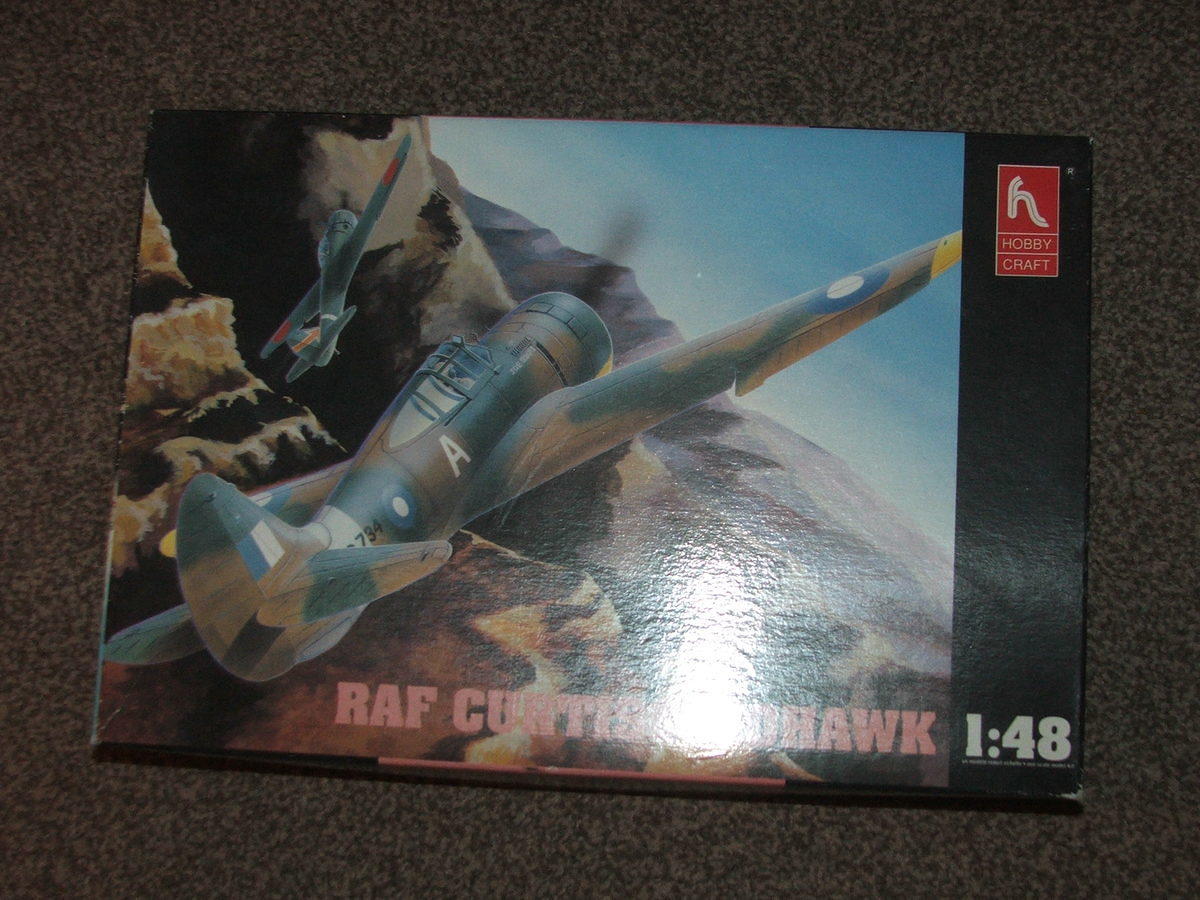
The source kit is an old one from HobbyCraft:

Image

and here is the sprue shot:

Image

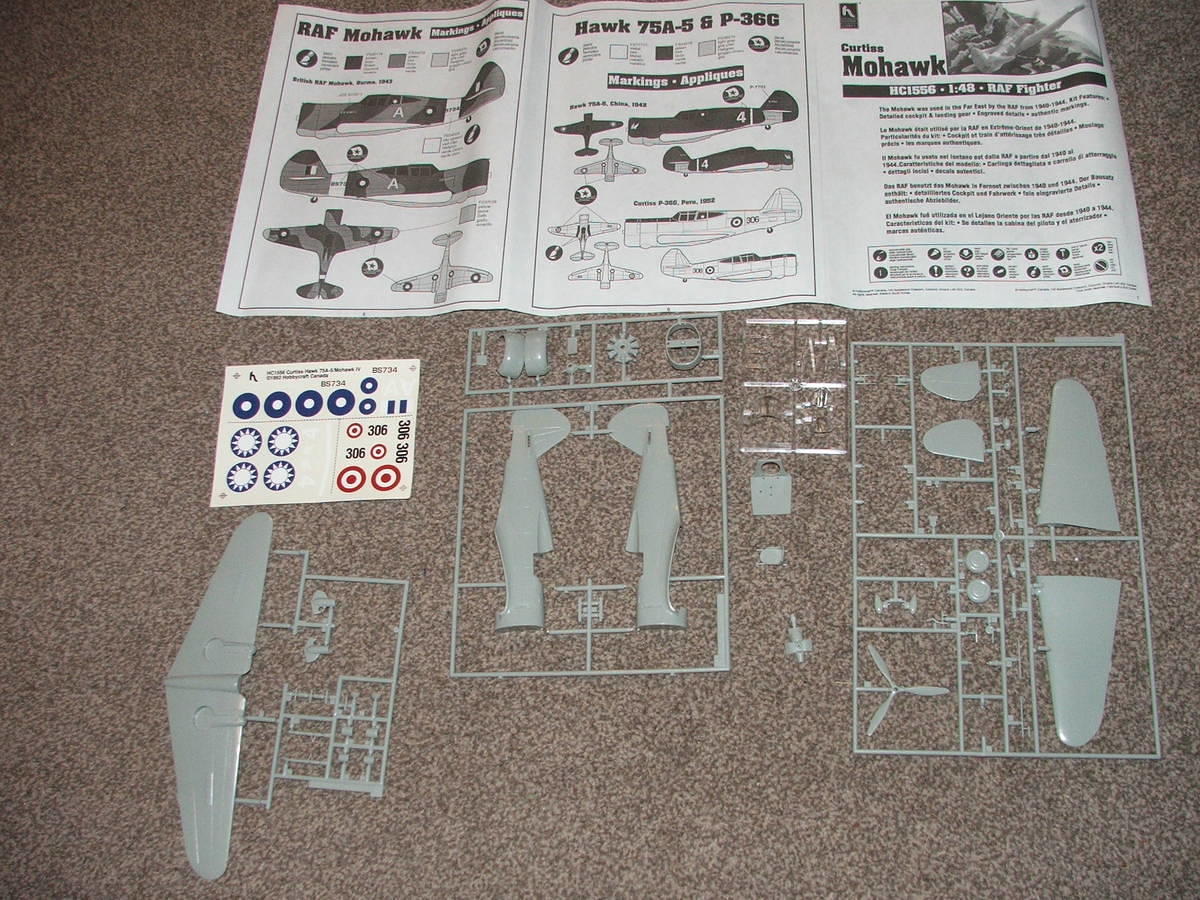
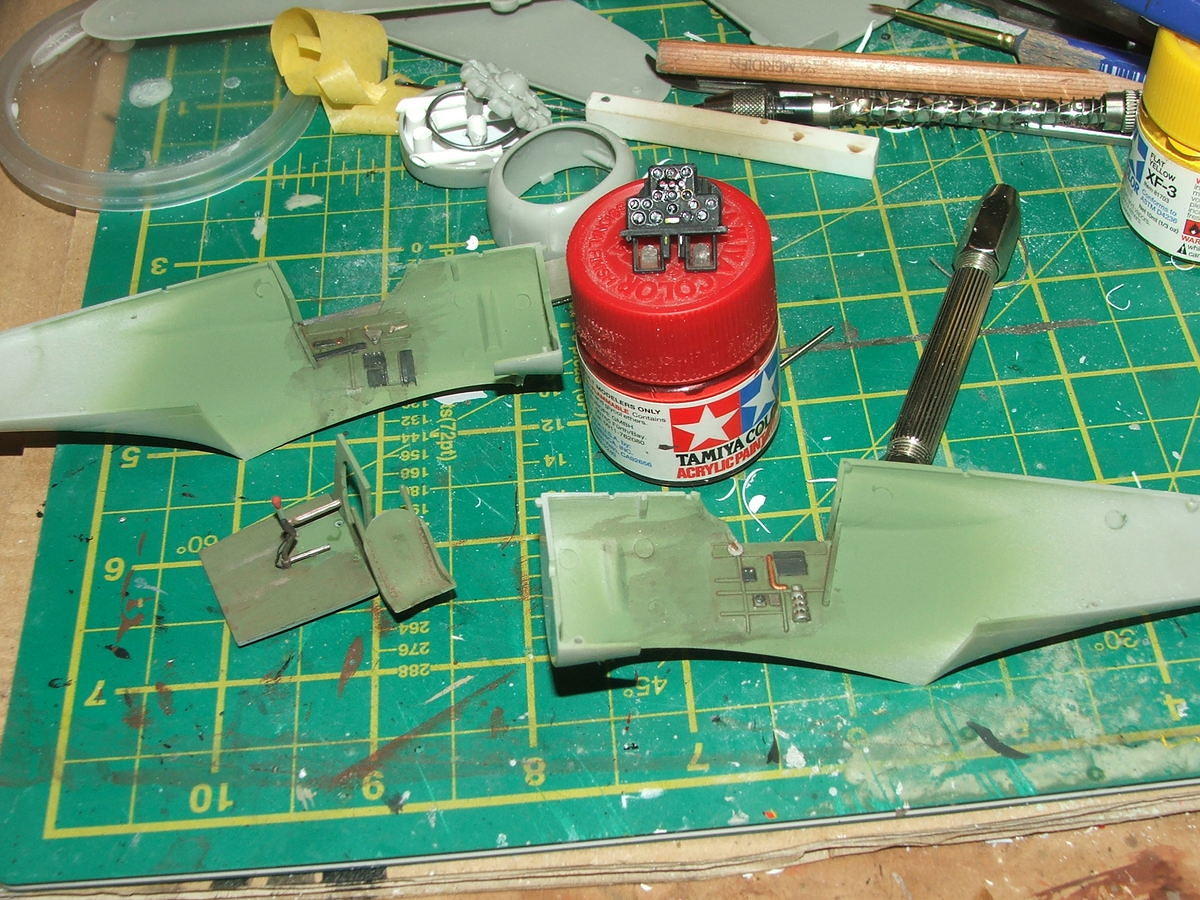
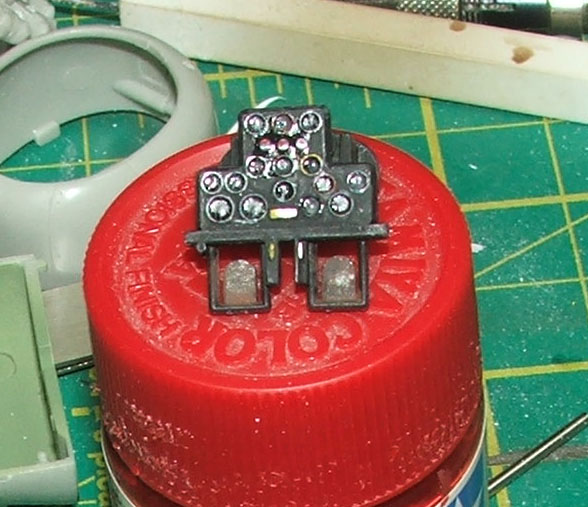
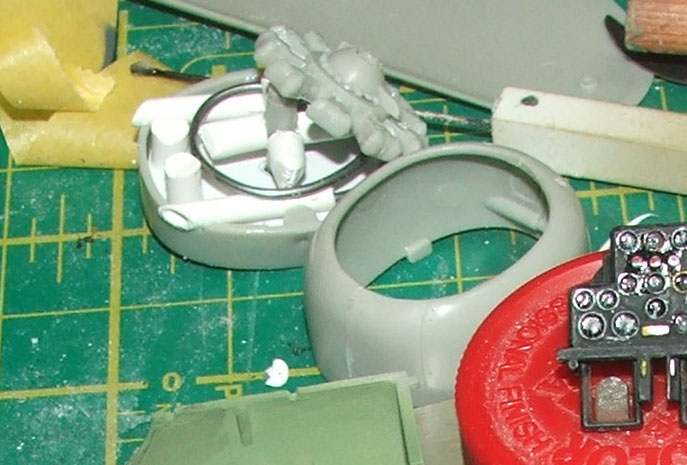
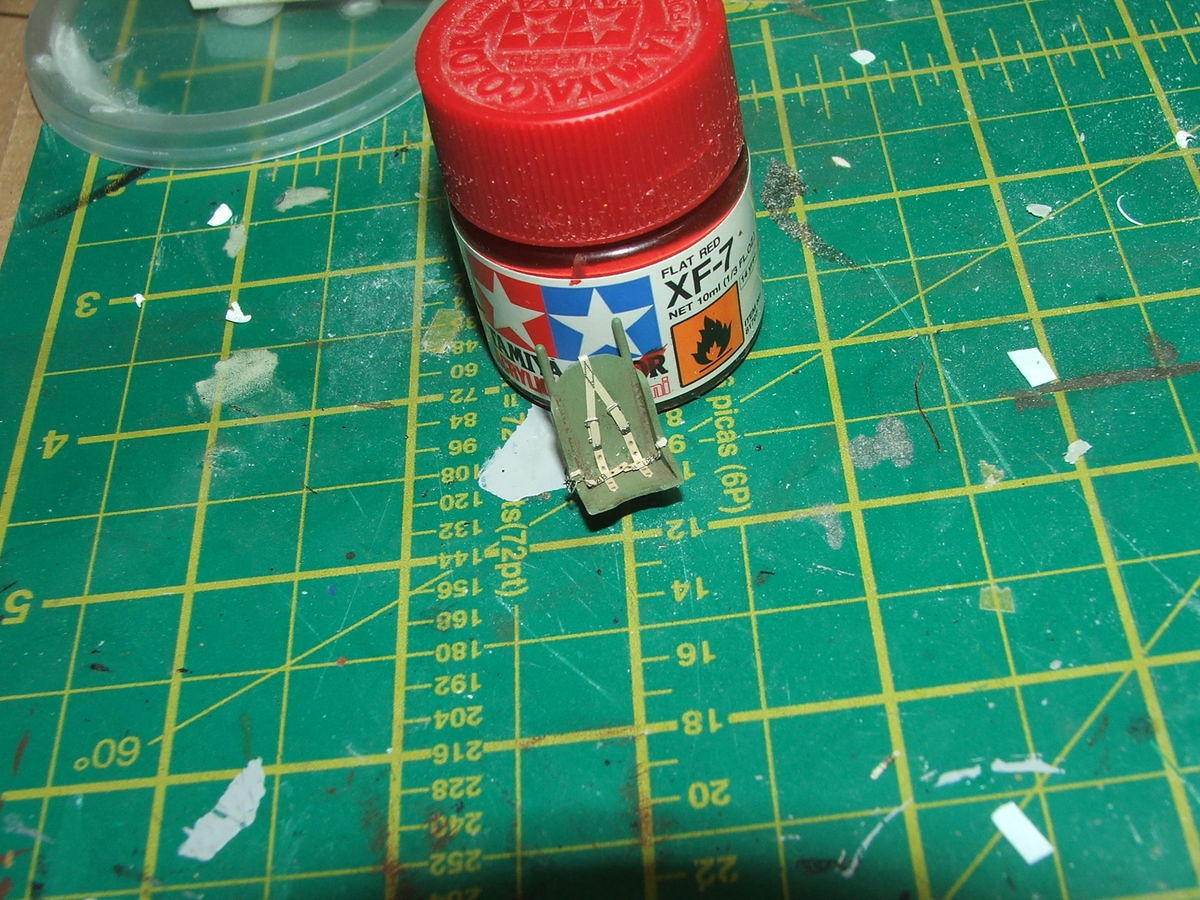
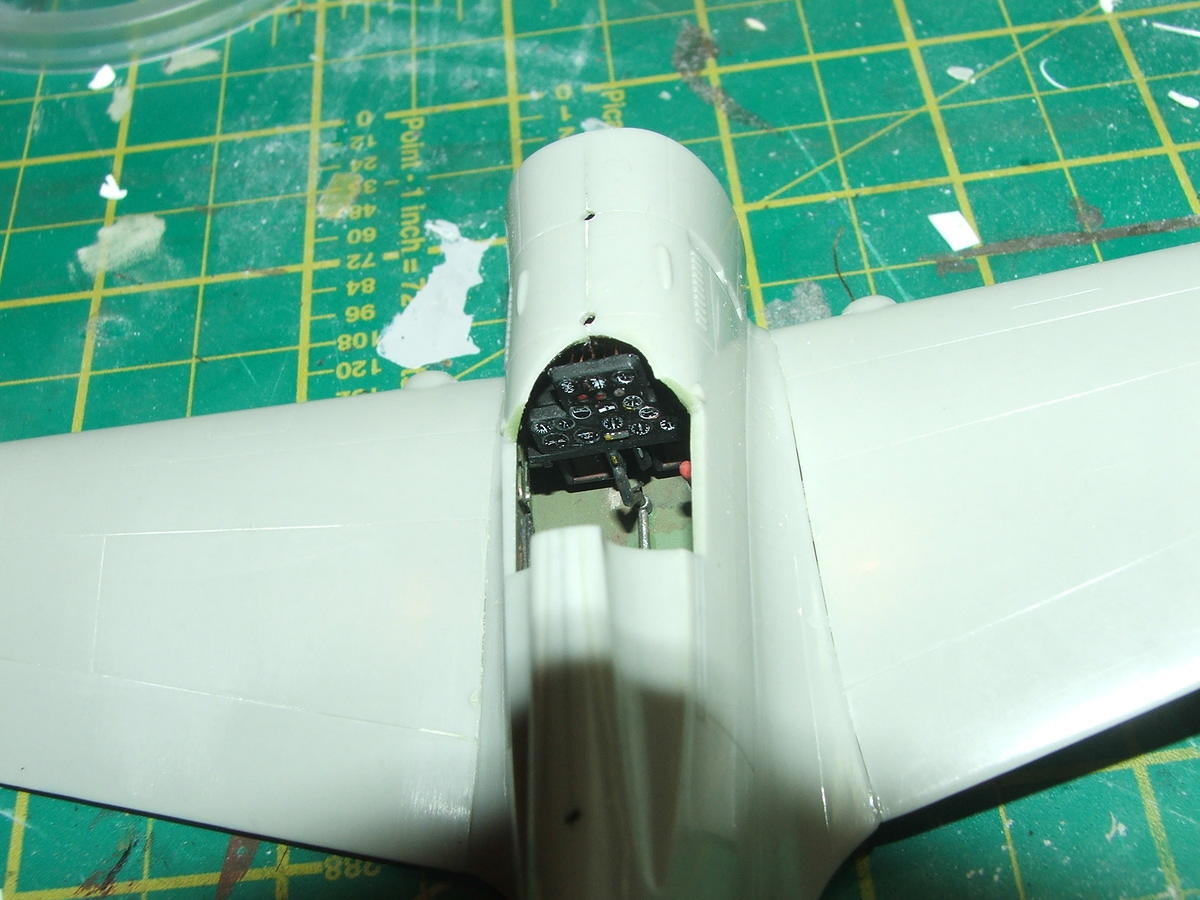
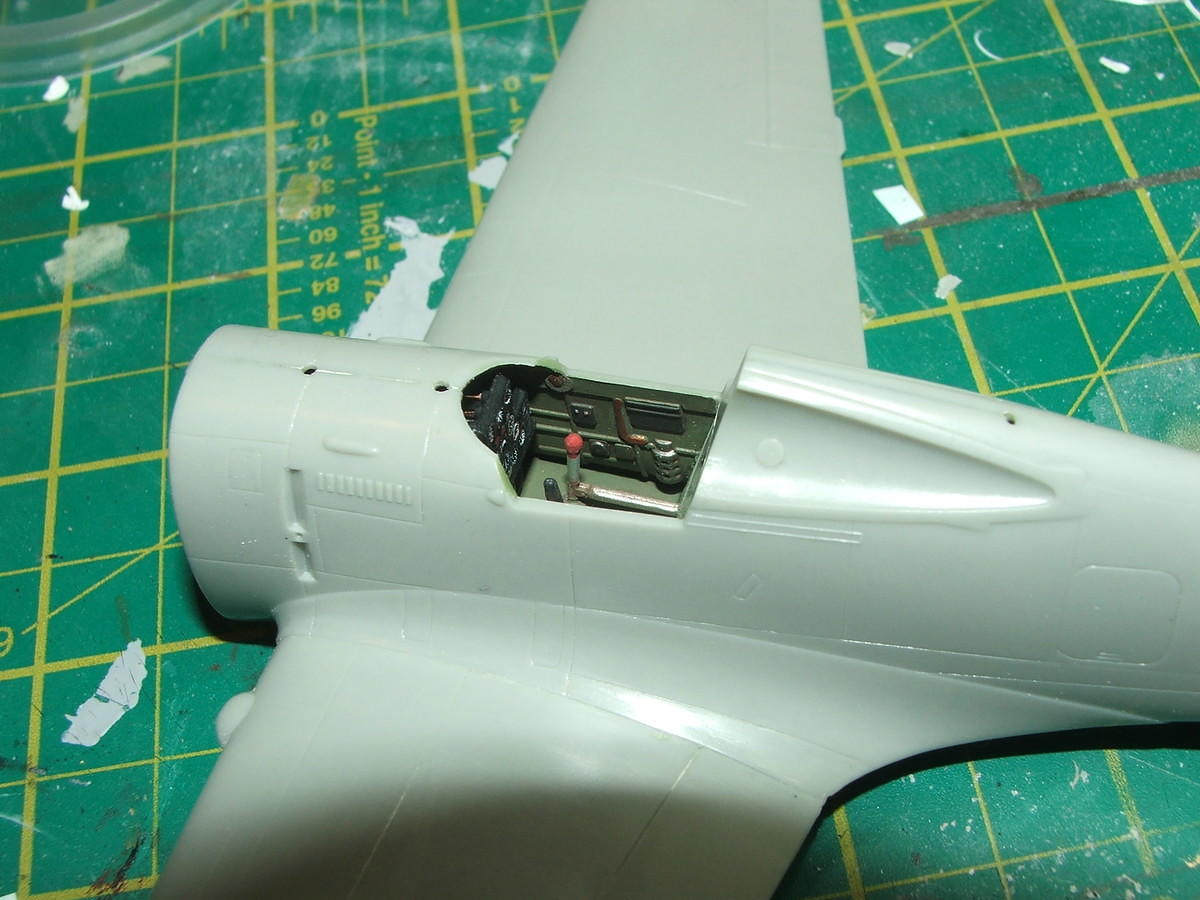
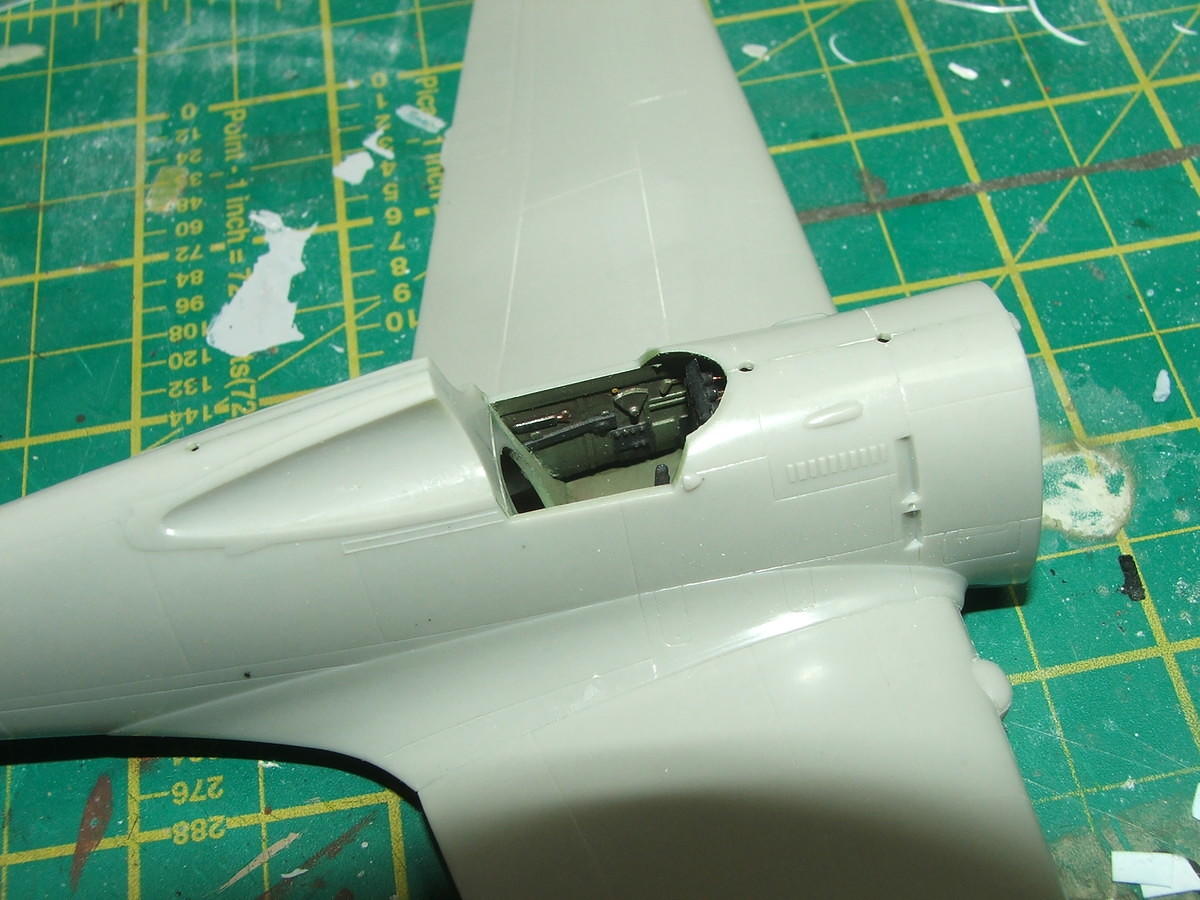
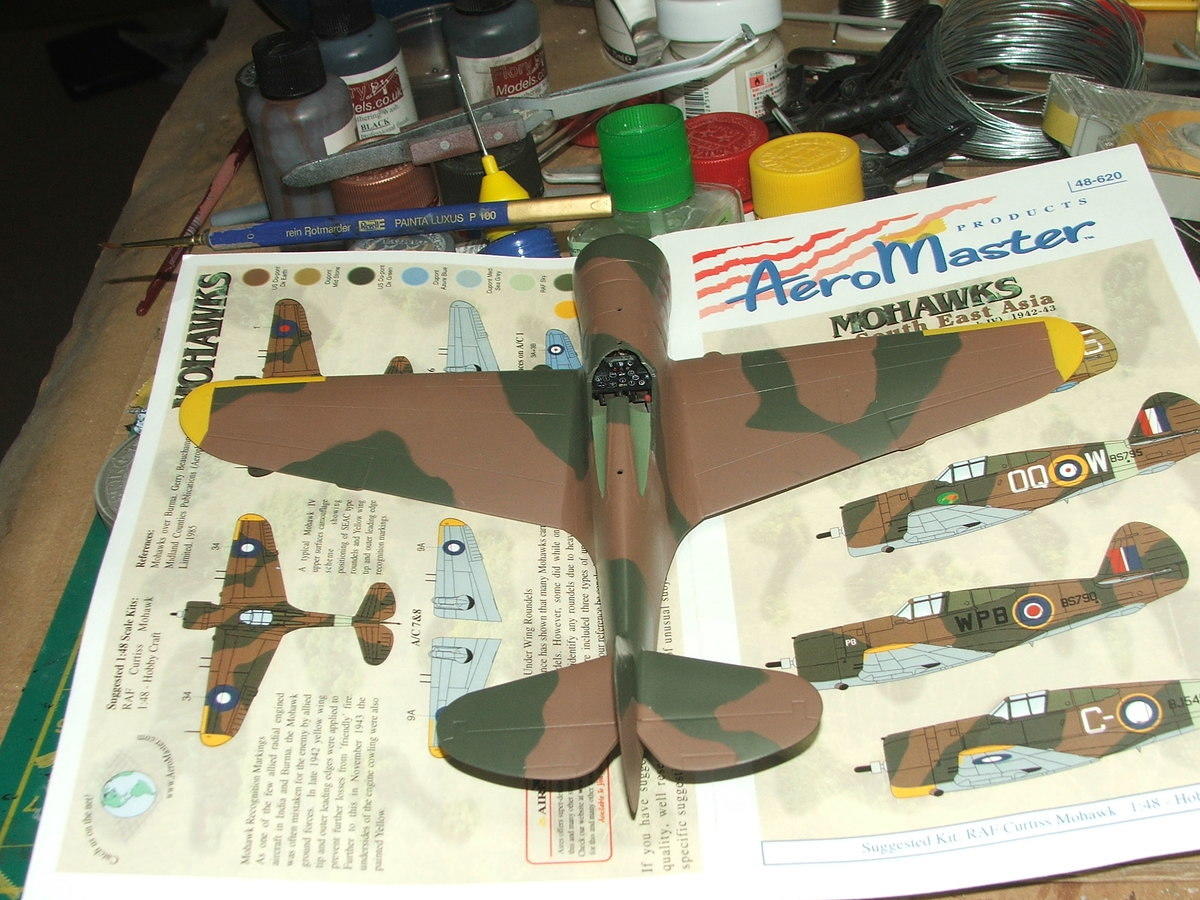
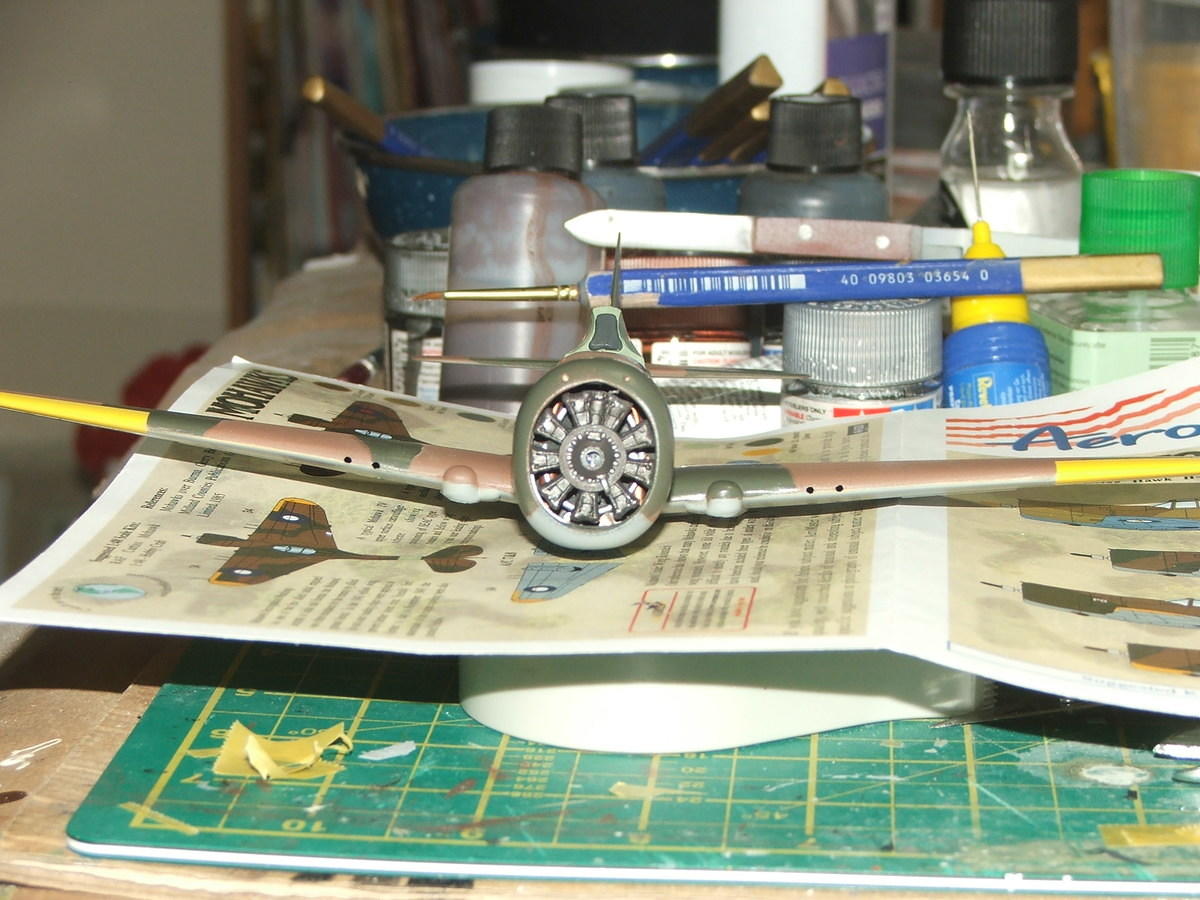
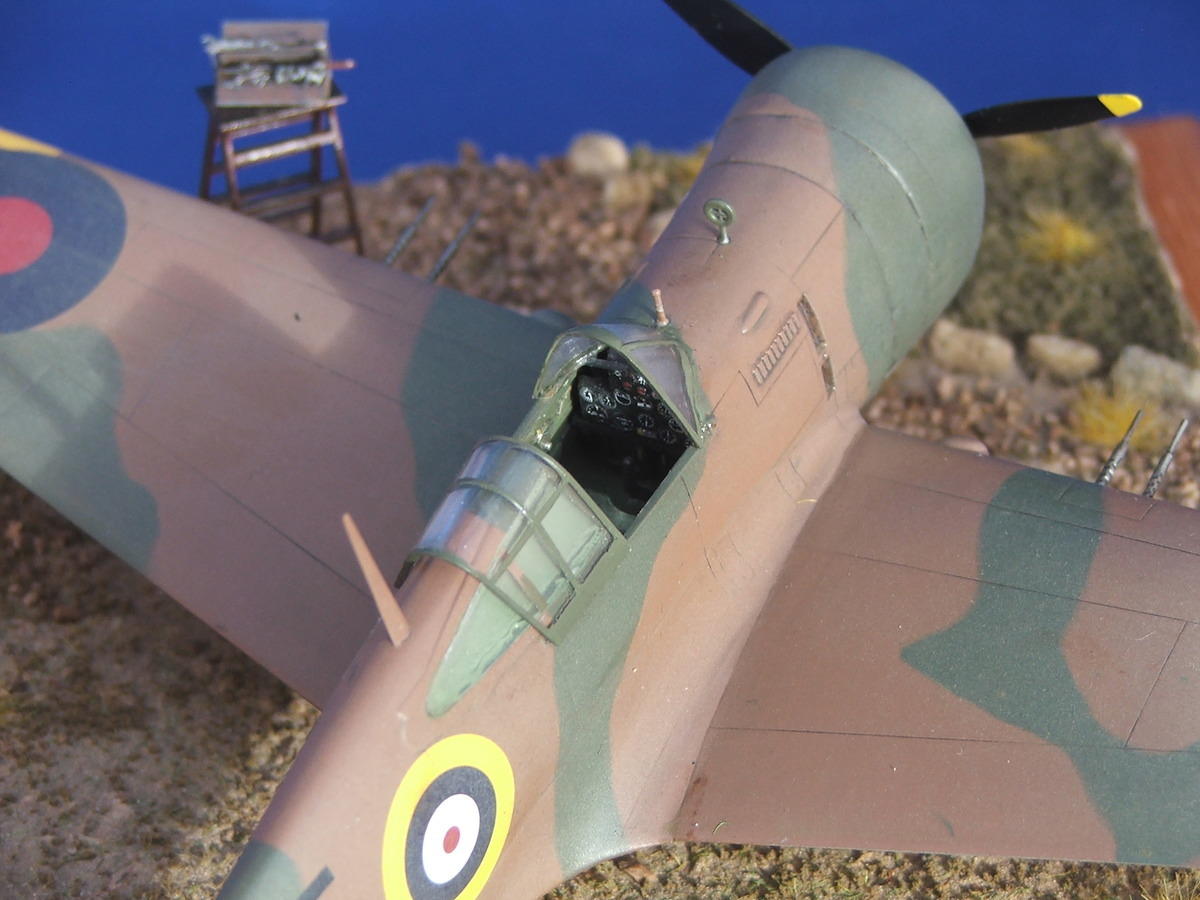
As you can see, its not a complicated kit! The cockpit is a bit basic and I can't really find any further information about it, so looks like I'll have to make do with a decent paint job and keep additional details to the obvious (seatbelts predominantly), althogh there does seem to be a deliberate gap between the back of the instrument panel and the top of the canopy which looks like it would reveal the back of some of the dials and so some wires ought to be in order!

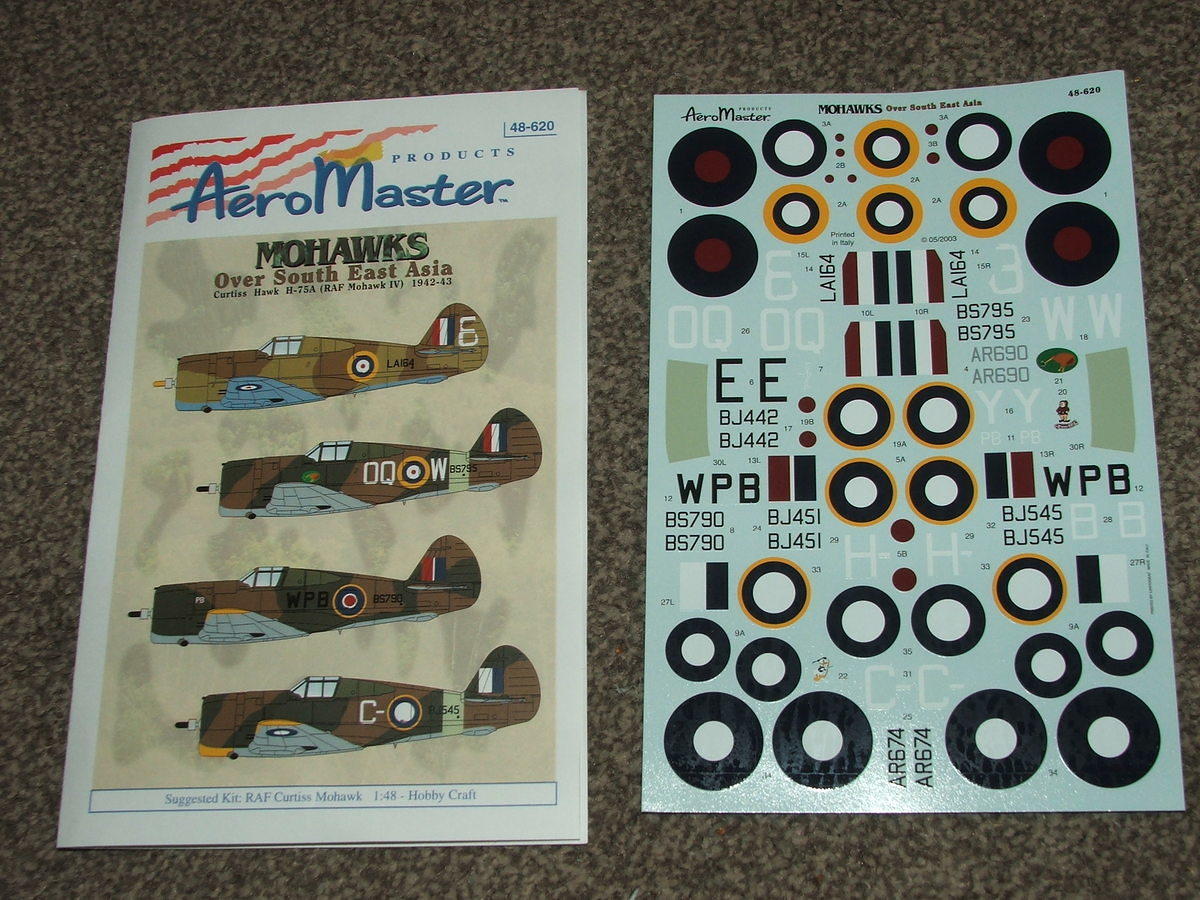
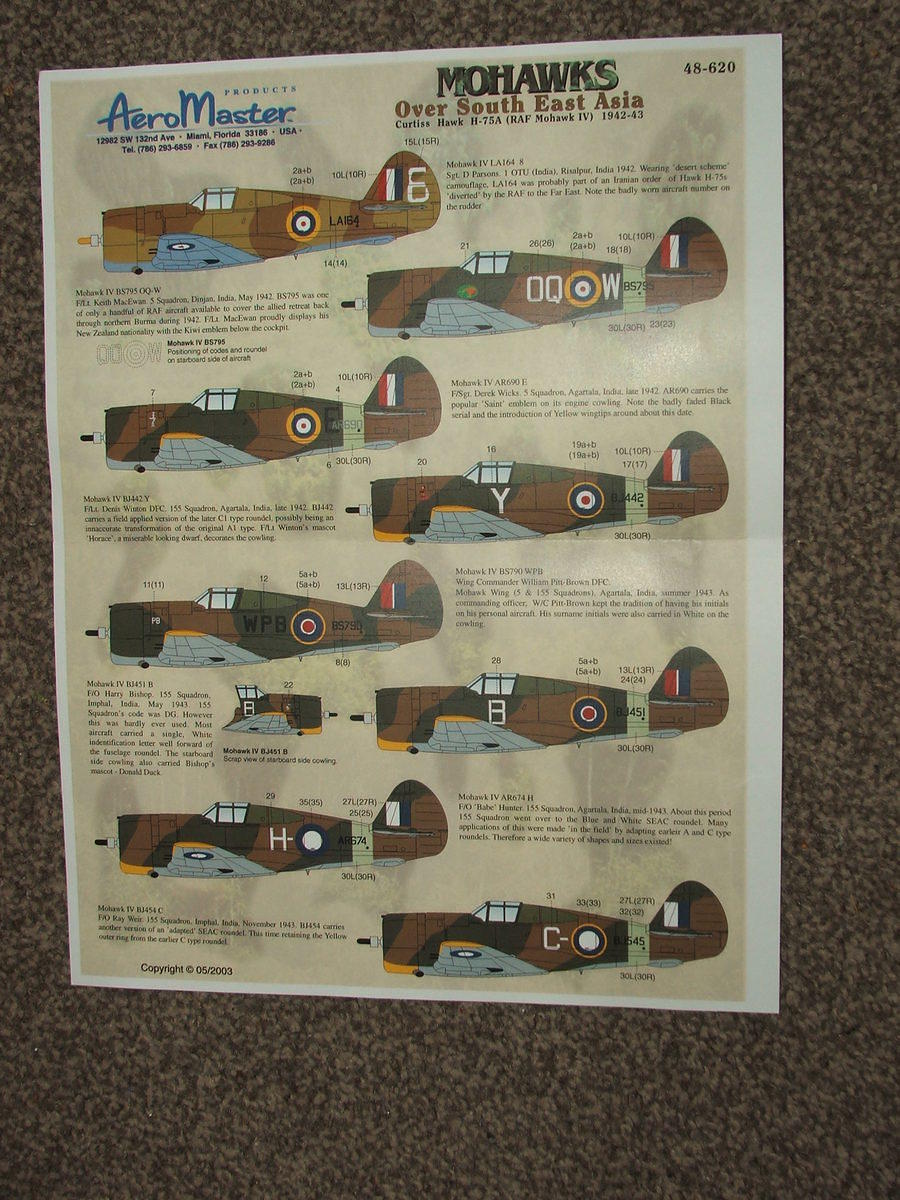
The kit details a colour scheme that simply says Burma, but it just so happens to corrspond to the markings for a 5 Sqn machine, so thats a happy coincidence!

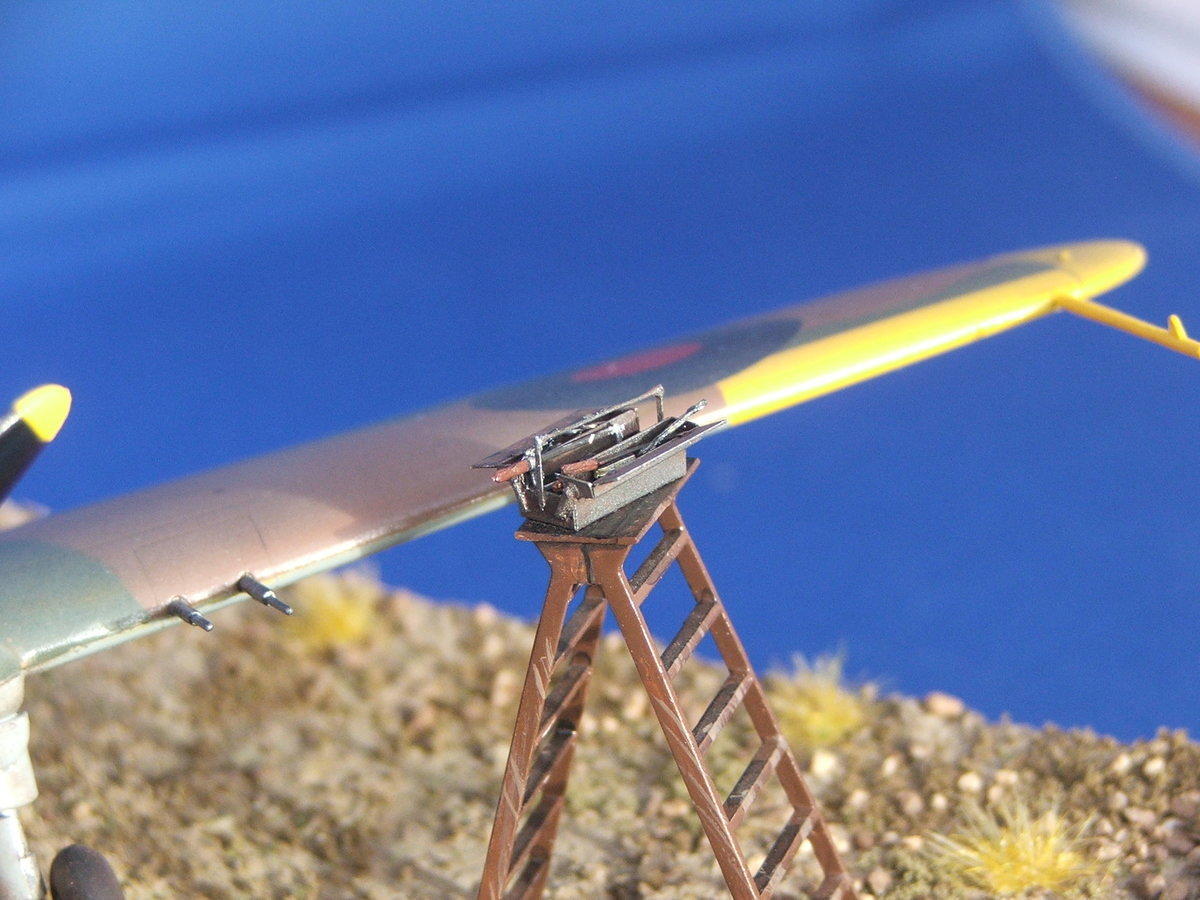
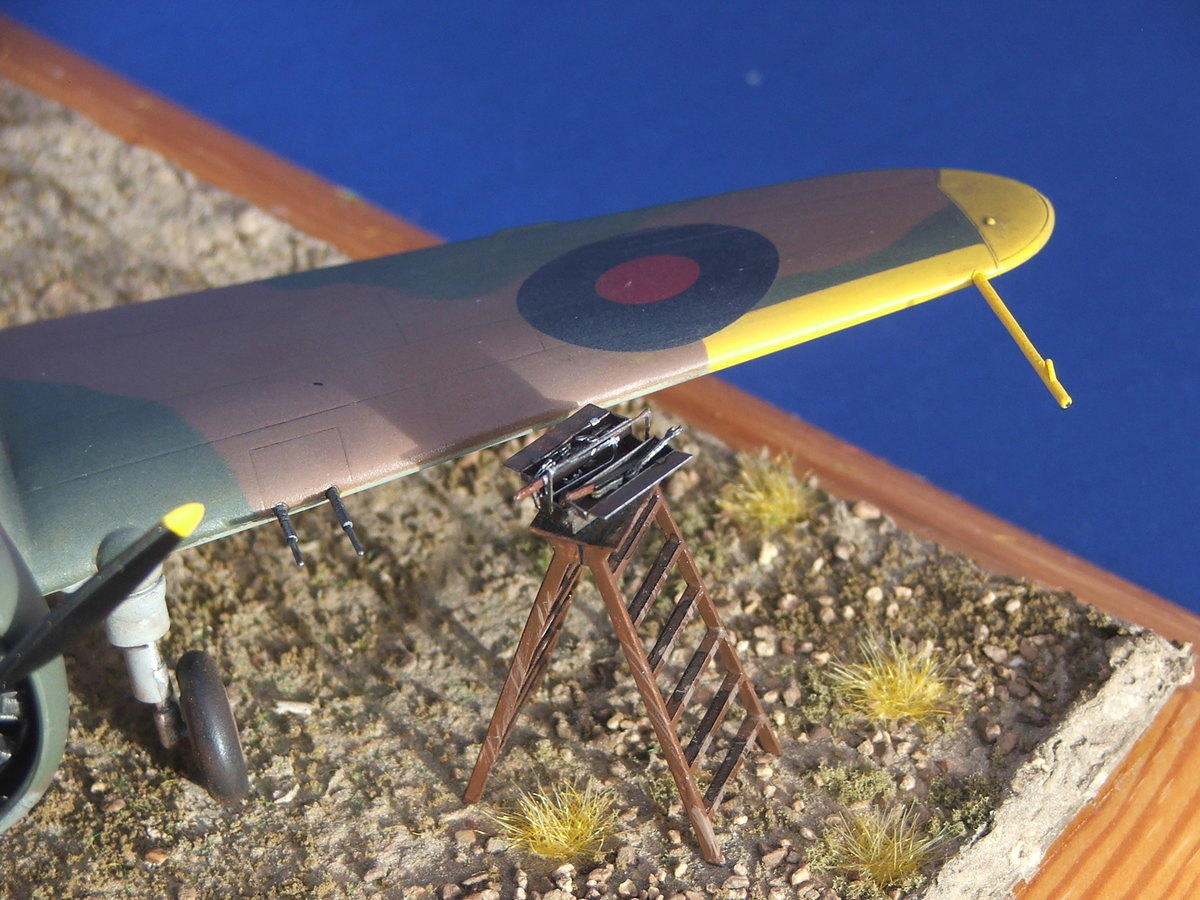
Needless to say I'll be putting it on a small base with groundwork to hopefully represent an airstrip in Burma.
User avatar
Boldman
The Bug Has Well And Truly Bitten
Posts: 310
Joined: November 18th, 2011, 10:31 pm

Re: 1-48 RAF Curtiss Mohawk IV from HobbyCraft

Post by Boldman »

Smooth progress -its a relatively simply kit.

Here is the cockpit pre-fuselage assembly

Image

and here is a close up of the instrument panel:

Image

After this was taken, some WWII instrument panel decals arrived from airscale and were added. You'll see the result further down - it looks pretty good I reckon. In the background you'll also see the scratch building I've done to put behind the engine piece to fill up the engine cowling a bit. When I driy fitted everything, it was pretty obvious that there was a huge gaping space behind the small engine piston casing piece, so I just filled up the space with some bits of plastic and wire. you won't really be able to see much, but at lest there will be something and not a load of empty space! You can see it better in this close up:

Image

So as you can see the seat is a bit plain - thankfully I've got an old PE fret with RAF-style seatbelts so I used them. I'm making as assumption that these aircraft had the american-style seatbelts replace by RAF ones, like they did with the Mustangs. I've no real evidence either way:

Image

The fuselage went together without drama, a few small spots of filler and some sanding in front of the cockpit and underneath, but otherwise not too much trouble. So this is what the cockpit looks like inside. I haven't put the seat in yet:

Image

You can see the dial decals here and if you look carefully in the gap behidn the instrument panel, you can see the wires I added that connect to the upper dials. Side views - these details were moulded into the sides of the fuselage and was very neat.

Image

Image

and finally this evening I attached the wings to the fuselage. With the wings, I had to drill out the 4 holes for the machine guns and slots in the underside for the shell ejects. This is where I encountered the first poorly fitting parts - the front of the wing and fuselage joint had a large gap, so I've filled it with Mr Dissolved Putty and when that dries I'll sand it smooth

Image

So there is is for now, the engine, cowling and propeller have been primed ready for painting.
User avatar
Jagewa
Modelling Gent and Scholar
Posts: 2752
Joined: April 6th, 2011, 2:18 am
Location: Christchurch, New Zealand
Contact:

Re: 1-48 RAF Curtiss Mohawk IV from HobbyCraft

Post by Jagewa »

Smooth work, I do like the lines of the Mohawk.

Cheers
Jim
User avatar
AndrewR
In the basement lab
Posts: 24108
Joined: April 5th, 2011, 4:13 pm
Location: Ottawa, Ontario, The Great White North
Contact:

Re: 1-48 RAF Curtiss Mohawk IV from HobbyCraft

Post by AndrewR »

Nice work on the cockpit. :)
Up in the Great White North
User avatar
Martin R
Modelling Gent and Scholar
Posts: 4695
Joined: May 1st, 2011, 7:53 am

Re: 1-48 RAF Curtiss Mohawk IV from HobbyCraft

Post by Martin R »

Nice bit of painting! I think it'll look great in the RAF colours.

regards,

Martin
User avatar
Boldman
The Bug Has Well And Truly Bitten
Posts: 310
Joined: November 18th, 2011, 10:31 pm

Re: 1-48 RAF Curtiss Mohawk IV from HobbyCraft

Post by Boldman »

Thanks guys :)

One thing I only realised yesterday is I had sourced the Aeromaster decals for Mohawks over South-East Asia for this build!

Image

Image

This was very fortunate as the kit instructions are very lacking in specific colour call outs! I will be building the 3rd one down in this set - it has a little "saint" on the cowling and represents the 5 Sqn Mohawks near to when my father joined the squadron.

So main assembly has been complete - the engine went together and was attached to the main fuselage and so it came down to painting...

Image

I cheated a bit on this as its likely that the colours used on this plane were the American versions of RAF Green and Dark Earth, but I'm going to be weathering the colours down so as a base I used the Tamiya RAF Dark Green and Medium Sea Grey from their rattle can range (AS-30 and AS-32 respectively) simply because I had some left over from previous builds. I used a 50/50 mix of XF-52 Flat Earth and XF-64 Red Brown for the Dark Earth colour. The yellow is plain XF-3 Yellow.

Here you can see into the engine space:

Image

which works as I wanted it to - you can see there are things behind the engine but you can't see in details whats there, however its not an empty space! In this view you can see the wire I added around the inside to represent the engine mounting frame:

Image

I've masked the canopies, so the next job is to get the undercarriage assembled and ready to fit. I will give this a coat of Klear now in preparation for the weathering. I want to fade the colours down to represent an aircraft thats been out in the sun and through a monsoon season...
User avatar
Migrant
Happily Landed after Many Circuits and Bumps
Posts: 2428
Joined: April 5th, 2011, 8:33 pm
Location: Calgary, Canada

Re: 1-48 RAF Curtiss Mohawk IV from HobbyCraft

Post by Migrant »

That's looking really nice, good work on the camo. Not sure if you've seen this but it's a re-box of the Hobbycraft/Academy kt with extra resin etc:-

Must Have Mohawk
User avatar
Boldman
The Bug Has Well And Truly Bitten
Posts: 310
Joined: November 18th, 2011, 10:31 pm

Re: 1-48 RAF Curtiss Mohawk IV from HobbyCraft

Post by Boldman »

Hi Migrant, yes I saw that AFTER I'd acquired the Hobbycraft version - I might pick one up for the stash as this is an interesting aircraft and I might want to try to build a better version that this turned out (see later)!

This is the Curtiss Hohawk IV,AR690 flown by F/Sgt Derek Wicks in late 1942 when 5 Sqn were based in Agartala, India. The kit is the Hobbycraft one with decals from the AeroMaster Mohawks over South East Asia set. Instrument dials were decals from airscale. Painted with Tamiya acrylics and using Mig Filters, Florymodels washes and an oil pin wash for panel lines.

I can't truthfully say its one of my best builds - several things went wrong or didn't turn out as I intended. For a start, the base didn't work as well as I expected. Its made up of a layer of claycrete (aka papier mache) which when it dried shrank much more than I expected, so pulled away from the edges and also lifted the base card up at the corners!

The major thing that went wrong however is I attempted to fade the paintwork using a new technique which didn't turn out at all well (as you can see!) It was a useful experiment in that it told me NOT to try this again!

To add some interest, I broke out the Aber toolbox PE I picked up a coupel of years ago and spent a headache inducing afternoon working with microscopic sized PE pieces to assemble the tools - each spanner came in two parts and the handles on the screwdrivers, files and hacksaw were also two extra pieces. The pliers and scissors were also two pieces. The toolbox should have been a 3 layer cantilever thing, but It was waaay too small and complicated! The steplader was robbed from my old Battle of Britain diorama and comes from the ICM RAF ground crew set.

Okay enough talking, here are some photos!

Image

Image

Image

Image

Image

Image

(this photo showed me that some of the machine guns are a bit crooked!)

Toolbox:
Image

Image
User avatar
PaulBradley
Staring out the window
Posts: 21219
Joined: April 6th, 2011, 3:08 pm
Location: Flagstaff, AZ

Re: 1-48 RAF Curtiss Mohawk IV from HobbyCraft

Post by PaulBradley »

I think that turned out very nicely - what a great tribute!
Paul

За демократію і незалежний Україну

"For Democracy and a Free Ukraine"
User avatar
Nax
Modelling Gent and Scholar
Posts: 1193
Joined: December 26th, 2011, 2:09 am
Location: Wagga, Australia

Re: 1-48 RAF Curtiss Mohawk IV from HobbyCraft

Post by Nax »

Terrific build and dio mate, it looks great. ;-)
Steve/Nax
Enjoying trying to make them look real.
User avatar
splash
Senior Service Rotorhead
Posts: 13828
Joined: May 1st, 2011, 11:02 am
Location: Somerset England

Re: 1-48 RAF Curtiss Mohawk IV from HobbyCraft

Post by splash »

It looks brilliant from here.

Regards Splash
My work bench is starting to look like Portsmouth Naval Dockyard.
User avatar
Boldman
The Bug Has Well And Truly Bitten
Posts: 310
Joined: November 18th, 2011, 10:31 pm

Re: 1-48 RAF Curtiss Mohawk IV from HobbyCraft

Post by Boldman »

Thanks guys, the photos are great at hiding the faults, but up close the fading is a bit "meh" :(
User avatar
Softscience
Staring out the window
Posts: 7491
Joined: April 5th, 2011, 4:34 pm
Location: Maryland, near Washington DC

Re: 1-48 RAF Curtiss Mohawk IV from HobbyCraft

Post by Softscience »

Terrific job Boldy! I like the yellow wing tips, the toolbox and all the other little nice touches throughout.
User avatar
jssel
Still crazy after all these years
Posts: 12006
Joined: April 5th, 2011, 3:42 pm

Re: 1-48 RAF Curtiss Mohawk IV from HobbyCraft

Post by jssel »

Bravo. Great subject and workmanship.
Besting 60 years of mediocre building of average kits in the stand off scale
Lyell72planes
Likes Paint and Markings!
Posts: 930
Joined: May 1st, 2011, 11:36 am
Location: Virginia, USA

Re: 1-48 RAF Curtiss Mohawk IV from HobbyCraft

Post by Lyell72planes »

Great looking model. I like your vignette. :grin: Lyell
Classic British Kit Collector
Post Reply

Return to “Aviation Modelling”