Try here for some walkarounds of Hurricanes. They have some good pics.
http://www.primeportal.net/the_airstrip.htm;
1:32 Revell Hurricane IIC
-
forest1000

- Getting well comfy!
- Posts: 96
- Joined: December 8th, 2012, 1:47 am
- Location: Ontario, Canada
Re: 1:32 Revell Hurricane IIC
Dave
Ontario, Canada
2013 A:3 B:4 C:3
Ontario, Canada
2013 A:3 B:4 C:3

Re: 1:32 Revell Hurricane IIC
Thanks for the link, I'd already seen those which are useful but the fittings inside are modern and don't fully represent how it would have looked in 1944  The photos are useful for the wires and pipes however - I already had those in my library...
Re: 1:32 Revell Hurricane IIC
Big update over this weekend...
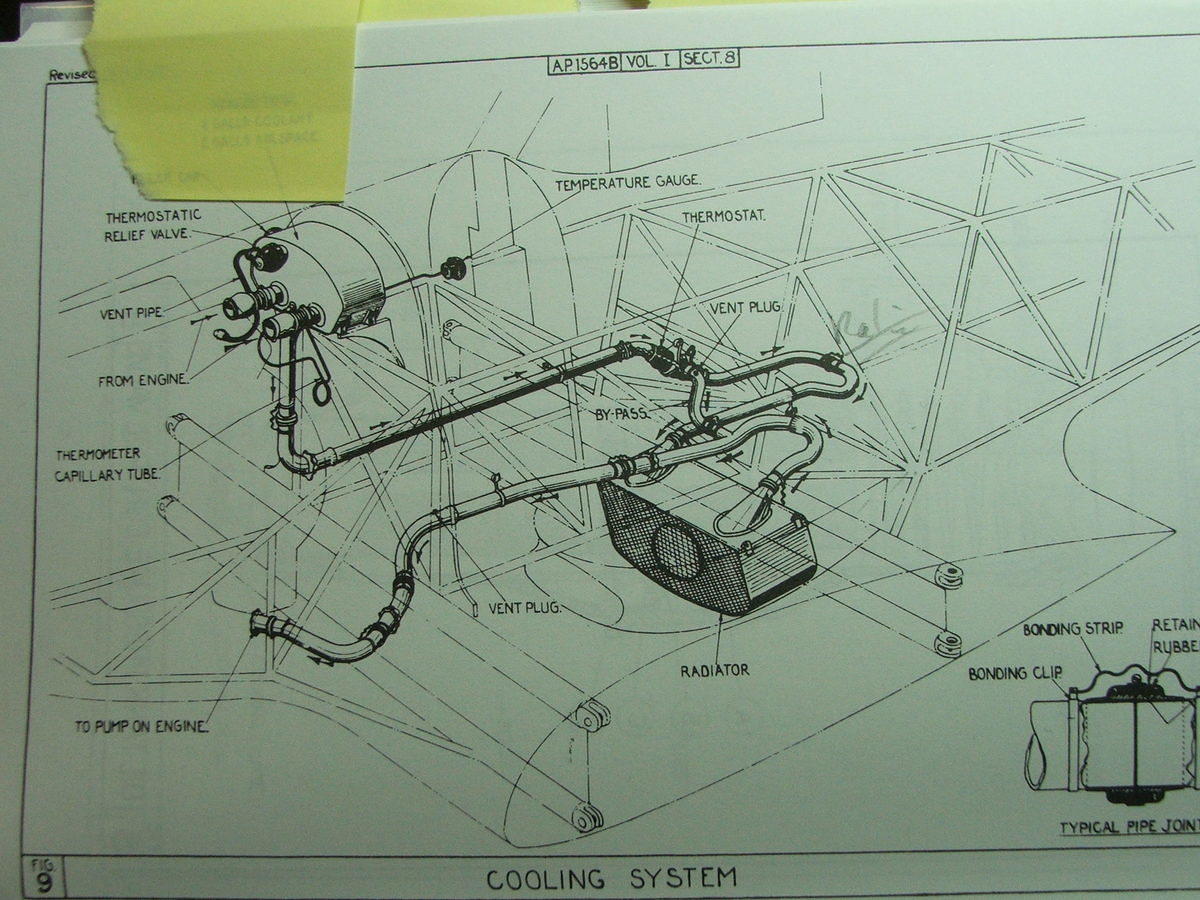
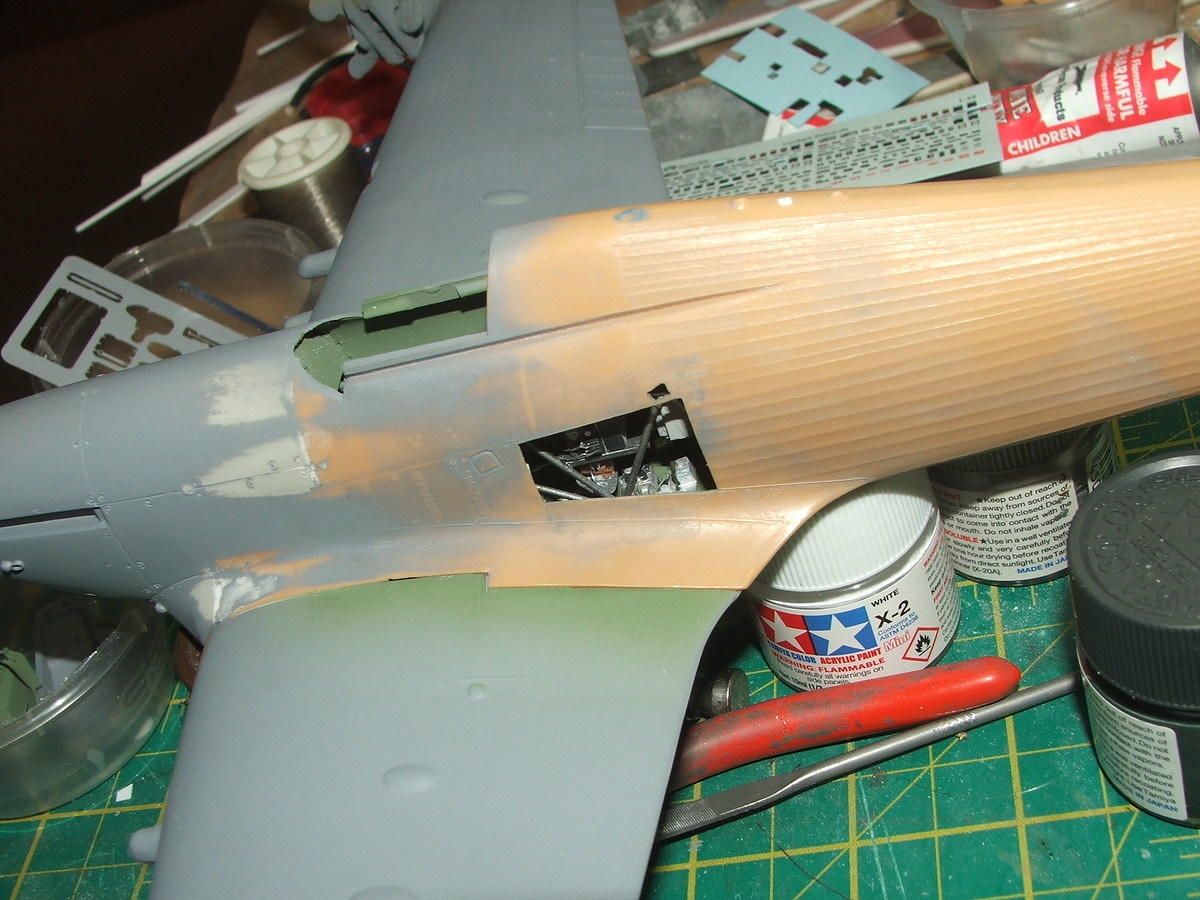
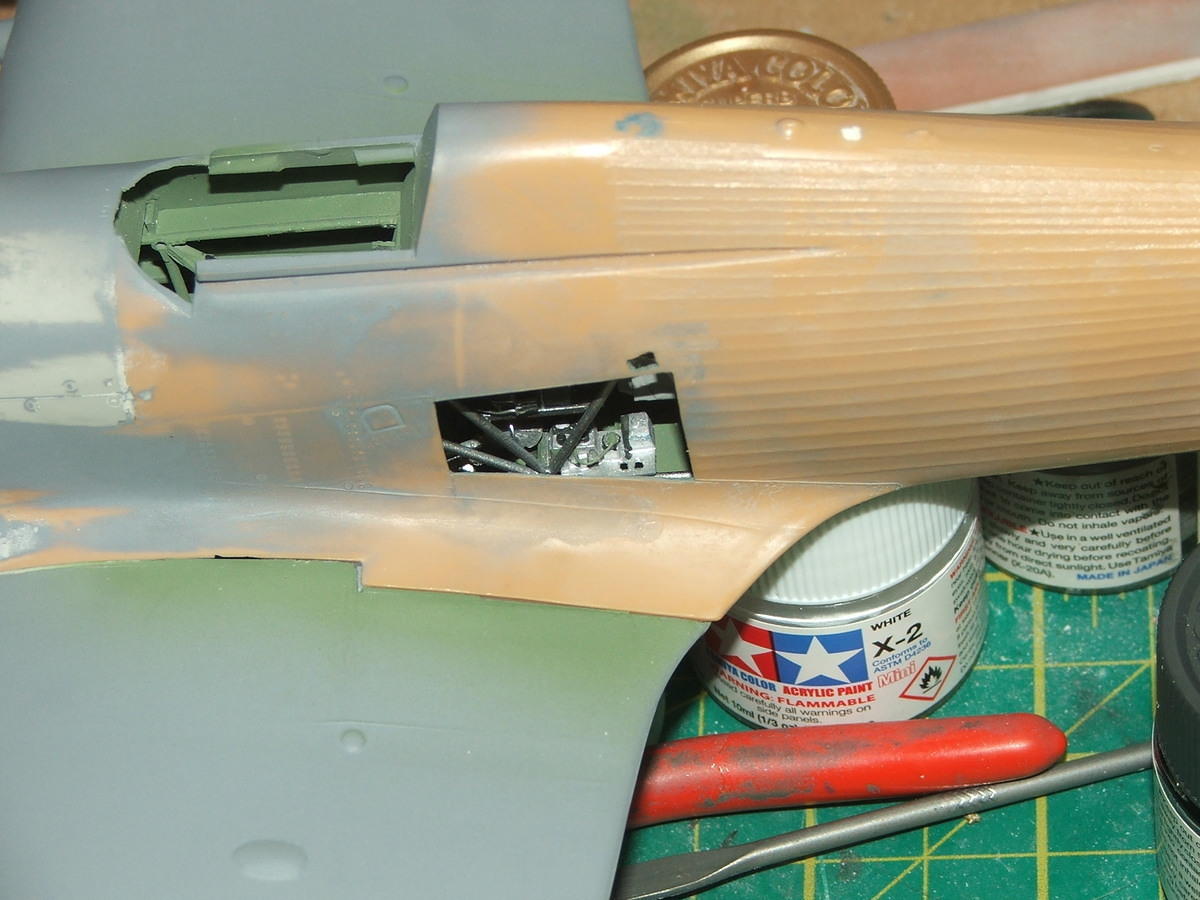
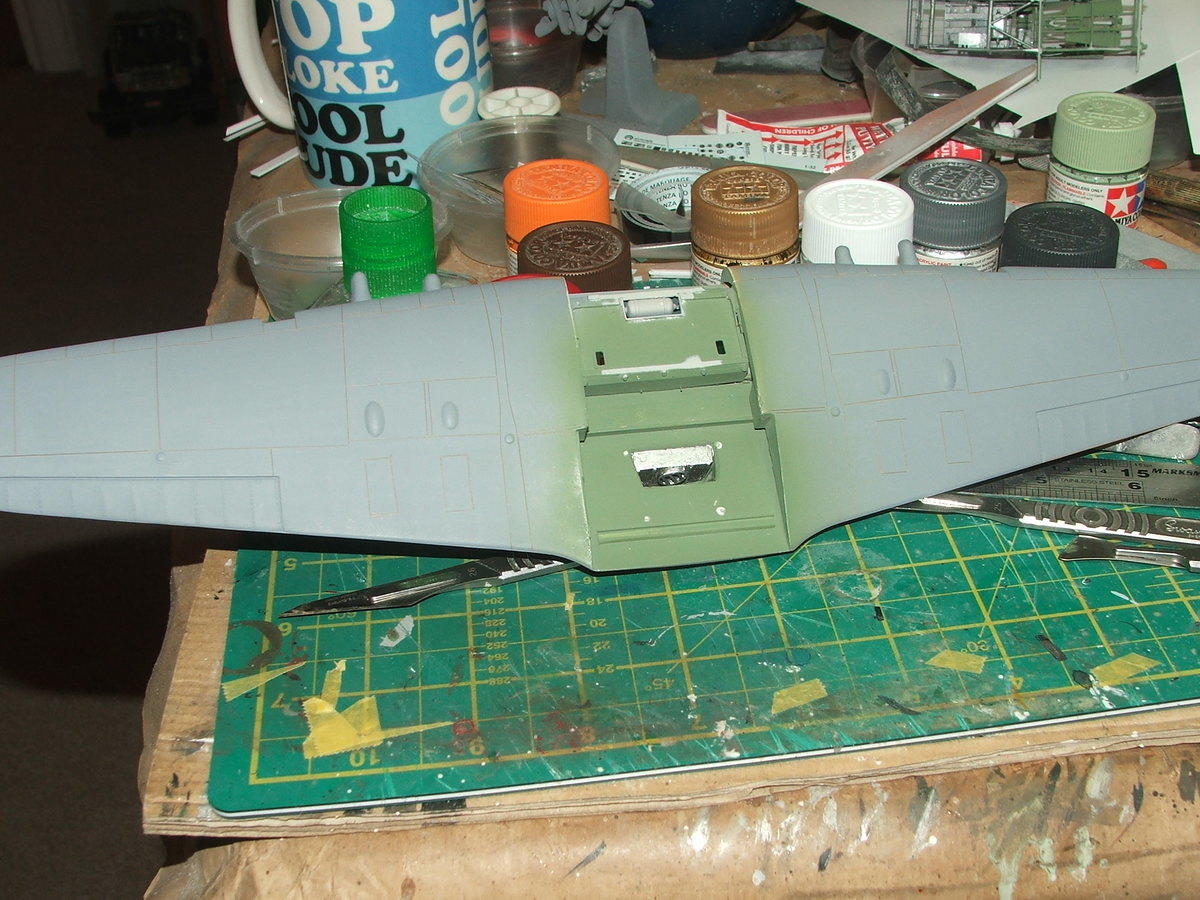
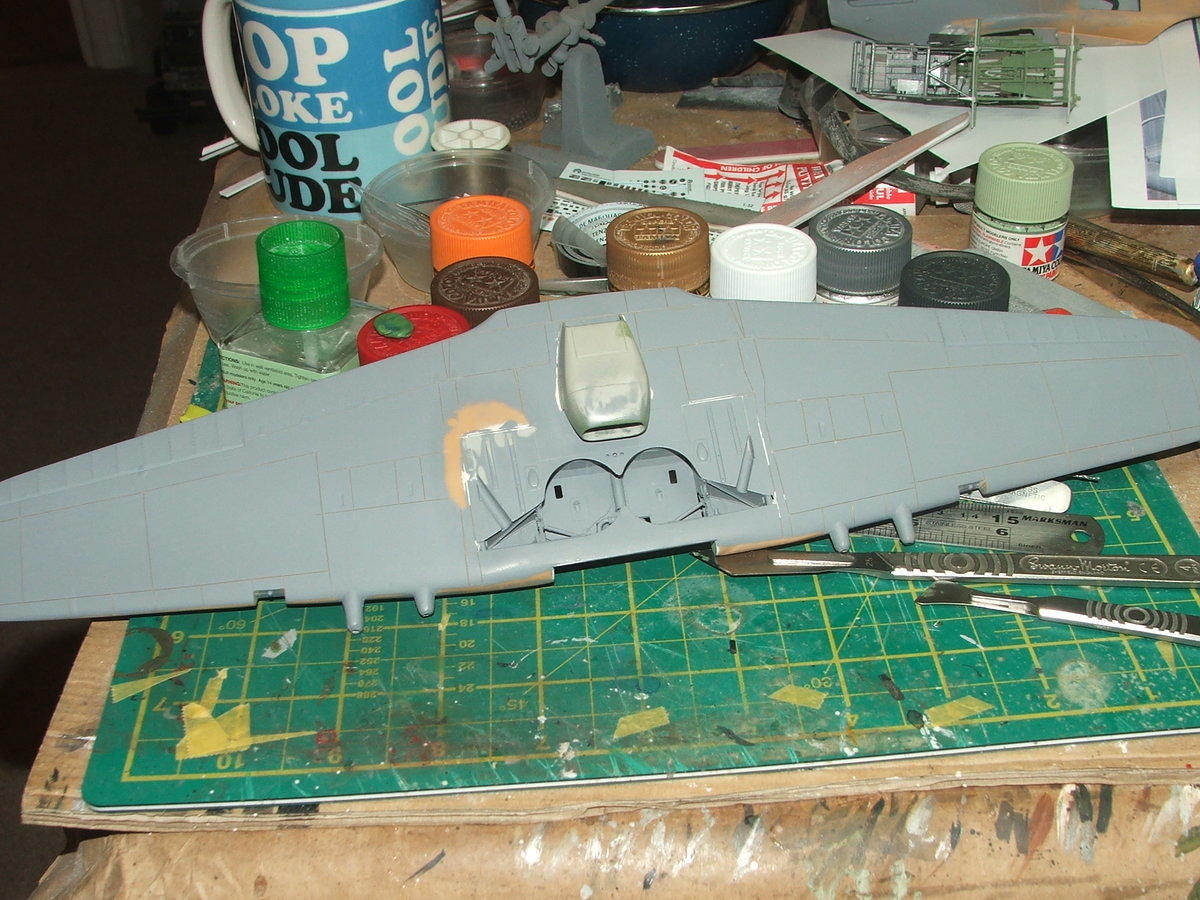
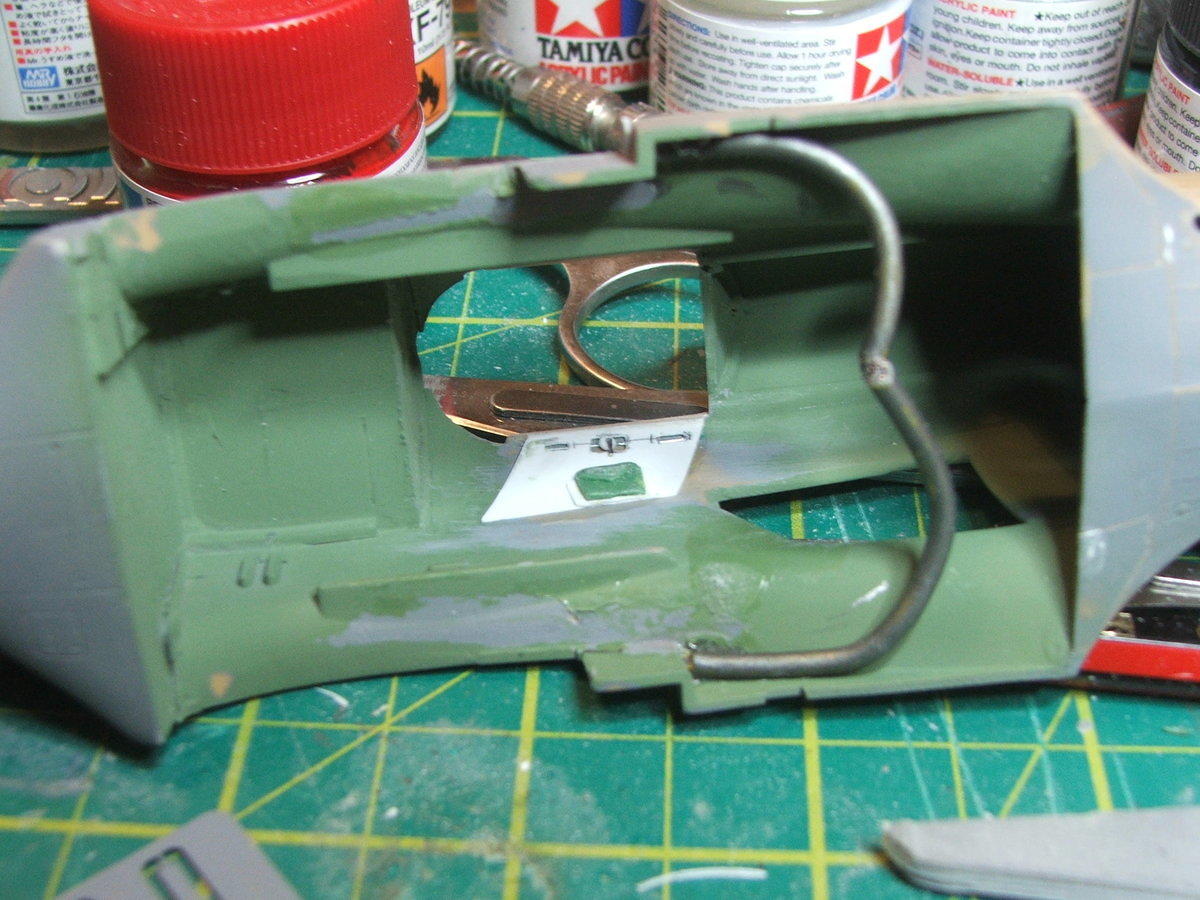
First off, I decided to further complicate matters when I realised that the pipes that served the underwing radiator will be partly visible in the open space...
So lets start by cutting a hole in the wing where the radiator would be connected...
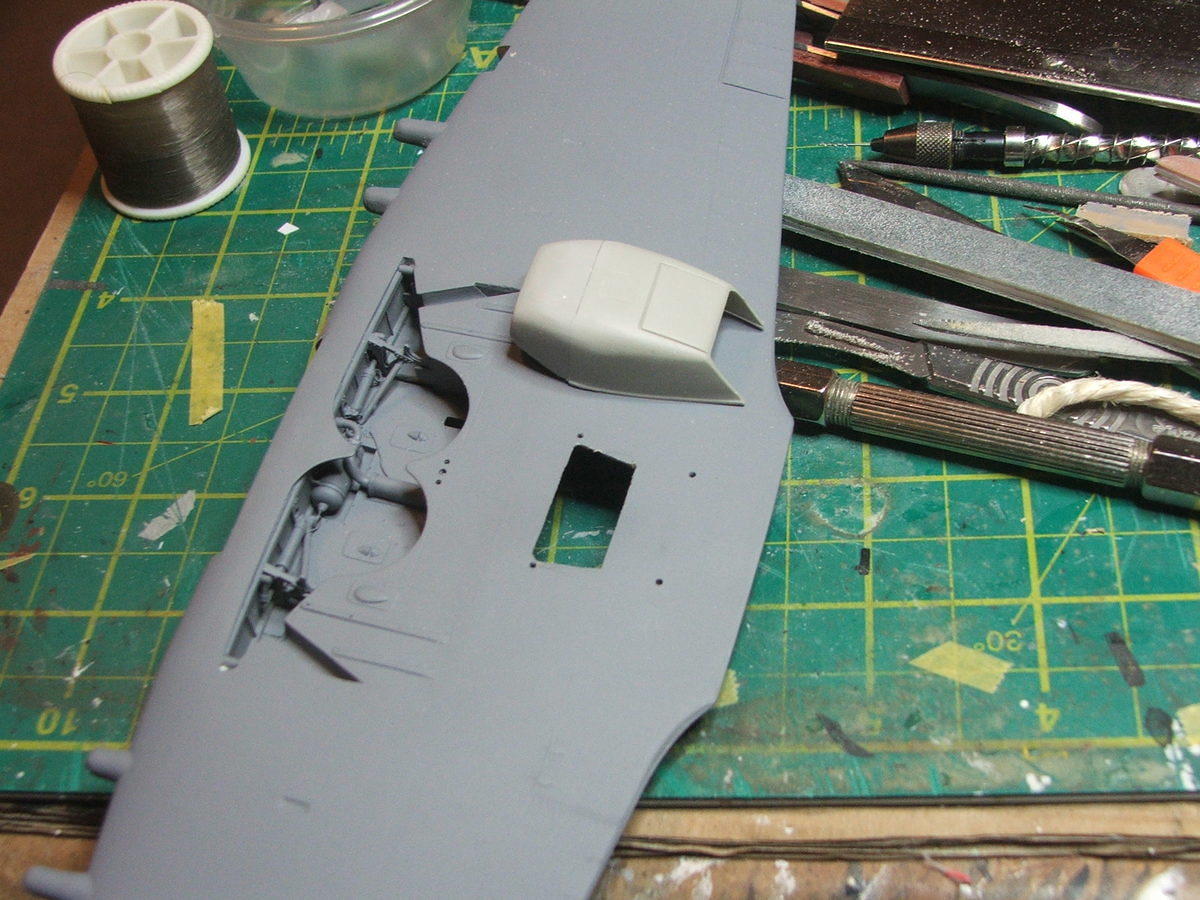
of course the inside has had to be painted ahead of attaching it....
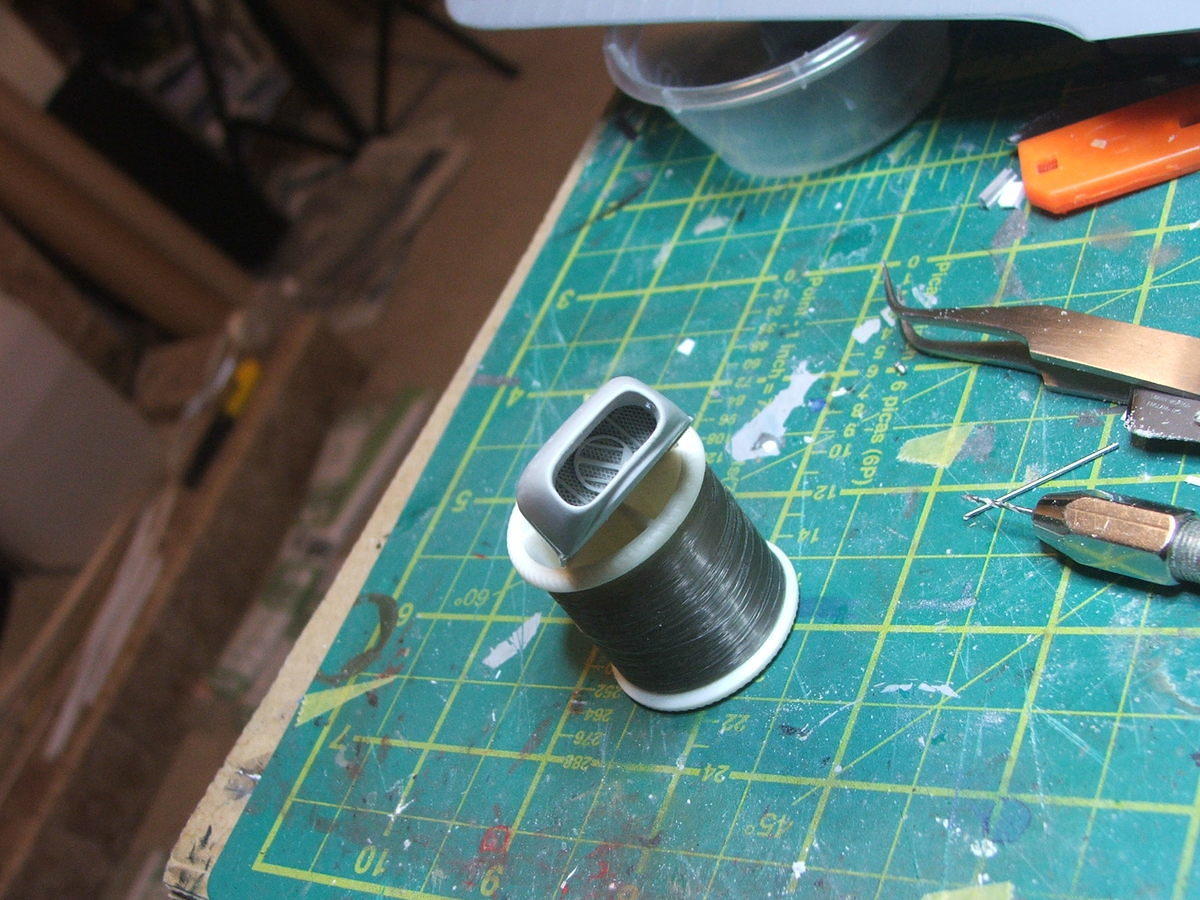
The pipes are being represented by some electrical wire that is about the right diameter which will be painted metallic grey and shaped appropriately when the fuselage and wings are joined at some point in the near future
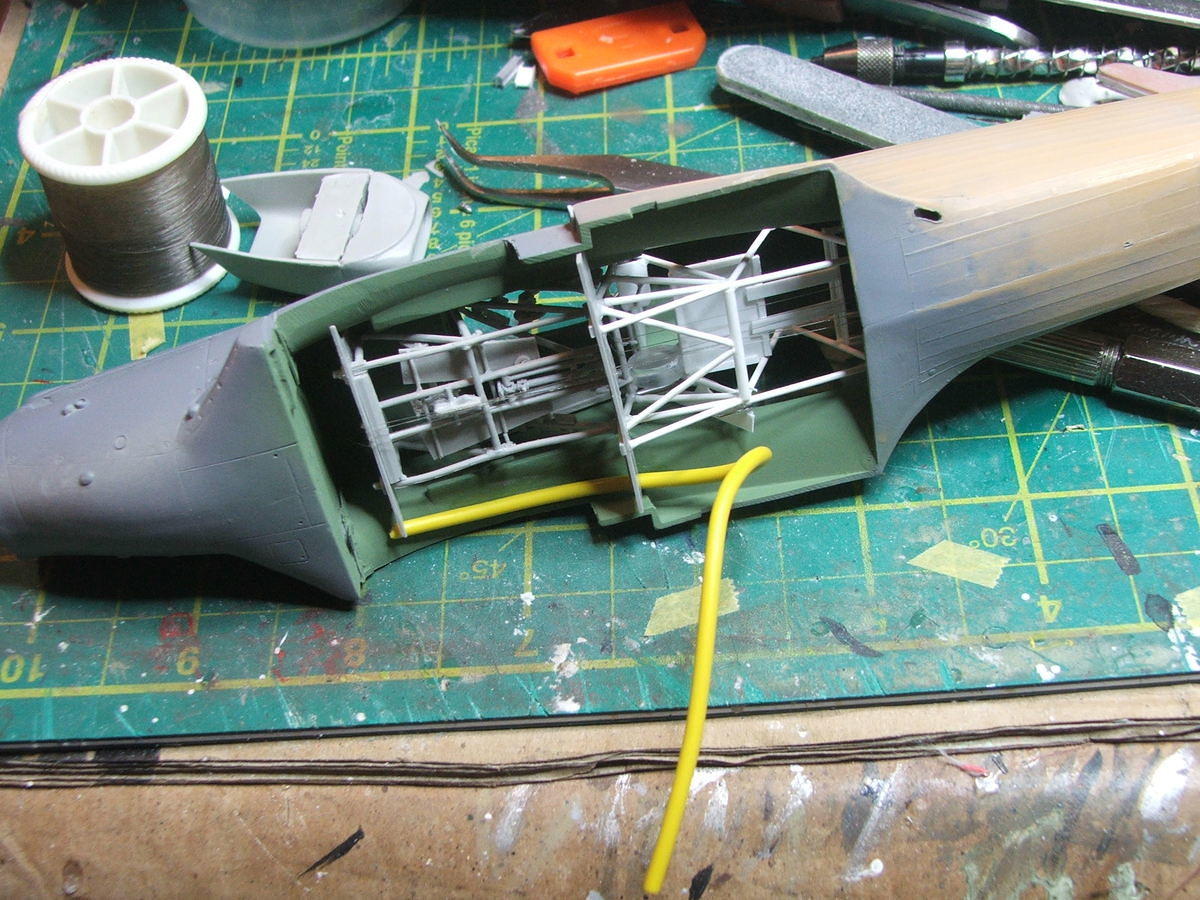
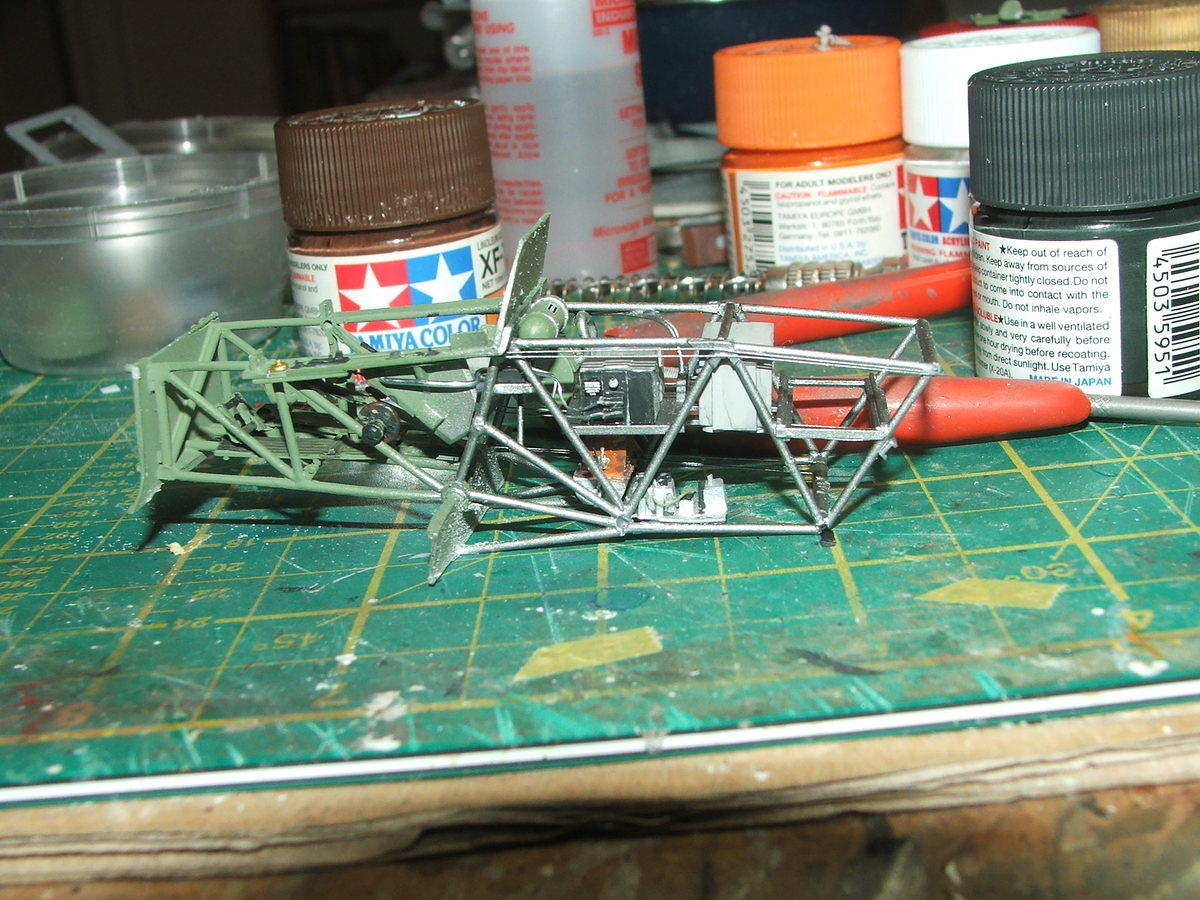
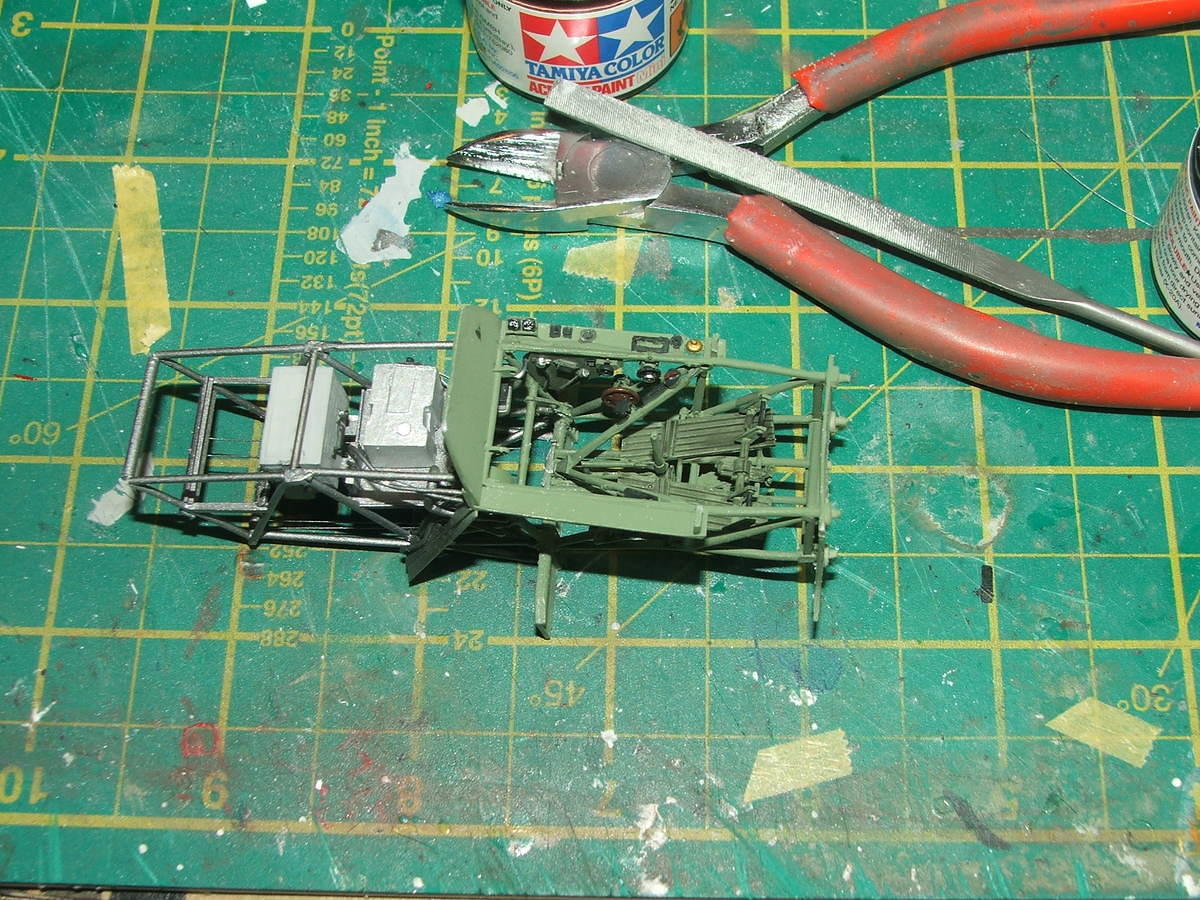
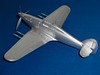
Finally, the time has come to a) paint the cockpit b) assemble the components behind the cockpit. The cockpit got a coat of XF 71, while the fame behind got a metallic grey coat. Then came the very fiddly task of locating and connecting all the components:
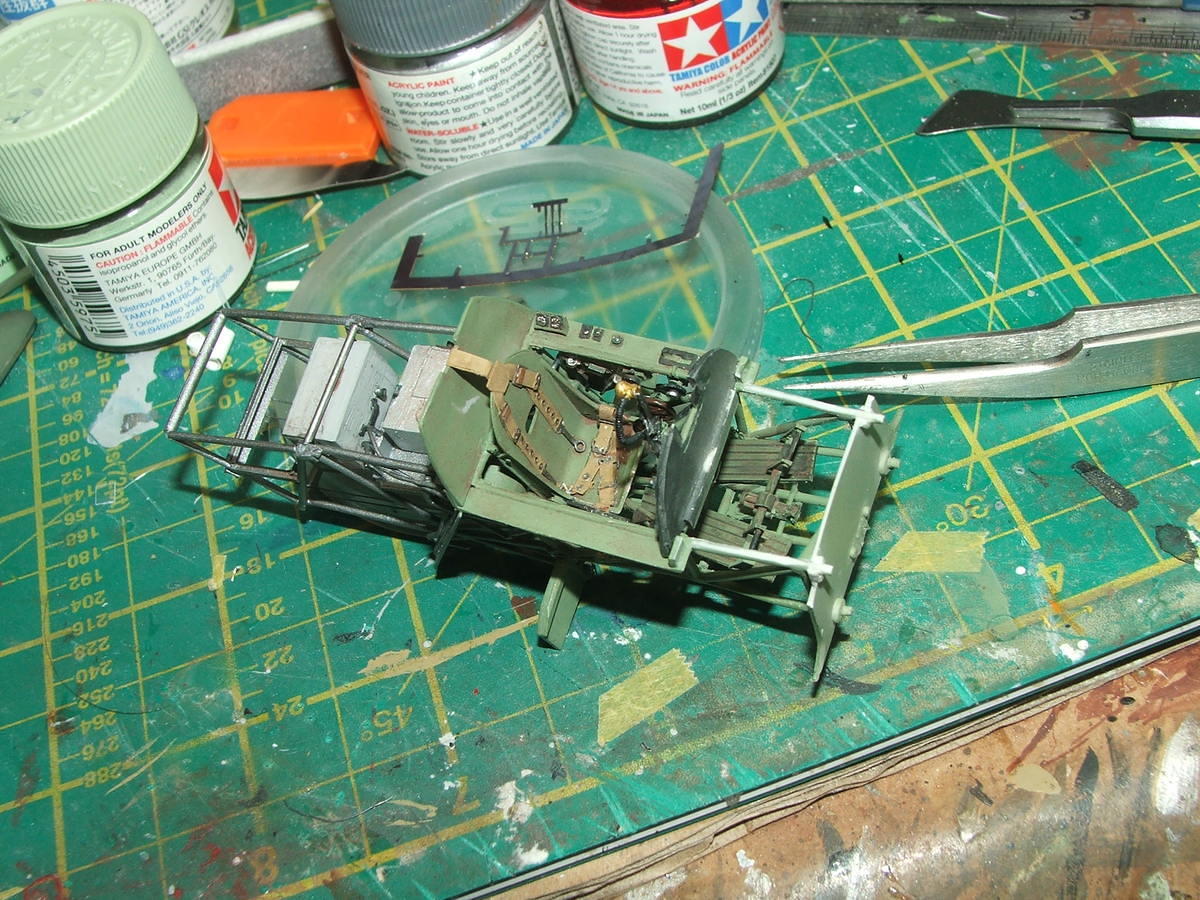
Instrument panel:
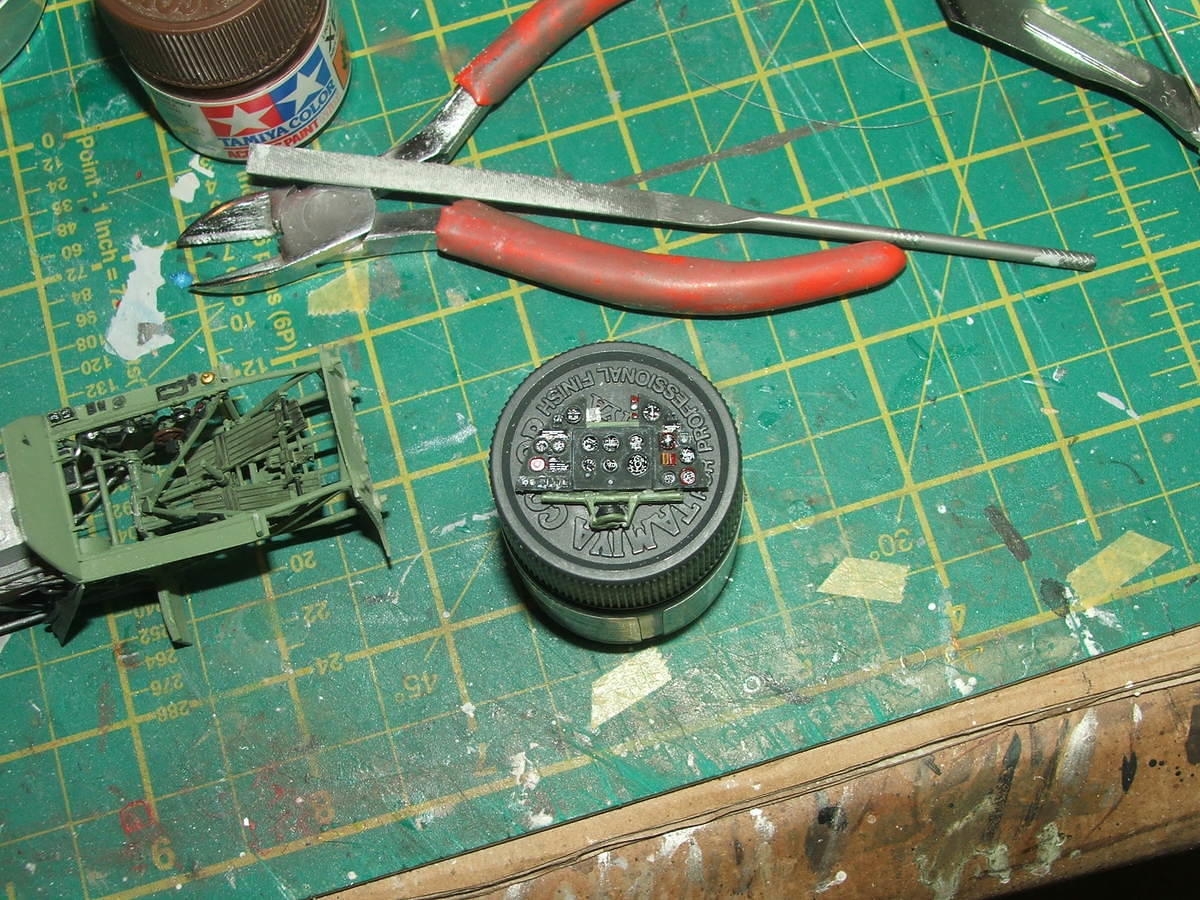
(larger version)
For this I used some excellent references plus the Airscale WW2 RAF Instrument dial decals plus some from the cockpit placards set. These are fantastic and add so much detail to the cockpit.
So how does this look inside the fuselage? Lets try it out...
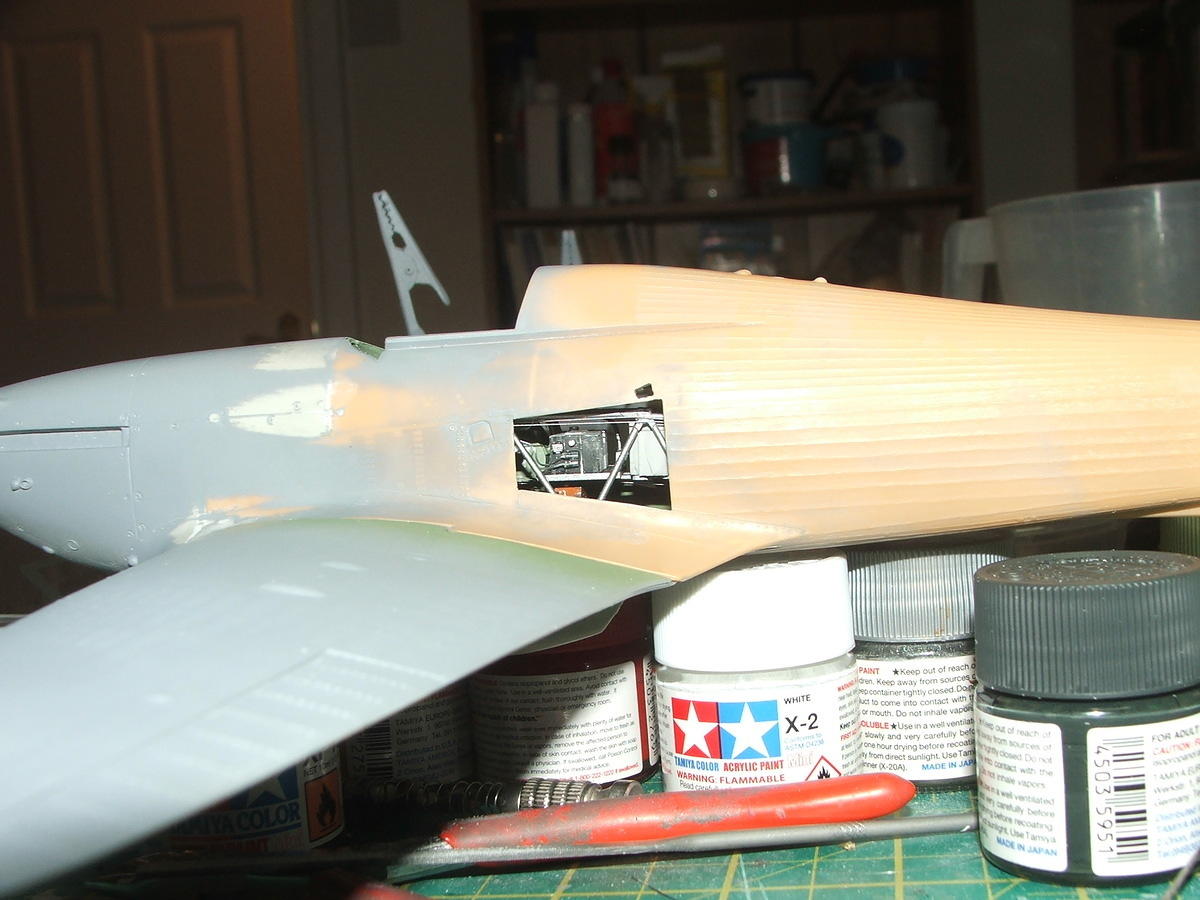
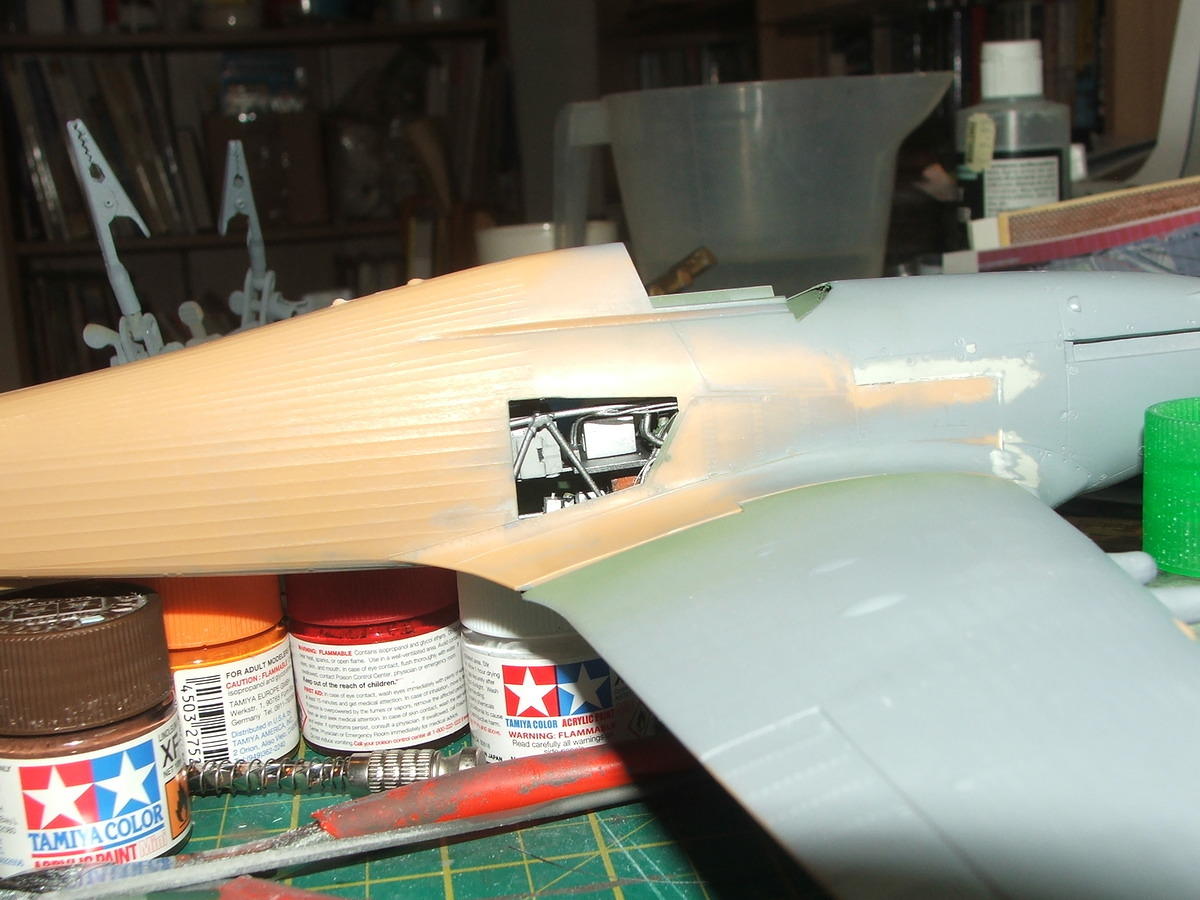
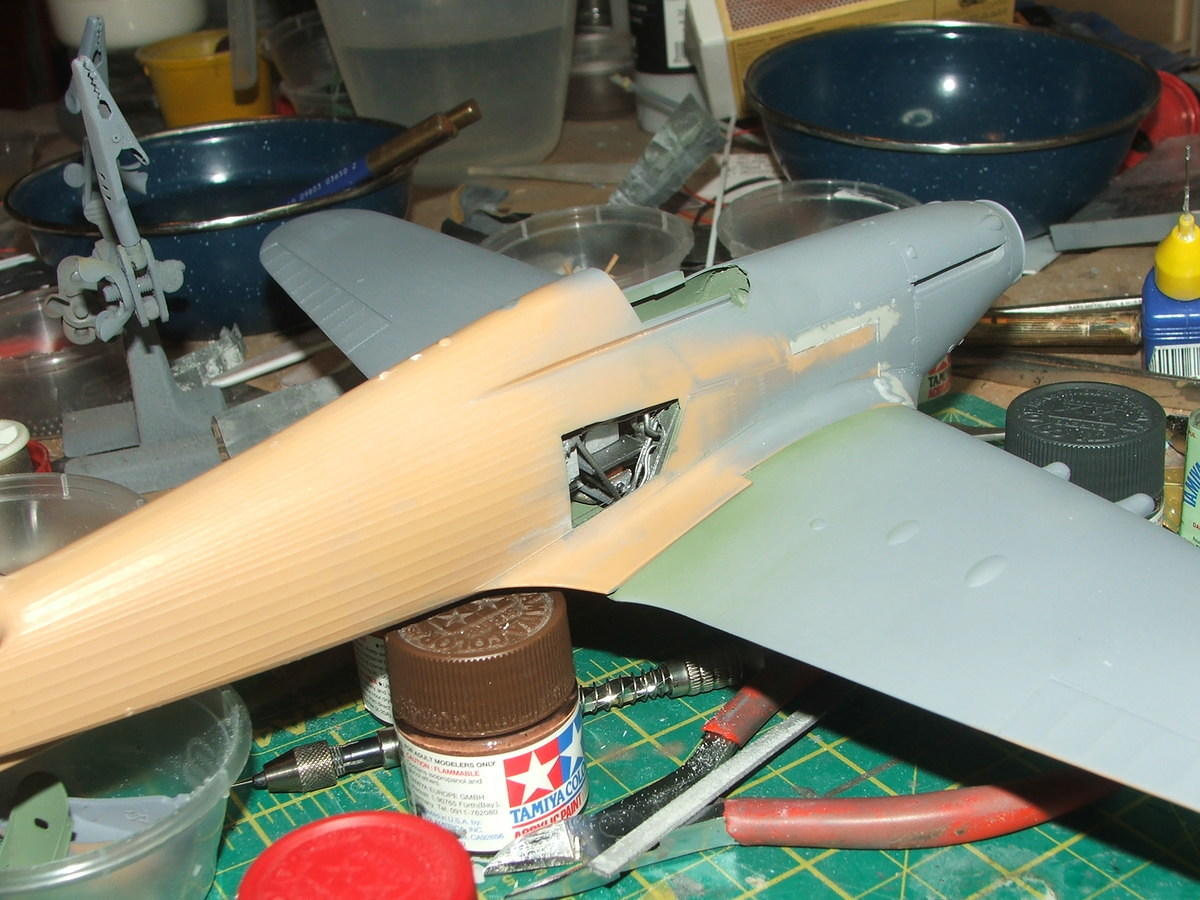
Hmmm okay thats not bad
I've now discovered that I appear to have lost the gun sight that came with the Grey Matter Figures resin set and also one of the things that isn't covered in this set is the inside of the emergency door, which has the metal pigeon hole thingy for orders plus another pouch and various handles etc. Looks like I'm going to have to do some more scratch building!
Next up as well will be some rescribing of panel lines, a job I'm really not looking forward to!
First off, I decided to further complicate matters when I realised that the pipes that served the underwing radiator will be partly visible in the open space...
So lets start by cutting a hole in the wing where the radiator would be connected...
of course the inside has had to be painted ahead of attaching it....
The pipes are being represented by some electrical wire that is about the right diameter which will be painted metallic grey and shaped appropriately when the fuselage and wings are joined at some point in the near future
Finally, the time has come to a) paint the cockpit b) assemble the components behind the cockpit. The cockpit got a coat of XF 71, while the fame behind got a metallic grey coat. Then came the very fiddly task of locating and connecting all the components:
Instrument panel:
(larger version)
For this I used some excellent references plus the Airscale WW2 RAF Instrument dial decals plus some from the cockpit placards set. These are fantastic and add so much detail to the cockpit.
So how does this look inside the fuselage? Lets try it out...
Hmmm okay thats not bad
I've now discovered that I appear to have lost the gun sight that came with the Grey Matter Figures resin set and also one of the things that isn't covered in this set is the inside of the emergency door, which has the metal pigeon hole thingy for orders plus another pouch and various handles etc. Looks like I'm going to have to do some more scratch building!
Next up as well will be some rescribing of panel lines, a job I'm really not looking forward to!
Re: 1:32 Revell Hurricane IIC
metal pigeon hole thingy = map case by the way!
-
Narayan

- If anyone needs me, I'll be in my office
- Posts: 2602
- Joined: April 10th, 2011, 7:01 pm
- Location: The Middle of Nowhere in Ireland
Re: 1:32 Revell Hurricane IIC
Comin g along very nicely Boldman, the CD-ROM sounds very useful.
_________________
Narayan
The rifle is the first weapon you learn how to use, because it lets you keep your distance from the client. The closer you get to being a pro, the closer you can get to the client. The knife, for example, is the last thing you learn.
A:B
2012 20:05 2009 19:16
2011 11:10 2008 16:03
2010 44:12
Overall 193:51
-
JohnRatzenberger

- Why is he so confused ?
- Posts: 15734
- Joined: April 5th, 2011, 3:42 pm
- Location: Living on a sandbar - Nags Head, NC.
Re: 1:32 Revell Hurricane IIC
That is some interior ... looks like a photo out of a Detail & Scale walkaround ....
John Ratzenberger 
It's my model and I'll do what I want with it.
It's my model and I'll do what I want with it.

Re: 1:32 Revell Hurricane IIC
Very impressive work, Boldman. I look forward to further progress.
regards,
Martin
regards,
Martin
Martin R
"the 'R' stands for 'Representative'."
"the 'R' stands for 'Representative'."
Re: 1:32 Revell Hurricane IIC
Thanks Narayan, John and Martin.
This week's update, rescribing and emergency exit door interior...
I finally got around to the job I wasn't really looking forward to - rescribing!
Wing topside:
Underside:
In fact it wasn't as difficult as I expected - I used a LOT of dymo tape, but only made a handful of small mistakes which were fixed with a drop of Mt Dissolved Putty.
The other item I realised was totally missing was the inside surface of the emergency escape door, plus the various map pockets on that side of the cockpit. The panel wsa simply a thin piece of plasticard, with some holes carefully shaped and with a wire behind to represent the locking mechanism, plus a pocket sculpted from some green stuff epoxy putty and a map case made from more thin plastic card, which was a tricky assembly as the plastic card side preferred to stick to the tweezers rather than each other!
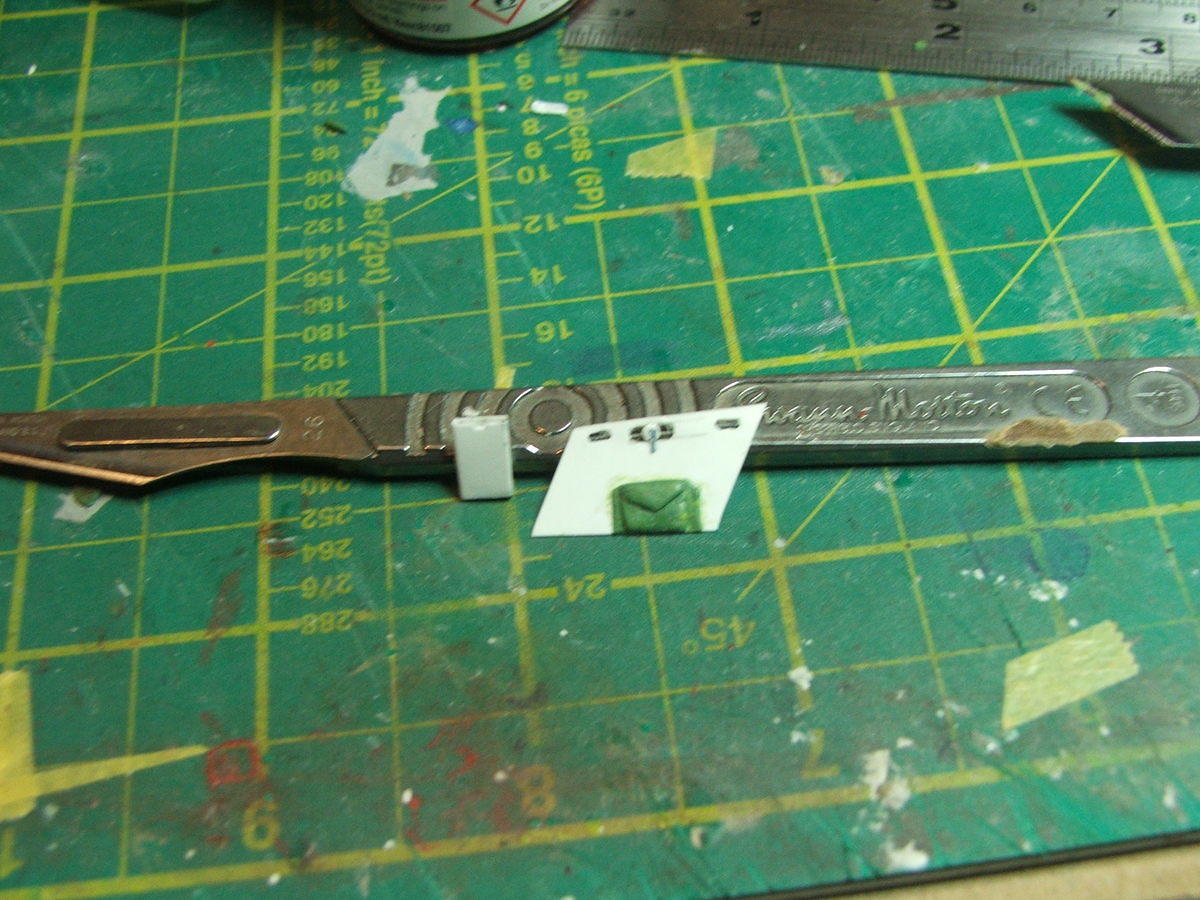
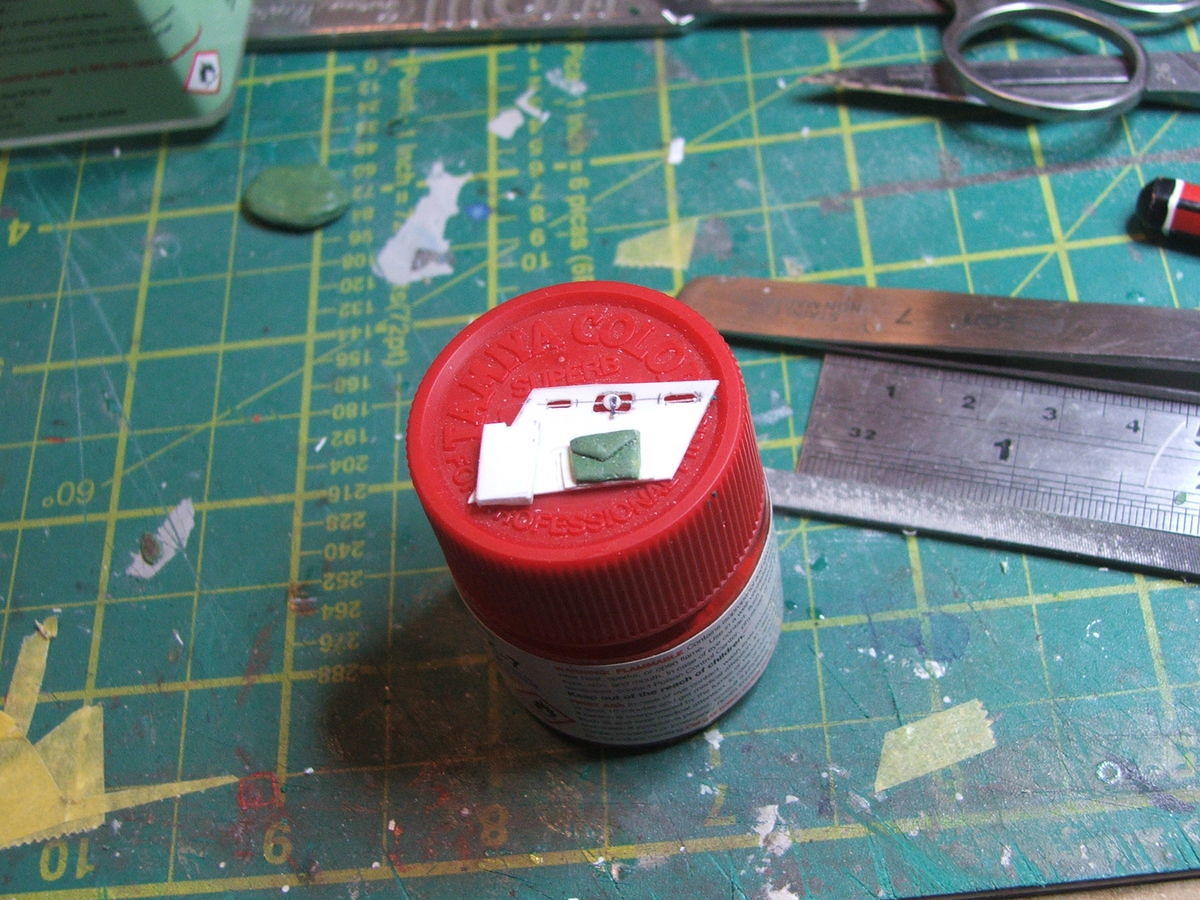
It was only after I tried fitting the door to the inside that I realised I had made this first one upside down!! So another piece of plastic card was shaped and the fitting transferred! You can see this version fitted here:
This has now been painted and last night I did some more intricate work on the cockpit, adding some wires and seat belts. I've also managed to find a spare gun sight in the spares box, left over from building my Tamiya IX a year or so ago - I used the newer gun sight in that model so had to older one left over! Phew! its a tiny thing and quite complicated so so I'm glad I didn't have to scratch it totally! I am having to scratch build the mounting to the instrument panel and the angled glass plate got swallowed by the carpet monster so that too had to be scratched. I'll post more photos of these stages later...
This week's update, rescribing and emergency exit door interior...
I finally got around to the job I wasn't really looking forward to - rescribing!
Wing topside:
Underside:
In fact it wasn't as difficult as I expected - I used a LOT of dymo tape, but only made a handful of small mistakes which were fixed with a drop of Mt Dissolved Putty.
The other item I realised was totally missing was the inside surface of the emergency escape door, plus the various map pockets on that side of the cockpit. The panel wsa simply a thin piece of plasticard, with some holes carefully shaped and with a wire behind to represent the locking mechanism, plus a pocket sculpted from some green stuff epoxy putty and a map case made from more thin plastic card, which was a tricky assembly as the plastic card side preferred to stick to the tweezers rather than each other!
It was only after I tried fitting the door to the inside that I realised I had made this first one upside down!! So another piece of plastic card was shaped and the fitting transferred! You can see this version fitted here:
This has now been painted and last night I did some more intricate work on the cockpit, adding some wires and seat belts. I've also managed to find a spare gun sight in the spares box, left over from building my Tamiya IX a year or so ago - I used the newer gun sight in that model so had to older one left over! Phew! its a tiny thing and quite complicated so so I'm glad I didn't have to scratch it totally! I am having to scratch build the mounting to the instrument panel and the angled glass plate got swallowed by the carpet monster so that too had to be scratched. I'll post more photos of these stages later...
-
Chuck E
- Established 1949
- Posts: 2424
- Joined: May 3rd, 2011, 8:05 pm
- Location: Darlington. Home of the Railways
Re: 1:32 Revell Hurricane IIC
Coming along nicely. Enjoying the thread a lot. Very nice detail work.
So many models, so little time.
-
skypirate

- Modelling Gent and Scholar
- Posts: 7303
- Joined: May 1st, 2011, 6:13 am
- Location: Port Macquarie, Australia
Re: 1:32 Revell Hurricane IIC
Fabulous work going on here. Inspiring to watch!
I have this kit to build, but it won't be getting that treatment!
cheers,
David
I have this kit to build, but it won't be getting that treatment!
cheers,
David
Re: 1:32 Revell Hurricane IIC
Thanks Chuck and David!
-
Narayan
- If anyone needs me, I'll be in my office
- Posts: 2602
- Joined: April 10th, 2011, 7:01 pm
- Location: The Middle of Nowhere in Ireland
Re: 1:32 Revell Hurricane IIC
Thoroughly enjoying this, can't wait for the next episode!
_________________
Narayan
There's a big hayfield up near Buxton. It's got a long rock wall with a big oak tree at the north end. It's like something out of a Robert Frost poem. At the base of that wall, you'll find a rock that has no earthly business in a Maine hayfield. Piece of black, volcanic glass. There's something buried under it I want you to have.
A:B
2012 20:05 2009 19:16
2011 11:10 2008 16:03
2010 44:12
Overall 193:51
Re: 1:32 Revell Hurricane IIC
Hehe thanks Narayan... I took a litte break from the aircraft today and started work on the base and also built the accumulator trolley from IconAir - more on that when I post a proper update with photos later..
Re: 1:32 Revell Hurricane IIC
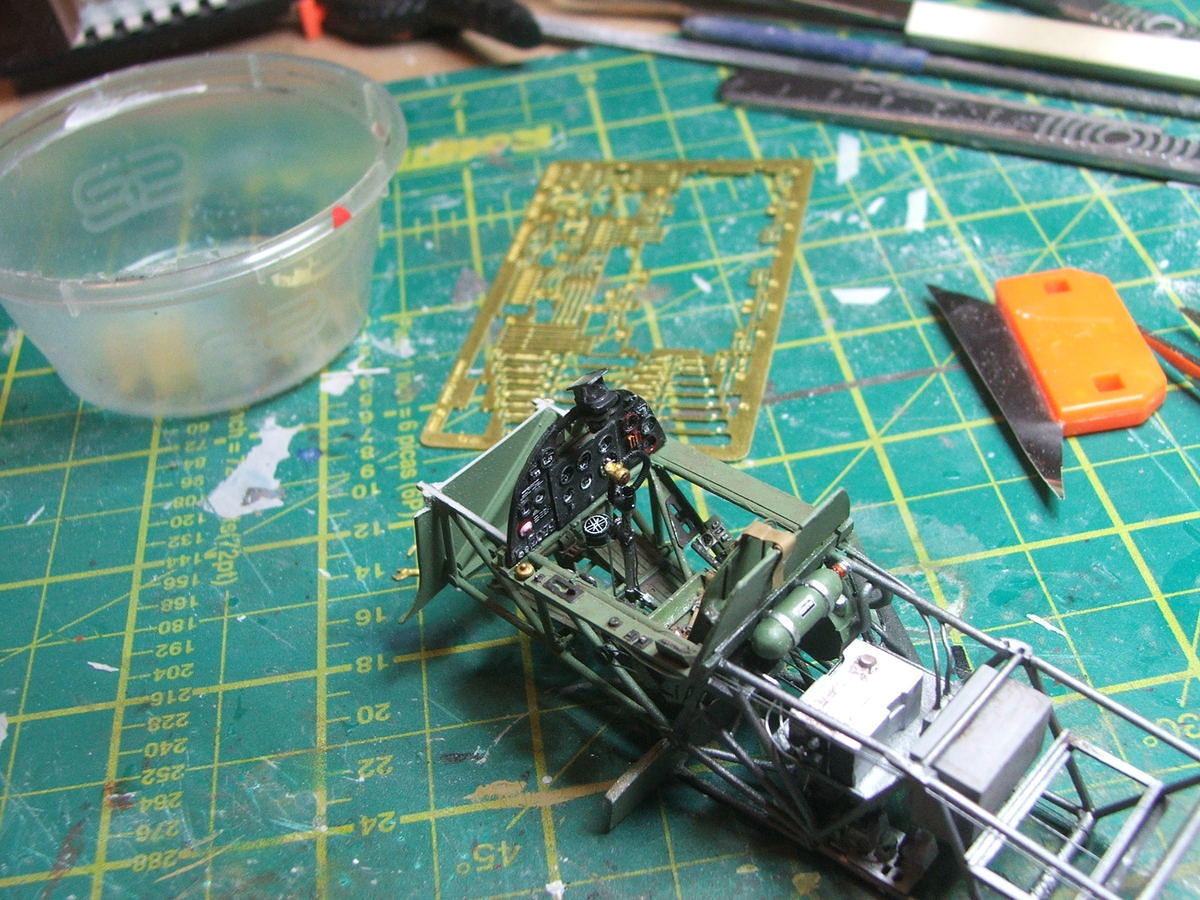
Got a bit more to update now - cockpit details including the gun sight, base and some ancillary pieces... first though, the cockpit.
Seat belts added
Here you can see the control column and just about make out the control wires that have been added
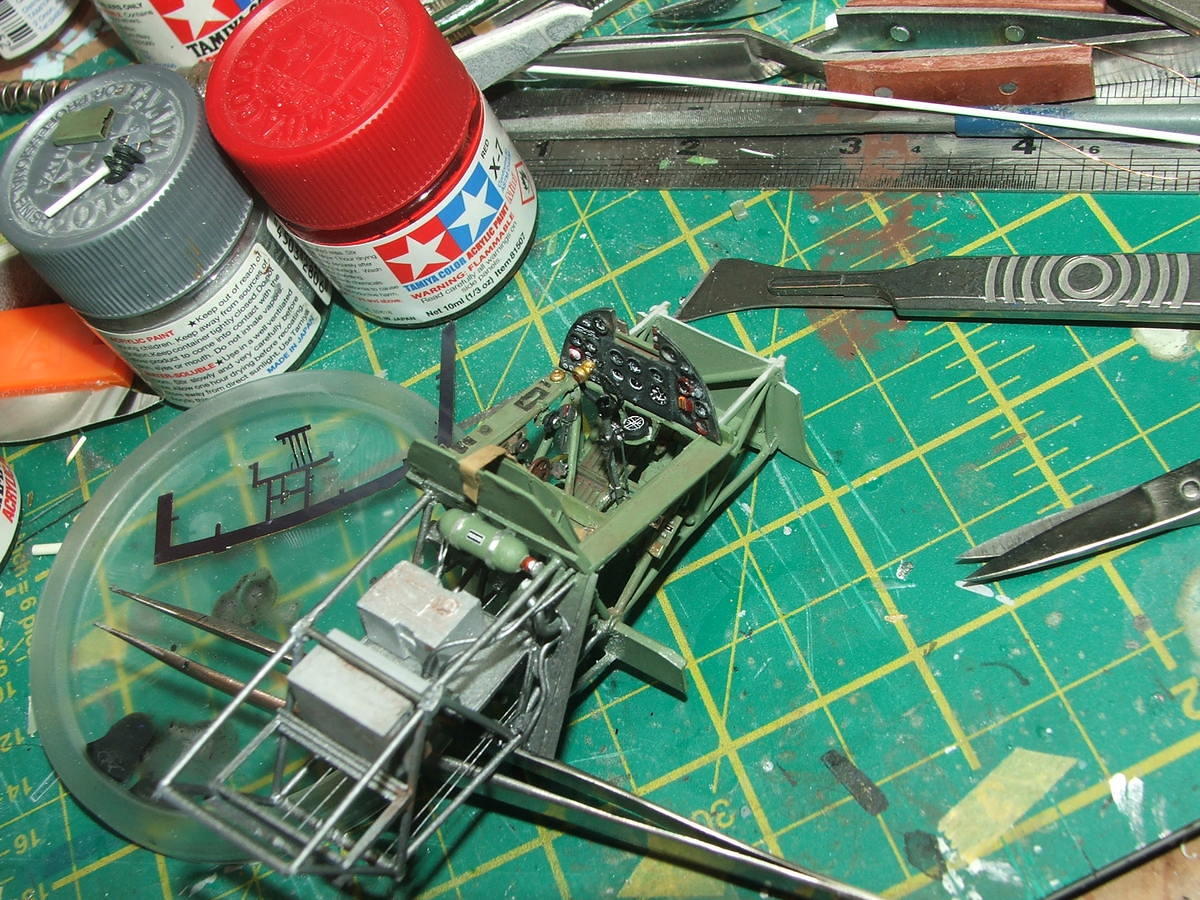
and here finally is the gun-sight, mounted in the right place
So for a bit of a break from the aircraft itself, I turned to the base. This is a trusty old picture frame sourced from Oxfam, with a layer of claycrete stained with artists acrylics, dusted with various ground scatter, wood logs, small boulders, plants from long green and cream hairs and a scattering of mixed herbs nicked from the kitchen...
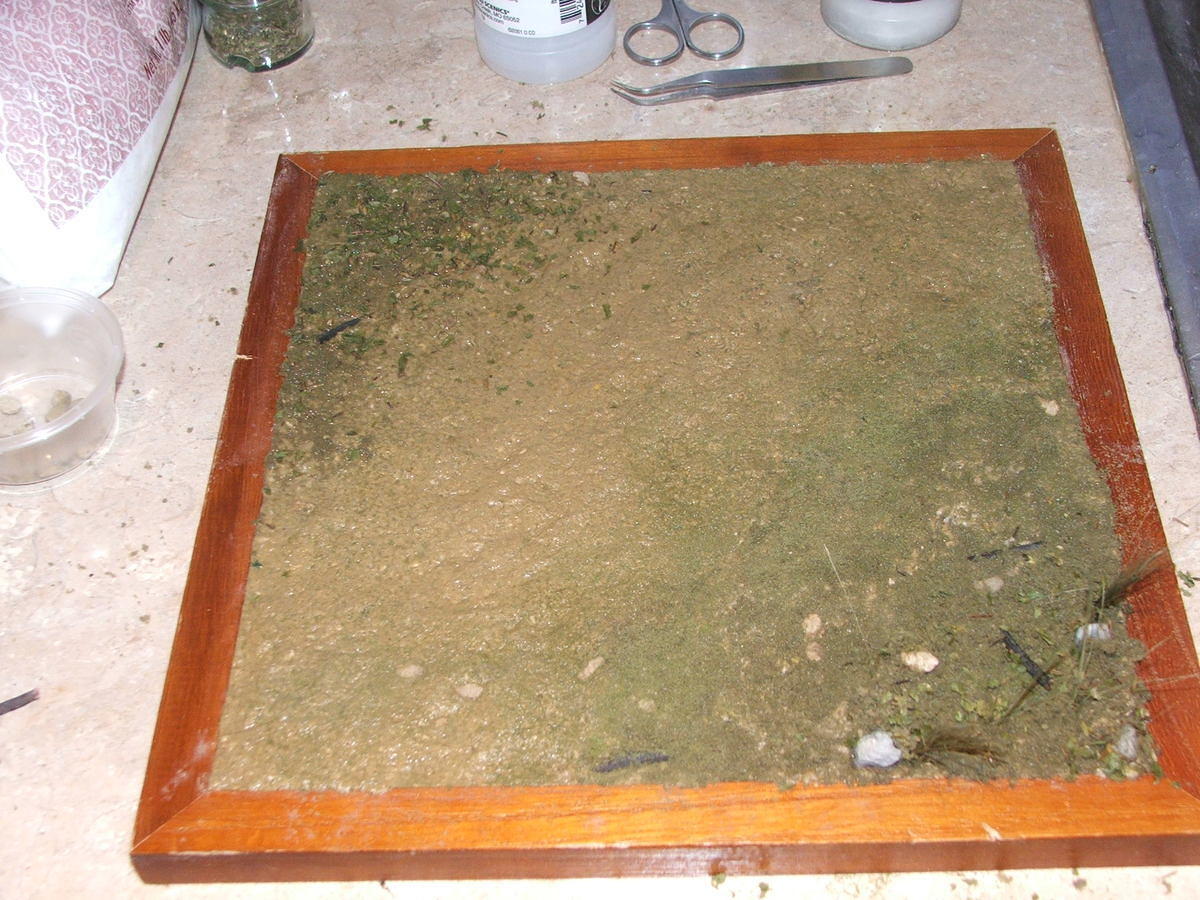
This is 11" square which is big enough for this model. So what about what else will be appearing in the diaorama? Well how about this:
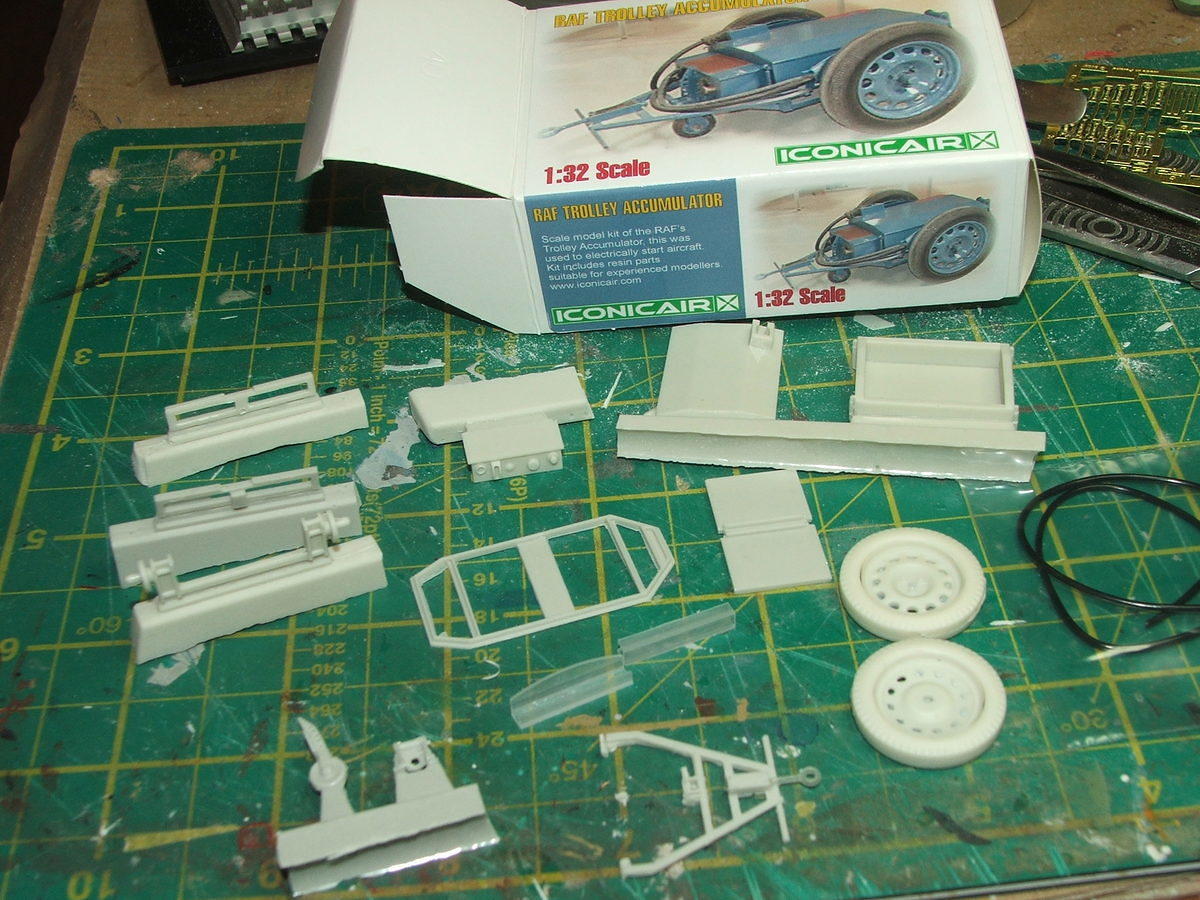
its the RAF Accumulator trolley in resin from Iconicair and this iwhat it looks like assembled:
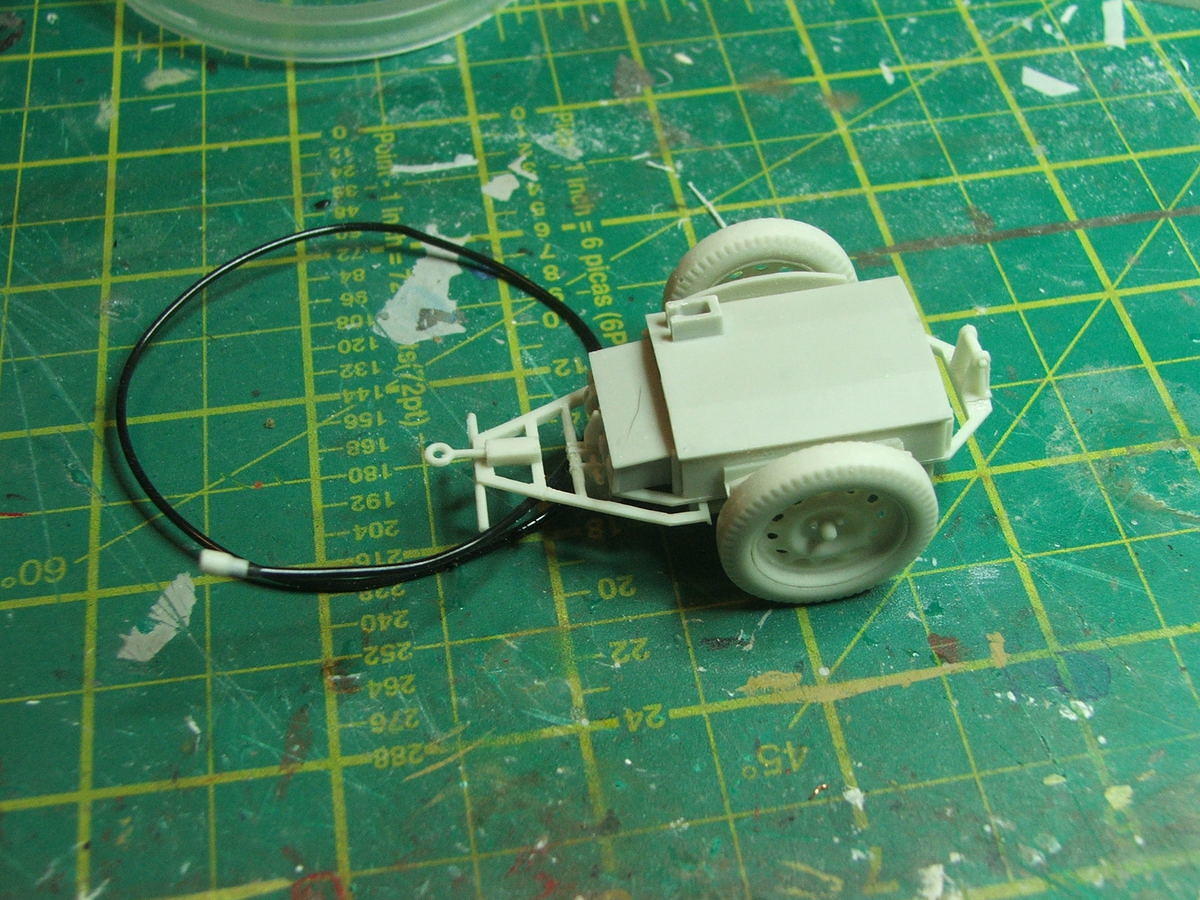
I'm sure there's been discussions about the various inaccuracies of this kit - ie the wheels being post war versions, but lets face it, there isn't much choice so I'm making do with this one. I'm not sure exactly what colour it should be to be in Burma - RAF Blue or Olive Drab or sand? I can't fond any definitive information about it so I'm going to go with what I feel will work - a blue base coat, over-painted with sand with the paint flaking off in places. Well thats what I'd like to achieve ;)
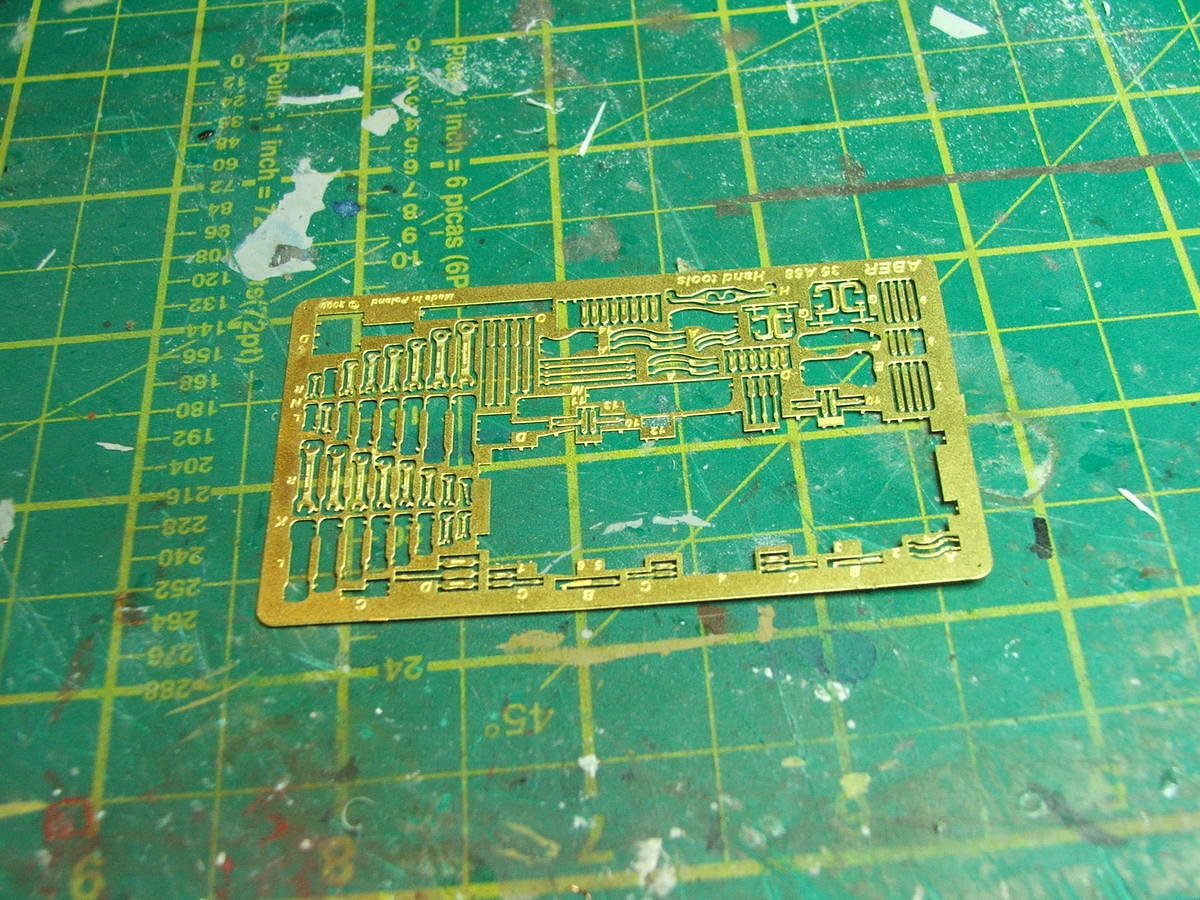
Finally in this update, some tools from the 1:35 Aber PE set
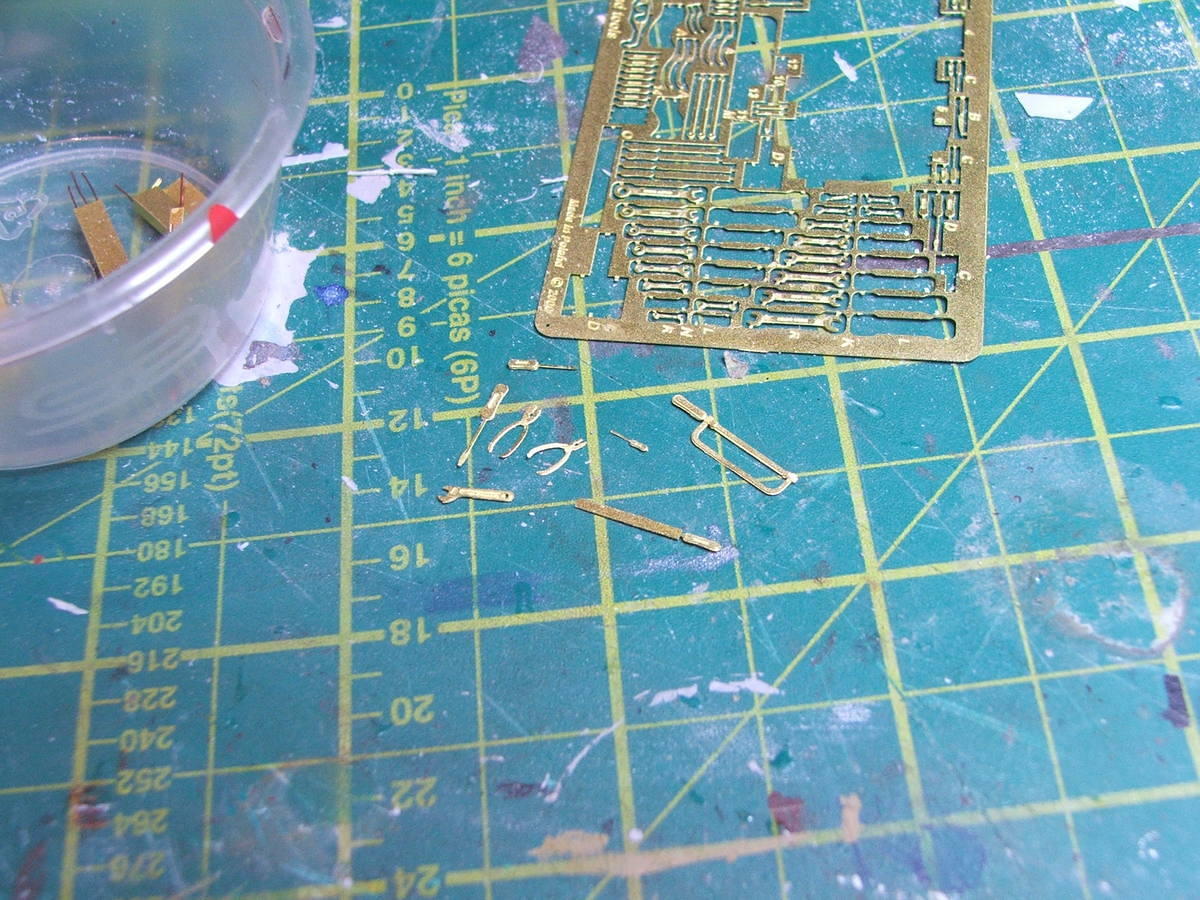
Spanners:
Toolbox compartments with wires added to attache the hinges
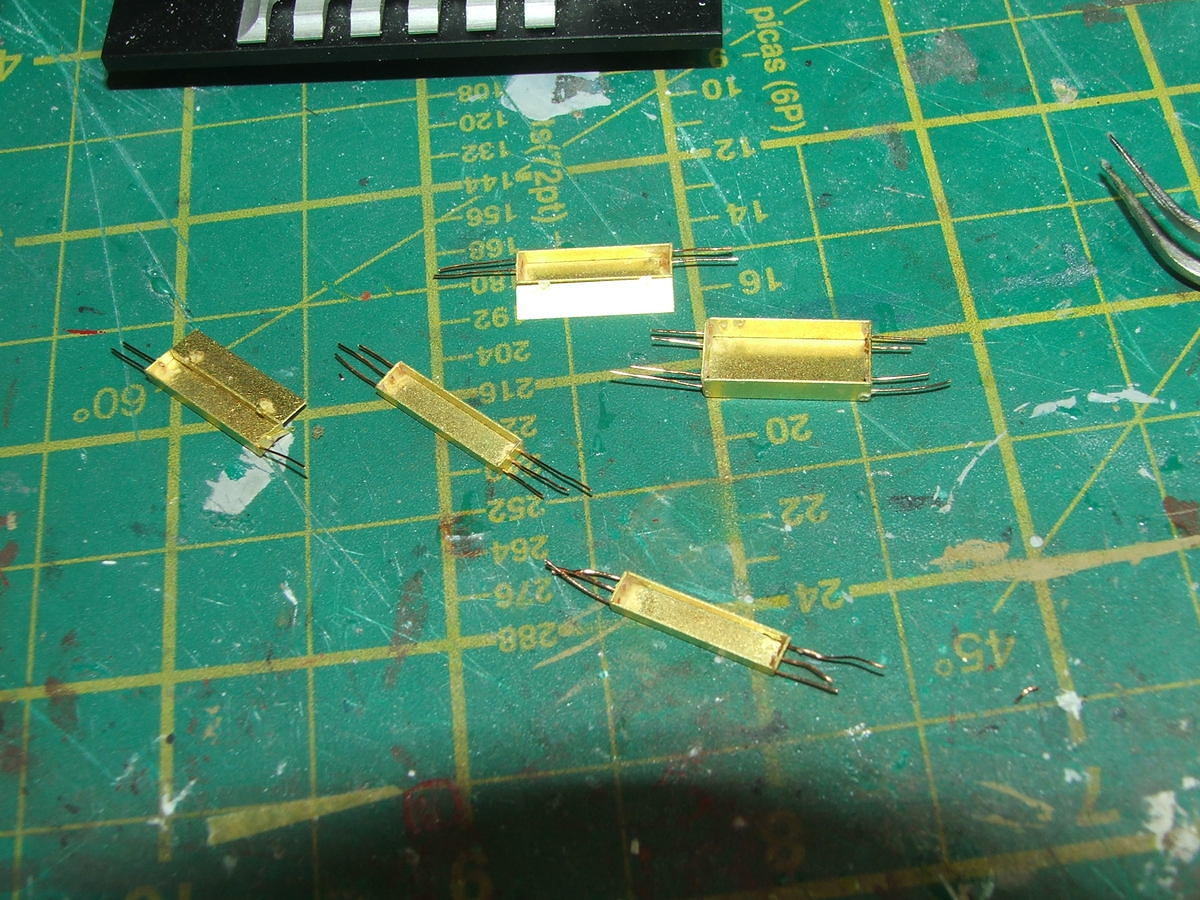
and finally with hinges added...
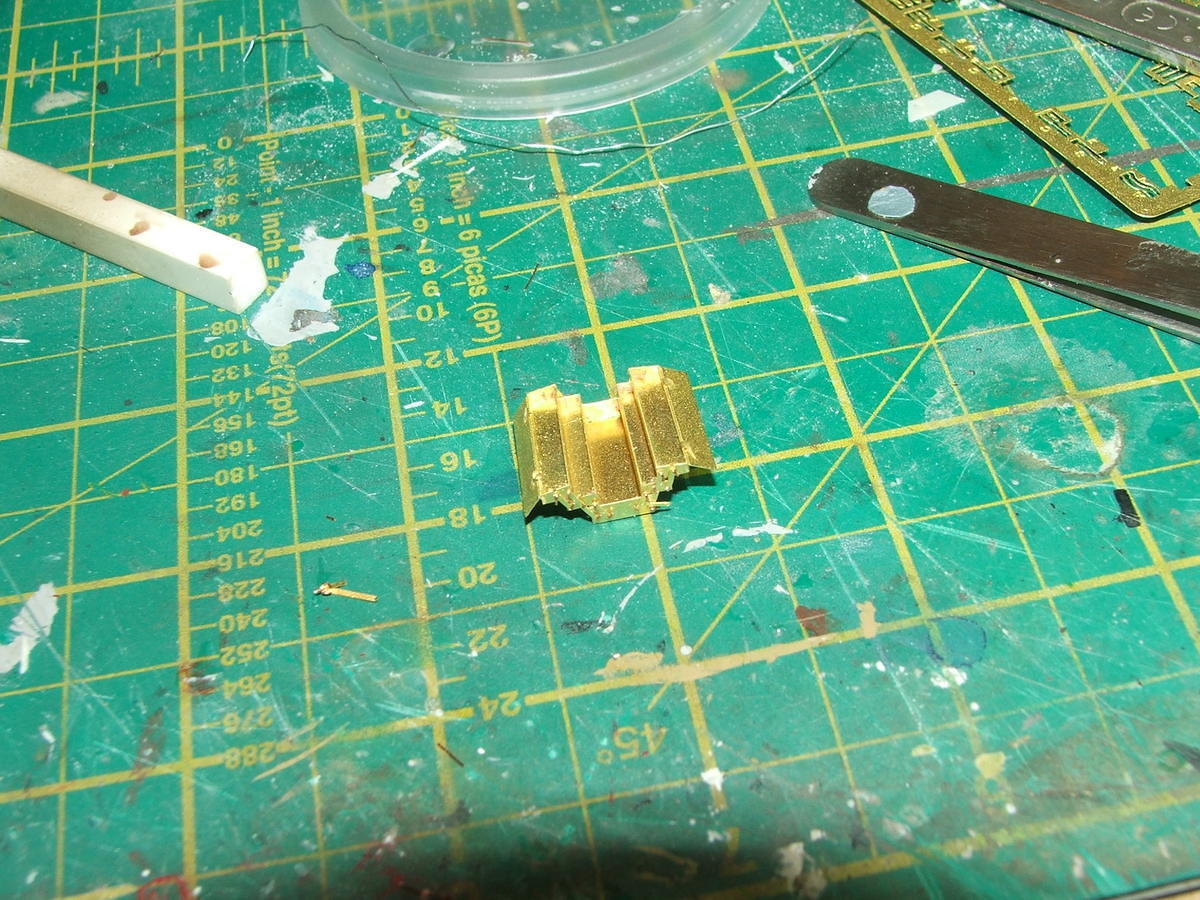
and yes it DOES open and close as it should - although if it still works after painting I'll be very surprised!
Seat belts added
Here you can see the control column and just about make out the control wires that have been added
and here finally is the gun-sight, mounted in the right place
So for a bit of a break from the aircraft itself, I turned to the base. This is a trusty old picture frame sourced from Oxfam, with a layer of claycrete stained with artists acrylics, dusted with various ground scatter, wood logs, small boulders, plants from long green and cream hairs and a scattering of mixed herbs nicked from the kitchen...
This is 11" square which is big enough for this model. So what about what else will be appearing in the diaorama? Well how about this:
its the RAF Accumulator trolley in resin from Iconicair and this iwhat it looks like assembled:
I'm sure there's been discussions about the various inaccuracies of this kit - ie the wheels being post war versions, but lets face it, there isn't much choice so I'm making do with this one. I'm not sure exactly what colour it should be to be in Burma - RAF Blue or Olive Drab or sand? I can't fond any definitive information about it so I'm going to go with what I feel will work - a blue base coat, over-painted with sand with the paint flaking off in places. Well thats what I'd like to achieve ;)
Finally in this update, some tools from the 1:35 Aber PE set
Spanners:
Toolbox compartments with wires added to attache the hinges
and finally with hinges added...
and yes it DOES open and close as it should - although if it still works after painting I'll be very surprised!
