Wow! How long did that tool box take you?
________________
Narayan
Like a midget at a urinal I was going to have to stay on my toes.
A:B
2013 01:00 2010 44:12
2012 20:05 2009 19:16
2011 11:10 2008 16:03
Overall 194:51
1:32 Revell Hurricane IIC
Re: 1:32 Revell Hurricane IIC
Fantastic stuff!!

Re: 1:32 Revell Hurricane IIC
Hi Guys, not been online much this week so only now catching up!
Narayan - it took a whole evening to assemble that far
Thanks Steve and broadside
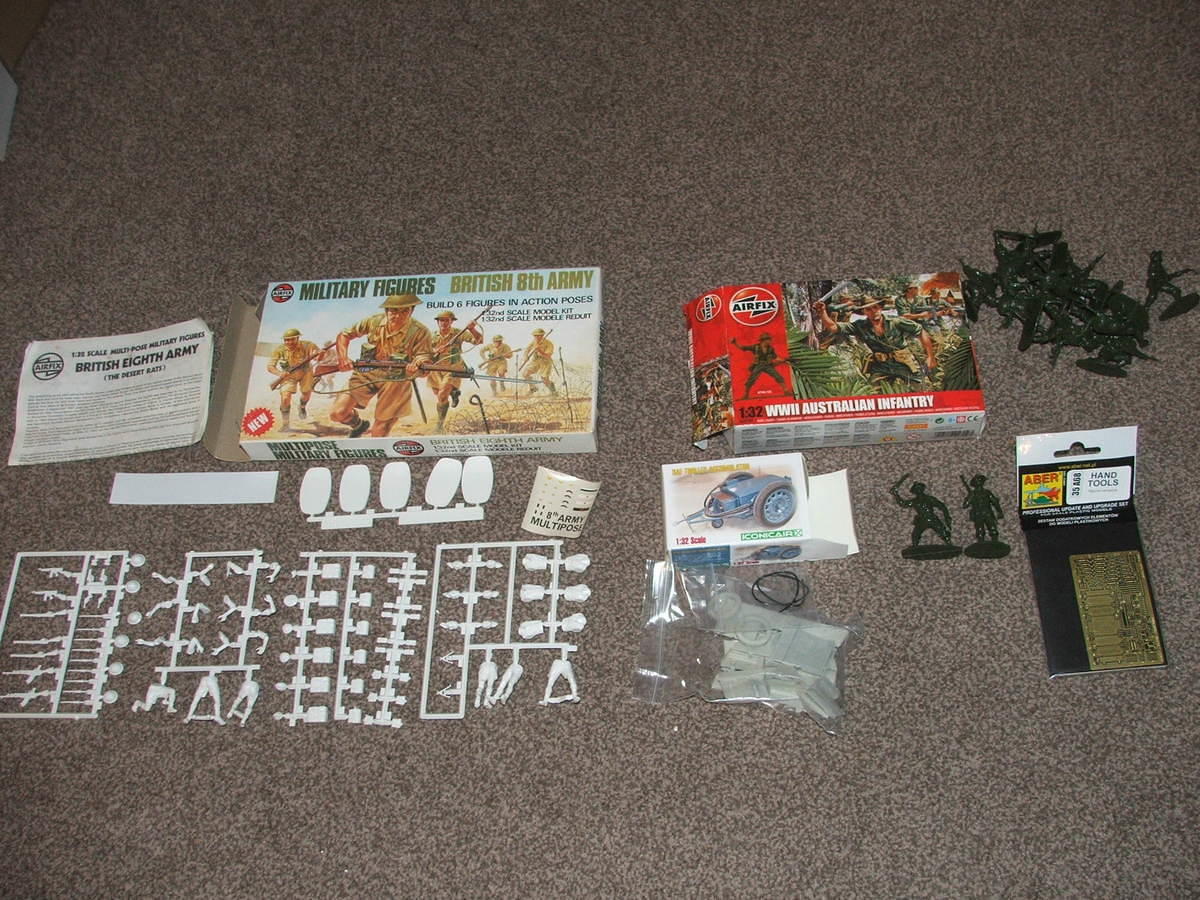
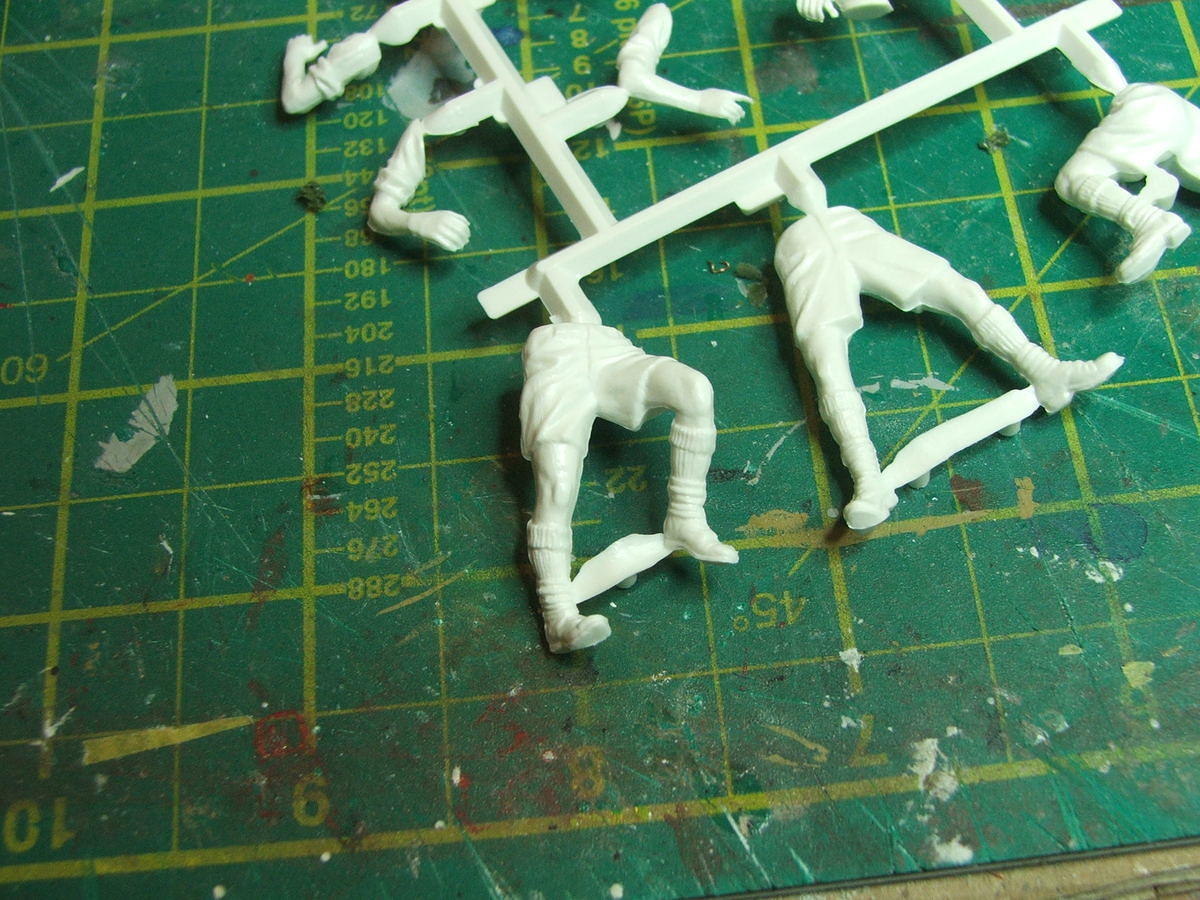
So for progress this weeks its been a bit all over the place. I started work on the figure that will represent my father. Beginning with the Airfix Multipose 8th Army figure set as shown here:
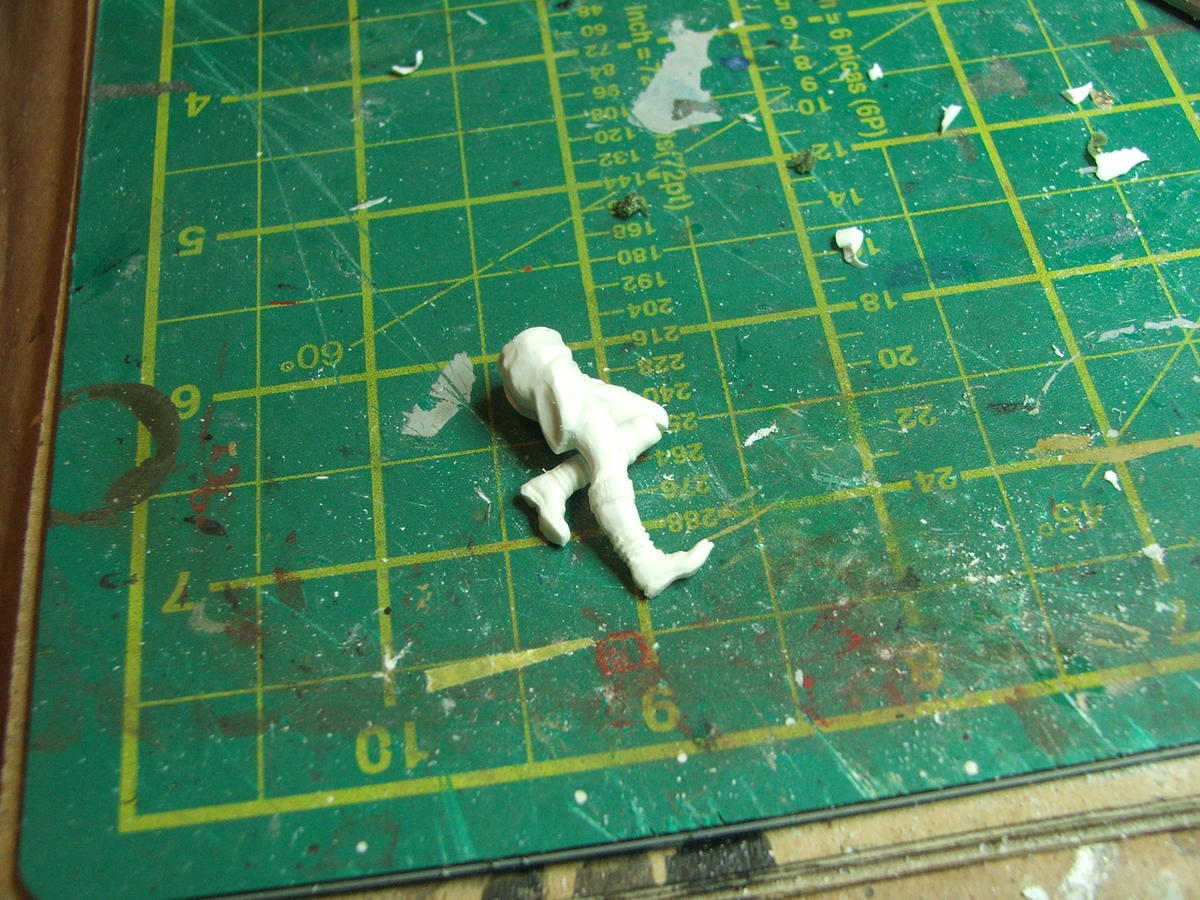
the prone figure immediately stands out for the position of the legs...
so with a bit of manipulation this can be turned into this:
which is a very good approximation to the pose I've got in mind as inspired by this photo
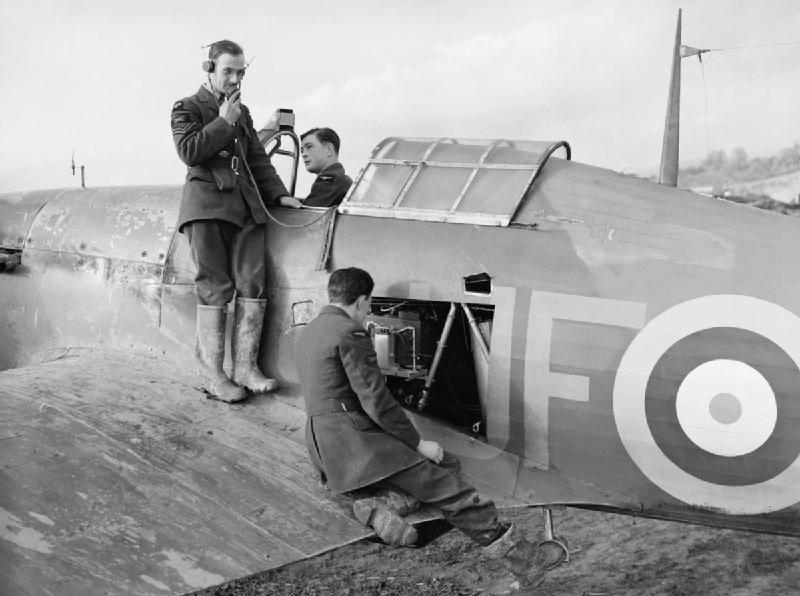
except of course my Dad would be in tropical gear and not wellies!
In place this looks pretty convincing...
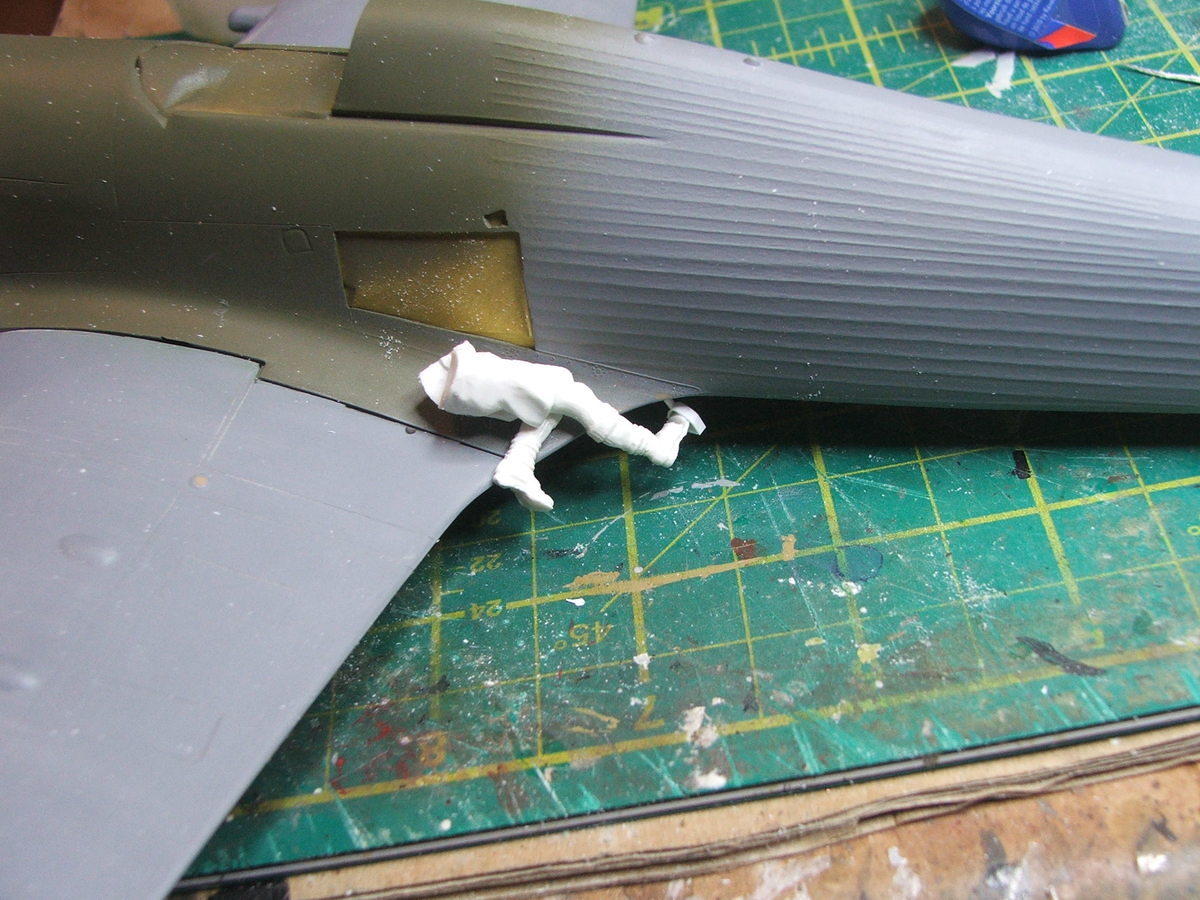
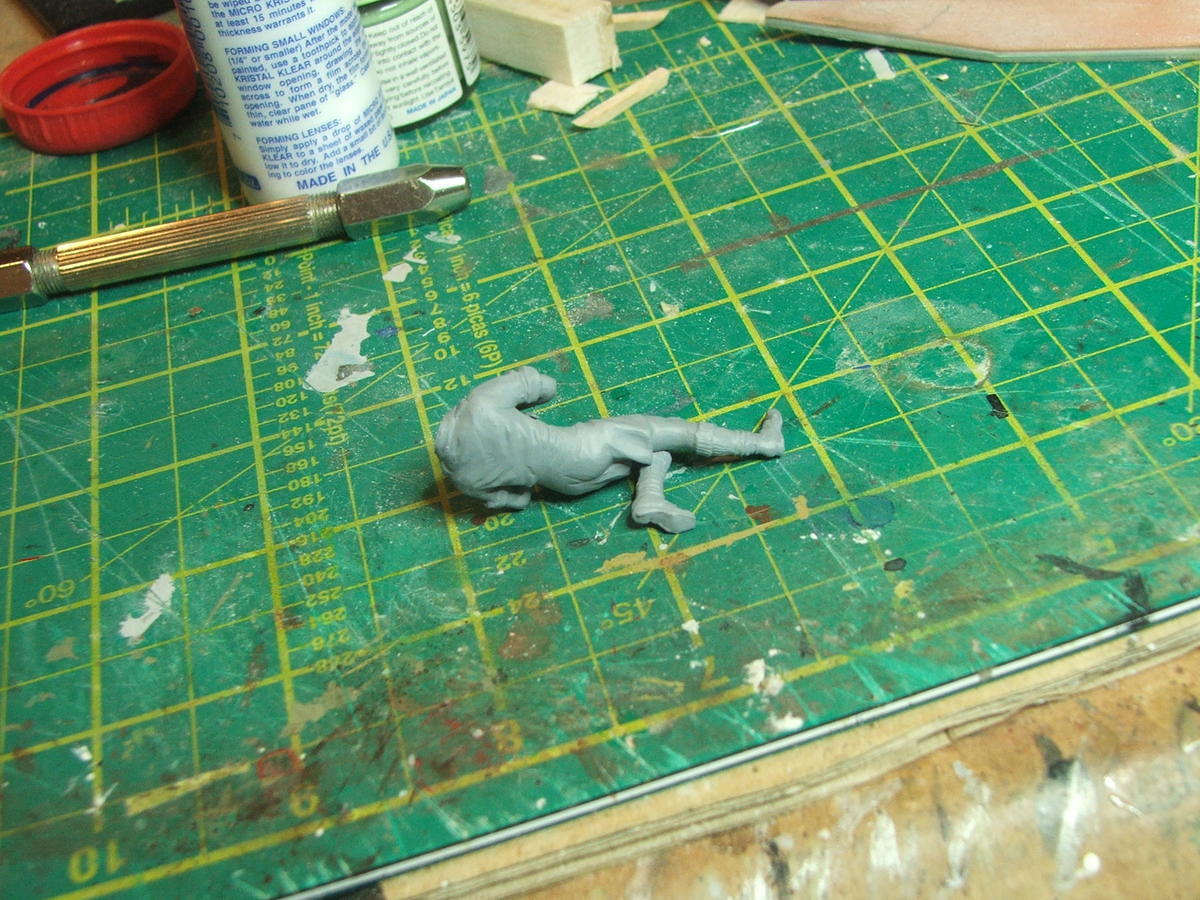
So what about the torso? This went on okay along with arms that make the right pose. The torso-waist join required a lot of filling with some epoxy green stuff, but came out okay with a bit of careful carving and sanding. After trying a number of arms, I found a handy one for the left arm which would be resting on the fuselage as a support, and a right arm reaching into the body. Here it is all primed up and ready for paint:
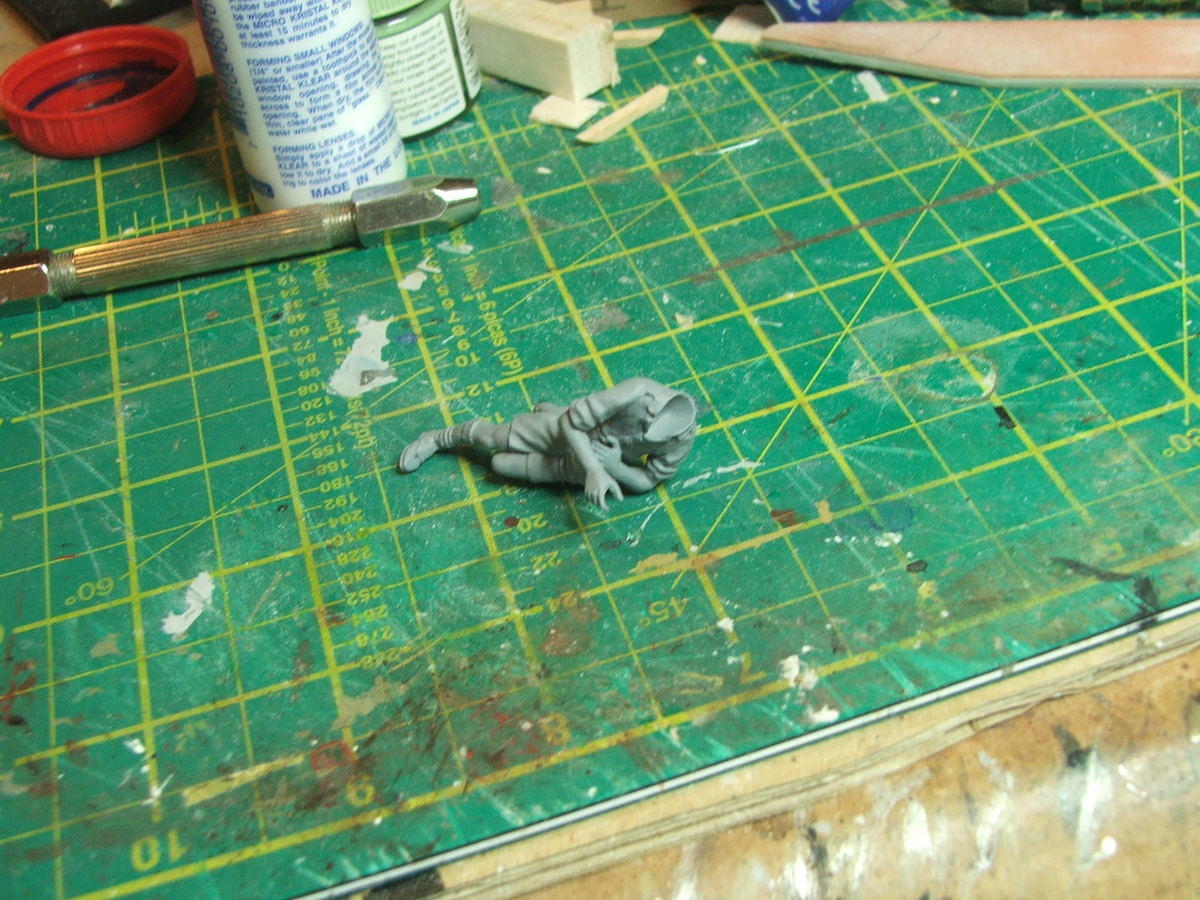
and from behind (the most common view)
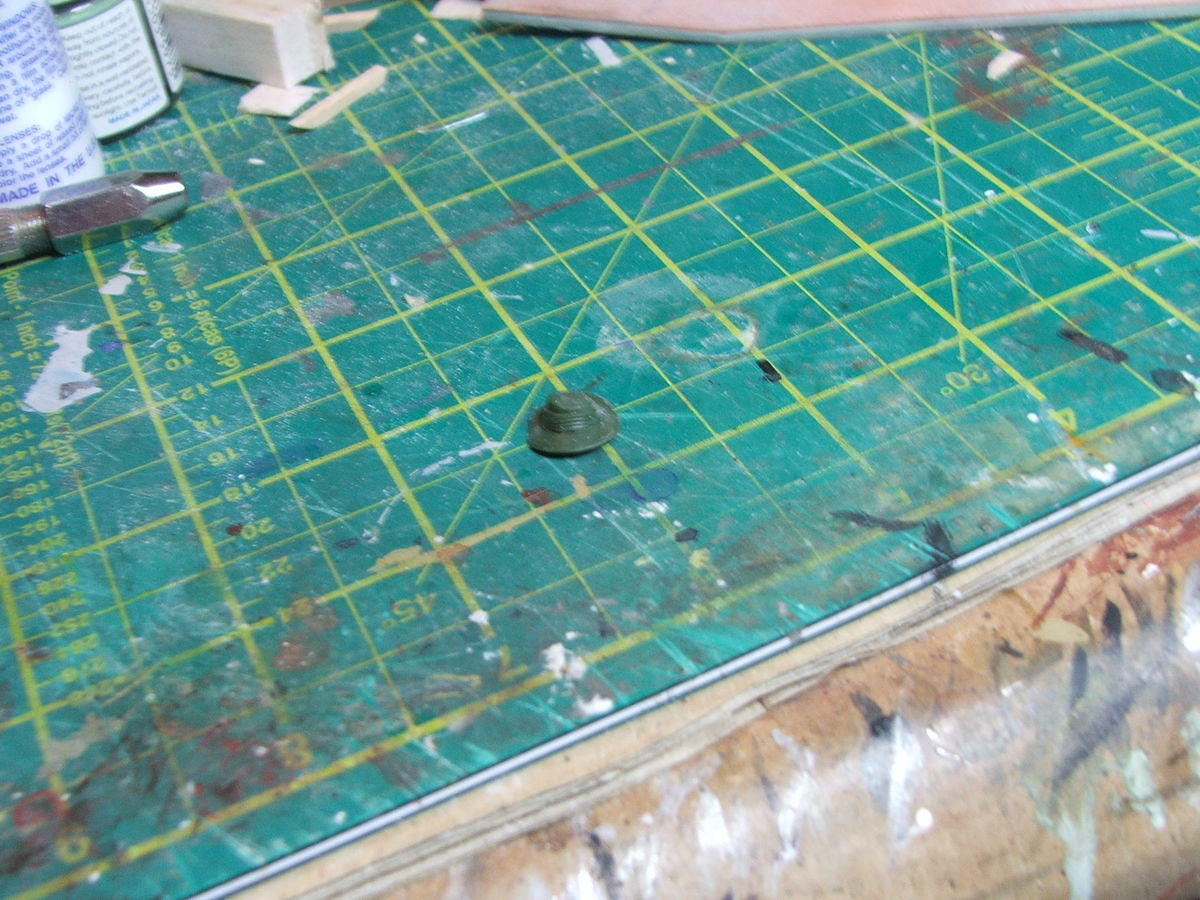
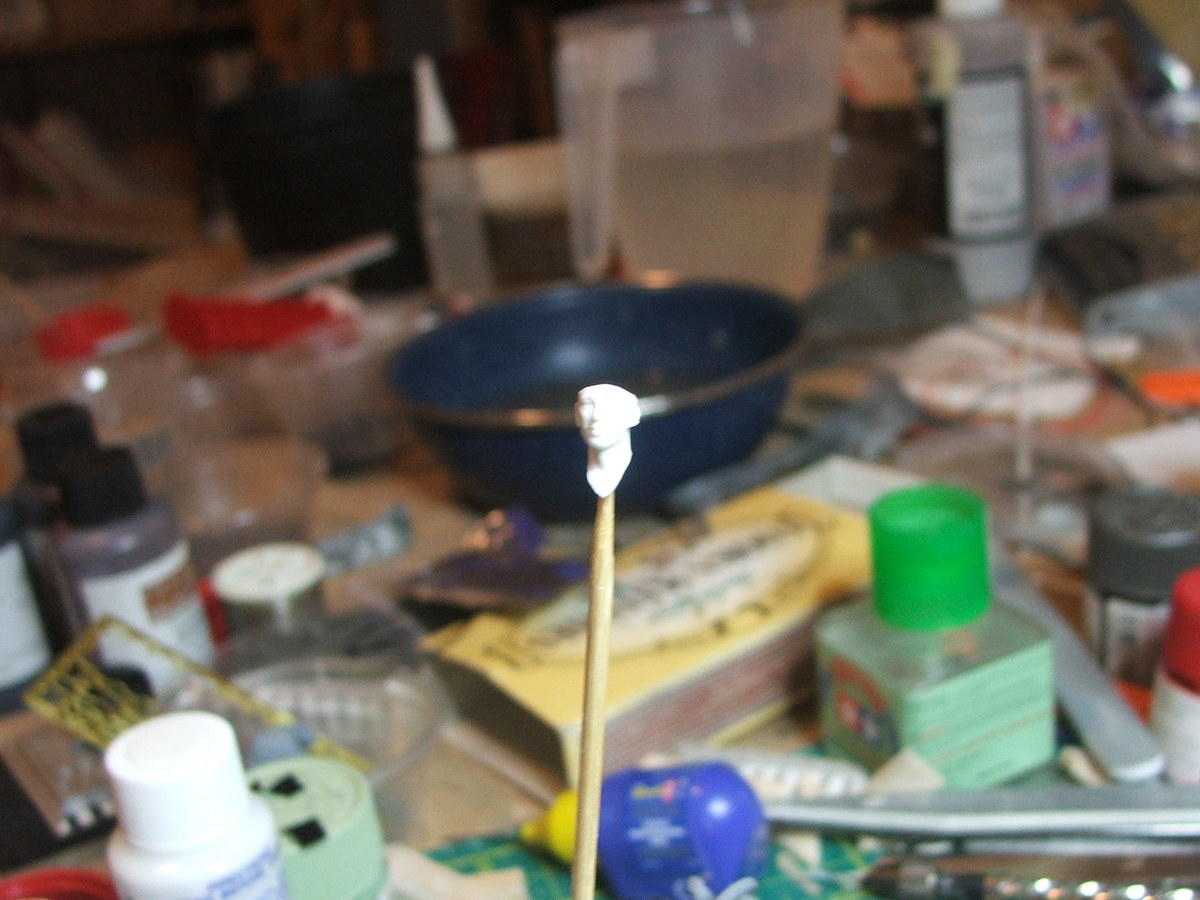
So for the head, I salvaged a bush had from one of the Aussie infantry set. This led to the discovery that the plastic used in this is a very stiff form of vinyl and not polystyrene as I expected. This caused issues with sanding - ie you can't sand vinyl! However I did get around that problem by sticking it in the freezer overnight which acts to make the plastic more solid and allows a certain amount of sanding if done quickly before it warms up. That led to this:
So to fit, the head needed a bit of trimming, which is difficult to see in this photo as the white plastic has got overexposed...
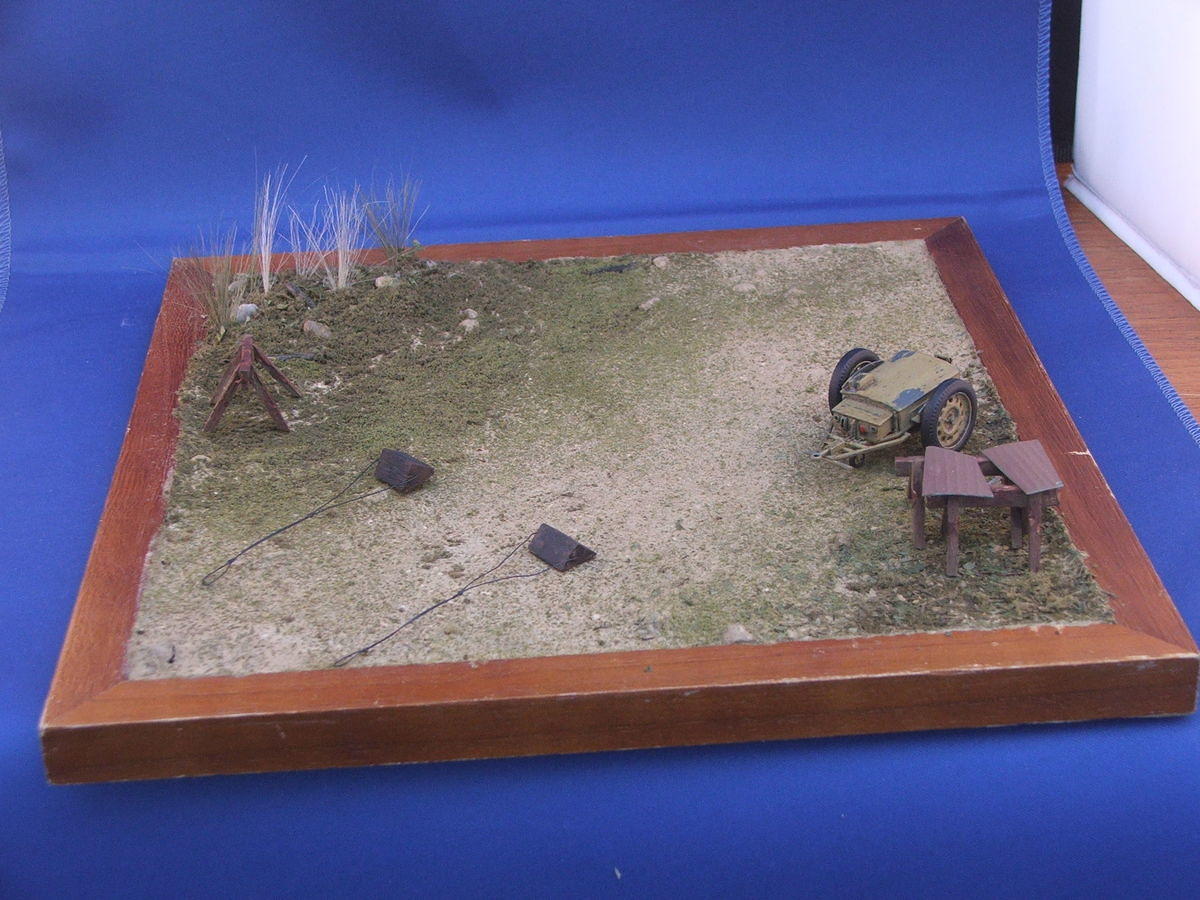
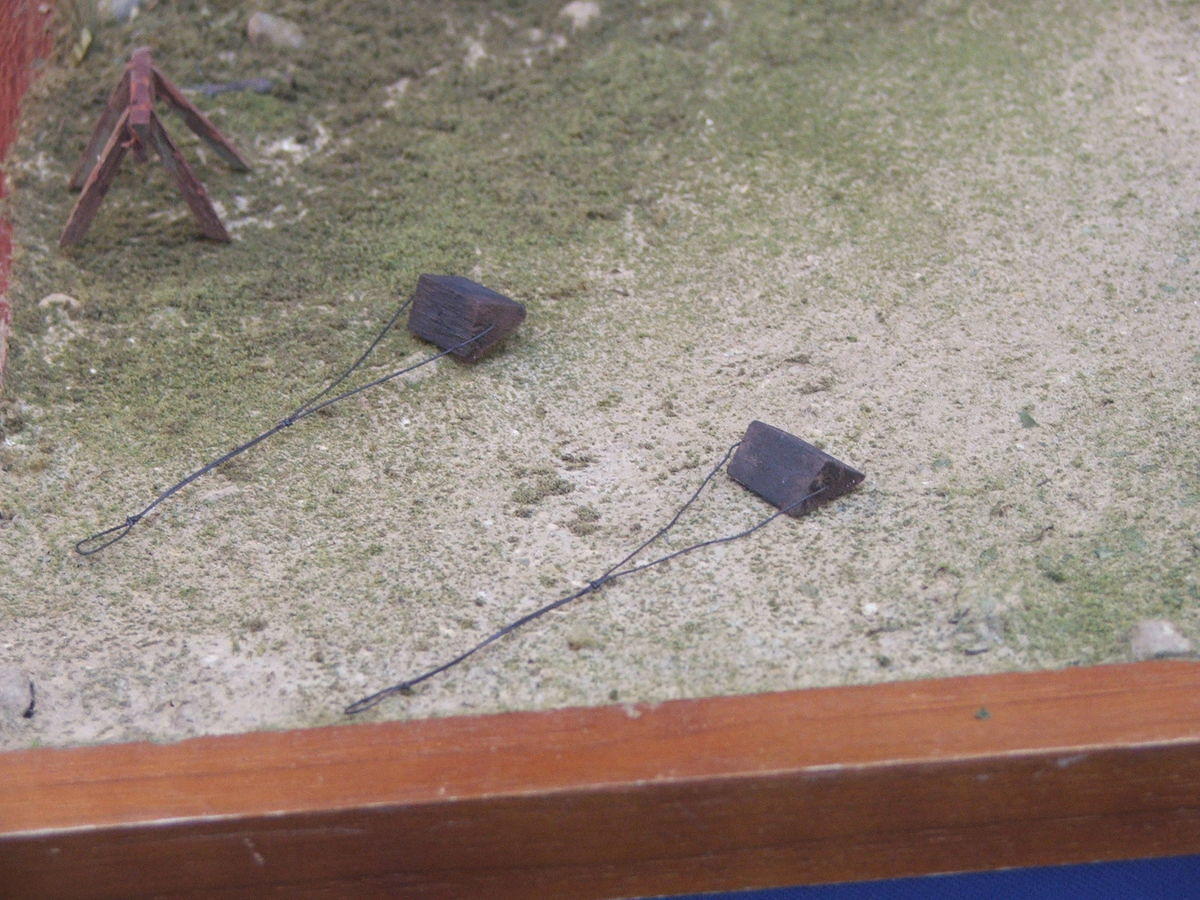
Now what about the base and the trolley? Well the trolley has been completed, painted and weathered. In addition I've knocked up some wooden trestles out of balsa to support the panels that have been removed from the fuselage as I doubt they'd have made a habit of dropping them in the dust/mud of the airfield. Then I also made up some wheel chocks so all together on the base it looks like this:
Close up of the accumulator trolley:
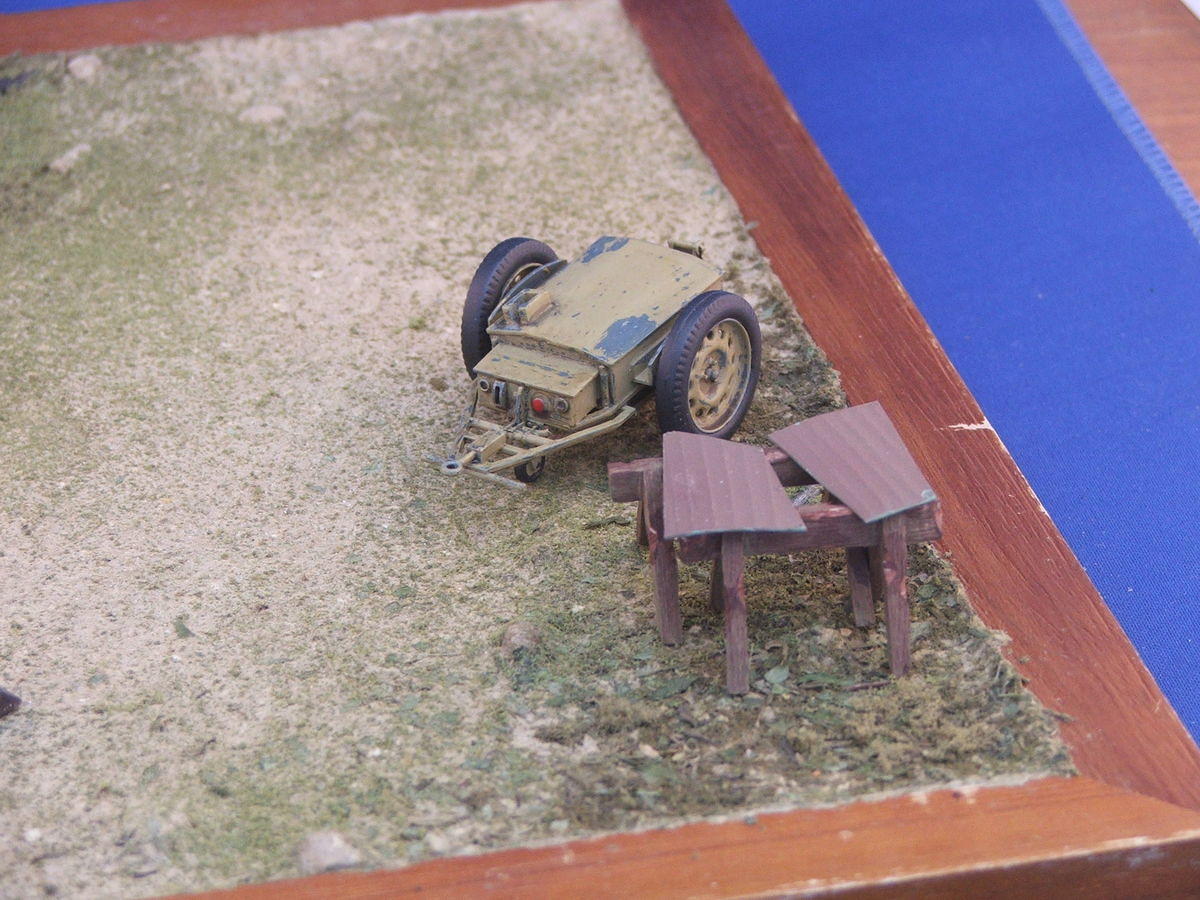
I painted this RAF blue, then did the hairspray trick and painted it stone colour then chipped some of the stone paint off to make it look worn and knocked about. I've left the cable off for now as that will be connected to the Hurricane in the finished diorama.
Here are the wheel chocks
Finally for this update, I plucked up courage and fixed the cockpit into the fuselage. I then spent a very annoying hour or more trying to get the bloody front canopy glass to stay glued. I had previously masked this up and painted inside and out, but when attached, there is contact with the gunsight and the small amount of pressure from this is enough to push the transparency forward. I first tried to glue it with Krystal Klear ie PVA glue, but that took so long to dry it all came apart. I then thought I'd be clever and use a 5 min epoxy to glue it as this would be quite strong. Sadly it took a LOT longer than 5 min to set (I think I got the mixture wrong) and it made a complete mess which took even longer to clean up. That was this morning and I carefully put it all to one side and took a break before it ended up thrown across the room in frustration - something I know I would have regretted HUGELY!!! Eventually this evening, I returned to the tried and trusted polystyrene cement and that did the job very efficiently and quickly! Jeeze!
So the cockpit now looks like this:
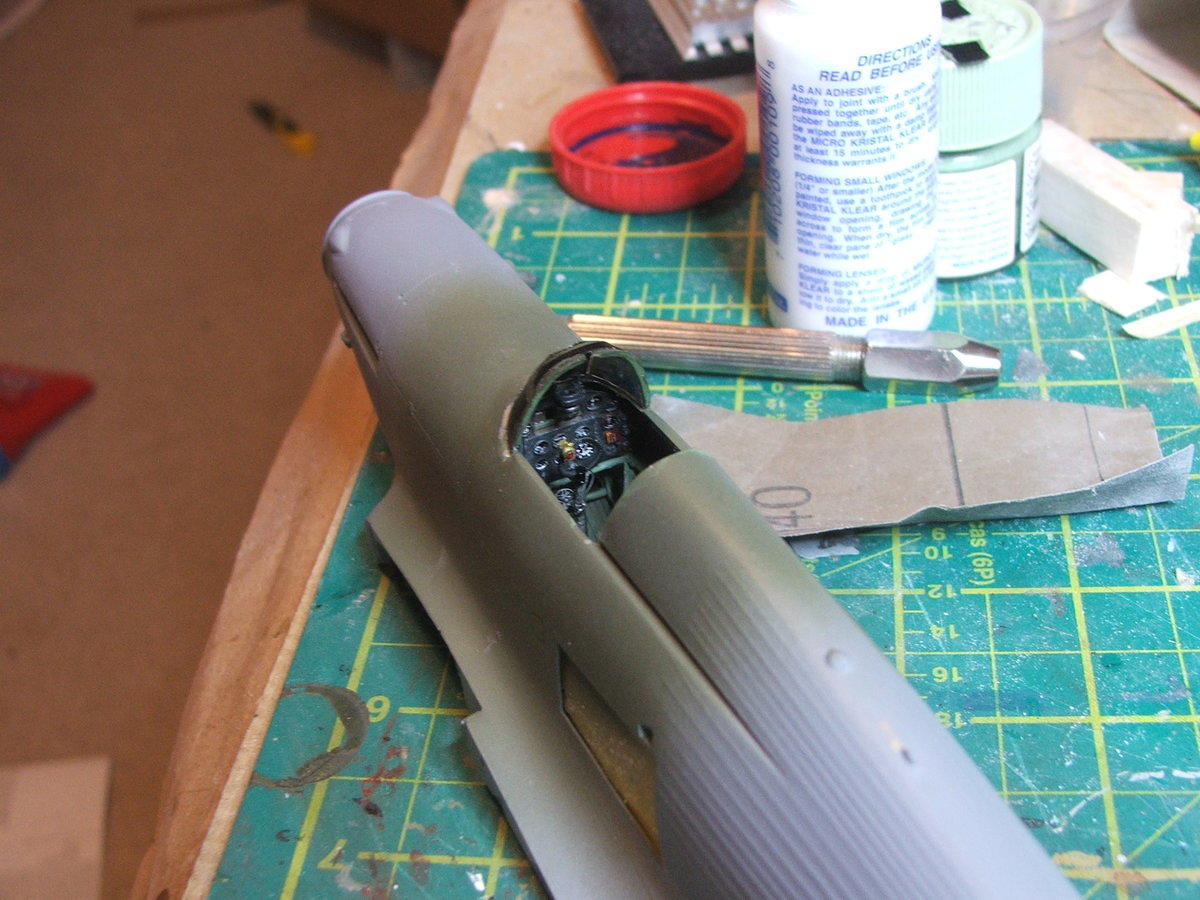
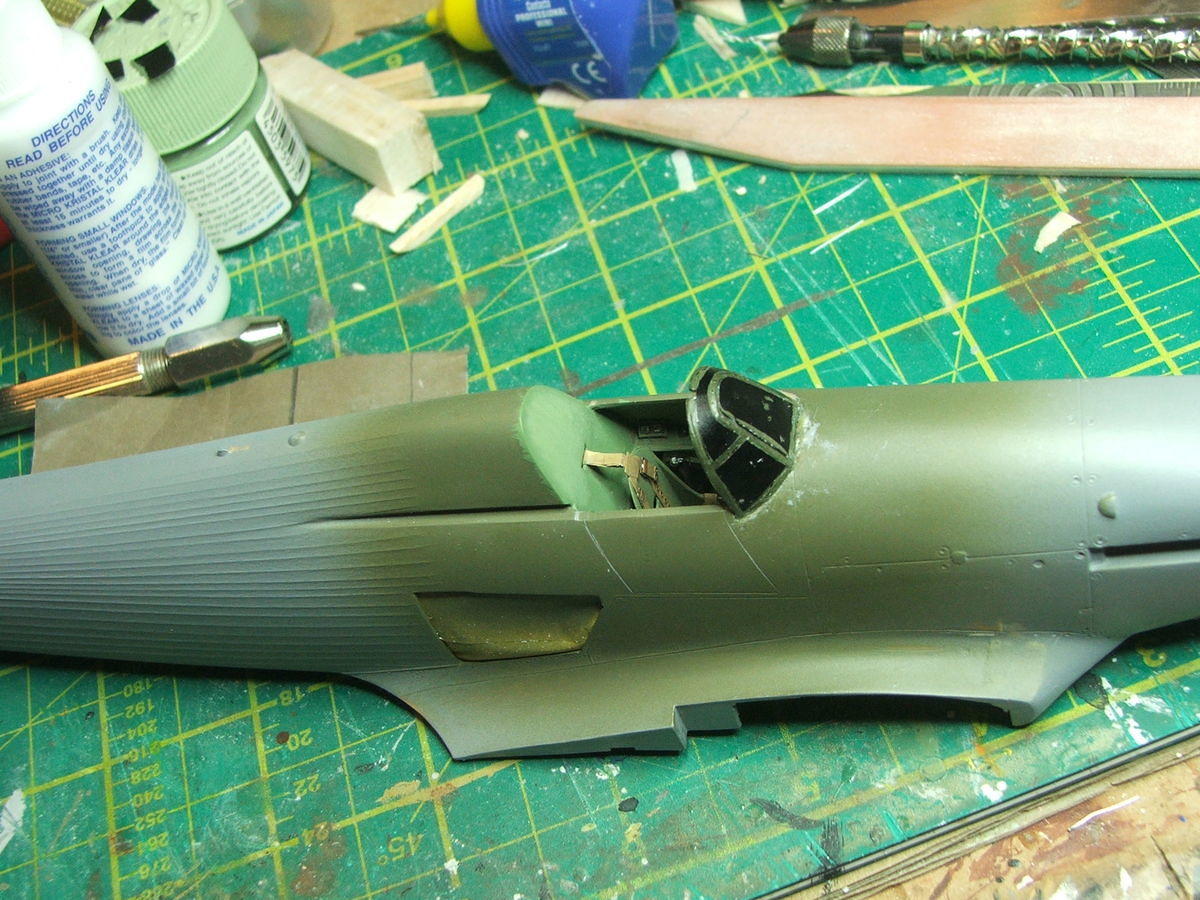
I've sanded down the joint between the cockpit rear bulkhead where it meets the upper planel behidn the pilots head and painted this cockpit green. You can also see the masking tape I've stuck on the inside of the open fuselage panels. This should be easy to remove one painting outside is complete. I've also pre-sprayed my mix of faded RAF green (XF81 with a couple of drops of XF 57 Buff, which I'll be using more of later) around the cockpit area so I can mask it easier when it comes to spraying the whole thing later.
One other thing that I've done that hasn't been photographed is the main wheels got painted using Tamiya xf85 Rubber black. This will get toned down and muddied up when it comes to weathering later. I've also done a few more details on the undercarriage legs, making sure then fit well into the resin wheel wells. I've left them off for now so its easier to handle, but when they get attached, I'll then be adding wires and break lines as required.
So thats it for now. I think this week will see the wings and fuselage finally joined together - a pretty big job as the fit is pretty bad, so I expect to do a lot of filling and sanding - another reason for masking the panel openings!
Narayan - it took a whole evening to assemble that far
Thanks Steve and broadside
So for progress this weeks its been a bit all over the place. I started work on the figure that will represent my father. Beginning with the Airfix Multipose 8th Army figure set as shown here:
the prone figure immediately stands out for the position of the legs...
so with a bit of manipulation this can be turned into this:
which is a very good approximation to the pose I've got in mind as inspired by this photo
except of course my Dad would be in tropical gear and not wellies!
In place this looks pretty convincing...
So what about the torso? This went on okay along with arms that make the right pose. The torso-waist join required a lot of filling with some epoxy green stuff, but came out okay with a bit of careful carving and sanding. After trying a number of arms, I found a handy one for the left arm which would be resting on the fuselage as a support, and a right arm reaching into the body. Here it is all primed up and ready for paint:
and from behind (the most common view)
So for the head, I salvaged a bush had from one of the Aussie infantry set. This led to the discovery that the plastic used in this is a very stiff form of vinyl and not polystyrene as I expected. This caused issues with sanding - ie you can't sand vinyl! However I did get around that problem by sticking it in the freezer overnight which acts to make the plastic more solid and allows a certain amount of sanding if done quickly before it warms up. That led to this:
So to fit, the head needed a bit of trimming, which is difficult to see in this photo as the white plastic has got overexposed...
Now what about the base and the trolley? Well the trolley has been completed, painted and weathered. In addition I've knocked up some wooden trestles out of balsa to support the panels that have been removed from the fuselage as I doubt they'd have made a habit of dropping them in the dust/mud of the airfield. Then I also made up some wheel chocks so all together on the base it looks like this:
Close up of the accumulator trolley:
I painted this RAF blue, then did the hairspray trick and painted it stone colour then chipped some of the stone paint off to make it look worn and knocked about. I've left the cable off for now as that will be connected to the Hurricane in the finished diorama.
Here are the wheel chocks
Finally for this update, I plucked up courage and fixed the cockpit into the fuselage. I then spent a very annoying hour or more trying to get the bloody front canopy glass to stay glued. I had previously masked this up and painted inside and out, but when attached, there is contact with the gunsight and the small amount of pressure from this is enough to push the transparency forward. I first tried to glue it with Krystal Klear ie PVA glue, but that took so long to dry it all came apart. I then thought I'd be clever and use a 5 min epoxy to glue it as this would be quite strong. Sadly it took a LOT longer than 5 min to set (I think I got the mixture wrong) and it made a complete mess which took even longer to clean up. That was this morning and I carefully put it all to one side and took a break before it ended up thrown across the room in frustration - something I know I would have regretted HUGELY!!! Eventually this evening, I returned to the tried and trusted polystyrene cement and that did the job very efficiently and quickly! Jeeze!
So the cockpit now looks like this:
I've sanded down the joint between the cockpit rear bulkhead where it meets the upper planel behidn the pilots head and painted this cockpit green. You can also see the masking tape I've stuck on the inside of the open fuselage panels. This should be easy to remove one painting outside is complete. I've also pre-sprayed my mix of faded RAF green (XF81 with a couple of drops of XF 57 Buff, which I'll be using more of later) around the cockpit area so I can mask it easier when it comes to spraying the whole thing later.
One other thing that I've done that hasn't been photographed is the main wheels got painted using Tamiya xf85 Rubber black. This will get toned down and muddied up when it comes to weathering later. I've also done a few more details on the undercarriage legs, making sure then fit well into the resin wheel wells. I've left them off for now so its easier to handle, but when they get attached, I'll then be adding wires and break lines as required.
So thats it for now. I think this week will see the wings and fuselage finally joined together - a pretty big job as the fit is pretty bad, so I expect to do a lot of filling and sanding - another reason for masking the panel openings!
-
Some Bloke
- Series 3 and Beyond
- Posts: 12
- Joined: November 28th, 2012, 3:59 pm
Re: 1:32 Revell Hurricane IIC
I'm gobsmacked!!!
Fantastic!!!
Fantastic!!!
-
Narayan

- If anyone needs me, I'll be in my office
- Posts: 2602
- Joined: April 10th, 2011, 7:01 pm
- Location: The Middle of Nowhere in Ireland
Re: 1:32 Revell Hurricane IIC
Taking shape very nicely, look forward to seeing those wings attached.
_________________
Narayan
Crooked cops. Do they come any other way? If I'd been just a little dumber, I could have joined the force myself.
A:B
2013 01:01 2010 44:12
2012 20:05 2009 19:16
2011 11:10 2008 16:03
Overall 194:52
_________________
Narayan
Crooked cops. Do they come any other way? If I'd been just a little dumber, I could have joined the force myself.
A:B
2013 01:01 2010 44:12
2012 20:05 2009 19:16
2011 11:10 2008 16:03
Overall 194:52
-
Old_Tonto

- Modelling Gent and Scholar
- Posts: 8061
- Joined: May 1st, 2011, 7:41 pm
- Location: Middlesbrough, Peoples Republic of Teesside.
Re: 1:32 Revell Hurricane IIC
That is a very nice looking base. Can't wait to see the Hurri on it.
2023 - A:0 B:0 C:0
Current Projects:
East German Air Force (1956-90)
South African Air Force (1958-93)
Current Projects:
East German Air Force (1956-90)
South African Air Force (1958-93)
-
Marek

- Modelling Gent and Scholar
- Posts: 2455
- Joined: May 1st, 2011, 8:03 am
- Location: Madison, WI
- Contact:
Re: 1:32 Revell Hurricane IIC
Wow, that dio will look mind-boggling.
-
Chuck E
- Established 1949
- Posts: 2421
- Joined: May 3rd, 2011, 8:05 pm
- Location: Darlington. Home of the Railways
Re: 1:32 Revell Hurricane IIC
Look at all that mud ! Some heavy weathering there. Great thread this.
So many models, so little time.
Re: 1:32 Revell Hurricane IIC
Thanks guys - the wings went on last night - gulp! a LOT of sanding and filling is required - the fit is pretty bad! Photos will follow later...
Re: 1:32 Revell Hurricane IIC
Might be too late, but the Battle Of Britain Memorial Flight's Facebook page are putting up detailed internal photos of their Hurricane at the moment
Re: 1:32 Revell Hurricane IIC
Thanks for letting me know - I posted some of my pics over there - they seems to like it
This weeks update... things slowed down a bit this week, partly due to being distracted with other non-modelling things. My girlfriend is coming over from Portugal this coming week for her first visit since I moved into the new house, so I've been "spring" cleaning and managed to almost do my back in moving the couch in the lounge! Oh well, its a good excuse to be sitting not moving about much lol. I'll have ot move all the paints etc into the shed when she's here as she has this silly thing about smelling paints, solvents and sundry chemicals. Very fussy! ;)
So what about the model I hear you ask? Welll this was the week where the wings went on. The problem was the wing cord of the wings was much deeper than that of the fuselage joints! So this required a careful build up of the complex curve. First was to fill the coarse gaps with Mr Dissolved putty:
This was left overnight to dry out. Then a layer of squadron white putty went over the top and again was left overnight to dry out. This was then carefully sanded down, trying to keep the complex curves smooth. A bit more filling and sanding left a reasonable surface. To smooth the whole lot off, a coat of Mr Surfacer 500 was painted over the joints and again left overnight
The final stage was to sand this down and get a nice smooth finish:

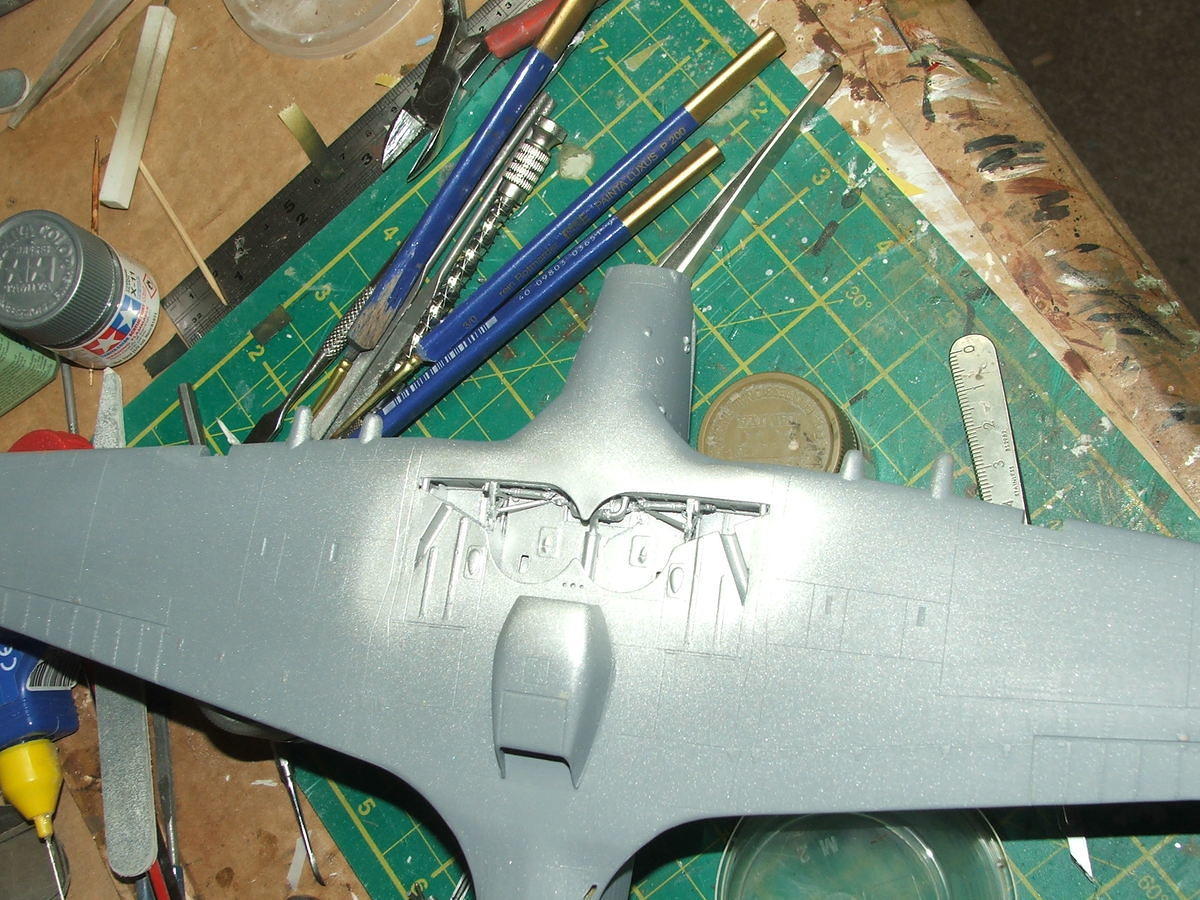
It was while taking that last photo that I realised I was dumb and had prayed silver in the wheel wells instead of cocpit green as I originally planned as this was common on later Hurricanes. I'm happy with the wing joints now - I thought it would be harder to get a good joint, but it just took patience!
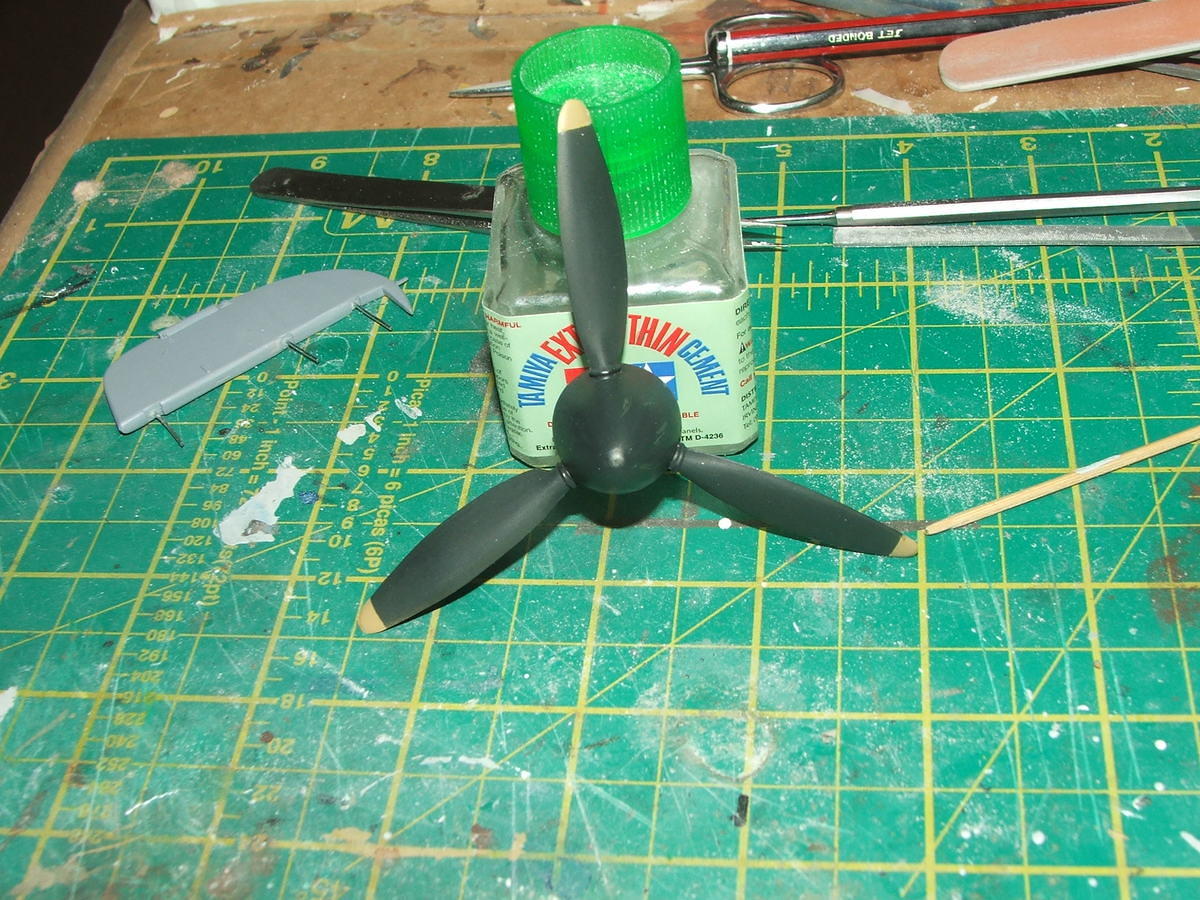
In other news, work continued on the properllor:
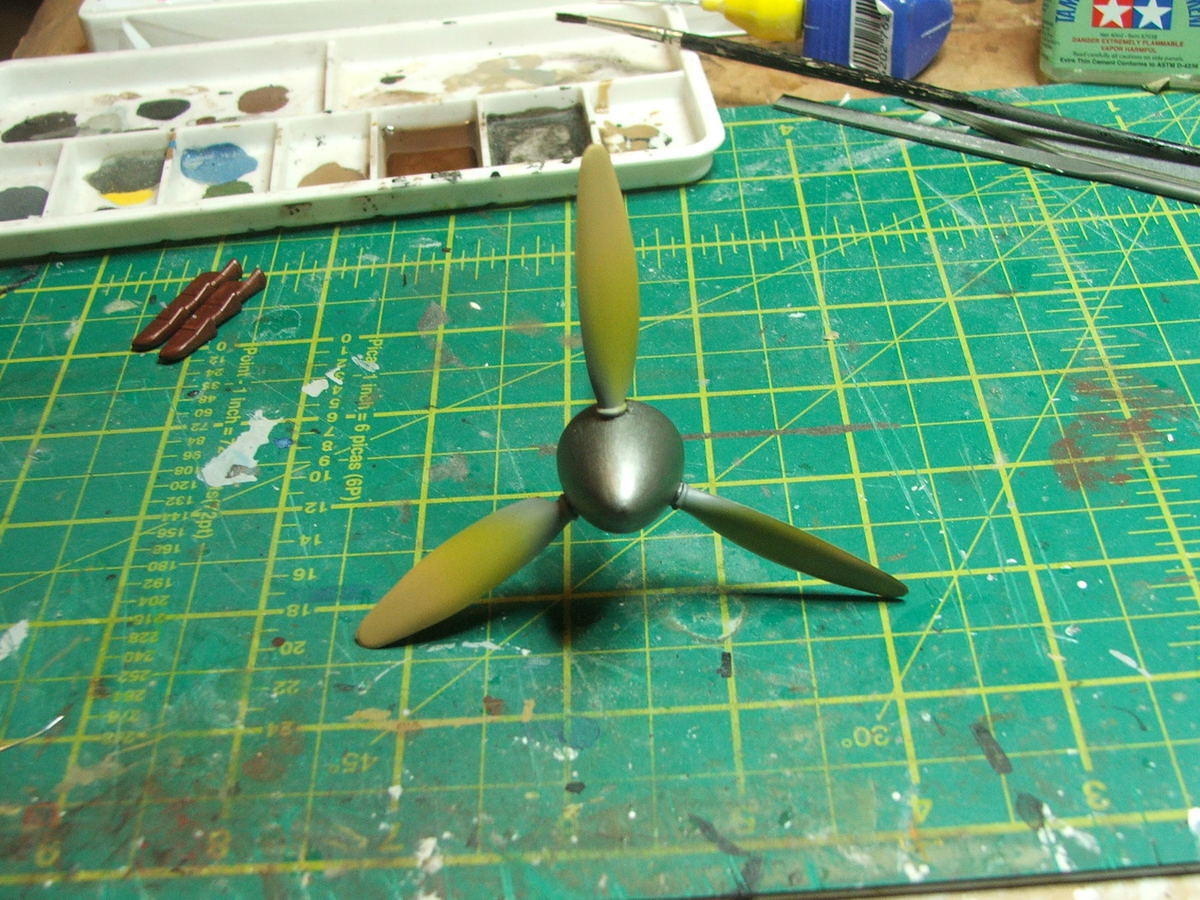
O've tried to represent a faded yellow tip using a mis of yellow and dark yellow. I painted the spinner metallic grey, then dabbed a few spots of masking fluid in streaks. Then once the tips were masked, I sprayed it with Nato Black. Next day, I peeled off the masking fluid then using a piece of kitchen towel polished up the matt finish to a more satin look.
In the background you can see the resin exhausts painted up but not yet weathered. All the while other bits were drying I continued on the figure to represent my dad. Hiw uniform was painted in XF 49 Khaki and exposed skin given a once over with some flash -coloured paint. A oil wash with burnt ochre was then applied and it was left for a day:
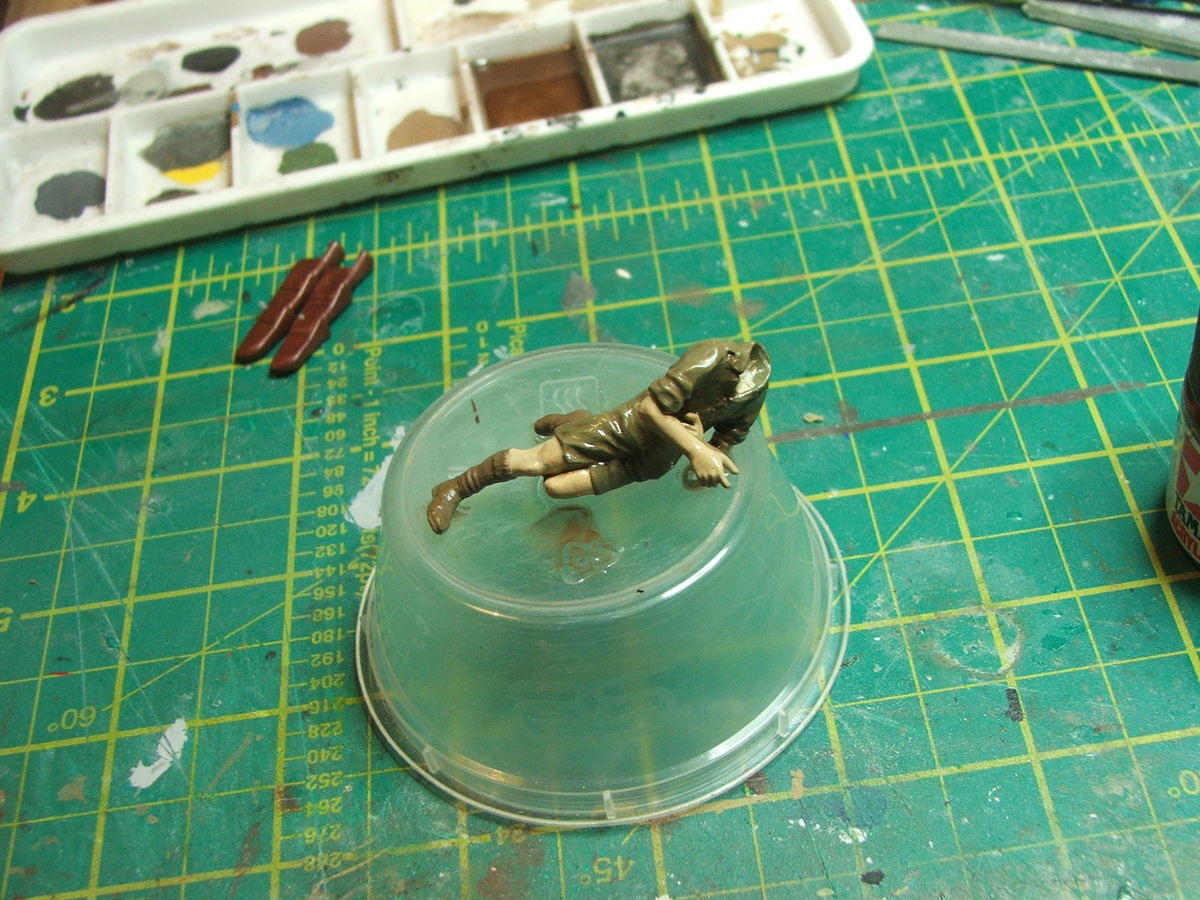
I then started on the head. Now I've not been very good with heads in the past so I looked up some tutorials on how to paint heads in 1:35 (although this is 1:32 of course!) and found a very good one on Missing Lynx which I'm following. Here is how the head looked after the first session - please excuse it being so dark - its bloody hard to photograph this thing without it being totally washed out with the camera flash!
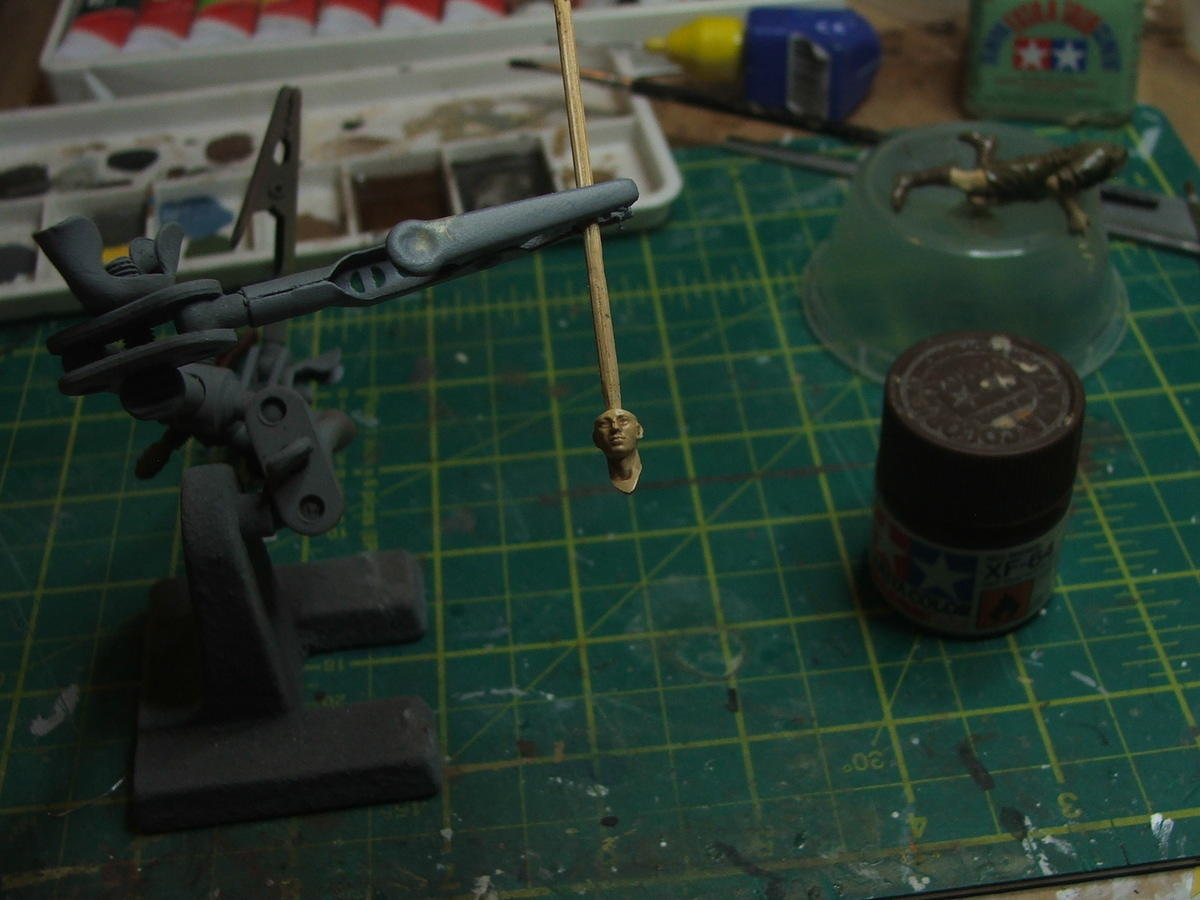
The big downside with oil paints is of course the drying time! I hed to leave things alone for several days then came back to
touch things up again with some more oil wash to accentuate the shadows better:
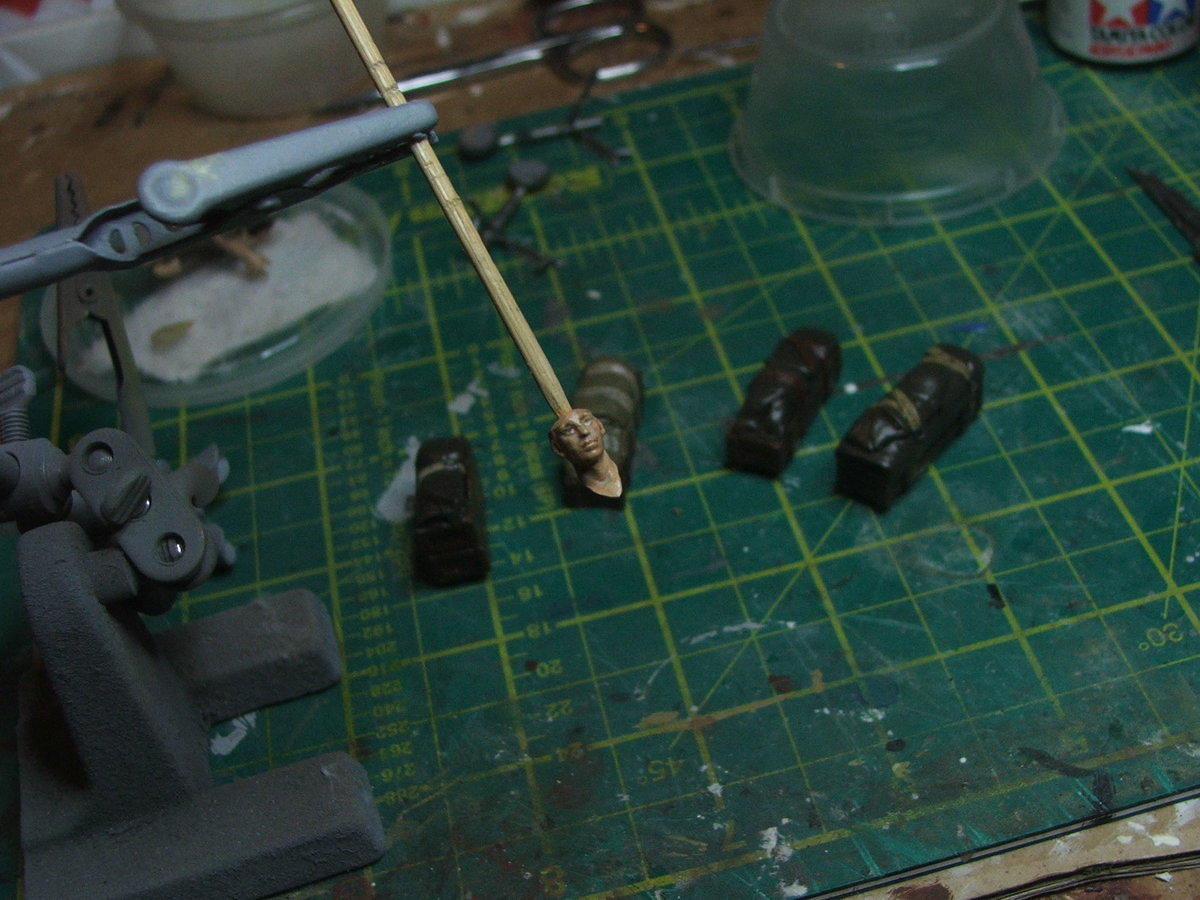
The face in this looks a bit "Black and White Minstrels" because the light seems to have picked up lighter areas around the eyes which are not all that obvious when you view it live. I've quite pleased with how this look. Sadly it doesn't really look much like my dad, but I guess thats asking perhaps a bit to much.
What else? Lots of spare time to work on other bits and bobs like the cockpit canopy, which got masked up insid and out and painted. I'm using the canopy that came with the kit rather than the vac formed one I bought. The kit one is not bad, with nice moulded frame detail.
I saw a mention of Value Gear on a forum this week and that reminded me I had picked up 3 sets at SMW so I had a look through the various piece and found some that might work in this context.
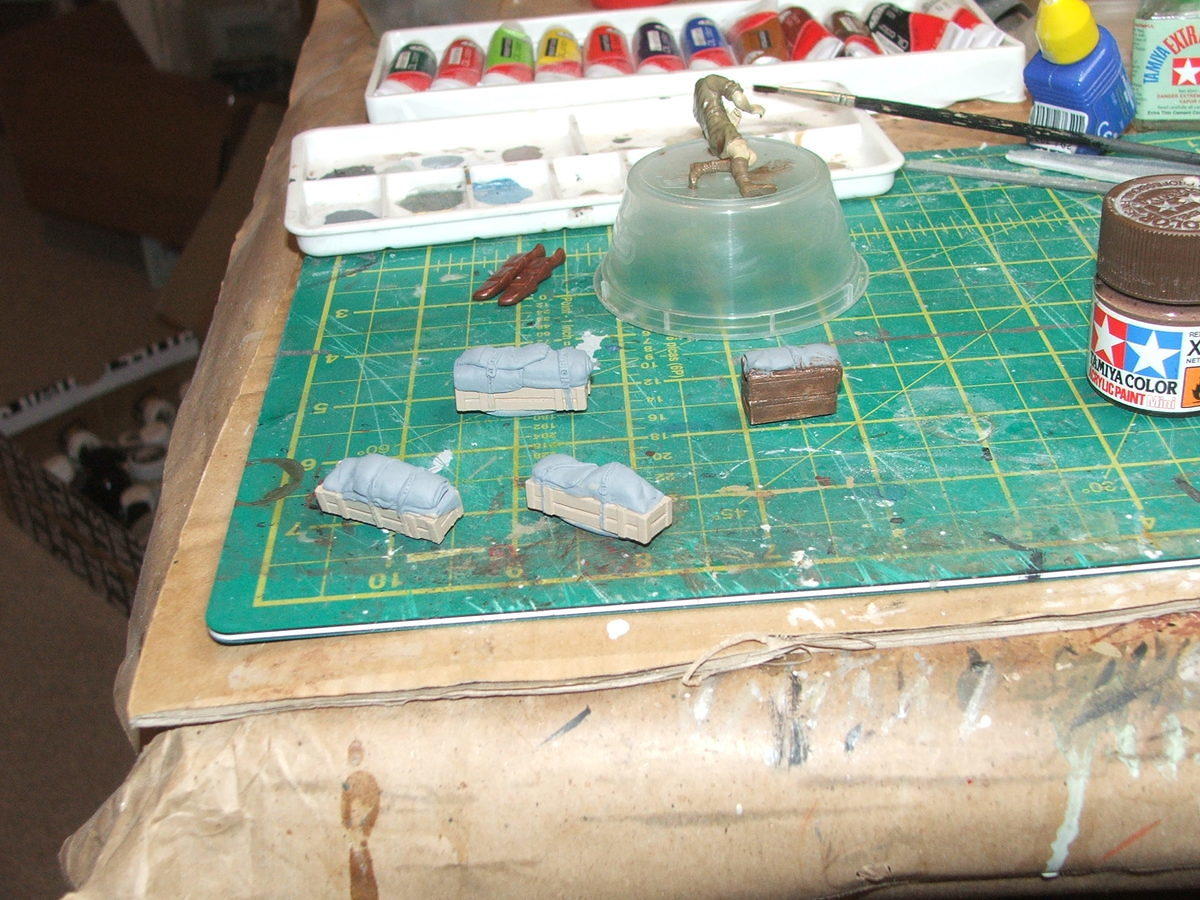
These are several crates with some tarp aor tents over the top. I gave the crates and initial coat of buff, then overpainted roughly with red brown to give the wood some colour variation
The tarps got painted khaki drab and one in Khaki, with the straps being painted a variety of colours from lenoleum brown to buff to desert yellow to give the straps some variation. Then an oil wash was applied to accentuate the creases etc.
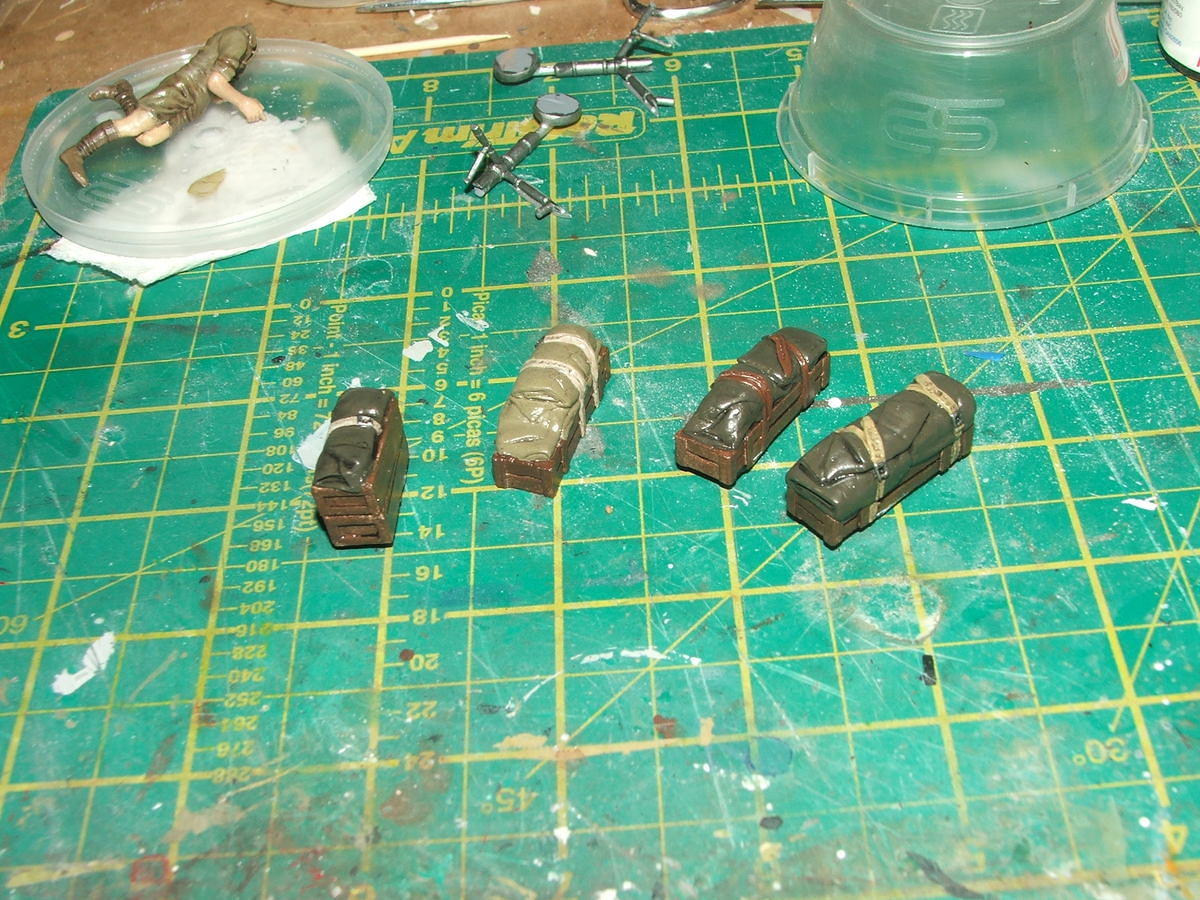
In the background you can also see the landing gear which was also given its initial silver and metallic gray colours. Unphotographed as yet, the tool box got sprayed silver, then given a coat of hairspray. Once all this has dried it'll be painted blue and then chipped/worn.
I've got a few more days this week before the GF arrives, then I'll be preoccupied for a week before I can return to the solvents and paint smells
This weeks update... things slowed down a bit this week, partly due to being distracted with other non-modelling things. My girlfriend is coming over from Portugal this coming week for her first visit since I moved into the new house, so I've been "spring" cleaning and managed to almost do my back in moving the couch in the lounge! Oh well, its a good excuse to be sitting not moving about much lol. I'll have ot move all the paints etc into the shed when she's here as she has this silly thing about smelling paints, solvents and sundry chemicals. Very fussy! ;)
So what about the model I hear you ask? Welll this was the week where the wings went on. The problem was the wing cord of the wings was much deeper than that of the fuselage joints! So this required a careful build up of the complex curve. First was to fill the coarse gaps with Mr Dissolved putty:
This was left overnight to dry out. Then a layer of squadron white putty went over the top and again was left overnight to dry out. This was then carefully sanded down, trying to keep the complex curves smooth. A bit more filling and sanding left a reasonable surface. To smooth the whole lot off, a coat of Mr Surfacer 500 was painted over the joints and again left overnight
The final stage was to sand this down and get a nice smooth finish:
It was while taking that last photo that I realised I was dumb and had prayed silver in the wheel wells instead of cocpit green as I originally planned as this was common on later Hurricanes. I'm happy with the wing joints now - I thought it would be harder to get a good joint, but it just took patience!
In other news, work continued on the properllor:
O've tried to represent a faded yellow tip using a mis of yellow and dark yellow. I painted the spinner metallic grey, then dabbed a few spots of masking fluid in streaks. Then once the tips were masked, I sprayed it with Nato Black. Next day, I peeled off the masking fluid then using a piece of kitchen towel polished up the matt finish to a more satin look.
In the background you can see the resin exhausts painted up but not yet weathered. All the while other bits were drying I continued on the figure to represent my dad. Hiw uniform was painted in XF 49 Khaki and exposed skin given a once over with some flash -coloured paint. A oil wash with burnt ochre was then applied and it was left for a day:
I then started on the head. Now I've not been very good with heads in the past so I looked up some tutorials on how to paint heads in 1:35 (although this is 1:32 of course!) and found a very good one on Missing Lynx which I'm following. Here is how the head looked after the first session - please excuse it being so dark - its bloody hard to photograph this thing without it being totally washed out with the camera flash!
The big downside with oil paints is of course the drying time! I hed to leave things alone for several days then came back to
touch things up again with some more oil wash to accentuate the shadows better:
The face in this looks a bit "Black and White Minstrels" because the light seems to have picked up lighter areas around the eyes which are not all that obvious when you view it live. I've quite pleased with how this look. Sadly it doesn't really look much like my dad, but I guess thats asking perhaps a bit to much.
What else? Lots of spare time to work on other bits and bobs like the cockpit canopy, which got masked up insid and out and painted. I'm using the canopy that came with the kit rather than the vac formed one I bought. The kit one is not bad, with nice moulded frame detail.
I saw a mention of Value Gear on a forum this week and that reminded me I had picked up 3 sets at SMW so I had a look through the various piece and found some that might work in this context.
These are several crates with some tarp aor tents over the top. I gave the crates and initial coat of buff, then overpainted roughly with red brown to give the wood some colour variation
The tarps got painted khaki drab and one in Khaki, with the straps being painted a variety of colours from lenoleum brown to buff to desert yellow to give the straps some variation. Then an oil wash was applied to accentuate the creases etc.
In the background you can also see the landing gear which was also given its initial silver and metallic gray colours. Unphotographed as yet, the tool box got sprayed silver, then given a coat of hairspray. Once all this has dried it'll be painted blue and then chipped/worn.
I've got a few more days this week before the GF arrives, then I'll be preoccupied for a week before I can return to the solvents and paint smells
-
Nax

- Modelling Gent and Scholar
- Posts: 1193
- Joined: December 26th, 2011, 2:09 am
- Location: Wagga, Australia
Re: 1:32 Revell Hurricane IIC
I'm really enjoying watching this build, and eagerly await each new post. Come on, show us some more, please. 
Steve/Nax
Enjoying trying to make them look real.
Enjoying trying to make them look real.
-
Old_Tonto
- Modelling Gent and Scholar
- Posts: 8061
- Joined: May 1st, 2011, 7:41 pm
- Location: Middlesbrough, Peoples Republic of Teesside.
Re: 1:32 Revell Hurricane IIC
It's all coming together. Can't wait for the finish. 
2023 - A:0 B:0 C:0
Current Projects:
East German Air Force (1956-90)
South African Air Force (1958-93)
Current Projects:
East German Air Force (1956-90)
South African Air Force (1958-93)
Re: 1:32 Revell Hurricane IIC
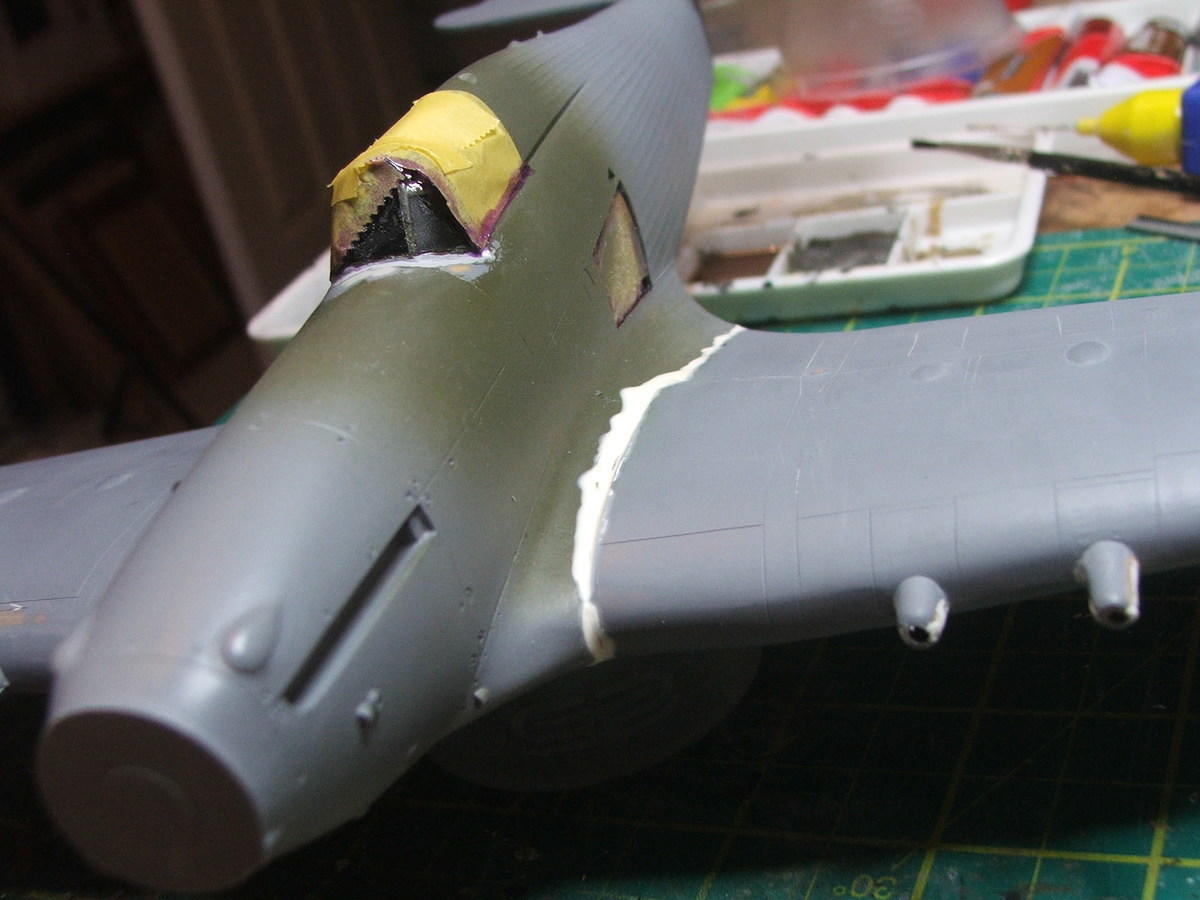
Indeed it is - the wheel bay nas now been properly painted and then stuffed with wet tissue to protect it from future spraying and yesterday and today I've been working on adding the Volkes air filter to the nose. Was a bit tricky as this was originally designed for the MK 1 nose and of course with the Mk II being longer, the curve was all wrong. Lots of filling required! I'll try to do an update tonight or tomorrow since my GF will be arriving tomorrow and I doubt if I'll get a chance to do any modelling or read the forums while she's here for a week - much more important things to do ;)
Re: 1:32 Revell Hurricane IIC
As promised here is a small update to cover to to this evening. I doubt if the re will be any more progress for the next week, what with the GF arriving tomorrow!
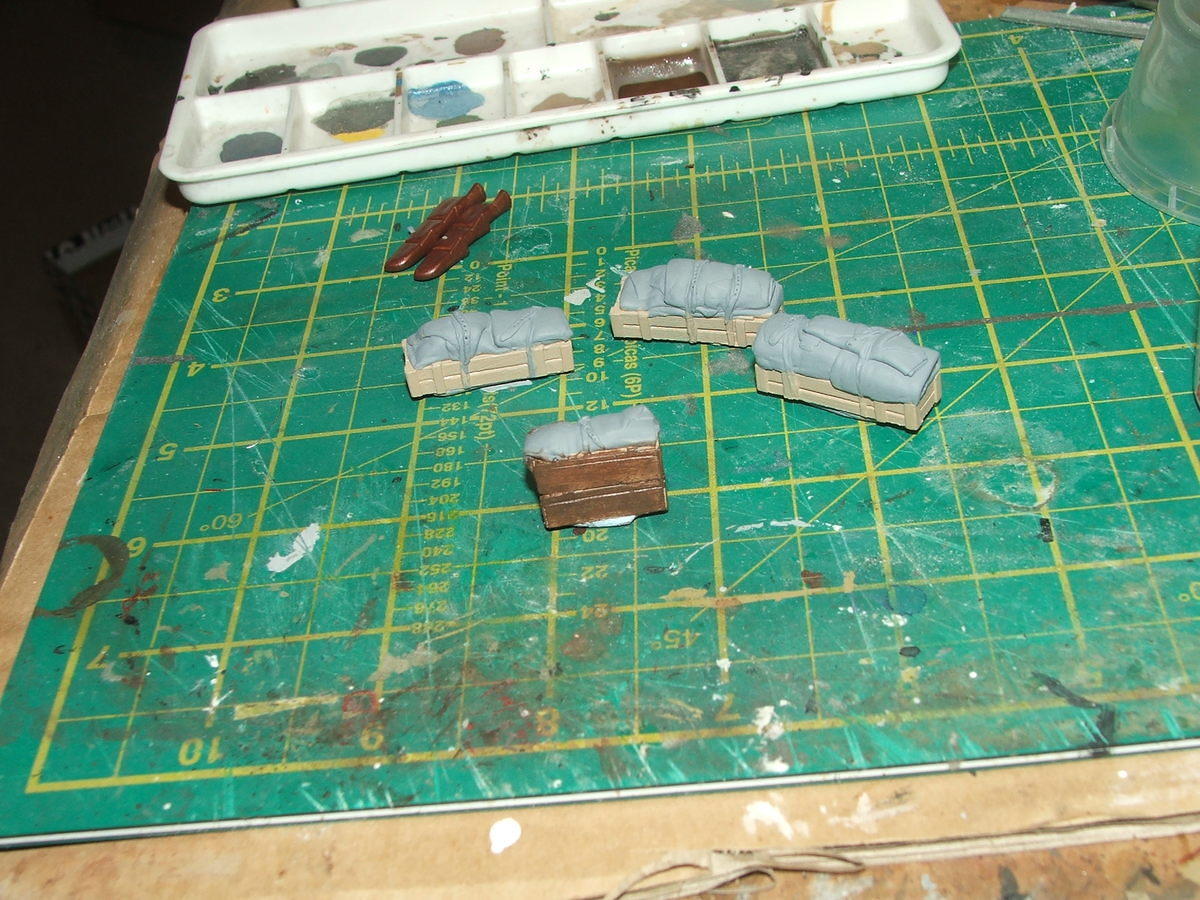
First off then, the crates got their final oil washes, matt varnish and a little bit of pigment dusting on the boxes:
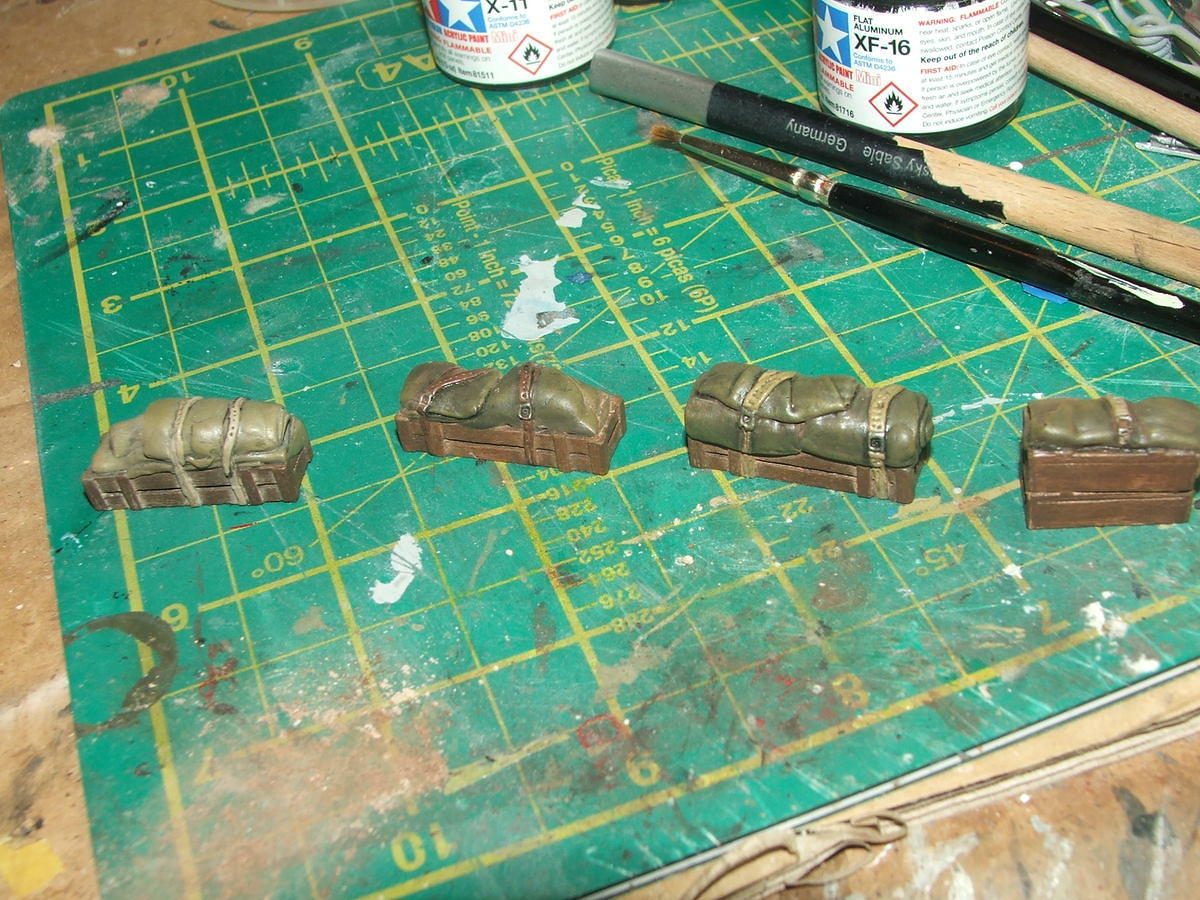
Trust me they are matt finish!
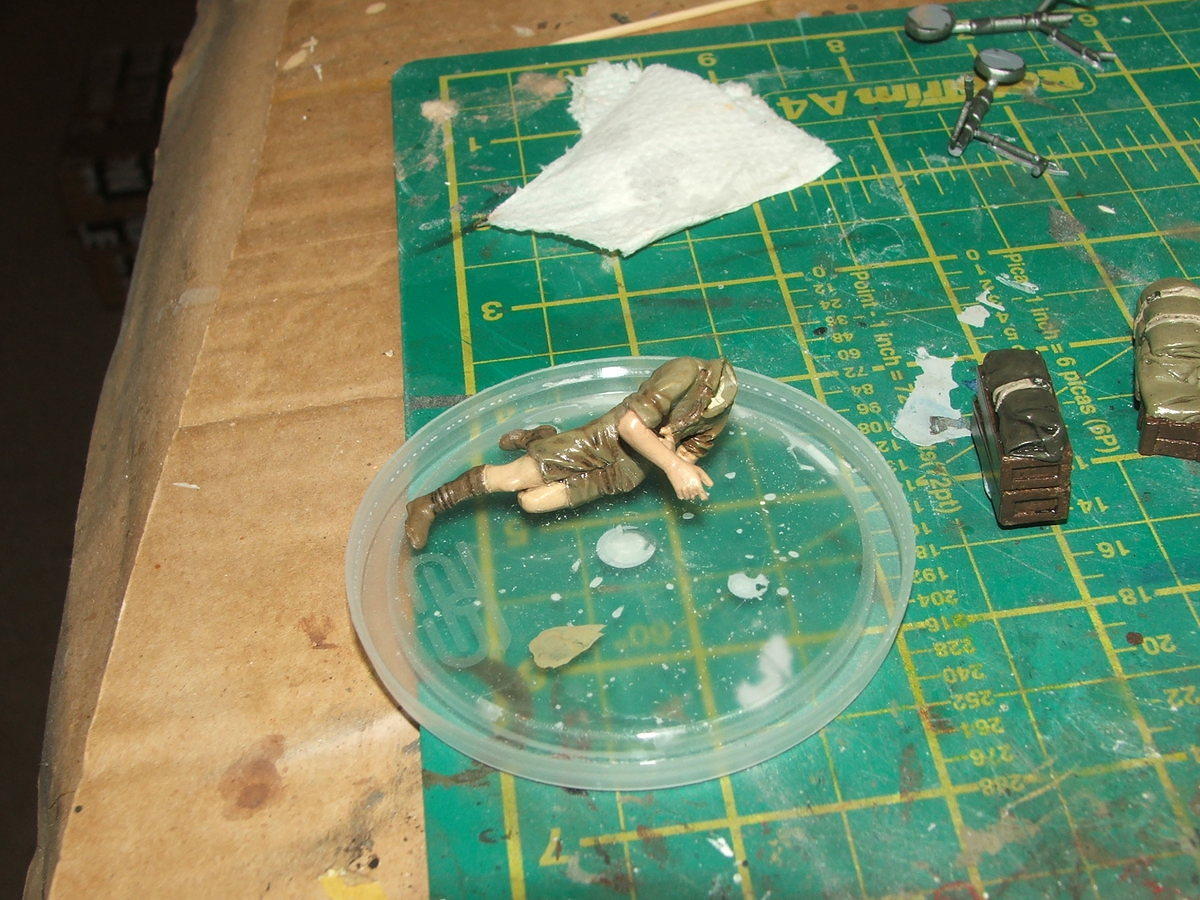
Next, the figure is almost complete. This has had multiple oil washes followed by a bit of drybrushing to bring up the folds and creases. The head was attached this evening and the only other thing I might do before the GF arrives is attach the hat.

The view that will be most common in the diorama
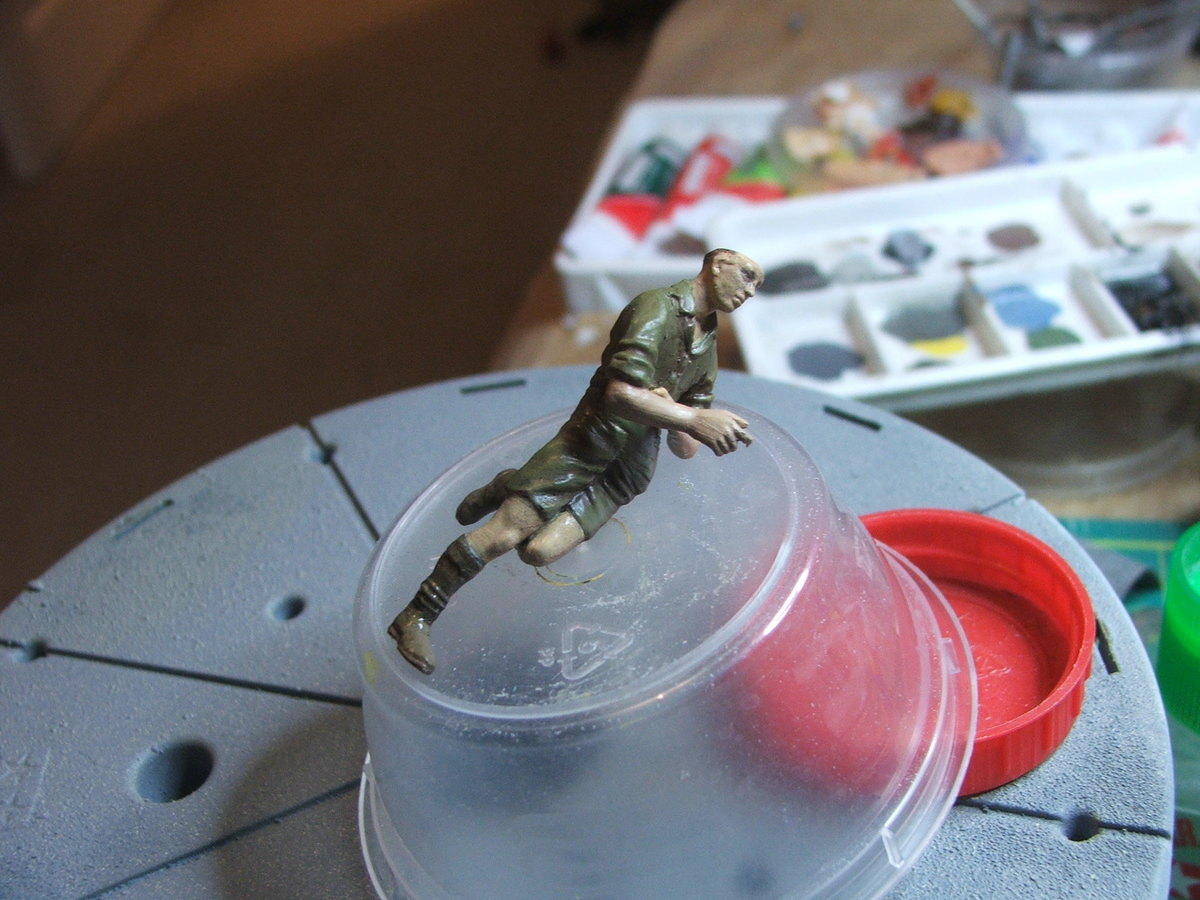
The shinyness comes from the oil washes. I will be giving it an all over matt varnish spray to tone that down.
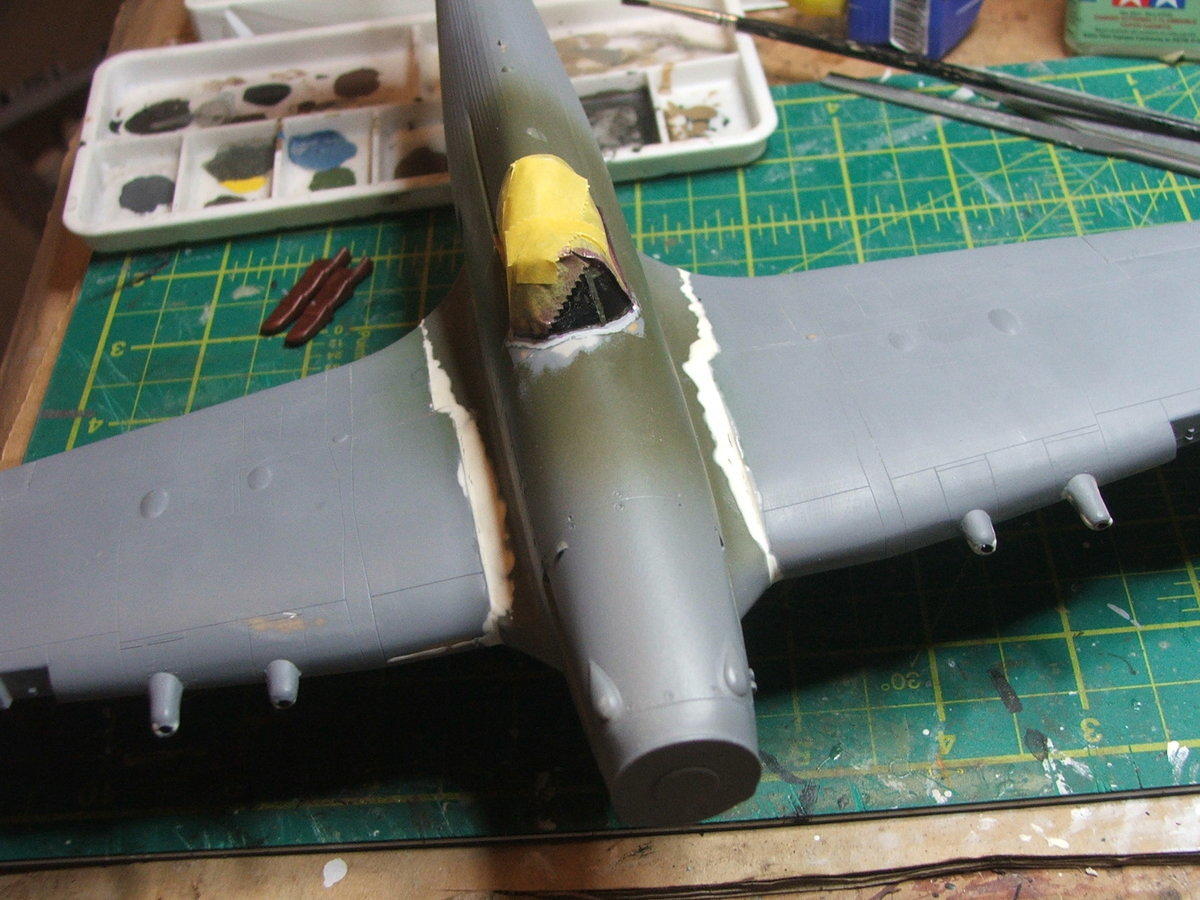
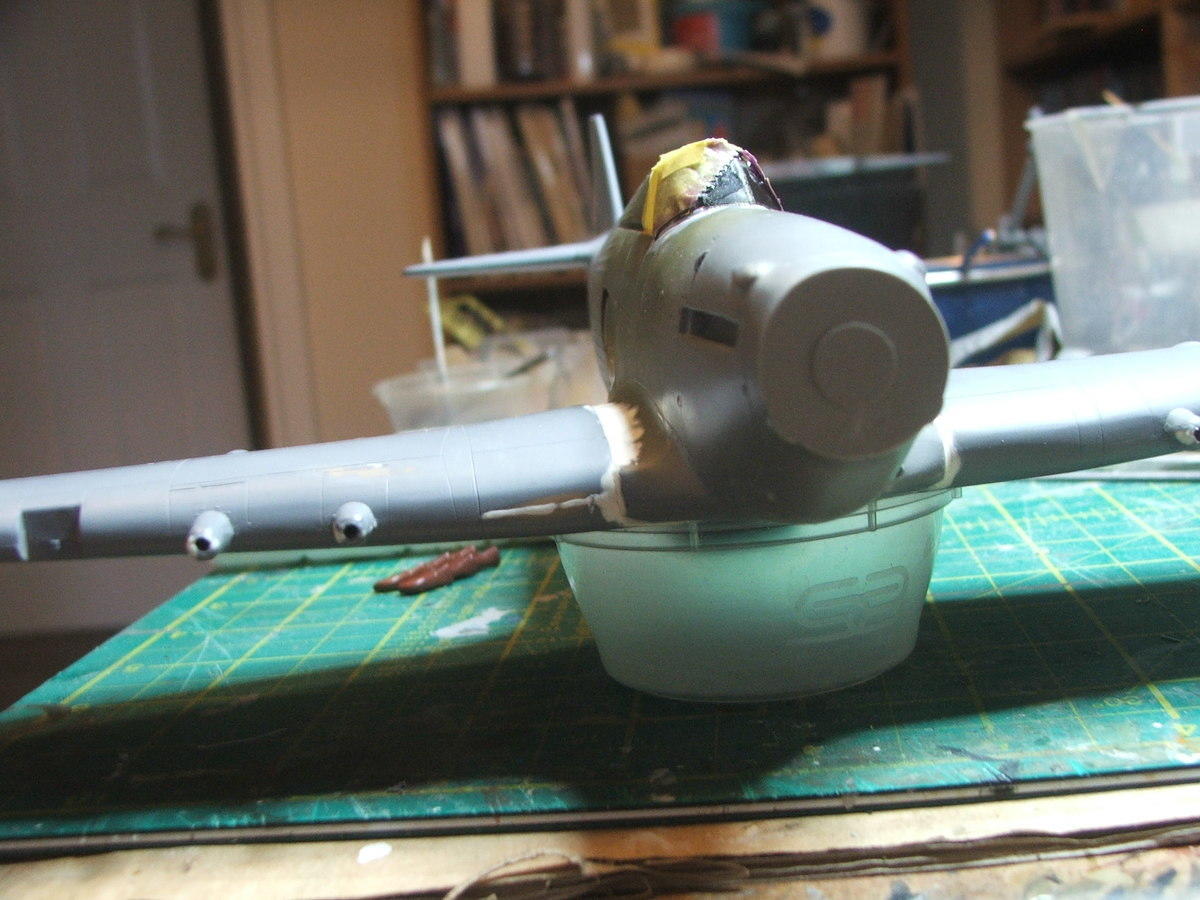
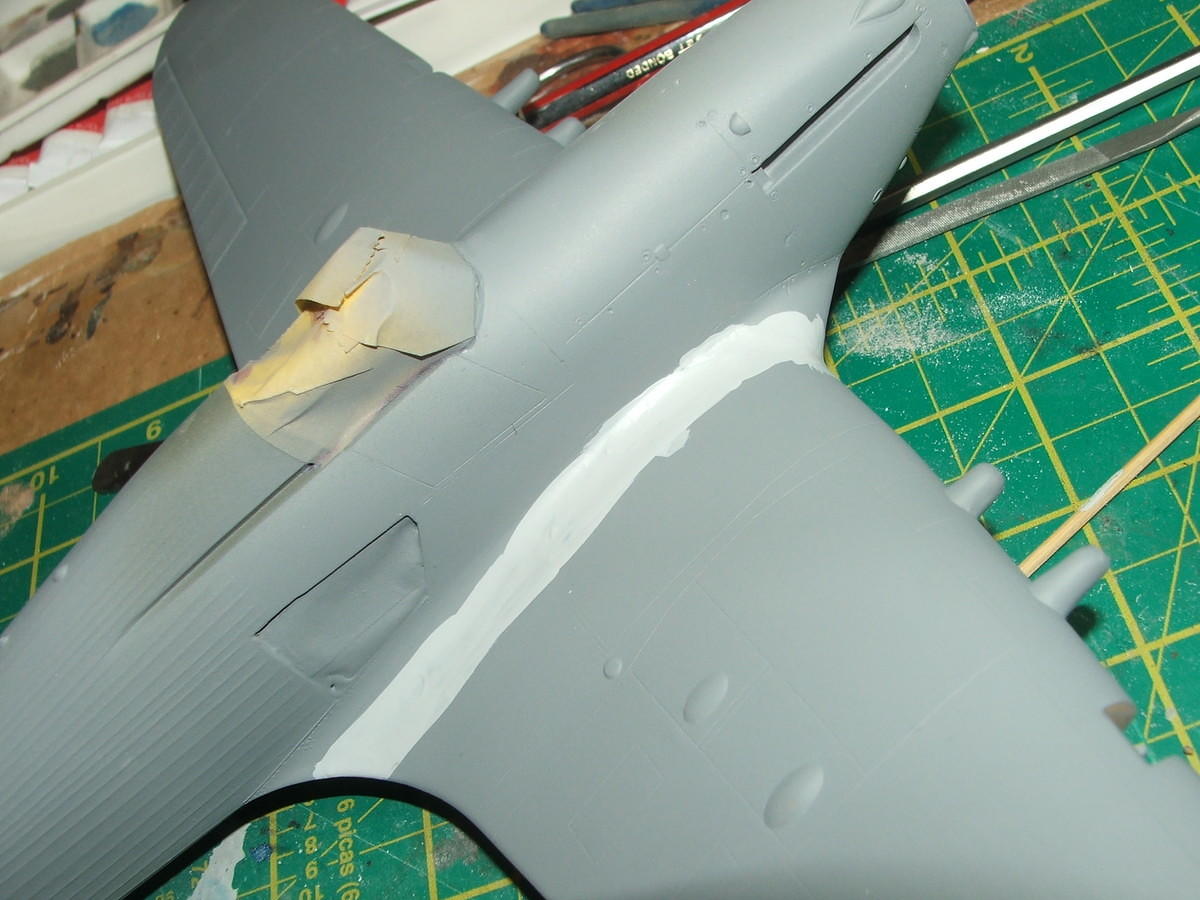
and finally, the Volkes filter is being fitted. This was a bit of a trial as the version provided in the kit was designed to fit on the original nose which was a MK I. Since the MK II has a longer nose, the curve is all wrong, so this had to be sanded, fitted, filled and sanded.
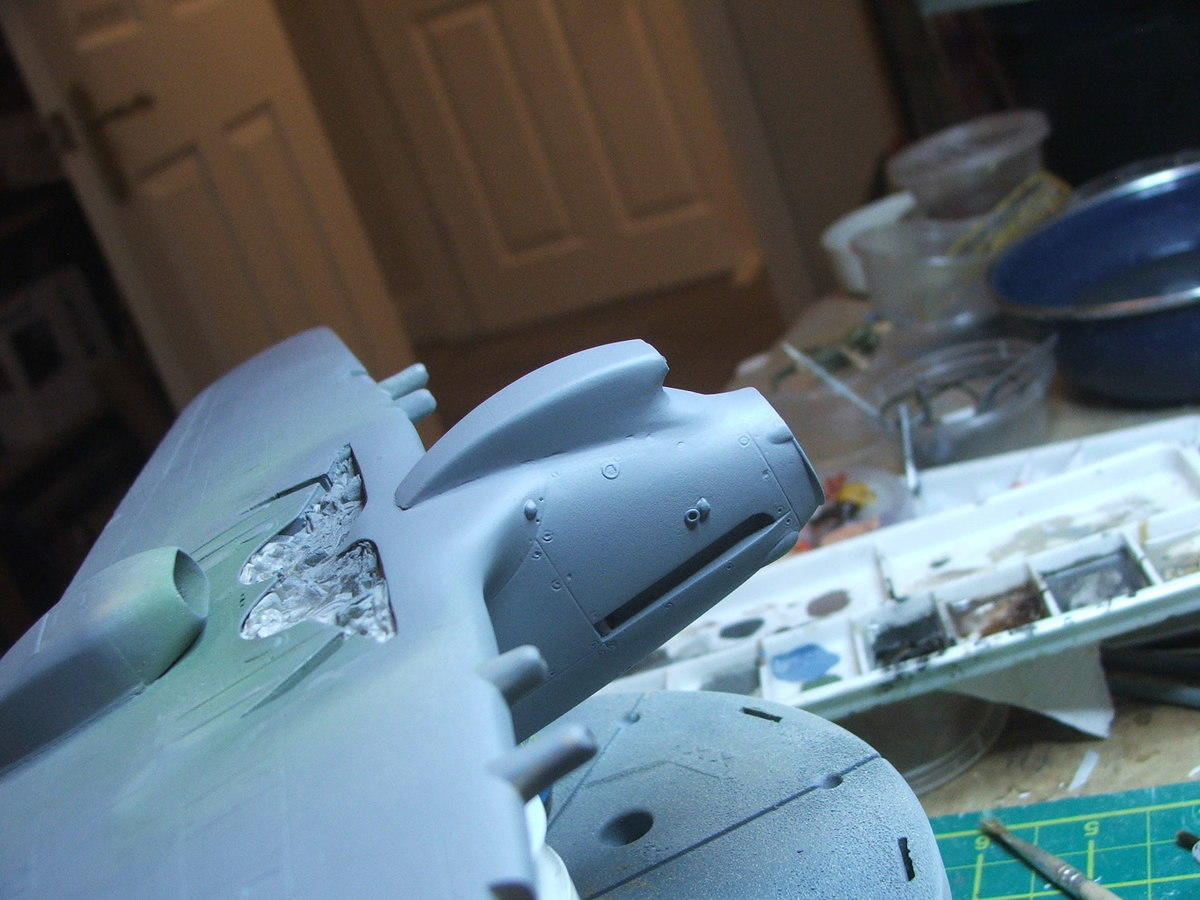
Still needs a bit of something here, although thinking about it I maybe ought to scribe a panel line in the joint as these were essentially bolted on so it wouldn't have been a smooth joint. Hmm, only just thought of that as I posted this!!!

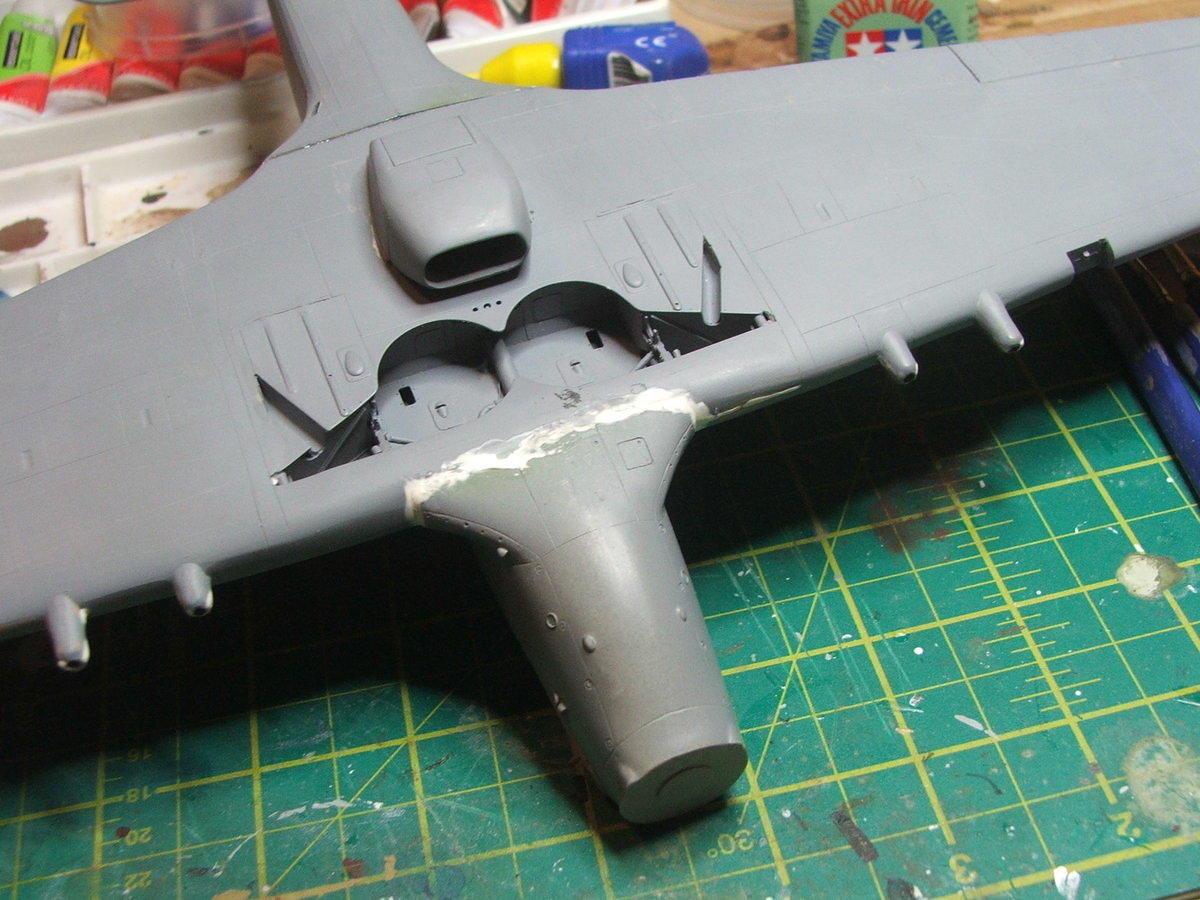
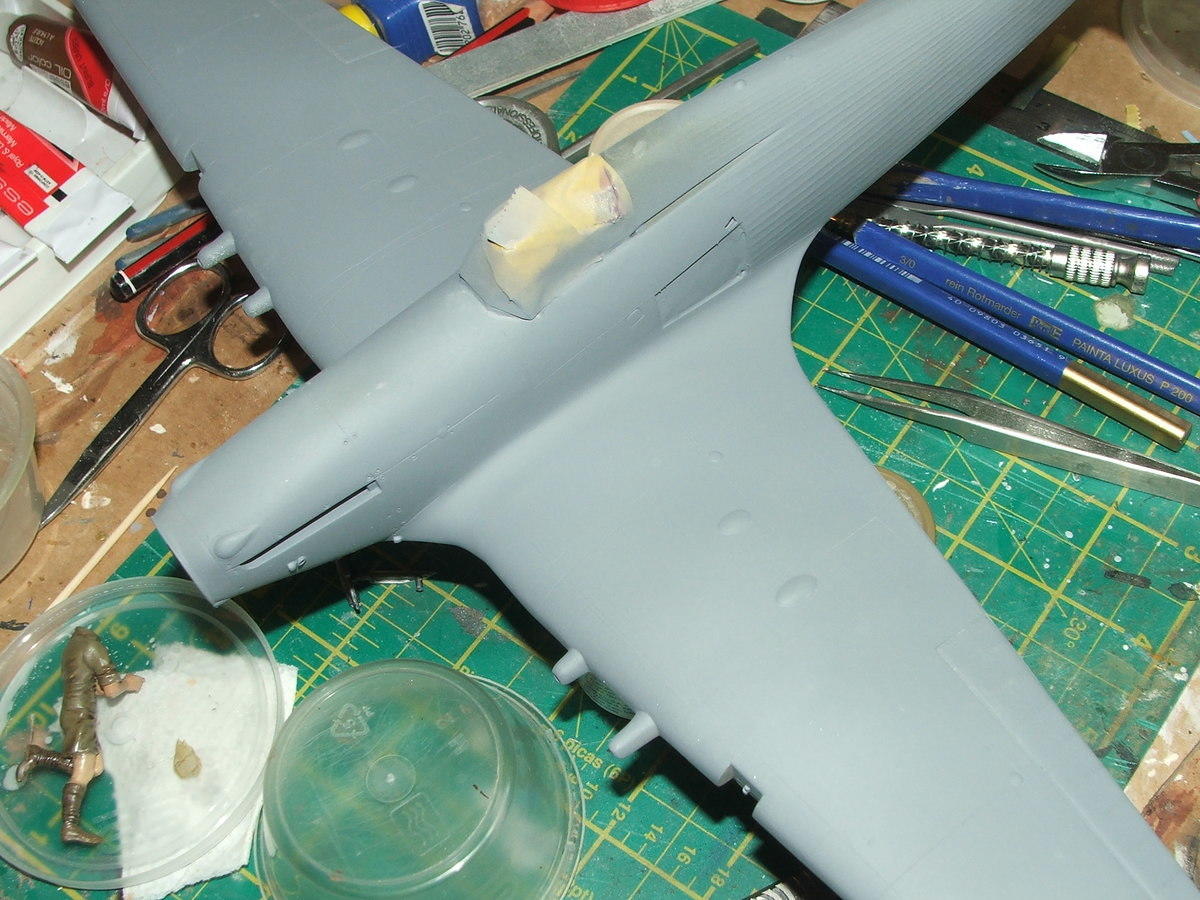
I also realised I forgot to take a pic of the wheel wells now that they have been painted up properly, but as you can see I've stuffed them with tissue to protect them against the spraying that will be in the near future...
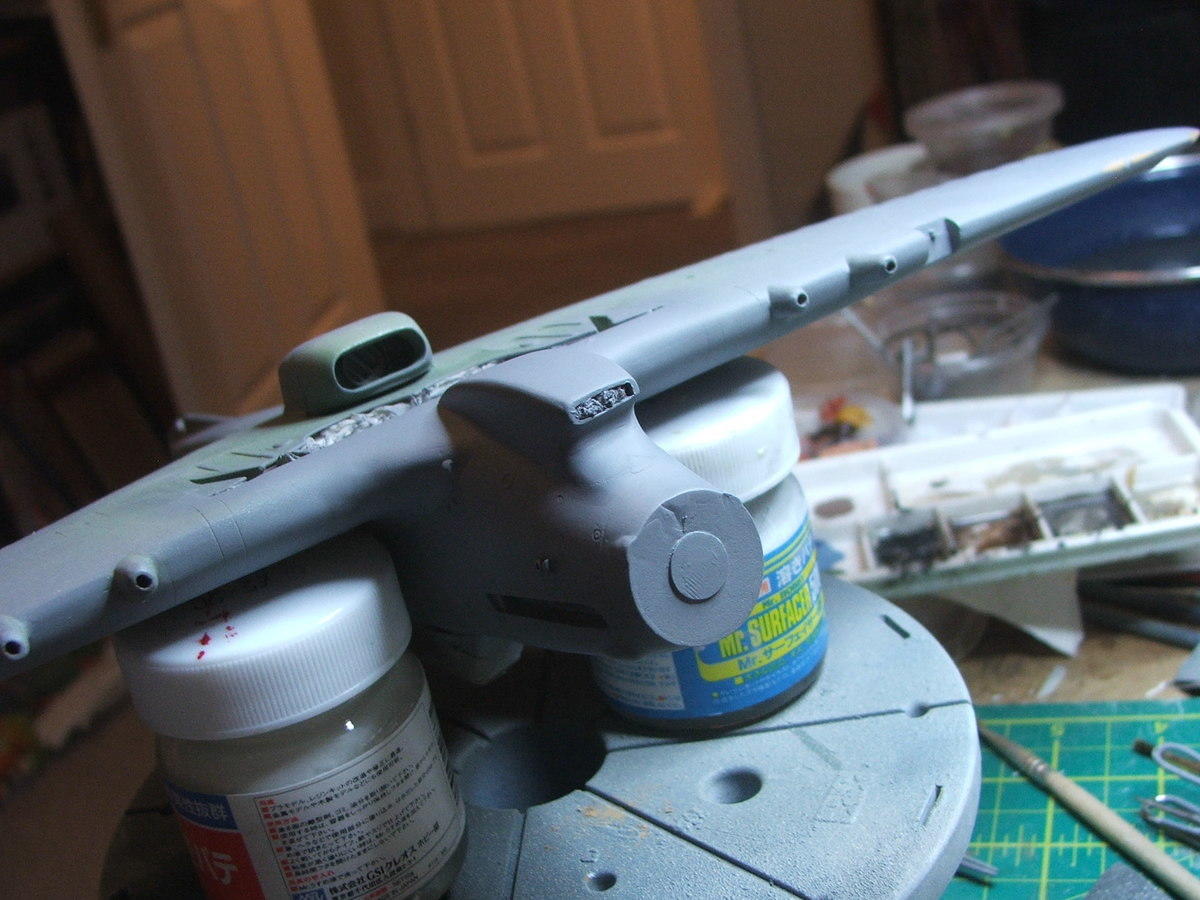
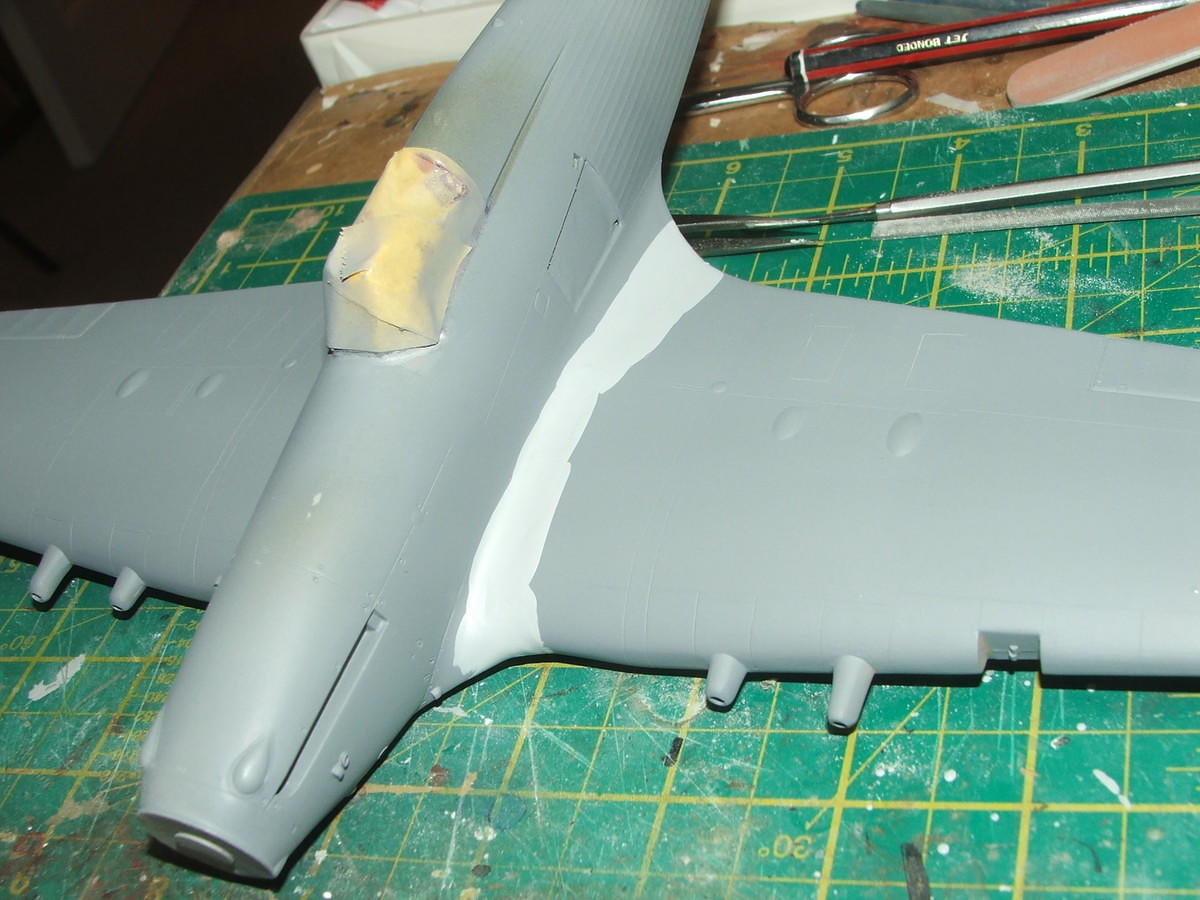
Hmm this image makes me think that scribing is going to be tricky! Looks like I've got a bit more research to do on how well the Volkes filter fitted onto MK II noses!
So that it for now. Other things that have been done but not photographed: tail wheel painted up, cannon barrels painted, undercarriage legs painted. along with the inside of the landing gear covers, tools for the toolbox painted.
Its coming together!!!
First off then, the crates got their final oil washes, matt varnish and a little bit of pigment dusting on the boxes:
Trust me they are matt finish!
Next, the figure is almost complete. This has had multiple oil washes followed by a bit of drybrushing to bring up the folds and creases. The head was attached this evening and the only other thing I might do before the GF arrives is attach the hat.
The view that will be most common in the diorama
The shinyness comes from the oil washes. I will be giving it an all over matt varnish spray to tone that down.
and finally, the Volkes filter is being fitted. This was a bit of a trial as the version provided in the kit was designed to fit on the original nose which was a MK I. Since the MK II has a longer nose, the curve is all wrong, so this had to be sanded, fitted, filled and sanded.
Still needs a bit of something here, although thinking about it I maybe ought to scribe a panel line in the joint as these were essentially bolted on so it wouldn't have been a smooth joint. Hmm, only just thought of that as I posted this!!!
I also realised I forgot to take a pic of the wheel wells now that they have been painted up properly, but as you can see I've stuffed them with tissue to protect them against the spraying that will be in the near future...
Hmm this image makes me think that scribing is going to be tricky! Looks like I've got a bit more research to do on how well the Volkes filter fitted onto MK II noses!
So that it for now. Other things that have been done but not photographed: tail wheel painted up, cannon barrels painted, undercarriage legs painted. along with the inside of the landing gear covers, tools for the toolbox painted.
Its coming together!!!