Rob's KLM Dakota *Finished*

An "off the books" special GB for those wishing to build a model to support this children's charity. Normal GB guidelines are suspended in here.
Runs: 1st January 2014 to 1st April 2014. GB Leader is DirkPitt289
rob_van_riel
Modelling Gent and Scholar
Posts: 3325
Joined: November 4th, 2012, 11:28 am
Location: The Netherlands
Contact:

Rob's KLM Dakota *Finished*

Post by rob_van_riel »

An earlier project left me with a bad case of Dakota-mania. Since the 80s there have for all intents and purposes been two Dakota kits, the Esci and the Italeri. People who claim to know think the Esci is the better of the two, so the hunt for a bunch of these was on. Revell at some stage reboxed the Esci kit, and I thought this was it. It was the Italeri instead (I've since found the Esci rebox as well, but that's another matter). One edition of the Italeri came with an absolutely magnificent decal sheet for several airlines, and again, this took me more than one attempt to obtain (through no fault of my own in this case; sellers aren't omniscient either). As a result, I found myself with a total of four Italeri Dakotas on my hands that I have no real need for. All this before Airfix announced their new tooling, so the status of the Esci kits is now dubious as well :roll:
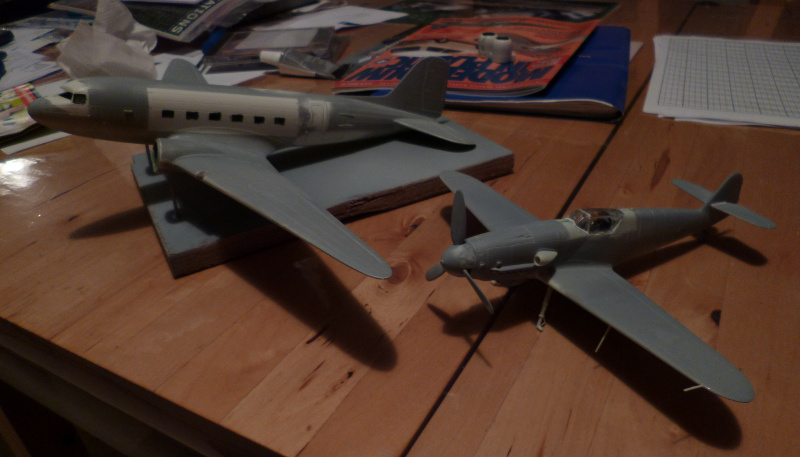
So, I'm drowning in Dakota's, I'm allways looking for a good place to park completed models, and then someone shows up and says he wants to auction off a bunch of newly built kits for a good cause. Too good an opportunity to pass up :-D
Image
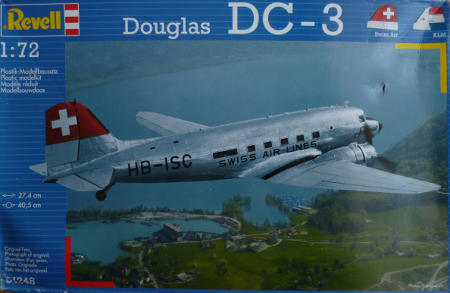
The kit I'll be building is the edition shown above. Well, almost. The box is in tatters, and I need something to store the parts in while working, so I'll actually be using the plastic and box from an Italeri release. They're identical, except for the decals which will come from the Revell boxing, and since the decals are the crucial characteristic, I'm the declaring the Revell boxing the victim of this project.
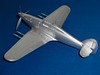
The Revell kit promises KLM markings, but this is true only by a serious stretch of the imagination. What they provide is the markings used on an exhibit from the Aerodrome museum in Lelystad, shown below.
Image
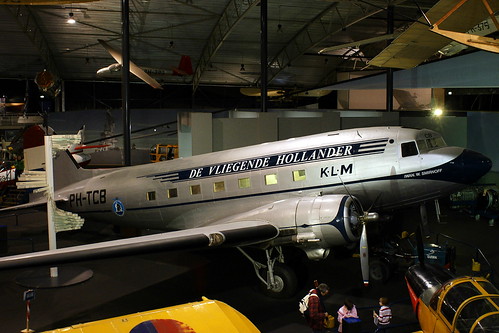
As near as I could trace, the actual exhibit was the result of a project to build an airworthy Dakota from two rundown machines. One was canibalised for parts, and rebuilt into the museum piece, the other went on to fly. The museum airplane (or should that be "model"?) is displayed in markings that were never actually used in flight. They are very close, but there are significant differences.
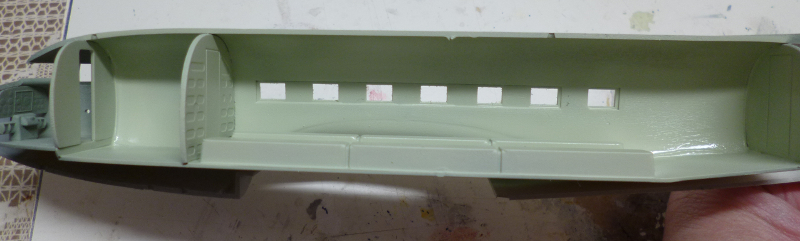
For those who are interested, the picture below shows what an Italeri Dakota lookes like before work begins.
Image
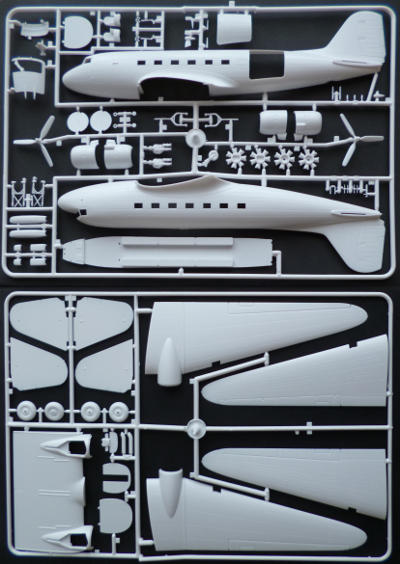
I should note that all Italeri Dakotas start out like this, unlike the Escis which have different interiors depending on the specific version being boxed. Definitely advantage Esci ;-) Fortunately, judgeing from the picture of the real thing, the museum piece doesn't have any kind of interior beyond the cockpit, so it just doesn't matter. So far, the Italeri seems very eager to become a Dakota, while the Esci I tackled earlier put up a fight.
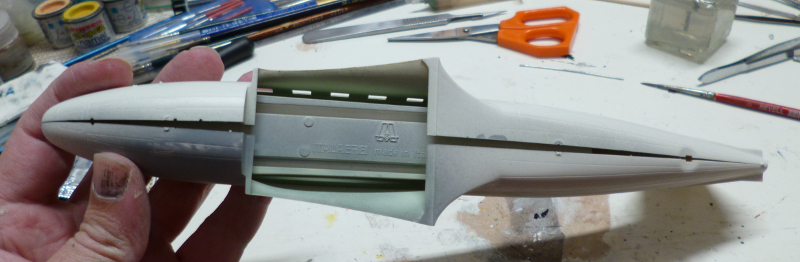
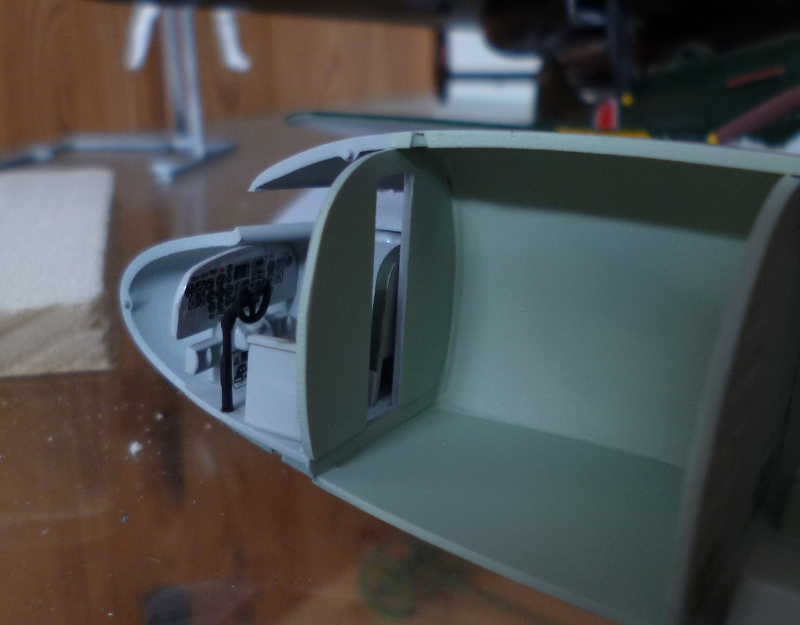
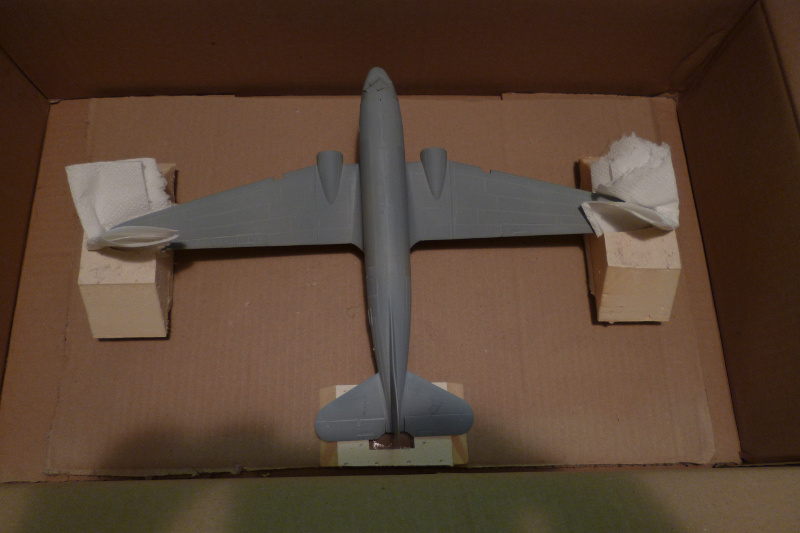
After a few hours fiddling parts, glue, and just a bit of filler, followed by a visit to the paint shop, it all looks like this:
Image
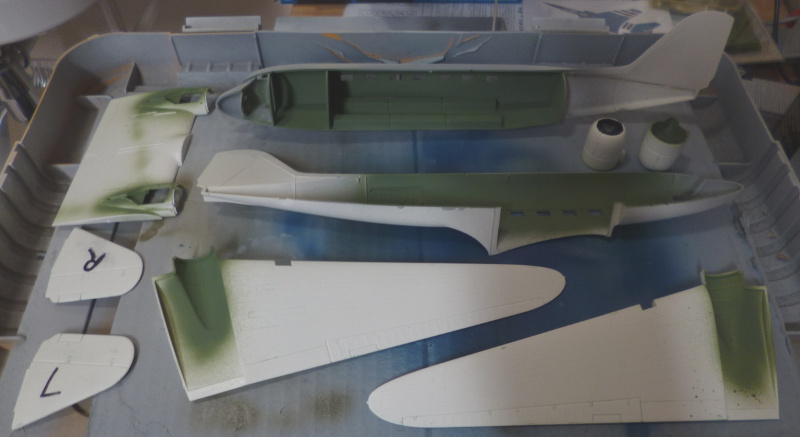
The instructions specify light grey for the interior, but it looks more like light green in the picture. Being a lazy bastard, I went with the same interior green as was specified for the wheelwells. Not good, this is way too dark. I'll have to rework that, after deciding what colour to use. The freaky part of my mumbles "RAF Sky", or possibly the slightly greener Humbrol colour Airfix suggests for it's Spitfires..
User avatar
Chuck E
Established 1949
Posts: 2423
Joined: May 3rd, 2011, 8:05 pm
Location: Darlington. Home of the Railways

Re: jimmy build Dakota

Post by Chuck E »

I've built 3 Italeri kits and 2 Esci kits of the DC-3 / C-47. Both are nice models. The Esci one had proper seats rather than benches, though you can't see them with the doors shut.
So many models, so little time.
rob_van_riel
Modelling Gent and Scholar
Posts: 3325
Joined: November 4th, 2012, 11:28 am
Location: The Netherlands
Contact:

Re: Rob's KLM Dakota

Post by rob_van_riel »

Despite some airbrush issues (turns out it was spitting due to a wrecked nozzle; time to break out a spare..), I got the inside re-painted with Humbrol 90. Hideous colour, but fairly close to what the reference appears to show.
Image
Some dry fitting revealed that at least one of the fuselage halves is crooked. This will take some persuading before it fits, as at present I can get either the front of the rear of the halve to line up, but both is a challenge.
Image
User avatar
Dirkpitt289
NUMA's Auto Mechanic
Posts: 8724
Joined: May 2nd, 2011, 1:55 am
Location: New jersey USA
Contact:

Re: Rob's KLM Dakota

Post by Dirkpitt289 »

The Dakoda is a great choice and surprisingly not one you see getting built all too often.
.... Dirk

Beware of the DOG's of WAR

My Youtube Channel
https://www.youtube.com/user/ModelingGu ... rid&view=0
rob_van_riel
Modelling Gent and Scholar
Posts: 3325
Joined: November 4th, 2012, 11:28 am
Location: The Netherlands
Contact:

Re: Rob's KLM Dakota

Post by rob_van_riel »

Dirkpitt289 wrote:The Dakoda is a great choice and surprisingly not one you see getting built all too often.
This may have something to do with the fact that military Dakotas, for all their merits, are about as boring as they get; the vast majority are olive drab over medium gray, with no distinctive markings. There are exceptions of course, like the Rhaspberry Ripple one I intend to do someday, or the Mediterranean theatre planes. Only when they put on civvies do things start to improve.
rob_van_riel
Modelling Gent and Scholar
Posts: 3325
Joined: November 4th, 2012, 11:28 am
Location: The Netherlands
Contact:

Re: Rob's KLM Dakota

Post by rob_van_riel »

I've completed the interior, such as it is, and fitted new windows.
Image
After that, I wrestled that bent fuselage into some semblance of submission, although alignment was not perfect. I've done some initial filling and sanding to deal with this, but I'll have to restore some panel lines before I continue (if I wait much longer, I'll lose what guidance from the original line I have left). Bit of bad luck with the fuselage; I checked with another identical kit in the stash, and that doesn't have these problems.
rob_van_riel
Modelling Gent and Scholar
Posts: 3325
Joined: November 4th, 2012, 11:28 am
Location: The Netherlands
Contact:

Re: Rob's KLM Dakota

Post by rob_van_riel »

The wings and tailplanes are on, and it's beginning to look like a Dakota. What little filler was needed is now curing.
With the rough shape now complete, I can start looking for a suitable box to convert into a shipping container for the finished product; I want to build the container before the model becomes too fragile for (relatively) rough handling.
rob_van_riel
Modelling Gent and Scholar
Posts: 3325
Joined: November 4th, 2012, 11:28 am
Location: The Netherlands
Contact:

Re: Rob's KLM Dakota

Post by rob_van_riel »

Over the past two weeks I've completed the first round of building, filling and sanding, and shot a coat of primer onto the kit just to see where further work is needed. As it turns out, this will involve just a bit of surface sanding and some very minor corrections.

I've found what I believe will be a suitable box for shipping the result once completed, and have started construction of the supports that will hopefully protect the plane in transit.

Image

Another sheet of cardboard will go on top of all this, with some further blocks of foam to press down on the plane. The whole shebang will then be wrapped in paper and secured inside the box.
rob_van_riel
Modelling Gent and Scholar
Posts: 3325
Joined: November 4th, 2012, 11:28 am
Location: The Netherlands
Contact:

Re: Rob's KLM Dakota

Post by rob_van_riel »

I haven't been ignoring this build, but reality has been getting in the way, and I've hit some snags.

The transport box has been completed, so if I do manage to finish this model, I know I can ship it safely. This weekend was supposed to be the time when this build went from "started" to "nearing completion", but a serious run in with the far-too-common-cold killed off any chance of getting some work done. The picture below shows the status at the end the weekend before that.

Image

Today, I finally reached the point where I could expect workable amounts of time between attempts to cough/sneeze my lungs out, so I attempted to install the windscreen, as one of the few remaining steps before hitting the paint shop. Problem is, the transparency provided is just plain the wrong shape to fit the gap in the fuselage, in fact, it's not even close. I expect I'll manage to come up with something, but with only three (somewhat crowded) weekends before the deadline, I'm getting worried.

Still, as someone (Pratchett ?) put it so nicely, the corpulent damsel hath yet to warble..
User avatar
Dirkpitt289
NUMA's Auto Mechanic
Posts: 8724
Joined: May 2nd, 2011, 1:55 am
Location: New jersey USA
Contact:

Re: Rob's KLM Dakota

Post by Dirkpitt289 »

Nice, pair of aircraft
.... Dirk

Beware of the DOG's of WAR

My Youtube Channel
https://www.youtube.com/user/ModelingGu ... rid&view=0
rob_van_riel
Modelling Gent and Scholar
Posts: 3325
Joined: November 4th, 2012, 11:28 am
Location: The Netherlands
Contact:

Re: Rob's KLM Dakota

Post by rob_van_riel »

I may have gotten a bit too rough today, since the planes are now black and blue. Then again, that would be gloss black to serve as a base for Alclad on the Dakota, and RLM76 for the 109, so it's probably OK :-D
ShaunW
NOT the sheep
Posts: 26188
Joined: November 26th, 2011, 6:11 pm
Location: Pontefract West Yorkshire

Re: Rob's KLM Dakota

Post by ShaunW »

Excellent and it is good to see a Dak being built although I've never done one myself. I did once nearly buy the Airfix gunship version many moons ago, but that's the closest I've come.
Doing - Tamiya 1/35th Universal Carrier.

Work is the curse of the modelling classes!
IPMS#12300
rob_van_riel
Modelling Gent and Scholar
Posts: 3325
Joined: November 4th, 2012, 11:28 am
Location: The Netherlands
Contact:

Re: Rob's KLM Dakota

Post by rob_van_riel »

I just spent about an hour gasping through a gasmask while misting on Alclad. No pictures yet; those will have to wait until I've gathered up the courage to remove the Maskol and tape masking (unmasking always scares the bejeezus out of me, and never more so than with metallisers, as correcting any problems after unmasking is pretty much impossible). Right now, it looks extremely shiny though..

[Edit]: I got off lightly with the masks; some minor fixes are needed, but nothing problematic. As promised, picture:

Image

Alclad hasn't failed to amaze me yet; if I hold printed text close enough to the surface, the reflection is readable (although mirrored, of course..) Up to some extent this can be seen in the photo, where the horizontal and vertical stabilisors are reflected in each other.
User avatar
Clashcityrocker
Modelling Gent and Scholar
Posts: 10816
Joined: May 1st, 2011, 12:31 am
Location: Adelaide. South Australia

Re: Rob's KLM Dakota

Post by Clashcityrocker »

You've managed a mirror like finish on this. I'd recommend gloves to handle it with now.

Nigel
rob_van_riel
Modelling Gent and Scholar
Posts: 3325
Joined: November 4th, 2012, 11:28 am
Location: The Netherlands
Contact:

Re: Rob's KLM Dakota

Post by rob_van_riel »

Clashcityrocker wrote:You've managed a mirror like finish on this. I'd recommend gloves to handle it with now.
Never had much luck with gloves, but I'll be very fussy about keeping my hands clean when working from now on...
Locked

Return to “Jimmy's Fund Charity GB”