I will be starting this in a few days from now and will put up the usual starting shots tomorrow hopefully.
Regards
Mark
Titan's Schwalben-Schutz***FINISHED***
-
Titan

- Modelling Gent and Scholar
- Posts: 1835
- Joined: November 13th, 2011, 10:38 pm
- Location: The windswept Isle of Cornwall
Titan's Schwalben-Schutz***FINISHED***
Regards
Mark
_________________________________________
My models are never perfect, but I kinda like them.
Mark
_________________________________________
My models are never perfect, but I kinda like them.
-
Titan
- Modelling Gent and Scholar
- Posts: 1835
- Joined: November 13th, 2011, 10:38 pm
- Location: The windswept Isle of Cornwall
Re: Titan's Schwalben-Schutz
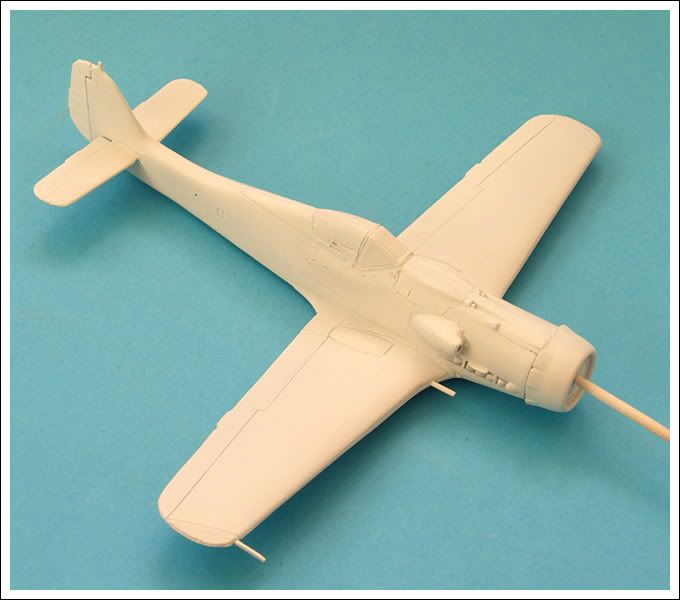
Ok the usual opening photos.
Just a small amount of flash but having made one of this a couple of years ago I can say that I am going to enjoy this build also.
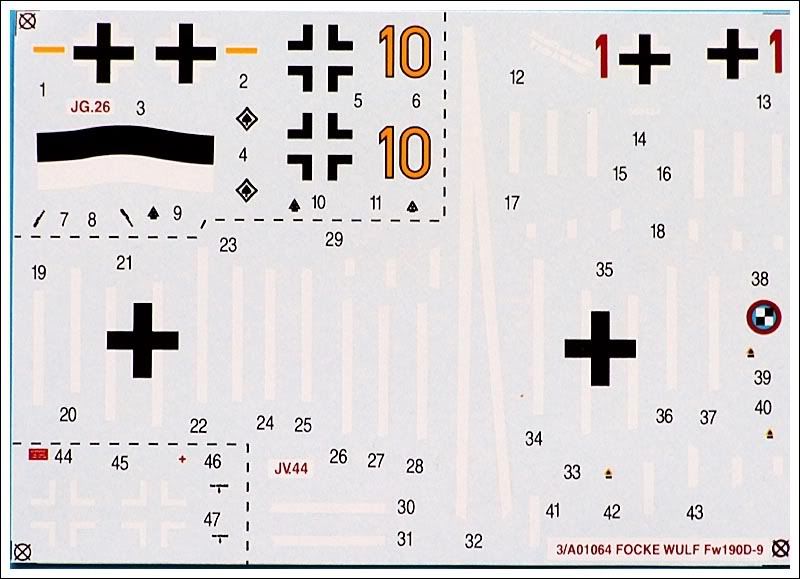
Decals look fine and I will be using those for the JV44 Aircraft.
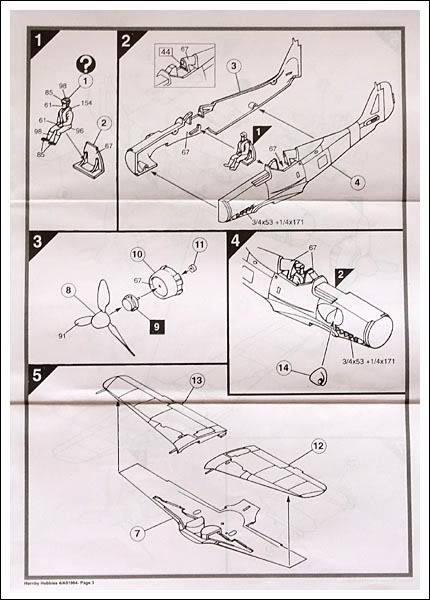
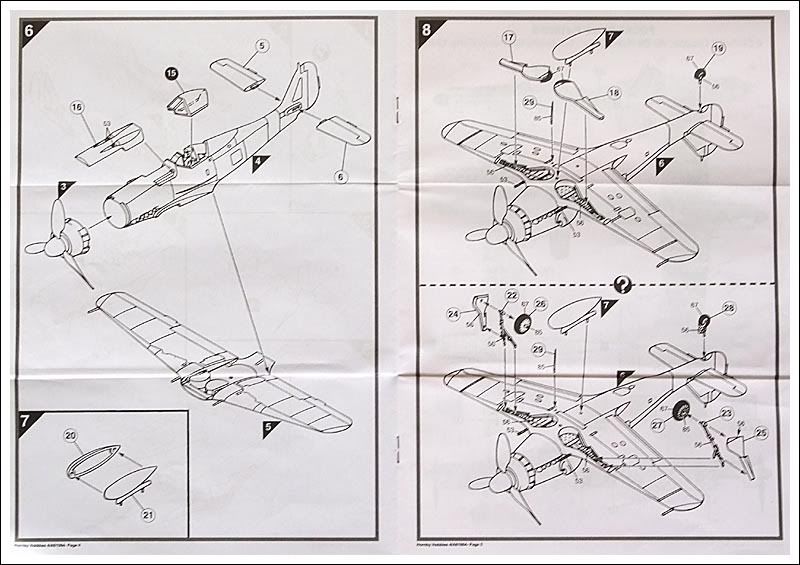

Only eight steps to this so not a difficult kit to put together by any stretch of imagination and as I am wary of the looming festive season I think this will be totally OOB maybe.
regards
Mark
Just a small amount of flash but having made one of this a couple of years ago I can say that I am going to enjoy this build also.
Decals look fine and I will be using those for the JV44 Aircraft.
Only eight steps to this so not a difficult kit to put together by any stretch of imagination and as I am wary of the looming festive season I think this will be totally OOB maybe.
regards
Mark
Regards
Mark
_________________________________________
My models are never perfect, but I kinda like them.
Mark
_________________________________________
My models are never perfect, but I kinda like them.
-
Jagewa

- Modelling Gent and Scholar
- Posts: 2752
- Joined: April 6th, 2011, 2:18 am
- Location: Christchurch, New Zealand
- Contact:
Re: Titan's Schwalben-Schutz
Woah, I didn't realise JV44 was an option in that kit, and white decal stripes on red, I'm thinking density. Are you going to use them or mask?
Cheers
Jim
Cheers
Jim
-
Titan
- Modelling Gent and Scholar
- Posts: 1835
- Joined: November 13th, 2011, 10:38 pm
- Location: The windswept Isle of Cornwall
Re: Titan's Schwalben-Schutz
Hi Jim
I was thinking about that and I will have to test the white decals first as I've not used them before and if proved to be too thin then I will have to mask the stripes. I'm hoping someone who has used them though could tell me before hand.
Regards
Mark
I was thinking about that and I will have to test the white decals first as I've not used them before and if proved to be too thin then I will have to mask the stripes. I'm hoping someone who has used them though could tell me before hand.
Regards
Mark
Regards
Mark
_________________________________________
My models are never perfect, but I kinda like them.
Mark
_________________________________________
My models are never perfect, but I kinda like them.
-
Titan
- Modelling Gent and Scholar
- Posts: 1835
- Joined: November 13th, 2011, 10:38 pm
- Location: The windswept Isle of Cornwall
Re: Titan's Schwalben-Schutz
Thanks Bruce, that is good to know and it's still possible that I may use them.
I have dug out some 2mm masking tape and I will measure the decals and see weather or not the tape is of the same width if so then I would prefer to mask but if the tape proves to be to wide then I will use the decal strips instead.
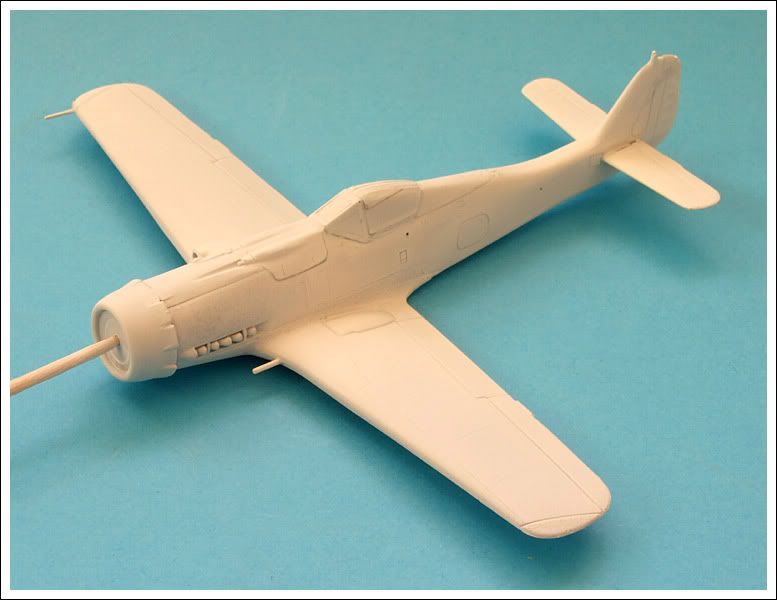
I was actually going to build this as wheels up and so I started to paint the pilot and I have only got his face and a bit of tidying up to do, a matt varnish then I can call him finished.
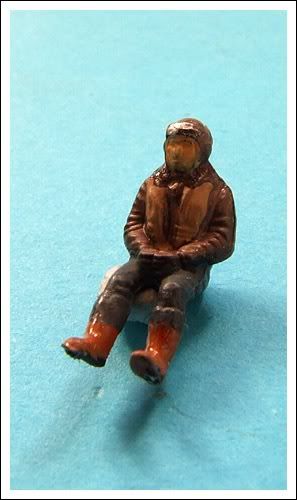
But that was last night and now I have decided not to have wheels up so I won't be needing a pilot and I will save him for another day once I complete him.
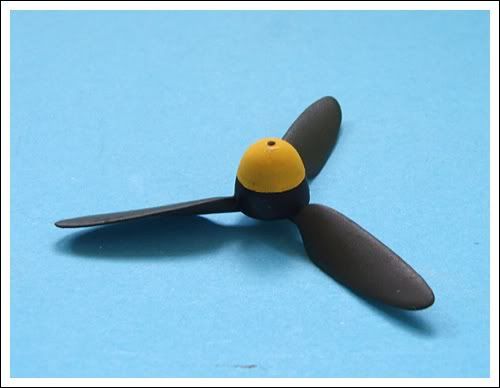
The prop got a little attention as well and I will mask the boss for the yellow paint.
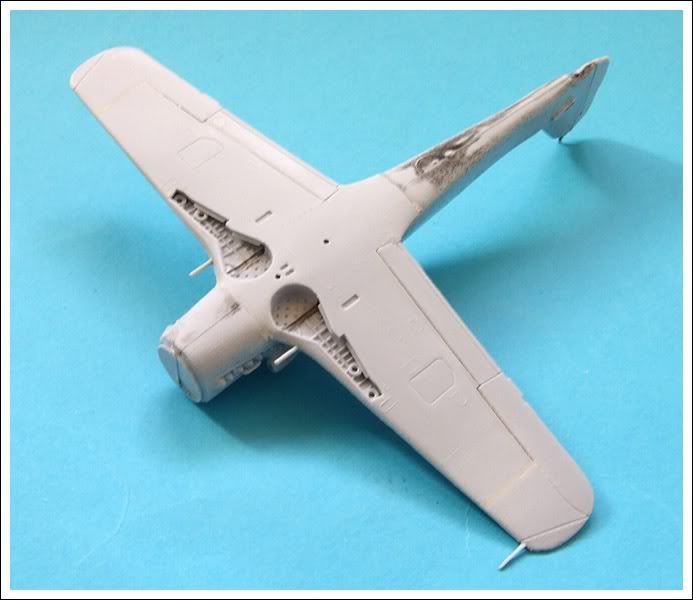
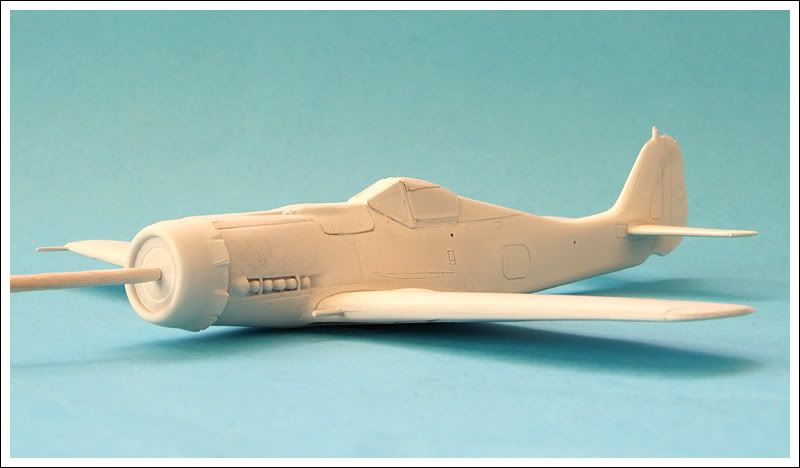
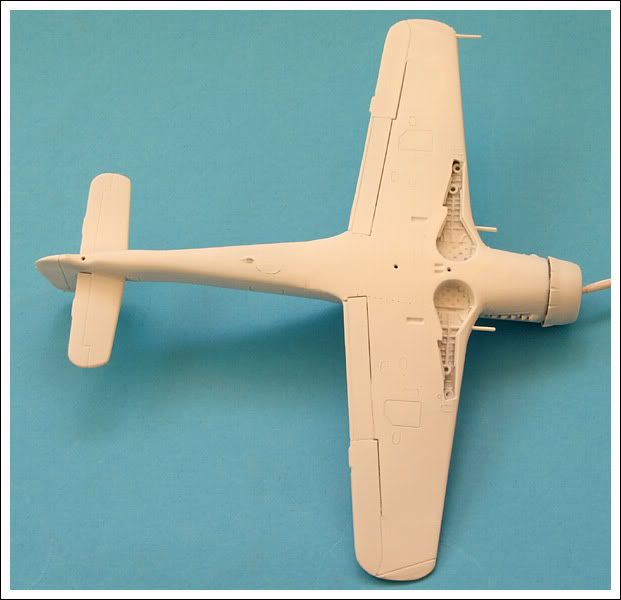
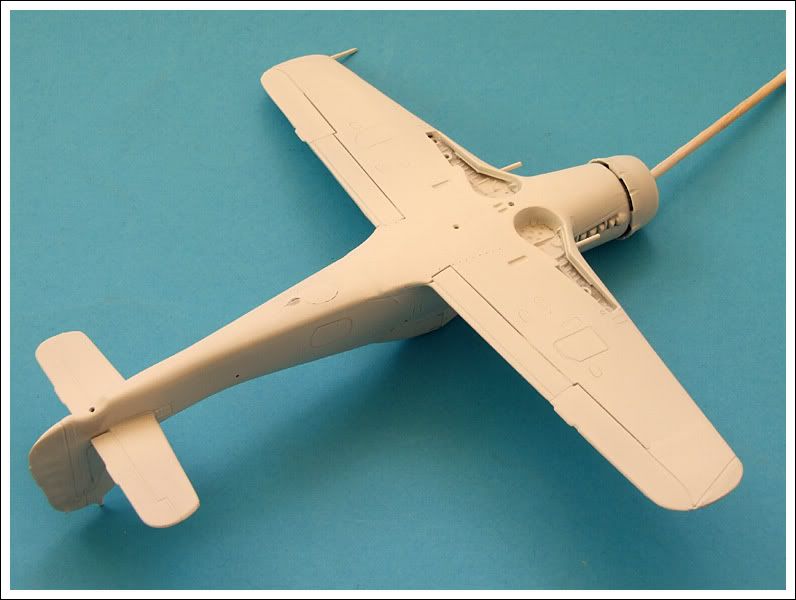
This model is so easy to put together OOB that only after one session last night I have painted the interior RLM66, added the masking tape seatbelts, closed up the fuselage halves and sanded the joins flush.
The wings were also glued together, filled and sanded then added to the fuselage so this is where I am at this present time.

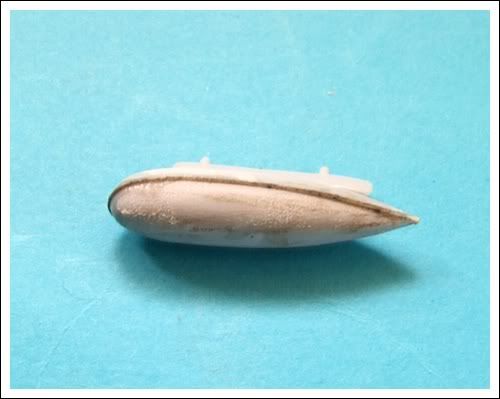
I also thinned down the pitot tube a tad because as we all know it was on the thick side.
Regards
Mark
I have dug out some 2mm masking tape and I will measure the decals and see weather or not the tape is of the same width if so then I would prefer to mask but if the tape proves to be to wide then I will use the decal strips instead.
I was actually going to build this as wheels up and so I started to paint the pilot and I have only got his face and a bit of tidying up to do, a matt varnish then I can call him finished.
But that was last night and now I have decided not to have wheels up so I won't be needing a pilot and I will save him for another day once I complete him.
The prop got a little attention as well and I will mask the boss for the yellow paint.
This model is so easy to put together OOB that only after one session last night I have painted the interior RLM66, added the masking tape seatbelts, closed up the fuselage halves and sanded the joins flush.
The wings were also glued together, filled and sanded then added to the fuselage so this is where I am at this present time.
I also thinned down the pitot tube a tad because as we all know it was on the thick side.
Regards
Mark
Regards
Mark
_________________________________________
My models are never perfect, but I kinda like them.
Mark
_________________________________________
My models are never perfect, but I kinda like them.
-
Dirkpitt289

- NUMA's Auto Mechanic
- Posts: 8724
- Joined: May 2nd, 2011, 1:55 am
- Location: New jersey USA
- Contact:
Re: Titan's Schwalben-Schutz
Nice work Mark. Like you said this is an easy kit to build oob. Like I said in another of the Dora threads I will be getting another one of these.
.... Dirk
Beware of the DOG's of WAR
My Youtube Channel
https://www.youtube.com/user/ModelingGu ... rid&view=0
Beware of the DOG's of WAR
My Youtube Channel
https://www.youtube.com/user/ModelingGu ... rid&view=0
-
Titan
- Modelling Gent and Scholar
- Posts: 1835
- Joined: November 13th, 2011, 10:38 pm
- Location: The windswept Isle of Cornwall
Re: Titan's Schwalben-Schutz
Thanks Bruce, the belts are easily moved to their correct position it's just the way they are resting in the photo, I'm thinking about painting them a lighter colour as the colour they are now is a little bit too dark.
There is a lap belt going across the seat but as you say it's not that obvious anyway.
Regards
Mark
There is a lap belt going across the seat but as you say it's not that obvious anyway.
Regards
Mark
Regards
Mark
_________________________________________
My models are never perfect, but I kinda like them.
Mark
_________________________________________
My models are never perfect, but I kinda like them.
-
TimJ

- Modelling Gent and Scholar
- Posts: 4290
- Joined: May 1st, 2011, 12:54 am
- Location: Oldbury, West Midlands
Re: Titan's Schwalben-Schutz
Nice work so far.
2020 A:35 B:18. 2021 A: 51 B:25 C:21 2022 A:63 B:23 C:11 2024 A:9 B:4 C:15
-
Titan
- Modelling Gent and Scholar
- Posts: 1835
- Joined: November 13th, 2011, 10:38 pm
- Location: The windswept Isle of Cornwall
Re: Titan's Schwalben-Schutz
Thanks Tim. 
I have had only a brief time to do anything today.
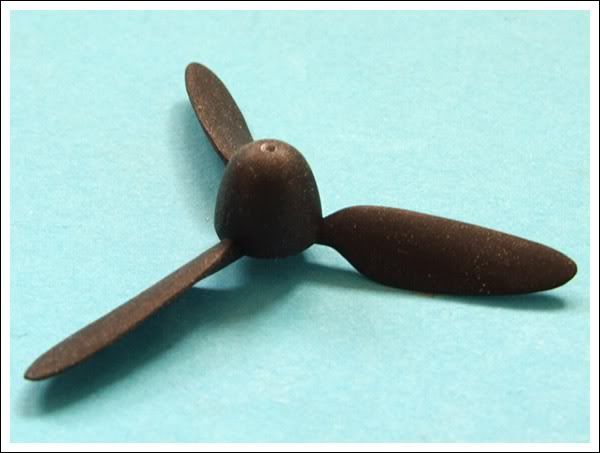
I have managed to get the propeller finished though and I also added a weld seam made from stretched sprue across the drop tank which after a little clean up will be ready for painting also.
Regards
Mark
I have had only a brief time to do anything today.
I have managed to get the propeller finished though and I also added a weld seam made from stretched sprue across the drop tank which after a little clean up will be ready for painting also.
Regards
Mark
Regards
Mark
_________________________________________
My models are never perfect, but I kinda like them.
Mark
_________________________________________
My models are never perfect, but I kinda like them.
-
Dirkpitt289
- NUMA's Auto Mechanic
- Posts: 8724
- Joined: May 2nd, 2011, 1:55 am
- Location: New jersey USA
- Contact:
Re: Titan's Schwalben-Schutz
Nice work Mark, looks great
.... Dirk
Beware of the DOG's of WAR
My Youtube Channel
https://www.youtube.com/user/ModelingGu ... rid&view=0
Beware of the DOG's of WAR
My Youtube Channel
https://www.youtube.com/user/ModelingGu ... rid&view=0
-
JamesPerrin

- Looks like his avatar
- Posts: 13669
- Joined: April 5th, 2011, 8:09 pm
- Location: W. Yorkshire
- Contact:
Re: Titan's Schwalben-Schutz
I always remember that there was something very satisfying about the 190D propeller.
Classic British Kits SIG Leader Better to fettle than to fill
(2024 A:B 5:2) (2023 13:8:7) (2022 21:11) (2021 15:8) (2020 8:4:4)
(2024 A:B 5:2) (2023 13:8:7) (2022 21:11) (2021 15:8) (2020 8:4:4)
-
Titan
- Modelling Gent and Scholar
- Posts: 1835
- Joined: November 13th, 2011, 10:38 pm
- Location: The windswept Isle of Cornwall
Re: Titan's Schwalben-Schutz
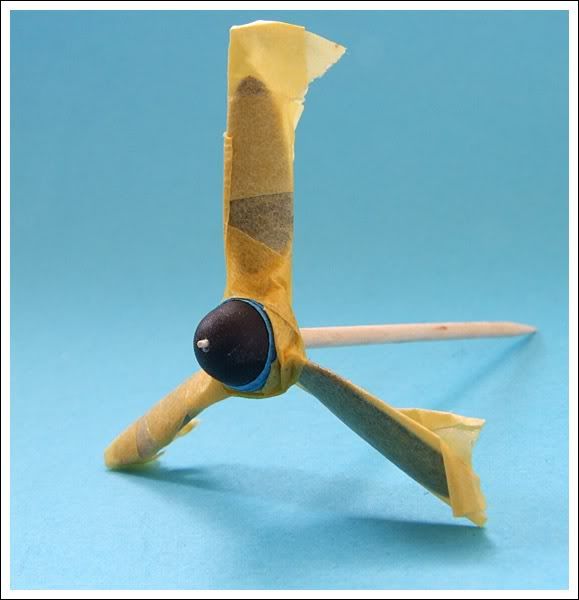
I could see why you would think that Bruce but I will be using the kit's prop shaft and it has now been added to the back of the propeller which itself will be left off until the kit has been painted.
The canopy has been masked off and given a coat of RLM66 and it has been attached to the cockpit and blended in with white glue.
Hopefully I can start painting the rest of the kit tomorrow as I have some spare time in the morning.
Regards
Mark
The canopy has been masked off and given a coat of RLM66 and it has been attached to the cockpit and blended in with white glue.
Hopefully I can start painting the rest of the kit tomorrow as I have some spare time in the morning.
Regards
Mark
Regards
Mark
_________________________________________
My models are never perfect, but I kinda like them.
Mark
_________________________________________
My models are never perfect, but I kinda like them.
-
Titan
- Modelling Gent and Scholar
- Posts: 1835
- Joined: November 13th, 2011, 10:38 pm
- Location: The windswept Isle of Cornwall
Re: Titan's Schwalben-Schutz
I have managed to get a couple of layers of white primer onto the top of the model this morning and three onto the bottom, each layer has been rubbed over with wet 3600 micromesh cloth so I think that it is good enough to move onto the next stage.
I plan on doing the topside camo first and then masking and painting the underside last as it will be easier to mask and keep the paint work cleaner.
The light is not so good today but I can assure you that the paint work is pure white and not off yellow...
Regards
Mark
I plan on doing the topside camo first and then masking and painting the underside last as it will be easier to mask and keep the paint work cleaner.
The light is not so good today but I can assure you that the paint work is pure white and not off yellow...
Regards
Mark
Regards
Mark
_________________________________________
My models are never perfect, but I kinda like them.
Mark
_________________________________________
My models are never perfect, but I kinda like them.
-
Titan
- Modelling Gent and Scholar
- Posts: 1835
- Joined: November 13th, 2011, 10:38 pm
- Location: The windswept Isle of Cornwall
Re: Titan's Schwalben-Schutz
I have started with the top surface and sprayed RLM76 freehand along the fuselage sides. I will start the camo with the lighter RLM82 and by the time I have uploaded these pictures I would have thought it dry enough to start spraying the RLM83.
I am using Xtracrylics for the camo by the way and freehand.
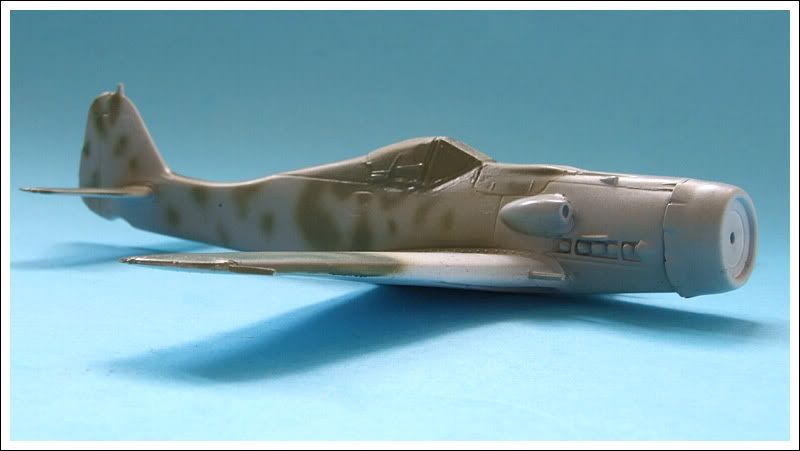
I can see a little touch up with the mottles is called for and will be done before the RLM82.
More later I hope.
Regards
Mark
I am using Xtracrylics for the camo by the way and freehand.
I can see a little touch up with the mottles is called for and will be done before the RLM82.
More later I hope.
Regards
Mark
Regards
Mark
_________________________________________
My models are never perfect, but I kinda like them.
Mark
_________________________________________
My models are never perfect, but I kinda like them.
-
Titan
- Modelling Gent and Scholar
- Posts: 1835
- Joined: November 13th, 2011, 10:38 pm
- Location: The windswept Isle of Cornwall
Re: Titan's Schwalben-Schutz
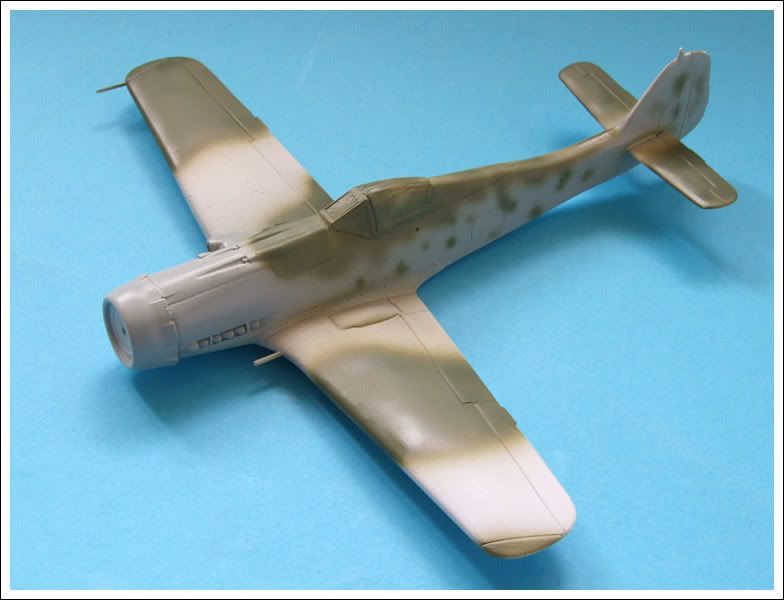
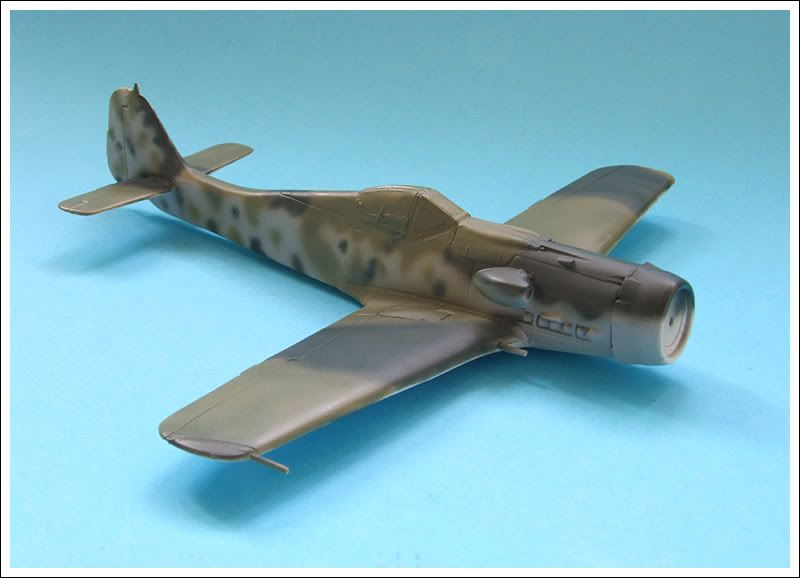
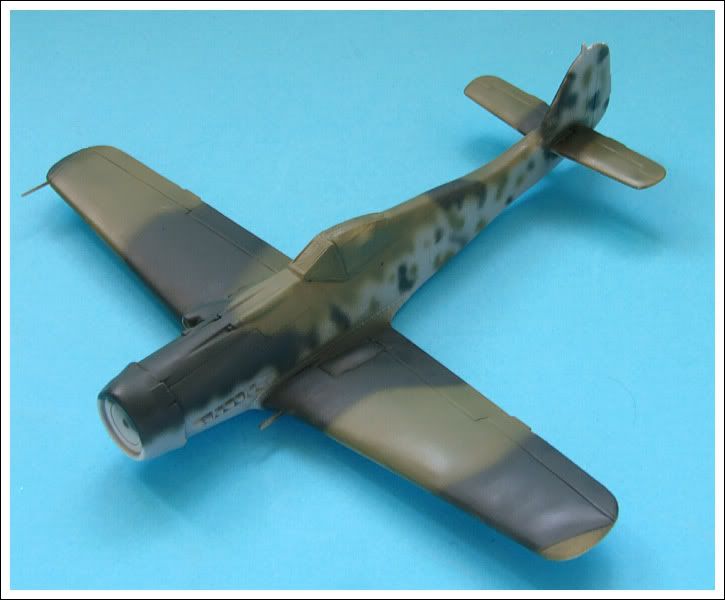
So on it goes and now the RLM83 has been added it is beginning to look a little more like it.
I have to say that I do like a bit of mottling now and again
I will give the top surface a coat of Klear and let it cure first before tackling the underside.
That's going to be it from me for a couple of days because work will be getting in the way for a while but fear not I will be posting updates ASAP.
Regards
Mark
Regards
Mark
_________________________________________
My models are never perfect, but I kinda like them.
Mark
_________________________________________
My models are never perfect, but I kinda like them.