Titan's Schwalben-Schutz***FINISHED***

Re: Titan's Schwalben-Schutz
Very seet looking, Mark
Besting 60 years of mediocre building of average kits in the stand off scale
-
PaulBradley

- Staring out the window
- Posts: 21201
- Joined: April 6th, 2011, 3:08 pm
- Location: Flagstaff, AZ
Re: Titan's Schwalben-Schutz
Nice mottling, Mark. Boy, that red is bright! 
Paul
За демократію і незалежний Україну
"For Democracy and a Free Ukraine"
За демократію і незалежний Україну
"For Democracy and a Free Ukraine"
-
Dirkpitt289

- NUMA's Auto Mechanic
- Posts: 8724
- Joined: May 2nd, 2011, 1:55 am
- Location: New jersey USA
- Contact:
Re: Titan's Schwalben-Schutz
SWEET!!!!!
.... Dirk
Beware of the DOG's of WAR
My Youtube Channel
https://www.youtube.com/user/ModelingGu ... rid&view=0
Beware of the DOG's of WAR
My Youtube Channel
https://www.youtube.com/user/ModelingGu ... rid&view=0

Re: Titan's Schwalben-Schutz
I was quite happy with how mine was looking till I took a look at yours Mark. It looks superb so far.
I'm a mostly full-time modeller put a part-time poster....
-
Titan

- Modelling Gent and Scholar
- Posts: 1835
- Joined: November 13th, 2011, 10:38 pm
- Location: The windswept Isle of Cornwall
Re: Titan's Schwalben-Schutz
Thanks guys.
Seeing as I have resorted to plan B with the decal stripes I thought that I had better try them out first and like Pugz I used them on the undercarriage covers first.
Strange thing that one set of three were all on one piece of decal film the other three though were separate.
Anyway they seemed ok density wise.
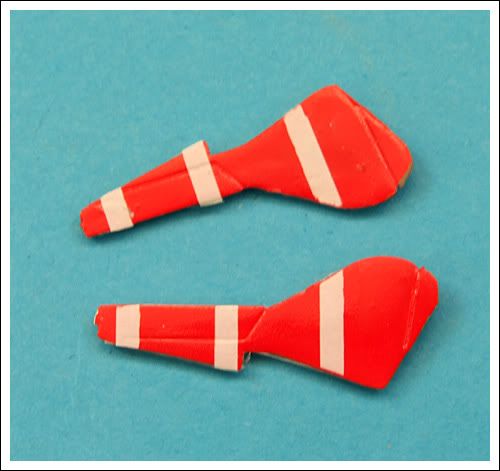
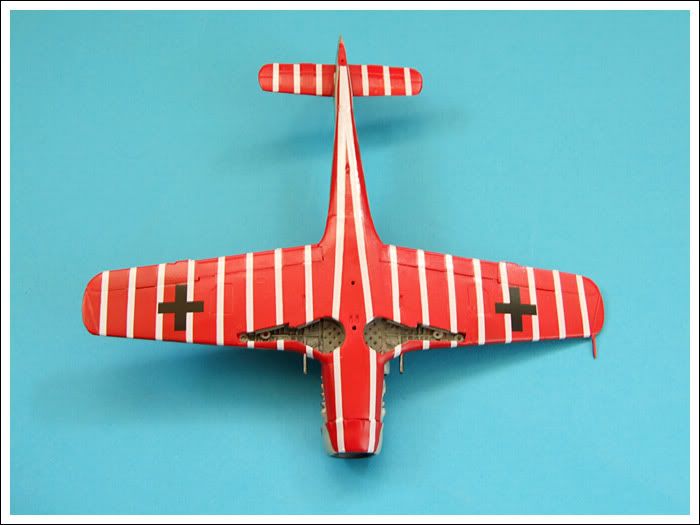
So with that I proceeded with the central stripes on the underside of the fuselage and it took me about 20 mins to get it placed into the correct position as it always looked off to me, but once there I then added the rest.
To get the correct spacing I measured between the double stripes underneath the German national cross before I started and made a mark onto a cocktail stick and went from there and it didn't take very long at all really after that.
The wheel wells also received a wash.
The legs and wheels have been finished and are ready to be added after the main decals have been applied.
Just a little touch up to do and then onto the main decals.
Regards
Mark
Seeing as I have resorted to plan B with the decal stripes I thought that I had better try them out first and like Pugz I used them on the undercarriage covers first.
Strange thing that one set of three were all on one piece of decal film the other three though were separate.
Anyway they seemed ok density wise.
So with that I proceeded with the central stripes on the underside of the fuselage and it took me about 20 mins to get it placed into the correct position as it always looked off to me, but once there I then added the rest.
To get the correct spacing I measured between the double stripes underneath the German national cross before I started and made a mark onto a cocktail stick and went from there and it didn't take very long at all really after that.
The wheel wells also received a wash.
The legs and wheels have been finished and are ready to be added after the main decals have been applied.
Just a little touch up to do and then onto the main decals.
Regards
Mark
Regards
Mark
_________________________________________
My models are never perfect, but I kinda like them.
Mark
_________________________________________
My models are never perfect, but I kinda like them.
-
Titan
- Modelling Gent and Scholar
- Posts: 1835
- Joined: November 13th, 2011, 10:38 pm
- Location: The windswept Isle of Cornwall
Re: Titan's Schwalben-Schutz
Thanks for reminding me Bruce , I would have forgotten and I will use RLM02 for the bearers.
There are a few other things I will add such as a boarding step another aerial at the rear as well as a loop aerial.
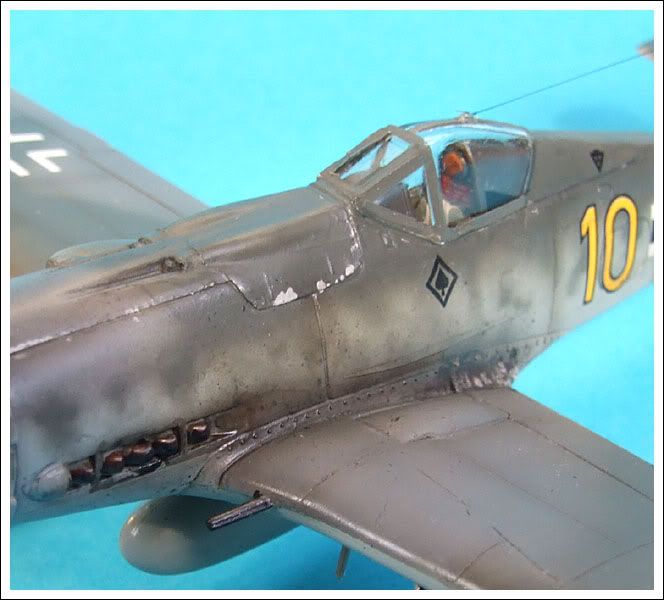
Exhaust staining and some chipping on the rear of the canopy and around the gun bay in the nose and maybe bits around the leading edges of the wings.
Finally some weathering and panel line wash and that will cover it I think.
Regards
Mark
There are a few other things I will add such as a boarding step another aerial at the rear as well as a loop aerial.
Exhaust staining and some chipping on the rear of the canopy and around the gun bay in the nose and maybe bits around the leading edges of the wings.
Finally some weathering and panel line wash and that will cover it I think.
Regards
Mark
Regards
Mark
_________________________________________
My models are never perfect, but I kinda like them.
Mark
_________________________________________
My models are never perfect, but I kinda like them.
-
Titan
- Modelling Gent and Scholar
- Posts: 1835
- Joined: November 13th, 2011, 10:38 pm
- Location: The windswept Isle of Cornwall
Re: Titan's Schwalben-Schutz
No Bruce, I v'e put mine in but added the masked canopy before I took the photos Sorry.
But I do have one from my other Airfix FW190D..
Regards
Mark
But I do have one from my other Airfix FW190D..
Regards
Mark
Regards
Mark
_________________________________________
My models are never perfect, but I kinda like them.
Mark
_________________________________________
My models are never perfect, but I kinda like them.
-
Titan
- Modelling Gent and Scholar
- Posts: 1835
- Joined: November 13th, 2011, 10:38 pm
- Location: The windswept Isle of Cornwall
Re: Titan's Schwalben-Schutz
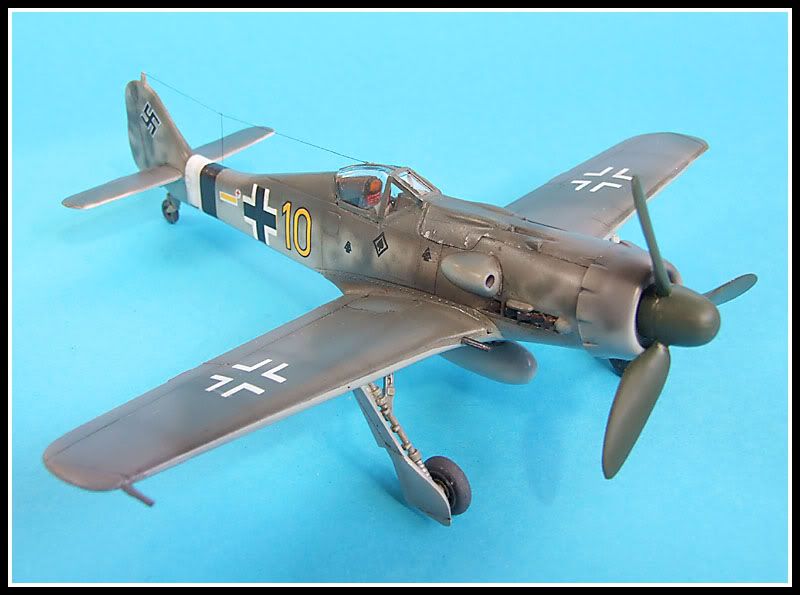
The main decals have been applied and I also used some spare ones from a Tally-ho sheet as well.
I will add the soot and then some weathering next, followed by the undercarriage and aerials.
Regards
Mark
I will add the soot and then some weathering next, followed by the undercarriage and aerials.
Regards
Mark
Regards
Mark
_________________________________________
My models are never perfect, but I kinda like them.
Mark
_________________________________________
My models are never perfect, but I kinda like them.
Re: Titan's Schwalben-Schutz
Nice Mark. Did the propeller markings come with the decal sheet? Very cool.
Besting 60 years of mediocre building of average kits in the stand off scale
-
Dirkpitt289
- NUMA's Auto Mechanic
- Posts: 8724
- Joined: May 2nd, 2011, 1:55 am
- Location: New jersey USA
- Contact:
Re: Titan's Schwalben-Schutz
Most impressive 
.... Dirk
Beware of the DOG's of WAR
My Youtube Channel
https://www.youtube.com/user/ModelingGu ... rid&view=0
Beware of the DOG's of WAR
My Youtube Channel
https://www.youtube.com/user/ModelingGu ... rid&view=0
-
Titan
- Modelling Gent and Scholar
- Posts: 1835
- Joined: November 13th, 2011, 10:38 pm
- Location: The windswept Isle of Cornwall
Re: Titan's Schwalben-Schutz
Thanks for the comments guys, they are most appreciated.
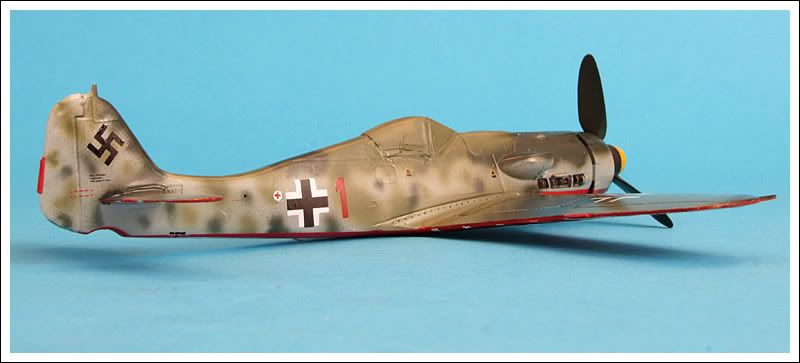
Well it's nearly finished and these will be the last photo's until then.
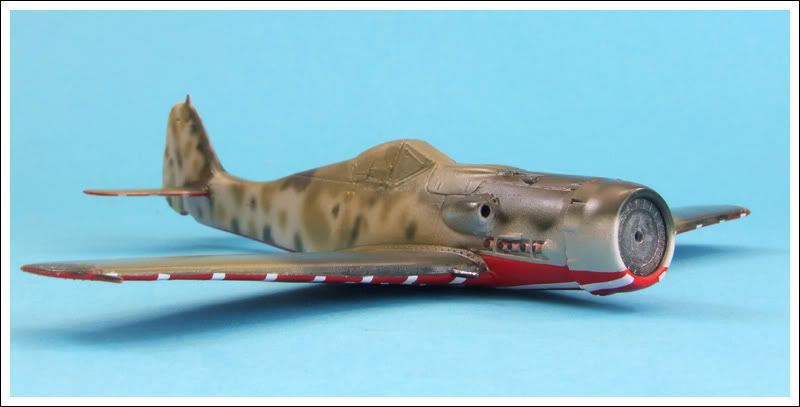
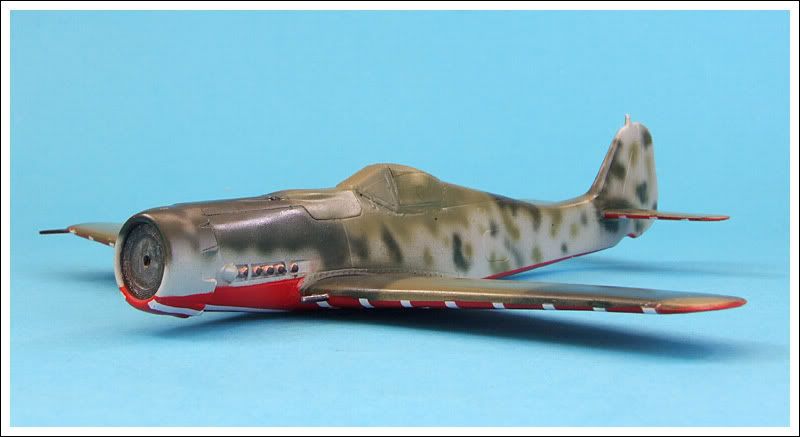
The undercarriage added.
I have post shaded around the panel lines and also added a wash to them as well.
The chipping around the rear of the canopy and around the nose gun cover was added with a sharpened cocktail stick dipped into some Tamiya flat aluminium.
The model was then given two coats of flat varnish.
The canopy masking was....err unmasked.
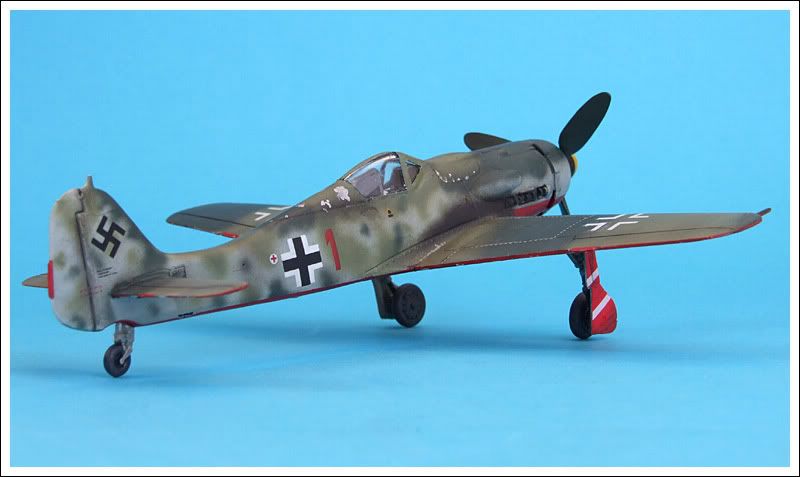
So all I will have to add now are all the aerials and the boarding step, the drop tank loathed though I am will be left off as I haven't seen any photos that show it actually attached and as Brews has said that there wasn't any need for it....so off it stays.
Regards
Mark
unfortunately not, they were leftovers from a Tally-Ho sheet for 1/72 Fw190 A/B/C/D's.jssel wrote: Did the propeller markings come with the decal sheet?
Well it's nearly finished and these will be the last photo's until then.
The undercarriage added.
I have post shaded around the panel lines and also added a wash to them as well.
The chipping around the rear of the canopy and around the nose gun cover was added with a sharpened cocktail stick dipped into some Tamiya flat aluminium.
The model was then given two coats of flat varnish.
The canopy masking was....err unmasked.
So all I will have to add now are all the aerials and the boarding step, the drop tank loathed though I am will be left off as I haven't seen any photos that show it actually attached and as Brews has said that there wasn't any need for it....so off it stays.
Regards
Mark
Regards
Mark
_________________________________________
My models are never perfect, but I kinda like them.
Mark
_________________________________________
My models are never perfect, but I kinda like them.
-
Titan
- Modelling Gent and Scholar
- Posts: 1835
- Joined: November 13th, 2011, 10:38 pm
- Location: The windswept Isle of Cornwall
Re: Titan's Schwalben-Schutz
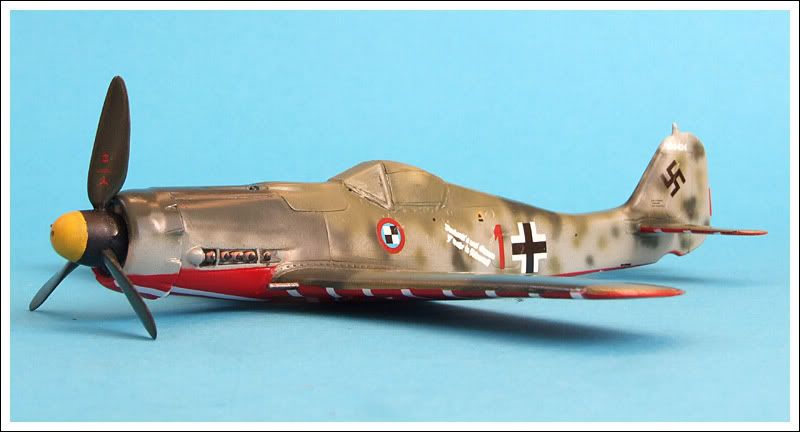
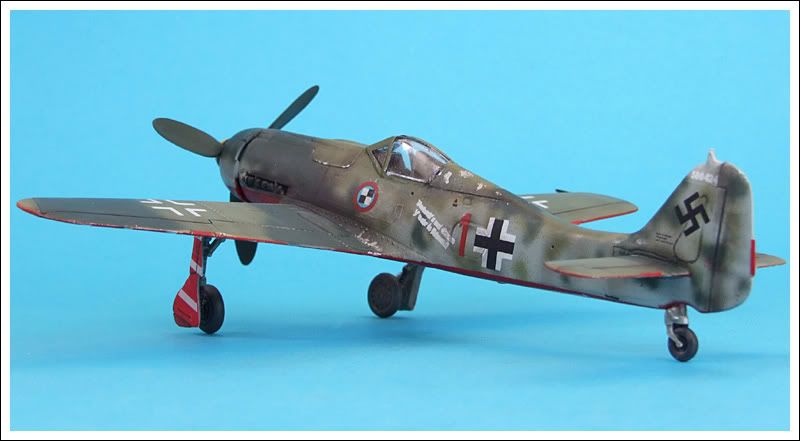
The wheels are now vertical although they are not glued on in the photos  .
.
I have also attached all of the aerials and the boarding step and will take the final photos of the finished model tomorrow.
Regards
Mark
I have also attached all of the aerials and the boarding step and will take the final photos of the finished model tomorrow.
Regards
Mark
Regards
Mark
_________________________________________
My models are never perfect, but I kinda like them.
Mark
_________________________________________
My models are never perfect, but I kinda like them.
Re: Titan's Schwalben-Schutz
Bravo, Mark. Very nice work.
Besting 60 years of mediocre building of average kits in the stand off scale
-
Jagewa

- Modelling Gent and Scholar
- Posts: 2752
- Joined: April 6th, 2011, 2:18 am
- Location: Christchurch, New Zealand
- Contact:
Re: Titan's Schwalben-Schutz
Whoo that stopped me in my tracks, top hole work Mark.
Cheers
Jim
Cheers
Jim
Re: Titan's Schwalben-Schutz
its suprising just how nice these cheapo kits can turn out with a bit of care and the right amount of attention to detail.
congratulations,
spot on build matey.
all the best
shaun
congratulations,
spot on build matey.
all the best
shaun