Dazzled's Ikea Special

Runs January 1st 2012 to January 31st
User avatar
Dazzled
Modelling Gent and Scholar
Posts: 9592
Joined: October 1st, 2011, 11:08 pm
Location: Mid Glamorgan, South Wales
Contact:

Dazzled's Ikea Special

Post by Dazzled »

First day of the GB and an excuse to get my model bench back :-D

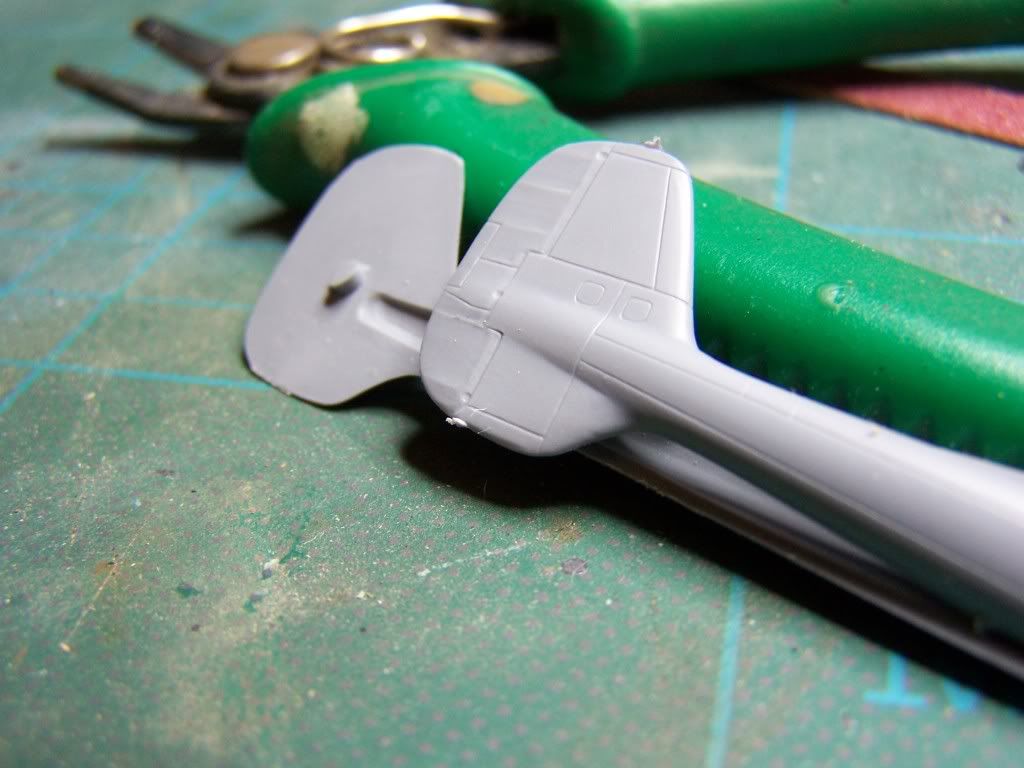
Having stripped off the Christmas tablecloth and moved the bottles of booze (hic), I set up my new daylight magnifier lamp and broke out the Special Hobby Saab J-21A I'd bought specially for this GB.

Image

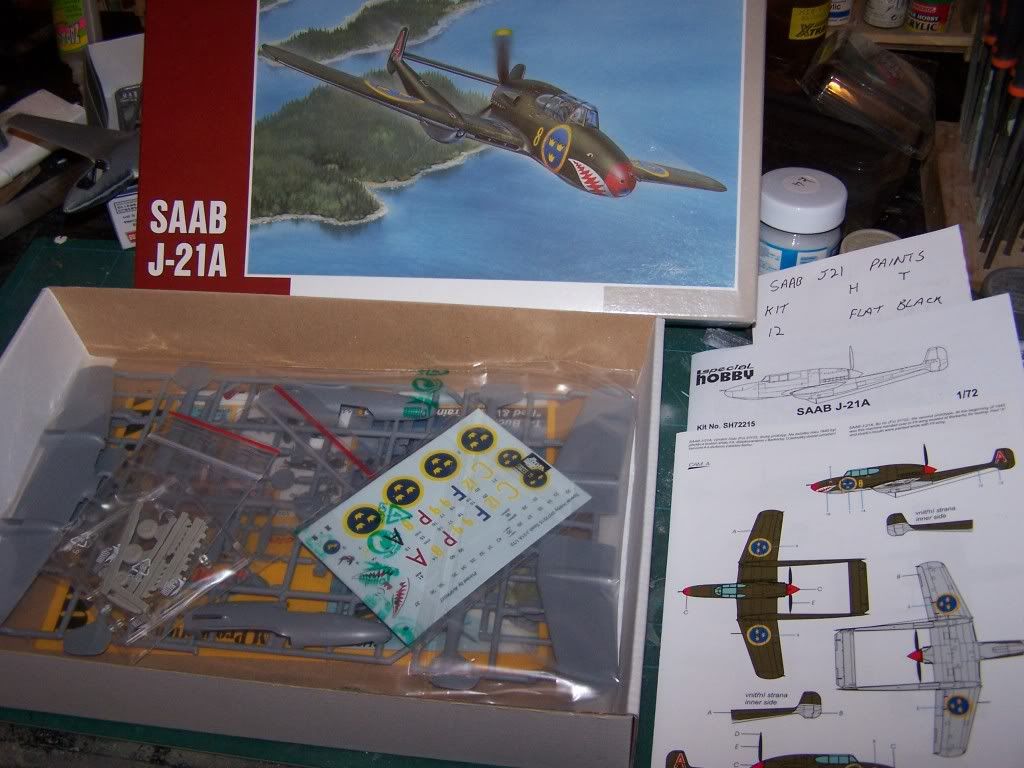
It's a limited run kit so I have no illusions about this build being a simple case of "throw it together and slap some paint on". That said the model looks very nice in the box.

The instructions are clear and very well produced, listing numbers for Gunze/Mr Hobby paints so my first action was to make a conversion list of equivalent Tamiya/Humbrol paints. A bit of research I'd done previously showed that SH are pretty much bang on with their colour recommendations.

Image

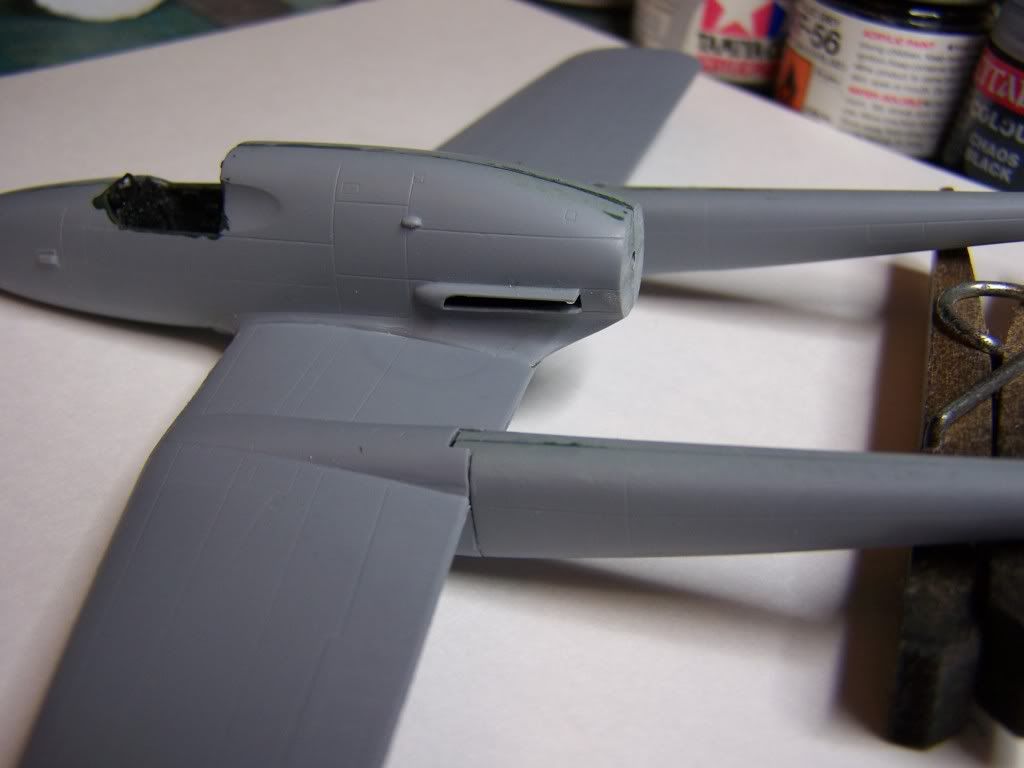
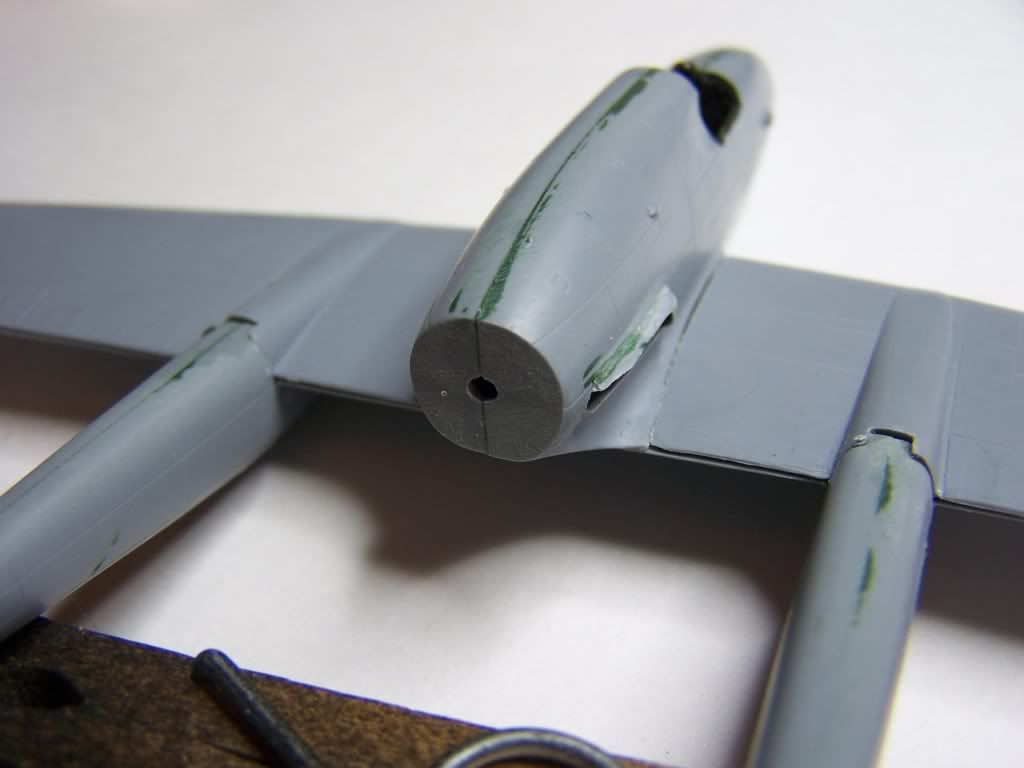
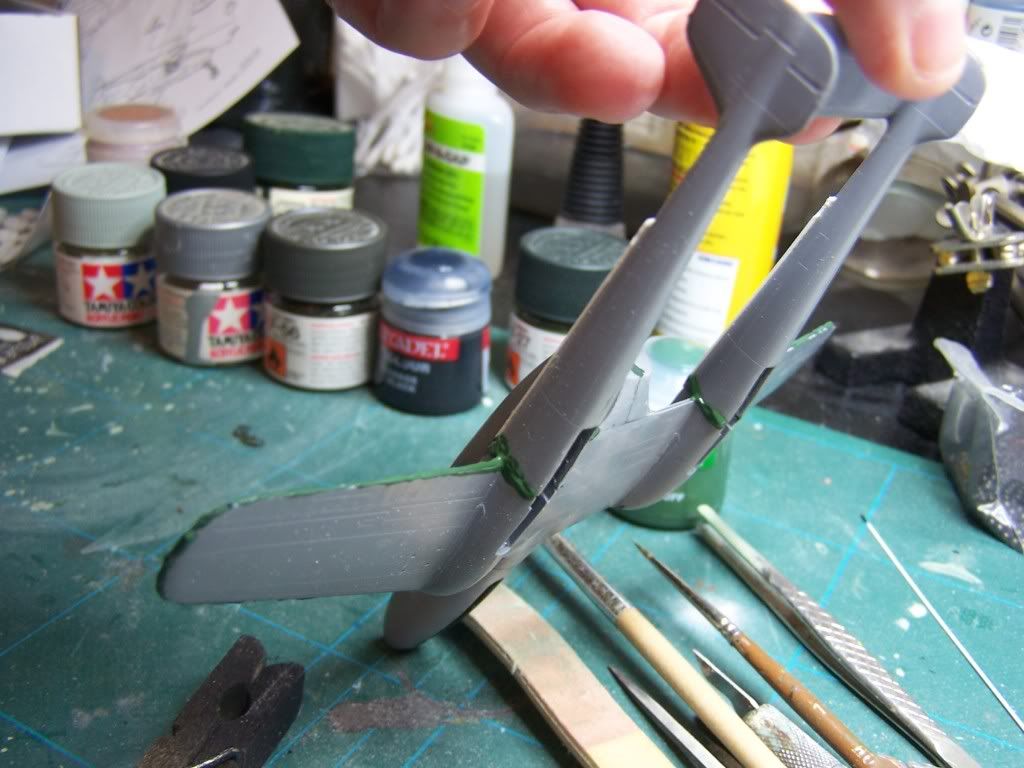
The kit has very fine recessed detail but also features big mould lugs, however all of them are out of sight and SH's styrene is soft and easy to sand. Quite normal for a kit of this kind. It does mean though that extra care must be taken when sanding off moulding gates.

Image

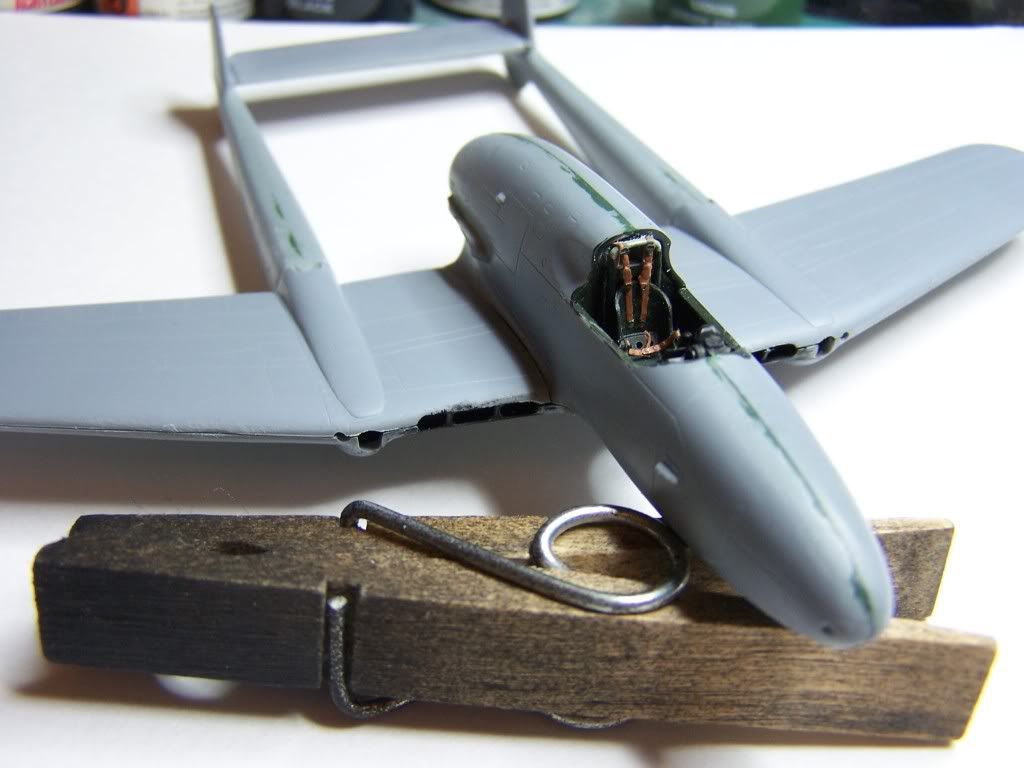
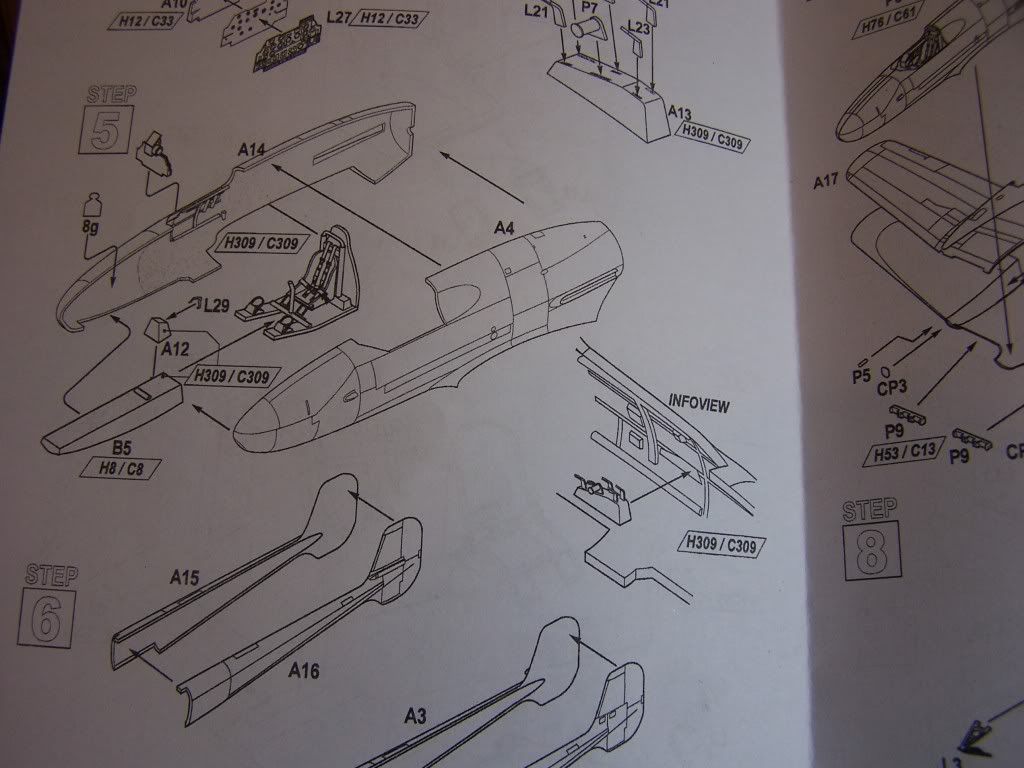
I started construction, as per usual, with the cockpit. On this kit the cockpit is a work of art in itself and displays an incredible level of detail for 1/72nd scale. The throttle quadrant box alone features a total of 7 parts in styrene, resin and etched metal. I got through it though with the help of the new magnifier.

Image

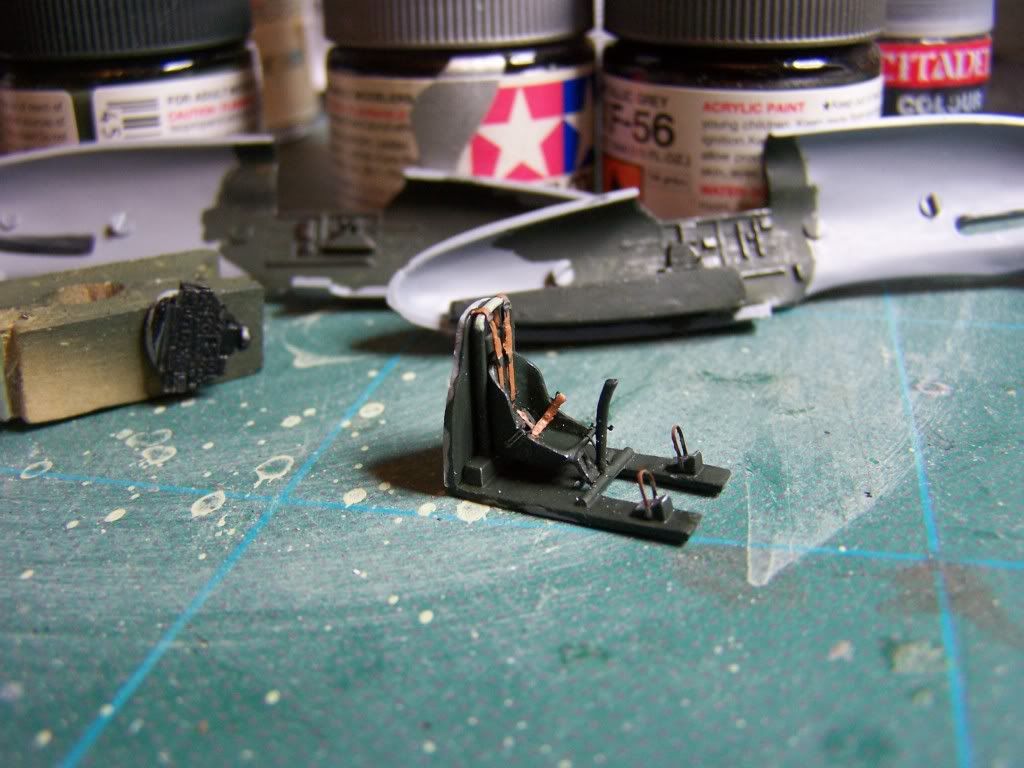
I painted the cockpit walls and attached the throttle quadrant.

Image

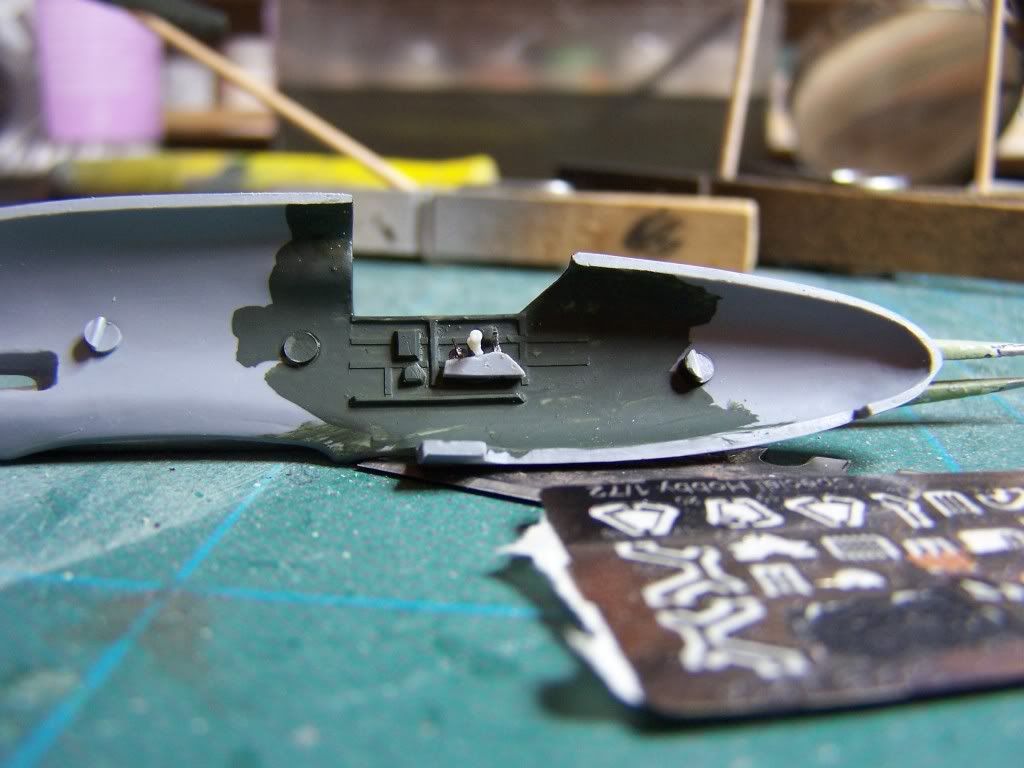
Next came the seat and cockpit floor/bulkhead. 11 parts for the seat, 6 for the floor/bulkhead and 3 for the nosewheel well.

Image

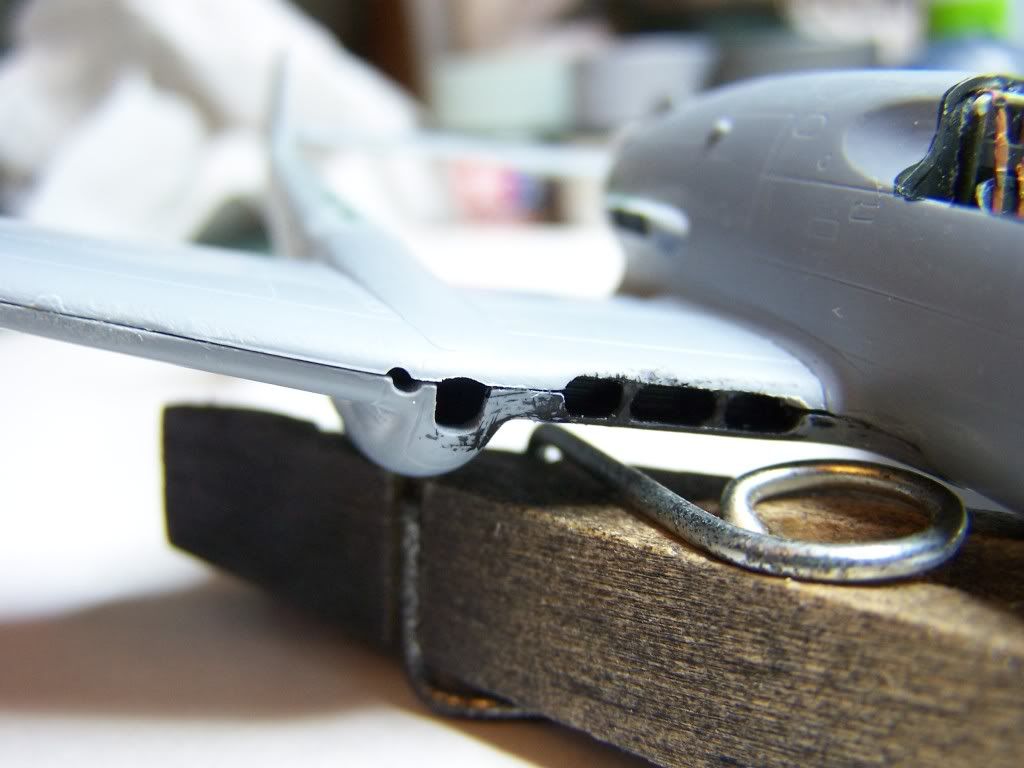
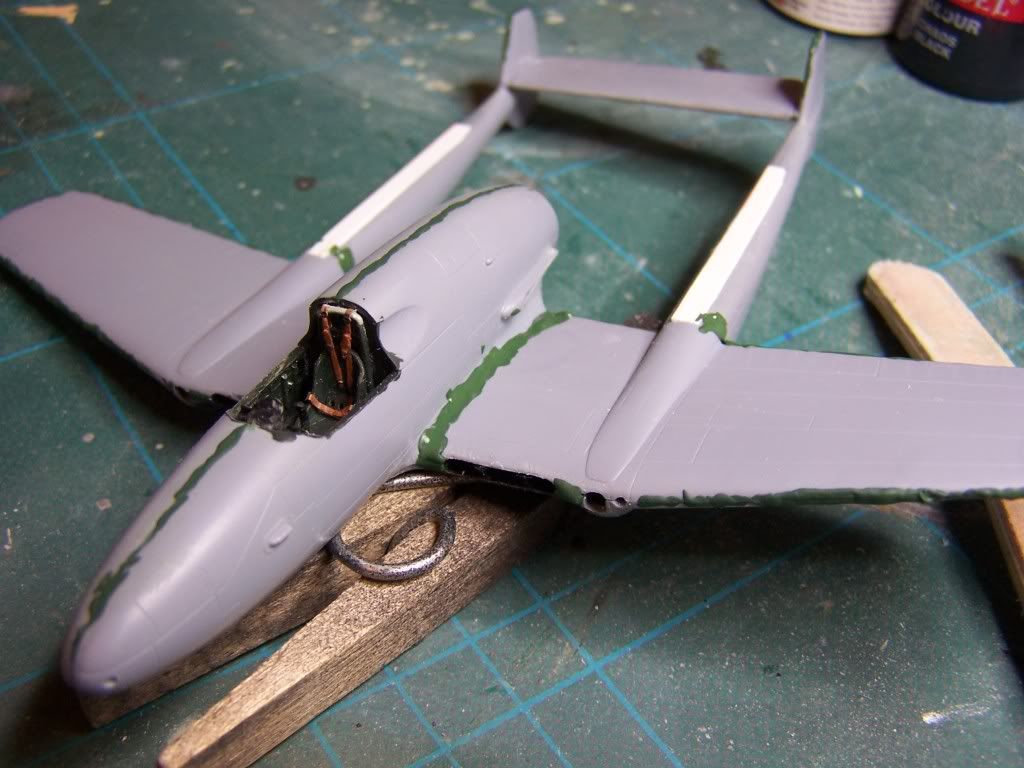
The cockpit was fitted around the nosewheel bay. The bay itself wasn't a great fit, but it's nothing a little filler can't cure.

Image

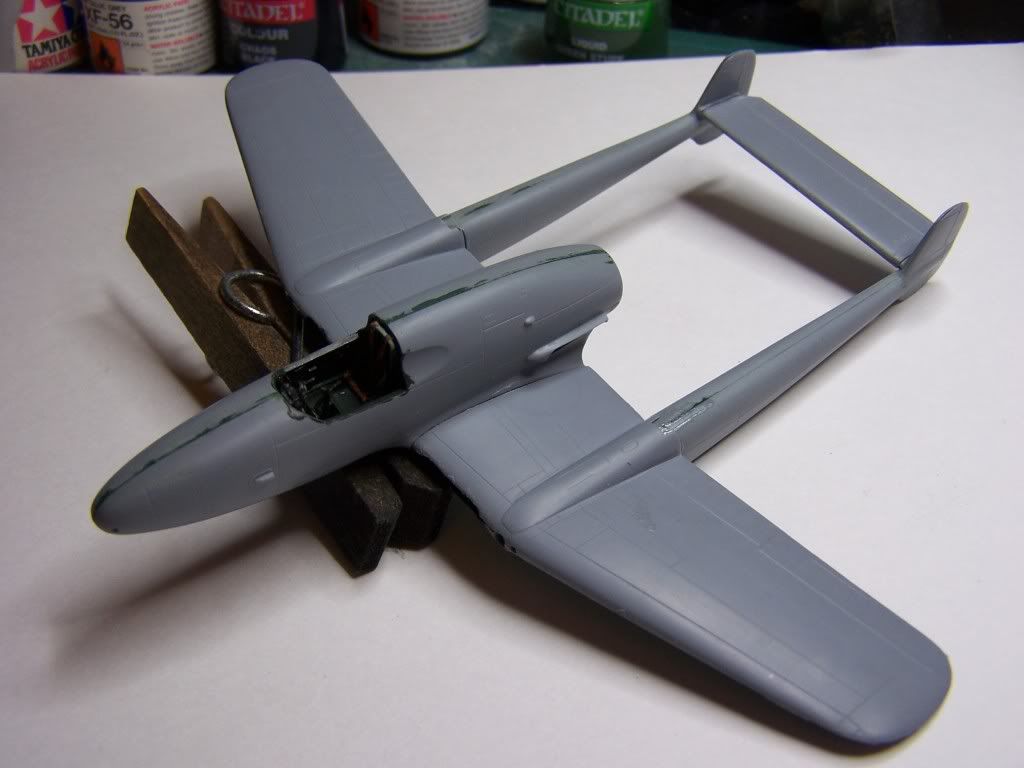
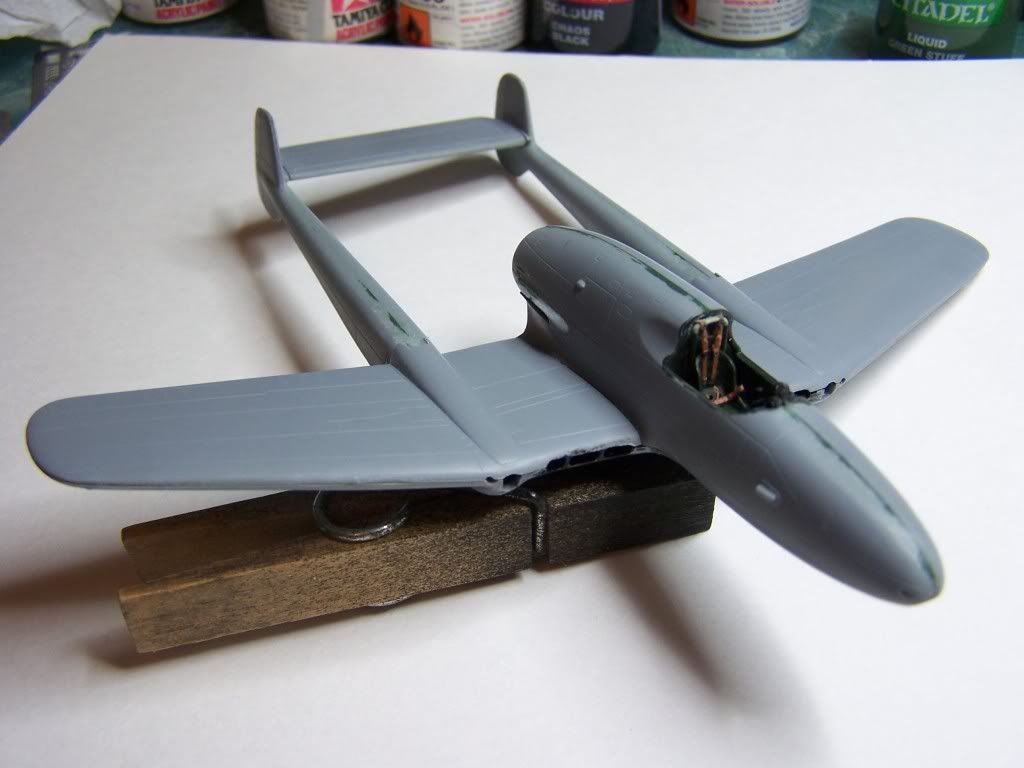
The interior colour is Tamiya XF-21 (black green) which SH also recommend as the upper surface colour for the aircraft exterior. This was dry brushed with metallic grey and came up very nicely. I didn't want to give the aircraft an overly weathered look as I felt that, particularly in a peacetime context, overdoing the weathering and wear would be unrealistic.

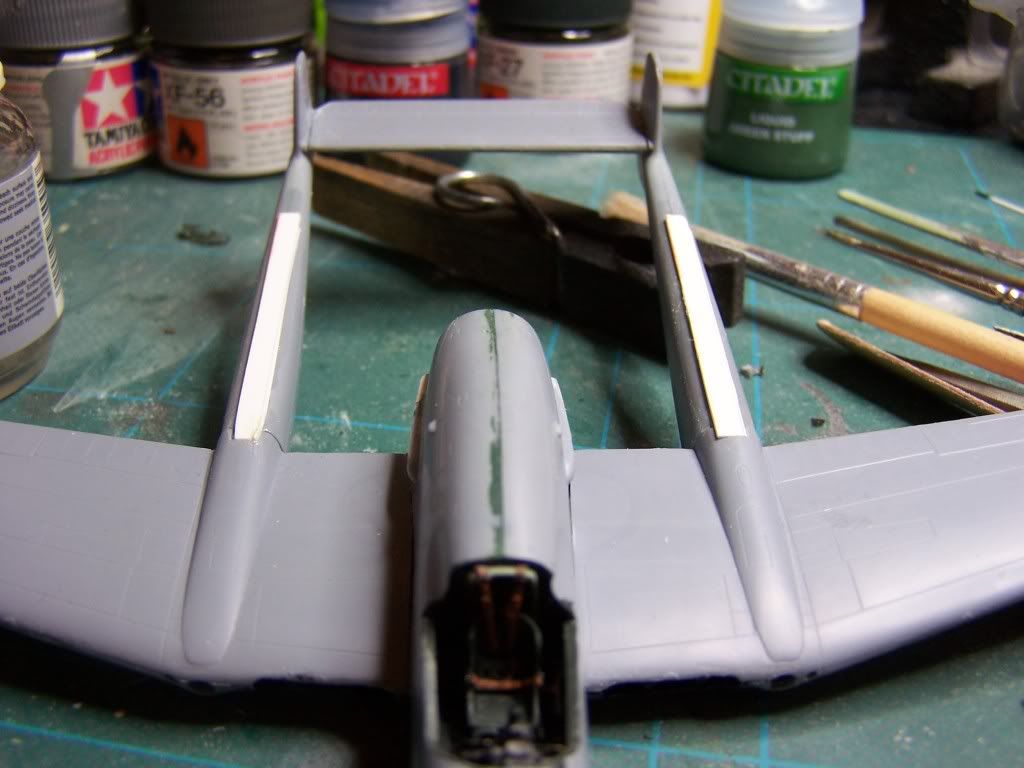
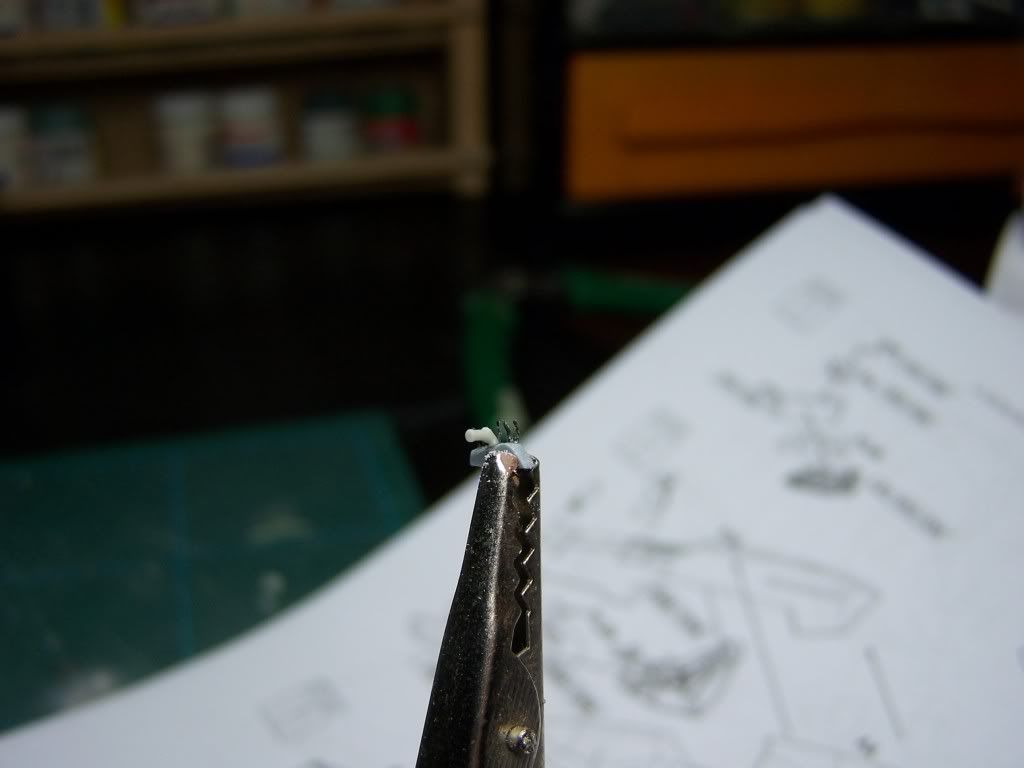
Having got the cockpit and u/c bay fully secure I fitted the Instrument panel. This, in itself contains another 4 parts, including a film insert and etched face plus a resin gunsight.

Image

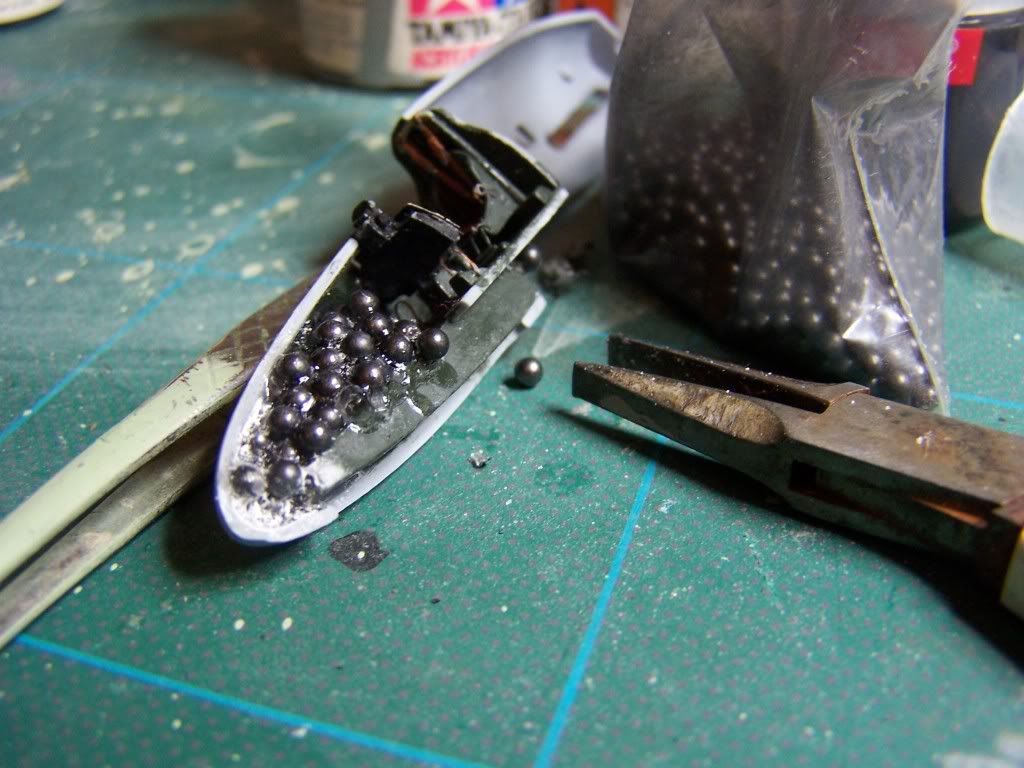
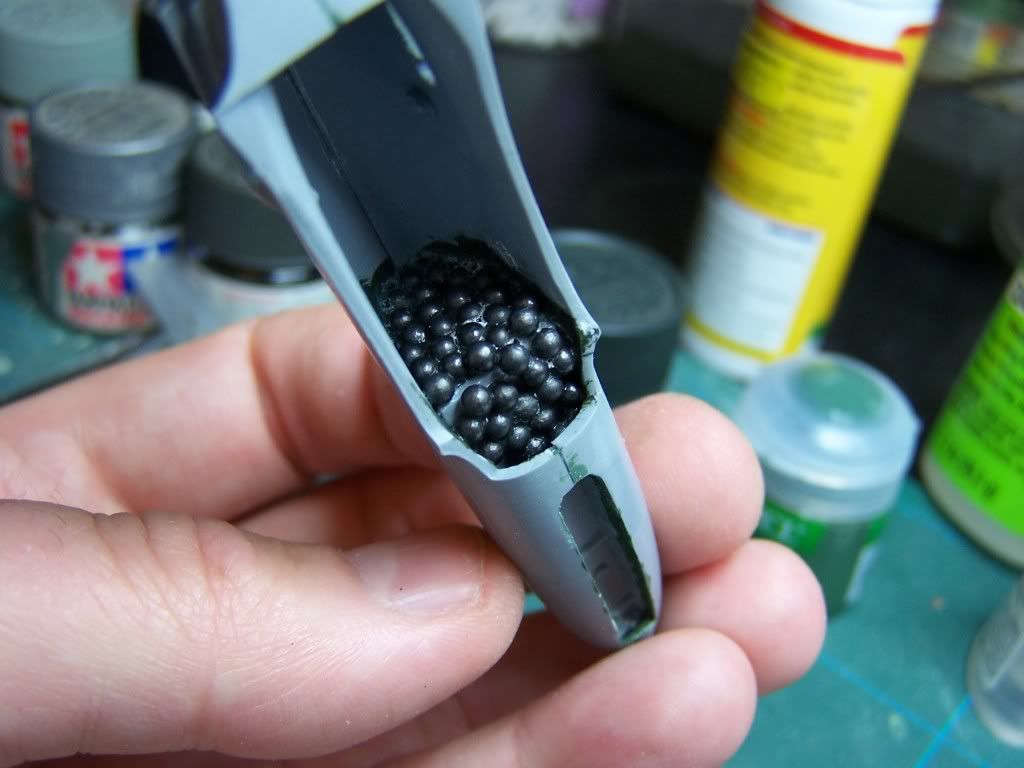
With this in place, I set about adding noseweight. One advantage in tidying away my bench for Christmas was that I found a bag of lead shot I forgot I had so this was applied with thick Zap-A-Gap. I have no idea if I have the 8 grams recommended by SH but I have got as much in there as I can at the moment. When the fuselage halves have cured fully I'll add more in the gaps underneath and behind the cockpit.

More updates soon. :)
COLD WAR S.I.G. LEADER

Wherever there's danger, wherever there's trouble, wherever there's important work to be done....I'll be somewhere else building a model!
User avatar
Beowulf Shaeffer
Earning Reputation Points
Posts: 823
Joined: May 1st, 2011, 12:01 am
Location: Monkey Hanger Town, UK

Re: Dazzled's Ikea Special

Post by Beowulf Shaeffer »

oooo...looking good. i love unusual looking aircraft

by the way, dont want to worry you but lead can react with superglue. not instantly but over a period of years. it forms a 'deposit' that grows and expands
The time you enjoy wasting is not wasted time........Bertrand Russell

On the Bench: Beagle
Next on the bench: not sure yet lol
User avatar
splash
Senior Service Rotorhead
Posts: 13828
Joined: May 1st, 2011, 11:02 am
Location: Somerset England

Re: Dazzled's Ikea Special

Post by splash »

Beowulf Shaeffer wrote:oooo...looking good. i love unusual looking aircraft

by the way, dont want to worry you but lead can react with superglue. not instantly but over a period of years. it forms a 'deposit' that grows and expands
I have started to use blu-tac and pva glue to hold my lead shot in place.

I agree with Beowulf it's looking good, did the seat belts come with the kit?

Regards
Splash
My work bench is starting to look like Portsmouth Naval Dockyard.
User avatar
Dazzled
Modelling Gent and Scholar
Posts: 9592
Joined: October 1st, 2011, 11:08 pm
Location: Mid Glamorgan, South Wales
Contact:

Re: Dazzled's Ikea Special

Post by Dazzled »

splash wrote:
I agree with Beowulf it's looking good, did the seat belts come with the kit?

Regards
Splash

Yes they did come with the kit. It's pretty much an "all in one box" model. A lot of work but quite satisfying so far.

As for the lead/superglue issue, it's a bit late now. I'll worry about it when it happens but I think I will use a different method from now on. ;-)
COLD WAR S.I.G. LEADER

Wherever there's danger, wherever there's trouble, wherever there's important work to be done....I'll be somewhere else building a model!
User avatar
JohnRatzenberger
Why is he so confused ?
Posts: 15734
Joined: April 5th, 2011, 3:42 pm
Location: Living on a sandbar - Nags Head, NC.

Re: Dazzled's Ikea Special

Post by JohnRatzenberger »

I don't think we can even get lead shot over here anymore, might poison the bird it's been shot into or something ...
John Ratzenberger :???:
It's my model and I'll do what I want with it.
User avatar
jssel
Still crazy after all these years
Posts: 12006
Joined: April 5th, 2011, 3:42 pm

Re: Dazzled's Ikea Special

Post by jssel »

Trap loads, John.

Nice looking work so far.
Besting 60 years of mediocre building of average kits in the stand off scale
User avatar
Dazzled
Modelling Gent and Scholar
Posts: 9592
Joined: October 1st, 2011, 11:08 pm
Location: Mid Glamorgan, South Wales
Contact:

Re: Dazzled's Ikea Special

Post by Dazzled »

OK - Next update.

I got the fuselage pod closed up, filled and sanded. Same for the tail booms, which went together with no trouble. Then I turned to the wings. They were removed from the sprues and the resin radiator inserts added.

Image

These are very nicely moulded but a little filler was required to hide the gaps where they don't quite meet the leading edge of the wing. Once this was dry and sanded a coat of Citadel chaos black was applied.

Before the wings went on I decided to add a bit more lead shot just to be on the safe side.

Image

So I "up-armoured" the cockpit bulkhead with a layer of lead added one ball at a time with tweezers.

Then came the fun bit of sticking the major assemblies together. As I did this using green Zap-a-Gap there wasn't much time to stop for pictures (plus I didn't want to risk getting stuck to my camera). It wasn't such a difficult assembly and SH have included quite a clever method, whereby the upper parts of the main u/c bays protrude into the booms thereby adding strength to what would otherwise have been little more than butt joints. The fit of the major parts is best described, however, as "interesting".

Image

The tailplane is handed by means of two locating pips, on one side it's forward while on the other it's aft. I can't see any difference between top and bottom though so I dont think it makes much difference. That said, despite the pips being only very small, the location was accurate and very positive.

It's not all fine and dandy with the fit though. As you can see here.

Image

The gun port on the starboard wing is misaligned. Not hard to correct, I know, but frustrating when the port side lined up perfectly.

There's also the matter of the fit of the booms.

Image

Yes, they do go on positively and lock into place very nicely but....

Image

...there's a bit of a step. OK there's a big step...on both of them. Bit of a c@#& up in SH's measurements department I think. I now have to decide whether to sand down the moulded in bit on the wing upper surfaces, which would be a bit of a pain to get to look right and blend in nicely, or to build up the spines of the booms and reprofile them. The second option seems the less risky path. Any suggestions?

Apart from that niggle and the filling, that I knew would be required, the only hiccup on the path to Saaby happiness so far has been that I've inadvertantly damaged one of the exhaust shrouds. SH styrene is pretty soft but still brittle!

Image

It wasn't hard to put right though, a bit of Squadron white putty and a few minutes of sanding soon had things looking balanced again.

This is the state of things now.

Image

Image

It's looking like a J-21A now and, having checked (and double checked) the wing/fuselage/boom alignments, I'm happy that everything's straight and as it should be. I also gave it the "tail-sitter" test. I really hope that the noseleg is good and strong because the model is definately nose-heavy. ;-) I think the COG is somewhere near the cockpit bulkhead :-D
COLD WAR S.I.G. LEADER

Wherever there's danger, wherever there's trouble, wherever there's important work to be done....I'll be somewhere else building a model!
User avatar
Martin R
Modelling Gent and Scholar
Posts: 4695
Joined: May 1st, 2011, 7:53 am

Re: Dazzled's Ikea Special

Post by Martin R »

I think you've made great progress there! That's my problem with SH kits; they have nice detail but often the delicately moulded stuff doesn't survive the fairly brutal process required to sort out the fit.

Looking good, though.

regards,

Martin
User avatar
Stamford
Modelling Gent and Scholar
Posts: 2240
Joined: May 1st, 2011, 7:42 am
Location: Klågerup Sweden

Re: Dazzled's Ikea Special

Post by Stamford »

I´m doing the Heller one at the mo so its interesting to follow this one - never seen it before! The old Heller seems a better fit though!
running at the edge of their world
User avatar
JamesPerrin
Looks like his avatar
Posts: 13695
Joined: April 5th, 2011, 8:09 pm
Location: W. Yorkshire
Contact:

Re: Dazzled's Ikea Special

Post by JamesPerrin »

I think if you sand down the boom ends you are in danger of over thinning the plastic. Best go half'n' half and build up the booms a little.
Classic British Kits SIG Leader Better to fettle than to fill
(2024 A:B 5:2) (2023 13:8:7) (2022 21:11) (2021 15:8) (2020 8:4:4)
User avatar
Dazzled
Modelling Gent and Scholar
Posts: 9592
Joined: October 1st, 2011, 11:08 pm
Location: Mid Glamorgan, South Wales
Contact:

Re: Dazzled's Ikea Special

Post by Dazzled »

I think you're right James. Plasticard strips and filler, I think.
COLD WAR S.I.G. LEADER

Wherever there's danger, wherever there's trouble, wherever there's important work to be done....I'll be somewhere else building a model!
User avatar
Dazzled
Modelling Gent and Scholar
Posts: 9592
Joined: October 1st, 2011, 11:08 pm
Location: Mid Glamorgan, South Wales
Contact:

Re: Dazzled's Ikea Special

Post by Dazzled »

Work's been interfering with my modelling for a couple of days but I've done a little towards filling the gaps.

Image

I've added some strips of plasticard to the upper spines of the booms. A good dose of liquid poly stuck them down and, as it'll be at least 2 days before I get any more modelling time, they'll have plenty of time to set. After the plasticard it was time for...

Image

Image

ATTACK OF THE FILLER MONSTER!!

I'm having a go with Citadel liquid green stuff. It's actually quite good. Just as well given that pretty much every seam on the model needs some :frown:

Still, "limited run kit" and all that.

More updates eventually :)
COLD WAR S.I.G. LEADER

Wherever there's danger, wherever there's trouble, wherever there's important work to be done....I'll be somewhere else building a model!
User avatar
splash
Senior Service Rotorhead
Posts: 13828
Joined: May 1st, 2011, 11:02 am
Location: Somerset England

Re: Dazzled's Ikea Special

Post by splash »

When the green stuff is dry you can still remove it just with water, try rubbing the join with a wet Q-tip, it saves rubbing it down and loosing the detail.

Go gently with the water as it comes off quite quick, the good news is it's easy to add more if you take to much off.

Regards
Splash
My work bench is starting to look like Portsmouth Naval Dockyard.
User avatar
Dazzled
Modelling Gent and Scholar
Posts: 9592
Joined: October 1st, 2011, 11:08 pm
Location: Mid Glamorgan, South Wales
Contact:

Re: Dazzled's Ikea Special

Post by Dazzled »

Thanks for the tip Splash :)
COLD WAR S.I.G. LEADER

Wherever there's danger, wherever there's trouble, wherever there's important work to be done....I'll be somewhere else building a model!
User avatar
Martin R
Modelling Gent and Scholar
Posts: 4695
Joined: May 1st, 2011, 7:53 am

Re: Dazzled's Ikea Special

Post by Martin R »

Dazzled,

How goes it? Still trapped in the sand . . . fill . . . sand cycle? Hope not. There's nothing more likely to drain the fun out of a build.

Let us know when you can.

regards,

Martin
Locked

Return to “Boom! Boom! Basil Brush's Twin-boom Aircraft GB”