Dazzled's Jag

Runs March 5th through April 15th.
GB Leader: JamesPerrin
User avatar
Dazzled
Modelling Gent and Scholar
Posts: 9592
Joined: October 1st, 2011, 11:08 pm
Location: Mid Glamorgan, South Wales
Contact:

Re: Dazzled's Jag

Post by Dazzled »

I haven't been completely idle with the Jag although I have been a little remiss about taking photos. I'm in the middle of a nightmare OU assignment at the moment so breaking away from it to do a little modelling has prevented me from murdering my family with an axe, although the Jag itself hasn't been altogether straightforward.

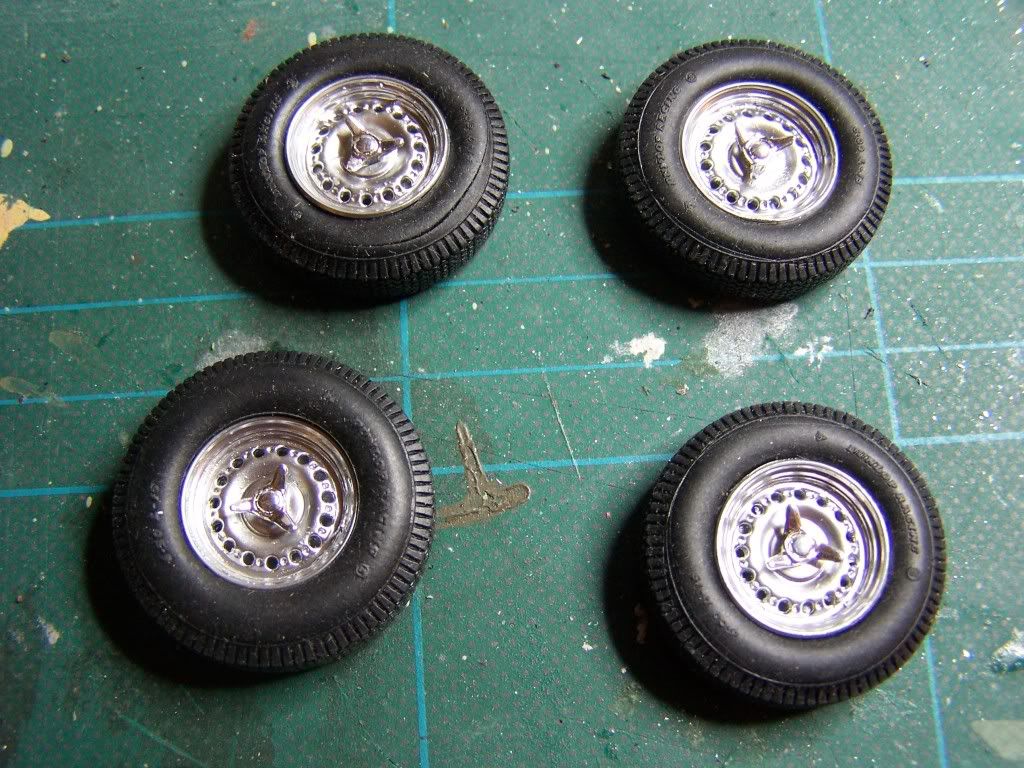
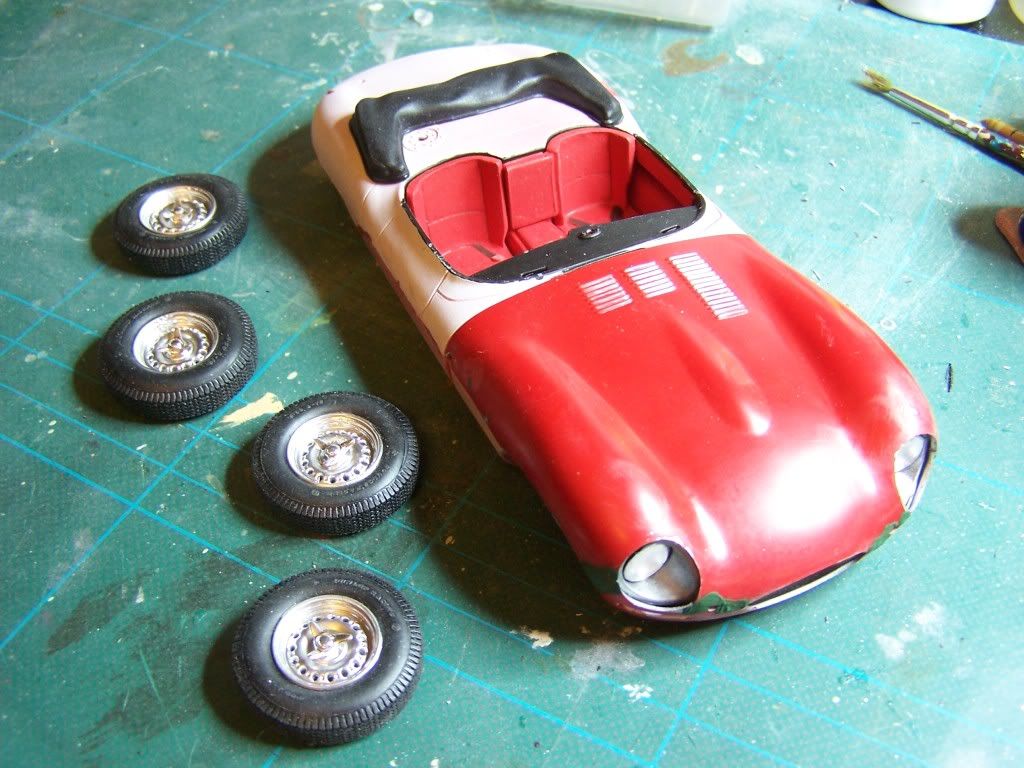
I've got the chrome plating off the required parts and have coated the wheels and exhaust shroud with plastikote chrome spray. These have been put in a plastic tray (ex Ferrero Rocher) on the kitchen windowsill to cure. Plastikote is great stuff but it takes ages to dry, so I'm going to give it at least a week before I touch anything.

The bumpers and window frames are going to get another treatment however.

Image

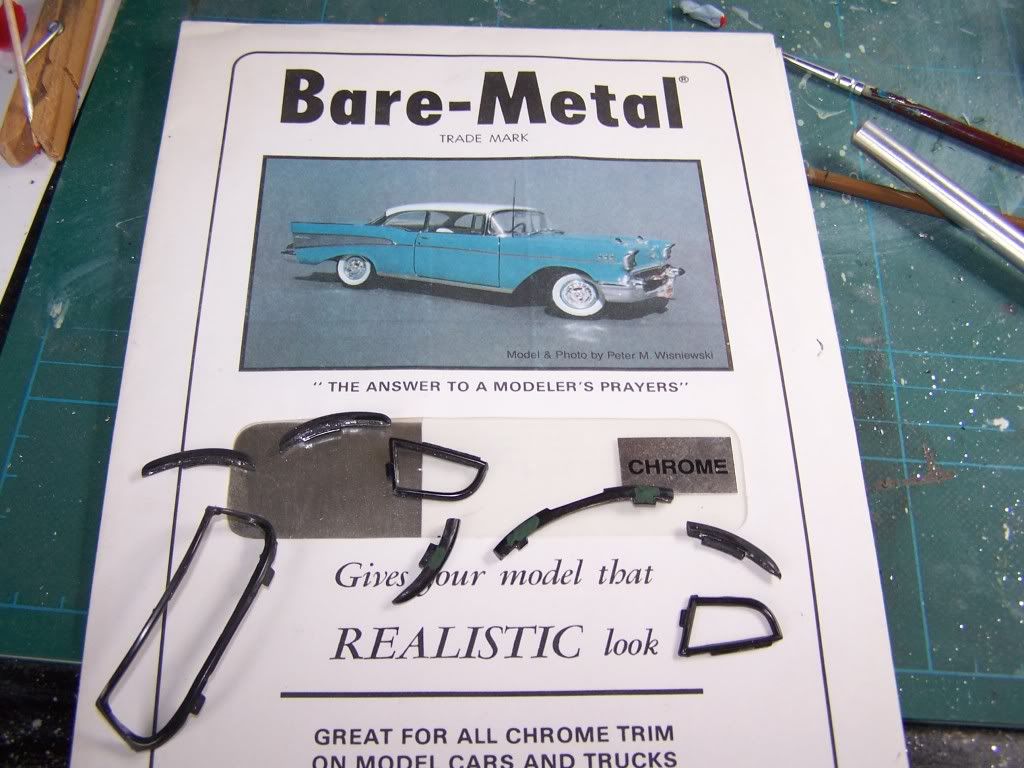
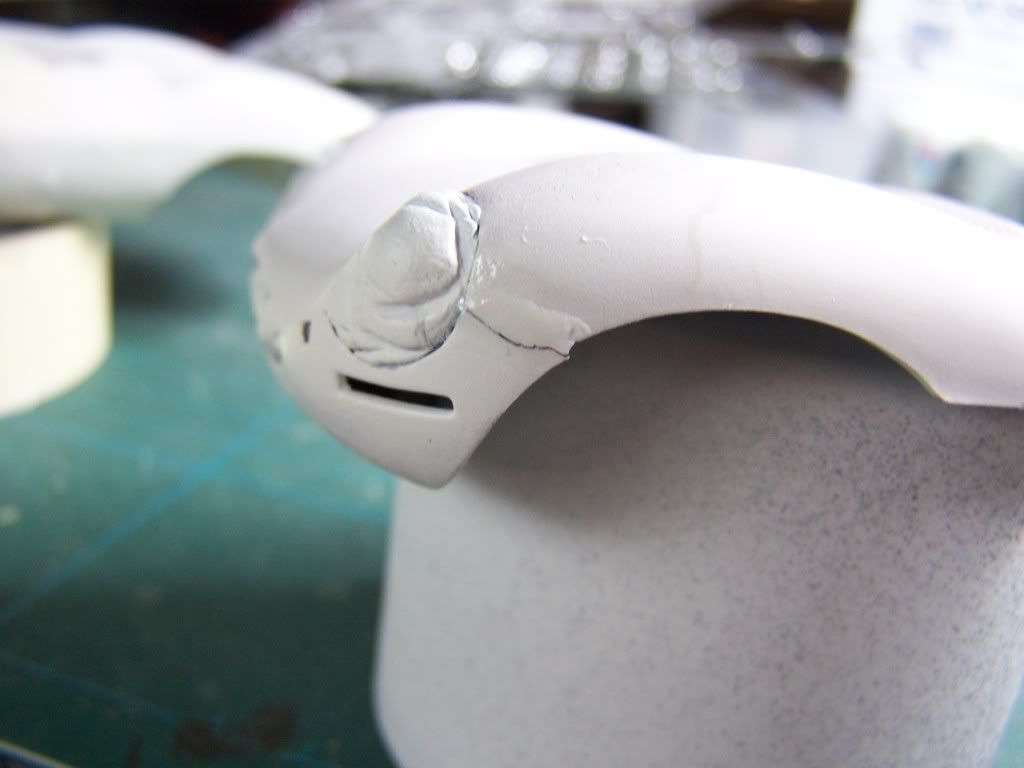
A bit of Bare Metal foil that just took me 20 minutes of rummaging to find (I knew it was lurking somewhere). So it's off to sand down the filler in the sink marks then a bit of foiling ;-)
COLD WAR S.I.G. LEADER

Wherever there's danger, wherever there's trouble, wherever there's important work to be done....I'll be somewhere else building a model!
User avatar
mattbacon
Too Cheerful To Be A JMN
Posts: 2312
Joined: April 11th, 2011, 1:54 pm

Re: Dazzled's Jag

Post by mattbacon »

...hoping it's not too late...

Daz... the fit of the windscreen into the frame is pretty dire, plus it is surrounded by a thick black rubber seal. I found out too late, and the hard way. I'd seriously think about putting the window in first, getting it thoroughly faired in and set, perhaps even with superglue, and then applying the BMF just to the outer part of the frame, using the black plastic colour as the seal. I'd be worried about getting any glue to to "take" solidly enough on the BMF to hold the window reliably in place. With the frame in bare plastic, you can also fettle the fit to the body before glazing it. The side frames are way too heavy, as well. I wouldn't bother with them and just apply some paint or BMF directly to some acetate sheet cut to shape...

Good luck!

bestest,
M
User avatar
Dazzled
Modelling Gent and Scholar
Posts: 9592
Joined: October 1st, 2011, 11:08 pm
Location: Mid Glamorgan, South Wales
Contact:

Re: Dazzled's Jag

Post by Dazzled »

Thanks Matt, you were just in time. I was just taking another study break to go and put the foil on. You've helped me dodge a bullet there :)
COLD WAR S.I.G. LEADER

Wherever there's danger, wherever there's trouble, wherever there's important work to be done....I'll be somewhere else building a model!
User avatar
Dazzled
Modelling Gent and Scholar
Posts: 9592
Joined: October 1st, 2011, 11:08 pm
Location: Mid Glamorgan, South Wales
Contact:

Re: Dazzled's Jag

Post by Dazzled »

You know how it is...

You wait ages for an update then two come along in the same day. Got my mojo going with my study work and decided to reward myself with a bit of quality bench time.

So a fair bit more prep work got done. It's all prep with this kit. I reckon it'll all come together in the last five minutes ;-)

Image

This is how my bench looks at the moment with bits of XKSS strewn all over the place. I really must tidy up properly when this kit is finished :roll:

Image

These are the bumpers,coated in bare metal foil and the windows fixed into their frames with Clearfix BEFORE applying the foil. Many thanks for the warning matt :)

Image

There's also been a bit more bodywork fettling and painting done. Photo research shows that the odd bits of body interior around the cockpit should be black,not aluminium as per the instructions. I've also embarked on a duel with the bonnet/lights/radiator bits :shock: . Shouldn't be too hard but it's a sod waiting for all the paint to dry.

Image

And finally a rather blurry picture of the slide out shelf under my bench which is also full of Jag bits.

I just hope I don't lose any :???:
COLD WAR S.I.G. LEADER

Wherever there's danger, wherever there's trouble, wherever there's important work to be done....I'll be somewhere else building a model!
User avatar
Dazzled
Modelling Gent and Scholar
Posts: 9592
Joined: October 1st, 2011, 11:08 pm
Location: Mid Glamorgan, South Wales
Contact:

Re: Dazzled's Jag

Post by Dazzled »

Despite not being in much of a fit shape to sit at my bench for any period of time, things have progressed a little with the Jag.

The instrument panel has had it's decals applied with the help of MicroSol/Set.

Image

And it's been fixed in place.

Image

As the picture shows, the body halves have been joined together using liquid poly and held together with ratchet clamps. Just got to give them a day to set up, then see what filling/sanding needs doing.

The bench looks like this at the moment.

Image

The inside of the bonnet ("hood" to our American cousins) has had a second and final coat of silver enamel, so needs a day to dry fully.

Also visible is the tray with the wheels and exhaust shroud that's been on the kitchen windowsill for a few days.

Image

The Plastikote seems to have set now so I should be able to handle these without leaving fingerprints (hopefully) ;-) .

So I should be able to get the wheels together and tyres on very soon :grin:
COLD WAR S.I.G. LEADER

Wherever there's danger, wherever there's trouble, wherever there's important work to be done....I'll be somewhere else building a model!
User avatar
JamesPerrin
Looks like his avatar
Posts: 13687
Joined: April 5th, 2011, 8:09 pm
Location: W. Yorkshire
Contact:

Re: Dazzled's Jag

Post by JamesPerrin »

It's a lot of bits but now you've got most of them painted they can start to come together which I'm sure will give you some satisfaction and help spur you along.
Classic British Kits SIG Leader Better to fettle than to fill
(2024 A:B 5:2) (2023 13:8:7) (2022 21:11) (2021 15:8) (2020 8:4:4)
User avatar
Dazzled
Modelling Gent and Scholar
Posts: 9592
Joined: October 1st, 2011, 11:08 pm
Location: Mid Glamorgan, South Wales
Contact:

Re: Dazzled's Jag

Post by Dazzled »

All together now!

"FOUR WHEELS ON MY WAGON....."

Image

It's very encouraging to see the wheels together after stripping the chrome, recoating and the time involved letting everything dry.

I'm feeling quite positive about this kit right now :grin:
COLD WAR S.I.G. LEADER

Wherever there's danger, wherever there's trouble, wherever there's important work to be done....I'll be somewhere else building a model!
User avatar
Dazzled
Modelling Gent and Scholar
Posts: 9592
Joined: October 1st, 2011, 11:08 pm
Location: Mid Glamorgan, South Wales
Contact:

Re: Dazzled's Jag

Post by Dazzled »

And with the bonnet largely together, at last displaying that distinctive nose, I couldn't resist a quick dry fit :)

Image

Image

Image

After all this time it was nice to see some visible progress. :grin:
COLD WAR S.I.G. LEADER

Wherever there's danger, wherever there's trouble, wherever there's important work to be done....I'll be somewhere else building a model!
User avatar
Jagewa
Modelling Gent and Scholar
Posts: 2752
Joined: April 6th, 2011, 2:18 am
Location: Christchurch, New Zealand
Contact:

Re: Dazzled's Jag

Post by Jagewa »

Man, great work here, what a cool looking car. certainly bags of character.

Looking forward to more.

Cheers
Jim
User avatar
Dazzled
Modelling Gent and Scholar
Posts: 9592
Joined: October 1st, 2011, 11:08 pm
Location: Mid Glamorgan, South Wales
Contact:

Re: Dazzled's Jag

Post by Dazzled »

Just when I thought things were going well and coming together I've gone and had a mishap at work, cutting my right index finger quite deeply, so my modelling activities are going to be seriously curtailed for a day or three just when I have three days off work :frown:

So it's looking doubtful if I'll finish the Jag in time now :cry:

I'm typing this very oddly at the moment with one rather tender finger well away from the keyboard.
COLD WAR S.I.G. LEADER

Wherever there's danger, wherever there's trouble, wherever there's important work to be done....I'll be somewhere else building a model!
User avatar
Jagewa
Modelling Gent and Scholar
Posts: 2752
Joined: April 6th, 2011, 2:18 am
Location: Christchurch, New Zealand
Contact:

Re: Dazzled's Jag

Post by Jagewa »

All the best for the abused digit Dazzled. Not painting it red then? :ha:

Cheers
Jim
User avatar
Dazzled
Modelling Gent and Scholar
Posts: 9592
Joined: October 1st, 2011, 11:08 pm
Location: Mid Glamorgan, South Wales
Contact:

Re: Dazzled's Jag

Post by Dazzled »

Jagewa wrote:All the best for the abused digit Dazzled. Not painting it red then? :ha:

Cheers
Jim
Not intentionally ;-)
COLD WAR S.I.G. LEADER

Wherever there's danger, wherever there's trouble, wherever there's important work to be done....I'll be somewhere else building a model!
User avatar
Dazzled
Modelling Gent and Scholar
Posts: 9592
Joined: October 1st, 2011, 11:08 pm
Location: Mid Glamorgan, South Wales
Contact:

Re: Dazzled's Jag

Post by Dazzled »

Stupid, stupid, stupid.

Couldn't resist attempting to progress the Jag despite the injured paw and the inevitable happened.

Image

I dropped the bonnet on the floor and one of the joints cracked. :evil:

And spraying from a can when you can't use your right index finger is really difficult :sad:

I feel about as useful as a chocolate teapot at the moment!
COLD WAR S.I.G. LEADER

Wherever there's danger, wherever there's trouble, wherever there's important work to be done....I'll be somewhere else building a model!
User avatar
Jagewa
Modelling Gent and Scholar
Posts: 2752
Joined: April 6th, 2011, 2:18 am
Location: Christchurch, New Zealand
Contact:

Re: Dazzled's Jag

Post by Jagewa »

I won't say pull your finger out then.. oops maybe I did :ha:

I had Easter eggs not chocolate tea pots, is it just for special occasions? :lol:

Take it easy Dazzled. Let that finger heal up, it's only a plastic kit.

Cheers
Jim
User avatar
JamesPerrin
Looks like his avatar
Posts: 13687
Joined: April 5th, 2011, 8:09 pm
Location: W. Yorkshire
Contact:

Re: Dazzled's Jag

Post by JamesPerrin »

There is no point rushing this for the GB deadline, it's a great kit and you've done a lovely job so far so just be patient so you can finish it off to the same standard and have something to be proud of.
Classic British Kits SIG Leader Better to fettle than to fill
(2024 A:B 5:2) (2023 13:8:7) (2022 21:11) (2021 15:8) (2020 8:4:4)
Locked

Return to “Wheels Go 'Round - the Auto GB”