Airfix 1/72 Angel Interceptor
-
gnomemeansgnome

- Modelling Gent and Scholar
- Posts: 5269
- Joined: July 16th, 2013, 4:03 pm
- Location: No Fun City
Re: Airfix 1/72 Angel Interceptor
Really nice work going on here.
Ego no habeo consilium.
ICBM = Insatiable Collector and Builder of Models
ICBM = Insatiable Collector and Builder of Models
Re: Airfix 1/72 Angel Interceptor
I have never done any space or prog related models but your work has encouraged me to have a go, thanks. 
-
ShaunW
- NOT the sheep
- Posts: 26188
- Joined: November 26th, 2011, 6:11 pm
- Location: Pontefract West Yorkshire
Re: Airfix 1/72 Angel Interceptor
I've seen a few modellers battle this kit Ian and it's great to see that you are now working your magic on it - the last one that you built looks excellet BTW.
Doing - Tamiya 1/35th Universal Carrier.
Work is the curse of the modelling classes!
IPMS#12300
Work is the curse of the modelling classes!
IPMS#12300
-
general rocket

- Modelling Gent and Scholar
- Posts: 2791
- Joined: May 1st, 2011, 4:42 pm
- Location: Telford
-
Sunray
- Active Participant
- Posts: 611
- Joined: March 18th, 2014, 4:01 pm
- Location: Penshaw, North East, England
- Contact:
Re: Airfix 1/72 Angel Interceptor
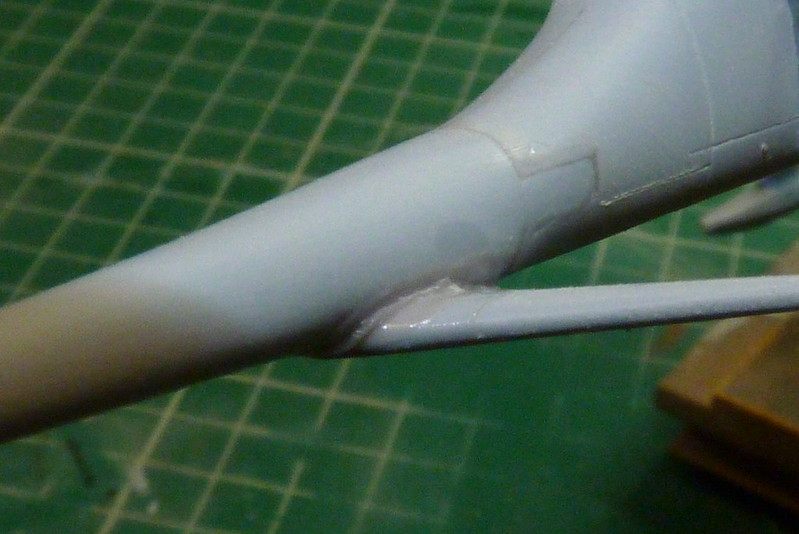
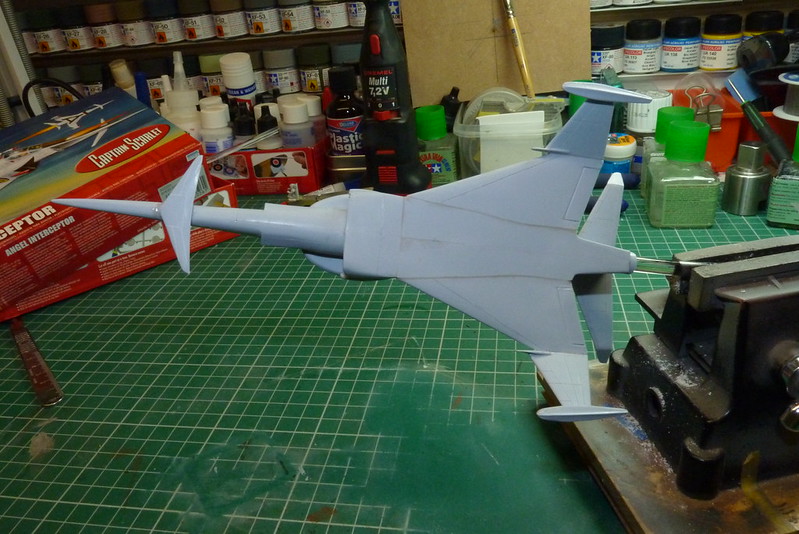
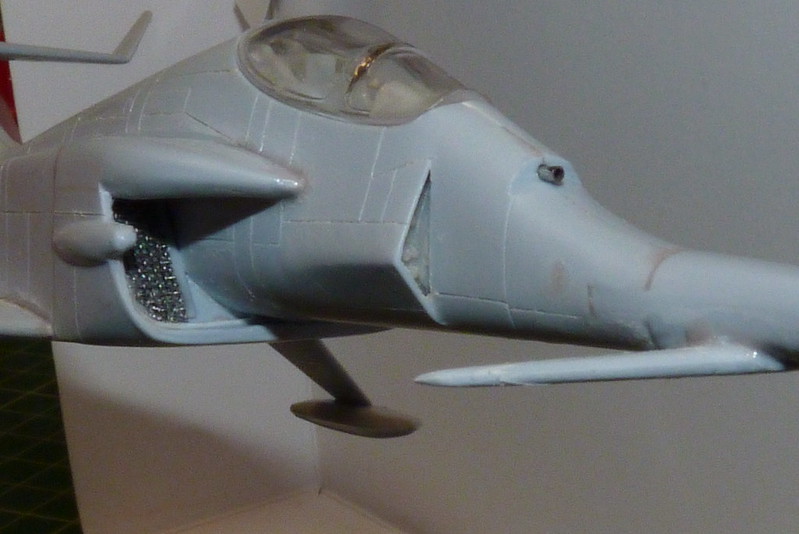
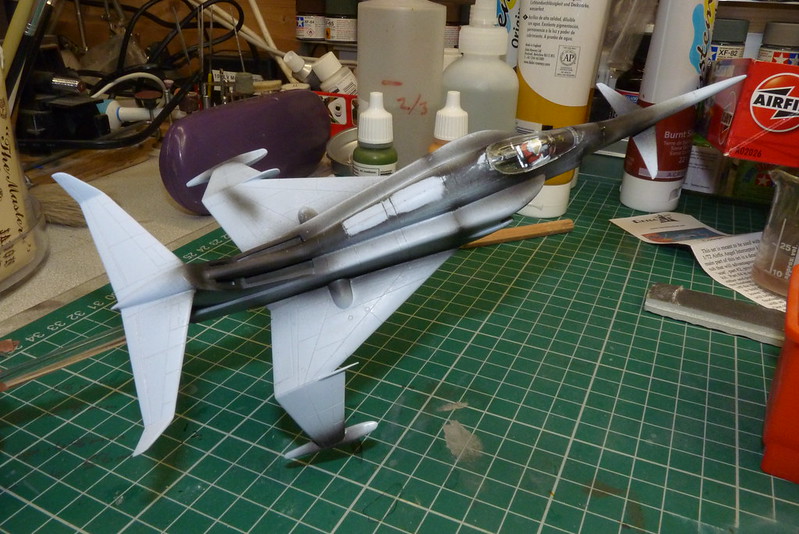
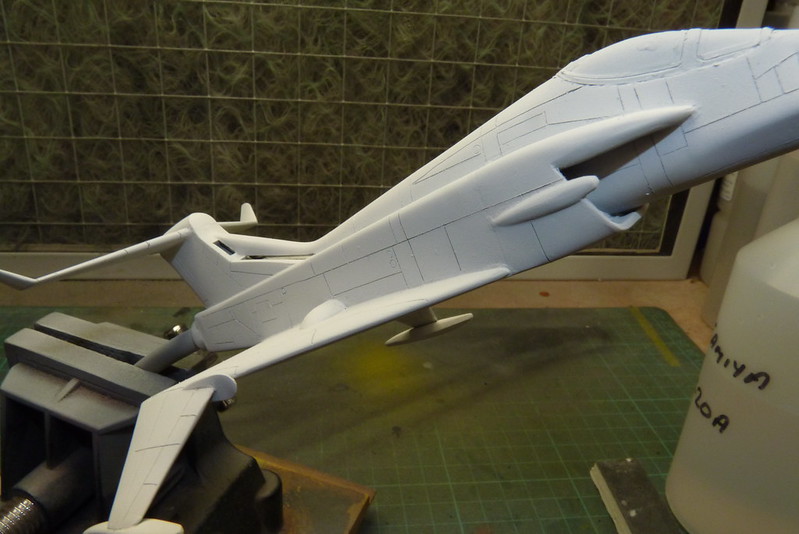
Thanks lads. I have attached the wings and tail plane without too much trouble but there were a few gaps which I filled with sprue dissolved in Tamiya Extra Thin cement and left over night to harden.
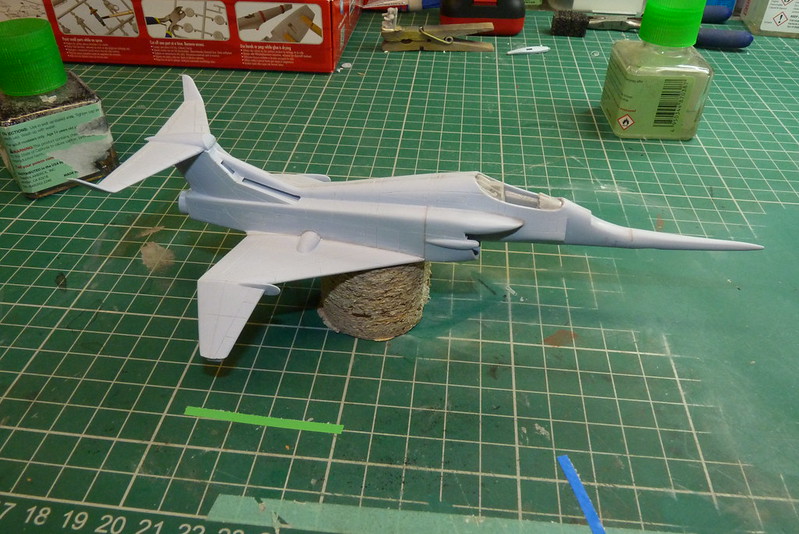
When the homemade filler was rock solid it was just a case of sanding down the filler and adding more if there were still gaps.
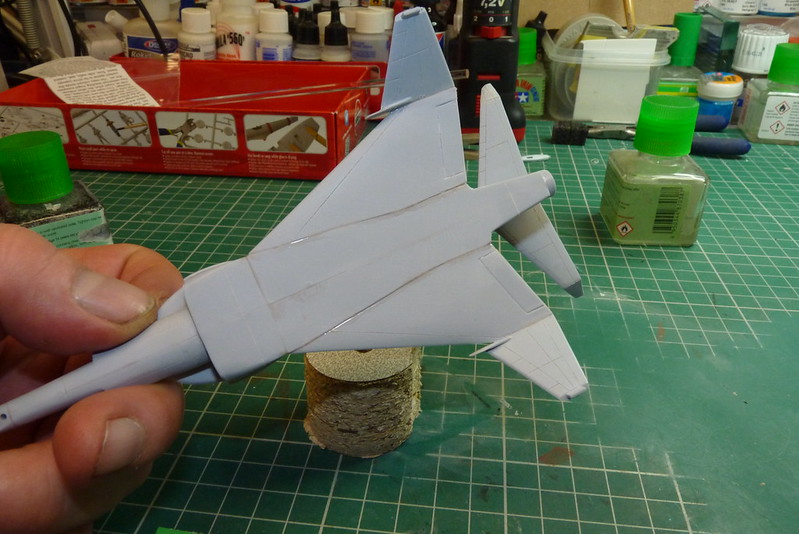
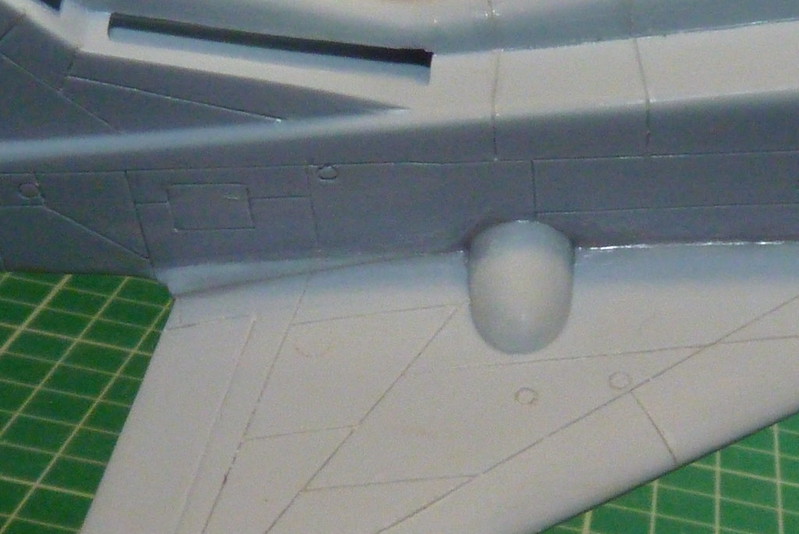
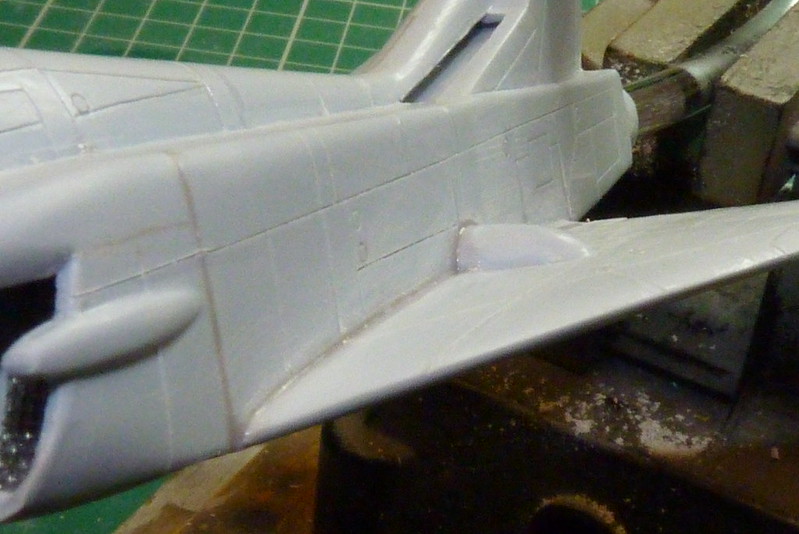
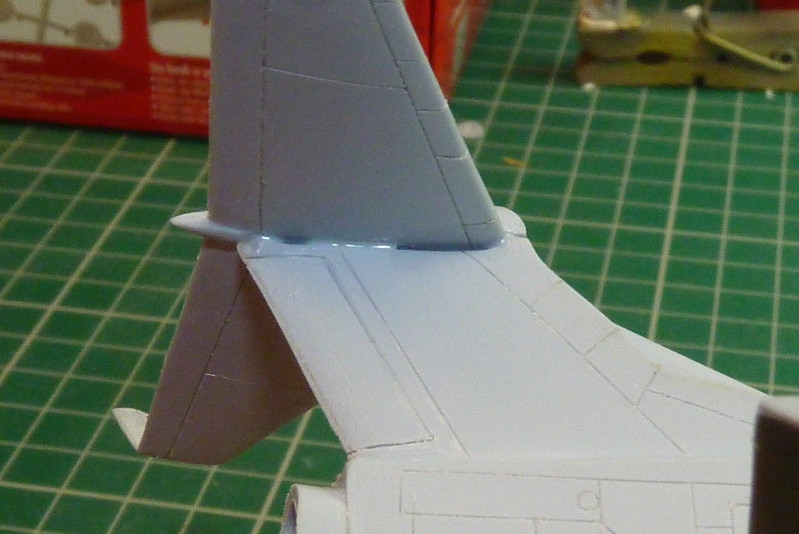

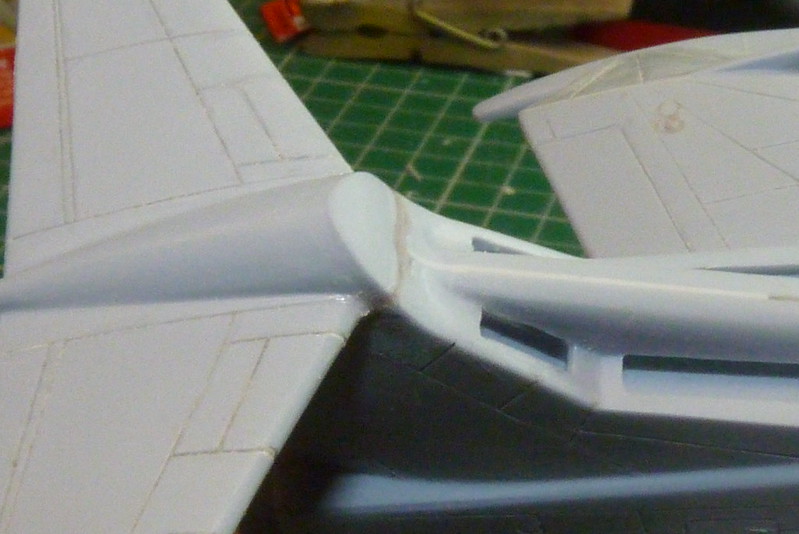
Then I moved on to adding the wing tip skids and the nose canards which also had a few gaps which were again filled.
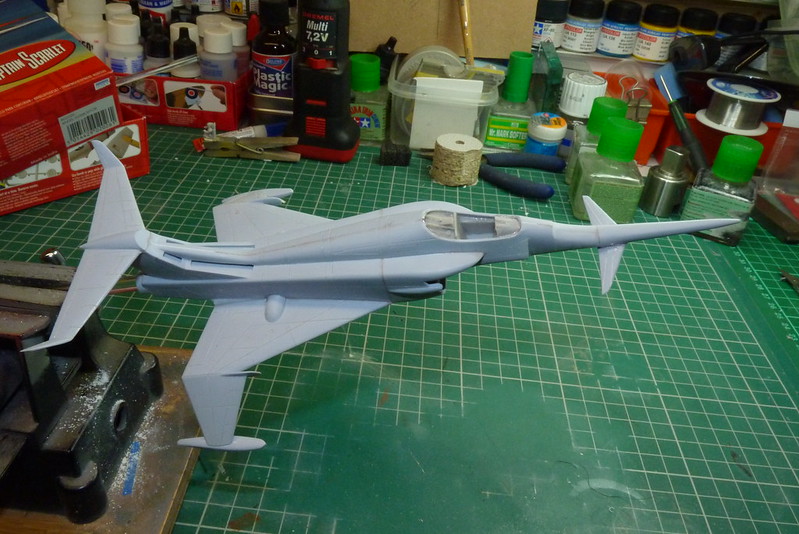
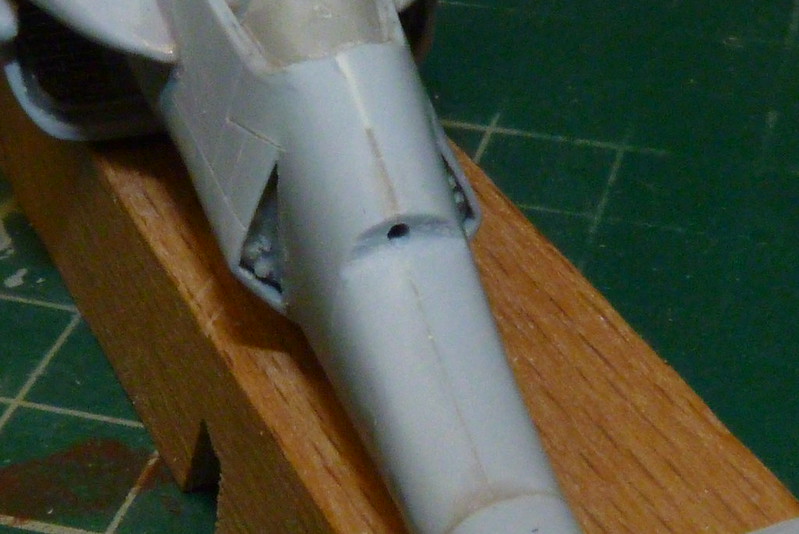
I had already cut off the piece of plastic that was the nose gun. I am going to make a new one from a syringe needle so first I drilled a hole the same diameter as the needle.
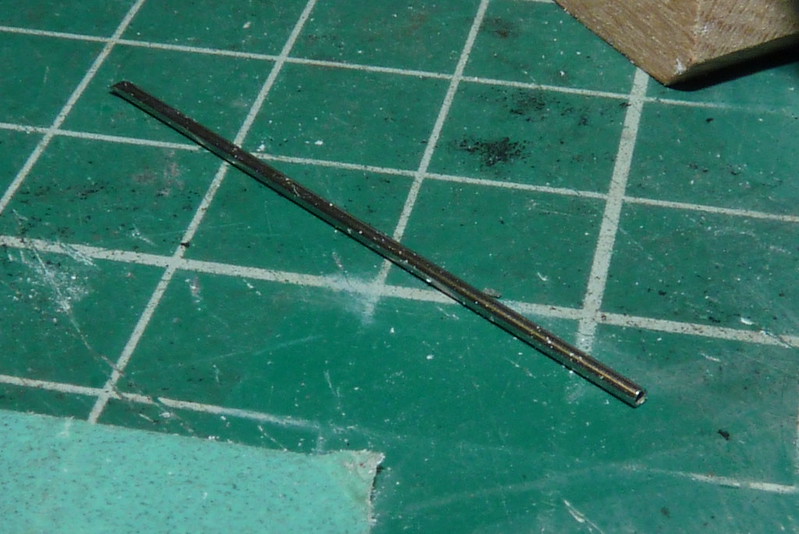
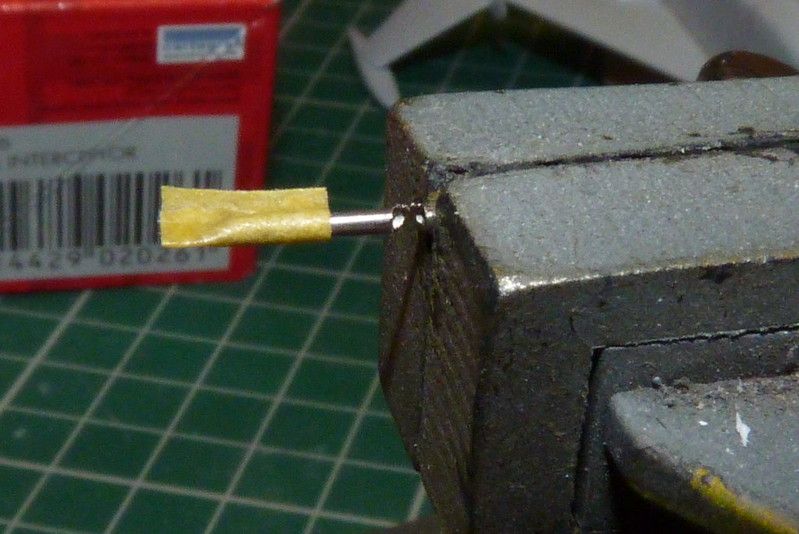
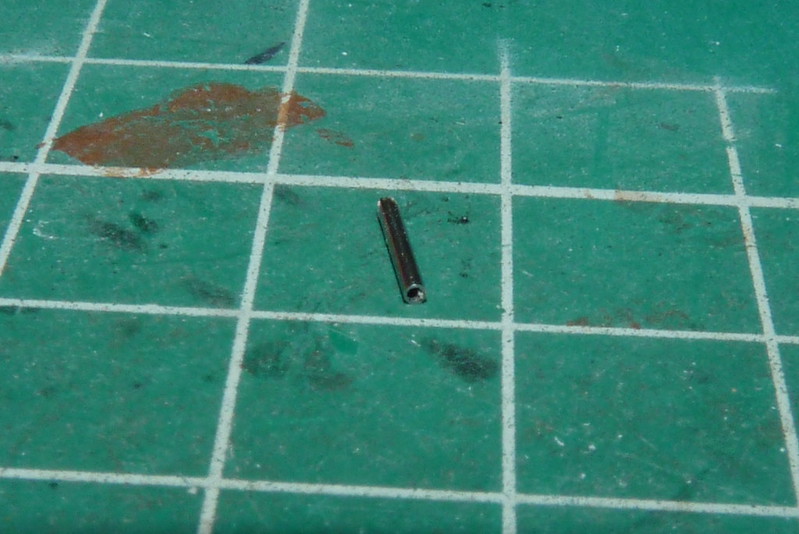
I cut the needle to size using my Dremel with a cutting disc with the needle held in a vice.
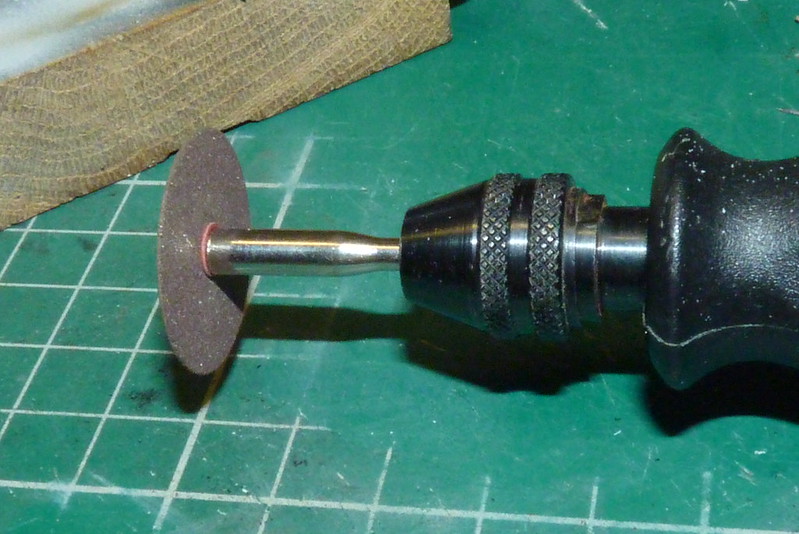
I stuck a small piece of tape to the end of the needle as it makes in easier to find if the cut piece of needle decides to go walkabout once cut. Also I don't cut all the way through the needle just in case it flies off. I leave just enough as to make it easy to snap apart.
Then I just glued in place using CA glue.
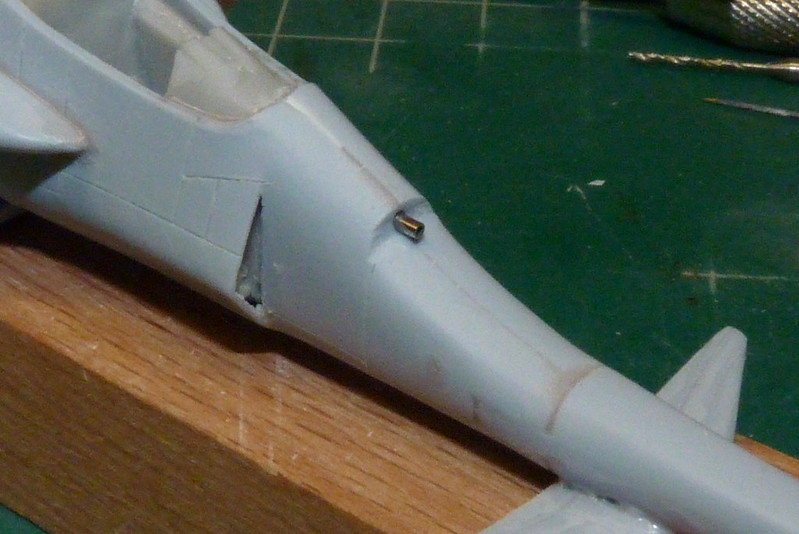
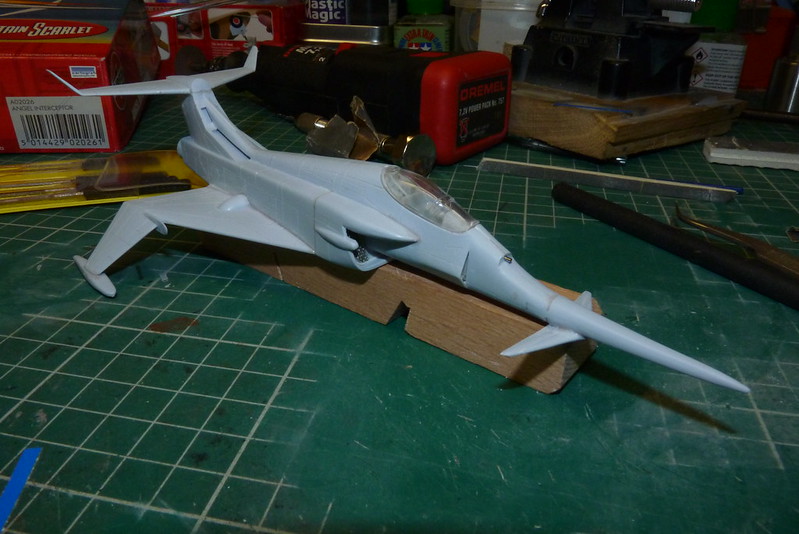
Now its starting to look the part.
When the homemade filler was rock solid it was just a case of sanding down the filler and adding more if there were still gaps.
Then I moved on to adding the wing tip skids and the nose canards which also had a few gaps which were again filled.
I had already cut off the piece of plastic that was the nose gun. I am going to make a new one from a syringe needle so first I drilled a hole the same diameter as the needle.
I cut the needle to size using my Dremel with a cutting disc with the needle held in a vice.
I stuck a small piece of tape to the end of the needle as it makes in easier to find if the cut piece of needle decides to go walkabout once cut. Also I don't cut all the way through the needle just in case it flies off. I leave just enough as to make it easy to snap apart.
Then I just glued in place using CA glue.
Now its starting to look the part.
Cheers
Ian
Please click on the web link below to have a look at all my photo's.
https://www.flickr.com/photos/ecirpnai/albums
Ian
Please click on the web link below to have a look at all my photo's.
https://www.flickr.com/photos/ecirpnai/albums
-
Sunray
- Active Participant
- Posts: 611
- Joined: March 18th, 2014, 4:01 pm
- Location: Penshaw, North East, England
- Contact:
Re: Airfix 1/72 Angel Interceptor
Sorry about the delay on updating the thread. I had to look for a new job as I have been made redundant today and it my birthday as well! Finding a job in the North East of England isn't the easiest of pastimes but the good news I found out this morning is that I start my new job on Monday. What a birthday present!
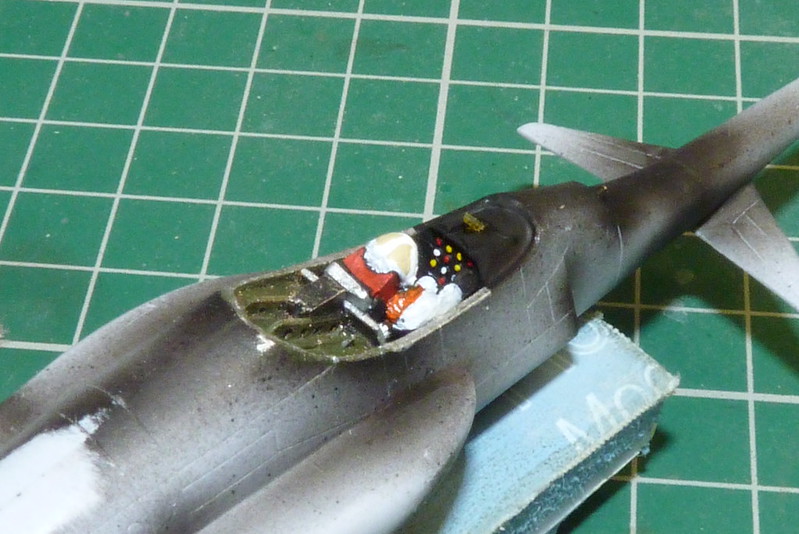
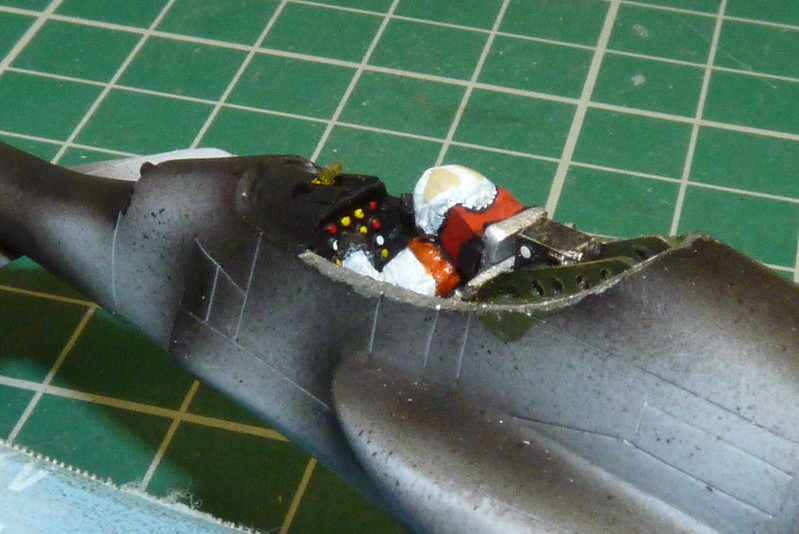
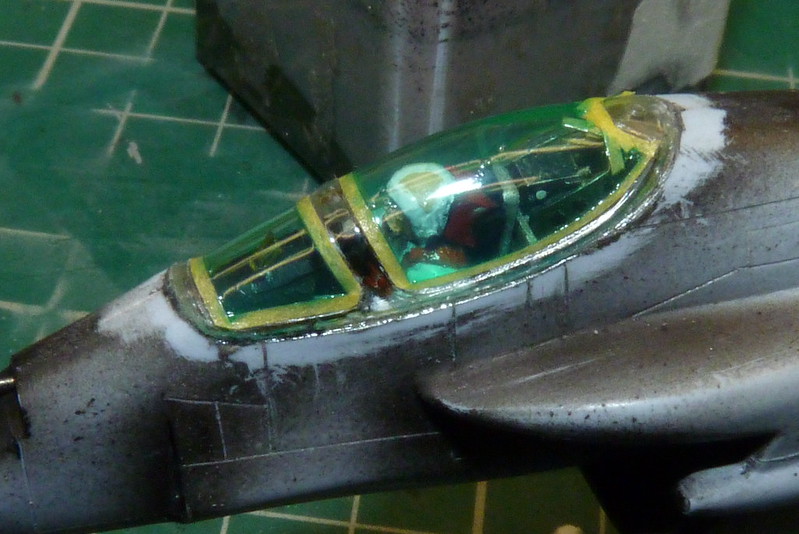
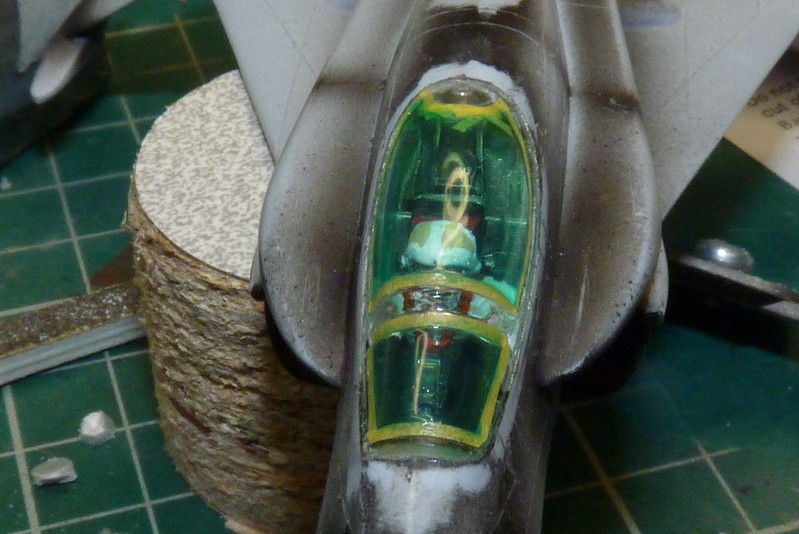
Anyway on with the real work. I sprayed the seams and joints to check for gaps then I have painted the pilot and ejector seat but to be honest the pilot's face leaves a lot to be desired. In my defence the resin moulding for the face isn't the best but c'est la vie. I also painted the cockpit and added a HUD made from a piece of scrap clear plastic from the packing of a shirt.
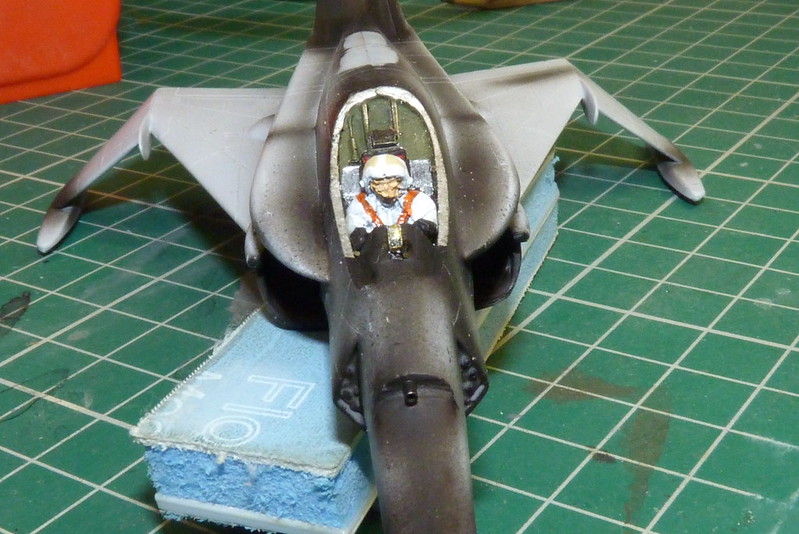
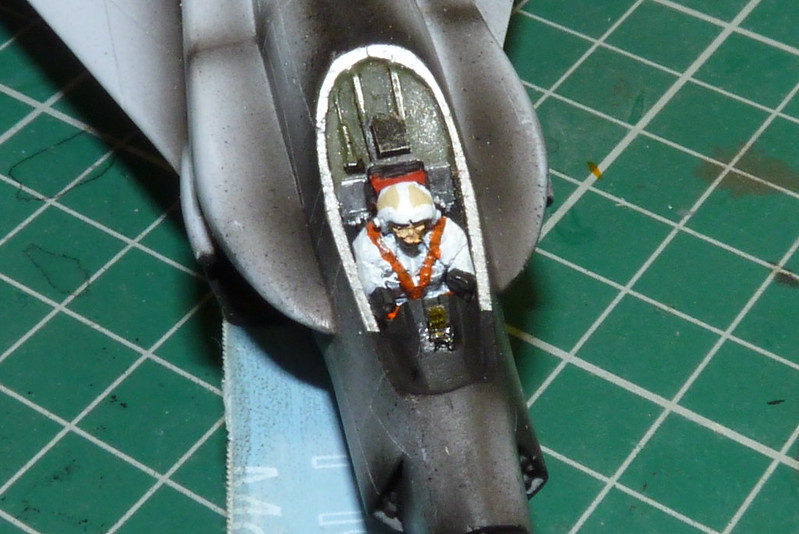
The instrument panel was painted black and then I used the tip of a cocktail stick dipped into red, yellow and white paint to add the detail.
The HUD was painted with Tamiya Clear Yellow to help it stand out.
With that done I used Roket Card Glue to attach the canopy.
The glue cures really fast and gives a good joint.
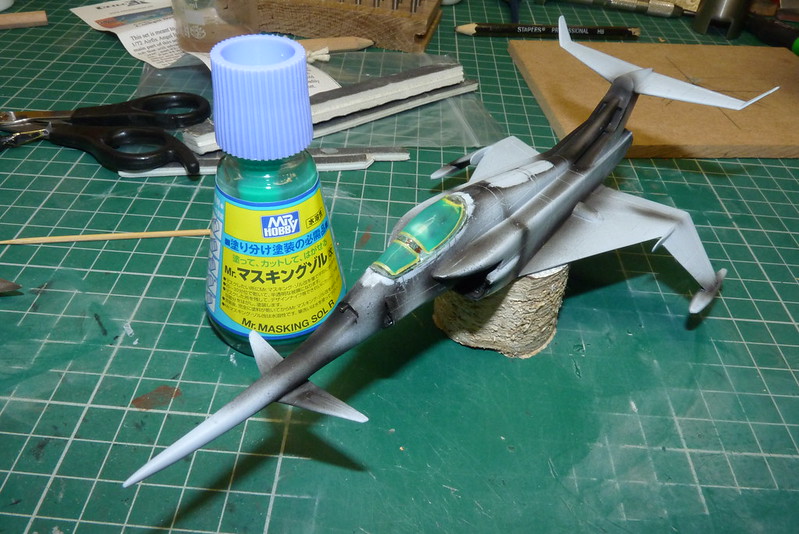
Now for one of my favourite jobs and that is masking the canopy. I first mask the canopy edges with thin masking tape. I find the thin tape is easier to bend along the curves of a canopy than wider tape plus you use less, if you know what I mean.
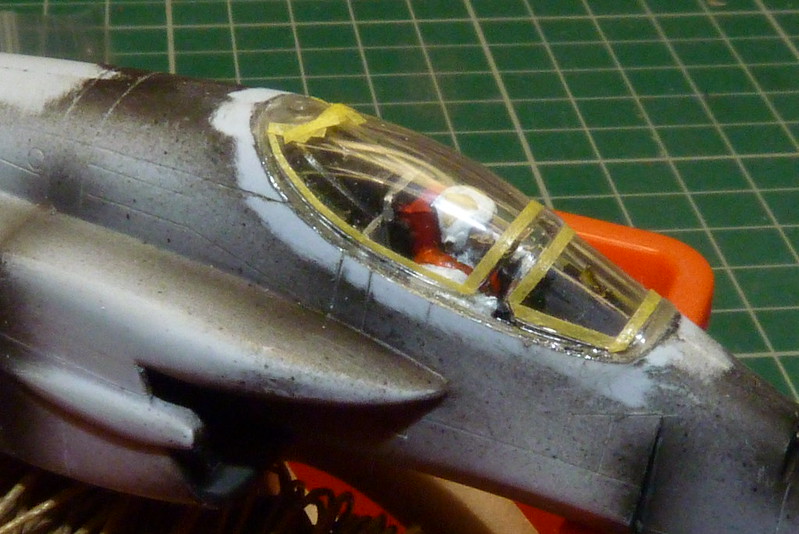
With the canopy edge masked I then used Mr Masking Sol R solution to mask the remainder of the canopy. I have used other liquid masks but I find this one the best. As you can see from the photo is goes on green but as it dries it turns clear.
Anyway on with the real work. I sprayed the seams and joints to check for gaps then I have painted the pilot and ejector seat but to be honest the pilot's face leaves a lot to be desired. In my defence the resin moulding for the face isn't the best but c'est la vie. I also painted the cockpit and added a HUD made from a piece of scrap clear plastic from the packing of a shirt.
The instrument panel was painted black and then I used the tip of a cocktail stick dipped into red, yellow and white paint to add the detail.
The HUD was painted with Tamiya Clear Yellow to help it stand out.
With that done I used Roket Card Glue to attach the canopy.
The glue cures really fast and gives a good joint.
Now for one of my favourite jobs and that is masking the canopy. I first mask the canopy edges with thin masking tape. I find the thin tape is easier to bend along the curves of a canopy than wider tape plus you use less, if you know what I mean.
With the canopy edge masked I then used Mr Masking Sol R solution to mask the remainder of the canopy. I have used other liquid masks but I find this one the best. As you can see from the photo is goes on green but as it dries it turns clear.
Cheers
Ian
Please click on the web link below to have a look at all my photo's.
https://www.flickr.com/photos/ecirpnai/albums
Ian
Please click on the web link below to have a look at all my photo's.
https://www.flickr.com/photos/ecirpnai/albums
-
iggie

- Modelling Gent and Scholar
- Posts: 23438
- Joined: July 31st, 2013, 11:04 am
- Location: North Somercotes, Lincolnshire
- Contact:
Re: Airfix 1/72 Angel Interceptor
Nice work Ian, and great news about your new job; I hope it goes well on Monday
Best wishes
Jim
If you can walk away from a landing, it's a good landing. If you use the airplane the next day, it's an outstanding landing
"Never put off till tomorrow, what you can do the day after tomorrow"
Jim
If you can walk away from a landing, it's a good landing. If you use the airplane the next day, it's an outstanding landing
"Never put off till tomorrow, what you can do the day after tomorrow"

Re: Airfix 1/72 Angel Interceptor
Glad the job thing worked out!!. The pilot looks like he/she landed and stopped sharply without tightening the seat belts!!.
Hoping to return to modelling sometime this year!! 
Owner of Marky's Model Emporium since 2013!.
Owner of Marky's Model Emporium since 2013!.
-
Sunray
- Active Participant
- Posts: 611
- Joined: March 18th, 2014, 4:01 pm
- Location: Penshaw, North East, England
- Contact:
Re: Airfix 1/72 Angel Interceptor
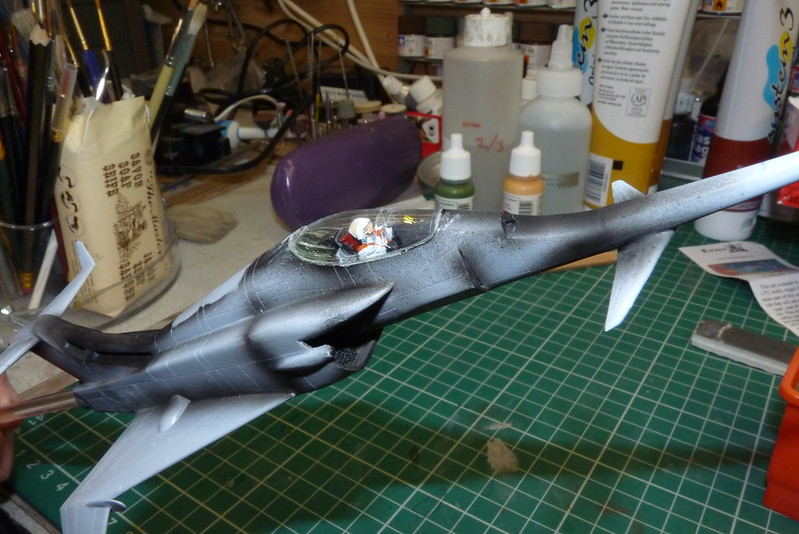
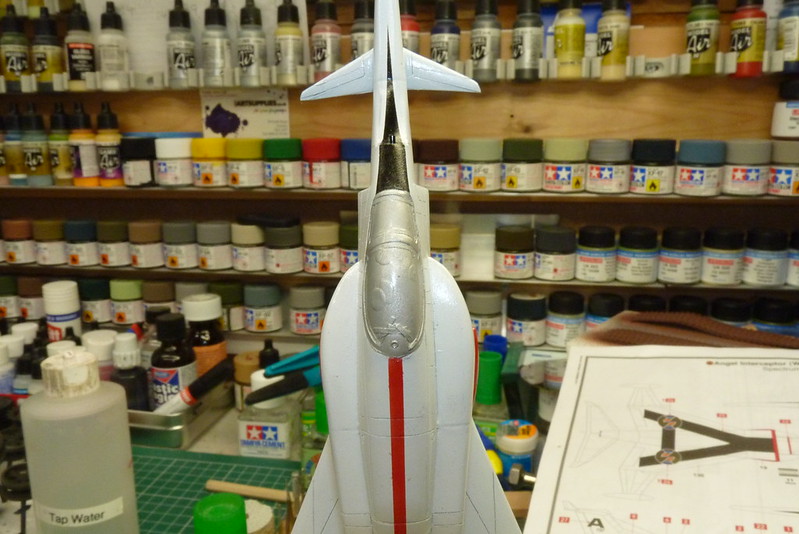
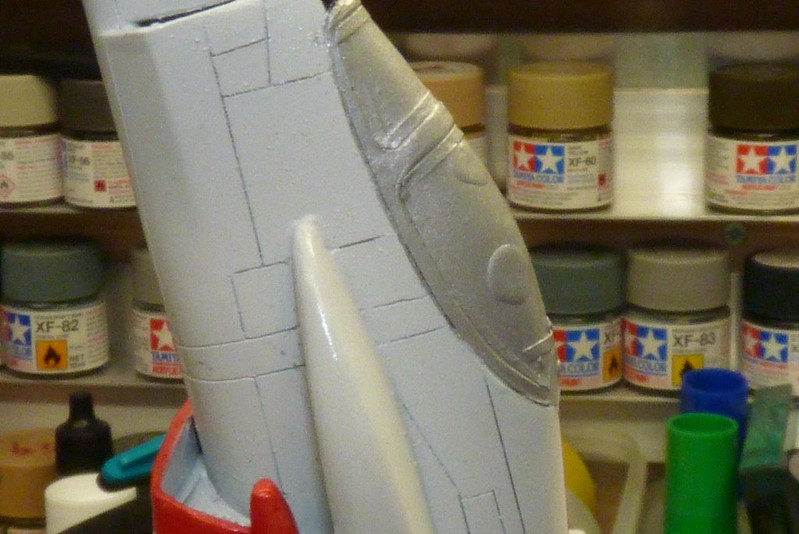
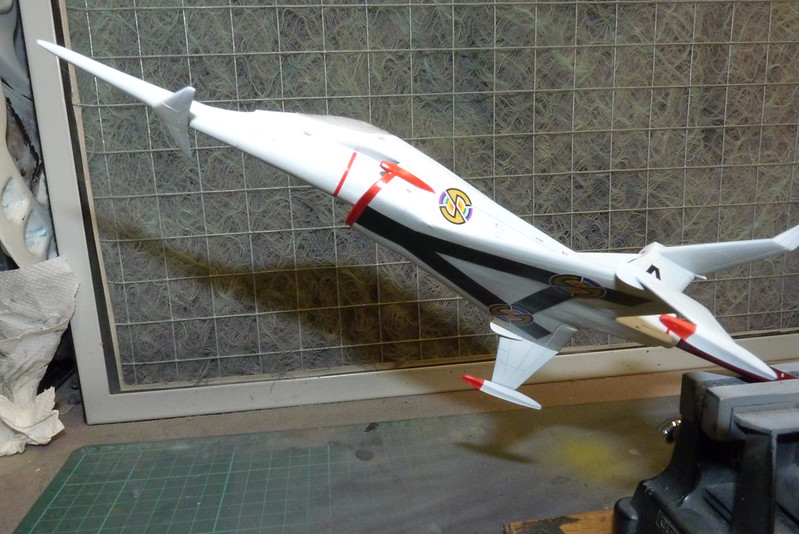
Thanks chaps sorry I haven't posted anything earlier but as you can imagine I have been a bit busy. Anyway here is an update for the Angel. Once the canopy was sorted I sprayed on the primer and added a touch of pre-shading.
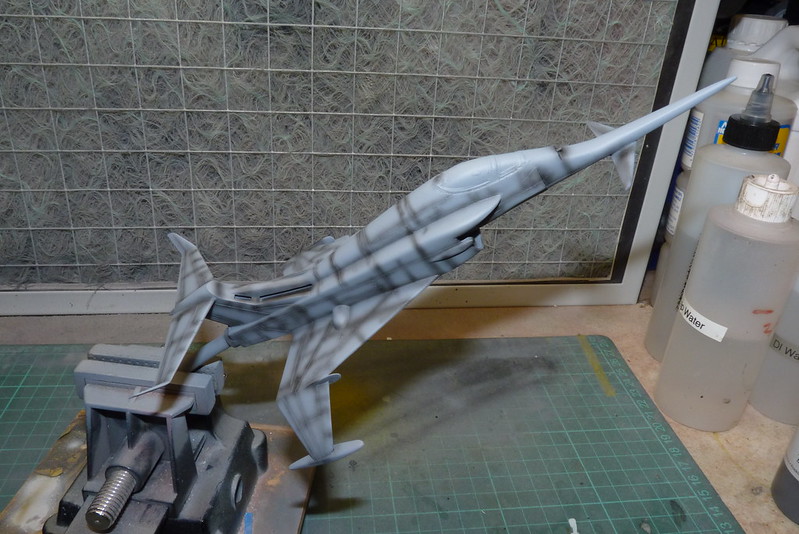
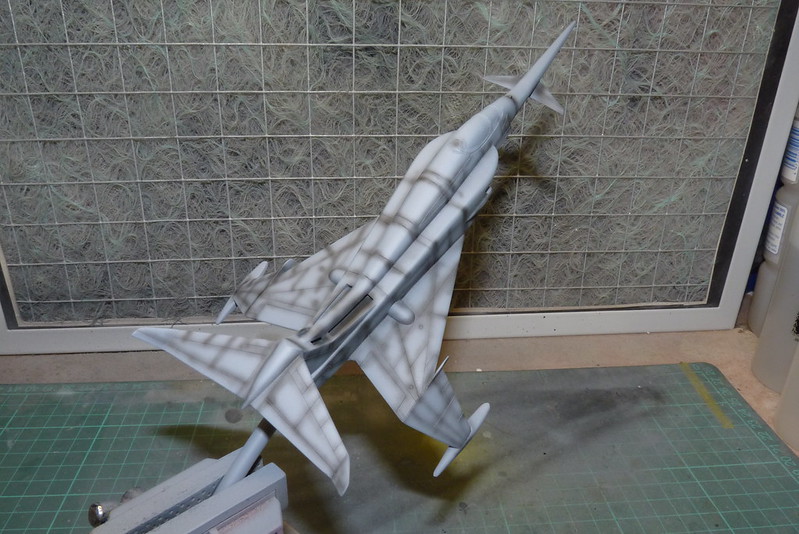
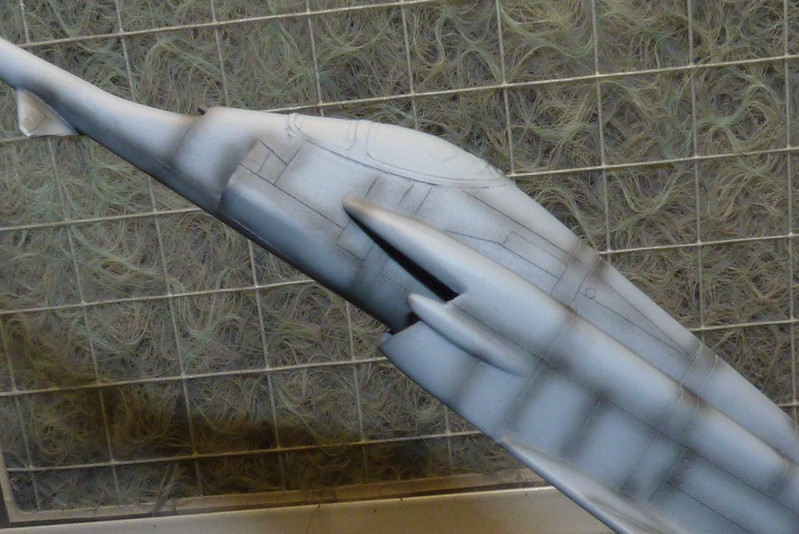
And then on went the base coat of Tamiya XF-2 white.
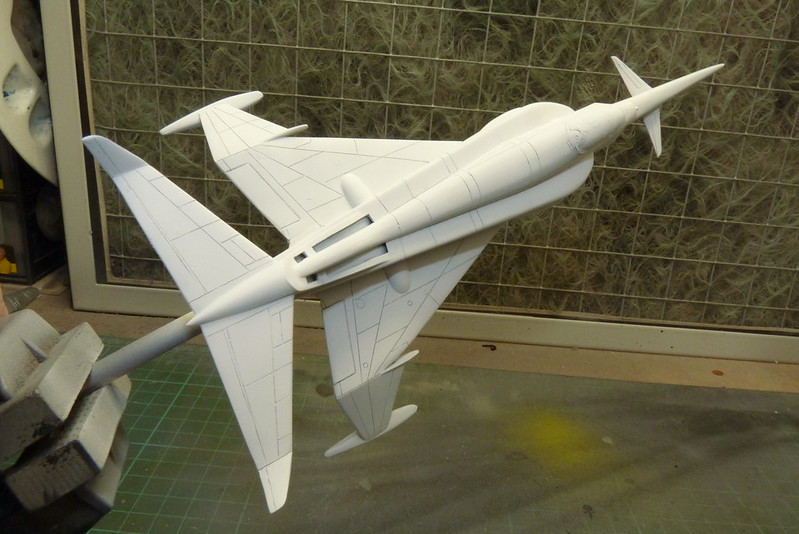
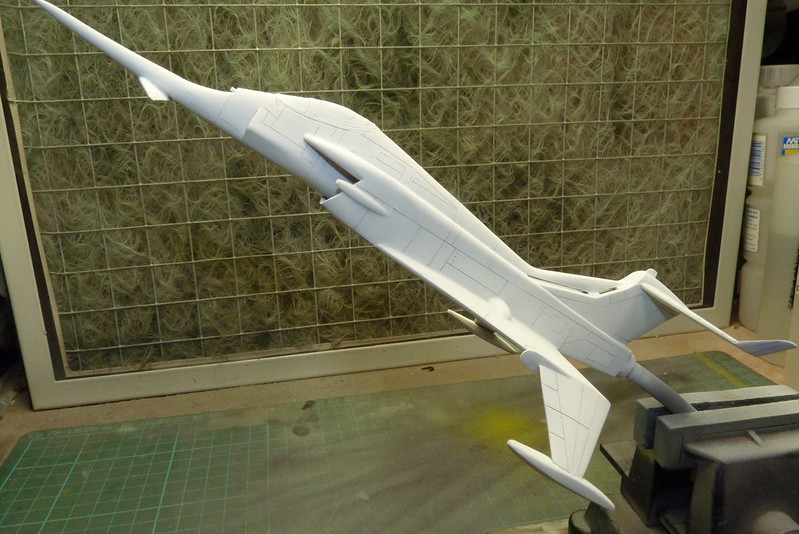
When that was dry I did a touch of masking and sprayed a few marking on.

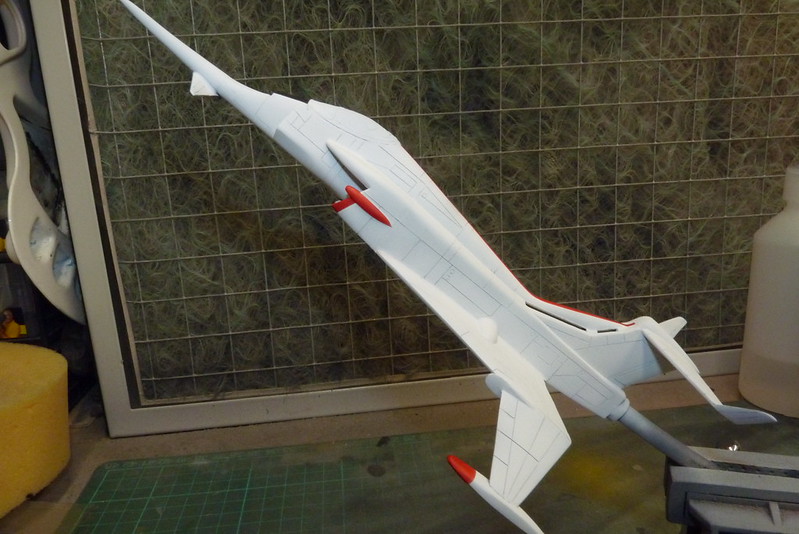
Tomorrow I will hopefully mask around the canopy frame and spray it silver and also paint the jet nozzle.
And then on went the base coat of Tamiya XF-2 white.
When that was dry I did a touch of masking and sprayed a few marking on.
Tomorrow I will hopefully mask around the canopy frame and spray it silver and also paint the jet nozzle.
Cheers
Ian
Please click on the web link below to have a look at all my photo's.
https://www.flickr.com/photos/ecirpnai/albums
Ian
Please click on the web link below to have a look at all my photo's.
https://www.flickr.com/photos/ecirpnai/albums
-
skypirate

- Modelling Gent and Scholar
- Posts: 7303
- Joined: May 1st, 2011, 6:13 am
- Location: Port Macquarie, Australia
Re: Airfix 1/72 Angel Interceptor
Fantastic work!
Congratulations, too, on bouncing back into a new job!
cheers,
David
Congratulations, too, on bouncing back into a new job!
cheers,
David
-
ShaunW
- NOT the sheep
- Posts: 26188
- Joined: November 26th, 2011, 6:11 pm
- Location: Pontefract West Yorkshire
Re: Airfix 1/72 Angel Interceptor
That looks great Ian and congrats on finding a new job!
Doing - Tamiya 1/35th Universal Carrier.
Work is the curse of the modelling classes!
IPMS#12300
Work is the curse of the modelling classes!
IPMS#12300
-
Sunray
- Active Participant
- Posts: 611
- Joined: March 18th, 2014, 4:01 pm
- Location: Penshaw, North East, England
- Contact:
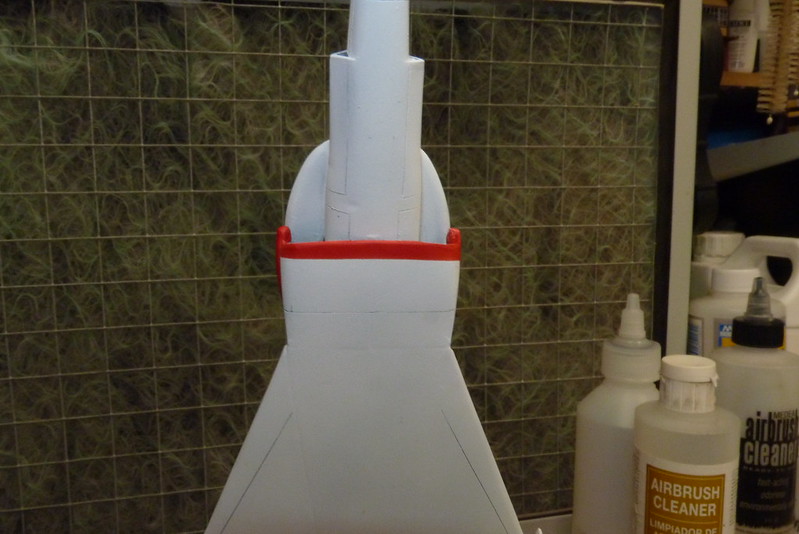
Re: Airfix 1/72 Angel Interceptor
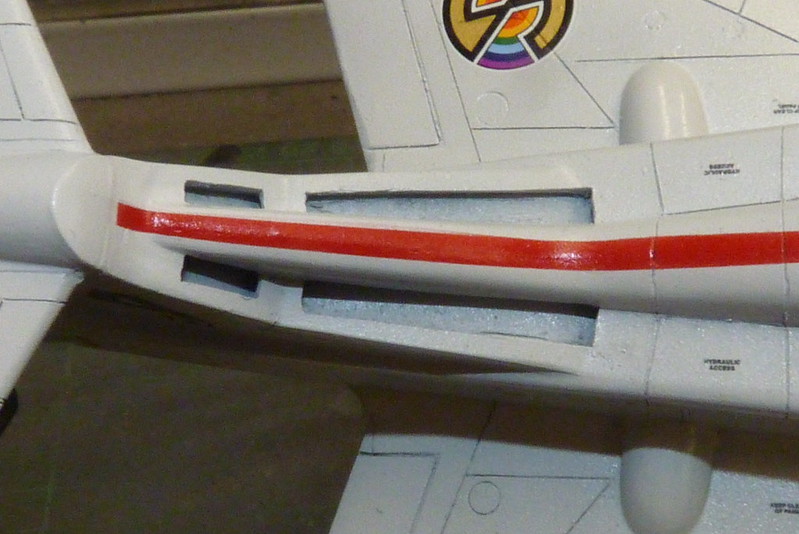
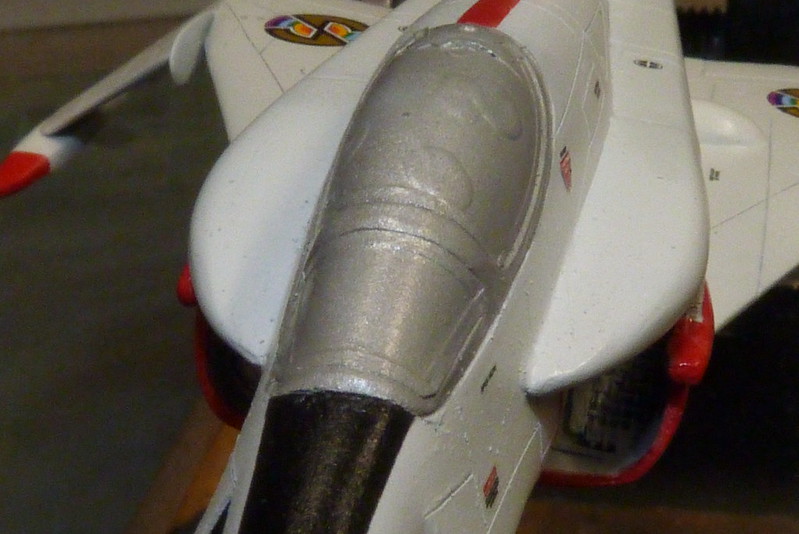
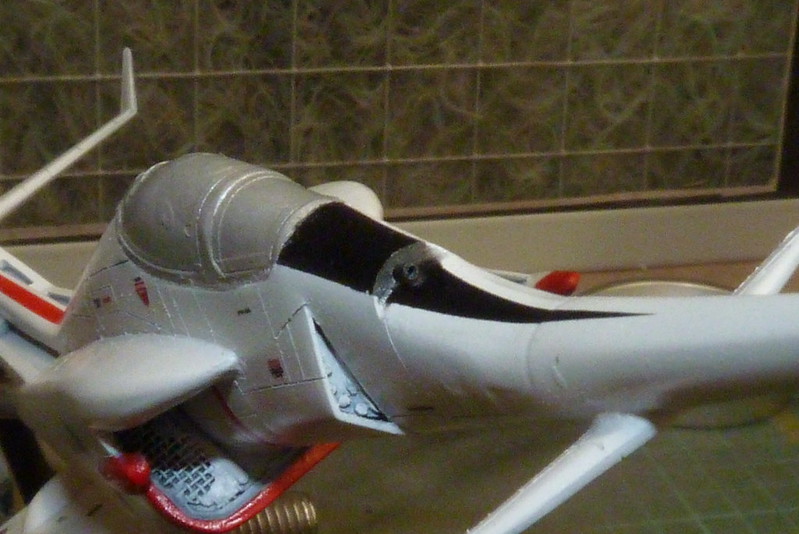
Thanks chaps. What I noticed was the red stripe down the spine of the Angel wasn't as straight as I wanted so I used a bit of Tamiya tape to mask off the stripe and sprayed a bit of Tamiya XF2 white to tidy it up a bit. I could of left it but I know it would bug me later on, so job done. Next I masked and sprayed the canopy using Vallejo Metaliser Aluminium and finally I then sprayed a few coats of Tamiya gloss to seal the paint.
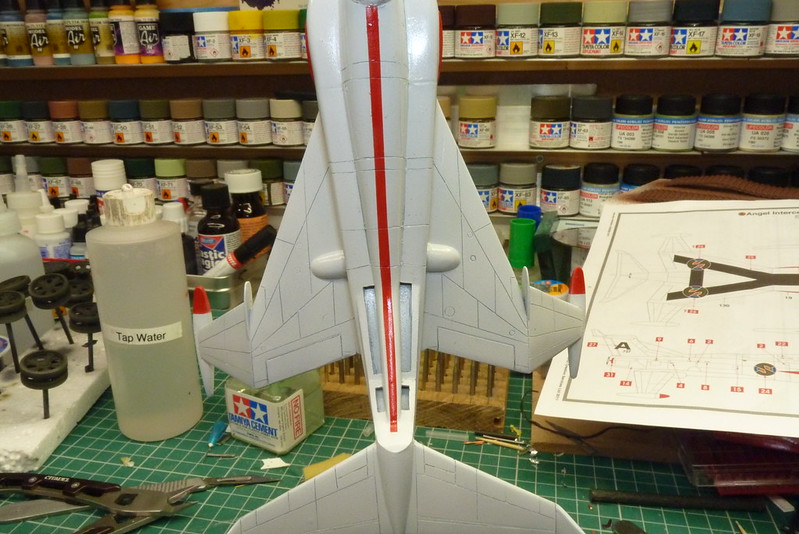

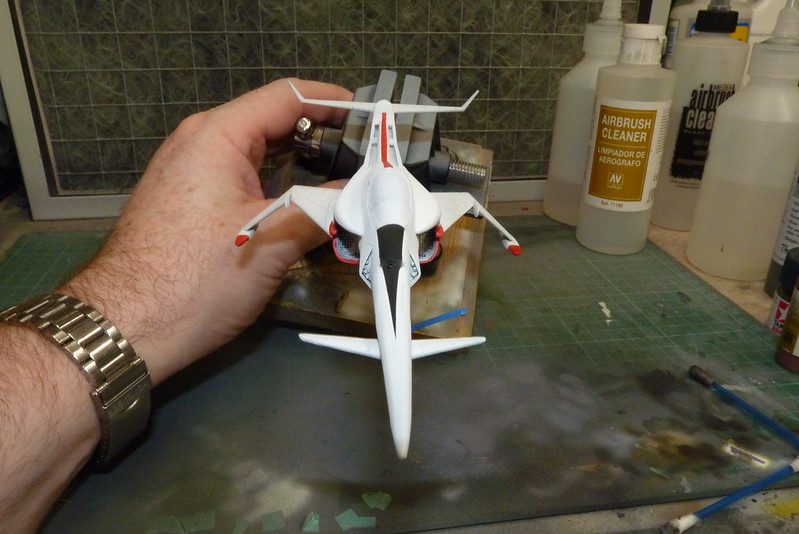
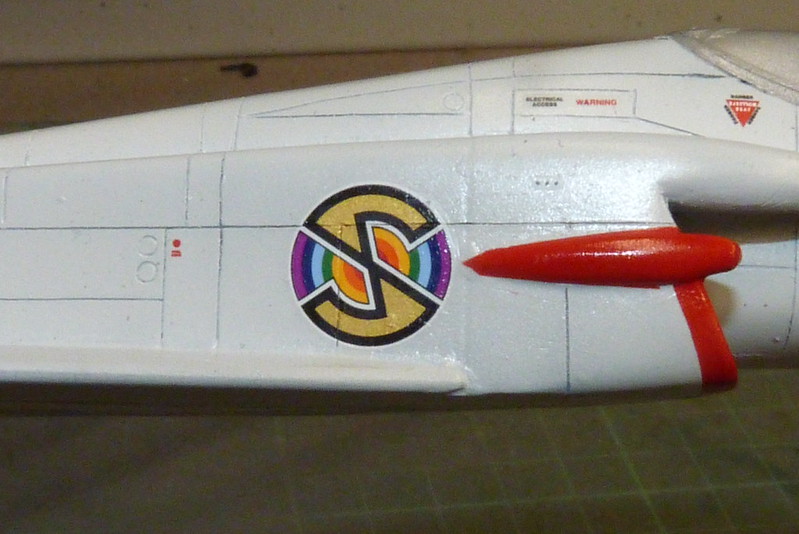
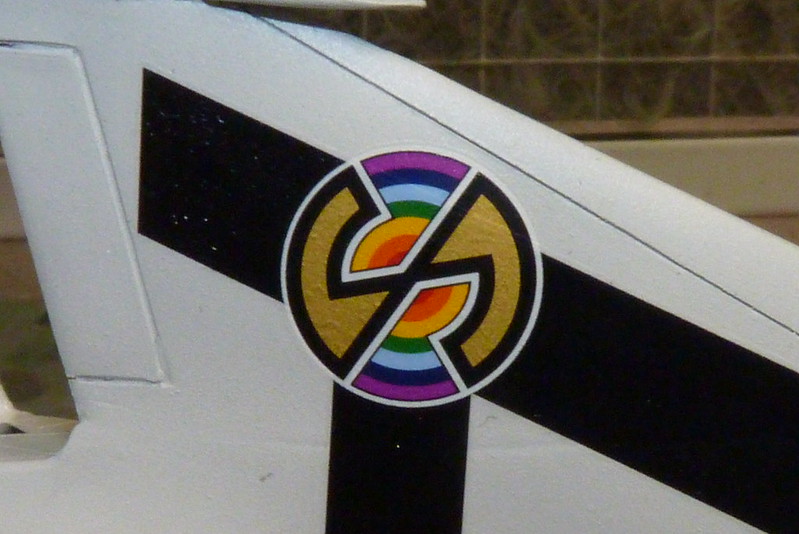
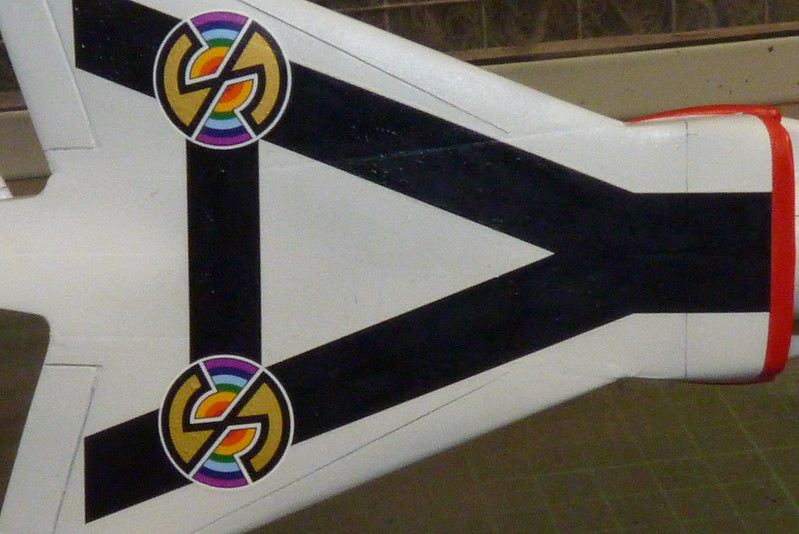
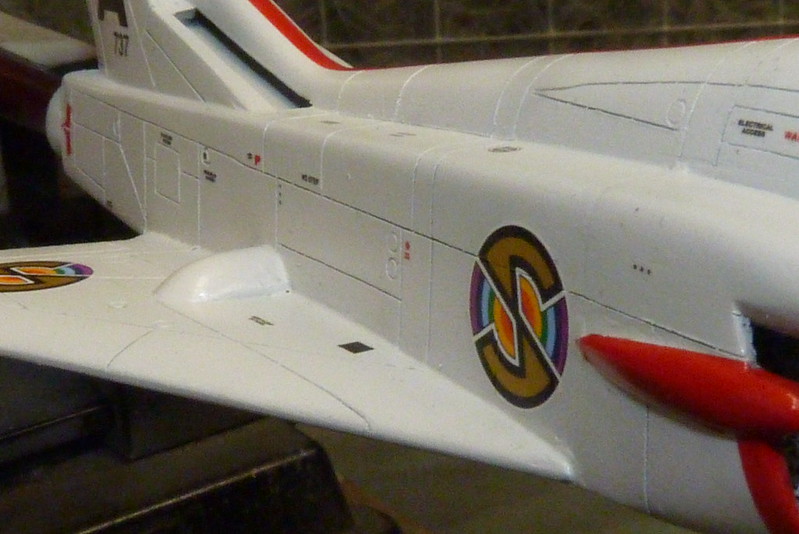
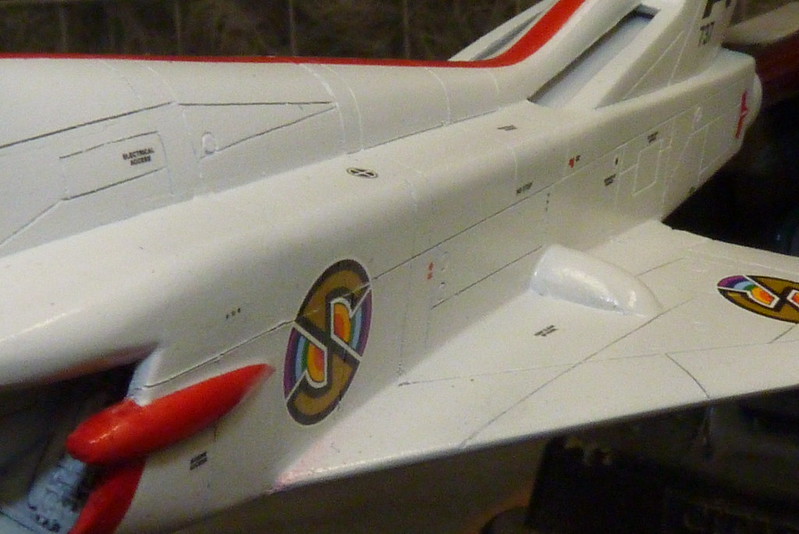
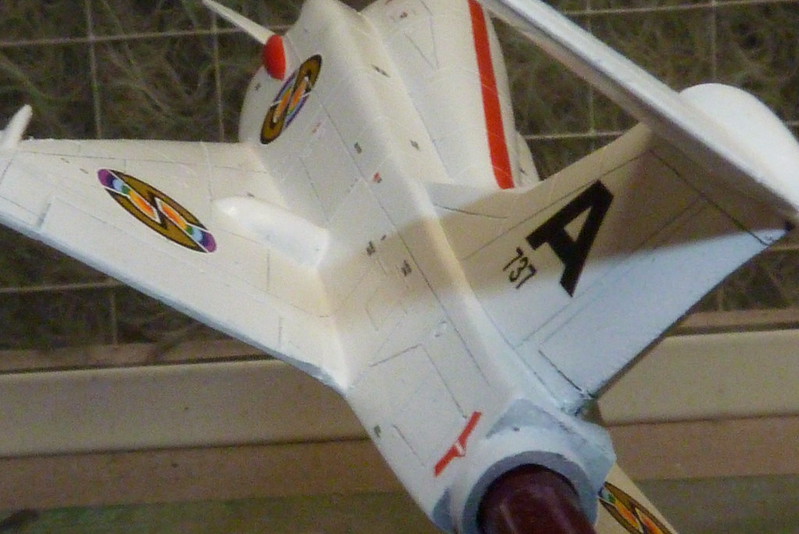
Once everything was dry on with the decals and for such a small model there are a few. I used Micro-Set and Sol on the decals to settle them down with out any problems and now I think its starting to look the part.
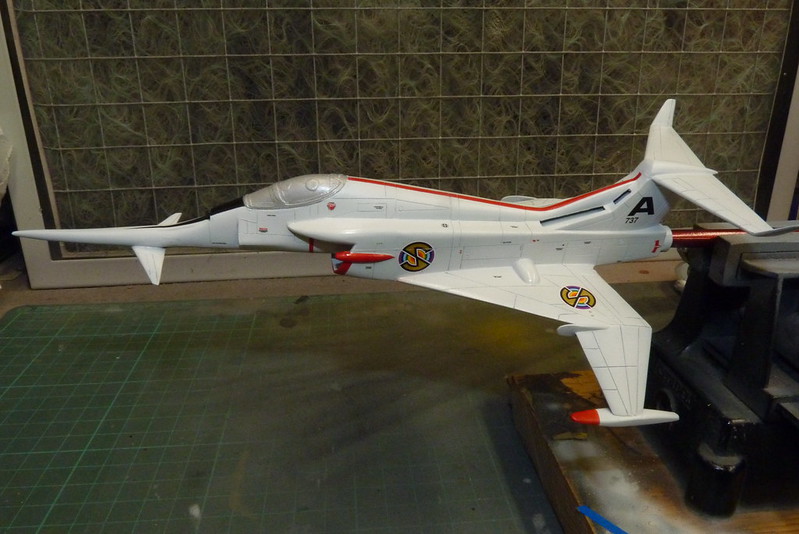
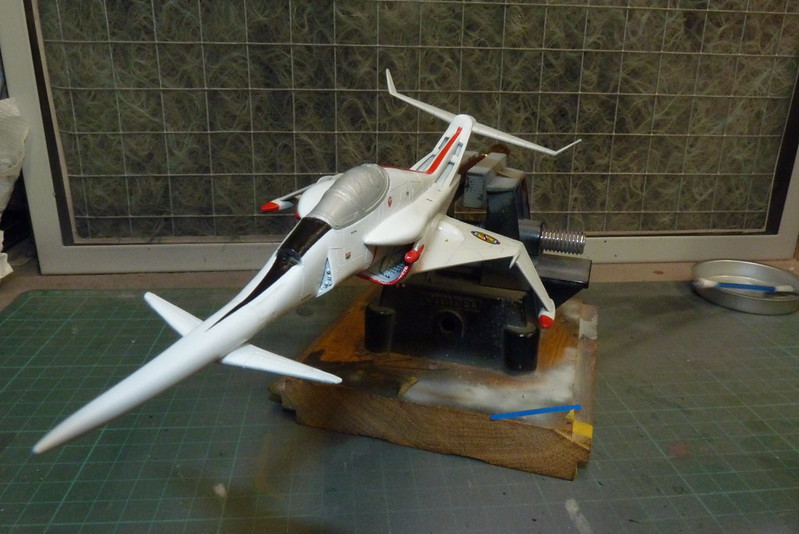

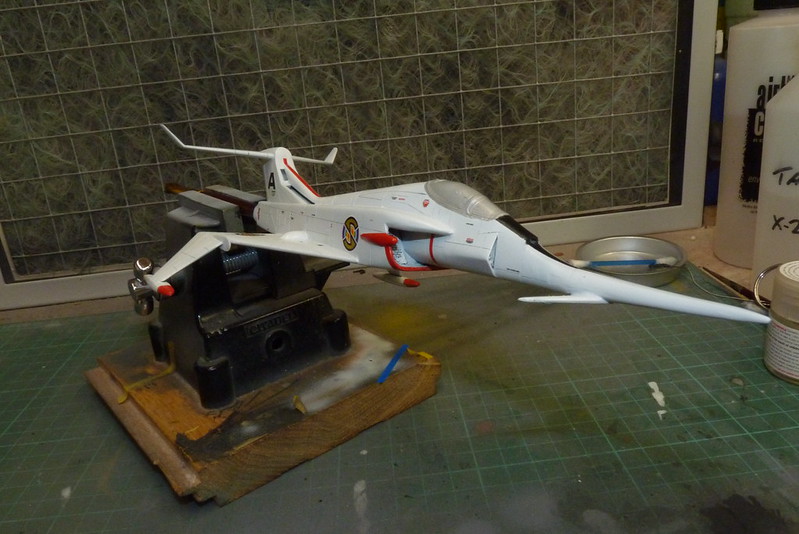
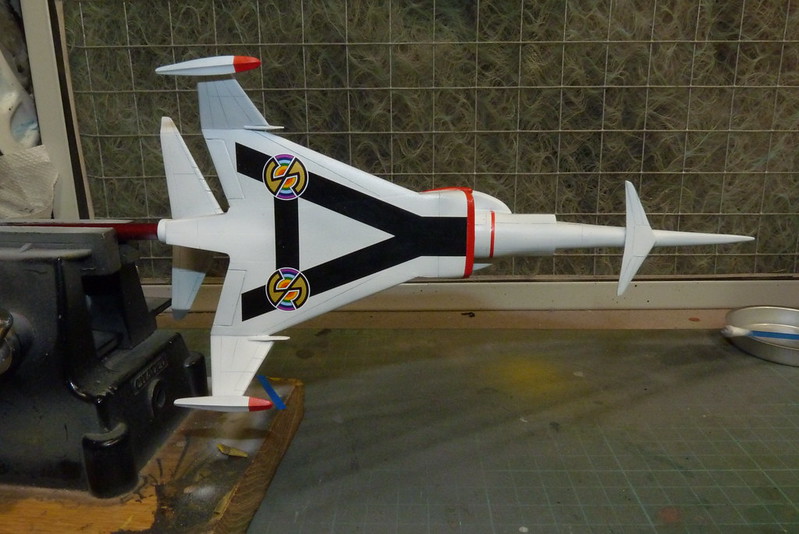
I have applied the Micro-Sol about 30 minutes before I took these photo's and already it is starting to pull them down.
Also I have still the jet nozzle to paint.
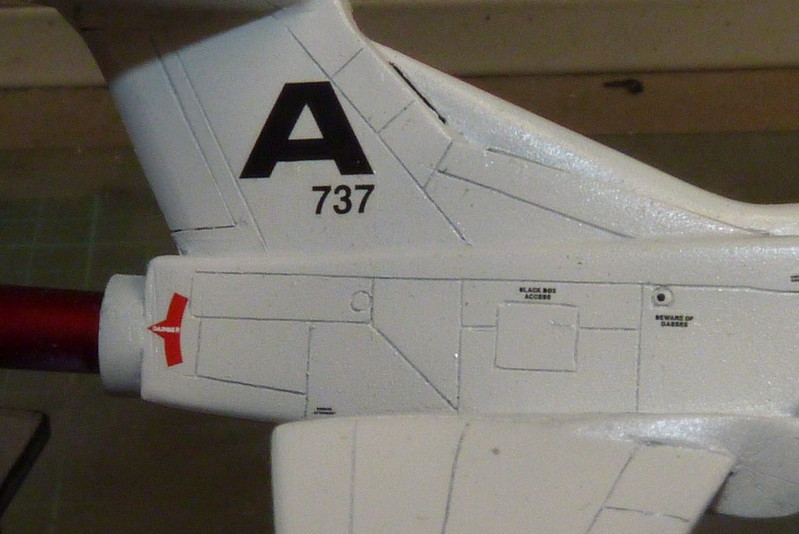

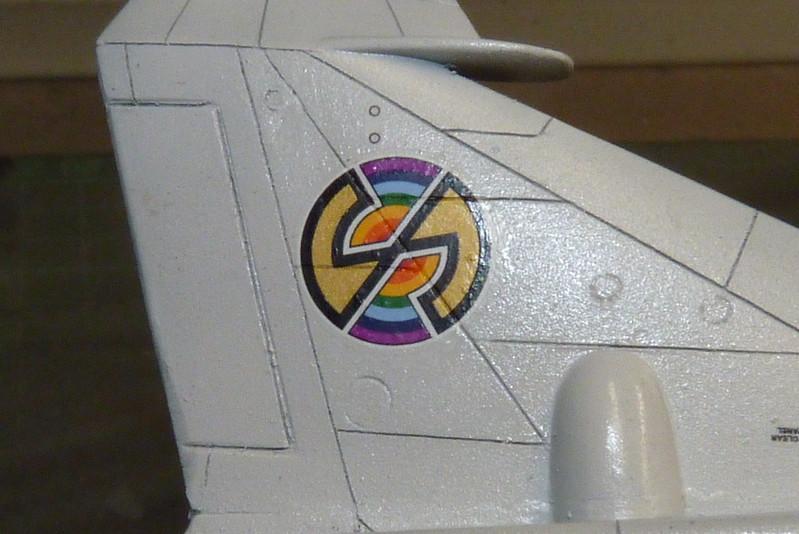
I must admit for a 1/72 kit the decals are excellent, you can even read every warning sign.
Once everything was dry on with the decals and for such a small model there are a few. I used Micro-Set and Sol on the decals to settle them down with out any problems and now I think its starting to look the part.
I have applied the Micro-Sol about 30 minutes before I took these photo's and already it is starting to pull them down.
Also I have still the jet nozzle to paint.
I must admit for a 1/72 kit the decals are excellent, you can even read every warning sign.
Cheers
Ian
Please click on the web link below to have a look at all my photo's.
https://www.flickr.com/photos/ecirpnai/albums
Ian
Please click on the web link below to have a look at all my photo's.
https://www.flickr.com/photos/ecirpnai/albums
-
philp

- Modelling Gent and Scholar
- Posts: 1279
- Joined: May 1st, 2011, 12:14 am
- Location: Kearns, Utah
- Contact:
Re: Airfix 1/72 Angel Interceptor
Looking good so far Ian.
Re: Airfix 1/72 Angel Interceptor
Second that.
Hoping to return to modelling sometime this year!!
Owner of Marky's Model Emporium since 2013!.
Owner of Marky's Model Emporium since 2013!.
-
DavidWomby

- Modelling Gent and Scholar
- Posts: 11765
- Joined: May 1st, 2011, 8:09 pm
- Location: Florida, USA
Re: Airfix 1/72 Angel Interceptor
That's looking great.
David
David