http://uamf.org.uk/viewtopic.php?f=20&t=4715;
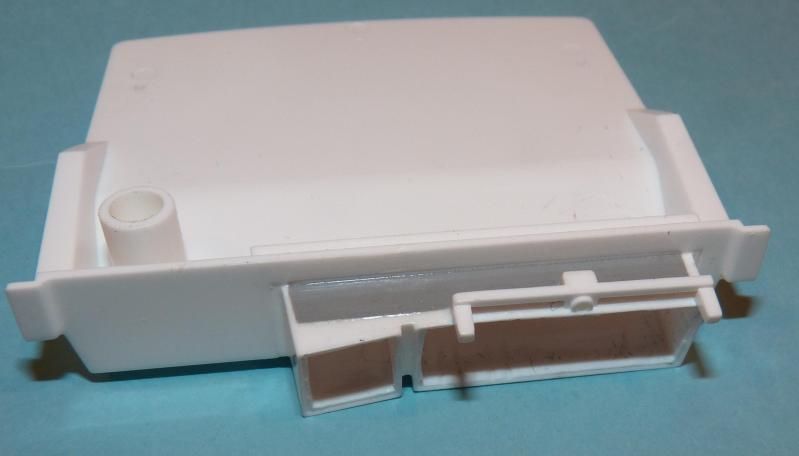
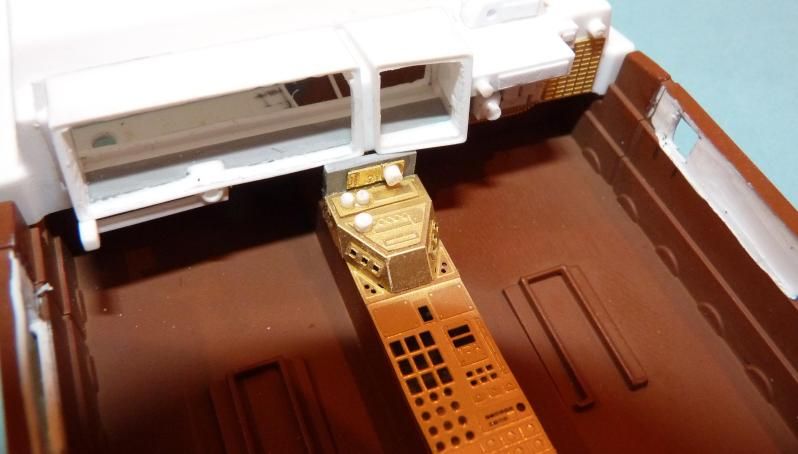
Here is the Fujimi Deckard Sedan upgraded with the ParaGrafix etched set...
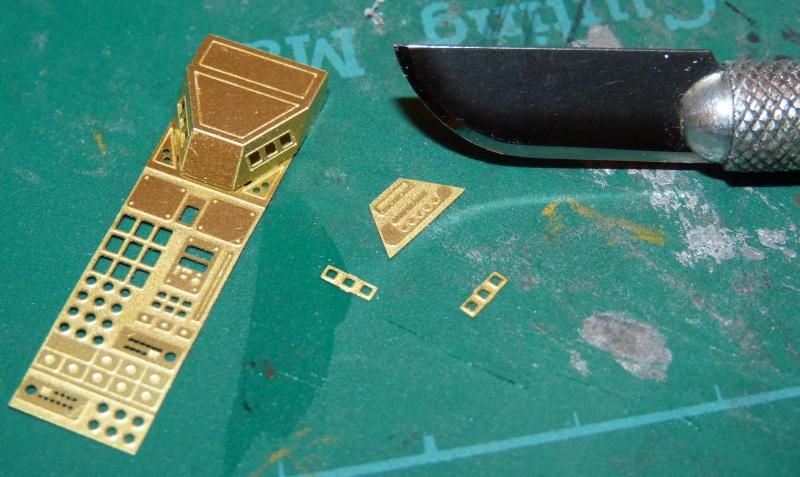
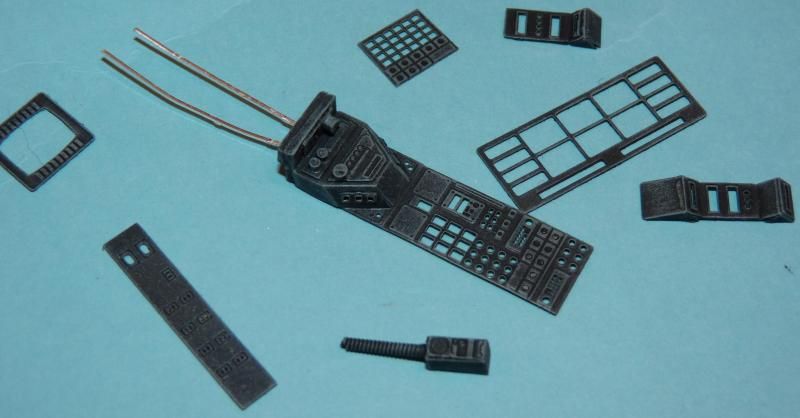
First the upgrade set....
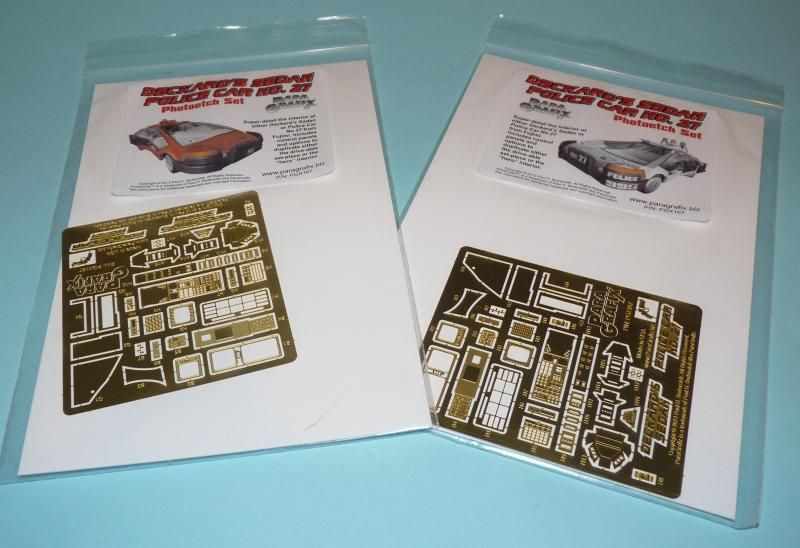
Despite having different labels, both sets are identical and provide parts for both the standard cars as seen driving around and the hero interior depicted when Deckard is behind the wheel. The attention to detail is what you'd expect from Paul and I can't wait to light one up.
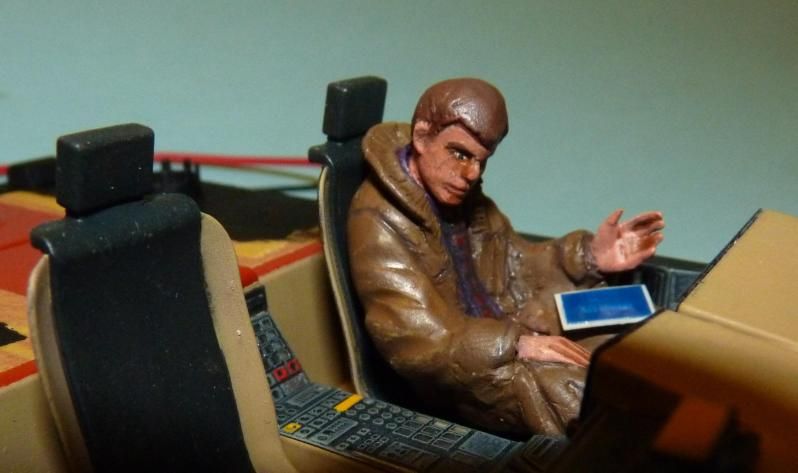
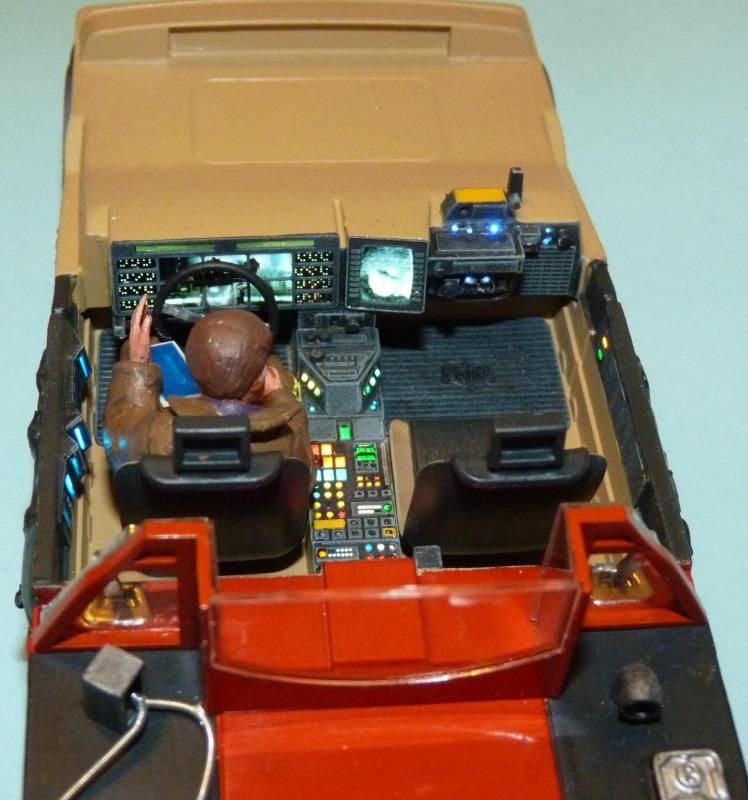
First plan is to upgrade my existing Sedan interior to model Deckard sitting in the car making the call to Pris.
I'm going to use the second set to build a Police version with an open door.....
I also have some plans for a Police Bike to match....
Obviously the arrival of the etch and the accompanying photo reference means that the build will be slightly more involved than the Police version I built last year.
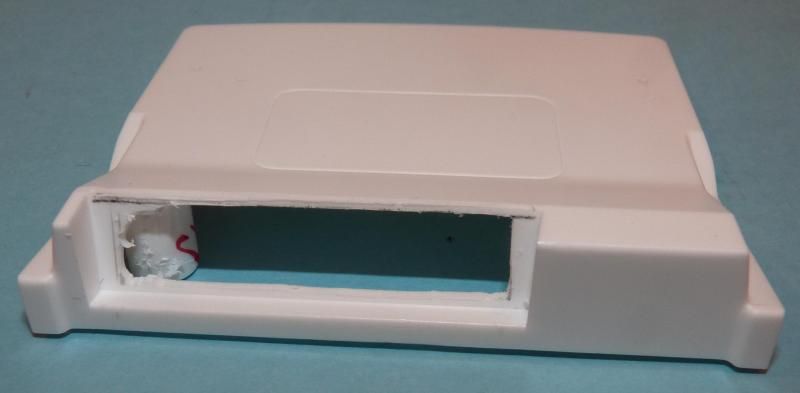
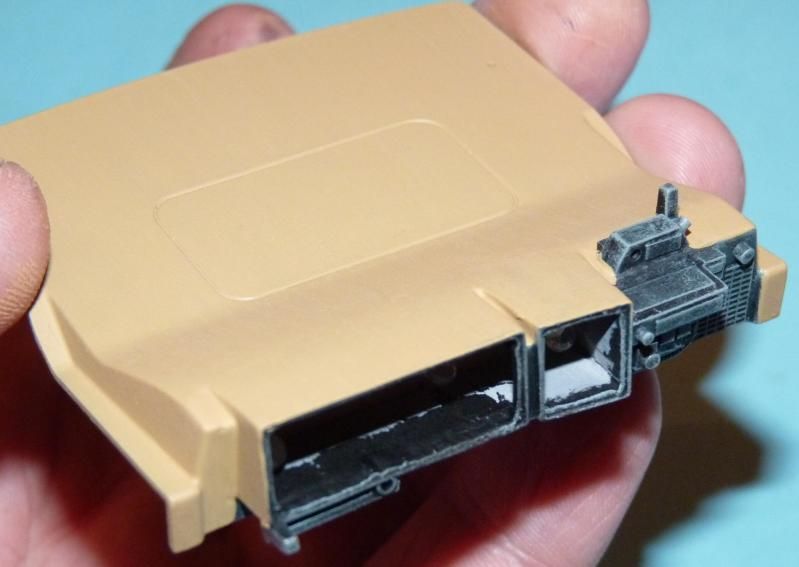
One issue I did come across was that I'd already assembled the dashboard on the Sedan before I obtained the etch. This would entail a much harder job cutting away two layers of styrene to make way for the lights. Luckily I have a spare Sedan kit which I'm intending building as the green version seen in the street scenes so I simply swapped out the parts so I could start afresh....
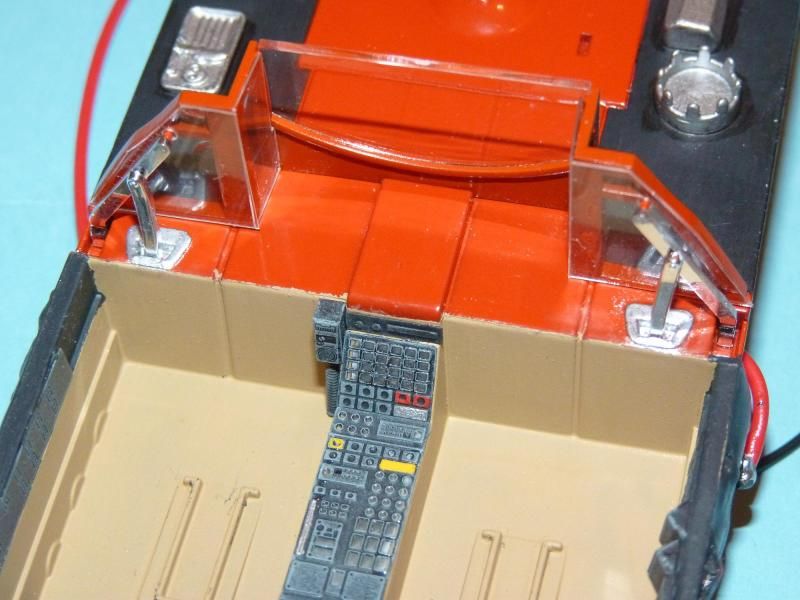
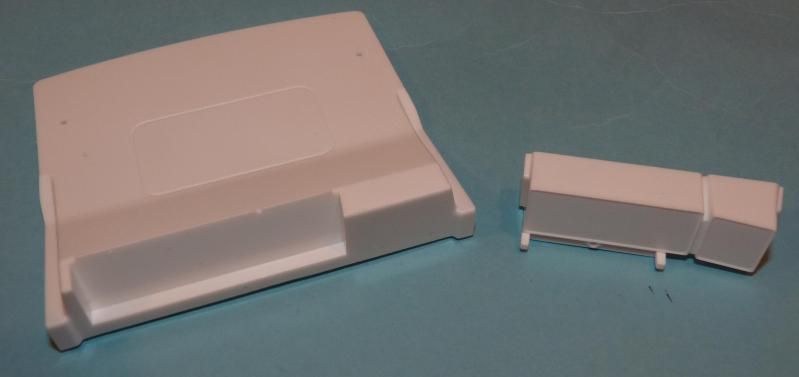
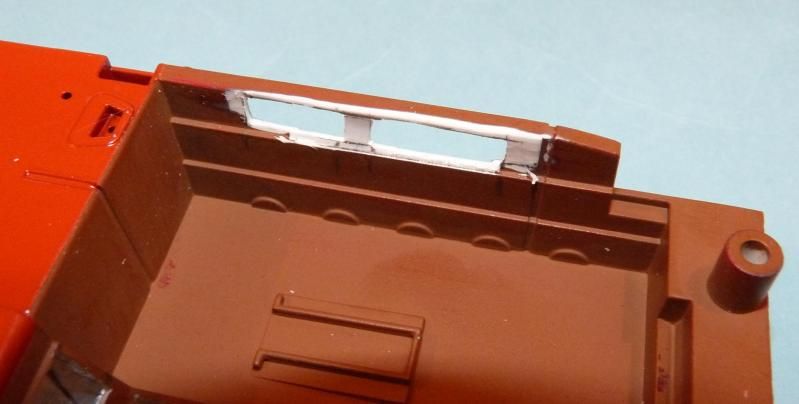
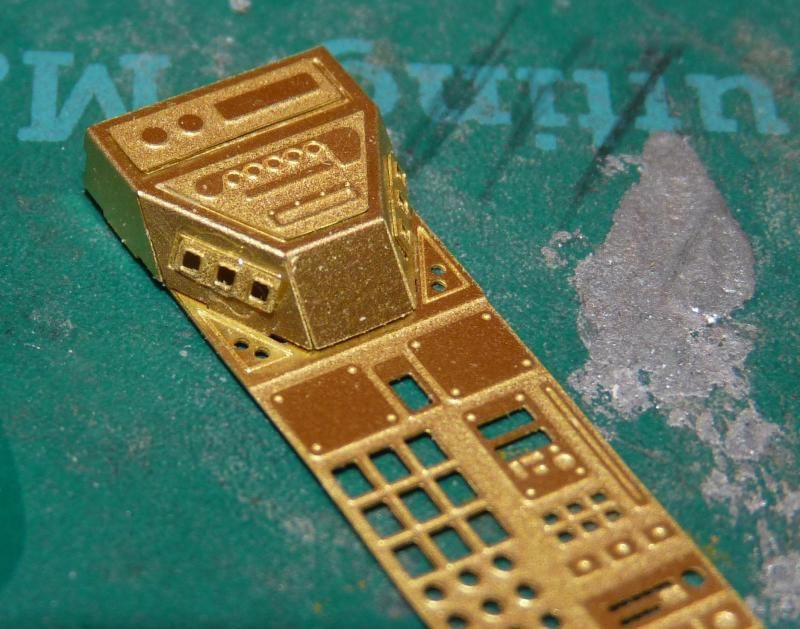
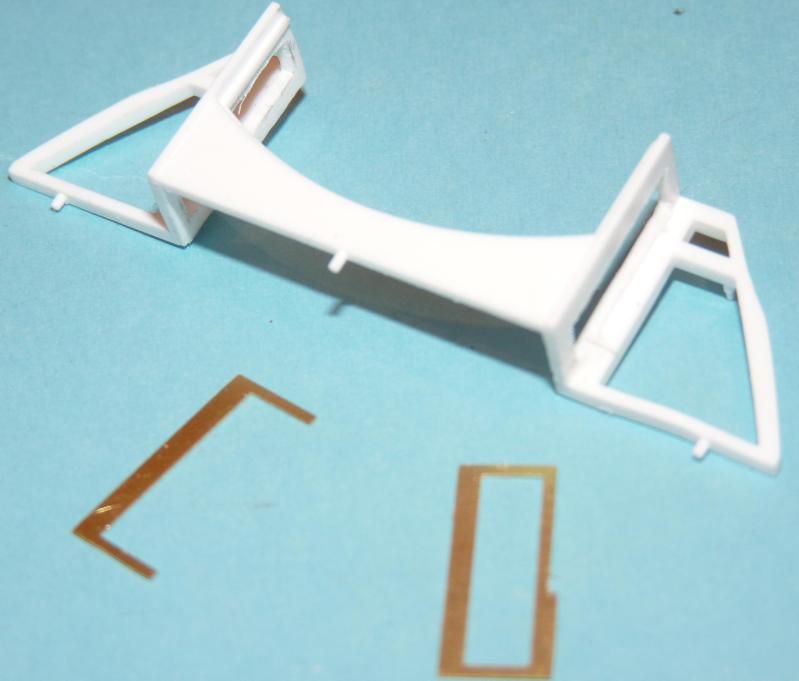
Here's the basic dashboard components....
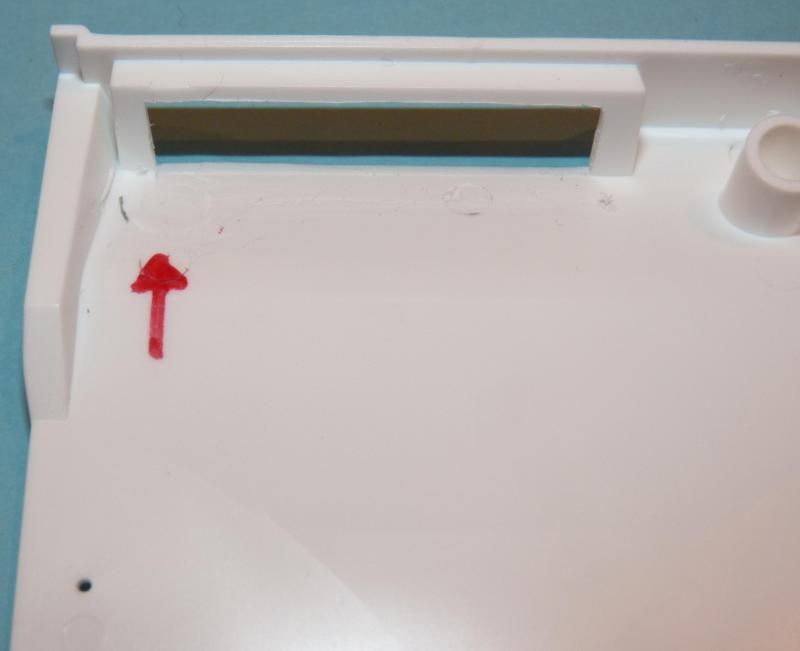
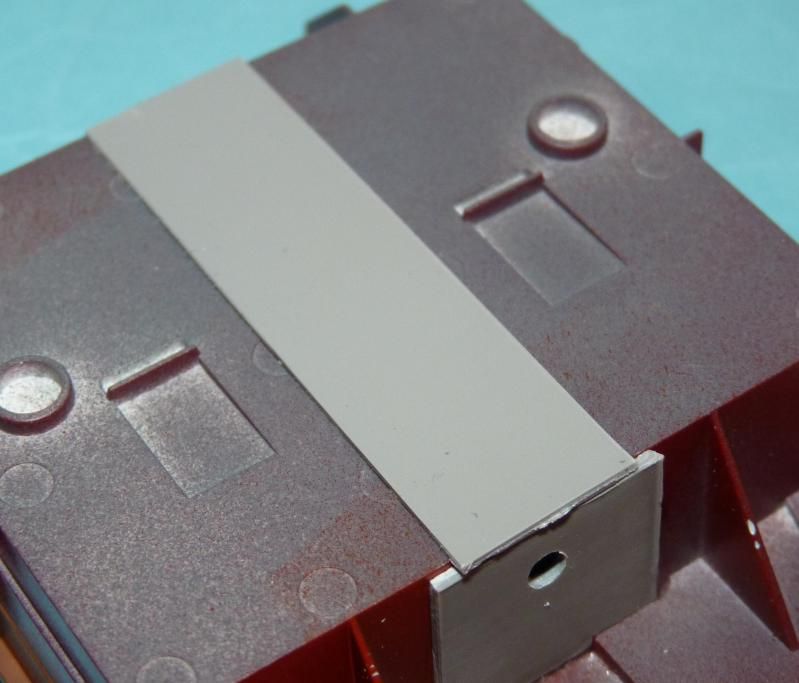
First job was to remove the prominent lip moulded onto the top edge....
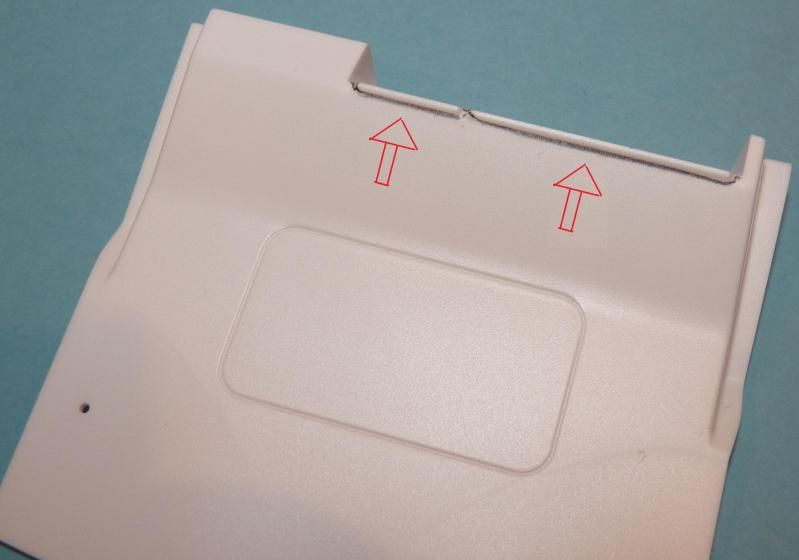
This joint should be seamless when the screens are in place so a little filler and sanding will be needed here.
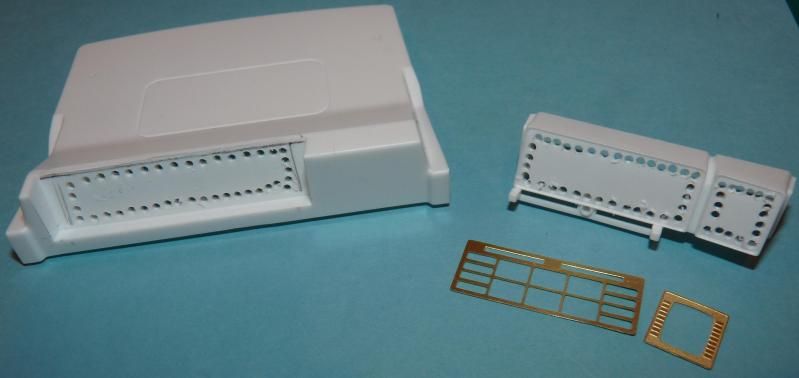
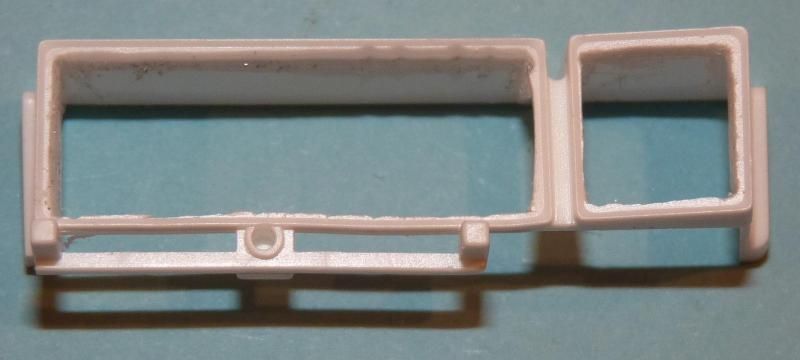
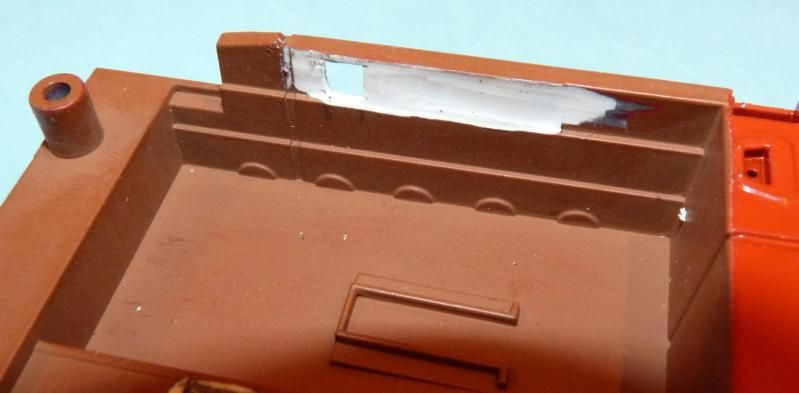
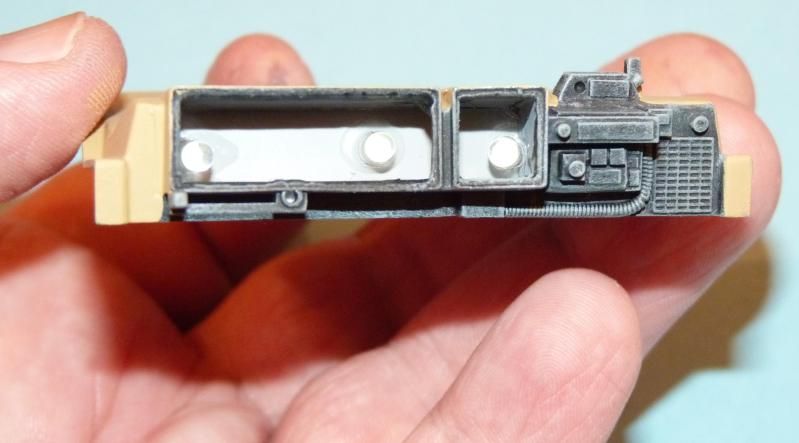
Next I cut the two etched screen parts from the fret and test fitted them to determine where to remove the plastic....note the area of the main dash piece that also needs surgery....These parts were then
chaindrilled and the excess plastic removed...
On chopping out the dashboard I discovered that the assembly socket that mates with the interior tub was visible and might interfere with the lighting so I removed it using side cutters and a sharp blade...

I then very carefully removed the excess plastic from the screens...you need to be super-careful here as the process doesn't leave a lot of material along the bottom edge of the main screen...I used a blade that was sharp but not too sharp to avoid removing too much material. Once the screens are fixed to the dash however there is scope to reinforce this area with sheet styrene....
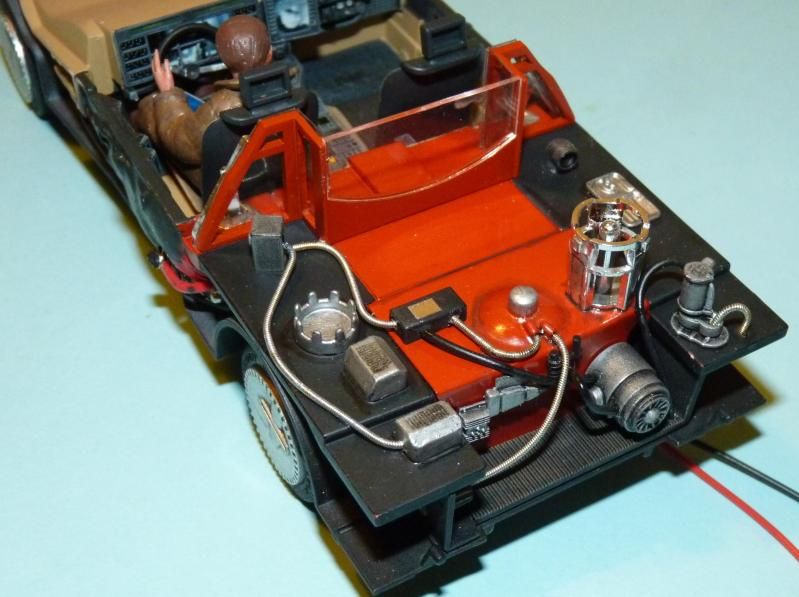
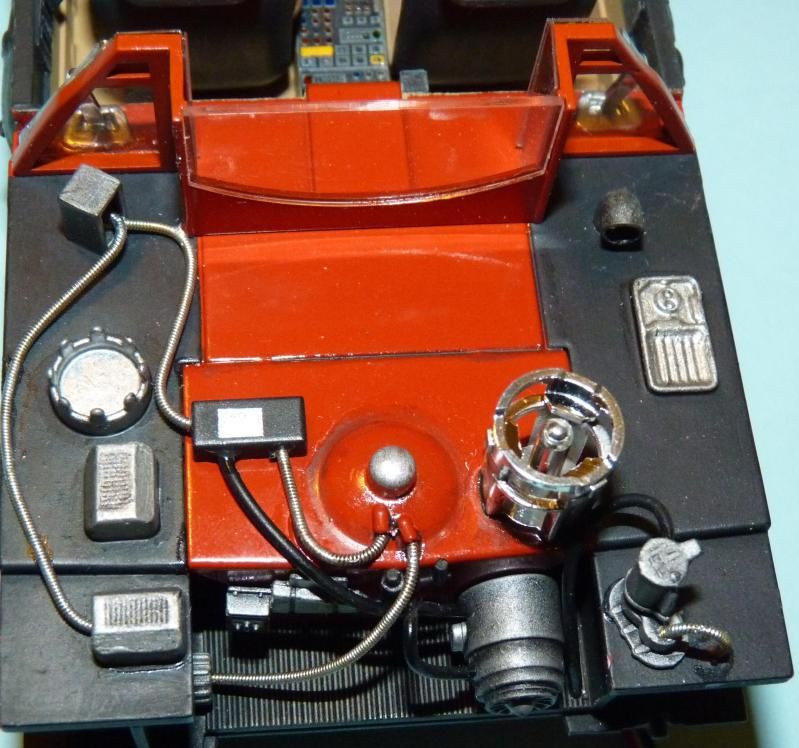
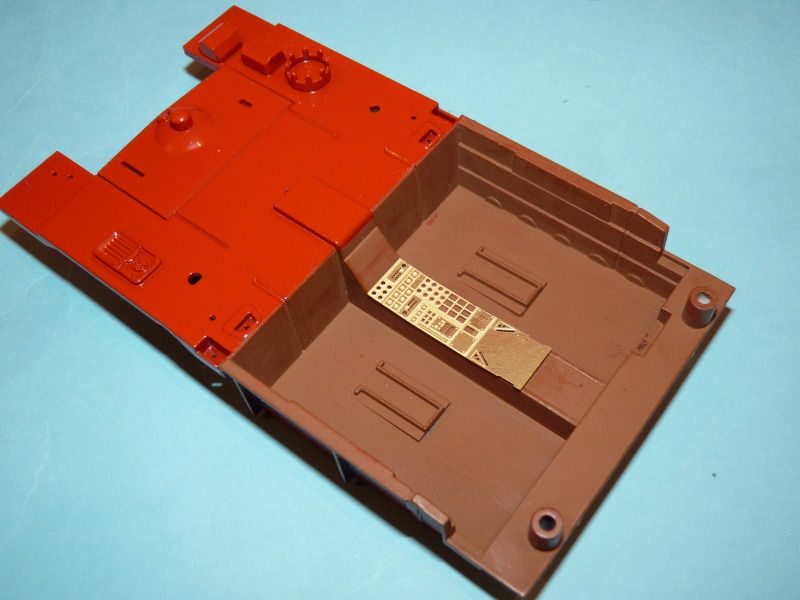
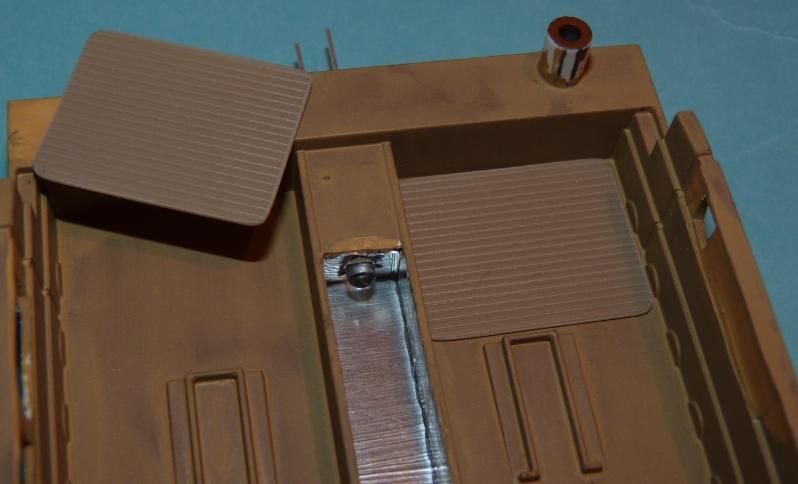
Next it was onto the main interior tub which had already recieved a coat of paint at the rear end....the dark matt brown in the seating area is just a base coat for the eventual beige colour.
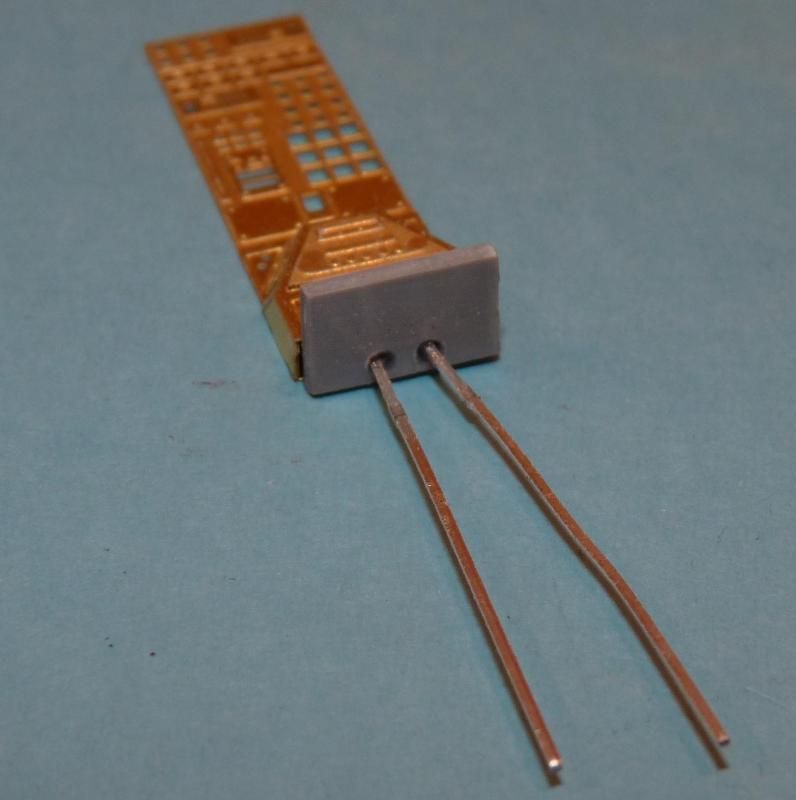
First I test fitted the brass for the centre console to determine where the lights will be going....It's worth mentioning here that I'm building the 'hero' version which is the one Deckard sits in outside the Bradbury. I should have enough spare etch and screens left to use on my Green 'street car'....
More chaindrilling and cutting resulted in two neat openings.....
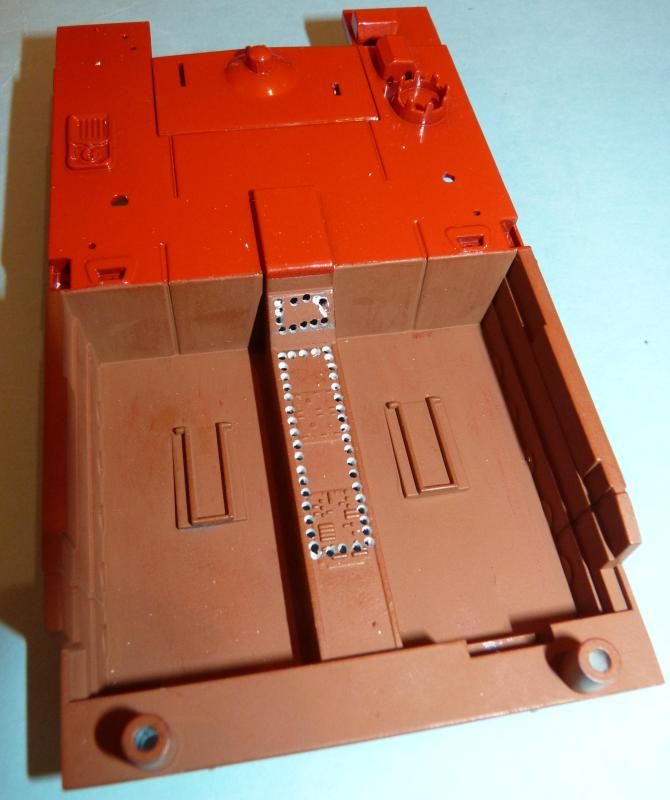
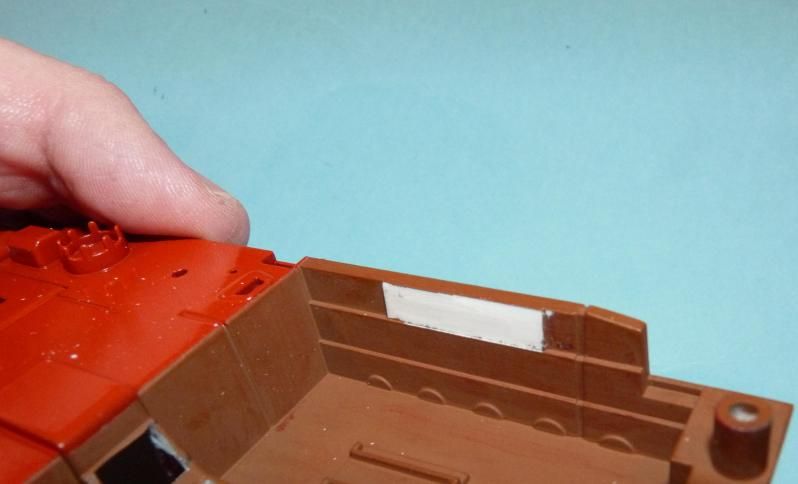
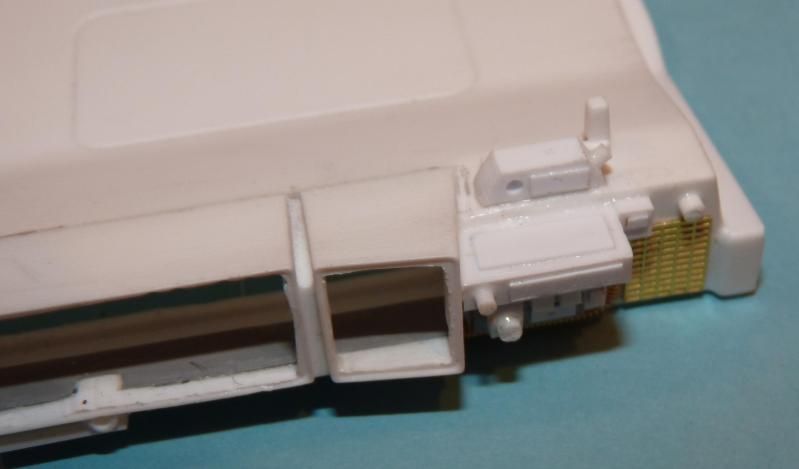
Another job is to level the door panels prior to testfitting the door controls....the white area is where the plastic has been scraped flat, level with its surroundings
When assembled to the dash, the monitors have a large gap underneath...not an issue in the basic kit but obviously a problem if you intend to light it...so a piece of scrap styrene was cut and fixed in place...note the notch to allow for the steering mount...
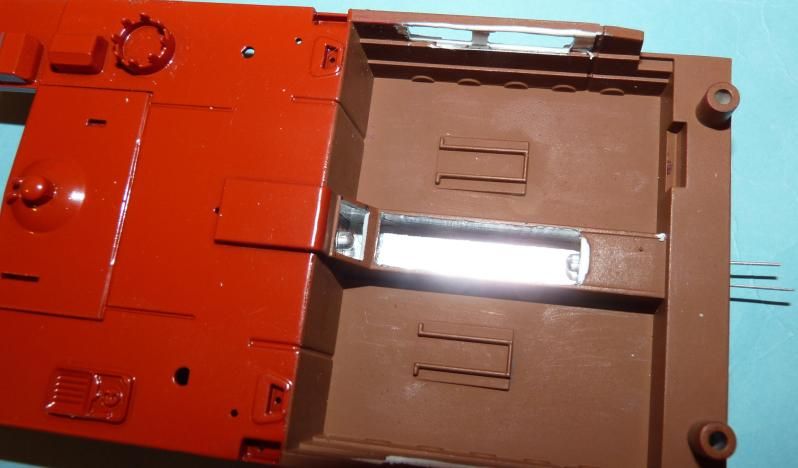
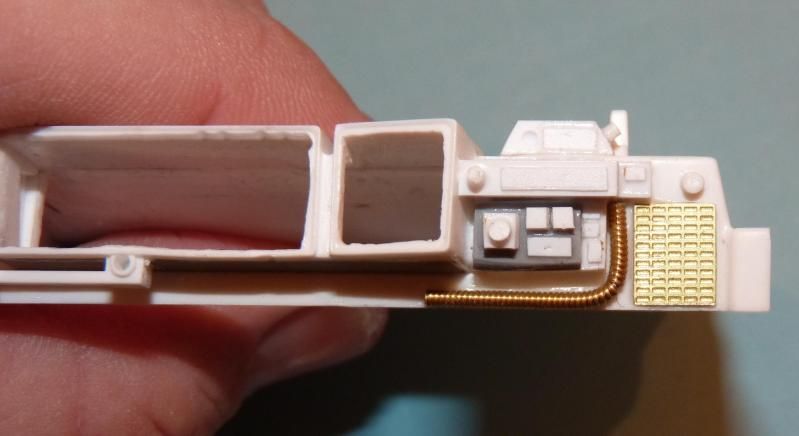
Also some holes need cutting into the door linings to allow light through to the etch....
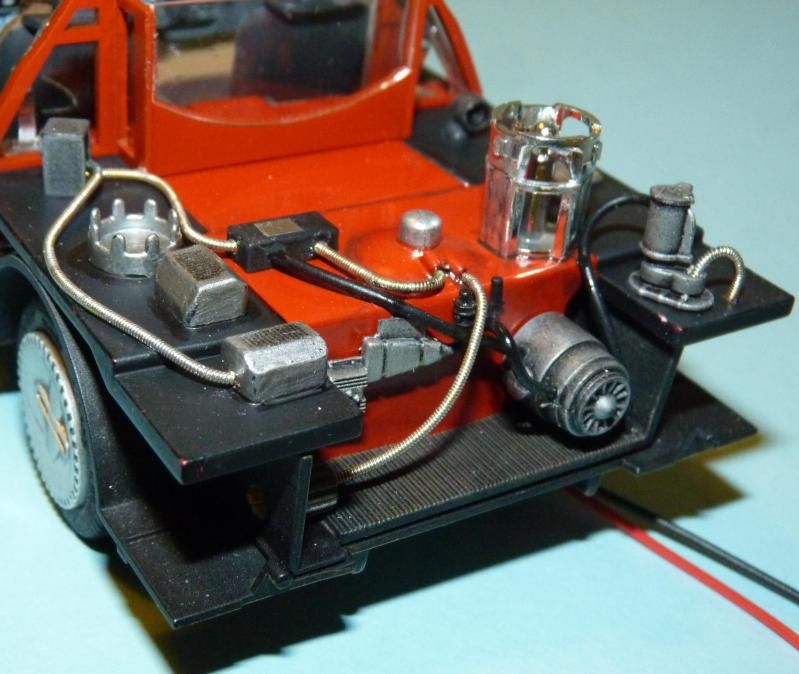
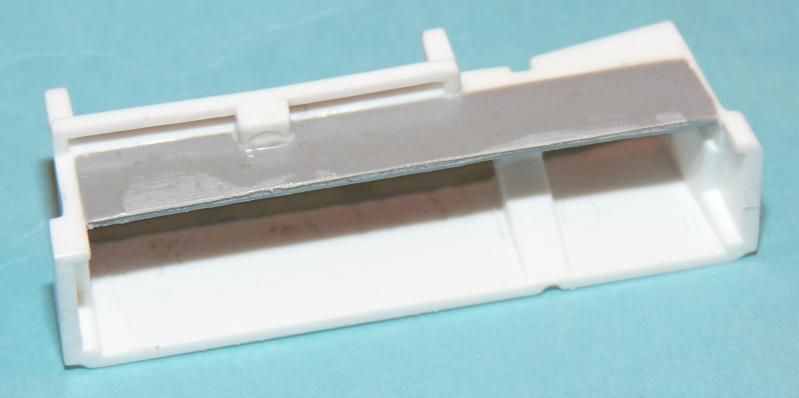
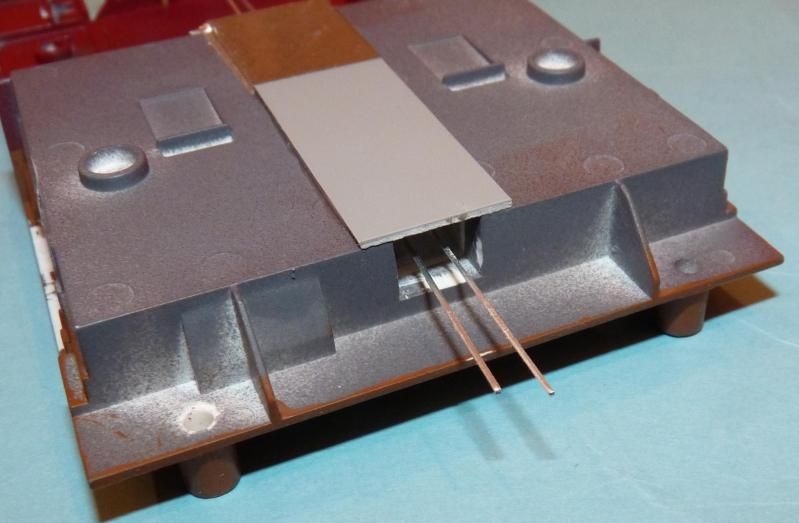
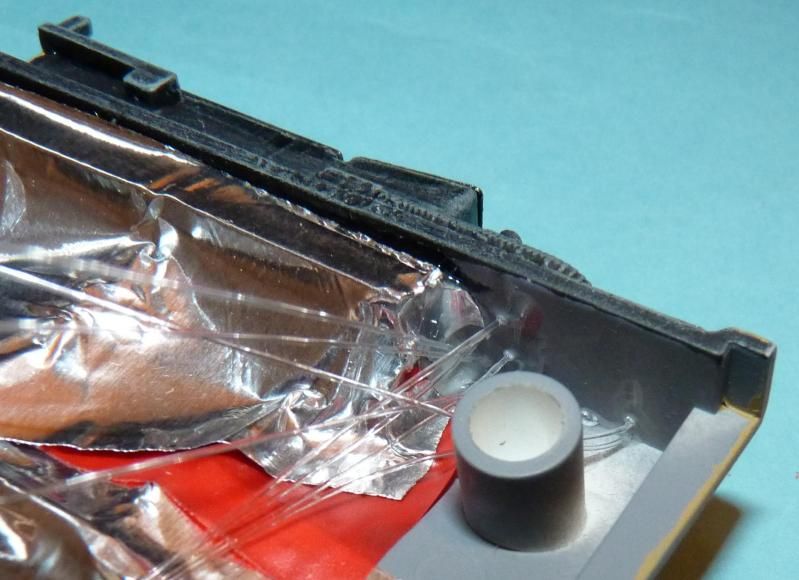
As with any lighting job it's important to plan ahead as to where the lights are fitted and to ensure that the kit will still fit together after modification. I lined the centre console with aluminium tape to prevent light leaks and also to bounce the light around inside so that it projects through the etch. A simple bulkhead was installed at the rear of the console and a hole drilled to take a 3mm white LED....
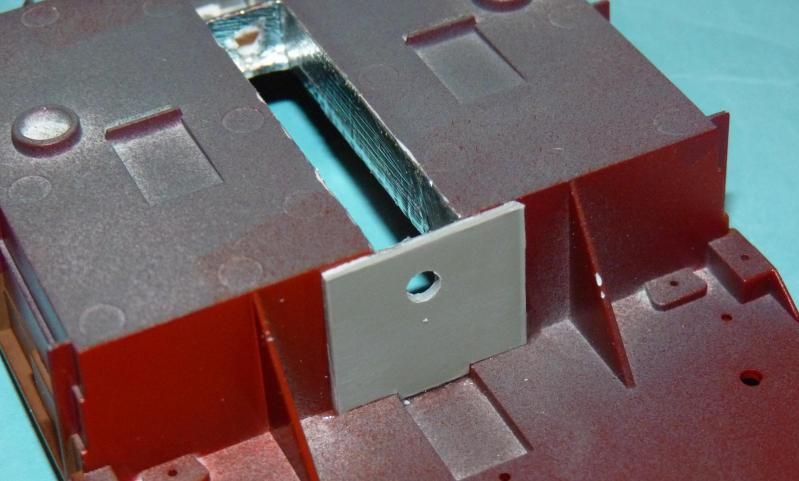
A similar hole was drilled in the front end and a piece of styrene fabricated to seal the bottom of the transmission tunnel....

The LED's were then glued in place....by having them light the box horizontally from either end this provides a more even light avoiding 'hot spots' through any particular area of etch....

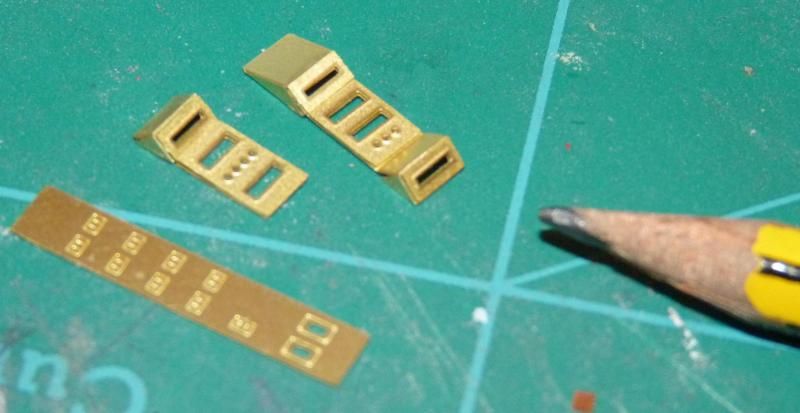
Back onto the etch and the instructions say to remove the end panel of the raised portion of the centre console and replace with styrene to allow you to insert a light within....the hatched portion was simply bent back and forth till it snapped off....
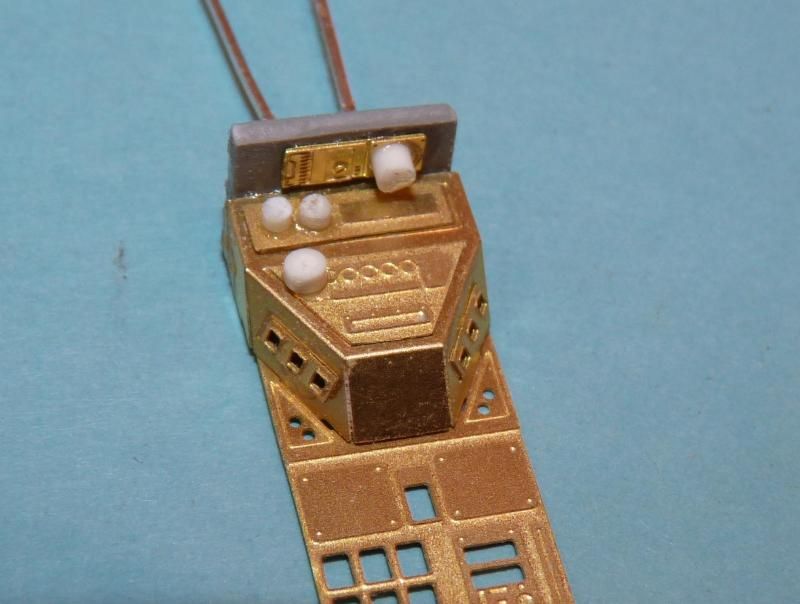
The part is then folded and attached to the main panel....before being clad in some truly tiny pieces...
It's a similar story with the parts for the door panels....
Next was a styrene replacement for the brass piece I removed from the centre console to accomodate an LED inside. The styrene piece was made overheight so it meets the underside of the dash. The LED within was carefully sanded to allow it to slide into the narrow aperture...as long as you take care not to expose the 'element' then it will still work fine....
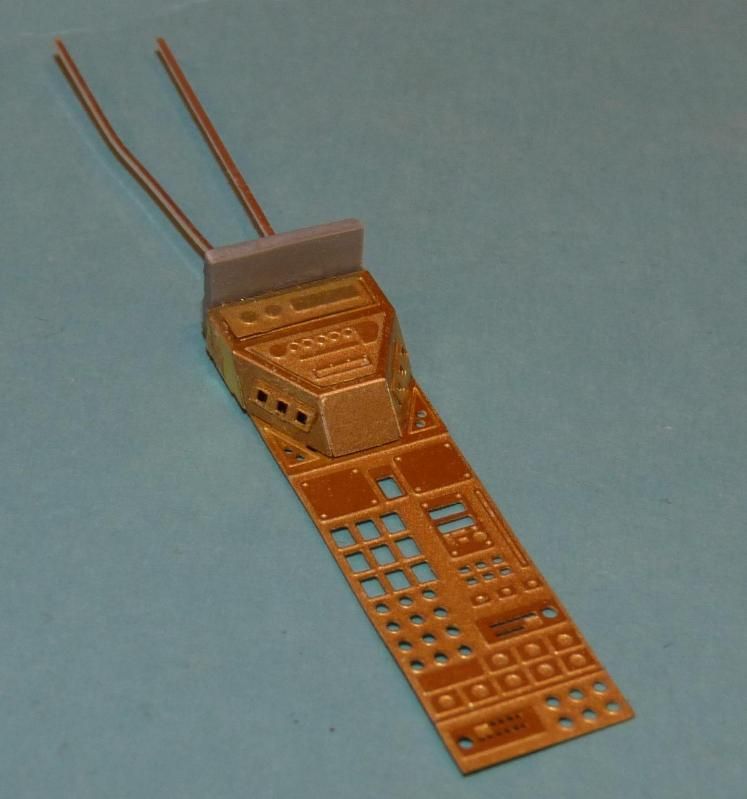
I also took the opportunity to add some styrene rod to the etch to give it some extra dimension....
Based on the reference pic kindly supplied earlier, I scratched some additional instruments for the passenger side using Evergreen strip and a length of guitar string....I'm intending to add a few more bits here and have some random fibre optic lights....
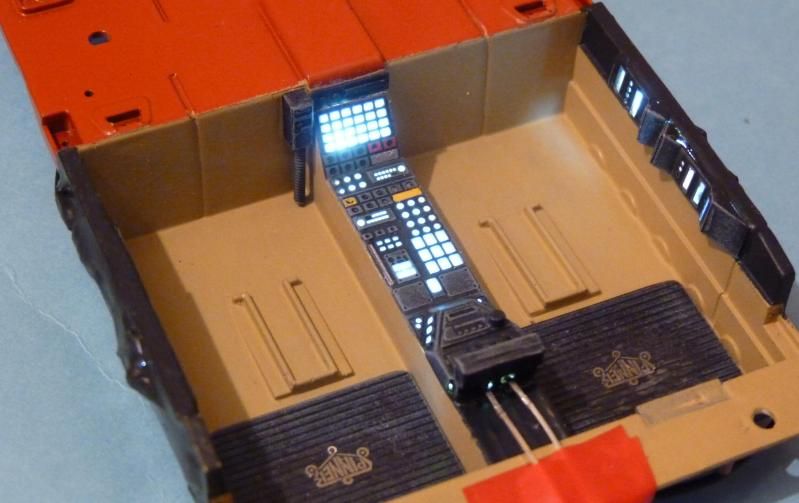
Here's a quick test fit with the dashboard in place.....
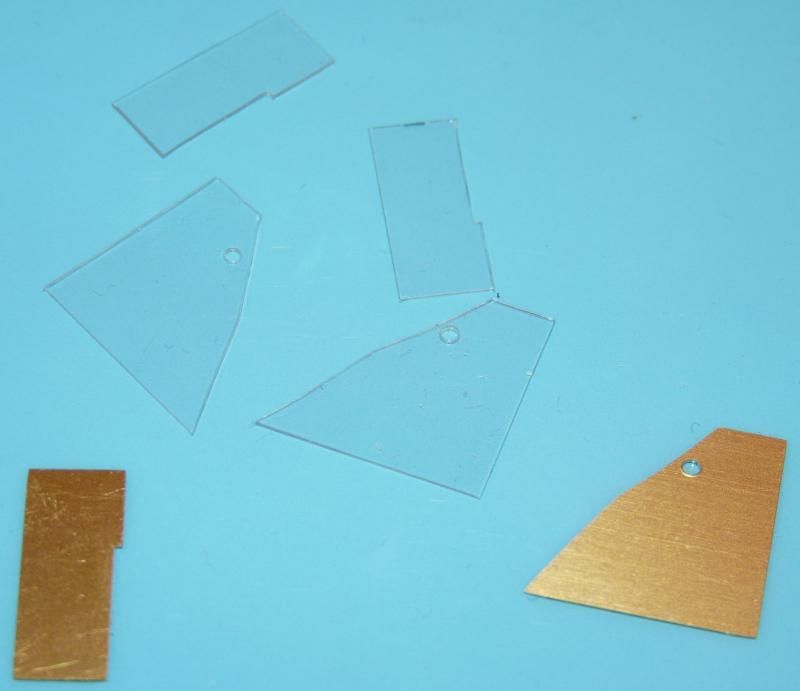
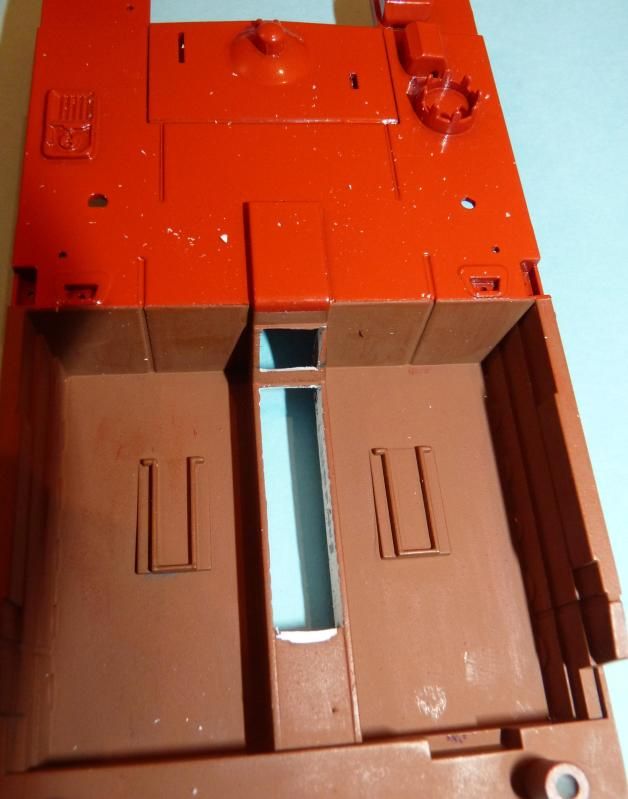
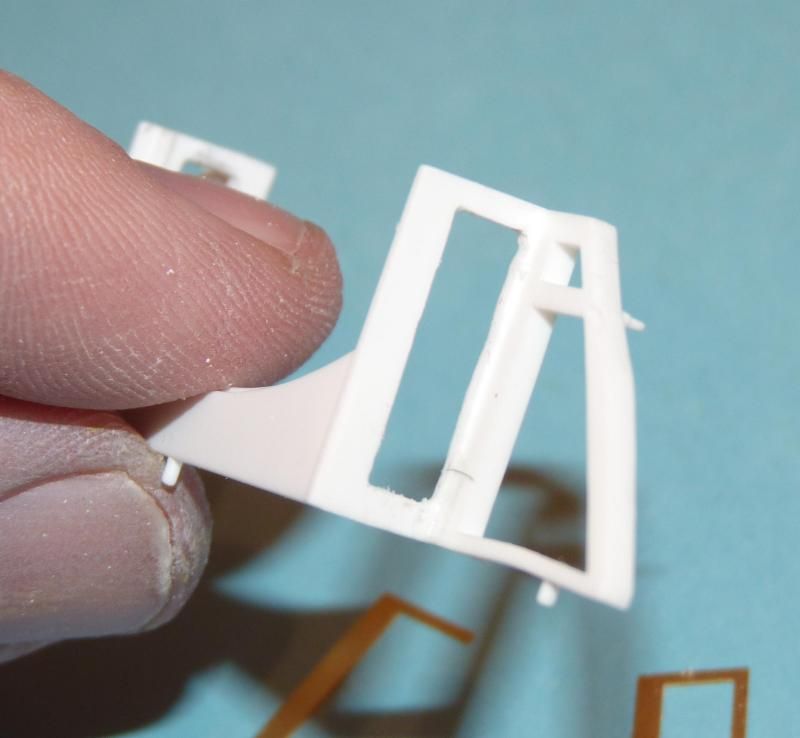
The upgrade set provides cutting guides to open up the two missing windows in the rear bulkhead...
It's a fiddly job and you need to take care not to put too much pressure on the rather delicate framework but it's well worth the effort....
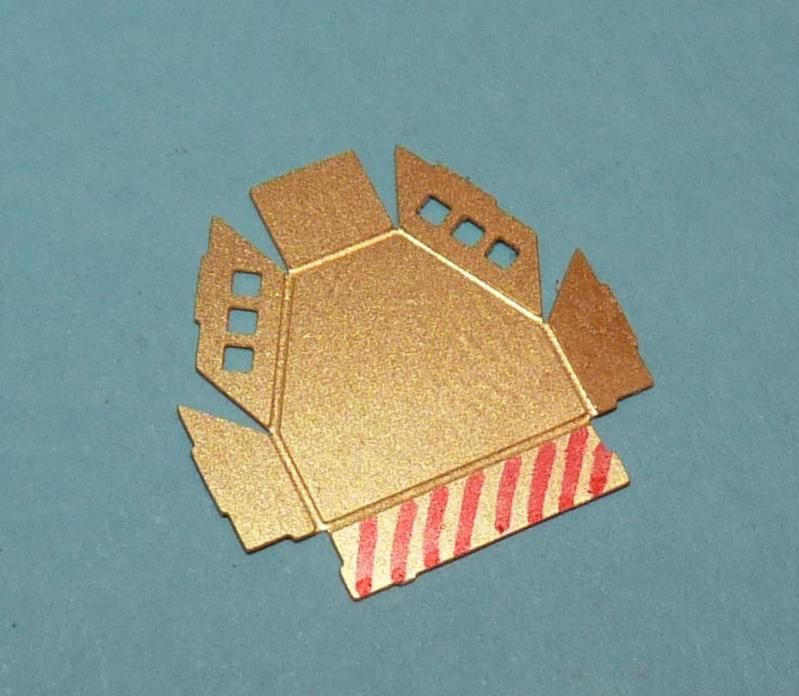
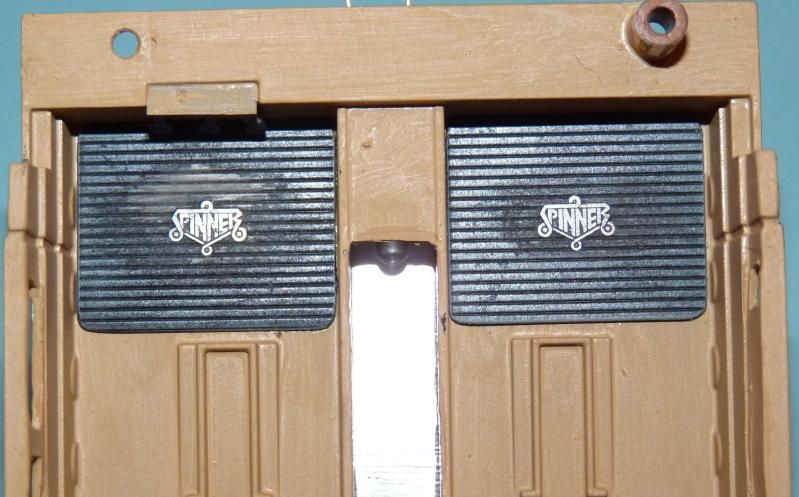
In every Sedan/Police Car 27 kit Fujimi kindly supply the etched fret that comes with the Spinner kit bearing the Spinner logos...presumably because Deckard's car is supposed to be a grounded earlier version of the Police fliers.
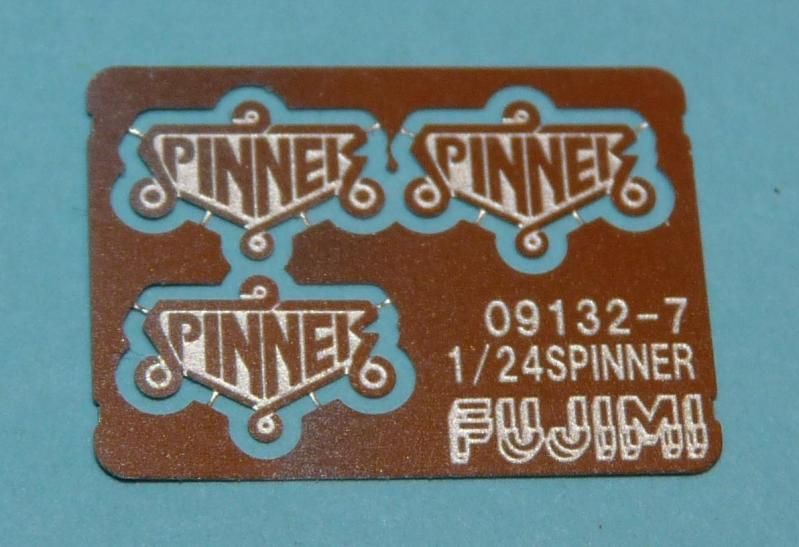
There's no evidence of this logo being used on the actual Sedan in the movie but I thought it might be fun to use it somewhere that might still remain in the grounded version. So I cut some ribbed Evergreen sheet to fit the footwells....(sorry about the dark pic)....
I then applied the logos....
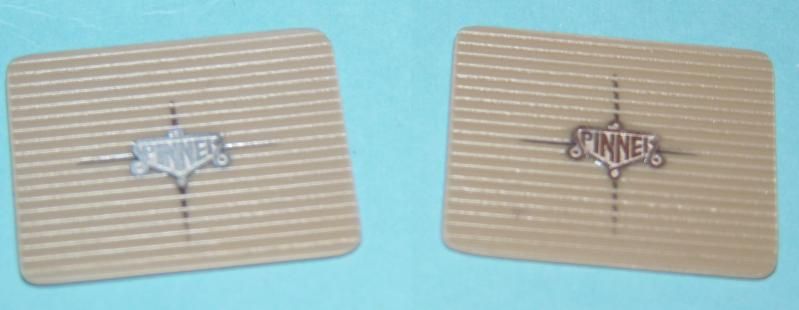
After some painting and scraping back the face of the logos I had some neat looking mats...just the thing to keep that acid rain from ruining your carpets....note the wear on the drivers side...
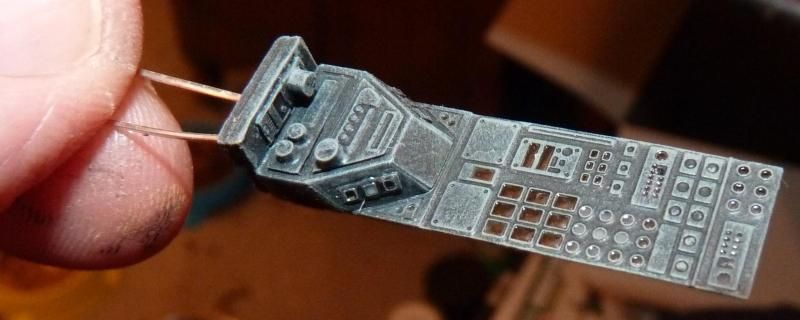
Meanwhile the interior etched pieces were first primed then painted matt black before being drybrushed with various shades of grey...
The dashboard is a mixture of black and desert yellow....
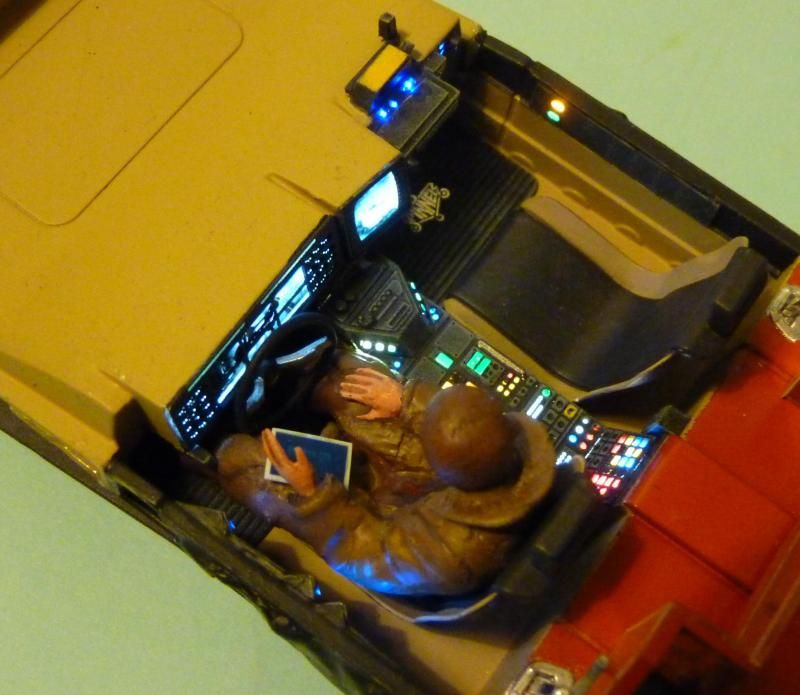
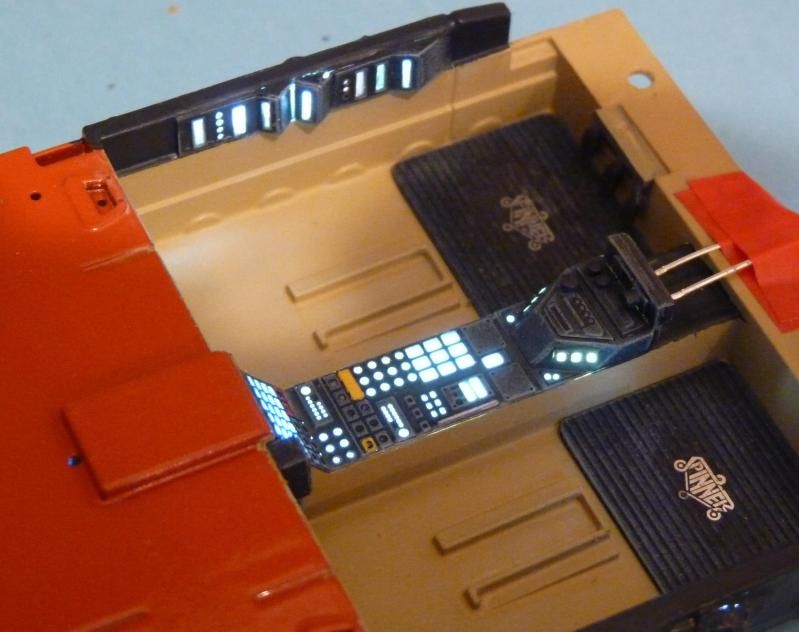
It's just about ready for the detail painting...note the LED's for the monitors...I'll use some diffuser material to even out the light from these behind the screens....
Here's the centre console prior to detail painting....note I've filled the open holes that let the light through using Microscale Kristal Klear (PVA or white glue works too) which dries transparent...these will then be tinted using Tamiya clear colours...
Here's a first look at the lights...still got some leaks on the edges of the panels but easily fixed....
Note that none of the individual holes have been colour tinted yet...
Console rear....
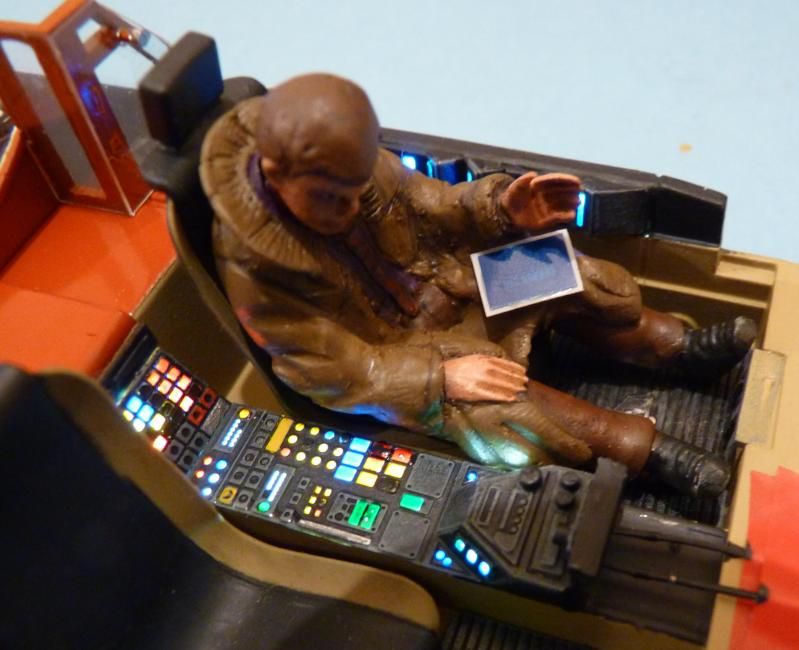
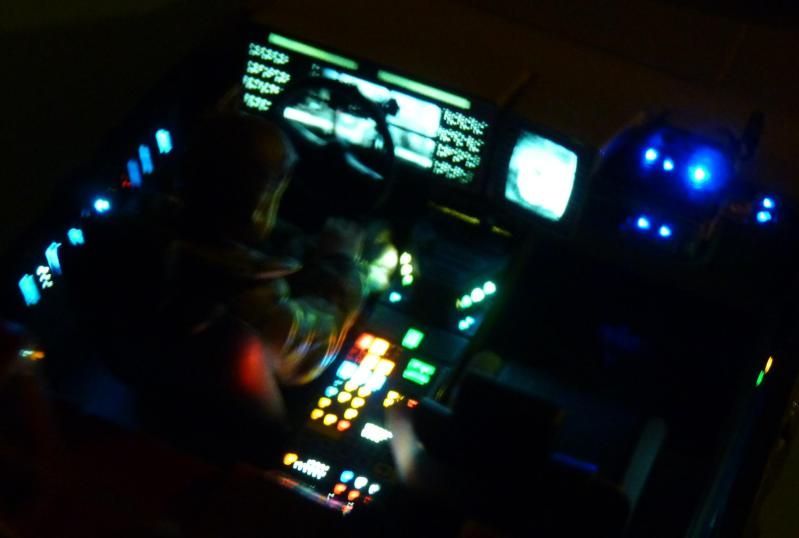
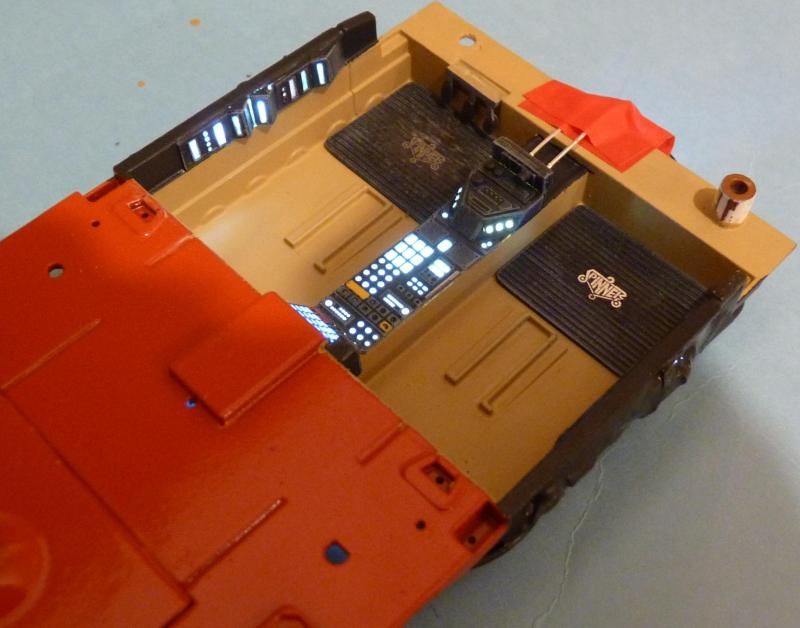
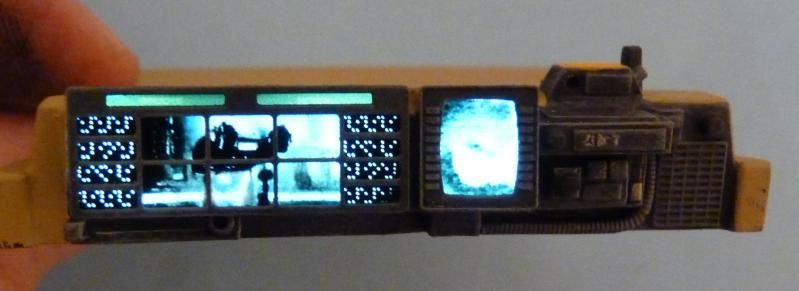
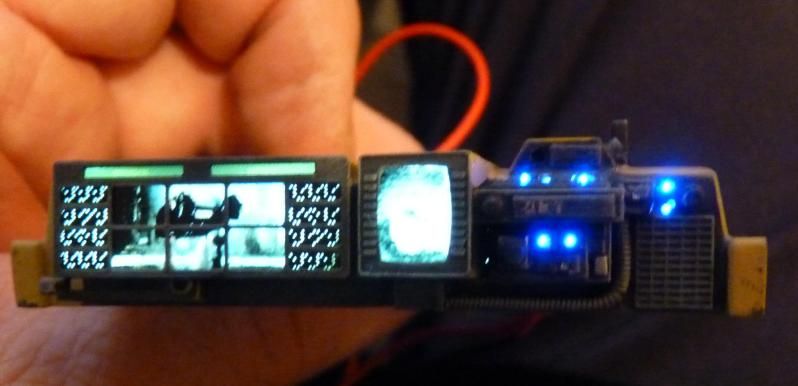
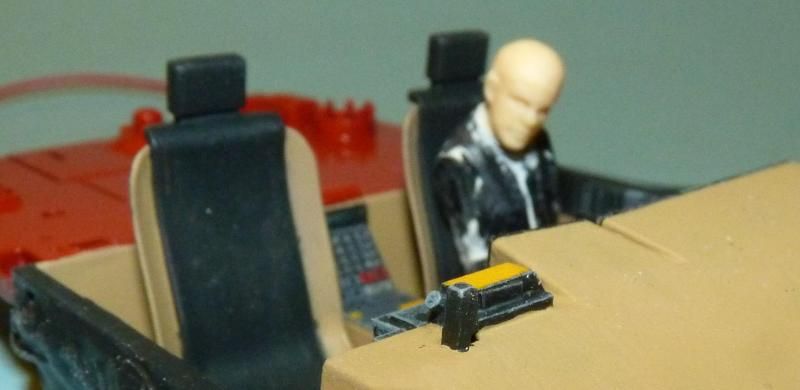
Here's the dashboard unlit....for the main screen I've gone with the Spinner lifting off after Deckard has explained who he is to the cops, the smaller screen has Pris answering Sebastian's phone....

And lit...this pic doesn't really do it justice....to the naked eye it looks fabulous, once more big thanks to Paul for such a fantastic product....
I added some fibre optics to the passenger side dash....

I got the fibres from a cheap Halloween toy and simply drilled out the dash using a 0.5mm drill and fed them through...what I didn't realise was that the CA glue I used to secure them reacted with them and actually melted the fibres!...nothing for it but to remove the damage, redrill them and then secure this time using 5-minute epoxy....
I fed them using a 3mm blue LED and the result was worth the hassle....
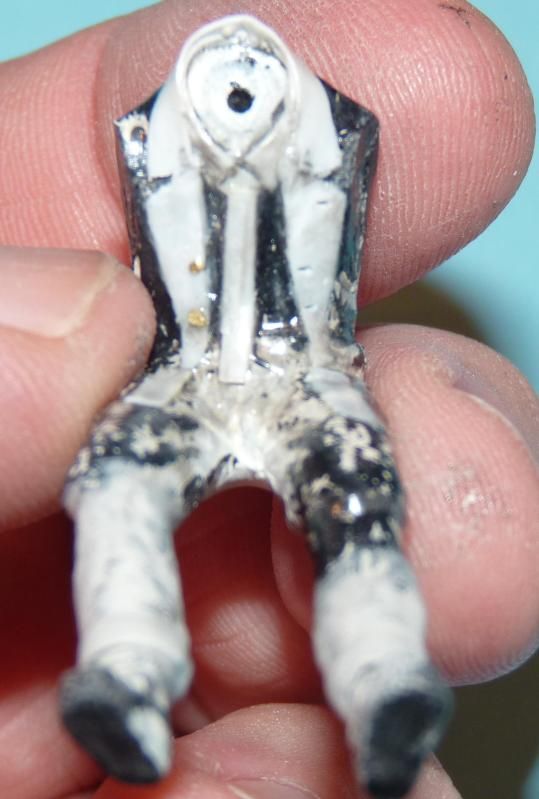
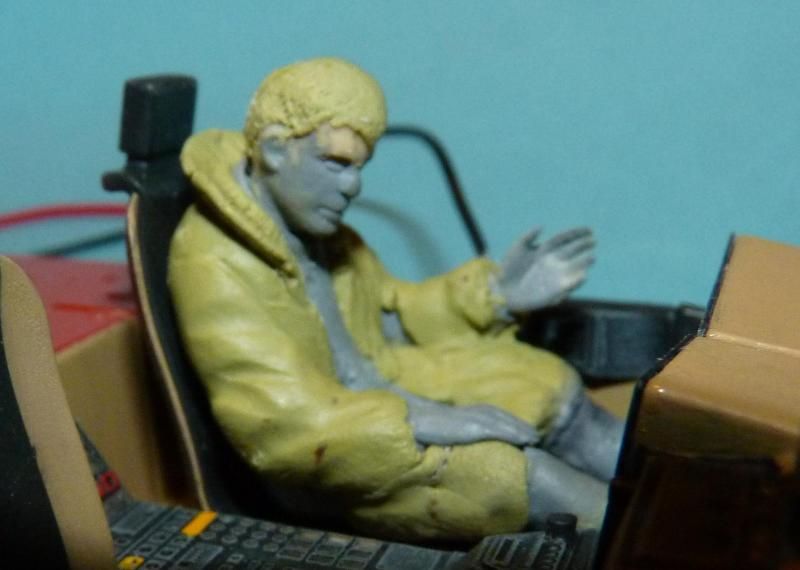
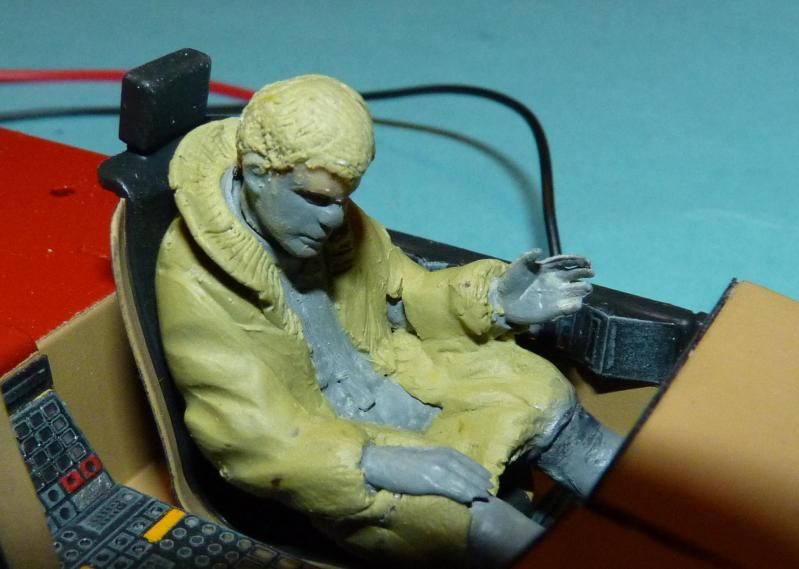
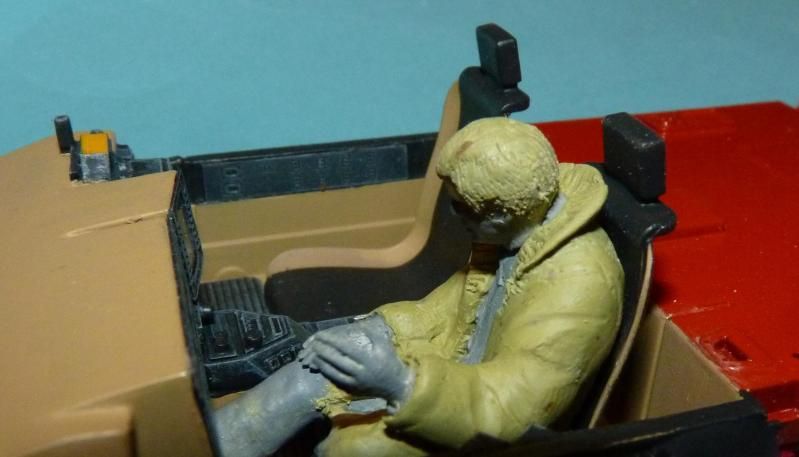
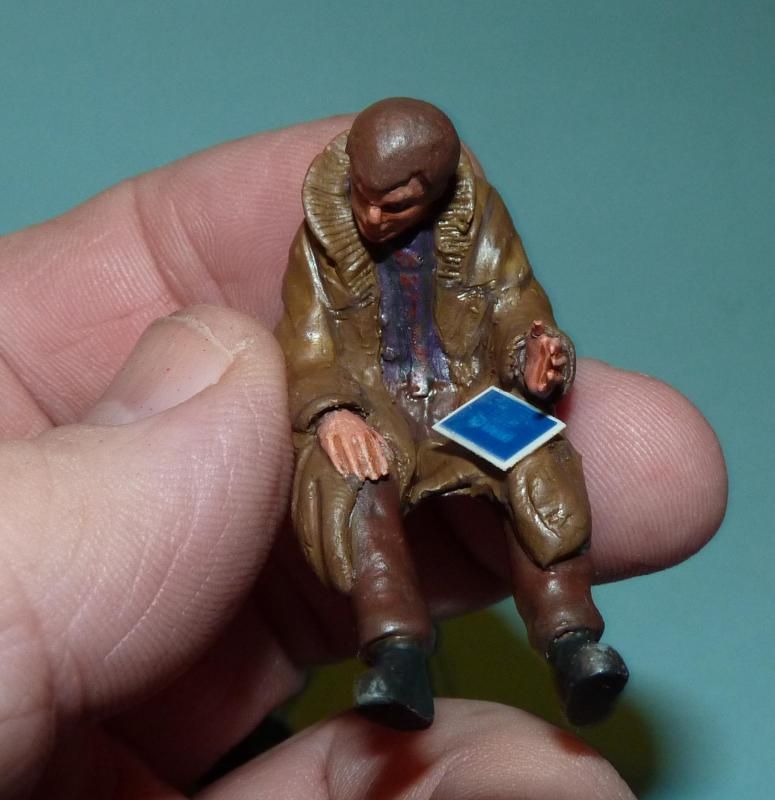
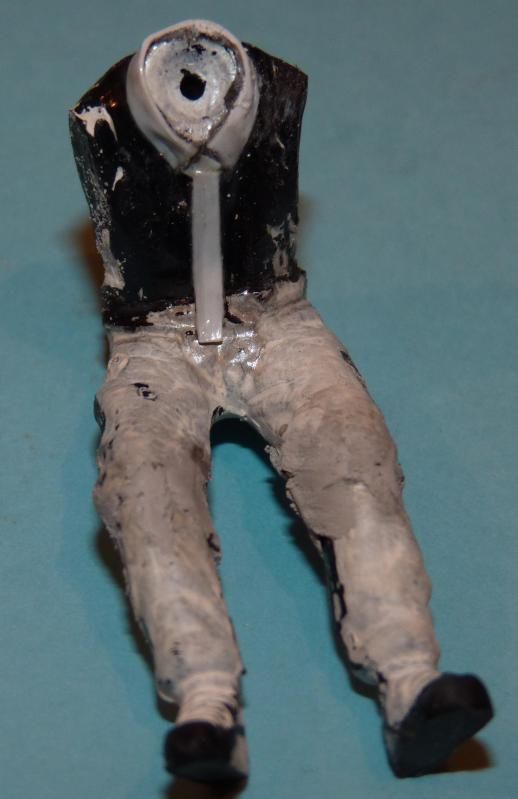
Now for the really hard part...scratchbuilding a realistic Deckard figure....I have one of the ODG figure sets for the Spinner which look ok in that context however the Deckard doesn't fit the Sedan and he's in the wrong pose...
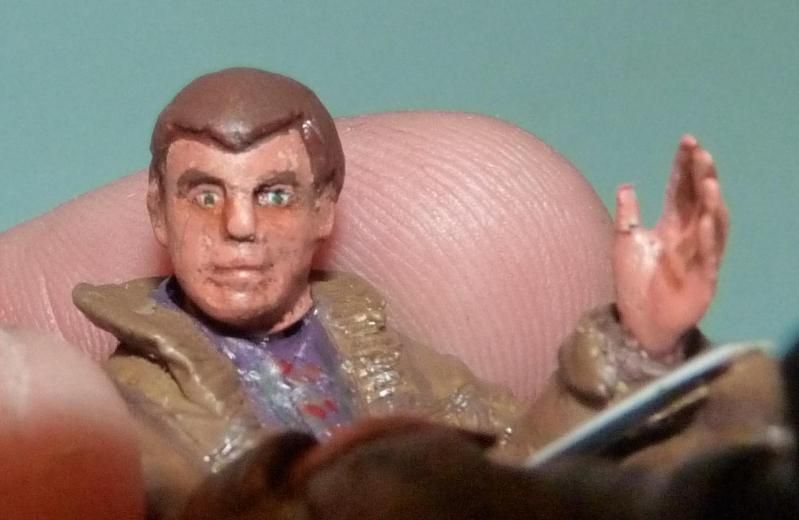
So, after a trawl through my spares boxes I came across the remains of what I think was the navigator from a Tamiya rally car...I was also lucky to find a 1/24 head, just about the only one I have that isn't wearing a crash helmet.
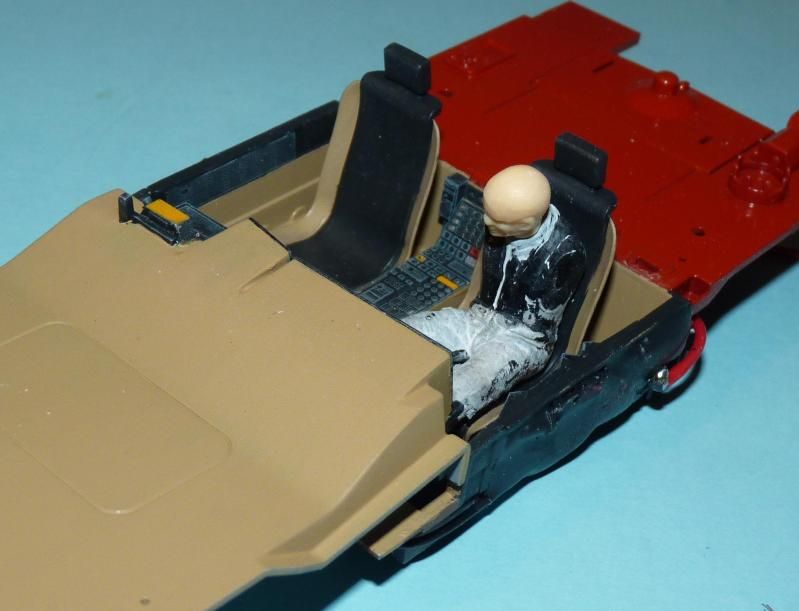
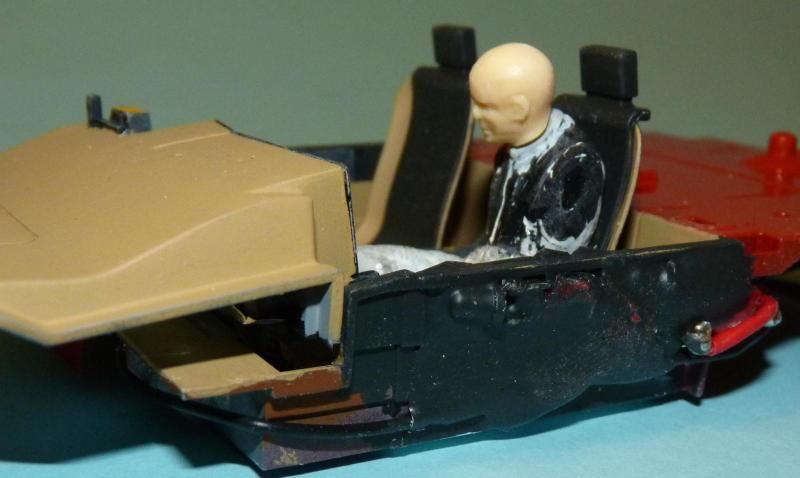
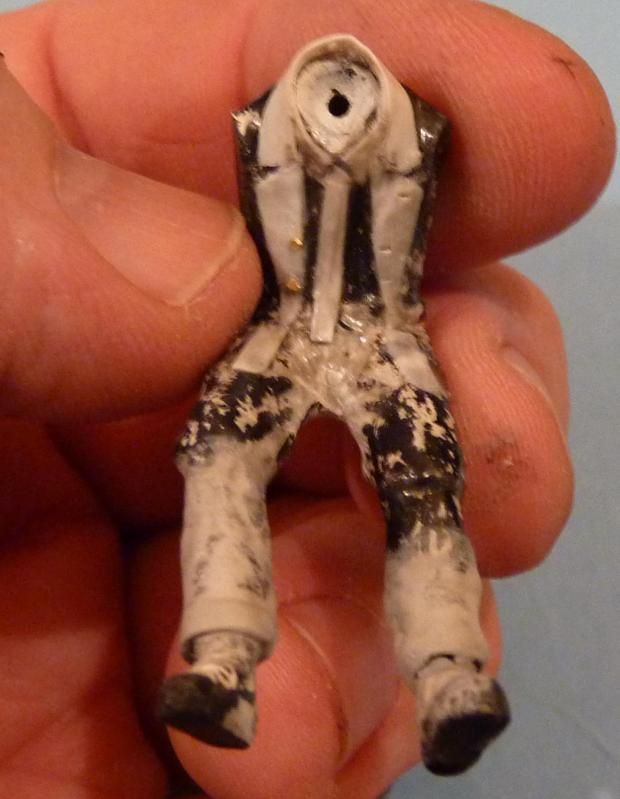
I've done some surgery on the legs as the Sedan seats are really low to the floor. I also carved away the racing harness on the torso. The challenge now is to create the shirt, tie, jacket and trenchcoat....hmmmmm
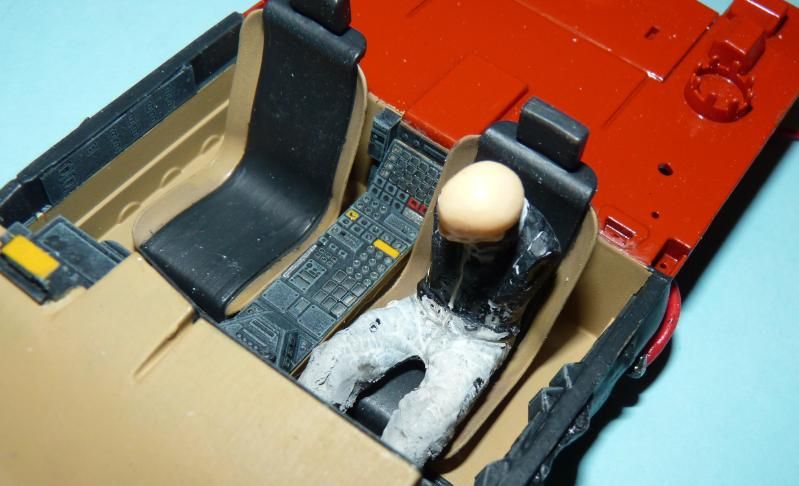
I started out by adding a shirt collar and tie from thin styrene sheet applied with copious amounts of Plastic Weld cement to soften it and make it conform....
It's surprising how much better the figure looks just by those simple additions...
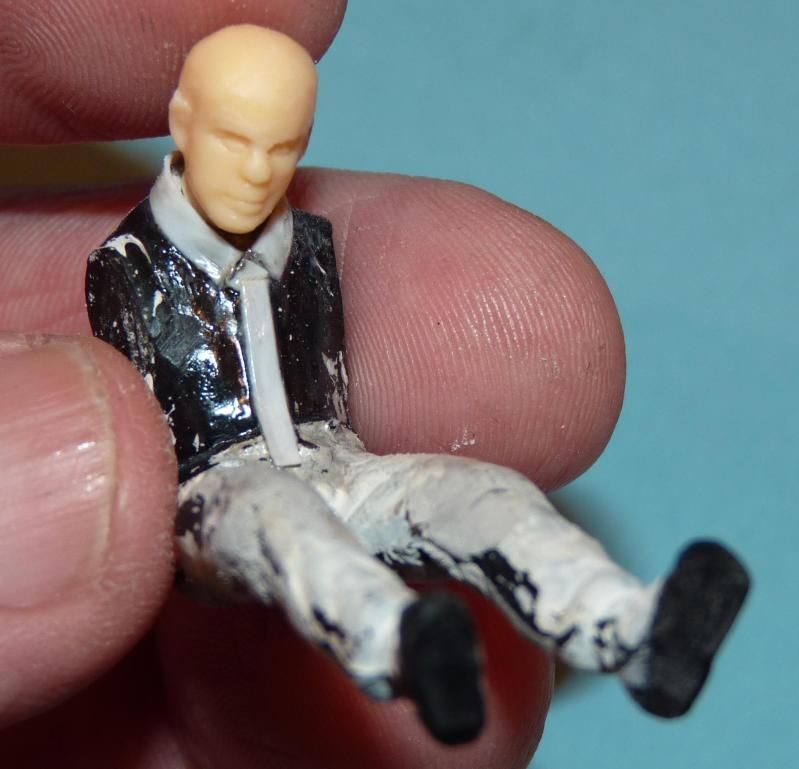
I then added some lapels and another collar to represent his suit jacket...I also added cuffs to the bottom of the trousers to disguise the rally driver origins...
The buttons were made from some of the etched ignition keys that come with the upgrade set....