MPC Pilgrim Observer Upgrade

From Apollo and Soyuz, to Gerry Anderson, Irwin Allen, Star Wars and Trek to Babylon 5, Battlestar Galactica and those strange, doe-eyed Japanese school girls...to any model kits you can think of, that only exists in imagination.
jargonking
Onto the Clever Stuff, Now.
Posts: 119
Joined: May 4th, 2011, 12:21 am

MPC Pilgrim Observer Upgrade

Post by jargonking »

In an attempt to break a two month bout of modeller's block I've dug this out of the stash....

Image

I've got several almost-finished projects on the go so I'm hoping this build will pull me out of the doldrums.

I'll start with a parts run-through for anyone unfamiliar with the kit....

Chrome parts....most of these will be either stripped or replaced....the clear nose is an option I won't be using either....

Image

Asteroid-type base...deep enough to hide the battery for the lights....

Image

Some nice decals although all the small ones appear to be generic aircraft stencils....I may invest in the aftermarket sheet for this...

Image

Solid nose cone will be going in the spares box too....

Image

Lots of fuel/LOX tanks...

Image

The moulding is typical '70's fare with some fine raised details...the moulds are in pretty good shape, probably because it hasn't been reissued since then...

Image

Habitation and hydroponic modules...expect some lighting in these....

Image

The brass upgrade set...typical high quality from ParaGrafix...note the antenna arrays and the long truss assembly...

Image

So, on with the build....
jargonking
Onto the Clever Stuff, Now.
Posts: 119
Joined: May 4th, 2011, 12:21 am

Re: MPC Pilgrim Observer Upgrade

Post by jargonking »

The etched truss ready for assembly...it can be assembled without any special folding tools...

Image

I used the kit part that the etch replaces as a former to fold around....

Image

The plastic part was removed and the long joint held tofether with tape while CA glue was run into the joint...

Image

The finished truss...it's remarkably strong...

Image

Note the end plates folded in and glued...

Image

Strangely the three engine bells are moulded with solid bases so require hollowing out and the trailing edges thinning...

Image

The truss was test fitted into the central core assembly...one odd thing about the kit is the complete lack of painting guidance other than the front and rear of the box...going to go for red for this assembly I think....

Image

Image

I decided to blank off these openings in the rear engine section as you can't see anything behind them anyway...I used small sections of Evergreen strip....

Image

Blanks completed....

Image

These are parts that will be used on the build but which I'll paint so I set them aside to de-chrome...

Image

These are chrome parts that are either replaced by etched brass or that I intend to replace with aluminium rod so these are headed for the spares box...

Image

The only piece I'm using off the chrome sprue as it comes is the mirror for the telescope...

Image

Parts to be de-chromed were set in a glass dish...

Image

Parts were soaked in neat household bleach, a process which normally removes chrome within about ten minutes....not this time, the bleach had no effect after an hour so I resorted to foam oven cleaner...still no joy, the MPC chrome is pretty much bullet proof....

Image
jargonking
Onto the Clever Stuff, Now.
Posts: 119
Joined: May 4th, 2011, 12:21 am

Re: MPC Pilgrim Observer Upgrade

Post by jargonking »

Meanwhile it was time to remove the moulded struts on the habitation modules...

Image

These are replaced with brass parts although I'll leave them off until I've done the seams on the modules....

Image

I'm intending to light the interiors of the habitation modules so first job was to line the halves with self-adhesive aluminium tape...this acts as both reflector and a light block to prevent the light bleeding through the styrene....

Image

To finally strip the chrome I resorted to caustic soda....12 hours later it had worked on all bar one stubborn piece...I'll scrape that back by hand....

Image
jargonking
Onto the Clever Stuff, Now.
Posts: 119
Joined: May 4th, 2011, 12:21 am

Re: MPC Pilgrim Observer Upgrade

Post by jargonking »

Started work on replacing the soft-detailed chrome parts with sharper pieces made from sections of aluminium tube...

Image

The main engine assembled...I used a section of the kit's styrene truss to form a mounting point for the new brass one....

Image

Side view of the engine a little washed out by the camera flash....

Image

I cut some lengths of fine square-section Evergreen strip....

Image

The strips were used to detail the inner wall of the rear thruster housing along with some aluminium tube....the strip locations were matched to the moulded strakes seen on the outside...

Image

Small sections of sprue were used to link the aluminium pipes to the moulded-on pipework...

Image

Test fit of the main engine components and truss...

Image

The brass truss really adds to the realism and lifts the kit out of the toy category....

Image

Main engine was detailed with brass wire to replace the styrene pipework...

Image

First subassembly completed and awaiting light weathering....the main tanks are still to be added....

Image

The aluminium tubing is a vast improvement on the kit parts. I also added some interest to the red tanks by wrapping a thin piece of aluminium tape around each end....

Image

The bulkhead behind the red gridwork was sprayed gold to simulate mylar foil similar to that used on the Apollo programme...

Image

The painted truss test fitted....I'll leave it loose until final assembly to avoid damage...

Image

Main engine module fitted to the truss....

Image

I used Humbrol Metalcote Polished Steel for the main module and Plasti-Kote Chrome for the engine bell...

Image

Is it just me or does it look like a dustbin?

Image

I also added the larger tanks, again with some aluminium tape bandings....

Image

I've decided to go for a very clean look on this build to resemble a NASA desktop model, the type you might find on the Mission Director's desk....

Image
jargonking
Onto the Clever Stuff, Now.
Posts: 119
Joined: May 4th, 2011, 12:21 am

Re: MPC Pilgrim Observer Upgrade

Post by jargonking »

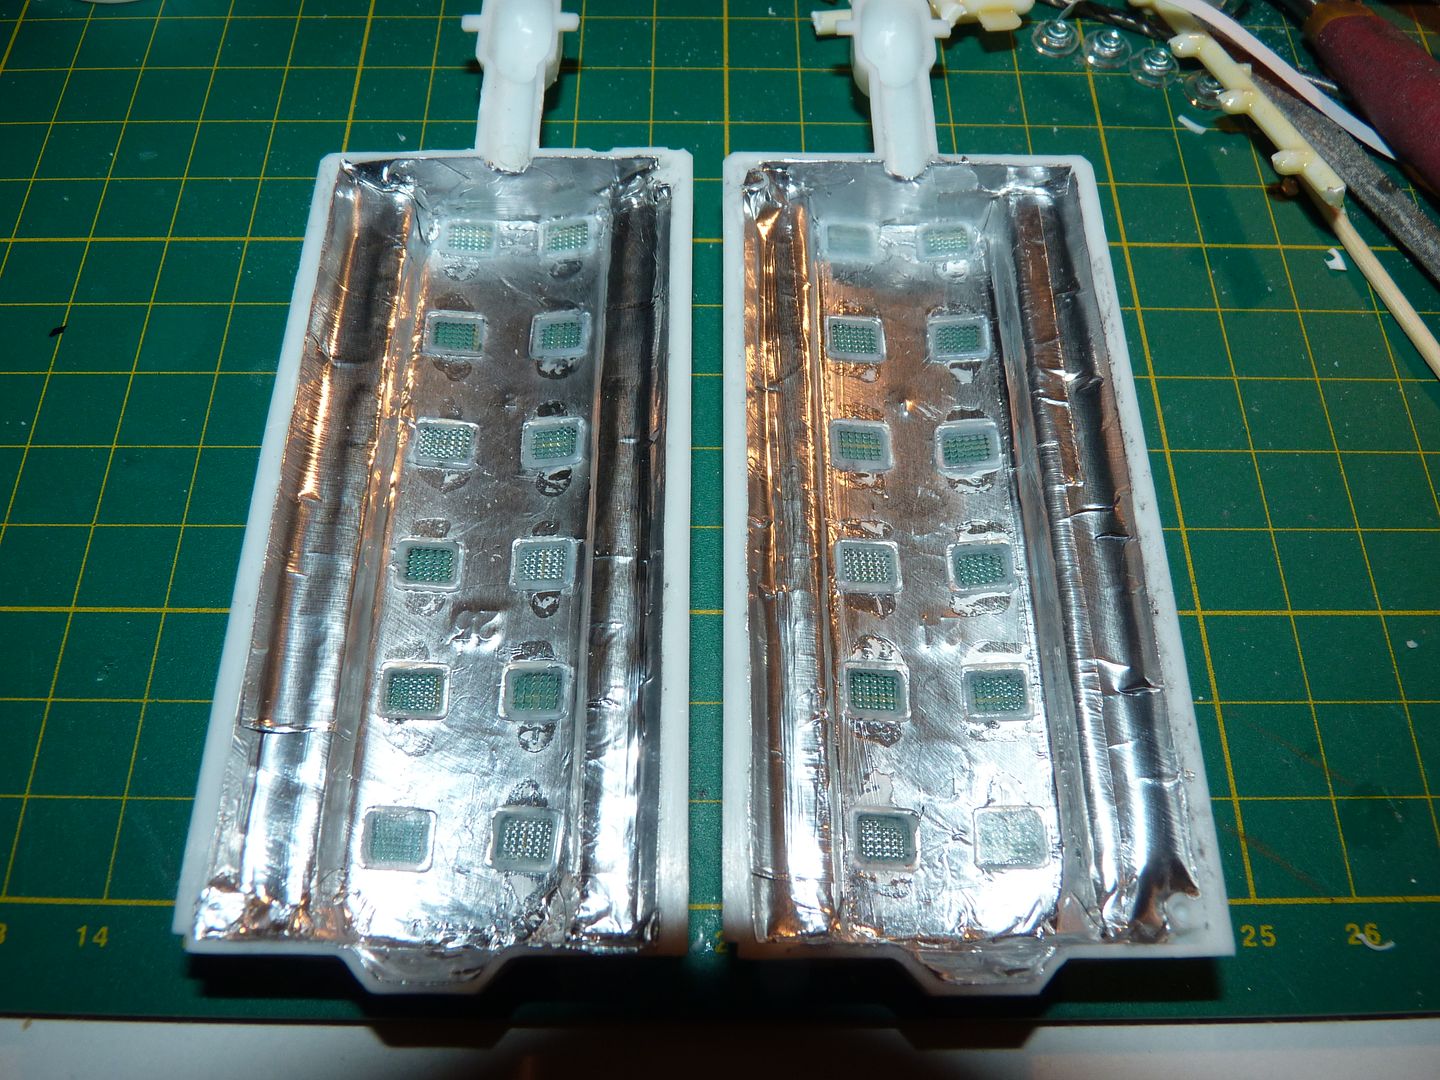
Finished lining the hydroponics module with foil tape and installed the windows....think I'll go with green lights in here....

Image

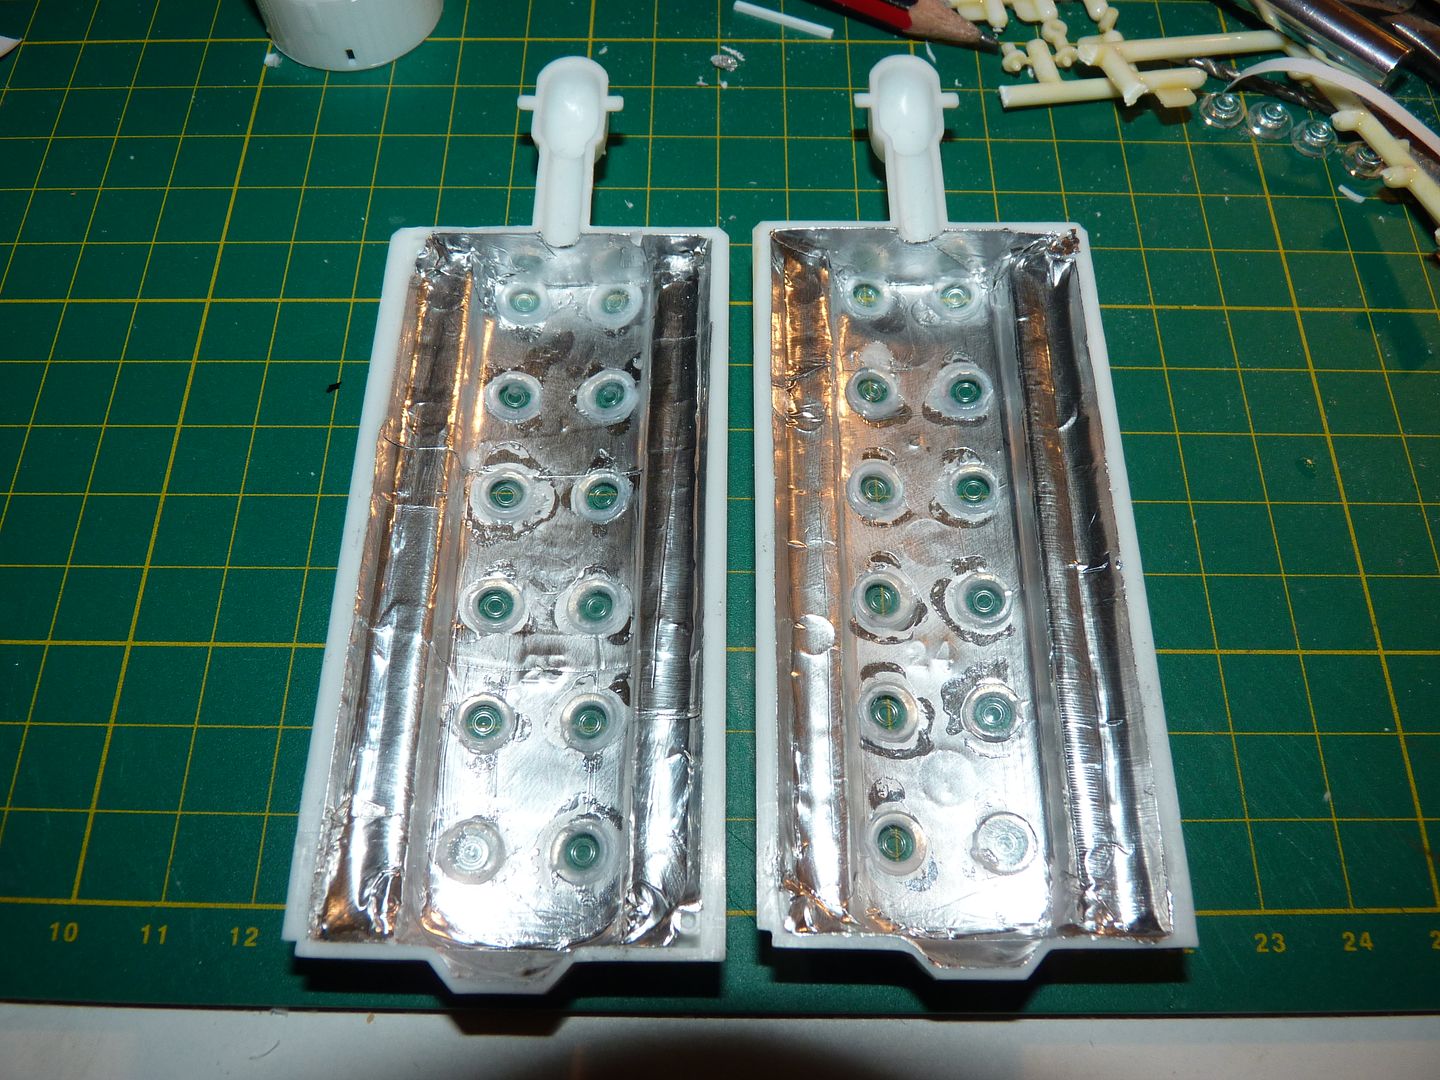
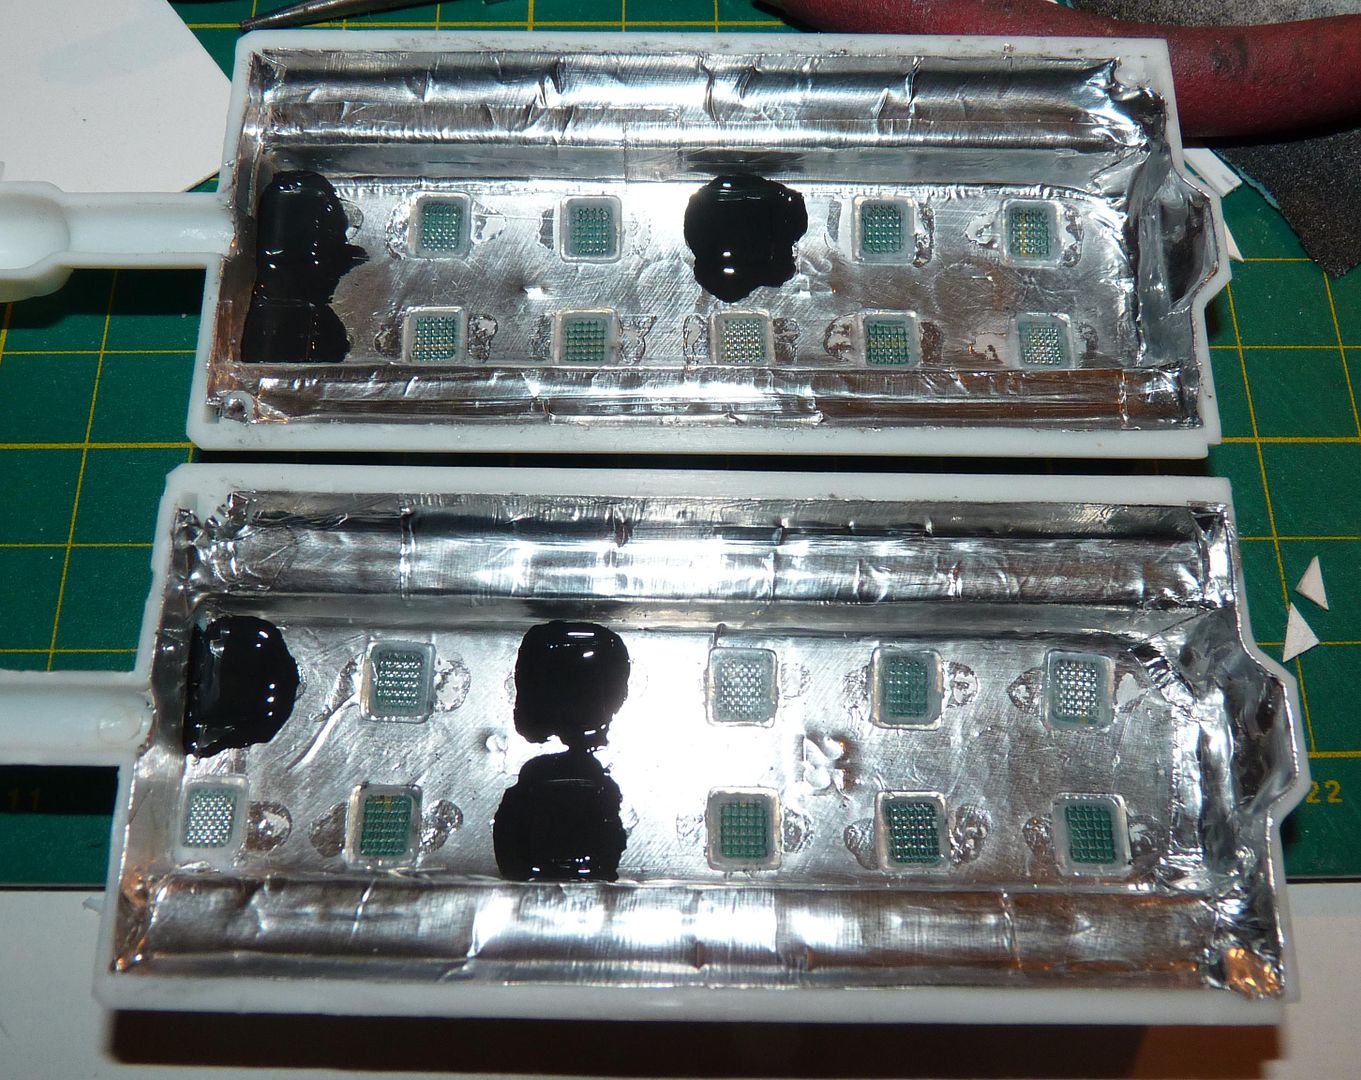
Same deal with the habitation module...white lights in here with the odd window blacked out....

Image

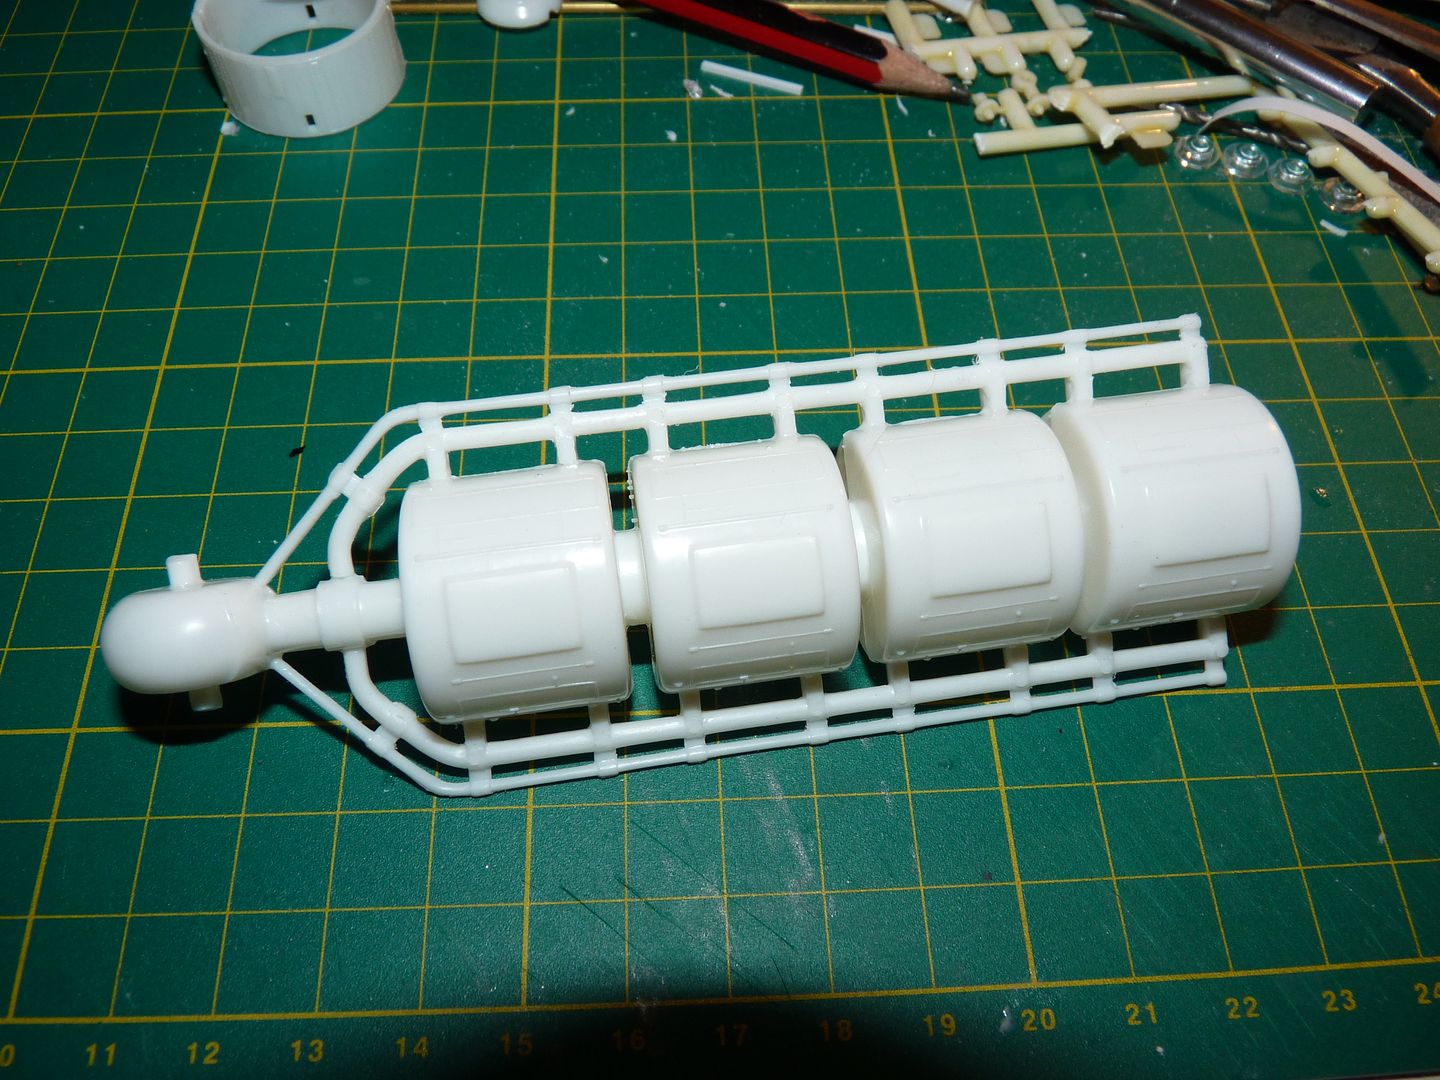
The nuclear fuel section....

Image

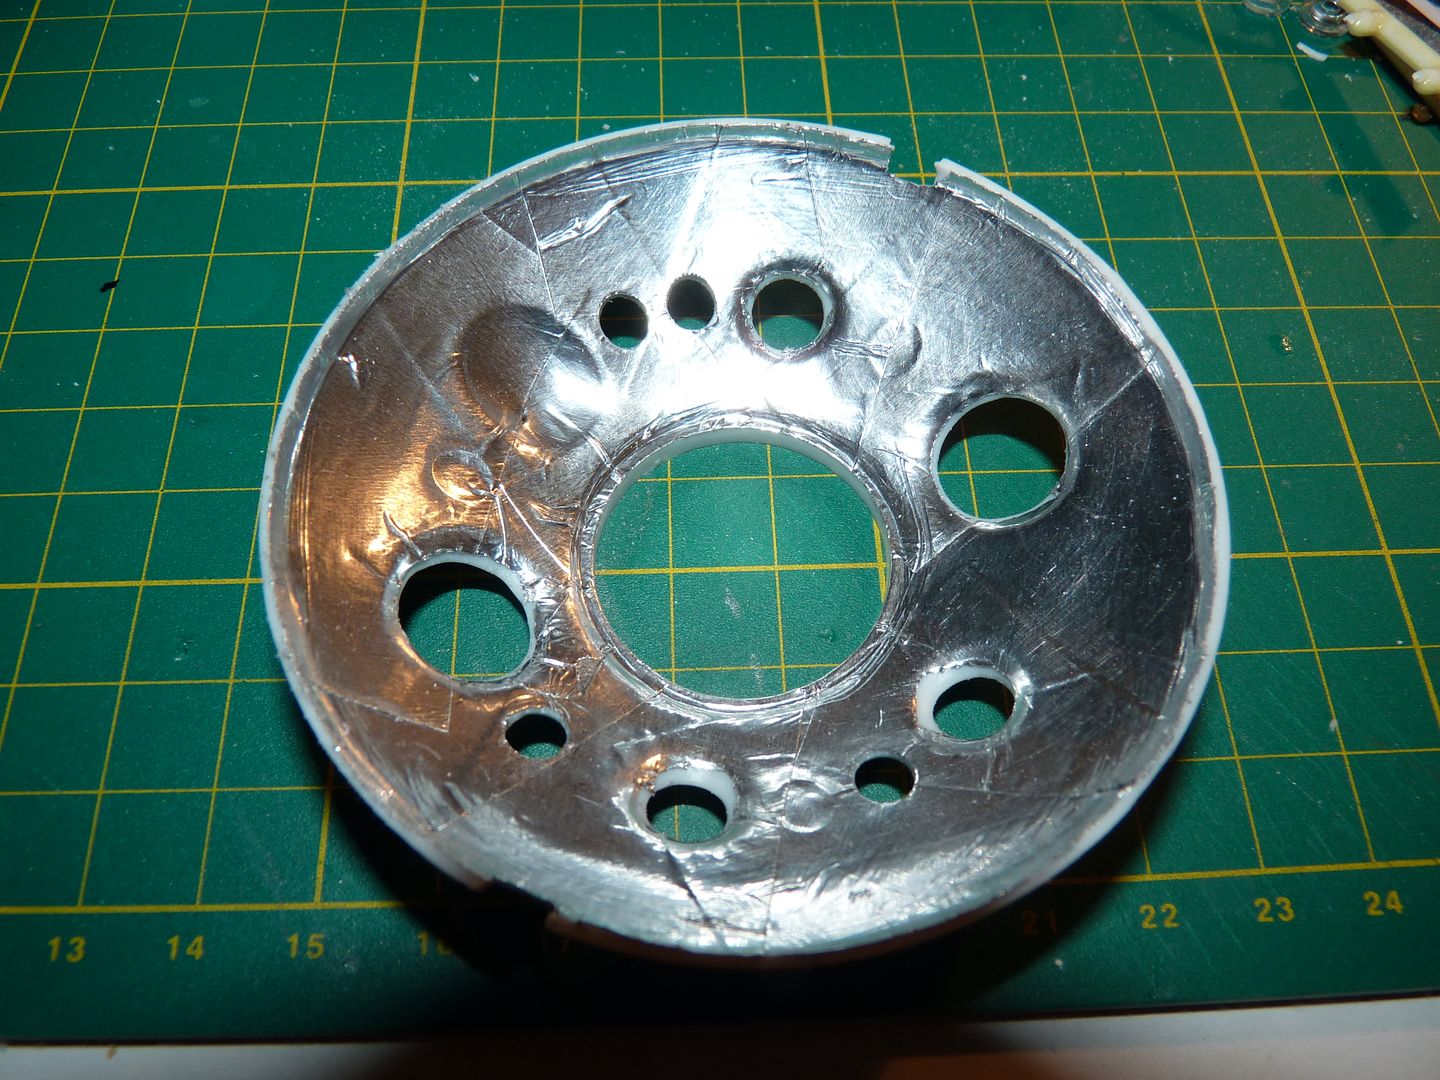
Lined the forward module with foil tape ready for lighting....

Image

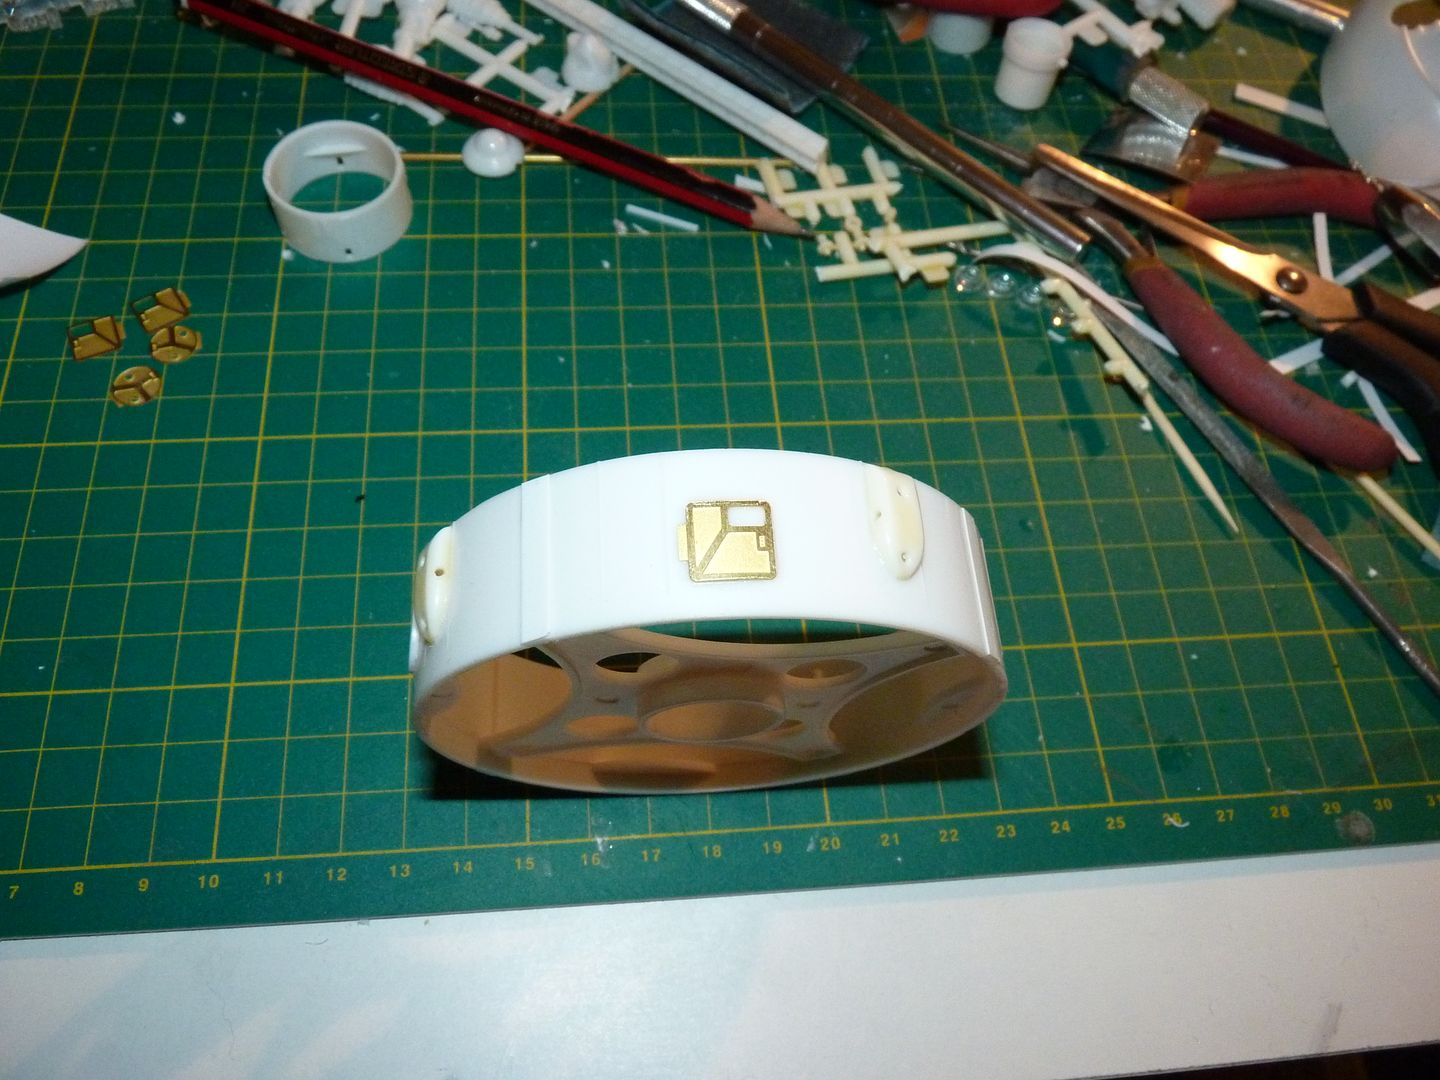
The ParaGrafix set provides additional hatches...

Image

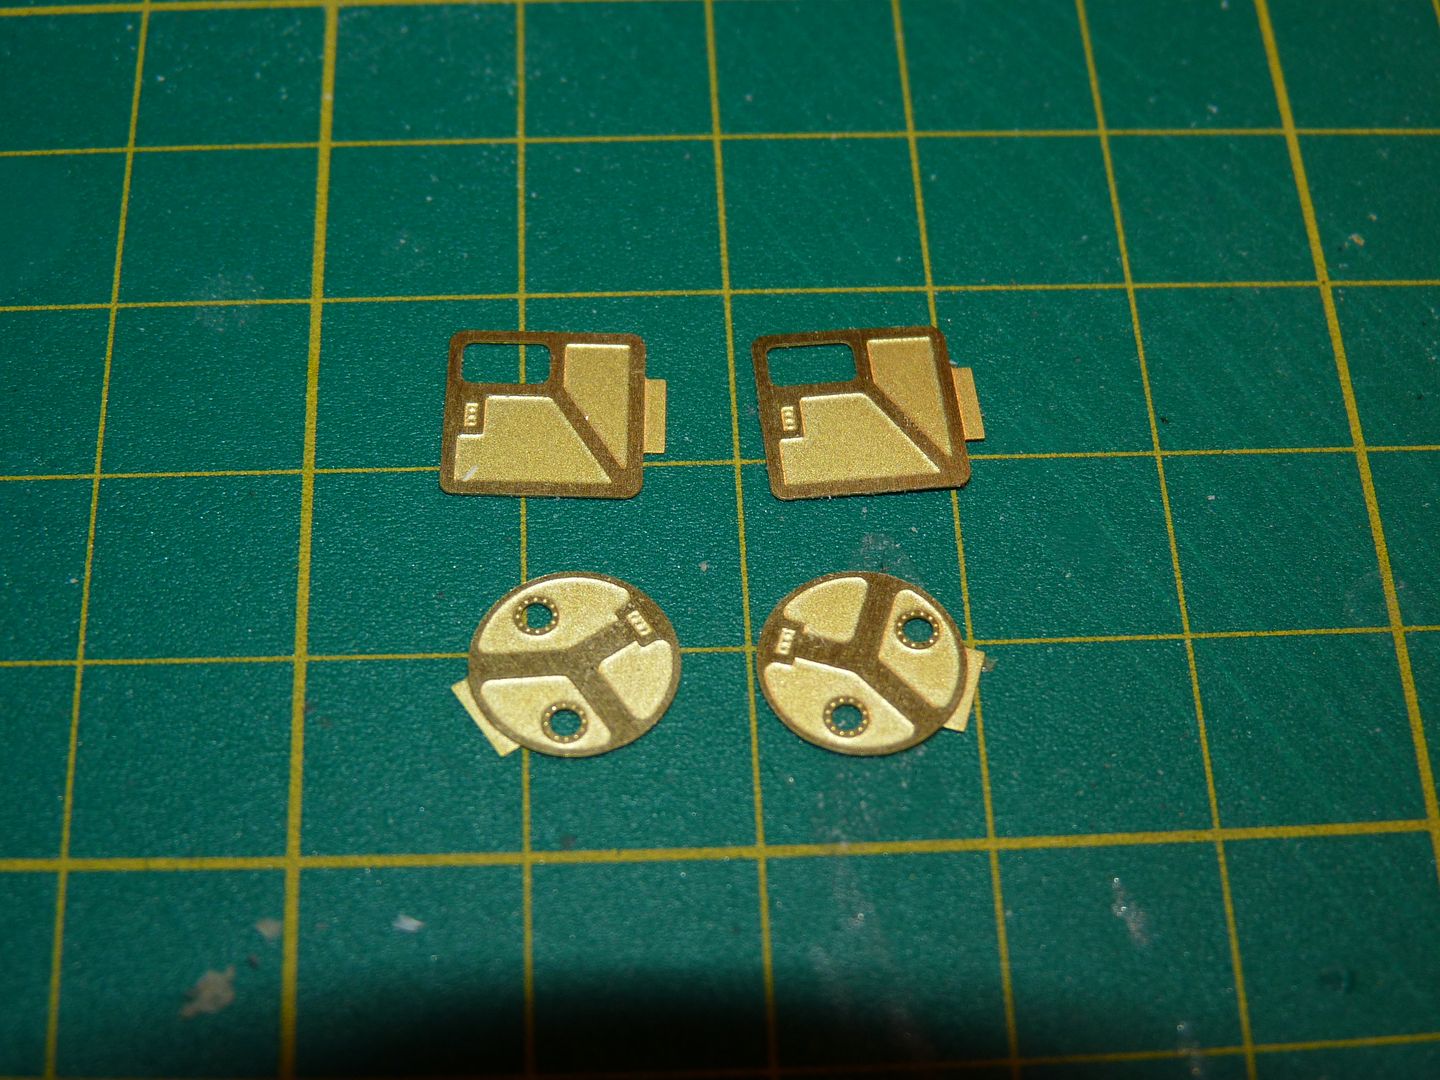
Hatches installed....

Image

Image


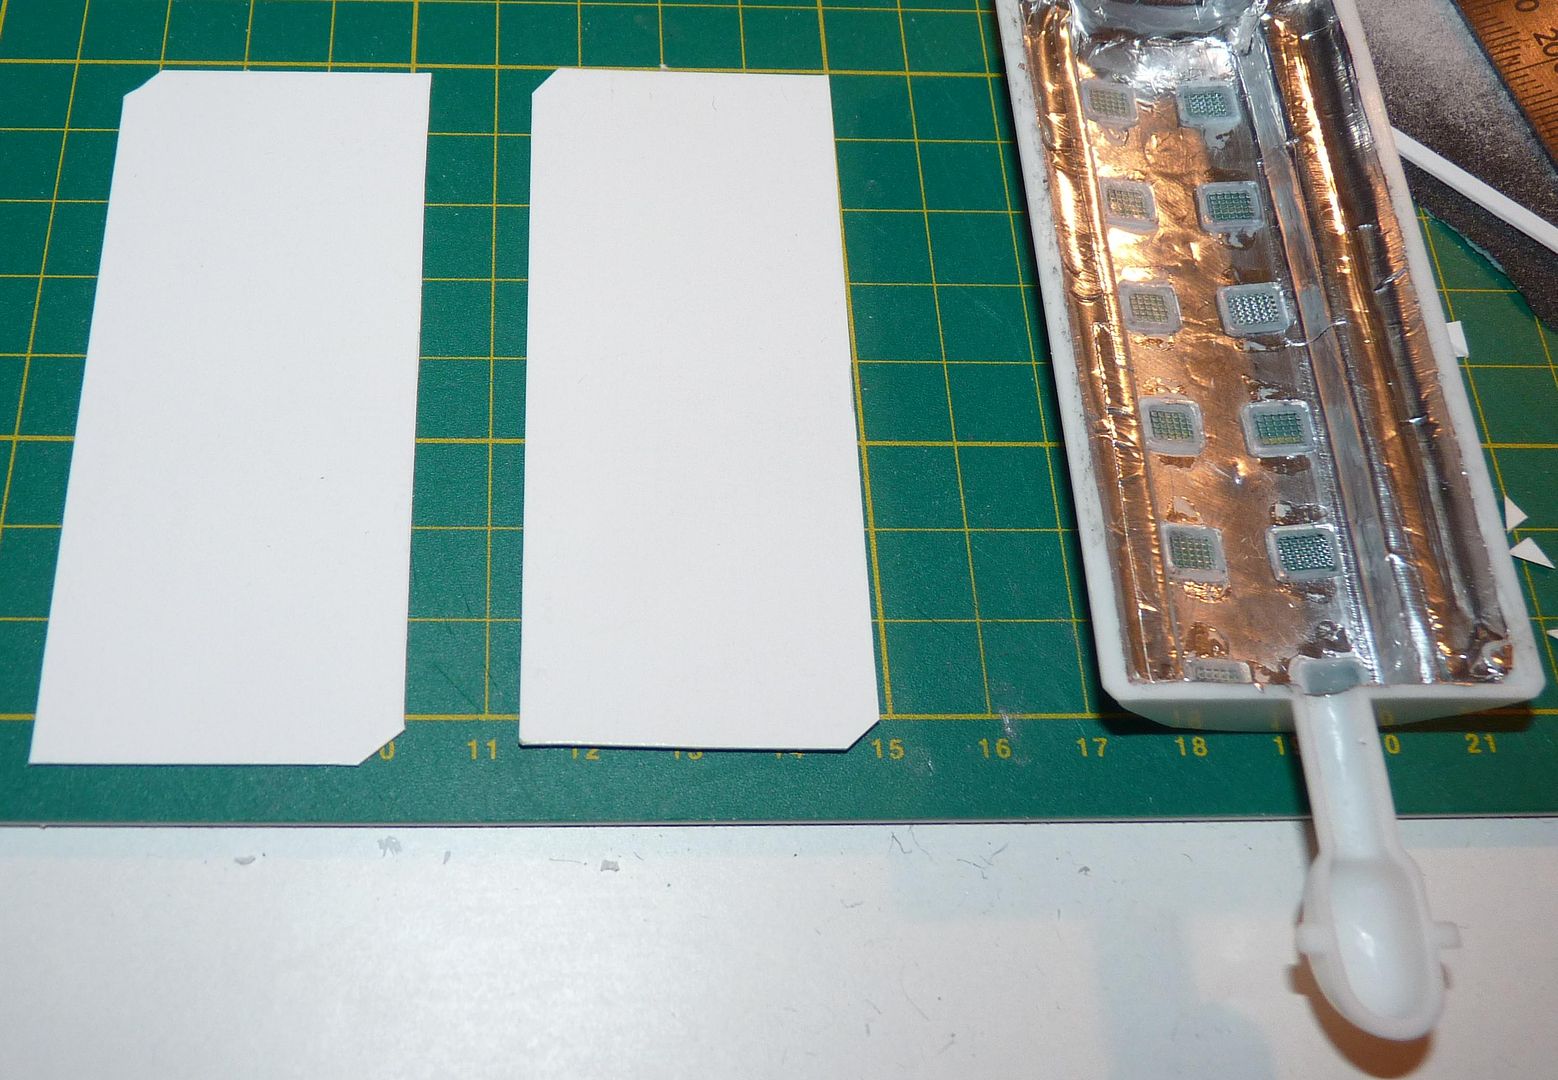
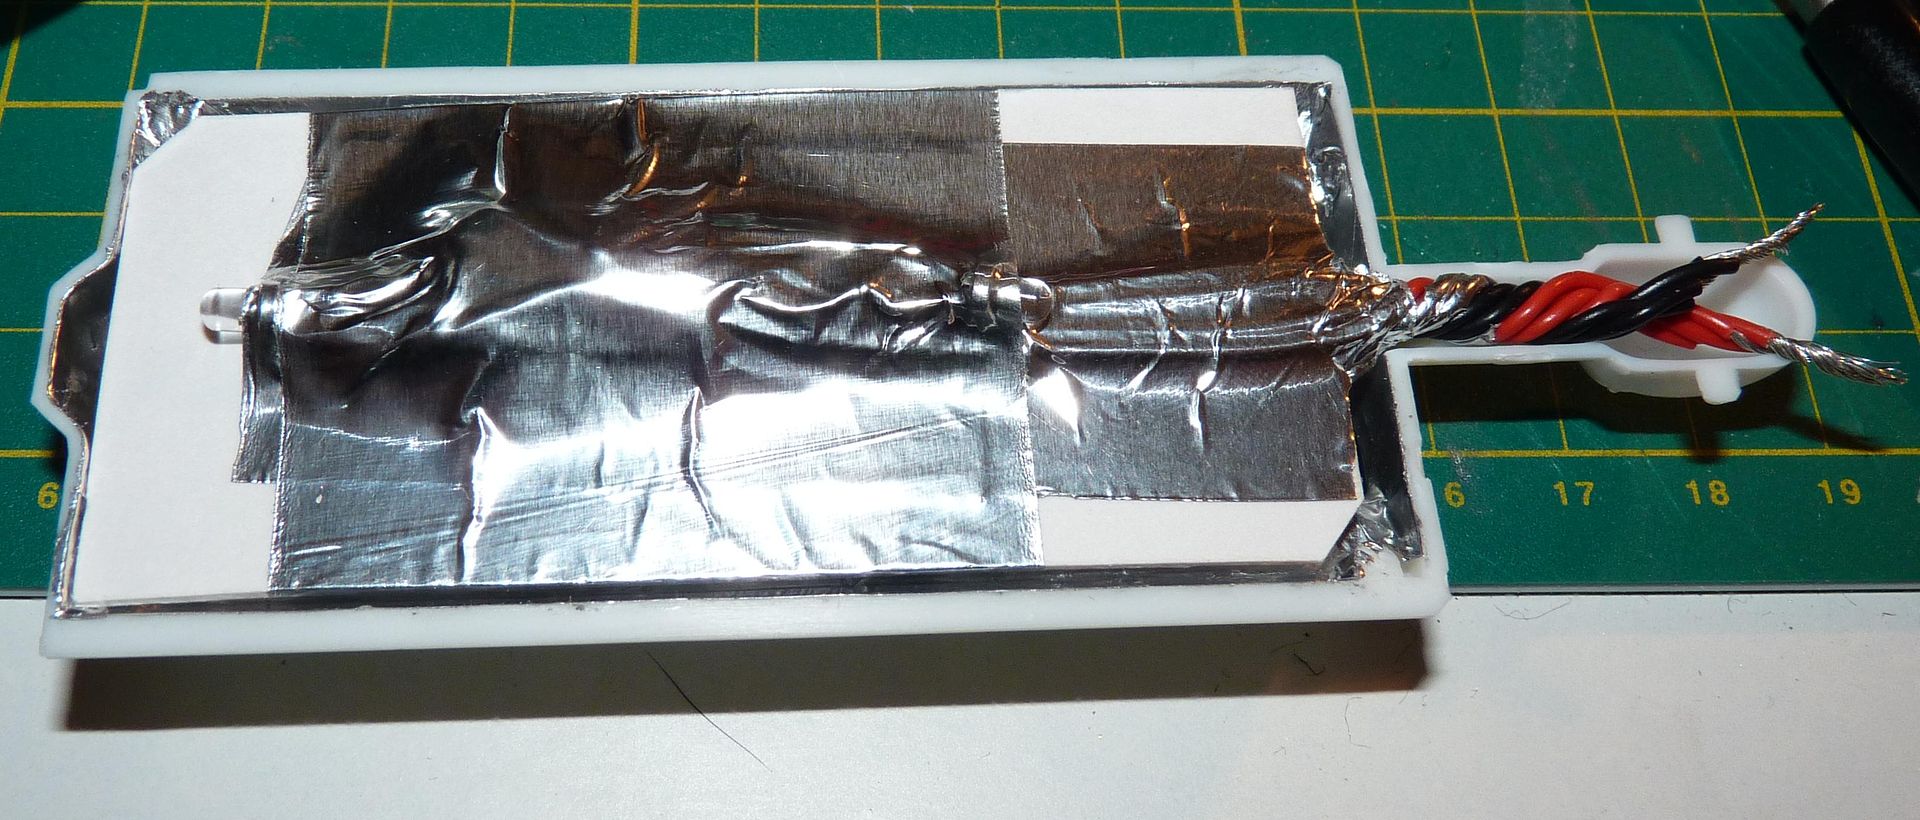
I've been experimenting with the lighting for the habitation module....I decided to go with just four 3mm ultrabright white LED's mounted two per side of a white card separator....

First I cut the card...this came from the backing card from the brass set and serves to both reflect the light and prevent a see-through effect through the module....

Image

I also painted over certain windows to give the effect of certain cabins being unoccupied...this helps create the illusion of separate rooms rather than one large area like on Skylab...

Image

The LED's were taped on to the card facing opposite ends of the module...here it is test fitted...

Image

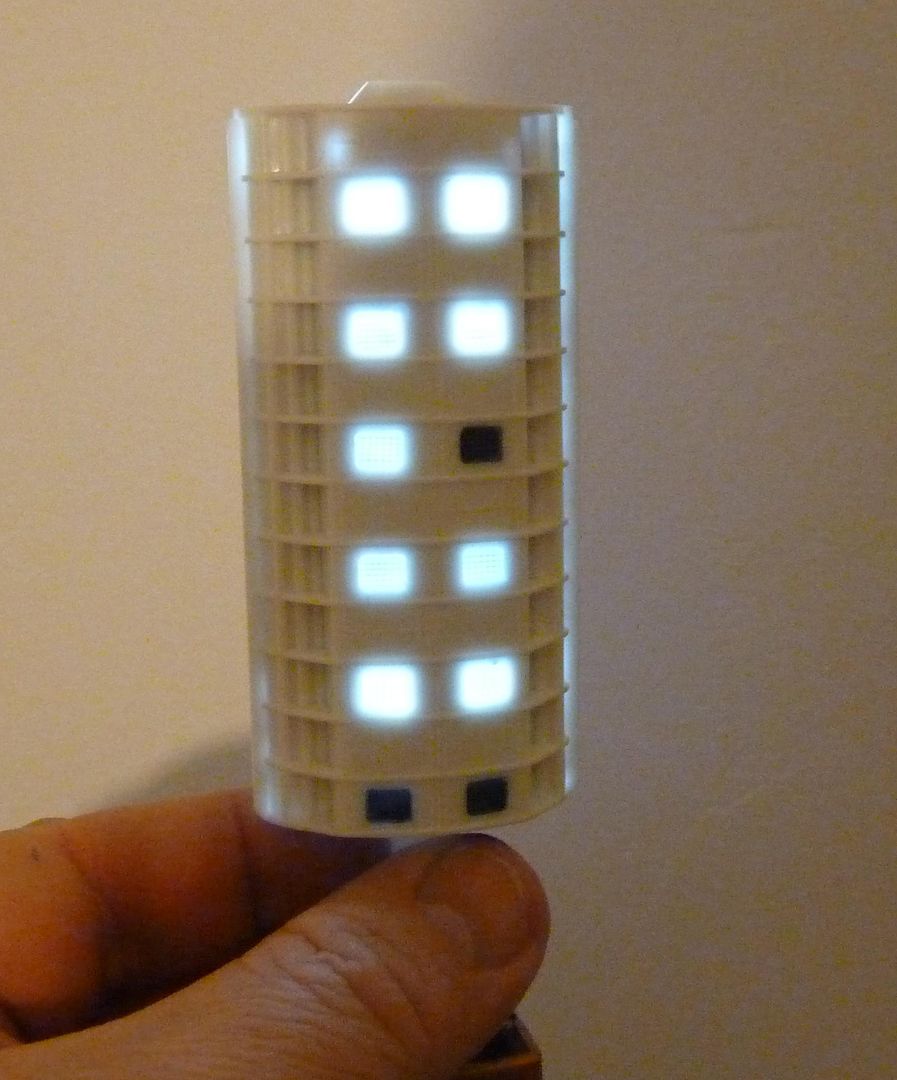
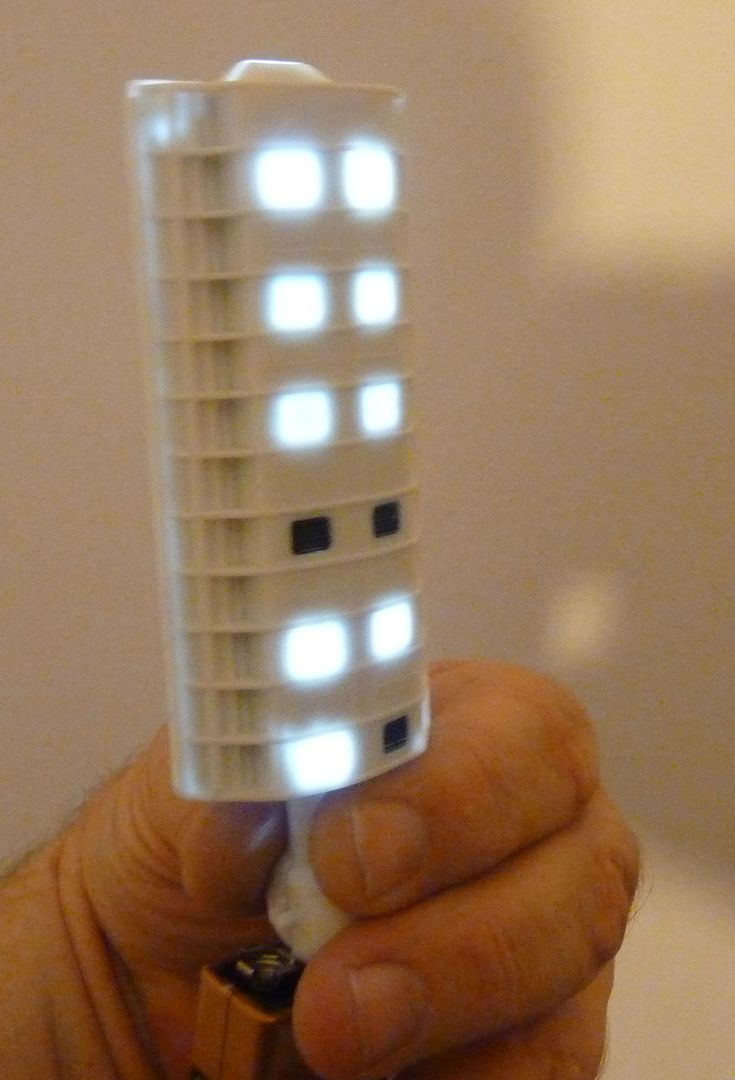
And lit....note the pieces here are not yet cemented together hence the light leaks round the seam....

Image

The ParaGrafix set provides some tiny figure shadowcasters for the windows which I'll install before gluing up the module....

Image

I'm currently bogged down in a lot of the smaller details which, due to the lighting, need completing before the next round of painting and major assembly...

First up is the capsule...I wanted to have this docked with the main ship but with the cockpit lit so the first job was to carefully open up the windows...

Image

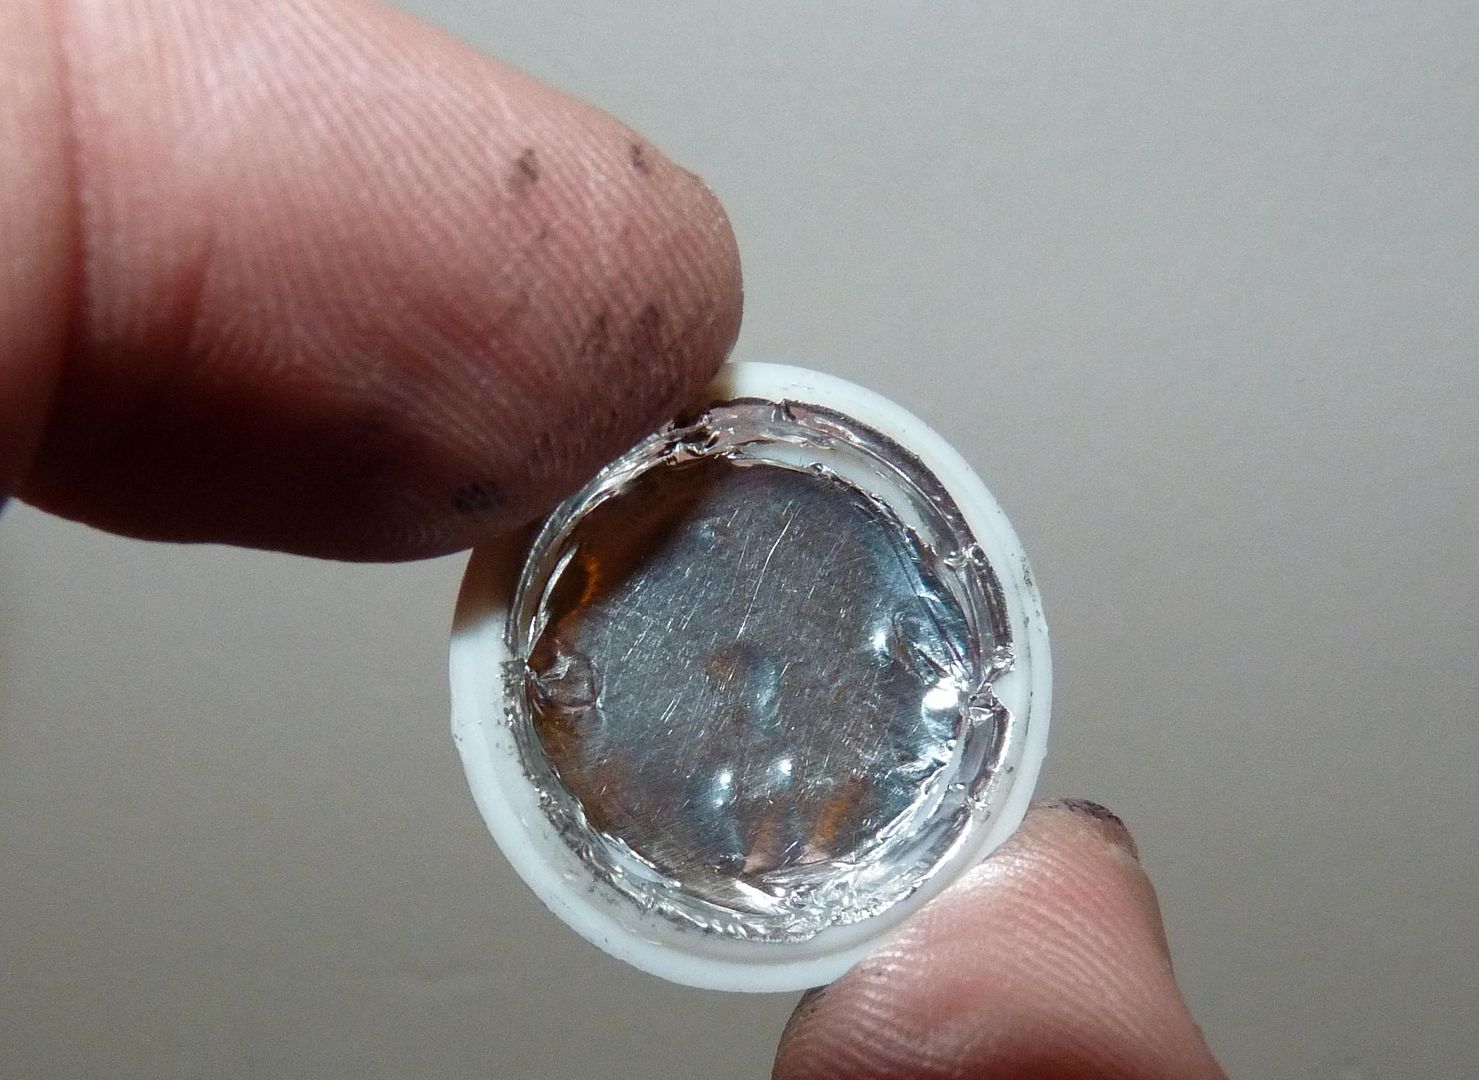
The interior is lit by two 3mm red LED's....space is tight in here so I soldered the legs together and fed the wires through the nosecone...the resistor will have to be connected on the inside of the main ship...

Image

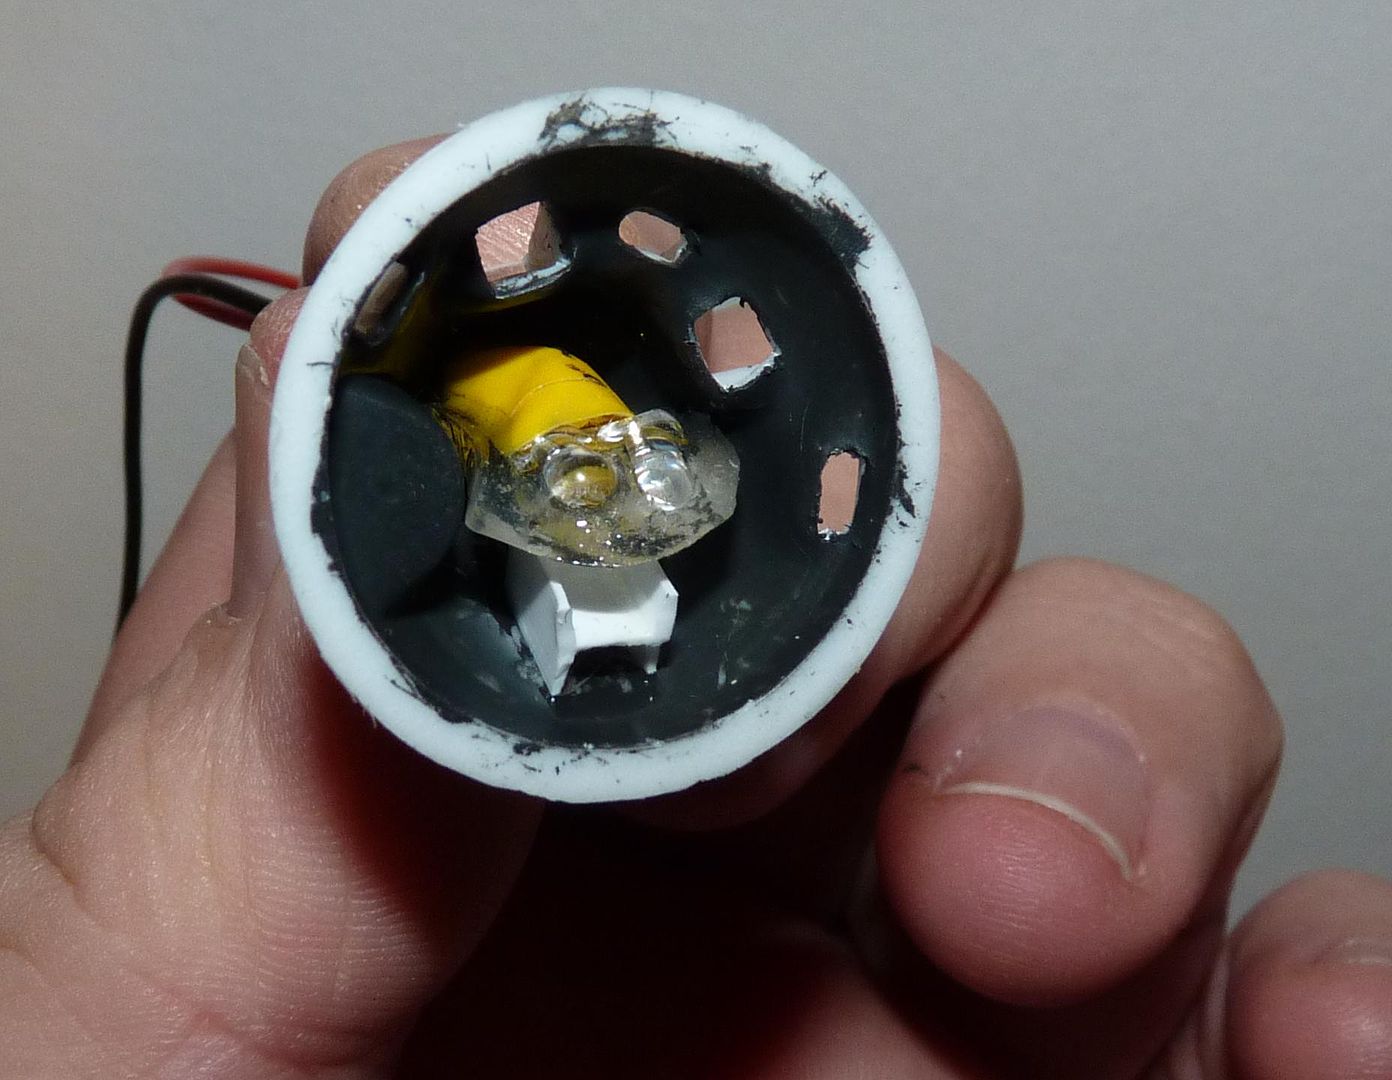
The back wall of the capsule was lined with a piece of aluminium tape to reflect the light forwards...I did think of adding some detail here but the capsule is so close to the main ship when docked that you can't really see directly through the windows anyway so in the end I left it plain....

Image

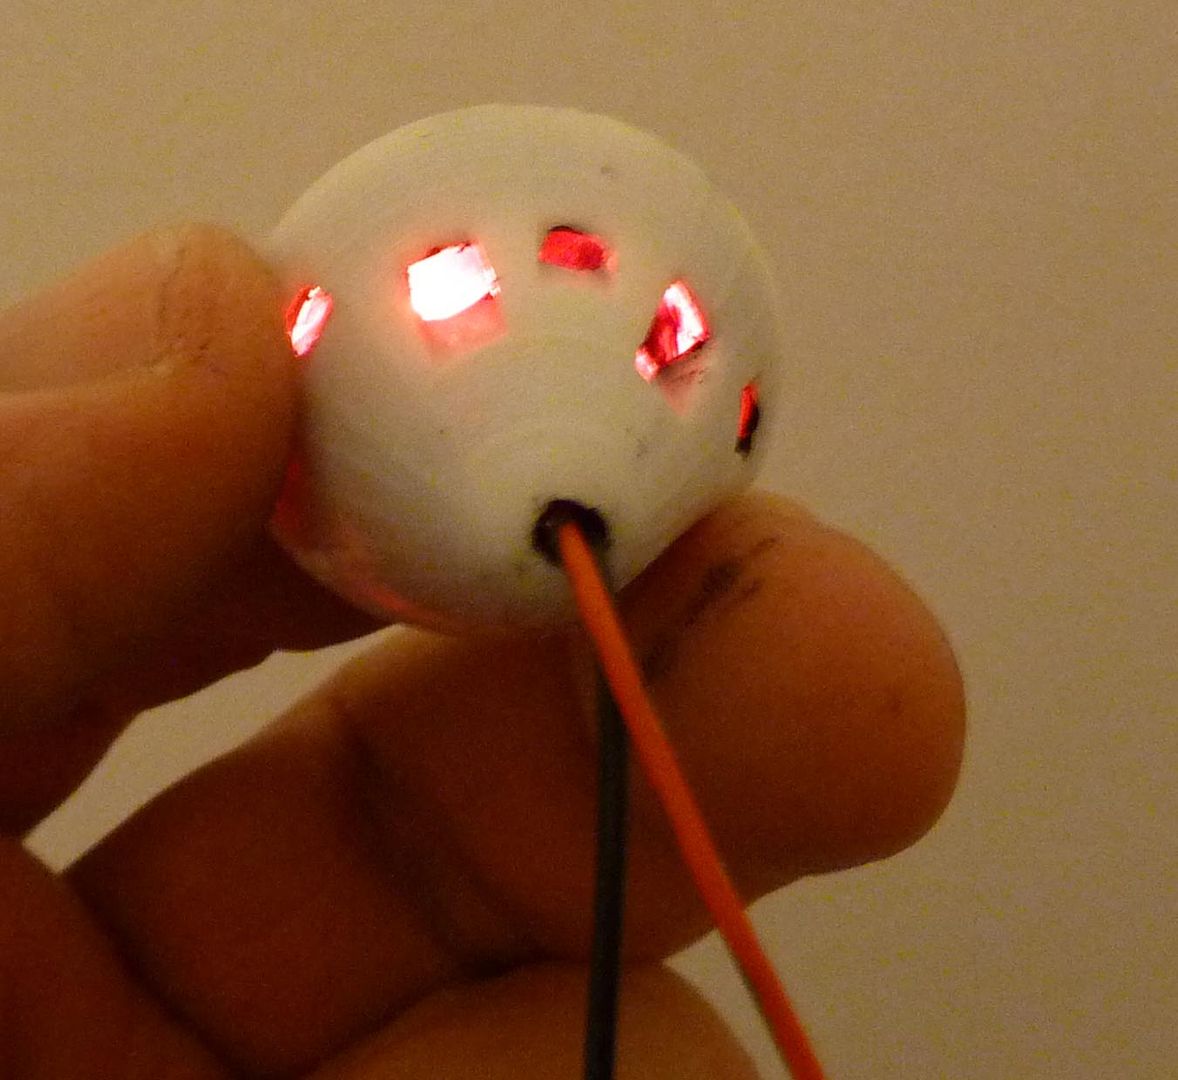
Here's a lighting test....

Image

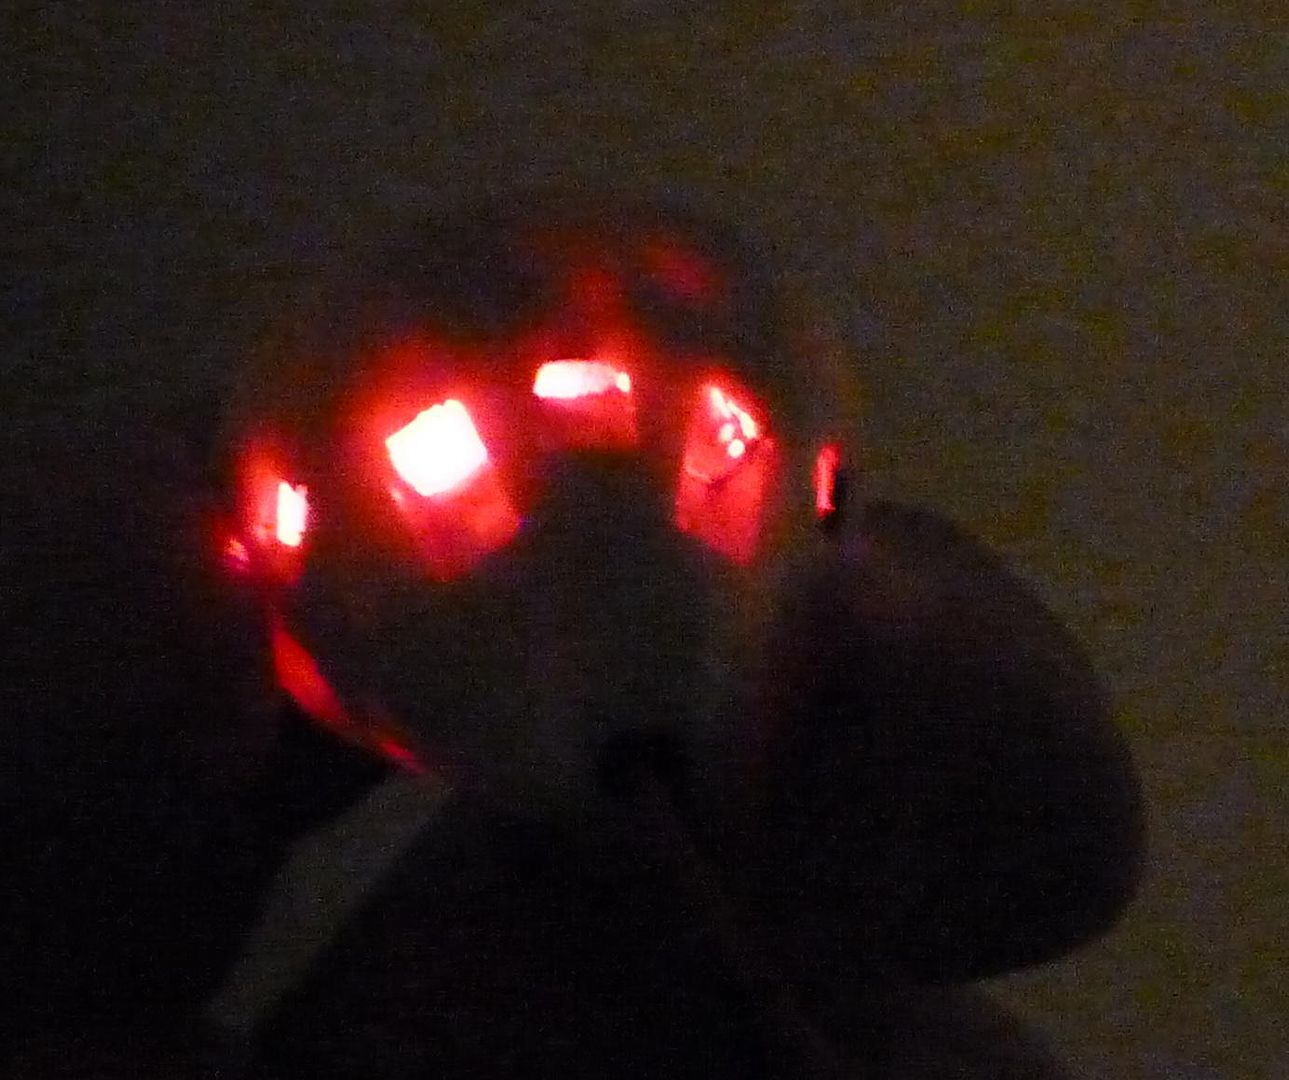
And in the dark....obviously a coat or two of flat black will be required as a primer to block those light leaks....

Image

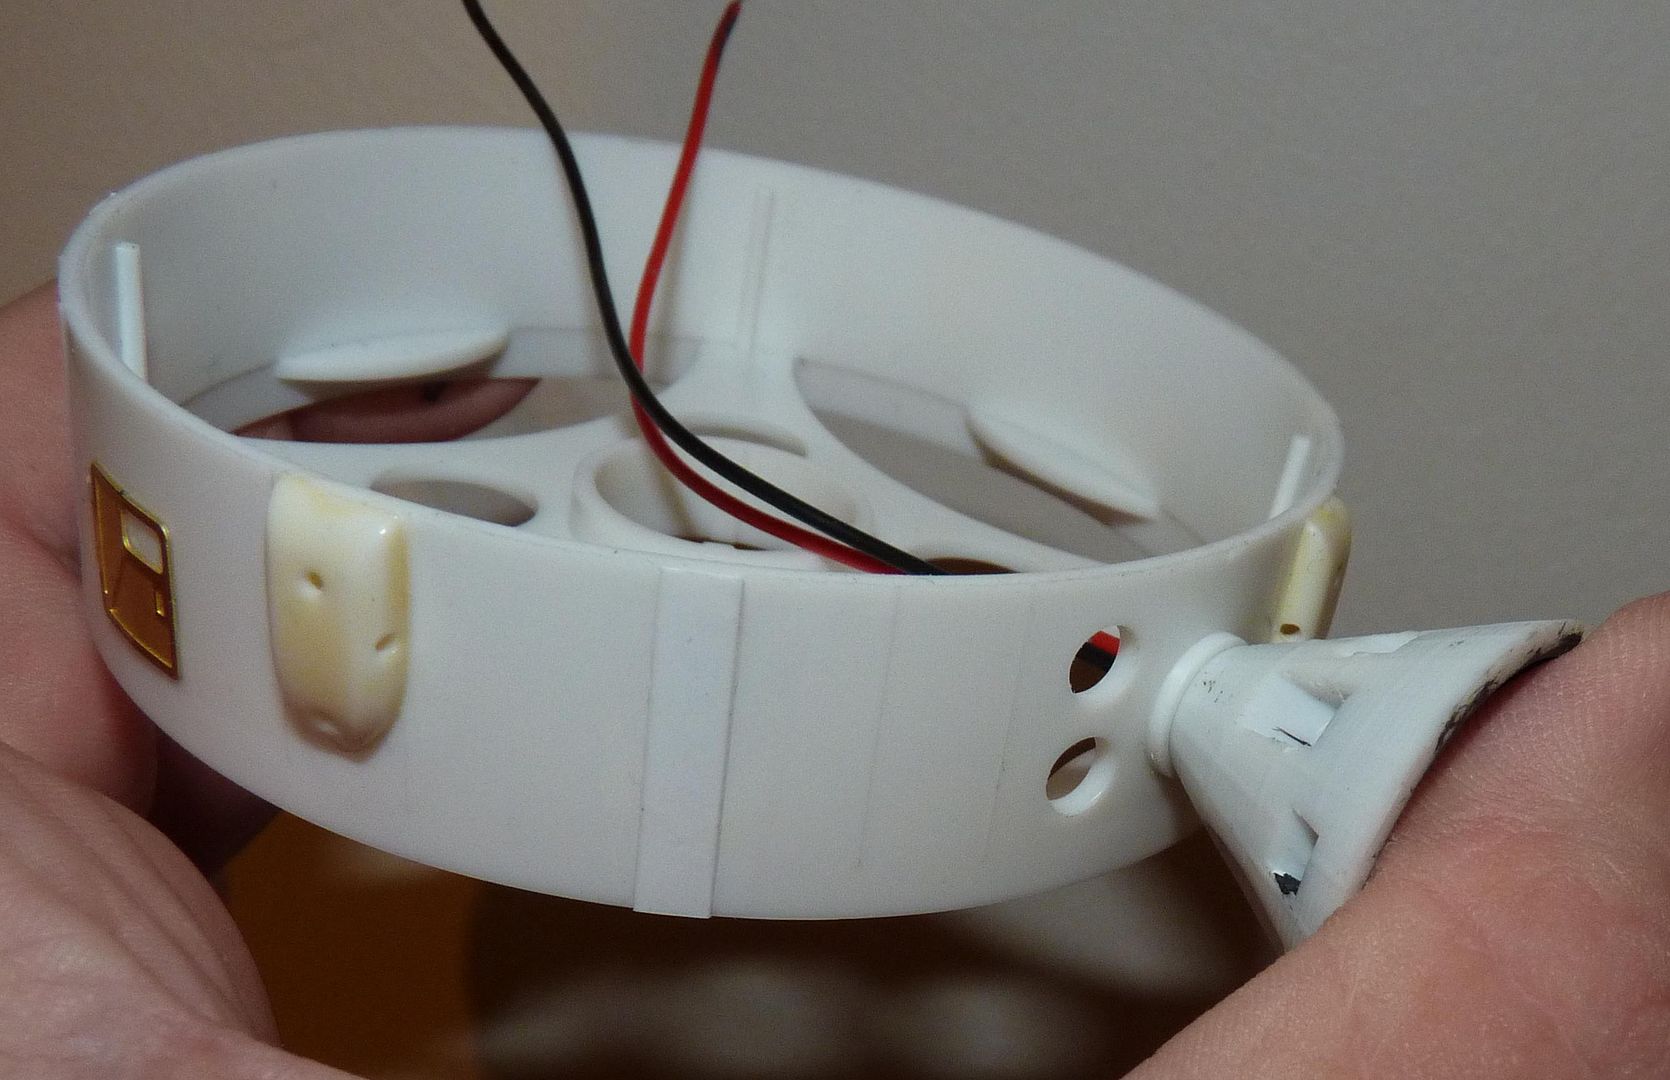
Here it is test fitted to the airlock on the forward module....

Image

There are two viewing ports next to the airlock that I intend to light....

Image

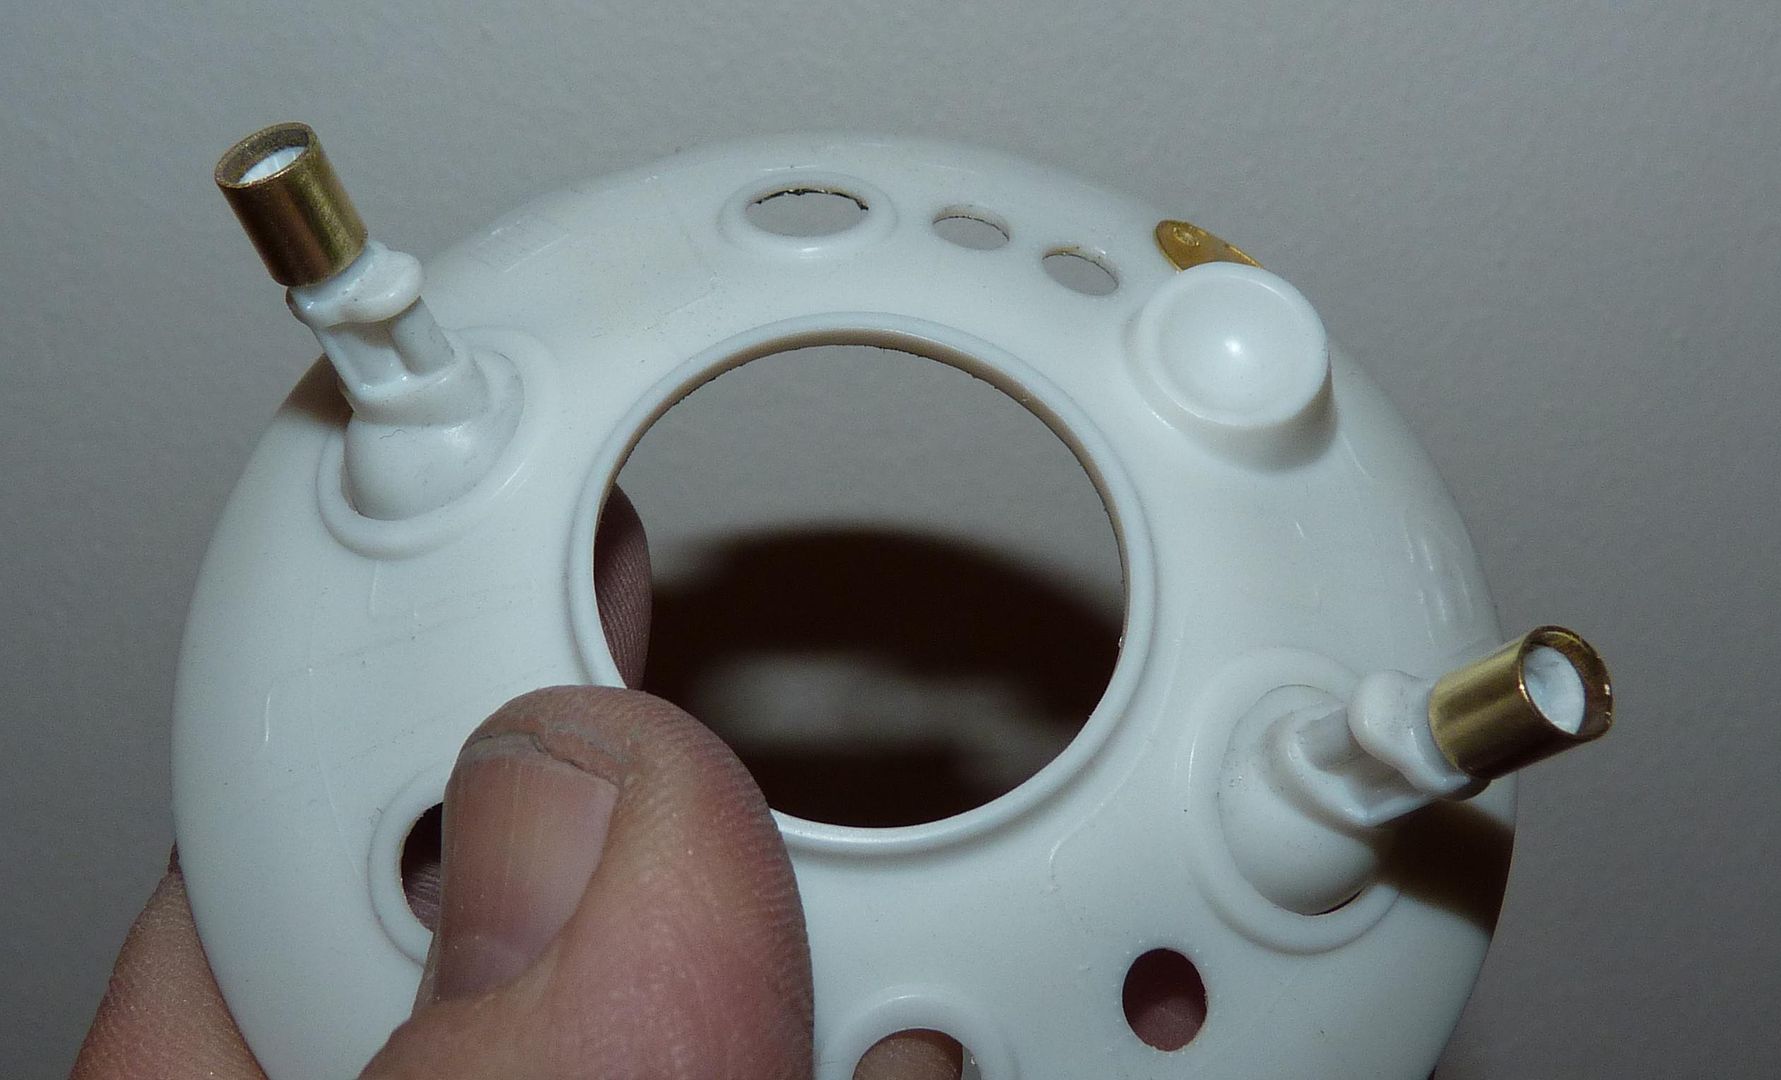
I'm not certain what these two assemblies represent...I'm guessing additional telescopes or cameras...anyway the end sections were not perfectly cylindrical after cleaning up the seams so I added an additional section of brass tubing....I'll leave these brass parts in their polished state to resemble mylar foil....

Image

Some more minor details....

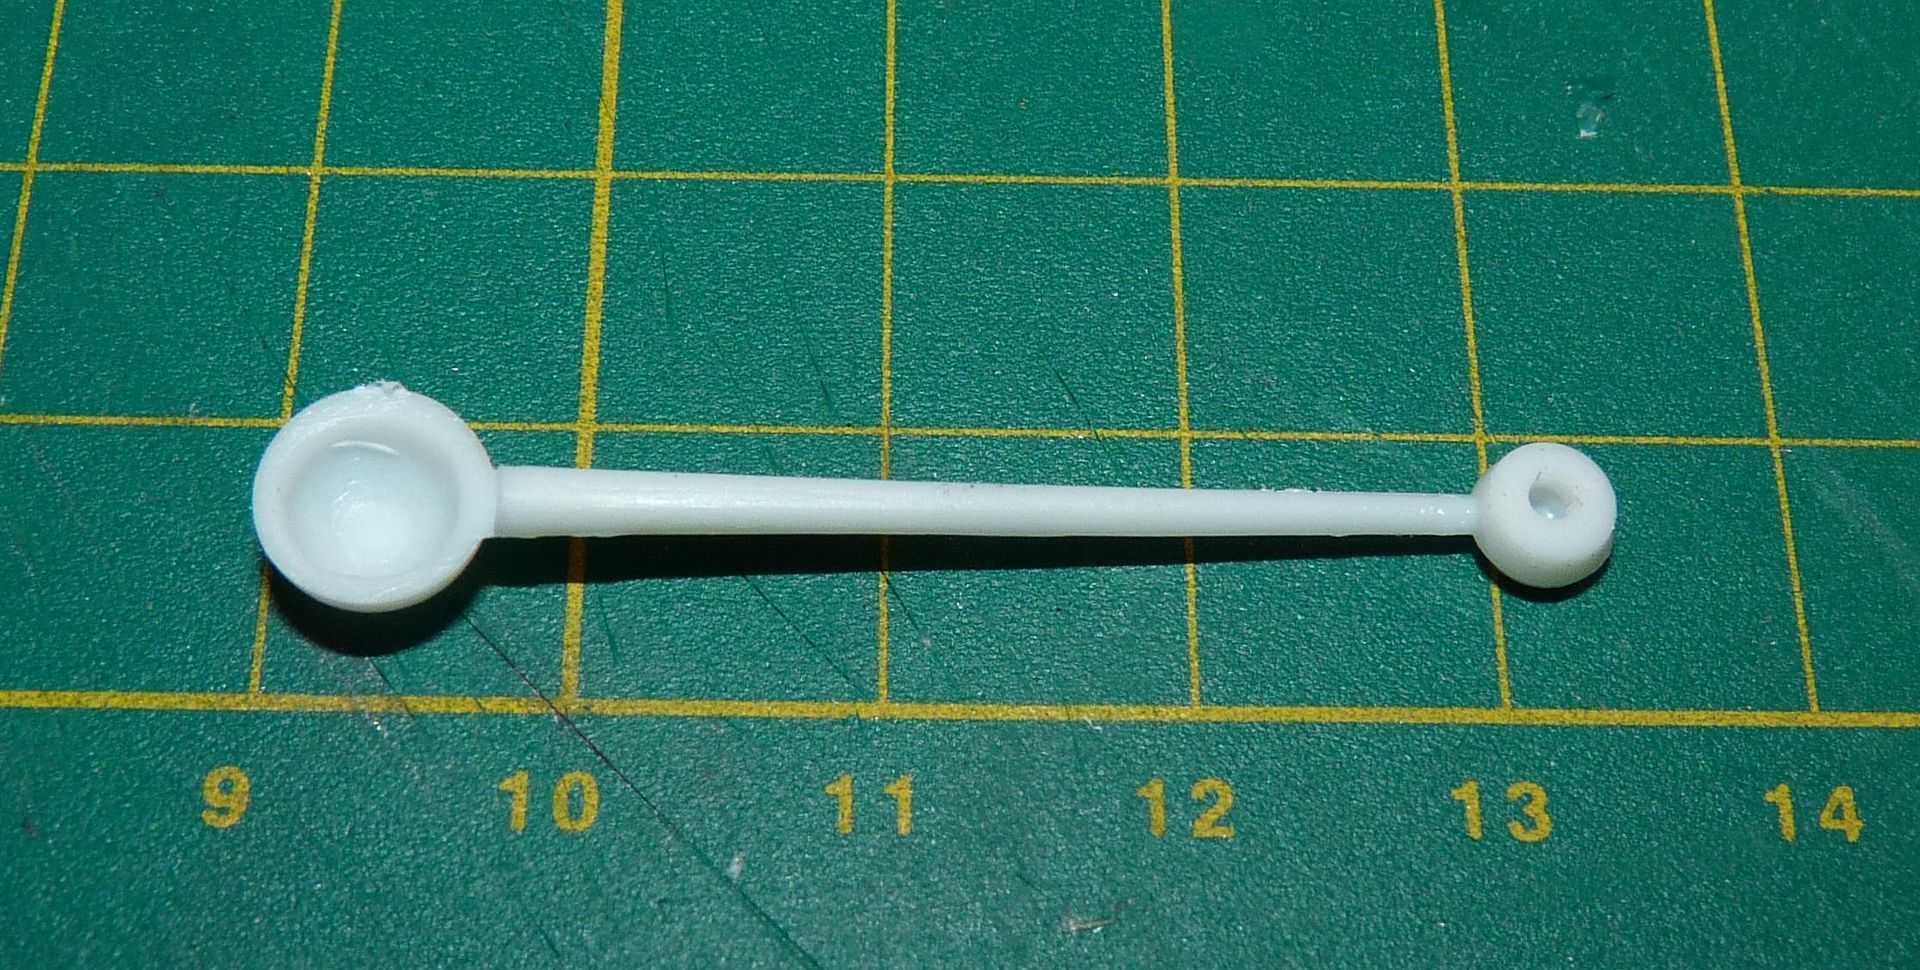
The antenna masts provided in the kit are a little crude and given that they will be supporting some awesome looking etched dishes I decided they needed replacing....here's one of the kit parts...

Image

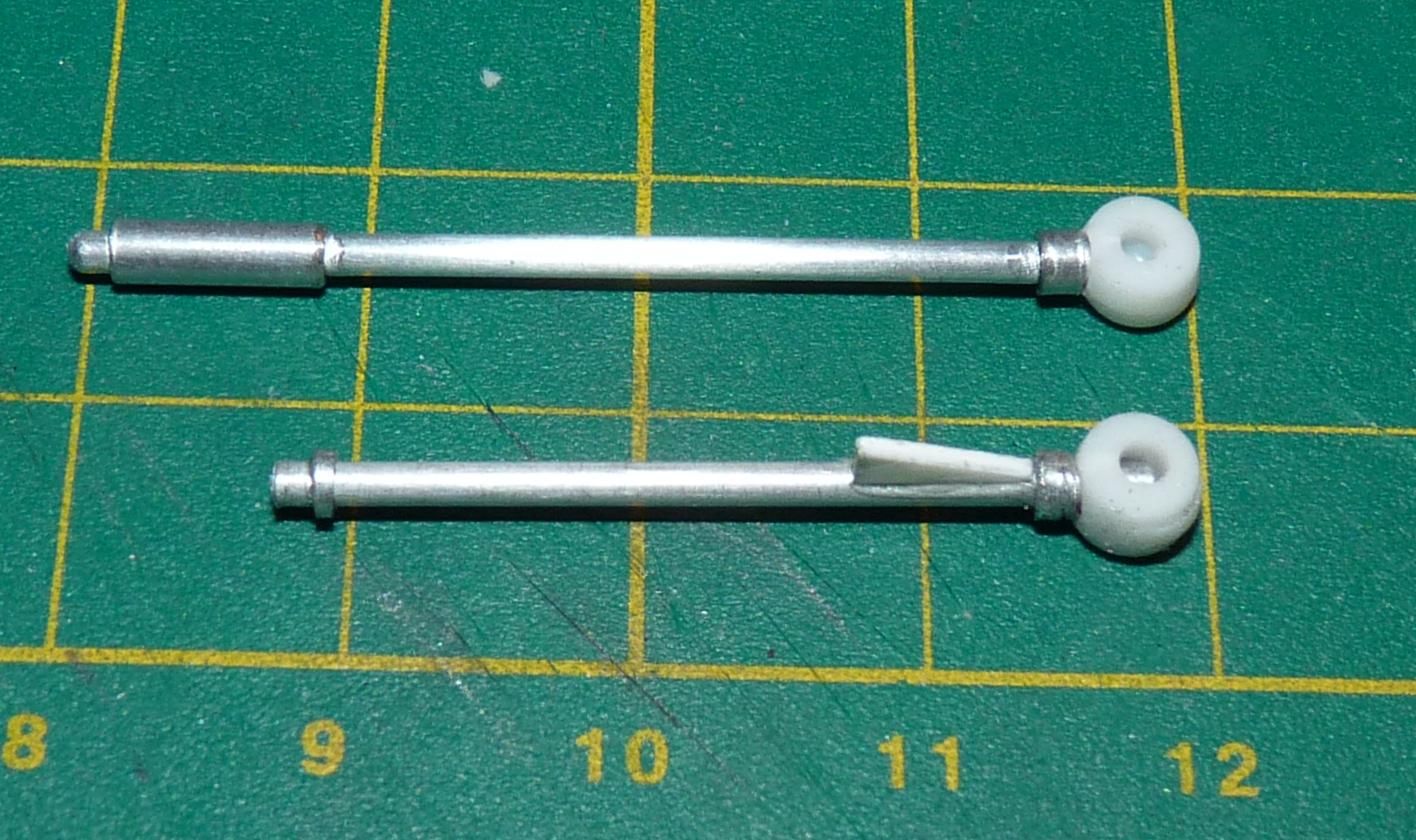
And here are the replacements made from sections of aluminium tubing grafted on to the kit hubs...the top one is for the four-dish array whilst the lower one is for the main communication dish....

Image

Finally, I've had comments on various forums and Facebook particularly from people who think I must operate in some kind of zen-like bubble of order and calm....nothing could be further from the reality, here's my work area currently....

Image

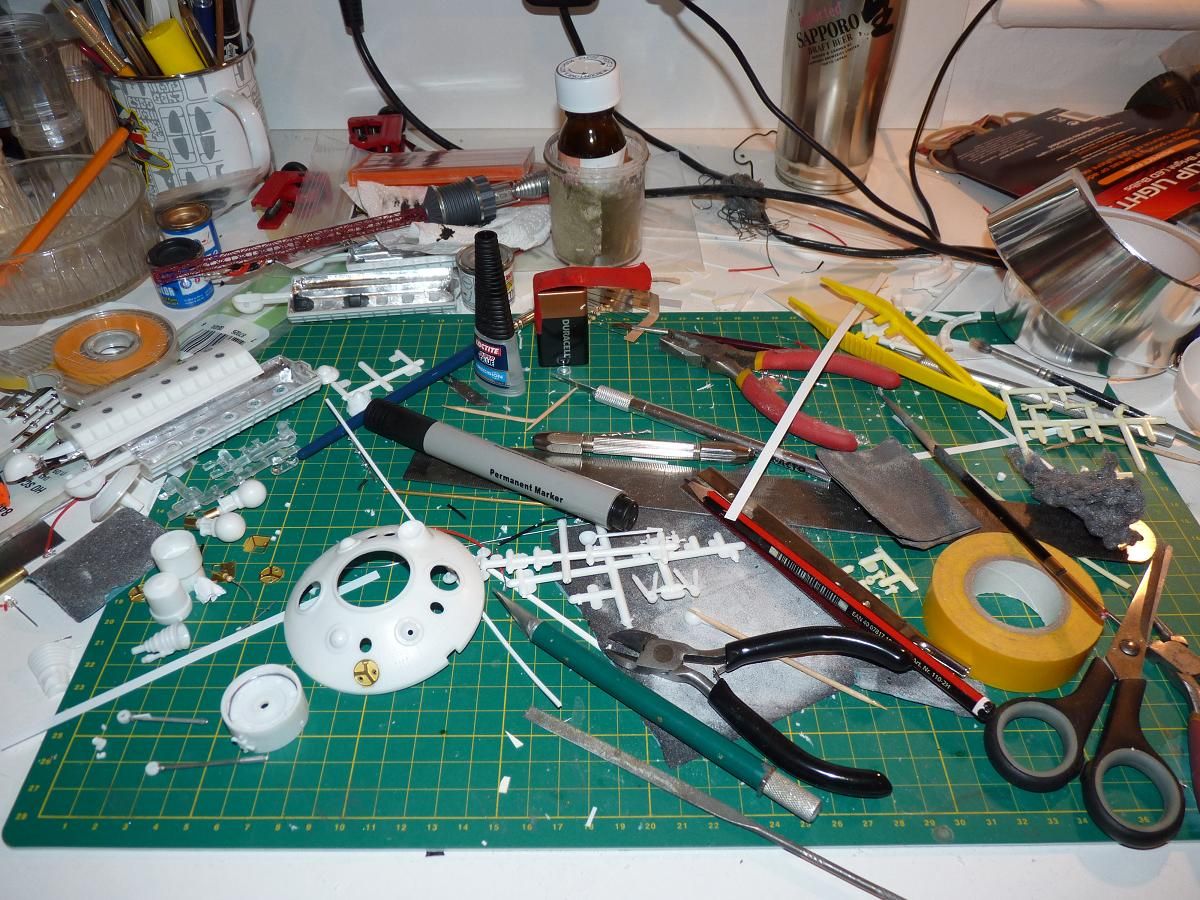
I do tend to clear up between projects but typically I tend to be working in a clear area about 4" square....
shangos70
Modelling Gent and Scholar
Posts: 4422
Joined: May 1st, 2011, 11:14 am
Location: Doncaster, Socialist Republic of South Yorkshire.

Re: MPC Pilgrim Observer Upgrade

Post by shangos70 »

Lovely stuff.
User avatar
Clashcityrocker
Modelling Gent and Scholar
Posts: 10817
Joined: May 1st, 2011, 12:31 am
Location: Adelaide. South Australia

Re: MPC Pilgrim Observer Upgrade

Post by Clashcityrocker »

Looking very nice.

Nigel
User avatar
JamesPerrin
Looks like his avatar
Posts: 13687
Joined: April 5th, 2011, 8:09 pm
Location: W. Yorkshire
Contact:

Re: MPC Pilgrim Observer Upgrade

Post by JamesPerrin »

The box art doesn't seem to give a good impression of what the model actually looks like. It appears to have some nice detail esp with the PE and your mods. What is this craft "from" TV, film book or just someone idea of an interplanetary ship?

Maybe too late but I think the truss could do with some pipes running down inside it else the engine appears to be completely isolated, but maybe, as it's nuclear, that's the idea.
Classic British Kits SIG Leader Better to fettle than to fill
(2024 A:B 5:2) (2023 13:8:7) (2022 21:11) (2021 15:8) (2020 8:4:4)
jargonking
Onto the Clever Stuff, Now.
Posts: 119
Joined: May 4th, 2011, 12:21 am

Re: MPC Pilgrim Observer Upgrade

Post by jargonking »

The design was a proposal for a post-Apollo vehicle to travel beyond the Moon. Here's some background from the Citizen in Space site....

"As the Apollo program wound down in the late 60′s, NASA began to think about how it could reuse some of the technology and systems that had been developed for Apollo. This recycling effort was called the Apollo Applications Program. Apollo Applications led to Skylab, America’s first space station, but it was intended for the program to be more than just a one-shot. Skylab was to be followed by Skylab II , which would be more reusable and incorporate the first use of artificial gravity. NASA hoped the Skylabs would lead to a 12-man space station and then a 50-man space base. There were also concepts for a lunar Skylab in polar orbit about the Moon. One by one, all of these concepts were dropped as NASA was forced to divert funding to its priority program – the development of the Space Shuttle.
One of the more interesting concepts from this period did not come from NASA but from a model company called MPC. It may seem unusual for a realistic space-vehicle concept to come from a toy company, but it’s not too surprising given that the Pilgrim Observer was designed by the late G. Harry Stine. An aerospace engineer who learned his trade under Dr. Wernher von Braun launching V-2 rockets at White Sands, Harry Stine was one of the early advocates of commercial space and author of several books on space exploration and space development, including The Third Industrial Revolution. Although the Pilgrim Observer was not based directly on NASA concepts, Stine did incorporate much of the technology which he knew to be current at the time.
The Pilgrim Observer was a reusable, nuclear-powered deep-space craft incorporating artificial gravity. For propulsion, it used the NERVA nuclear rocket engine which had already been tested-fired on the ground. The design included an Apollo taxi vehicle, with a shortened service module, and multiple telescopes and antennas for studying science targets. The Pilgrim Observer was not designed to land on a planet, but given sufficient propellant, it could carry out missions anywhere in the inner solar system. (The propellant tanks that come with the kit seem a bit small for the missions contemplated.) One possible mission was a Mars rendezvous with a Venus flyby en route. An asteroid rendezvous was another possible mission. Stine was already aware that the asteroids might be rich source of resources, and a plastic asteroid was included with the kit. The craft was sized for a crew of 12."
jargonking
Onto the Clever Stuff, Now.
Posts: 119
Joined: May 4th, 2011, 12:21 am

Re: MPC Pilgrim Observer Upgrade

Post by jargonking »

By the way James, I agree on the lack of pipes in the truss however I felt it detracted from the finesse of the etched part and I'm building this as a sort of desktop model anyway, like the contactors would use to sell the concept to Congress.
User avatar
IvanV22
Modelling Gent and Scholar
Posts: 1205
Joined: January 24th, 2012, 9:36 am
Location: Norway

Re: MPC Pilgrim Observer Upgrade

Post by IvanV22 »

Looking great, and thanks for the background info!!!!! Very interesting reading, have never heard of this before!
Best from Ivan
User avatar
Dirkpitt289
NUMA's Auto Mechanic
Posts: 8724
Joined: May 2nd, 2011, 1:55 am
Location: New jersey USA
Contact:

Re: MPC Pilgrim Observer Upgrade

Post by Dirkpitt289 »

Man that PE makes a world of difference in this kit.
.... Dirk

Beware of the DOG's of WAR

My Youtube Channel
https://www.youtube.com/user/ModelingGu ... rid&view=0
jargonking
Onto the Clever Stuff, Now.
Posts: 119
Joined: May 4th, 2011, 12:21 am

Re: MPC Pilgrim Observer Upgrade

Post by jargonking »

More progress with the lighting...this time the Hydroponic module....I decided to go with a green glow, partly to contrast with the rest of the ship and partly to give an impression of vegetation inside....yes. I know that they would grow the plants under 'daylight' conditions but remember this is designed to be a contractors desktop display so green it is....

I did something I rarely do these days in that I fabricated a couple of rudimentary circuit boards out of stripboard....

Image

These were mounted back-to-back and held together with miniature cable ties....

Image

The backs of the boards were lined with PVC tape to prevent shorts and the two separated by a thin section of card...

Image

A test on the bench....

Image

And in the dark....

Image

The assembly was mounted in the module using 5-minute epoxy....

Image

A test with the module taped up....

Image

And again in the dark....

Image

More coming up....:)
User avatar
Clashcityrocker
Modelling Gent and Scholar
Posts: 10817
Joined: May 1st, 2011, 12:31 am
Location: Adelaide. South Australia

Re: MPC Pilgrim Observer Upgrade

Post by Clashcityrocker »

Very impressive. I'm sure the customer will be happy with it.

Nigel
User avatar
Eric Mc
Modelling Gent and Scholar
Posts: 4811
Joined: May 3rd, 2011, 8:27 am
Location: Farnborough, Hants

Re: MPC Pilgrim Observer Upgrade

Post by Eric Mc »

A work of genius - and a fantastic back story the the real concept as well.
Post Reply

Return to “Real Space, Sci-Fi and What-iffery”