MPC Pilgrim Observer Upgrade

Re: MPC Pilgrim Observer Upgrade
Really impressive! Looking forward to seeing more of this build!
Best from Ivan
-
jargonking
- Onto the Clever Stuff, Now.
- Posts: 119
- Joined: May 4th, 2011, 12:21 am
Re: MPC Pilgrim Observer Upgrade
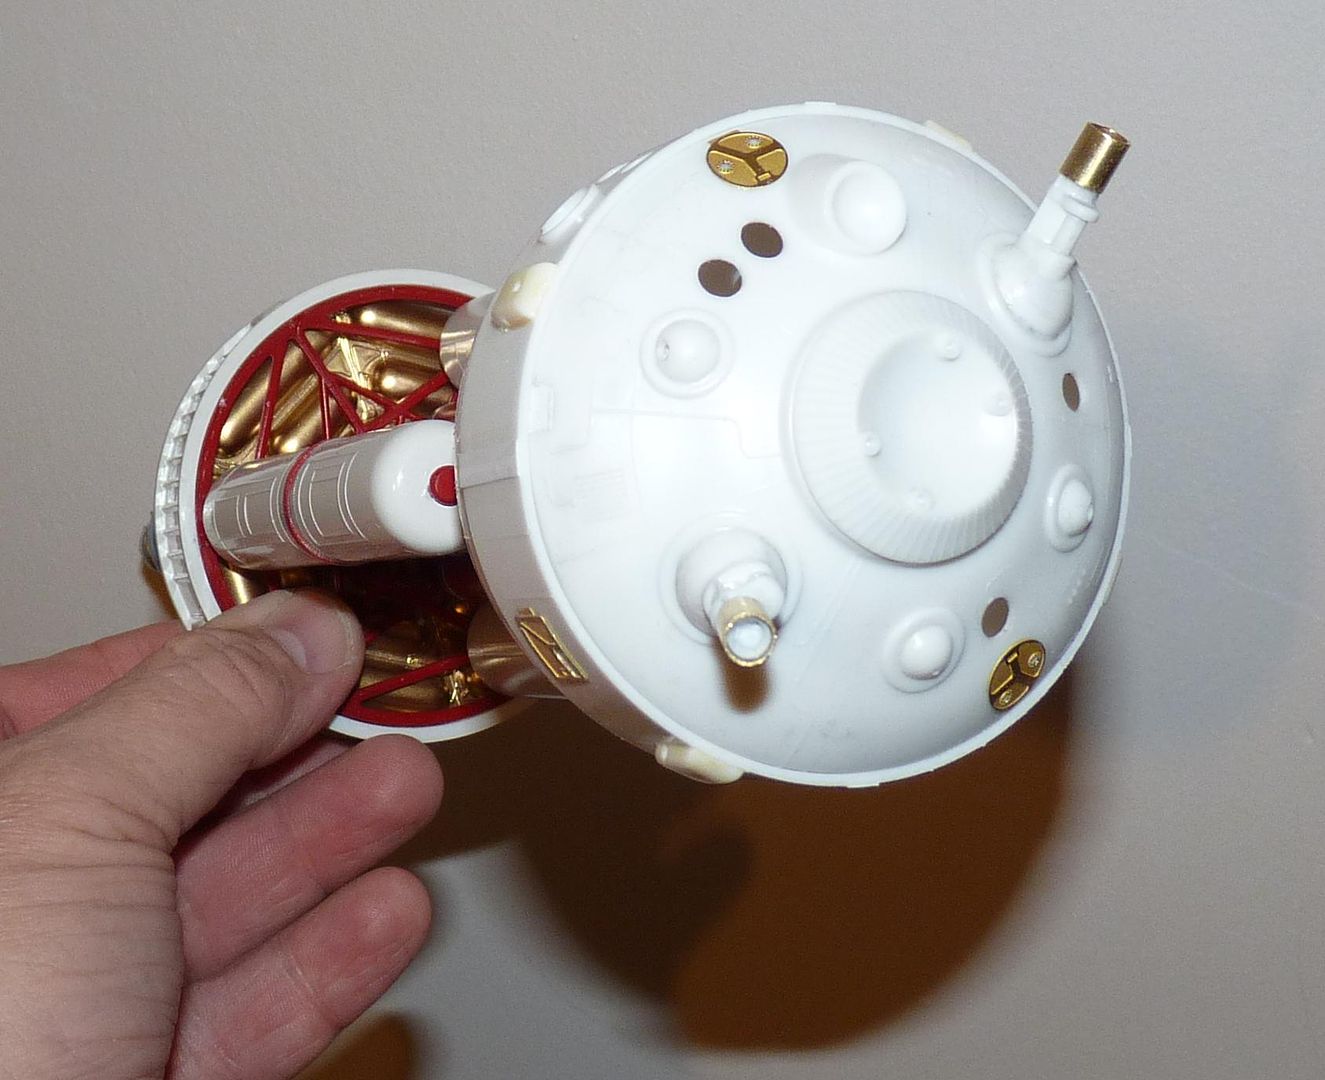
A test fitting of the forward module prior to painting and installing the lights....
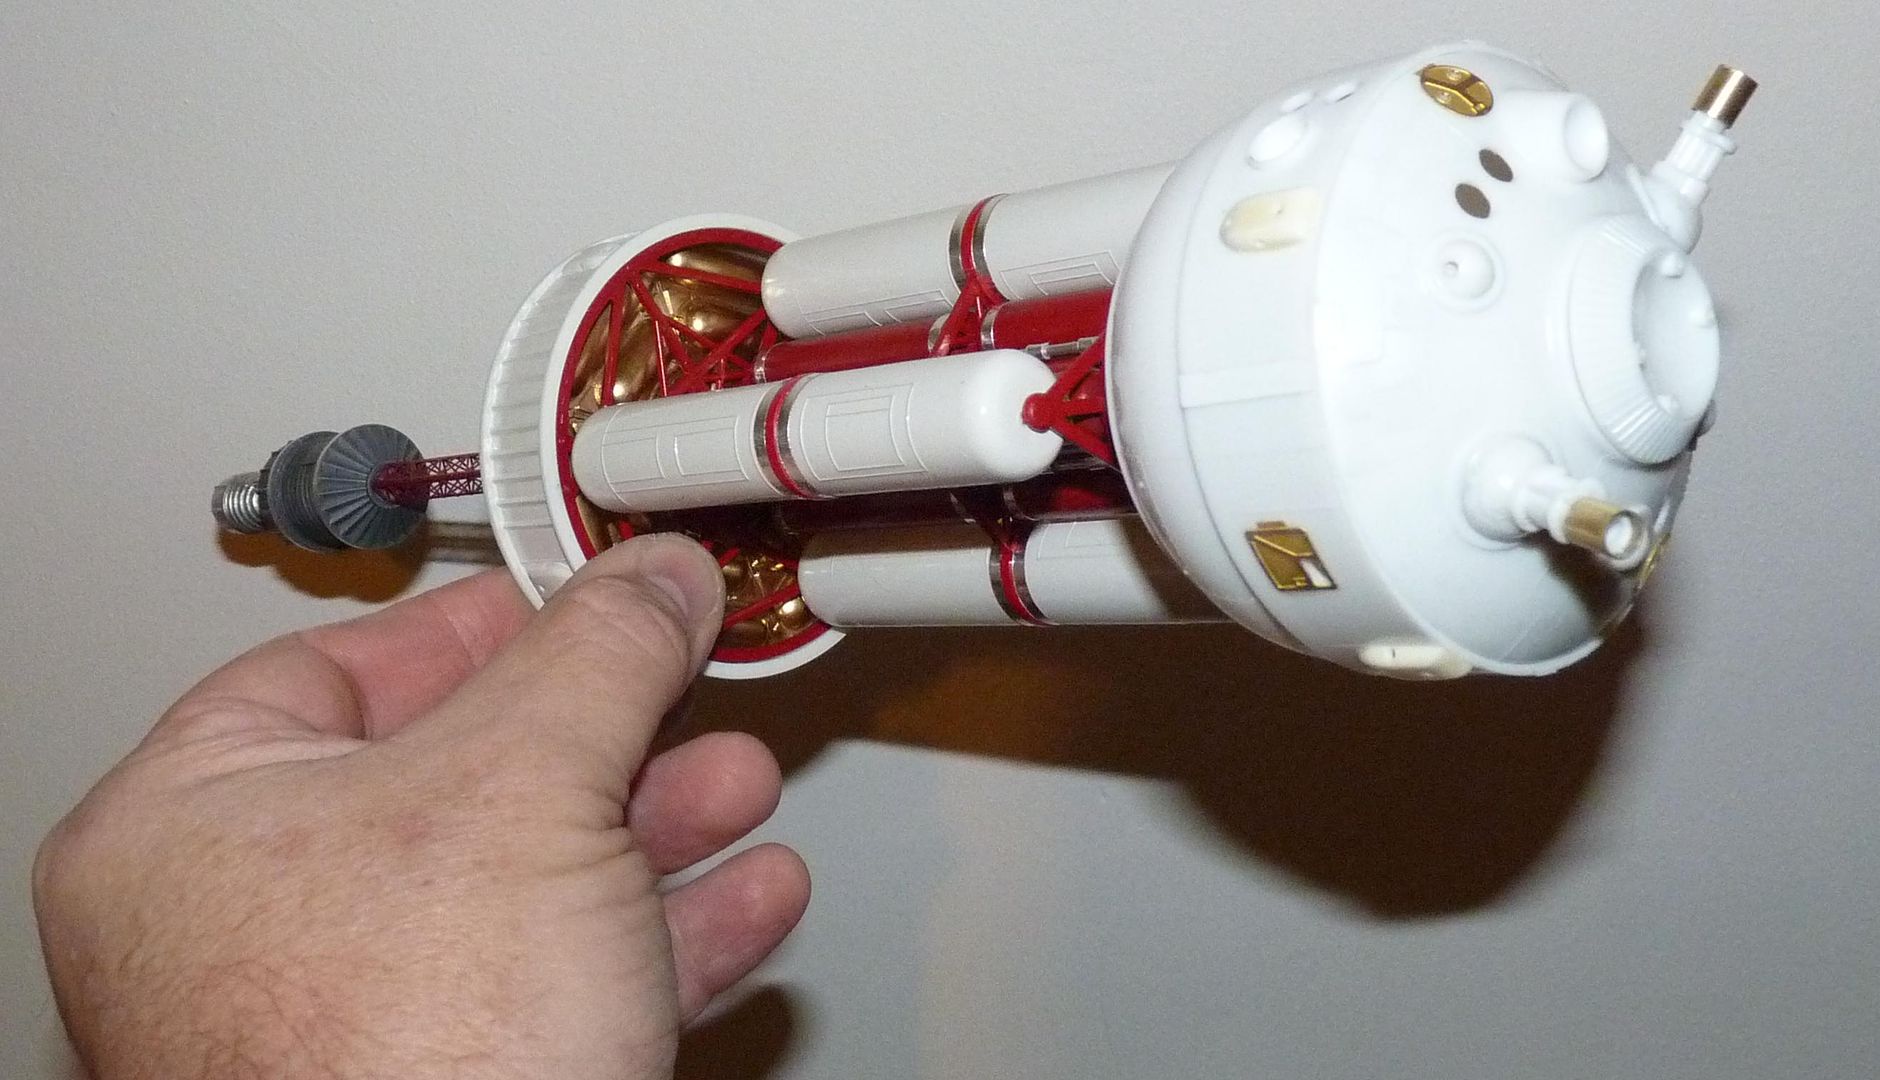
All the gimbals for the various antenna were cemented in place...I'm not going for the folding option and so just used the hemispheres without the masts attached then drilled them out for the replacement masts....
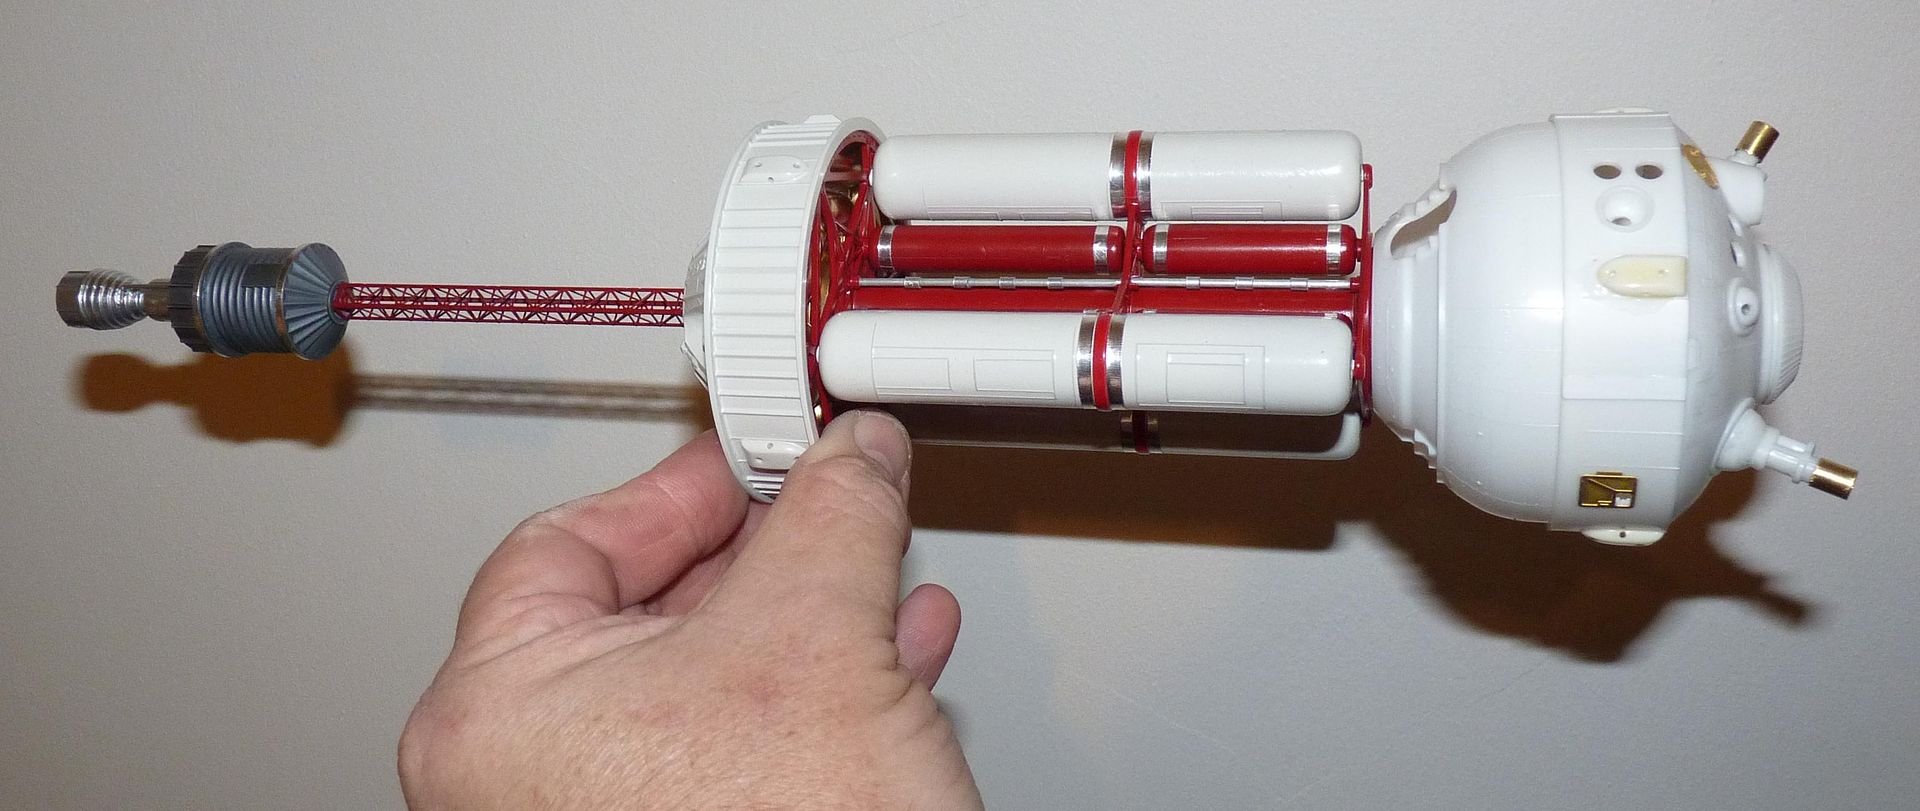
Surprising how big it is now with the engine extended...and that's even before the modules are added....
Test fit of the three hinged modules here in roomlight....
And in the dark....still light leaks to fix....
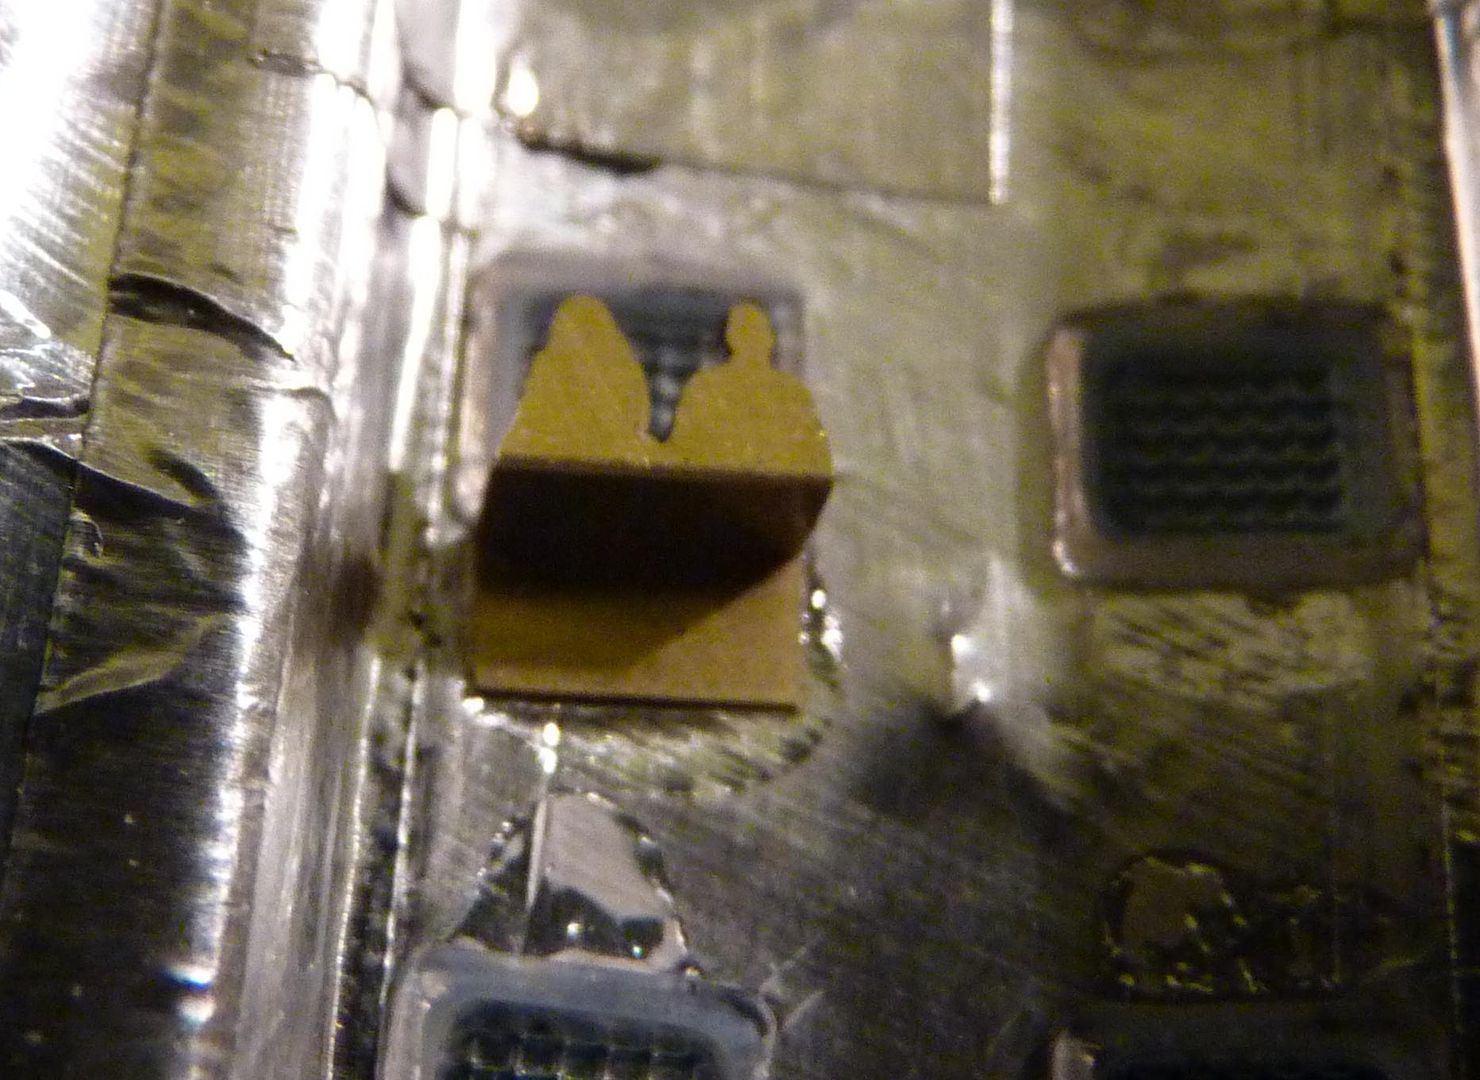
It was at this point I suddenly realised that I'd sealed up the habitation module without fitting the shadow casters at the windows...DOH!!!!....never mind, the only option was to prise it open again and fit them....
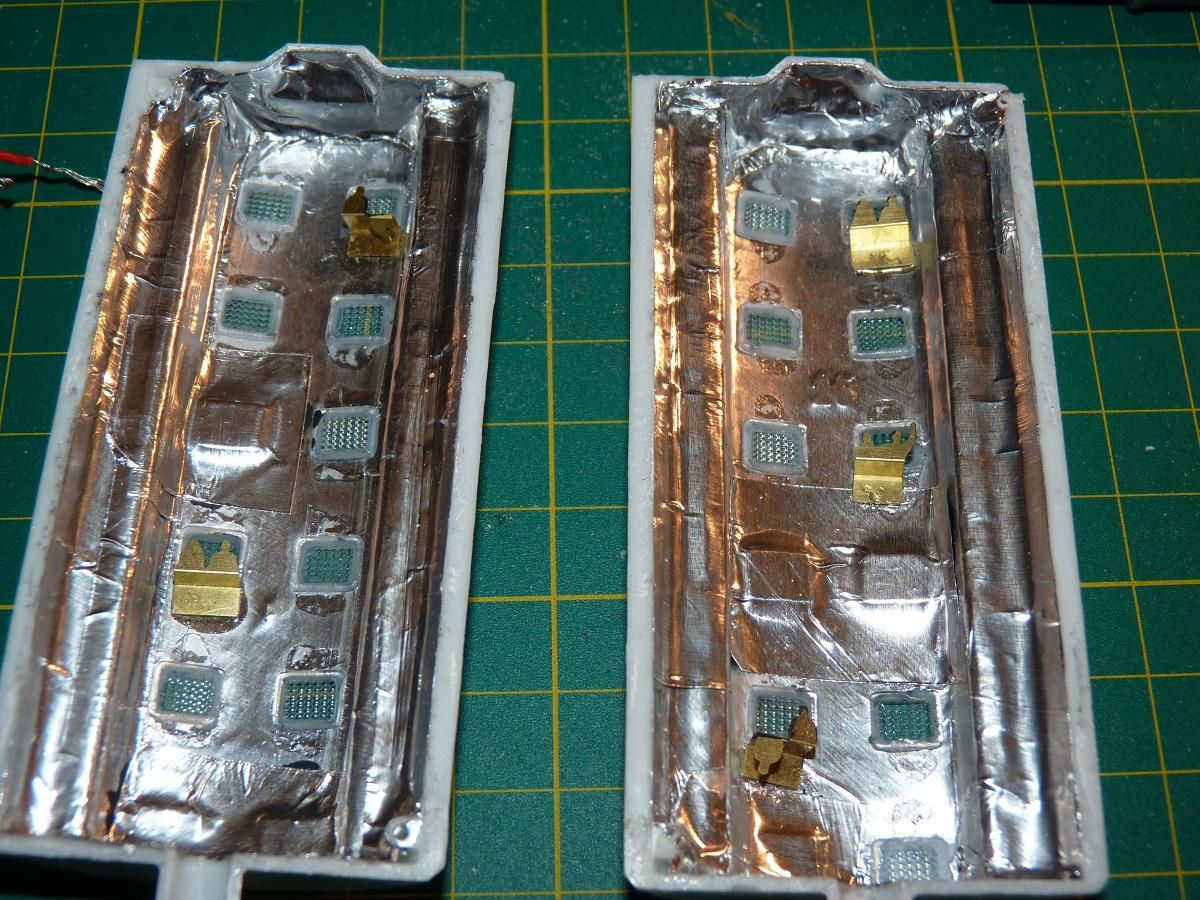
Close up....I painted the front of them matt black then CA-glued them in place....
More soon....:

All the gimbals for the various antenna were cemented in place...I'm not going for the folding option and so just used the hemispheres without the masts attached then drilled them out for the replacement masts....

Surprising how big it is now with the engine extended...and that's even before the modules are added....

Test fit of the three hinged modules here in roomlight....

And in the dark....still light leaks to fix....

It was at this point I suddenly realised that I'd sealed up the habitation module without fitting the shadow casters at the windows...DOH!!!!....never mind, the only option was to prise it open again and fit them....

Close up....I painted the front of them matt black then CA-glued them in place....

More soon....:
-
philp

- Modelling Gent and Scholar
- Posts: 1279
- Joined: May 1st, 2011, 12:14 am
- Location: Kearns, Utah
- Contact:
Re: MPC Pilgrim Observer Upgrade
Looks great. I have looked at this kit a few times but just didn't grab me.
I like the red color, definitely makes it different.
I like the red color, definitely makes it different.
-
jargonking
- Onto the Clever Stuff, Now.
- Posts: 119
- Joined: May 4th, 2011, 12:21 am
Re: MPC Pilgrim Observer Upgrade
Another small but significant update....
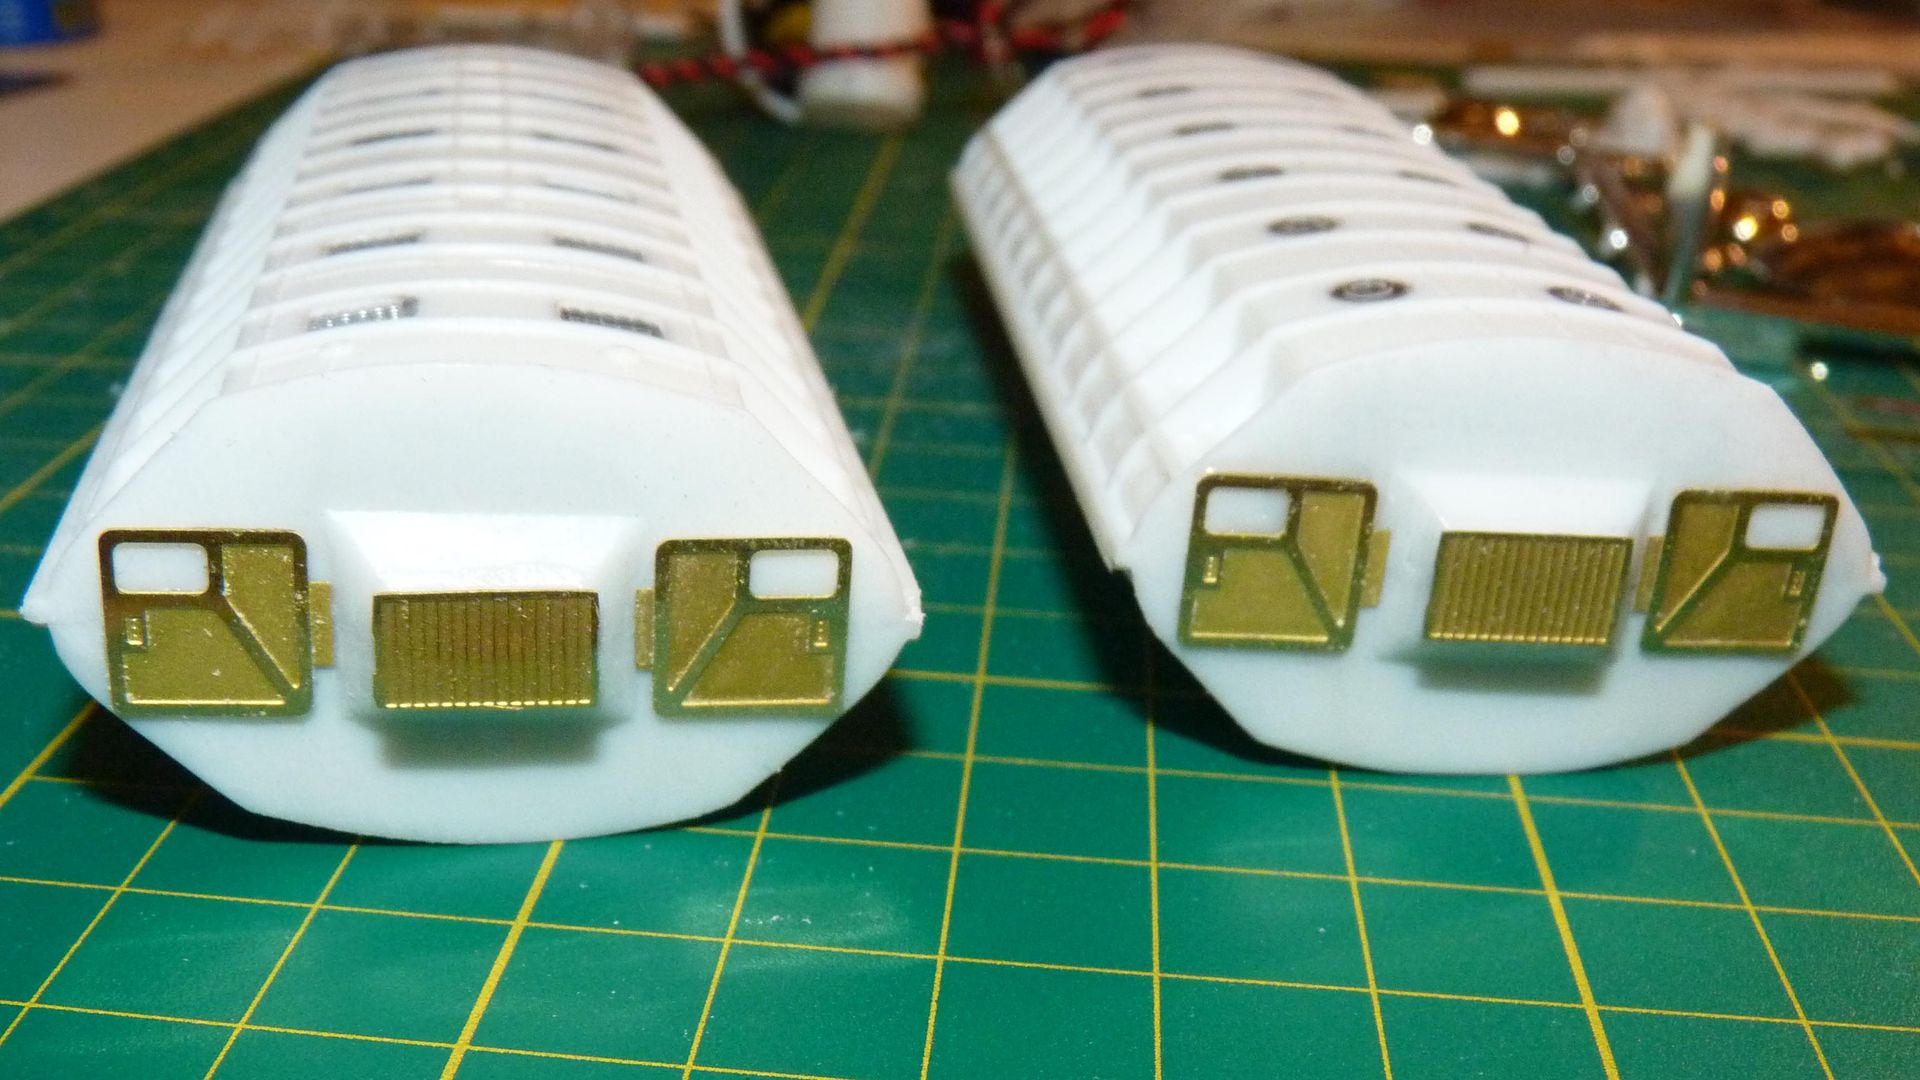
I cleaned up the seams on the modules and added some etched detail to the ends....
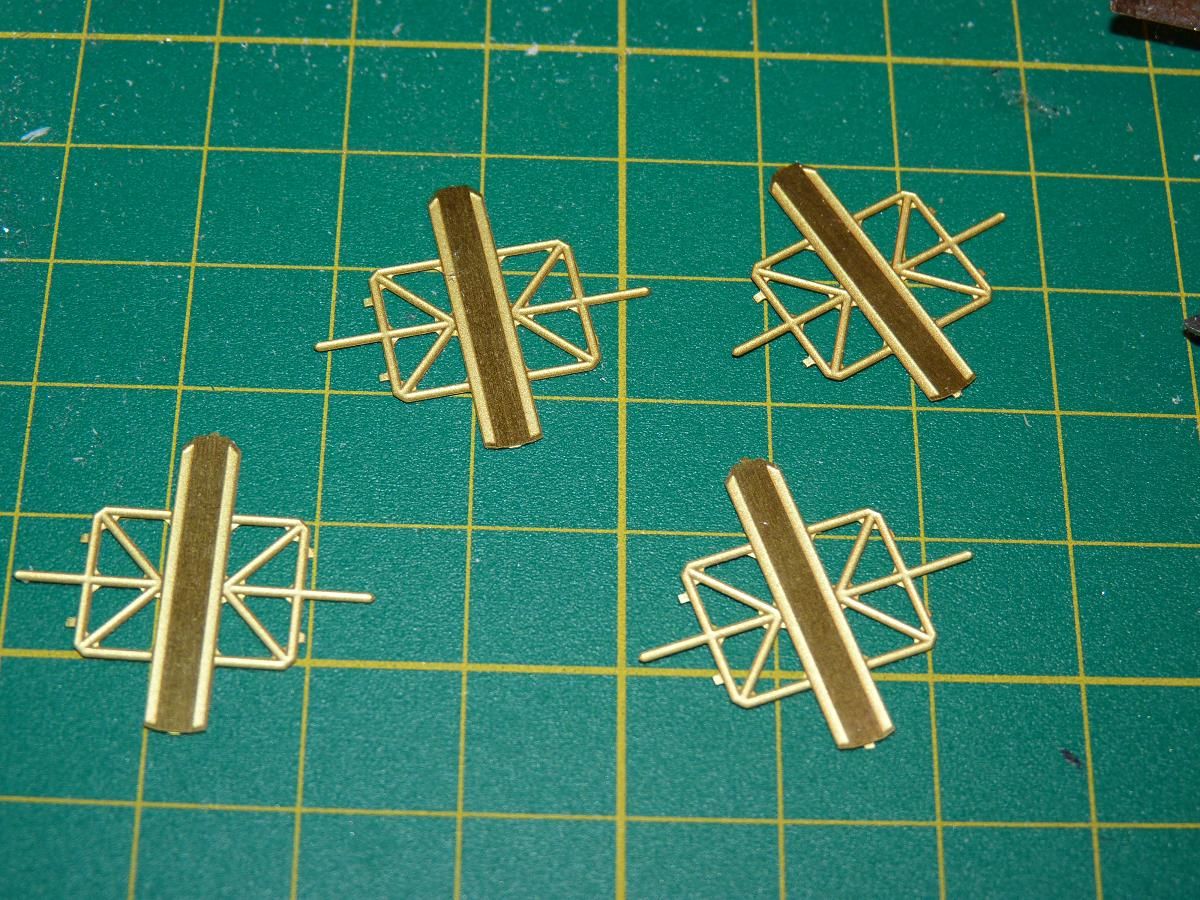
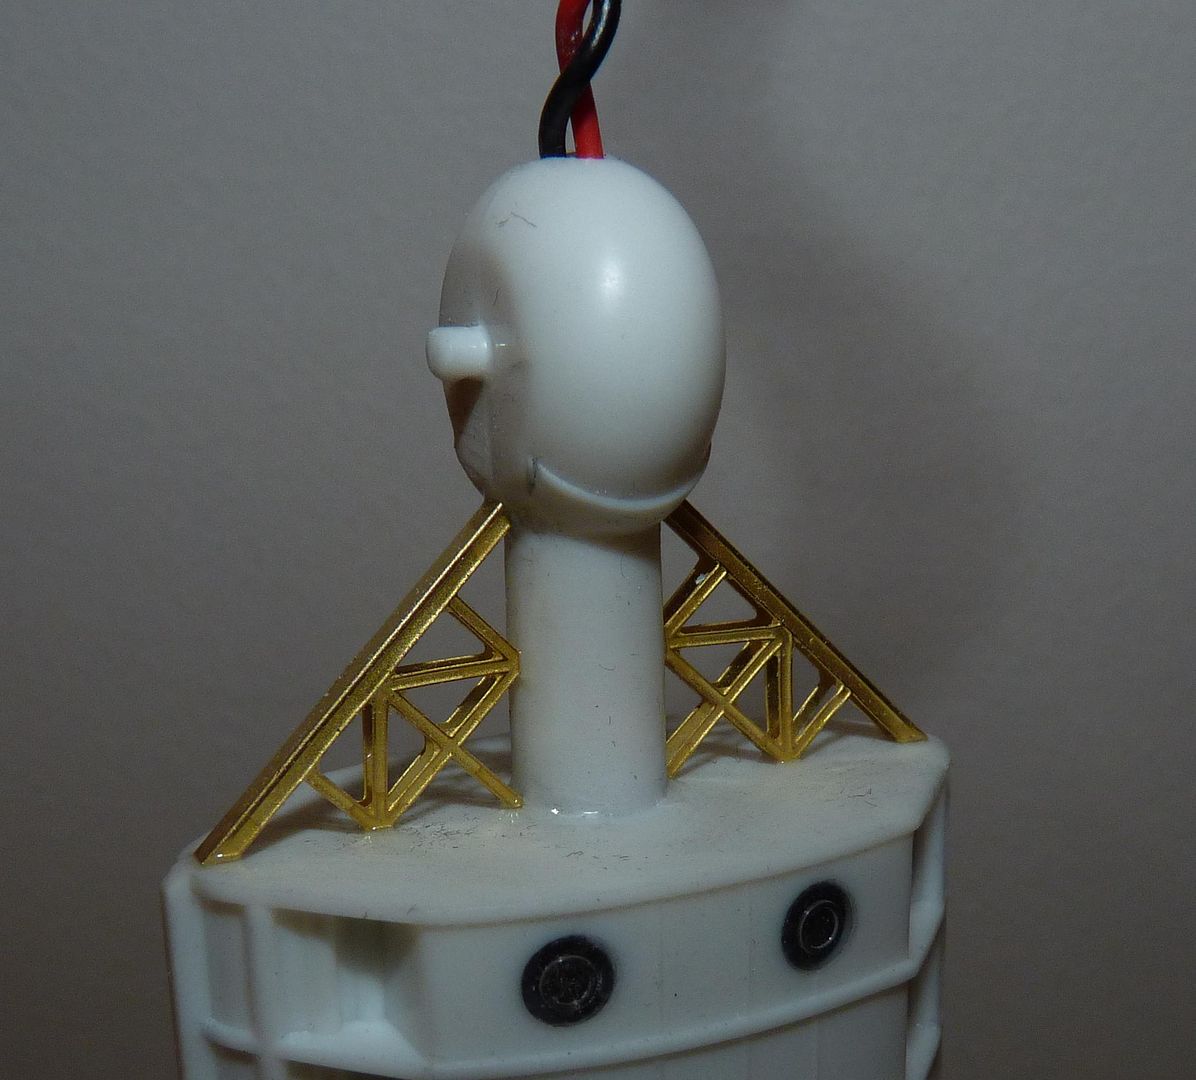
Then it was on with the replacement girders....here they are removed from the fret....
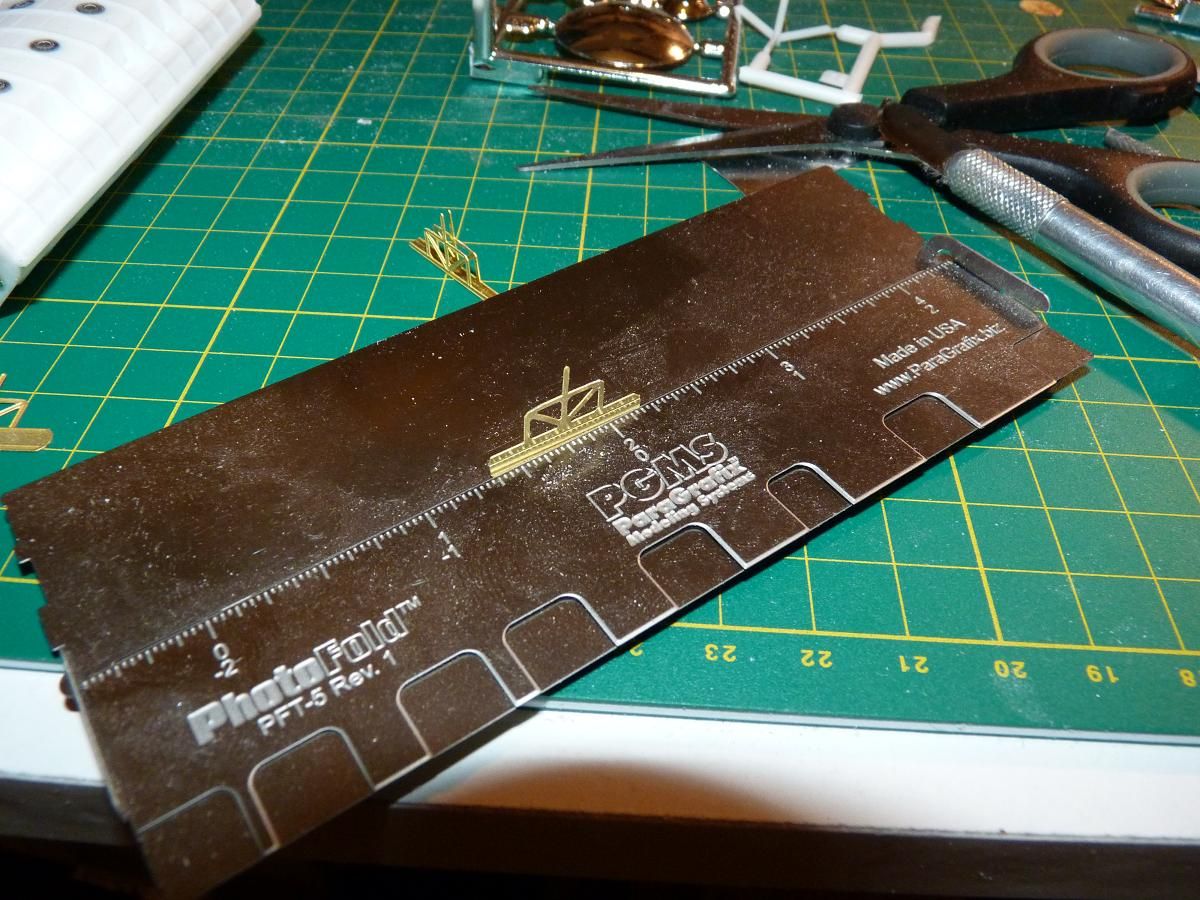
They require folding twice to create the correct box section....I did this using the Photofold tool, I've got several folding tools and this is by far the easiest to use....
Here are the girders folded and awaiting installation....they needed a tiny amount of sanding at the end that attaches to the central access tube but otherwise were relatively easy to install....
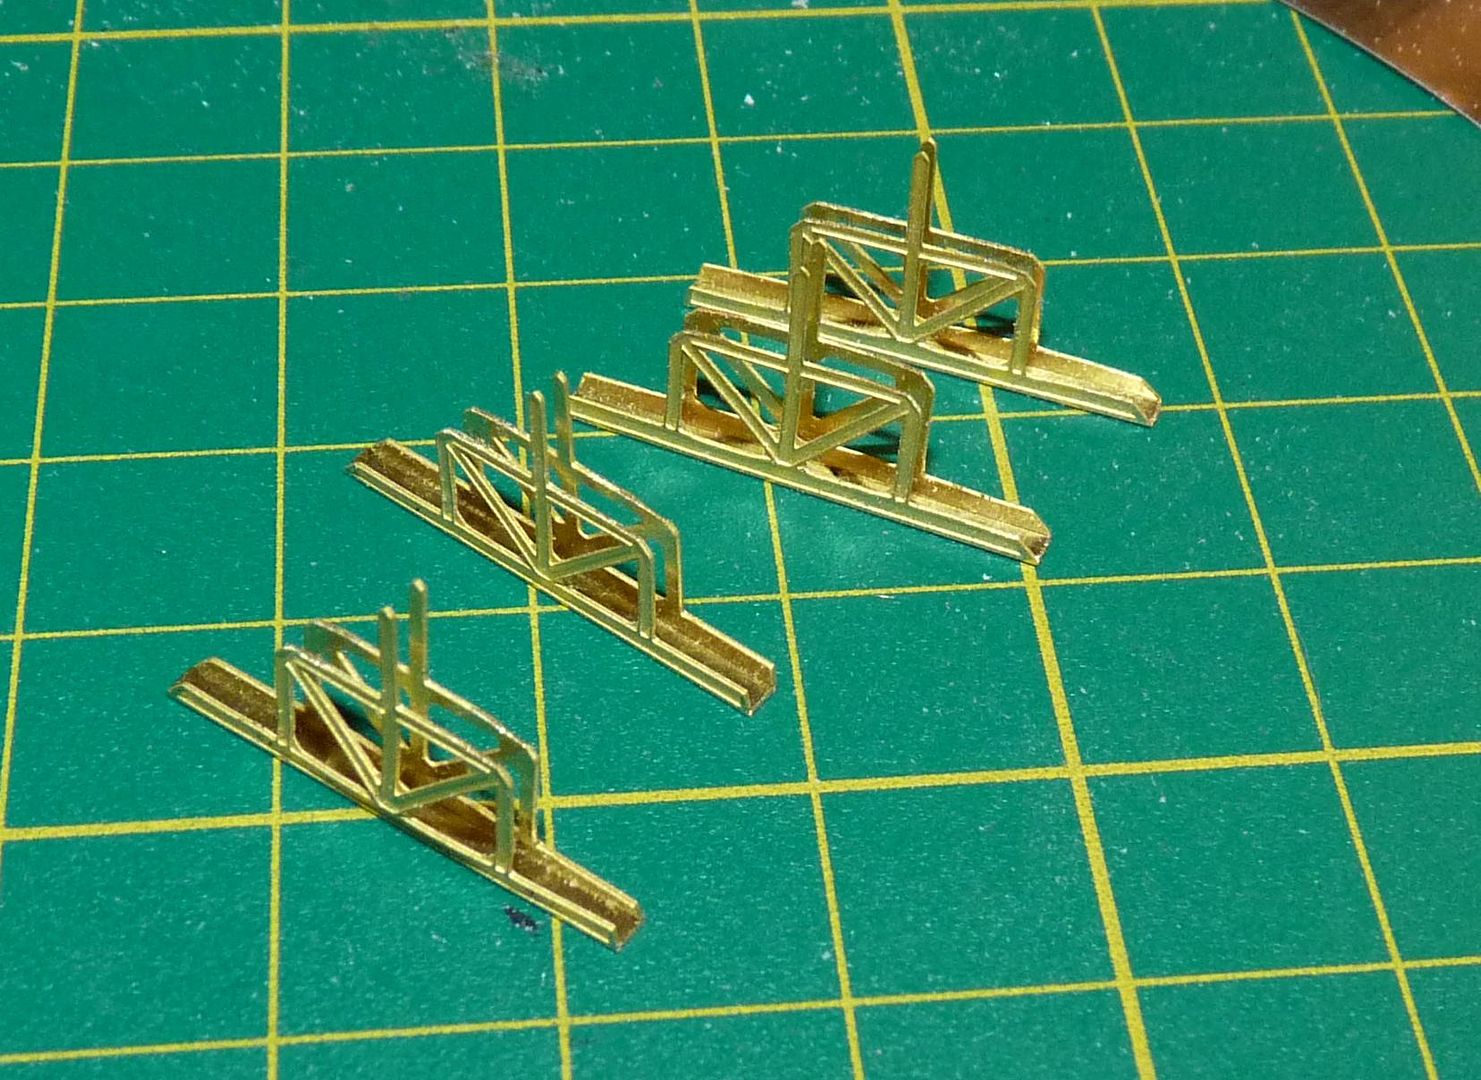
And installed....
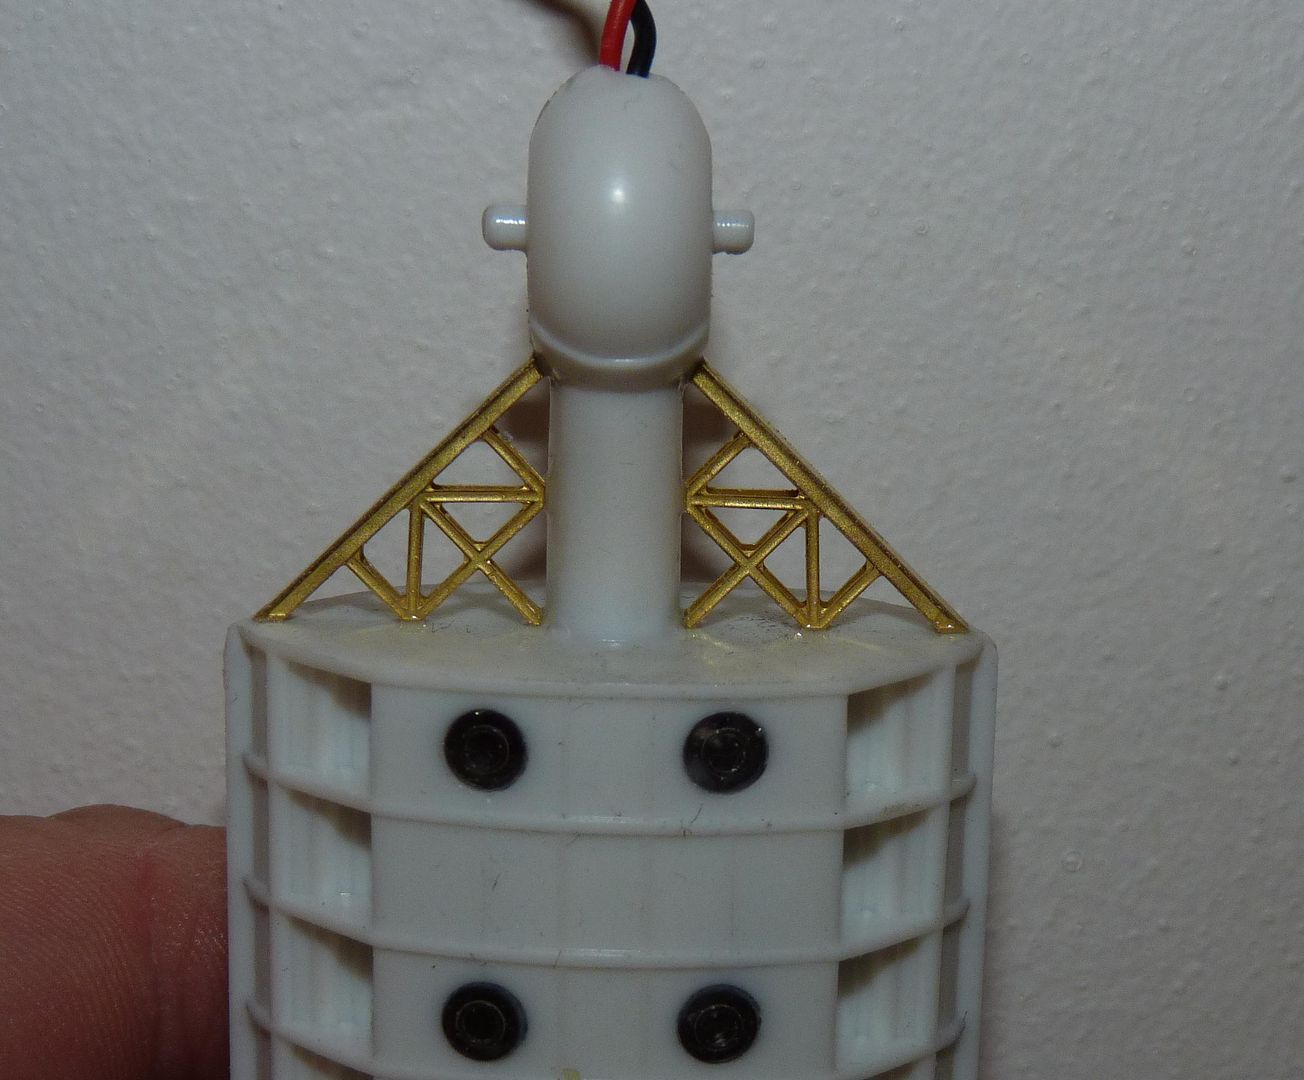
Definitely an improvement over the kit parts....
I cleaned up the seams on the modules and added some etched detail to the ends....

Then it was on with the replacement girders....here they are removed from the fret....

They require folding twice to create the correct box section....I did this using the Photofold tool, I've got several folding tools and this is by far the easiest to use....

Here are the girders folded and awaiting installation....they needed a tiny amount of sanding at the end that attaches to the central access tube but otherwise were relatively easy to install....

And installed....

Definitely an improvement over the kit parts....

-
jargonking
- Onto the Clever Stuff, Now.
- Posts: 119
- Joined: May 4th, 2011, 12:21 am
Re: MPC Pilgrim Observer Upgrade
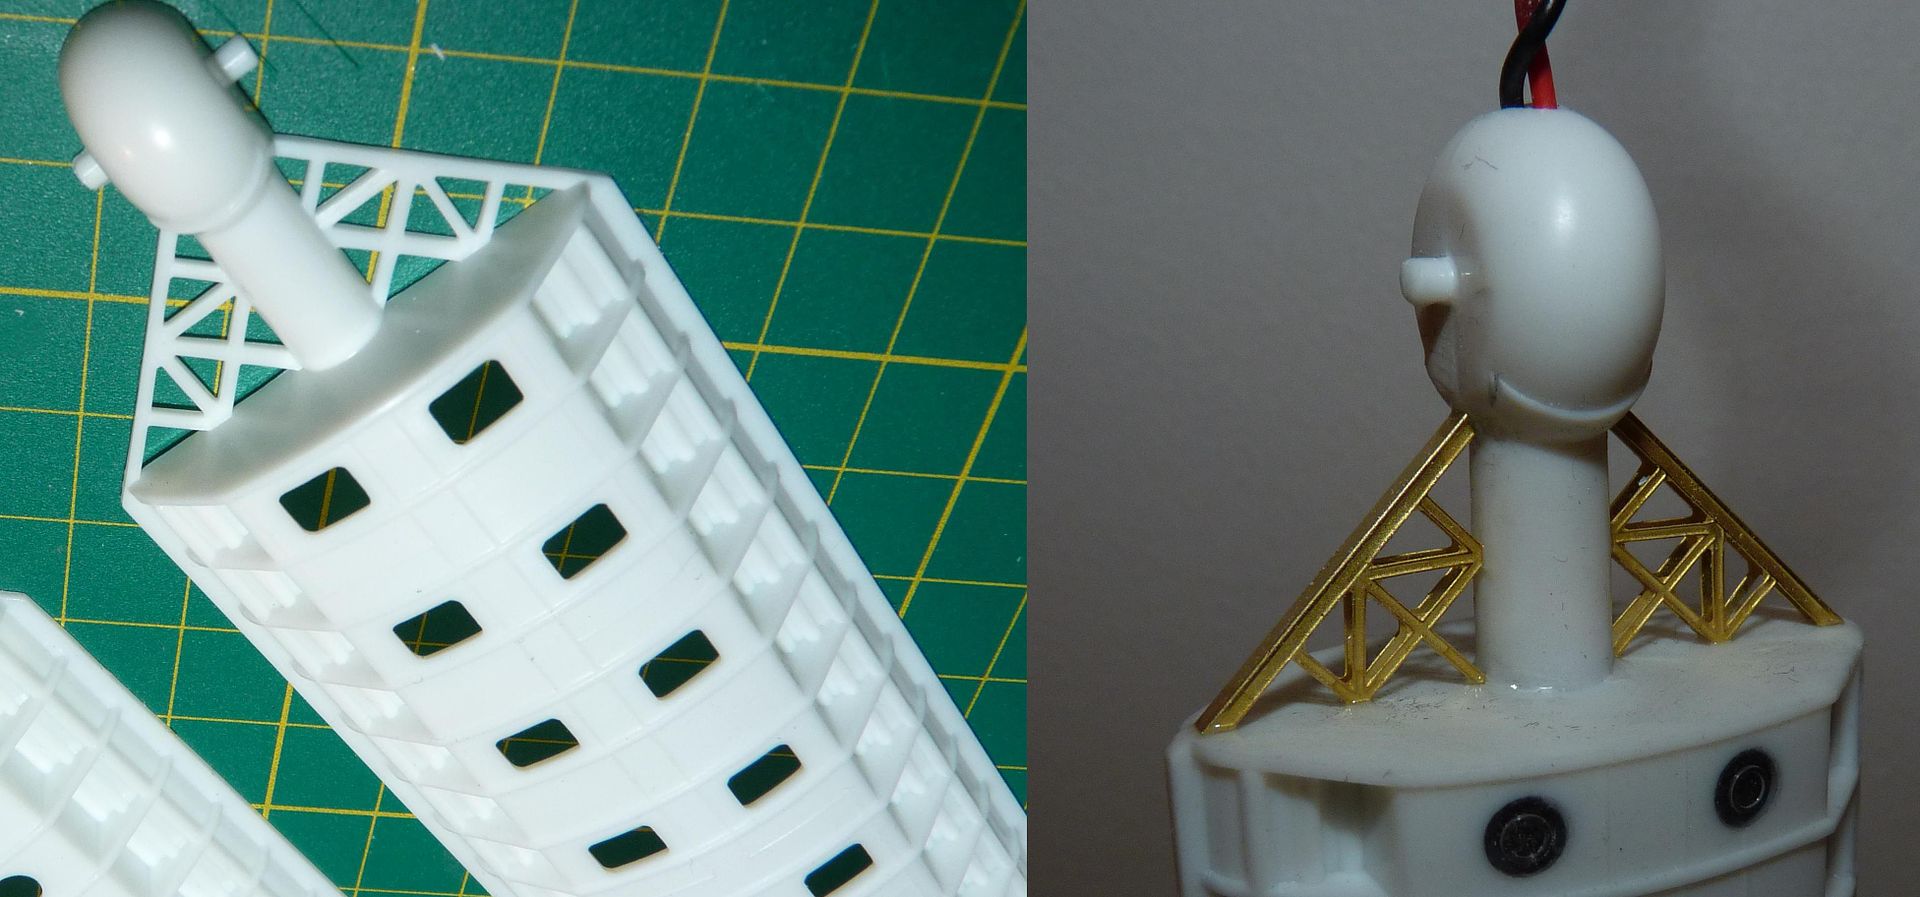
Girder comparison......

-
jargonking
- Onto the Clever Stuff, Now.
- Posts: 119
- Joined: May 4th, 2011, 12:21 am
Re: MPC Pilgrim Observer Upgrade
More progress tonight....
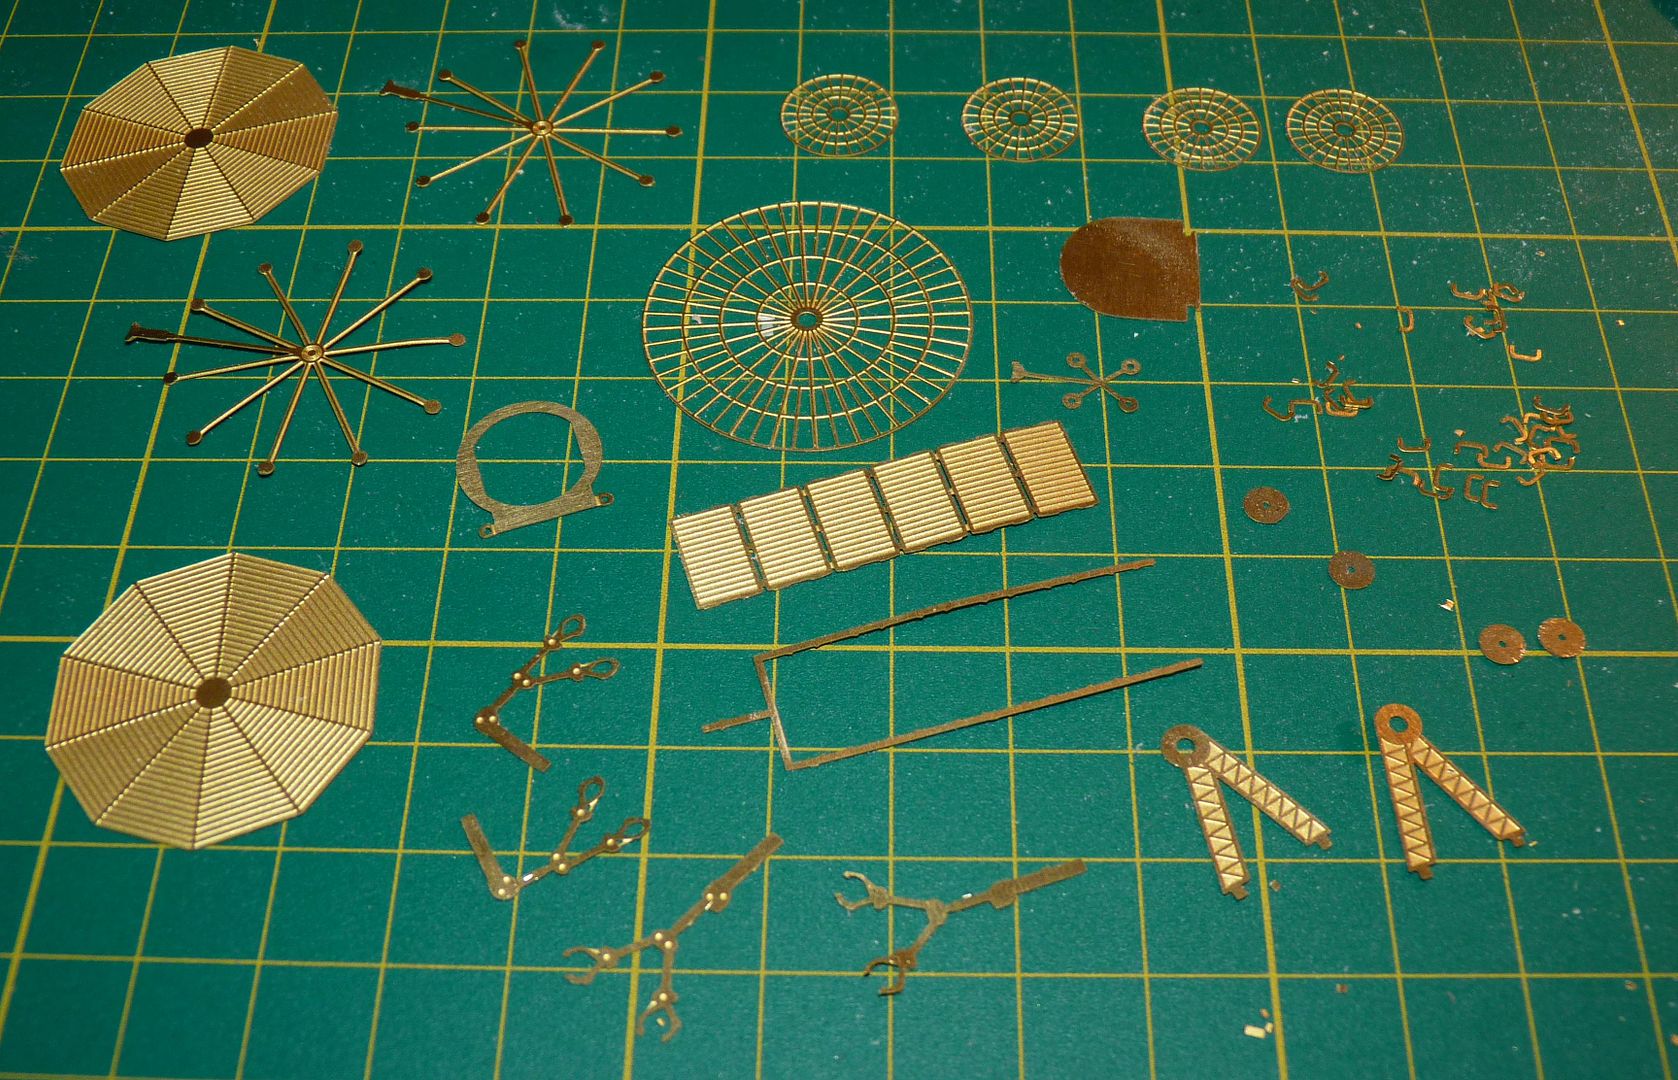
I decided to clean up the rest of the etch and prep it for painting....as you can see there's quite a lot still to do, not least the shaping of the antenna which at the moment are just flat discs....
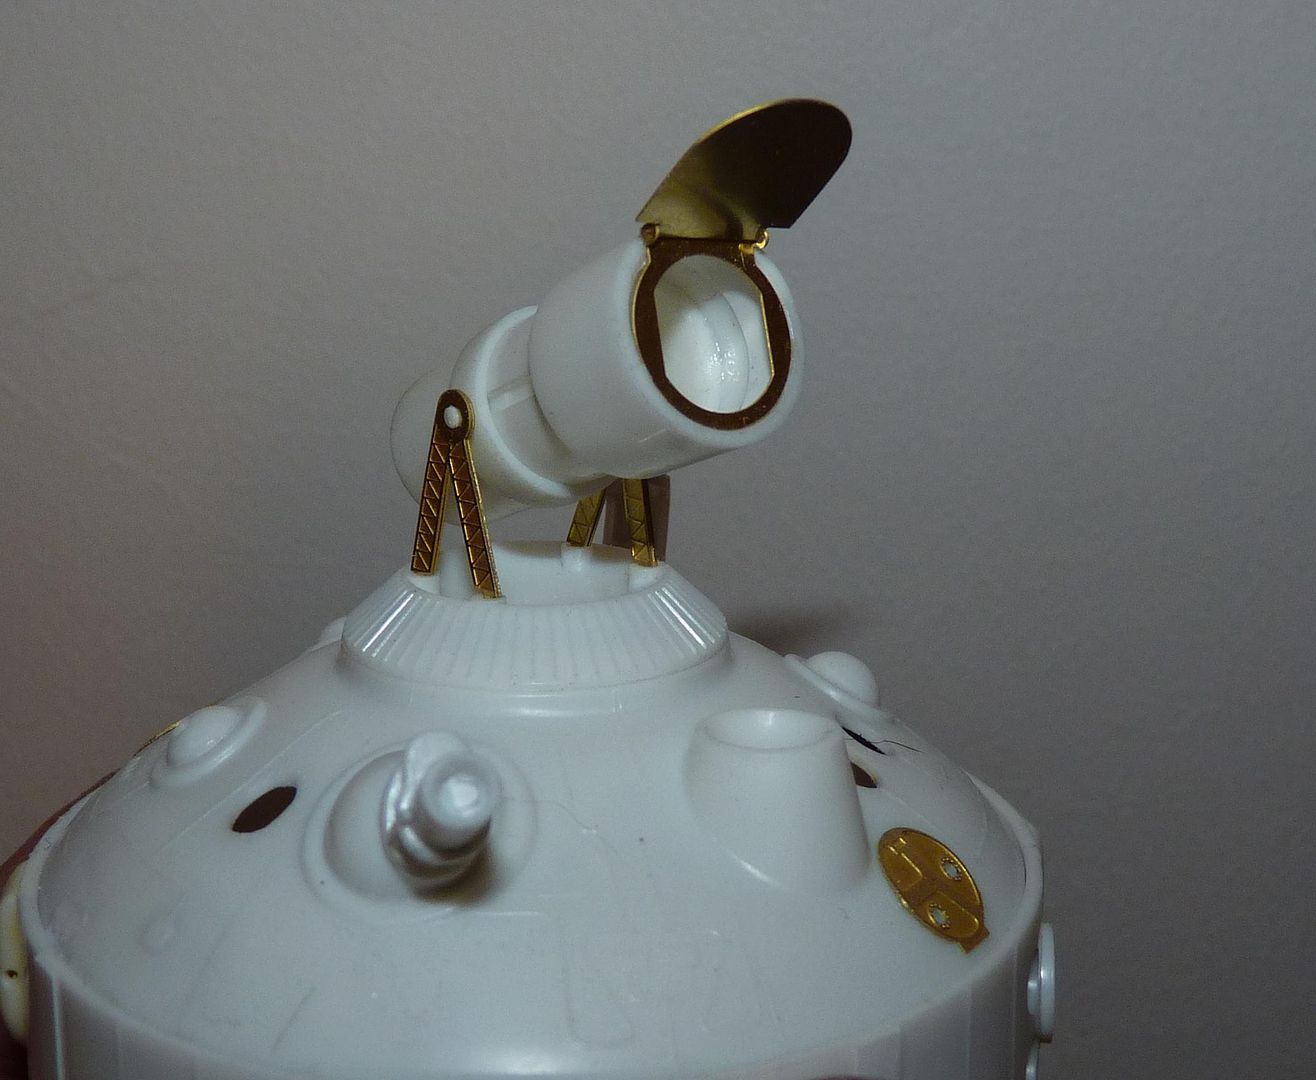
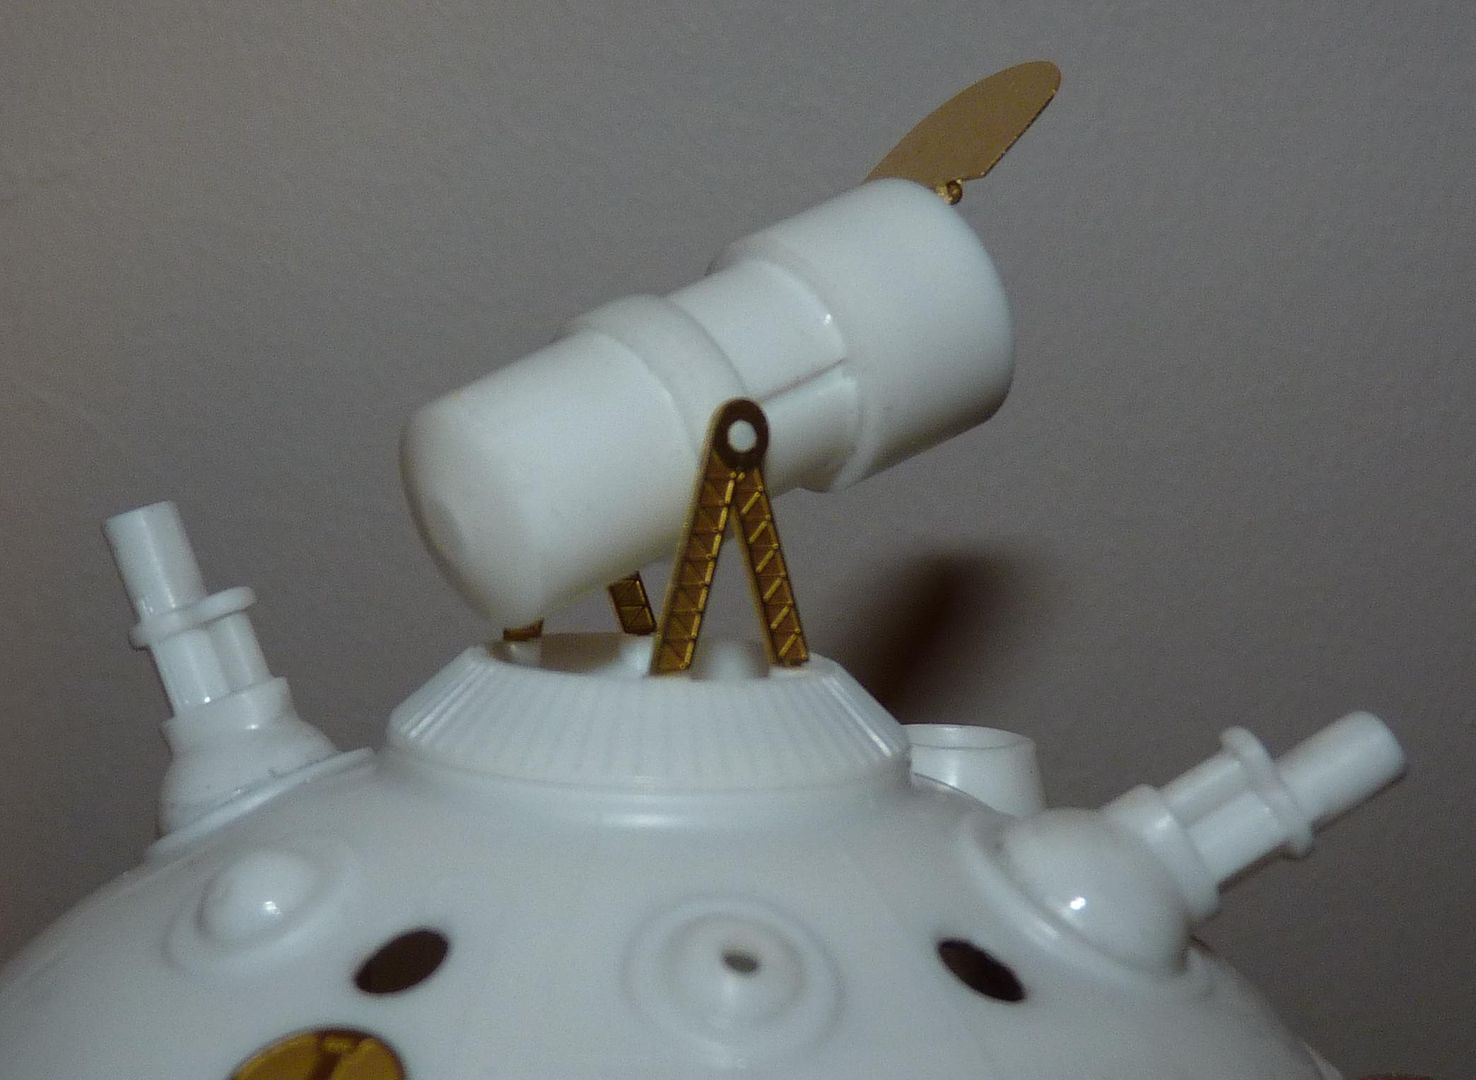
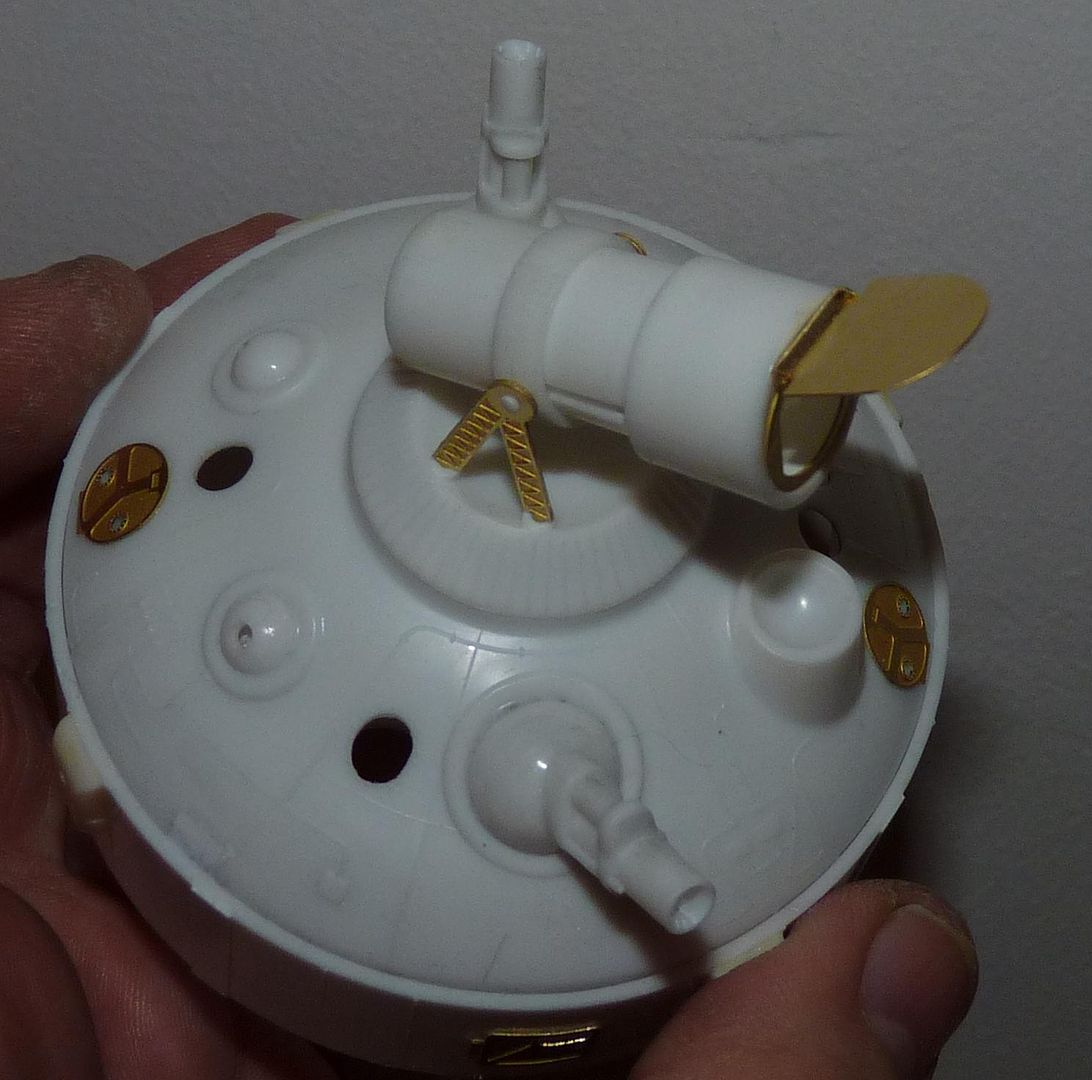
Here's the main telescope test fitted in place...the Hubble-like door really adds something to the kit parts...
The solar panel was the most fiddly piece to assemble...I think I dropped it on the floor about ten times while trying to align the vanes with the frame...
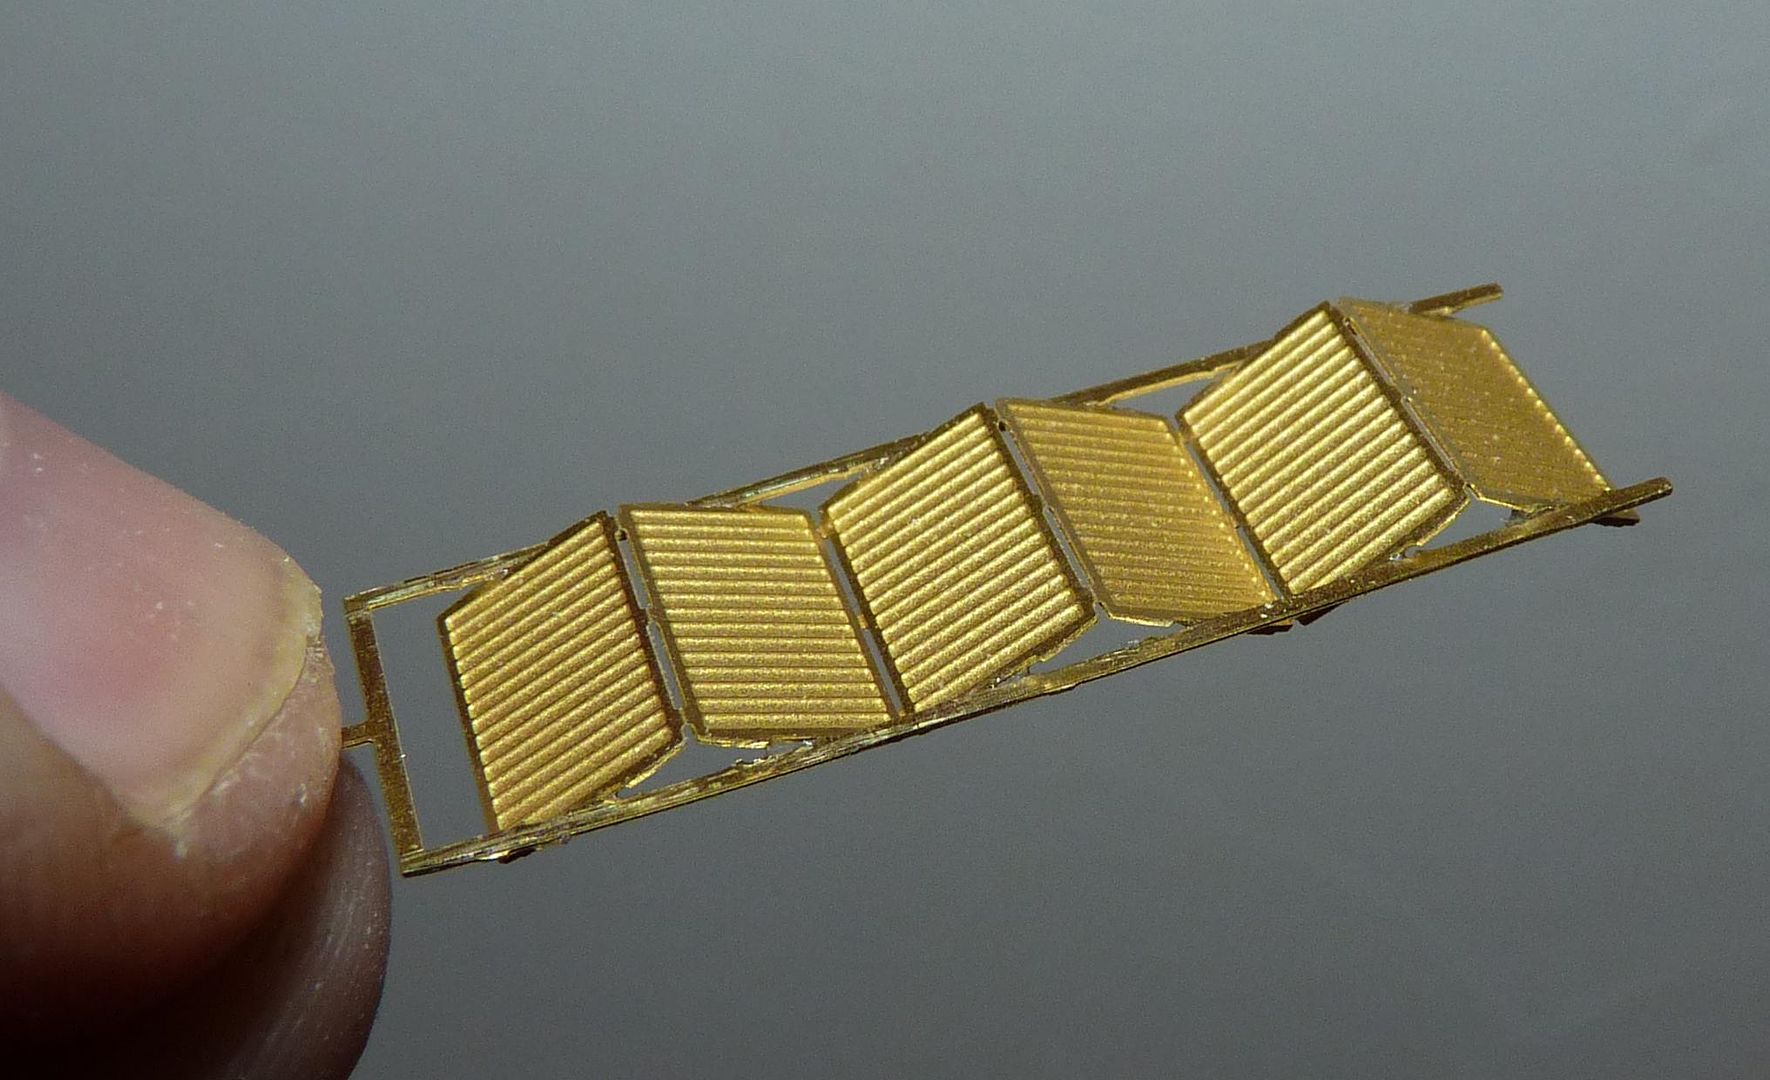
With parts like this attached I'll have to be careful handling the finished model....
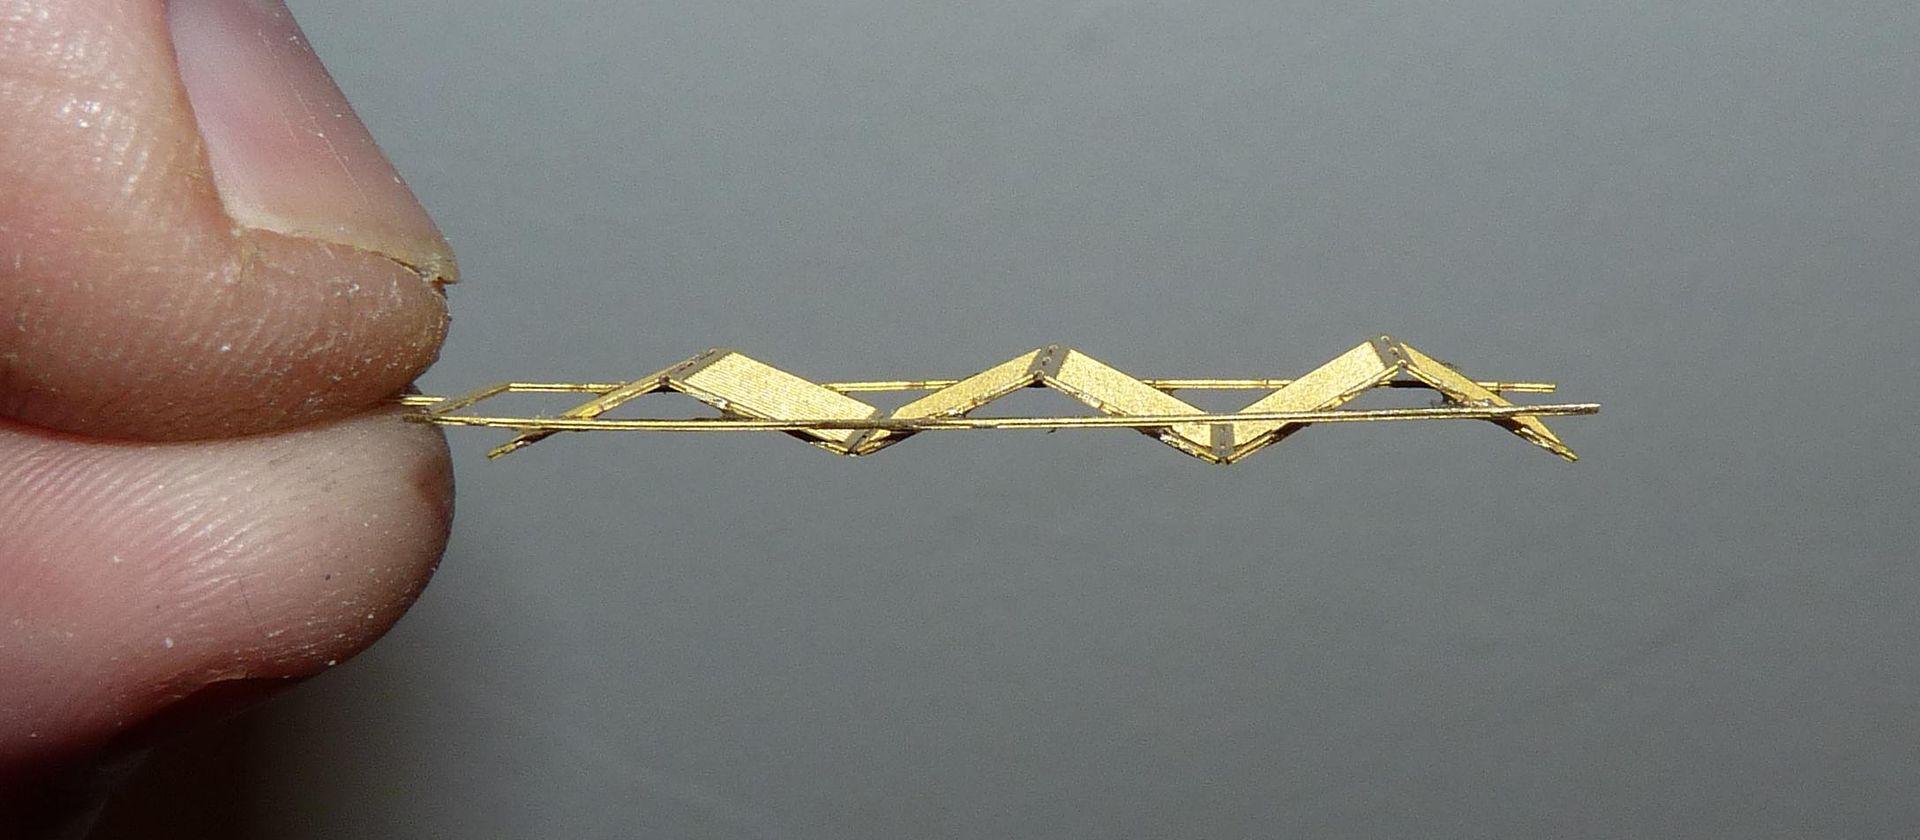
The solar arrays for the capsule comprise of two parts....the face piece....
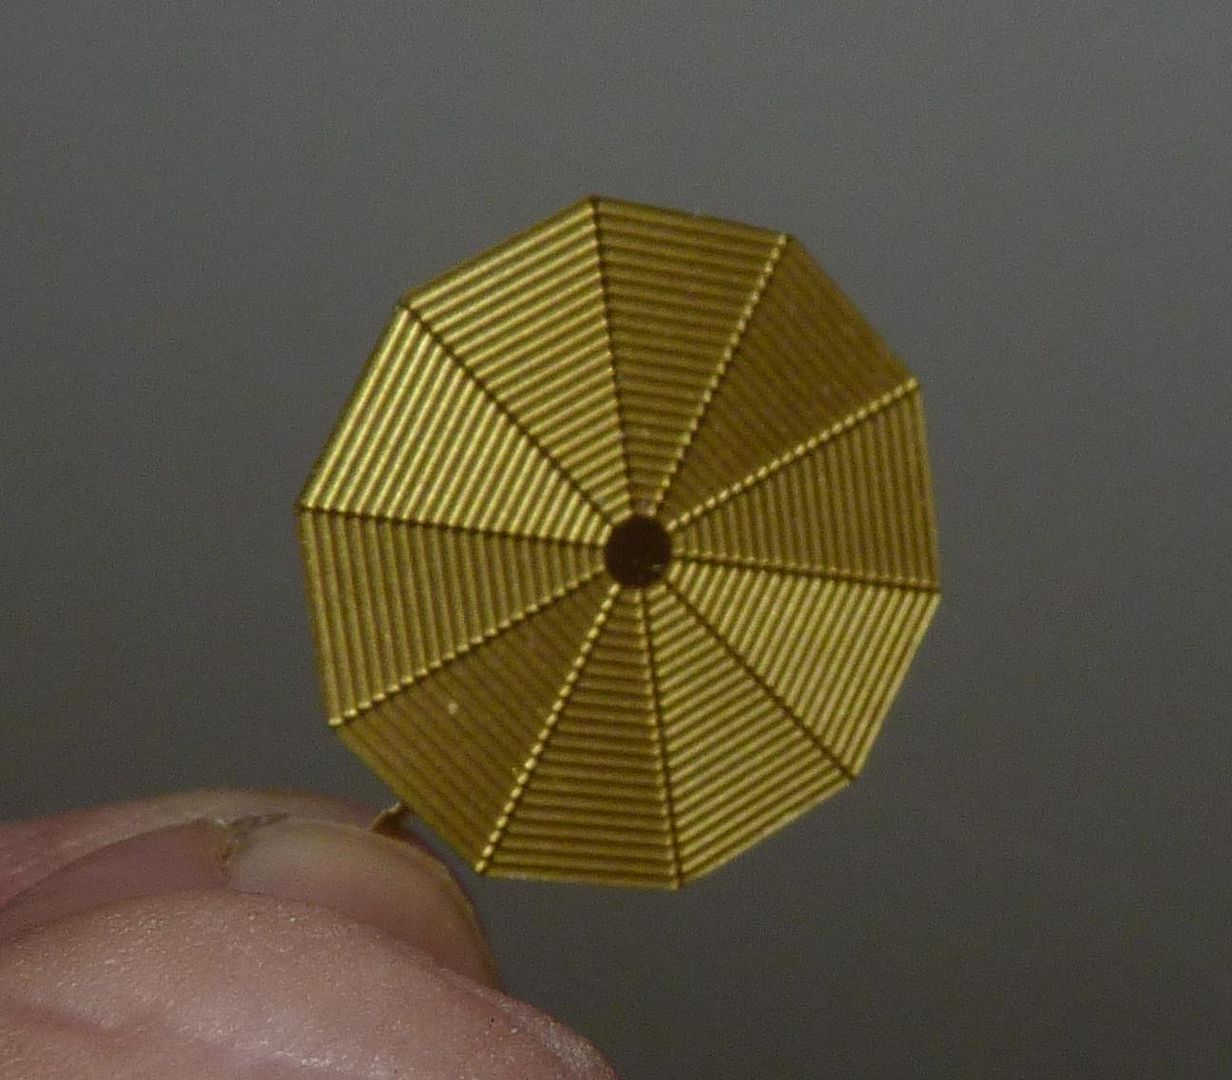
...and the back piece which is very delicate and requires careful handling while assembling....
I decided to clean up the rest of the etch and prep it for painting....as you can see there's quite a lot still to do, not least the shaping of the antenna which at the moment are just flat discs....

Here's the main telescope test fitted in place...the Hubble-like door really adds something to the kit parts...


The solar panel was the most fiddly piece to assemble...I think I dropped it on the floor about ten times while trying to align the vanes with the frame...

With parts like this attached I'll have to be careful handling the finished model....

The solar arrays for the capsule comprise of two parts....the face piece....

...and the back piece which is very delicate and requires careful handling while assembling....

-
general rocket

- Modelling Gent and Scholar
- Posts: 2790
- Joined: May 1st, 2011, 4:42 pm
- Location: Telford
Re: MPC Pilgrim Observer Upgrade
Impressive work so far, keep it up/
I wish, that I knew what was doing!
-
jargonking
- Onto the Clever Stuff, Now.
- Posts: 119
- Joined: May 4th, 2011, 12:21 am
Re: MPC Pilgrim Observer Upgrade
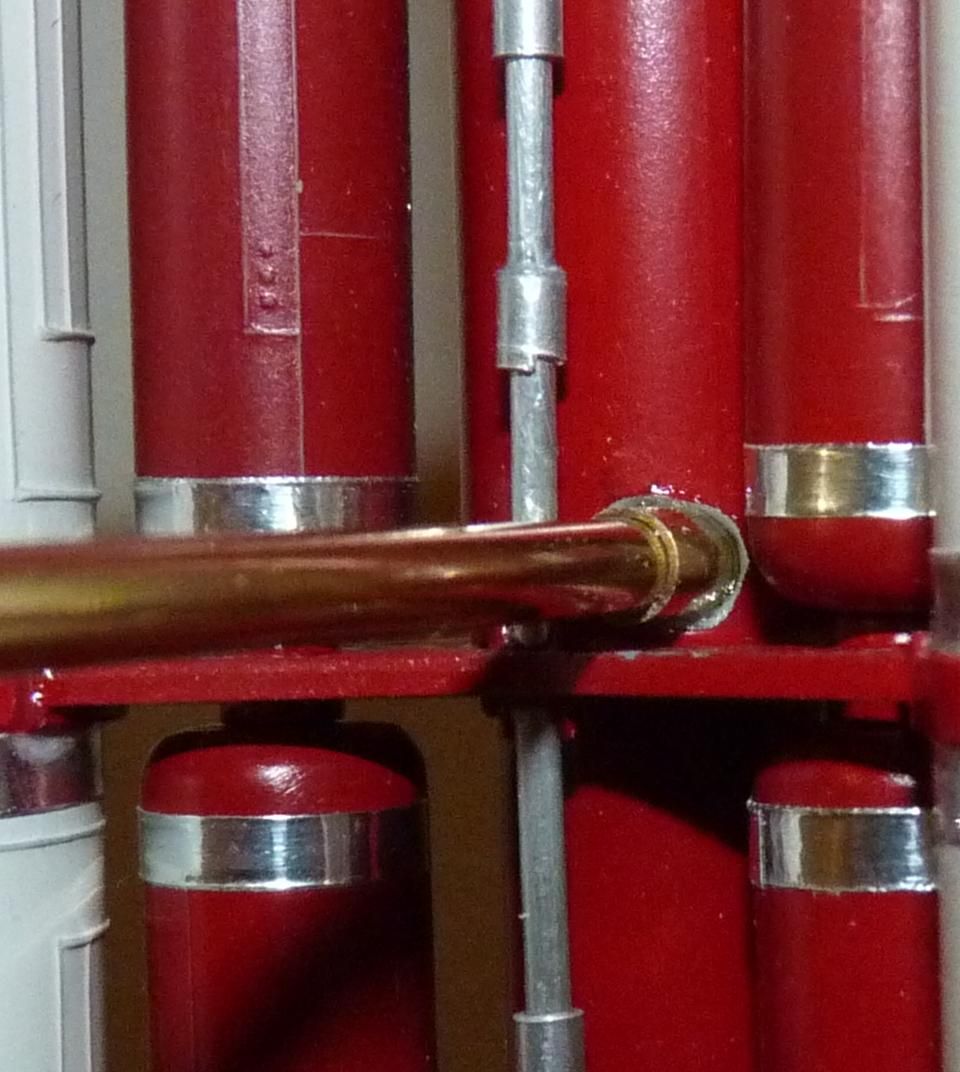
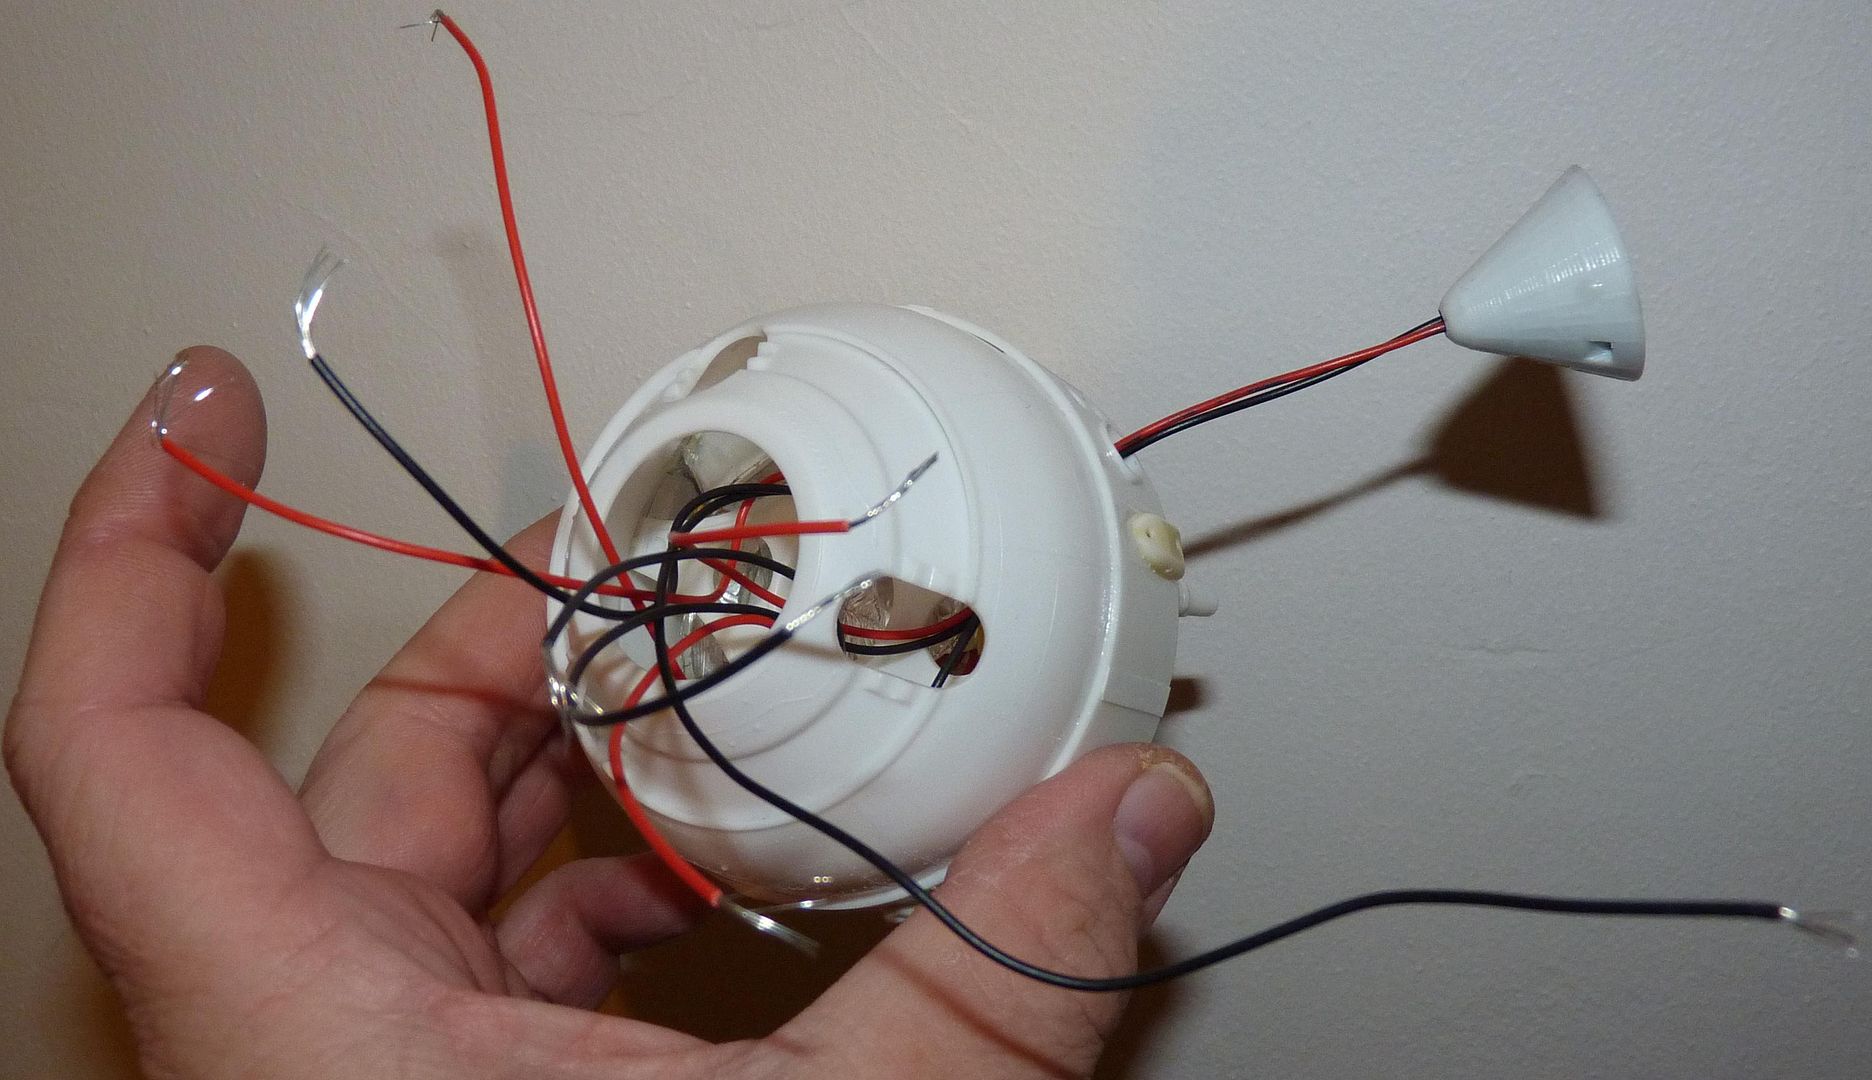
Time to start thinking about how to mount the finished build....
I drilled a hole into the central column and glued in a small section of brass tube using 5-minute epoxy. Into this I CA glued a smaller diameter tube which carries the power feed....
The wires were then fed one at a time up the tube then fished through the forward hole which connects to the command module...
I've also fitted some light boxes to provide illumination through the various ports in the command module....
I drilled a hole into the central column and glued in a small section of brass tube using 5-minute epoxy. Into this I CA glued a smaller diameter tube which carries the power feed....

The wires were then fed one at a time up the tube then fished through the forward hole which connects to the command module...


I've also fitted some light boxes to provide illumination through the various ports in the command module....

-
Clashcityrocker

- Modelling Gent and Scholar
- Posts: 10798
- Joined: May 1st, 2011, 12:31 am
- Location: Adelaide. South Australia
Re: MPC Pilgrim Observer Upgrade
Nice work. Looking forward to seeing the finish.
Nigel
Nigel
-
Old_Tonto

- Modelling Gent and Scholar
- Posts: 8061
- Joined: May 1st, 2011, 7:41 pm
- Location: Middlesbrough, Peoples Republic of Teesside.
Re: MPC Pilgrim Observer Upgrade
Thats a proper engineering project you have there mate. Love it. 
2023 - A:0 B:0 C:0
Current Projects:
East German Air Force (1956-90)
South African Air Force (1958-93)
Current Projects:
East German Air Force (1956-90)
South African Air Force (1958-93)
-
jargonking
- Onto the Clever Stuff, Now.
- Posts: 119
- Joined: May 4th, 2011, 12:21 am
Re: MPC Pilgrim Observer Upgrade
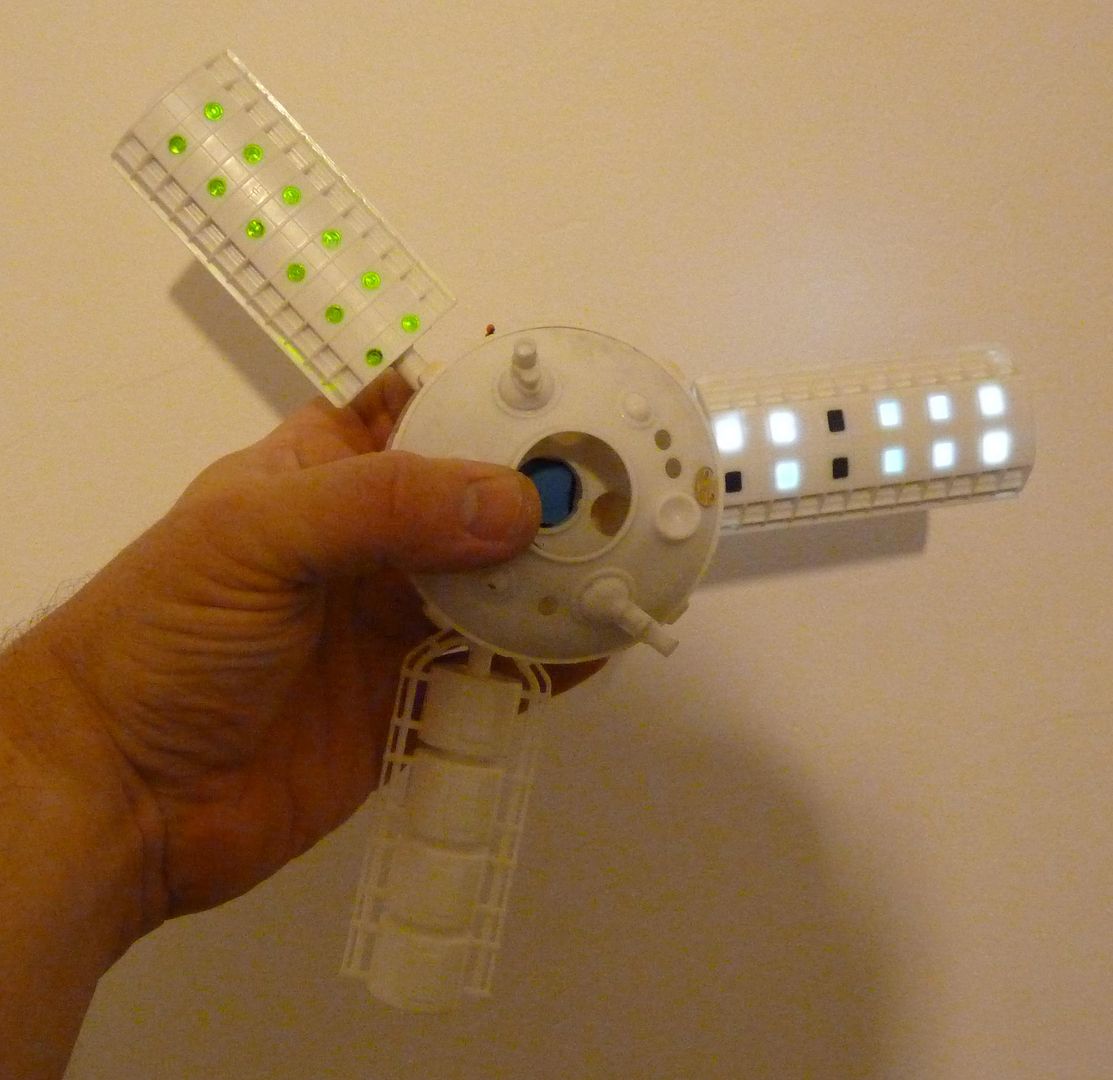
Getting close now to being able to paint the remaining modules and start to bring this thing together... just been taking care of some final lighting tasks....
The observatory portion of the command module had the now redundant kit part #31 reversed and epoxied in place to act as a platform for the lights....
Three white LED's were arranged in a triangle formation on a scrap of sheet styrene ....
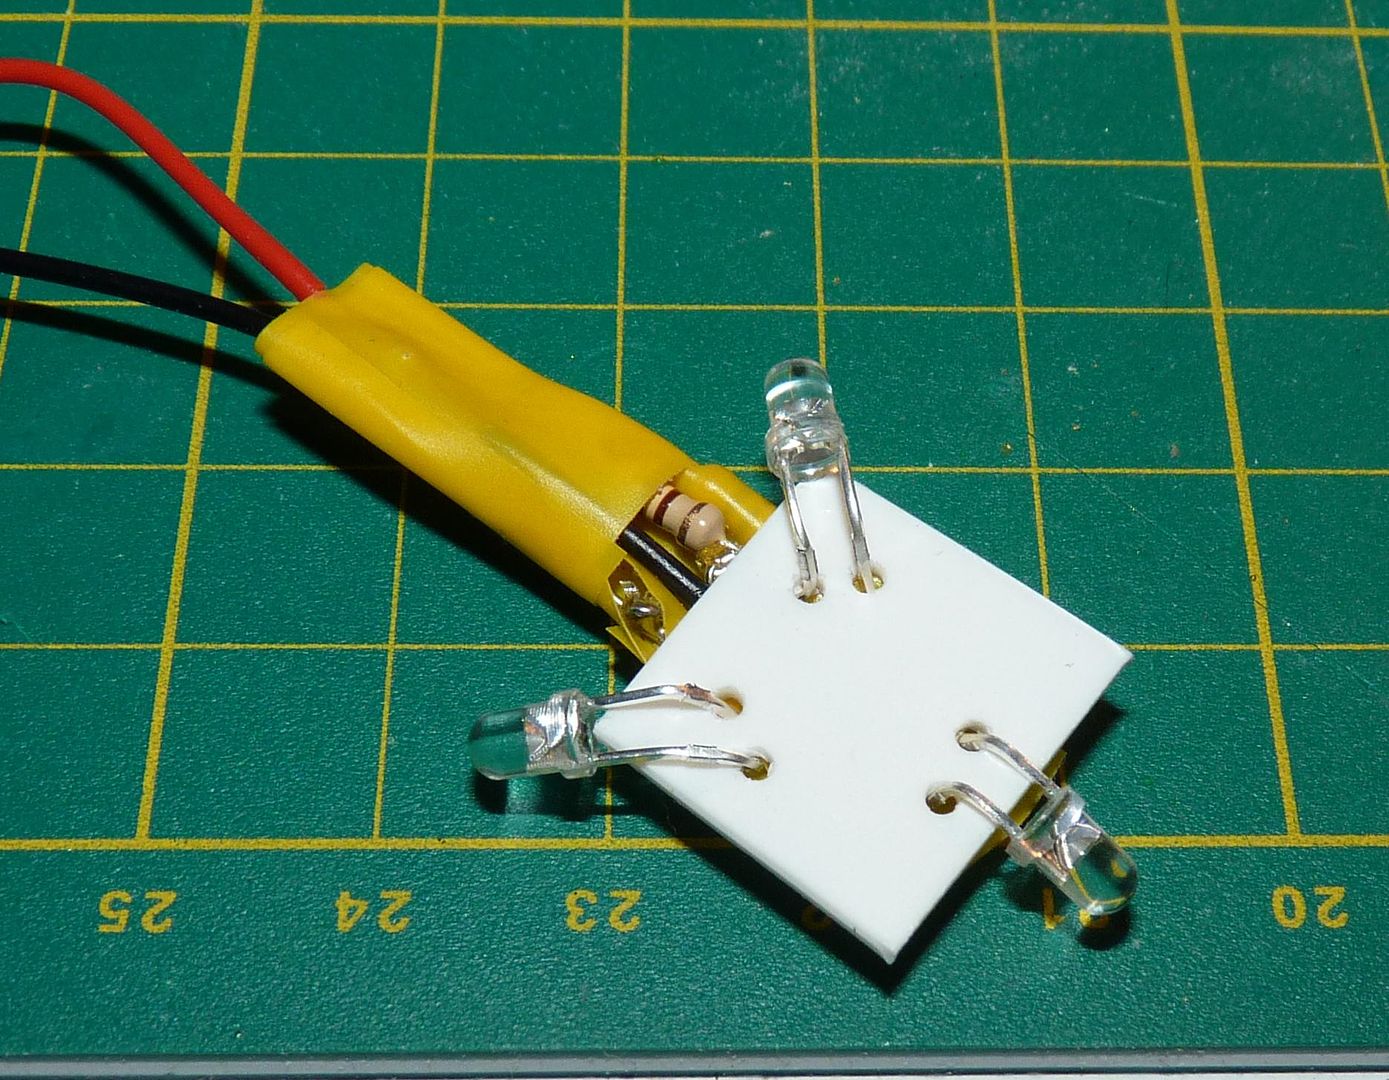
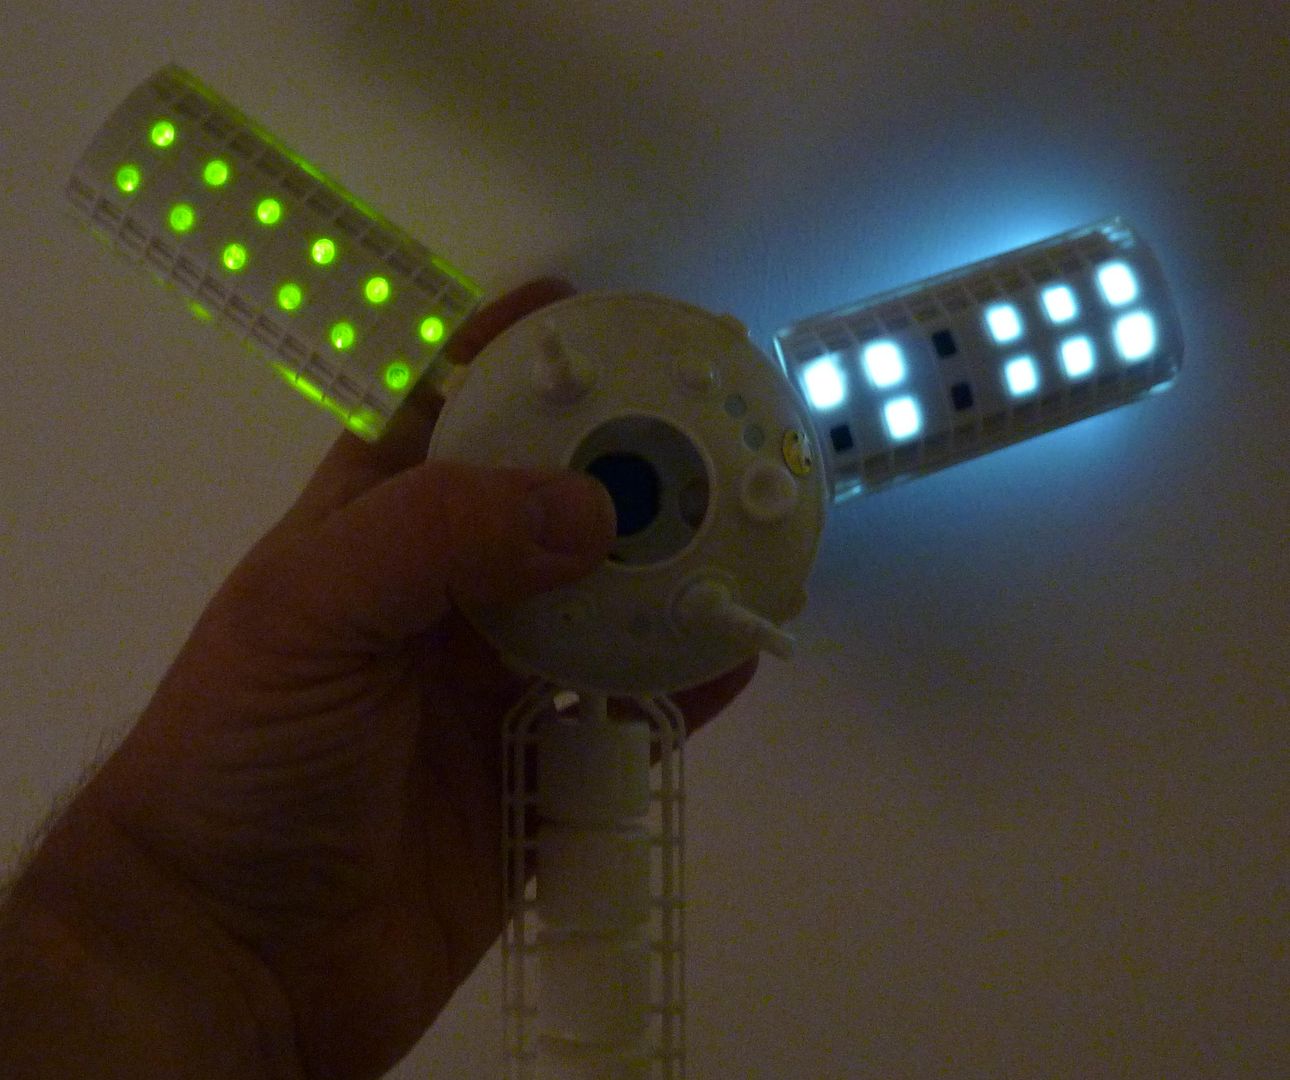
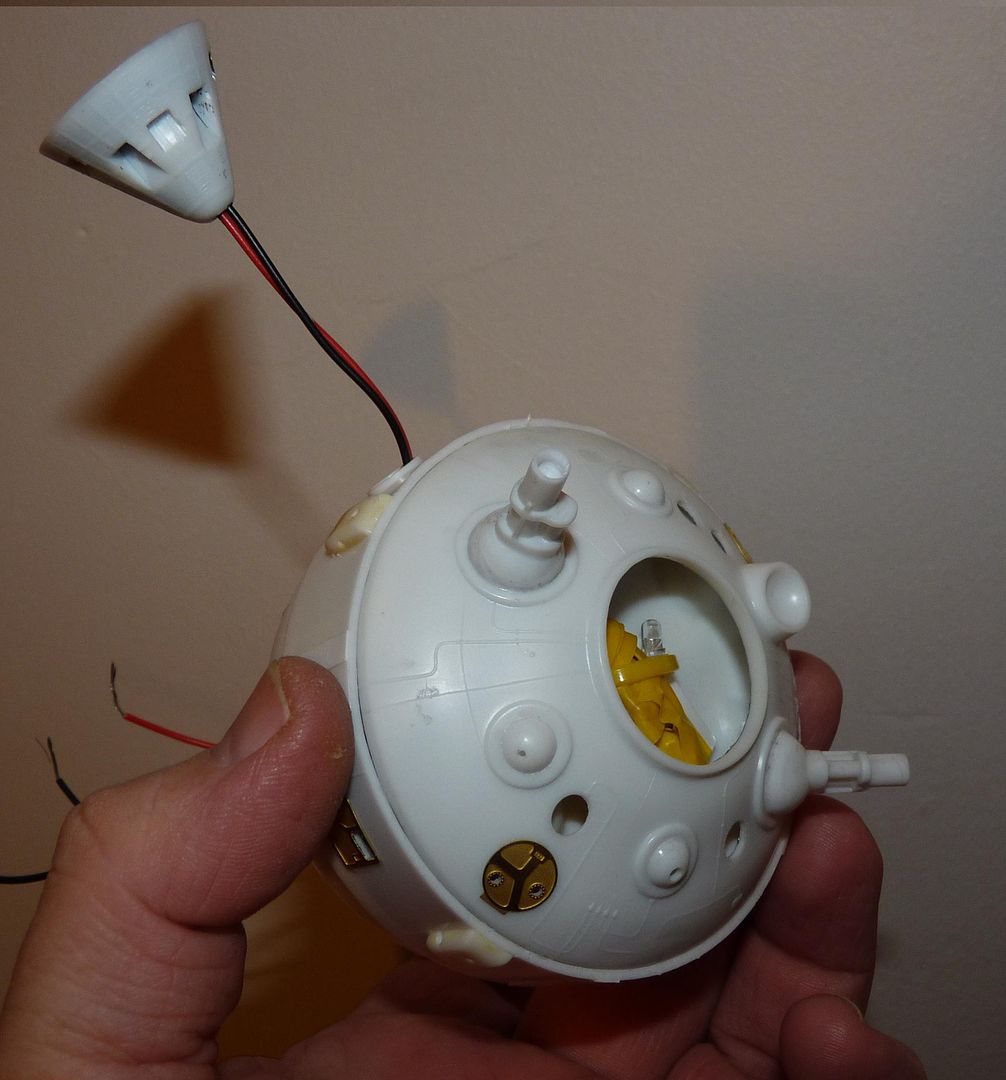
The LED assembly was fed through the hole in the nose of the module and held in place using a cable tie....here's a lighting test....
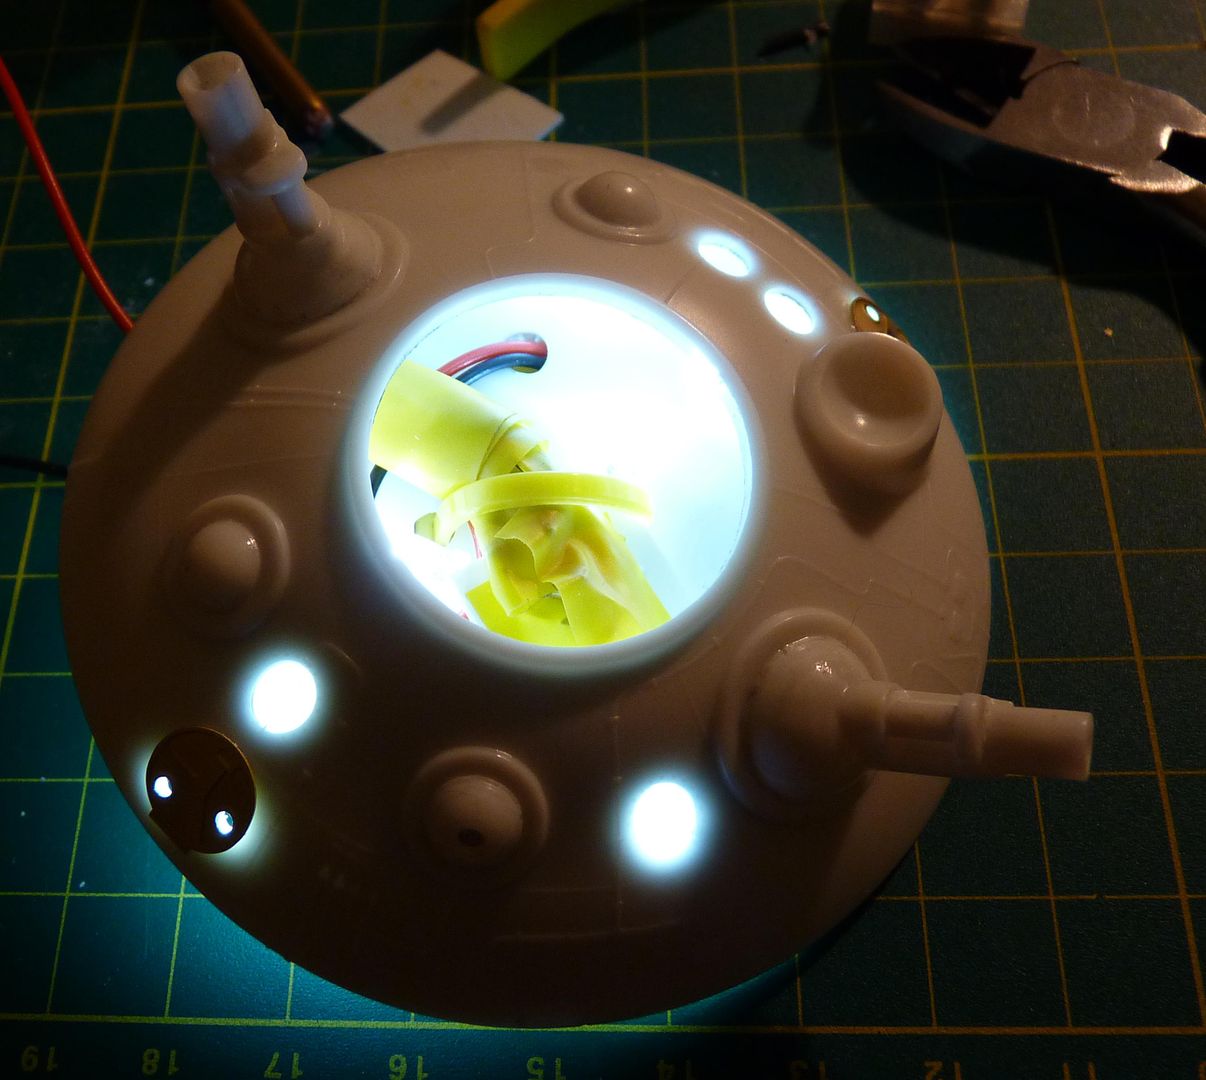
From the back....two additional LED's were installed to light the tiny windows in the circular brass access hatches....
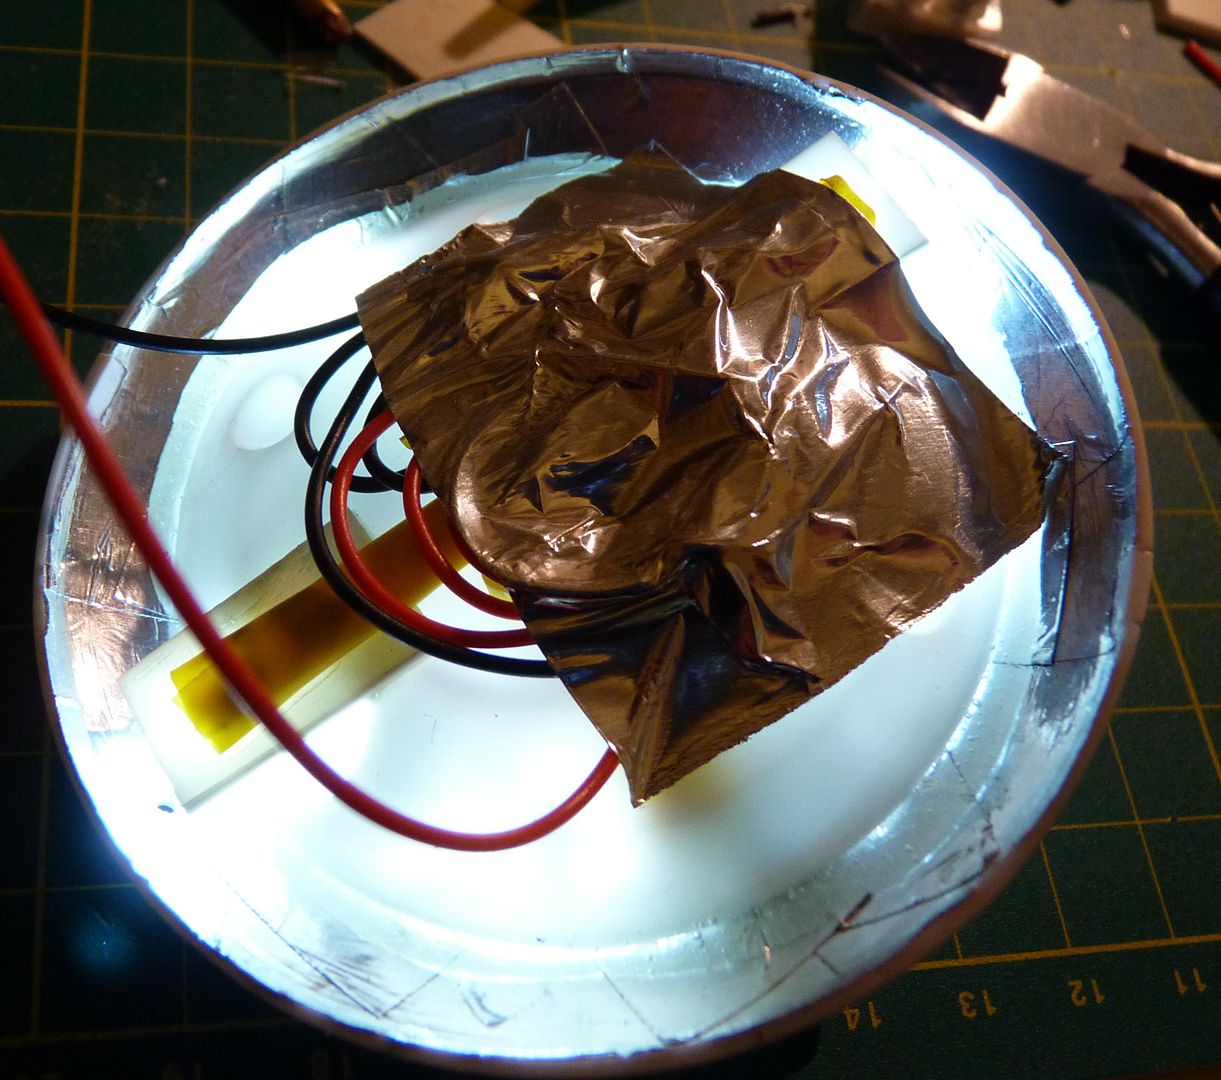
A quick test fit of all the wired components including the capsule to ensure there is enough wire to feed through....
A rear view shows the amount of separate feeds that will eventually be connected together....
One issue I have found is that the textured surface of the windows in the habitation module means that it is almost impossible to mask them using tape....after several failed attempts I resorted to using liquid mask applied with a cocktail stick....
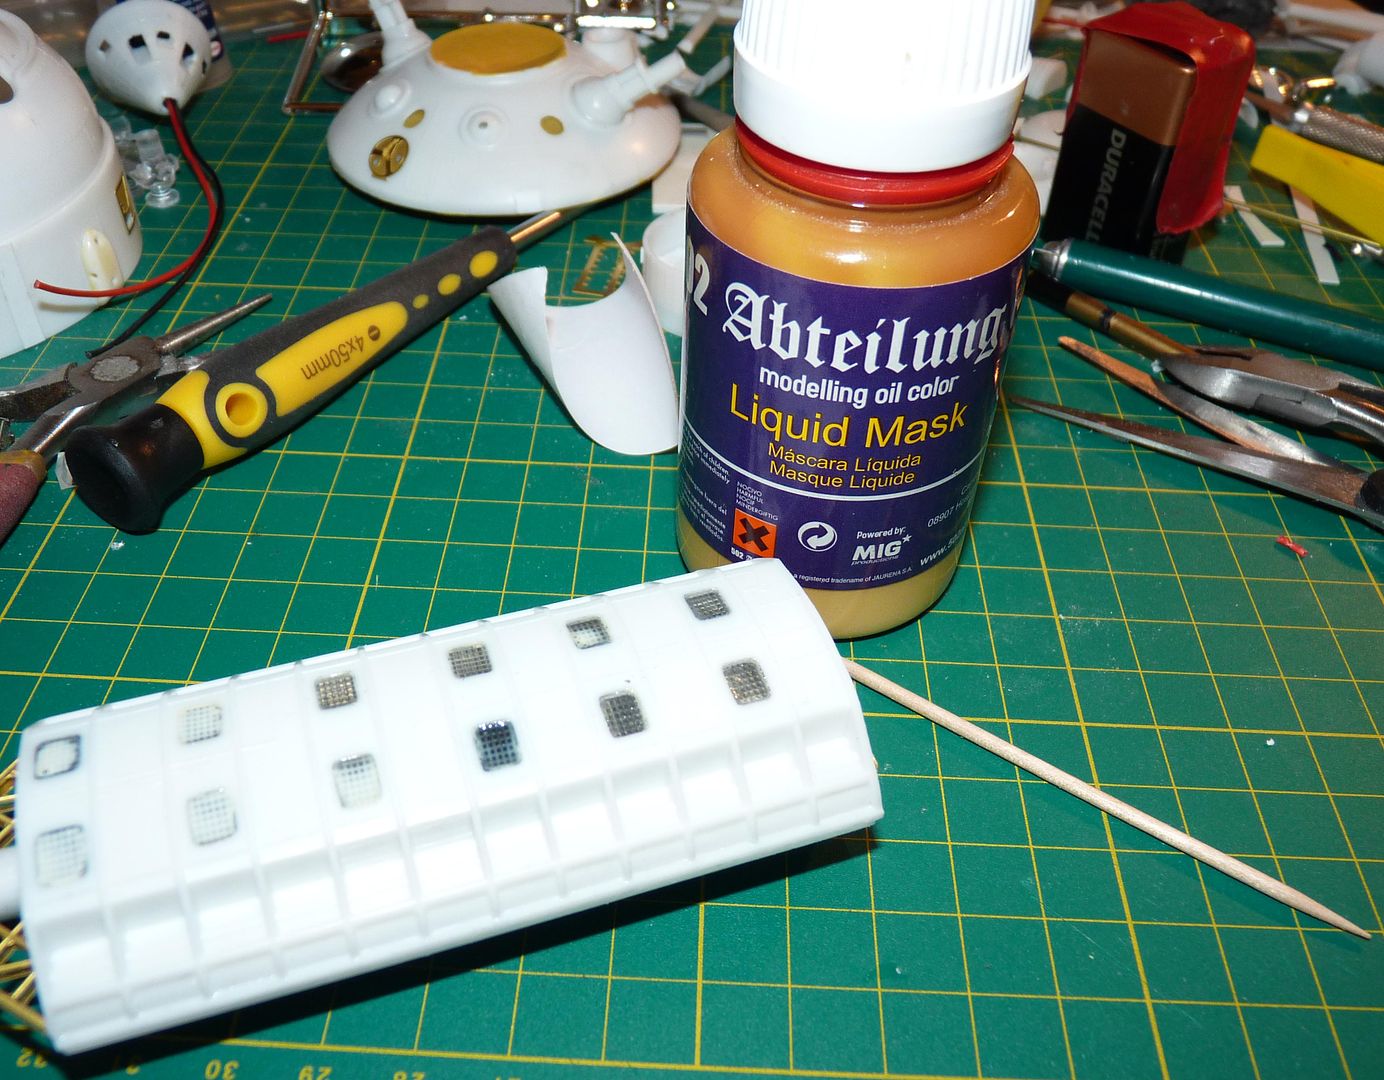
A little more masking then it's on with the paint.....:
The observatory portion of the command module had the now redundant kit part #31 reversed and epoxied in place to act as a platform for the lights....

Three white LED's were arranged in a triangle formation on a scrap of sheet styrene ....

The LED assembly was fed through the hole in the nose of the module and held in place using a cable tie....here's a lighting test....

From the back....two additional LED's were installed to light the tiny windows in the circular brass access hatches....

A quick test fit of all the wired components including the capsule to ensure there is enough wire to feed through....

A rear view shows the amount of separate feeds that will eventually be connected together....

One issue I have found is that the textured surface of the windows in the habitation module means that it is almost impossible to mask them using tape....after several failed attempts I resorted to using liquid mask applied with a cocktail stick....

A little more masking then it's on with the paint.....:
-
jargonking
- Onto the Clever Stuff, Now.
- Posts: 119
- Joined: May 4th, 2011, 12:21 am
Re: MPC Pilgrim Observer Upgrade
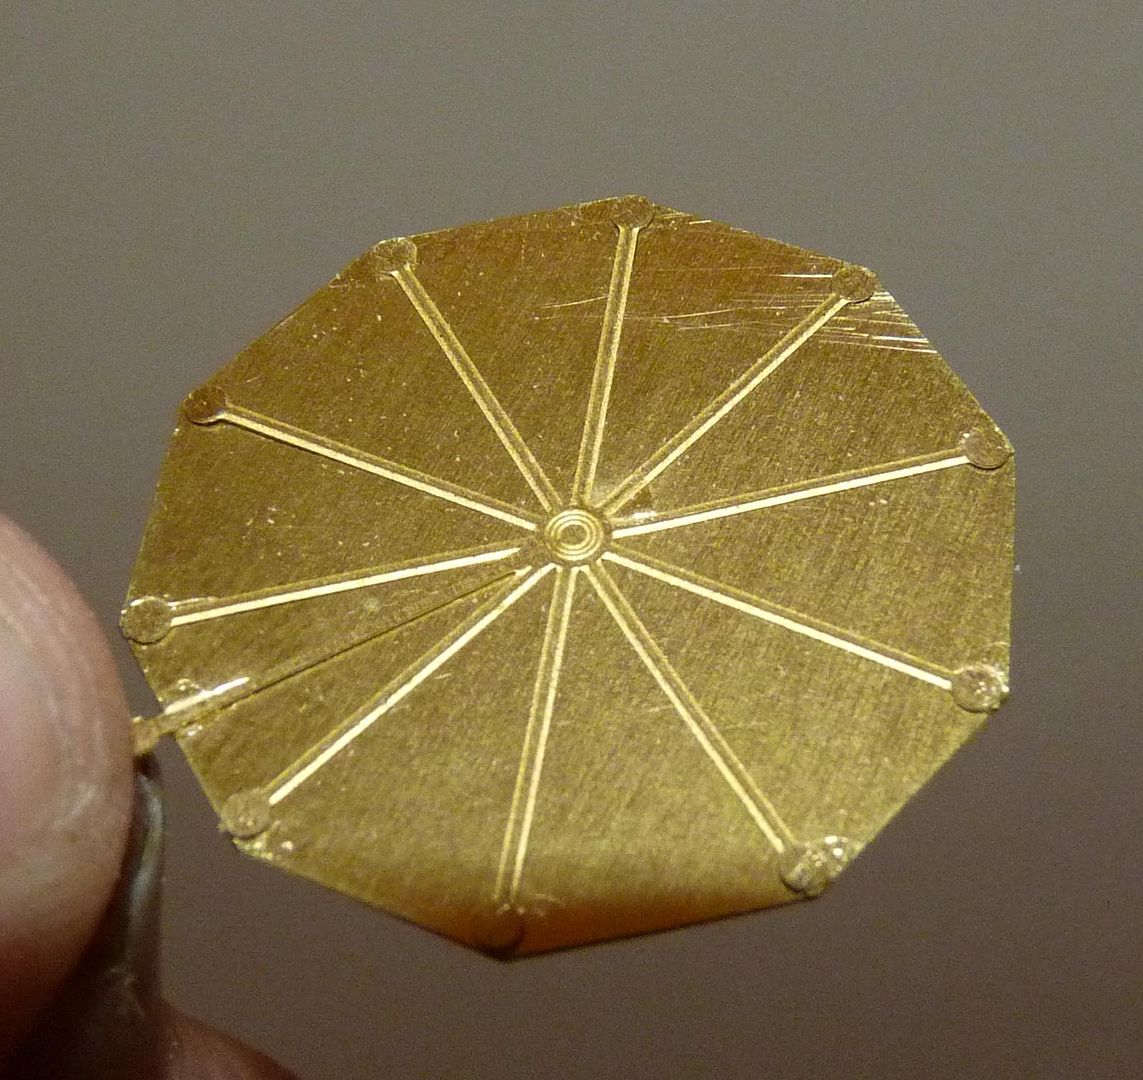
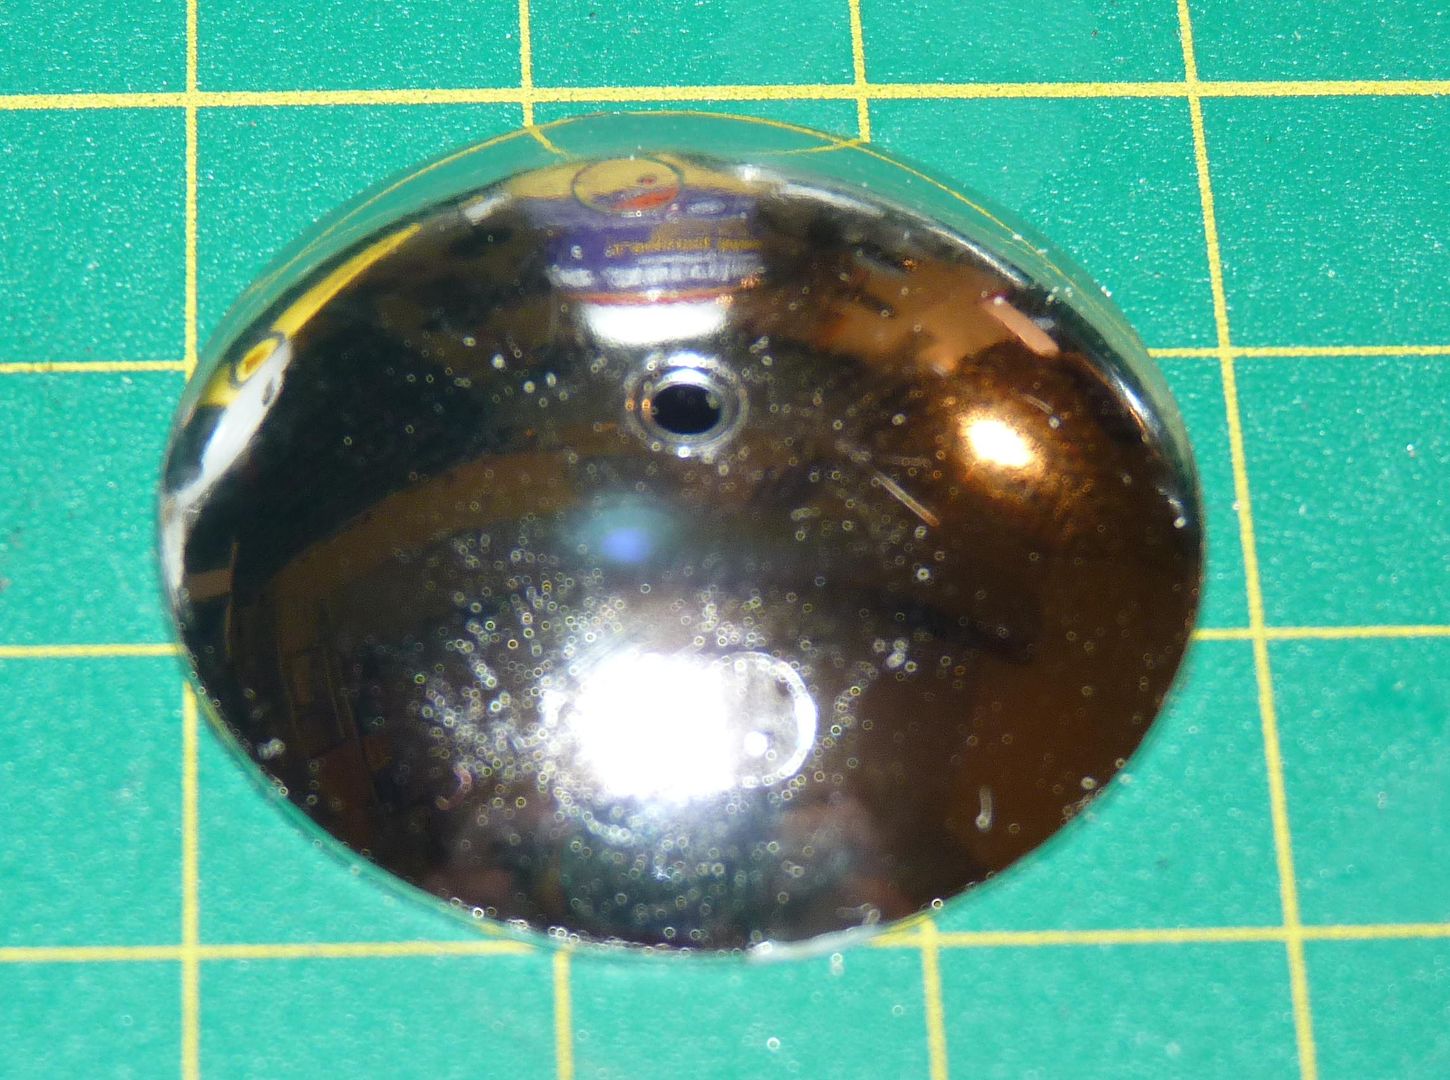
Time to experiment with the main communication dish and attempt to turn a flat brass disc into a dome....
Here's the original kit part....
I fixed a piece of rod to the centre of the dish and used modelling clay to attach it to some sheet styrene before building a retaining wall all round...
I mixed up some silicon and poured it into the mould....
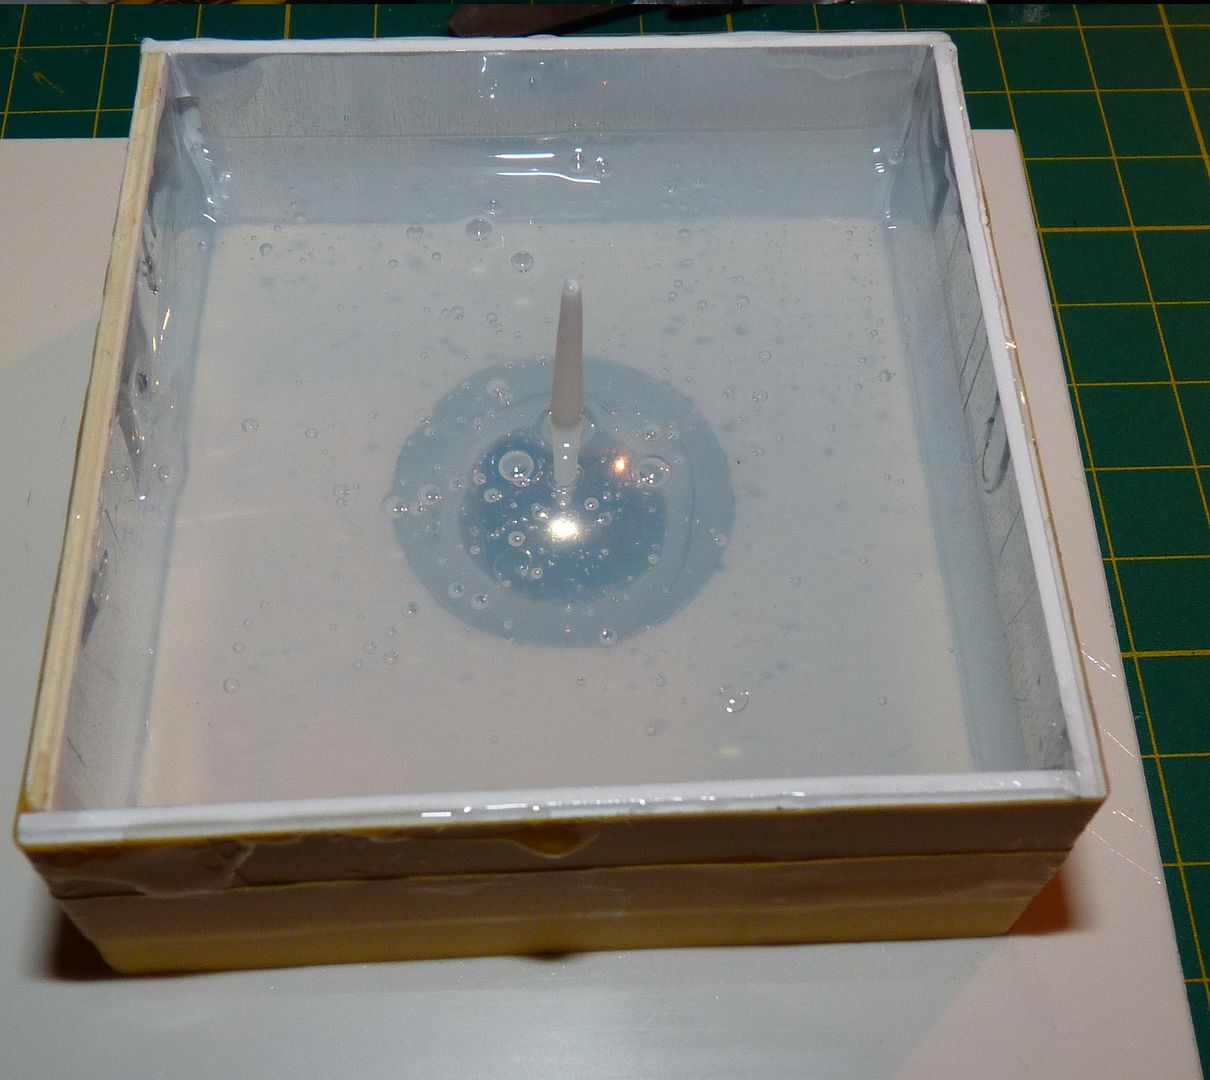
I left it overnight then broke open the mould....
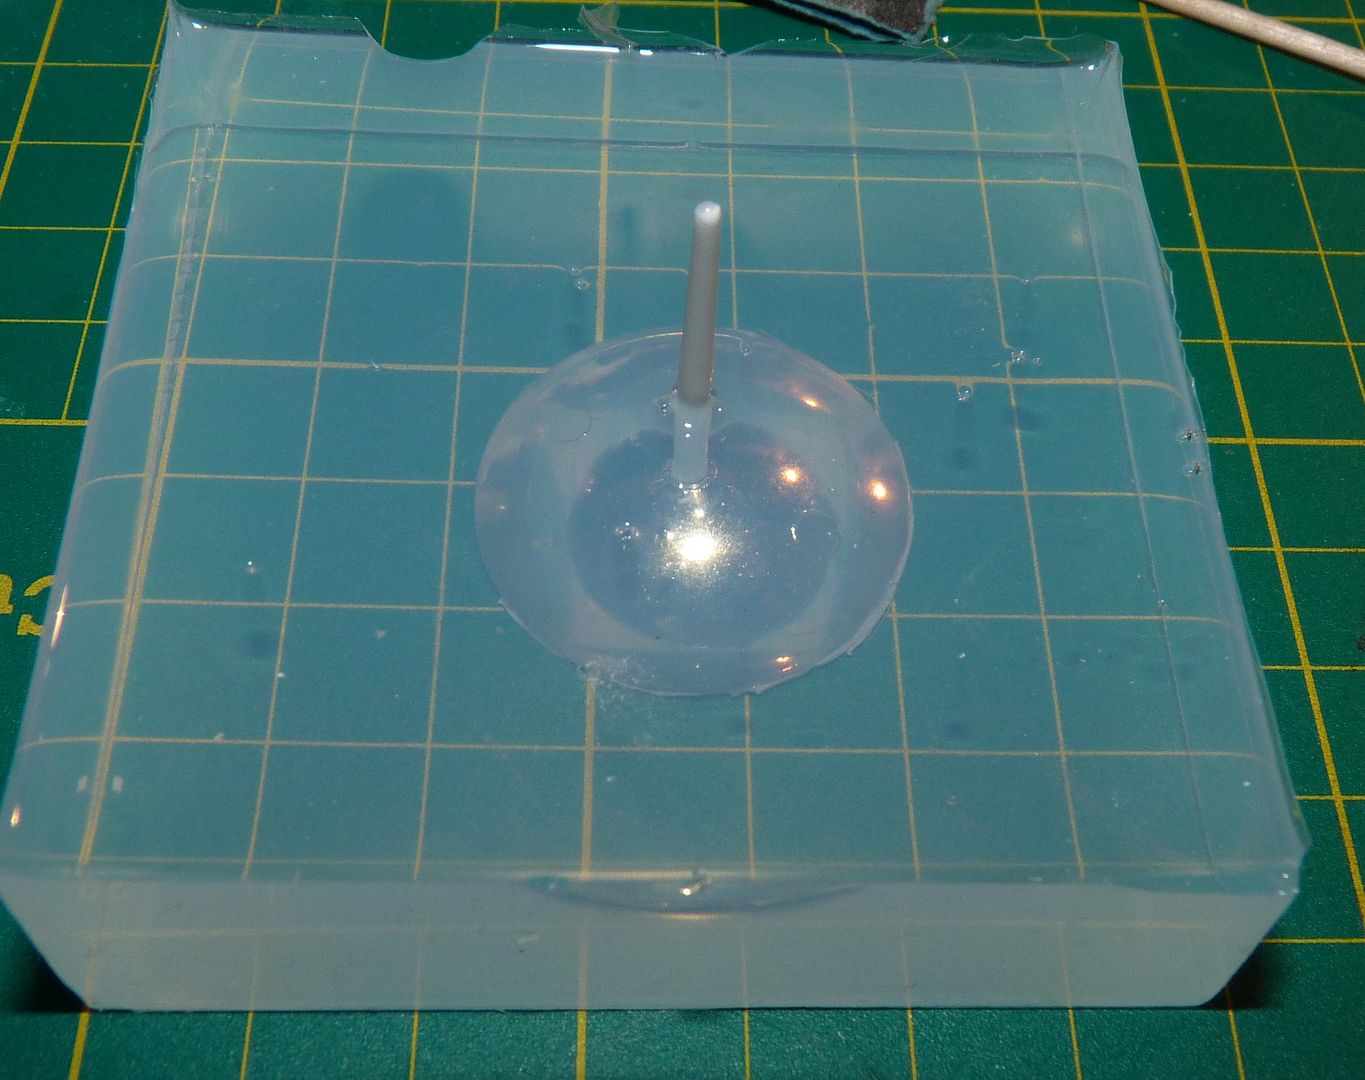
The cured silicon forms a rigid but slightly flexible female mould....into this I inserted the styrene rod again....
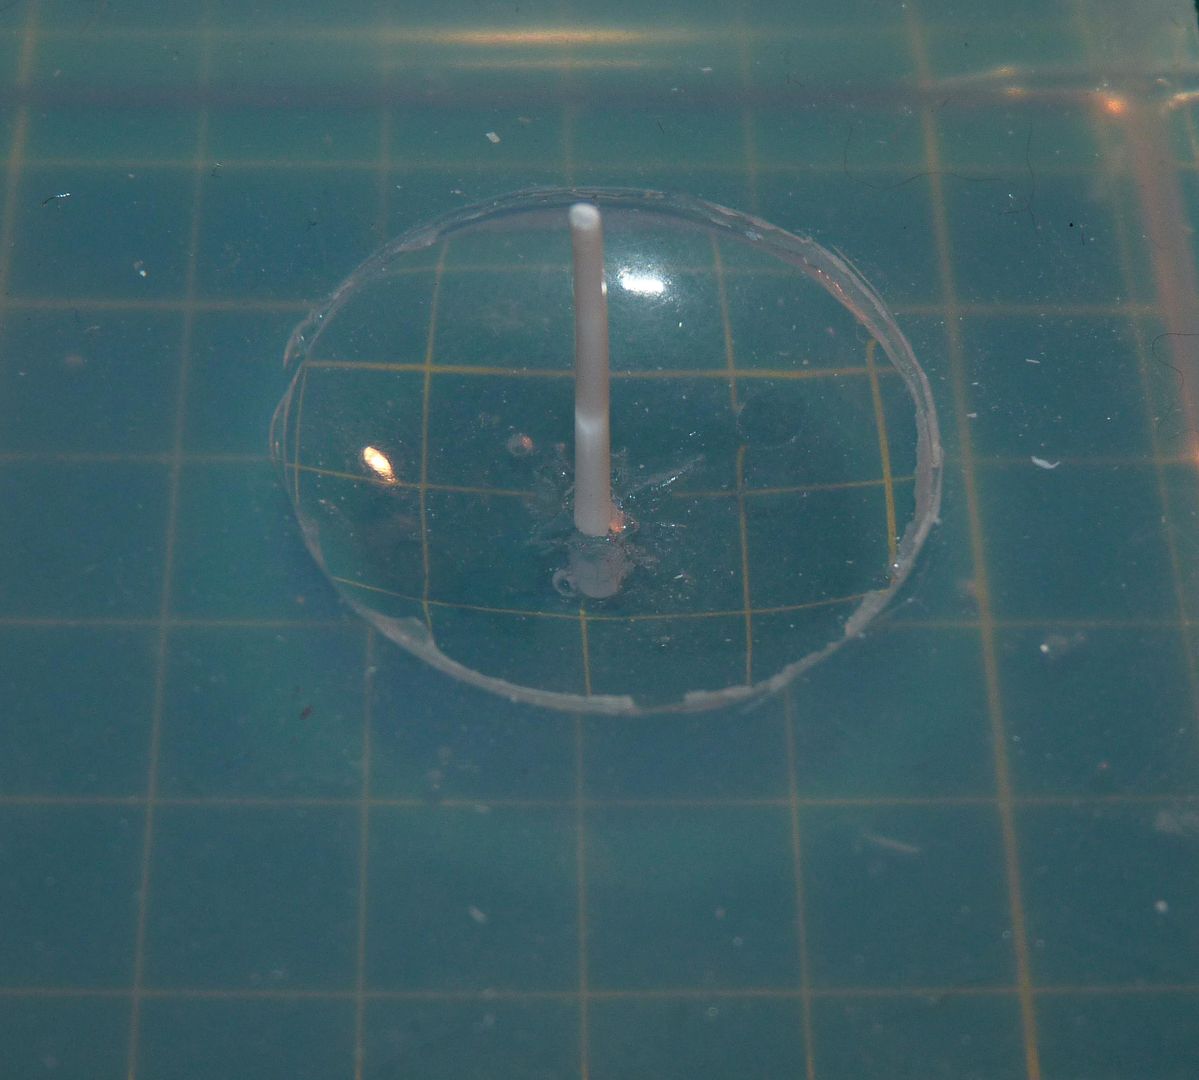
The brass was annealled by gently heating and then allowing to cool, it was then placed onto the mould....

Finally the kit part was placed on top and carefully pressed down....
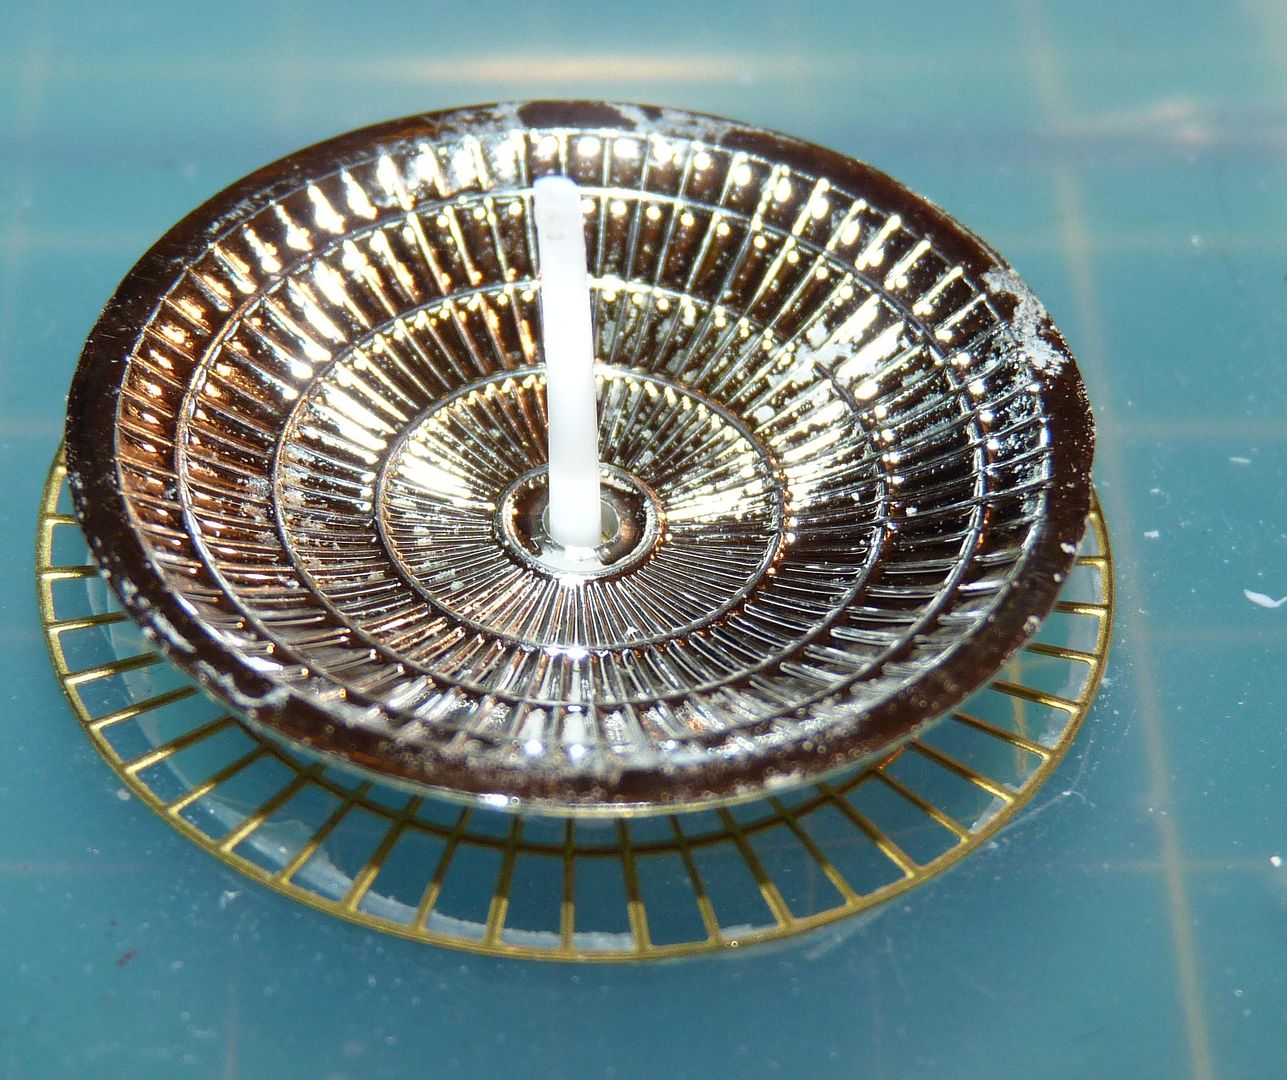
The result....a domed brass dish....albeit with a few kinks in it....
The formed brass was then attached to the kit part using a dremel sanding disc bit....
The assembled dishes were then rolled around on edge on the cutting mat to iron out the creases around the edge....
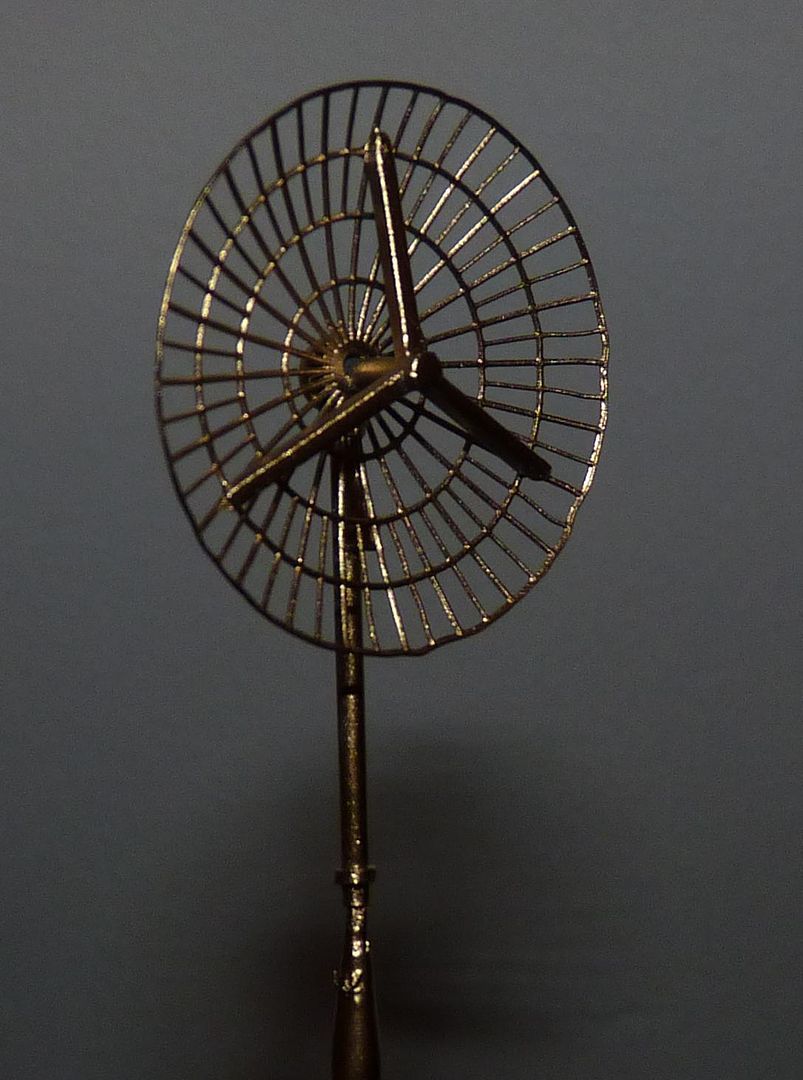
A fresh attempt this afternoon and the dish still has a couple of minor kinks but overall is better than my first....
Here it is attached to the scratchbuilt mast....
I hit it with a coat of primer then a couple of coats of gold to give it a little texture to try and simulate mylar foil....
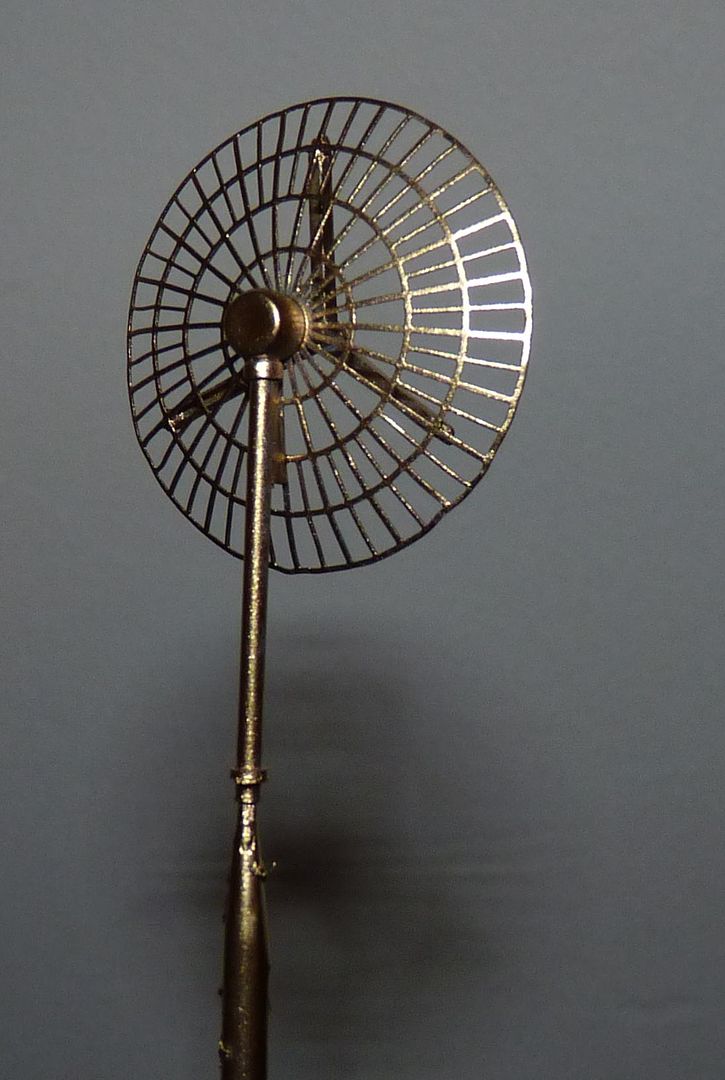
I did consider replacing the kit centre part with brass but I quite like the contrast between the dish and the three supports which are thick enough to look like they might house additional sensors or equipment....
Here's the original kit part....

I fixed a piece of rod to the centre of the dish and used modelling clay to attach it to some sheet styrene before building a retaining wall all round...

I mixed up some silicon and poured it into the mould....

I left it overnight then broke open the mould....

The cured silicon forms a rigid but slightly flexible female mould....into this I inserted the styrene rod again....

The brass was annealled by gently heating and then allowing to cool, it was then placed onto the mould....

Finally the kit part was placed on top and carefully pressed down....

The result....a domed brass dish....albeit with a few kinks in it....

The formed brass was then attached to the kit part using a dremel sanding disc bit....

The assembled dishes were then rolled around on edge on the cutting mat to iron out the creases around the edge....

A fresh attempt this afternoon and the dish still has a couple of minor kinks but overall is better than my first....
Here it is attached to the scratchbuilt mast....

I hit it with a coat of primer then a couple of coats of gold to give it a little texture to try and simulate mylar foil....

I did consider replacing the kit centre part with brass but I quite like the contrast between the dish and the three supports which are thick enough to look like they might house additional sensors or equipment....

-
jargonking
- Onto the Clever Stuff, Now.
- Posts: 119
- Joined: May 4th, 2011, 12:21 am
Re: MPC Pilgrim Observer Upgrade
Some more progress shots ....
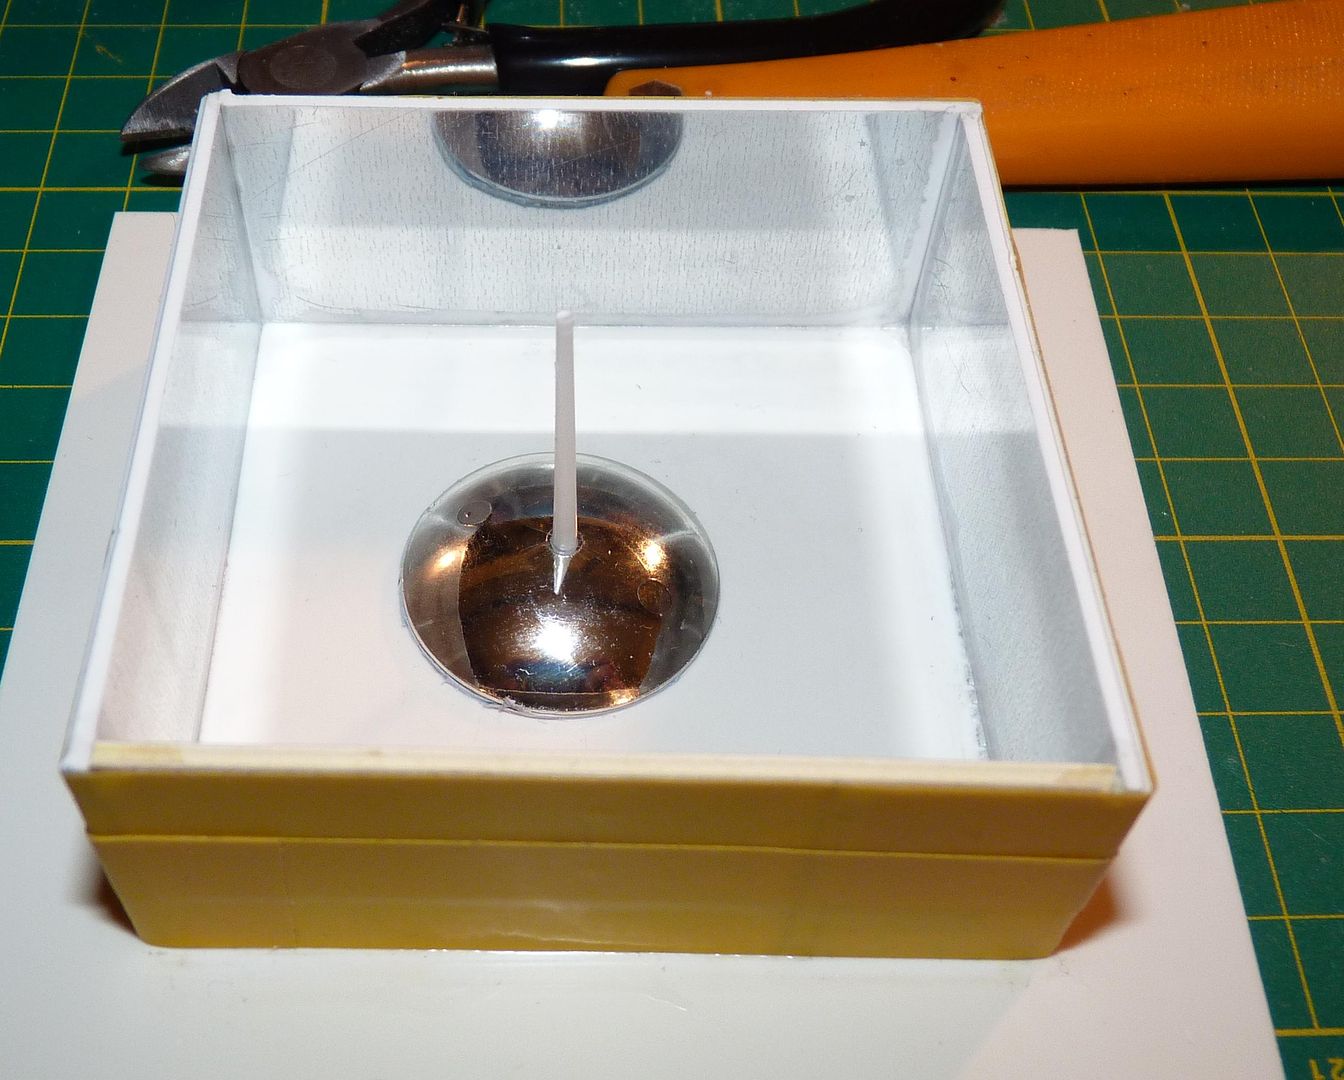
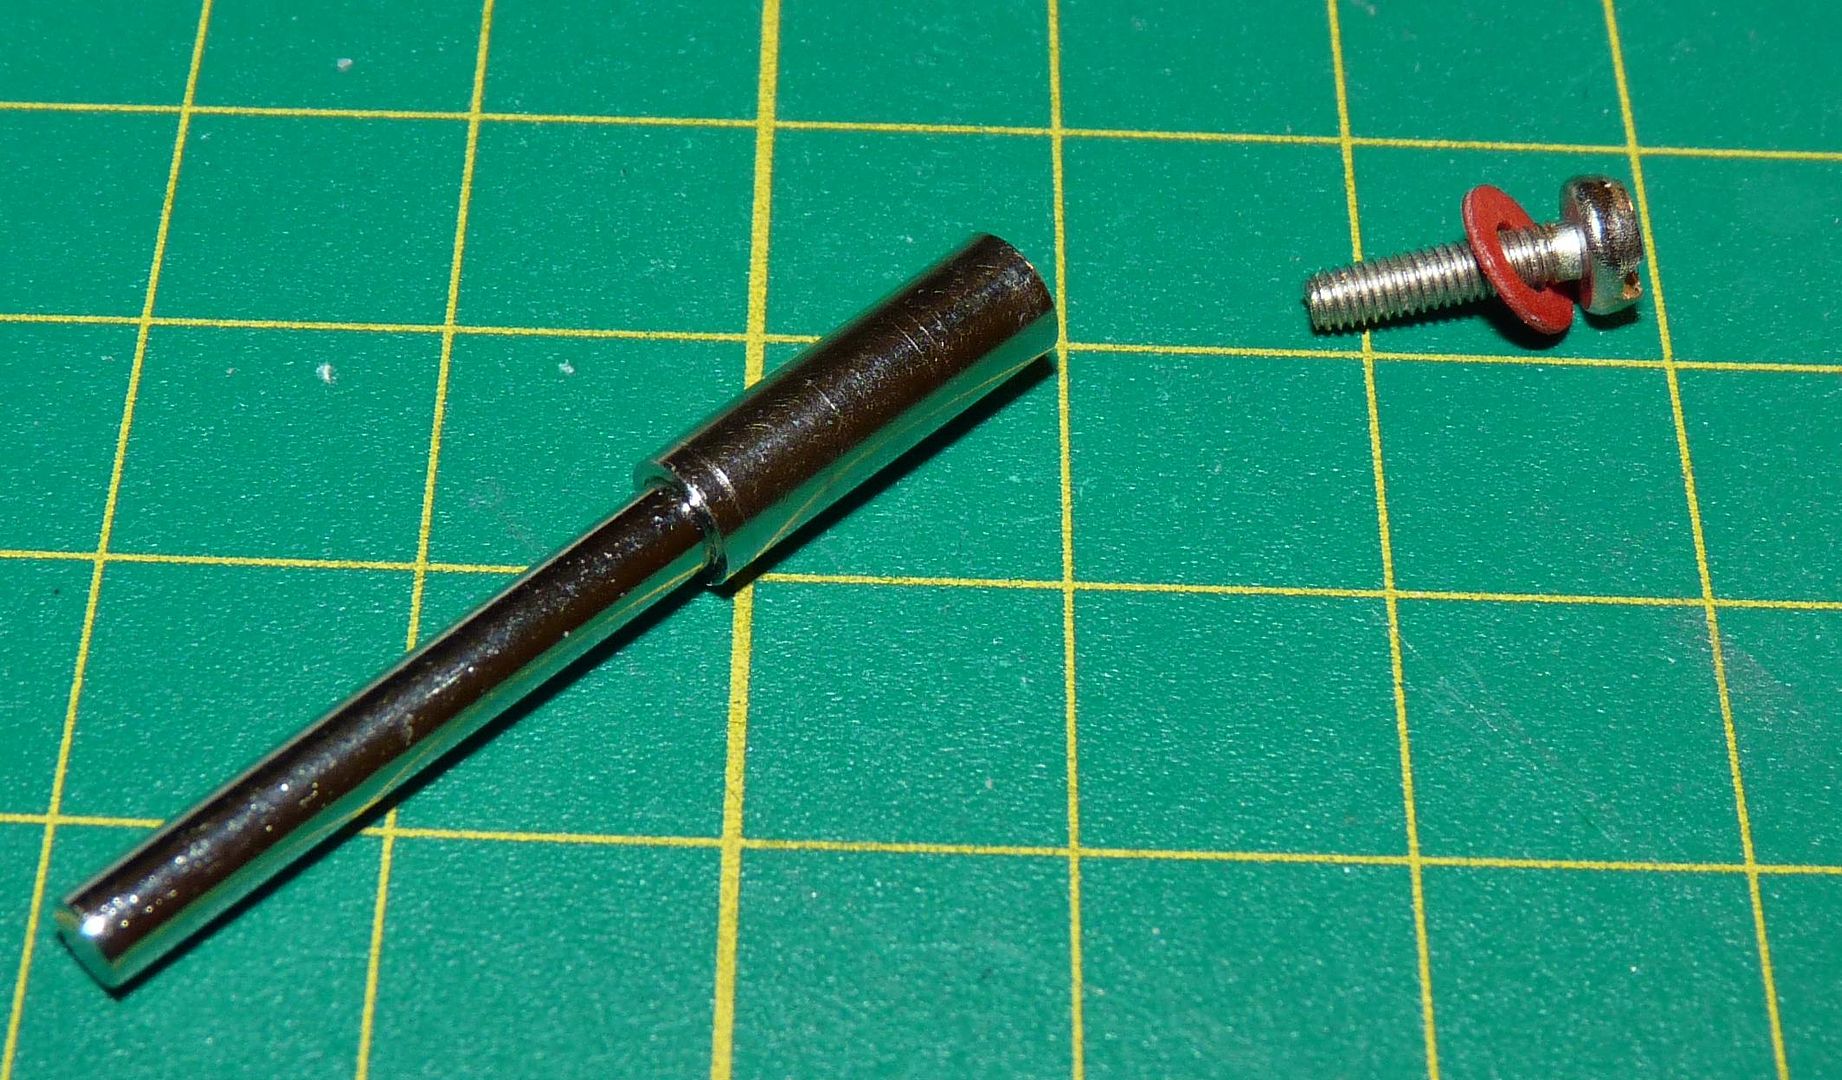
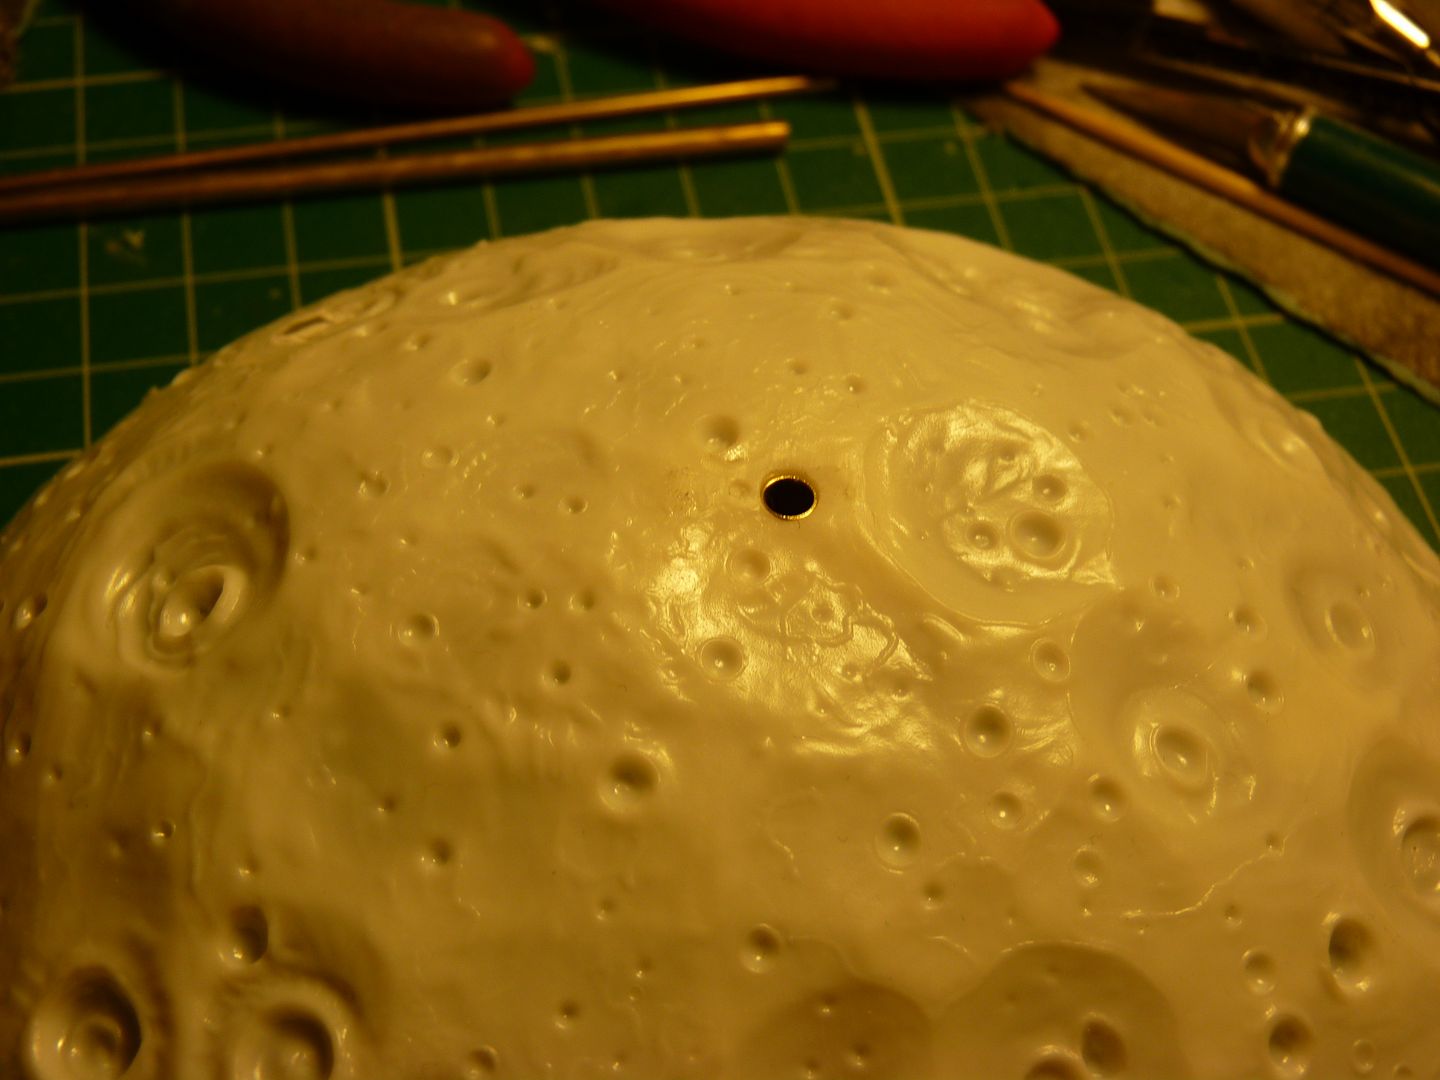
The asteroid base was prepped to receive the mounting rod by first cementing a block of styrene pieces to the underside....
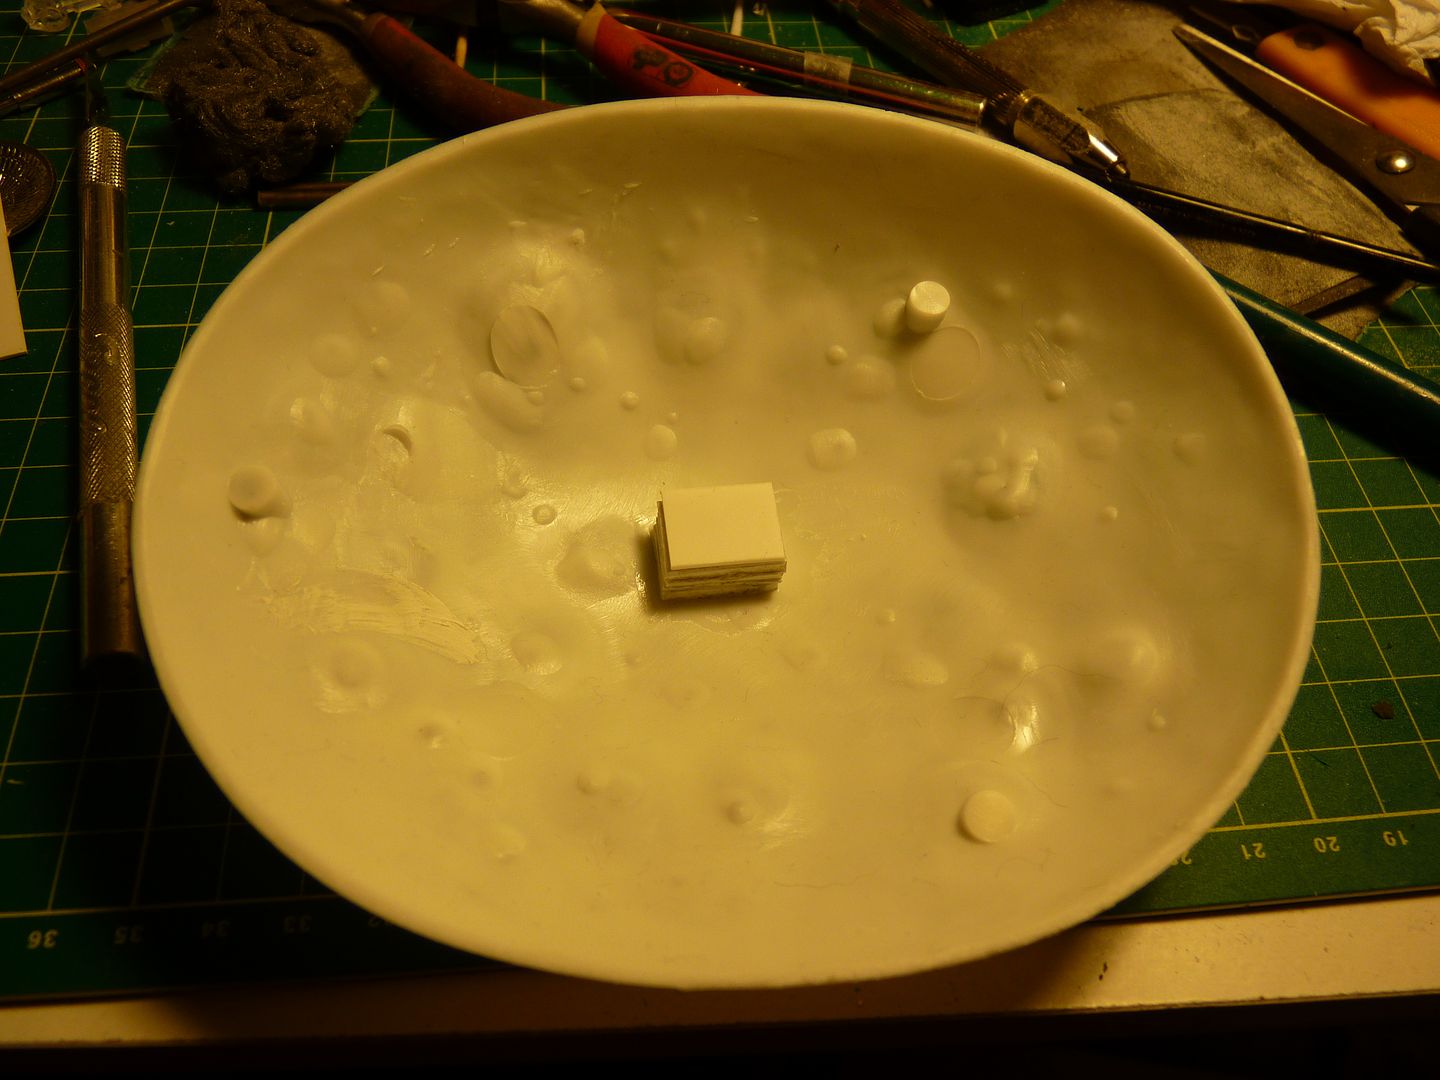
The base was then drilled through on the drill press to ensure the hole was vertical...
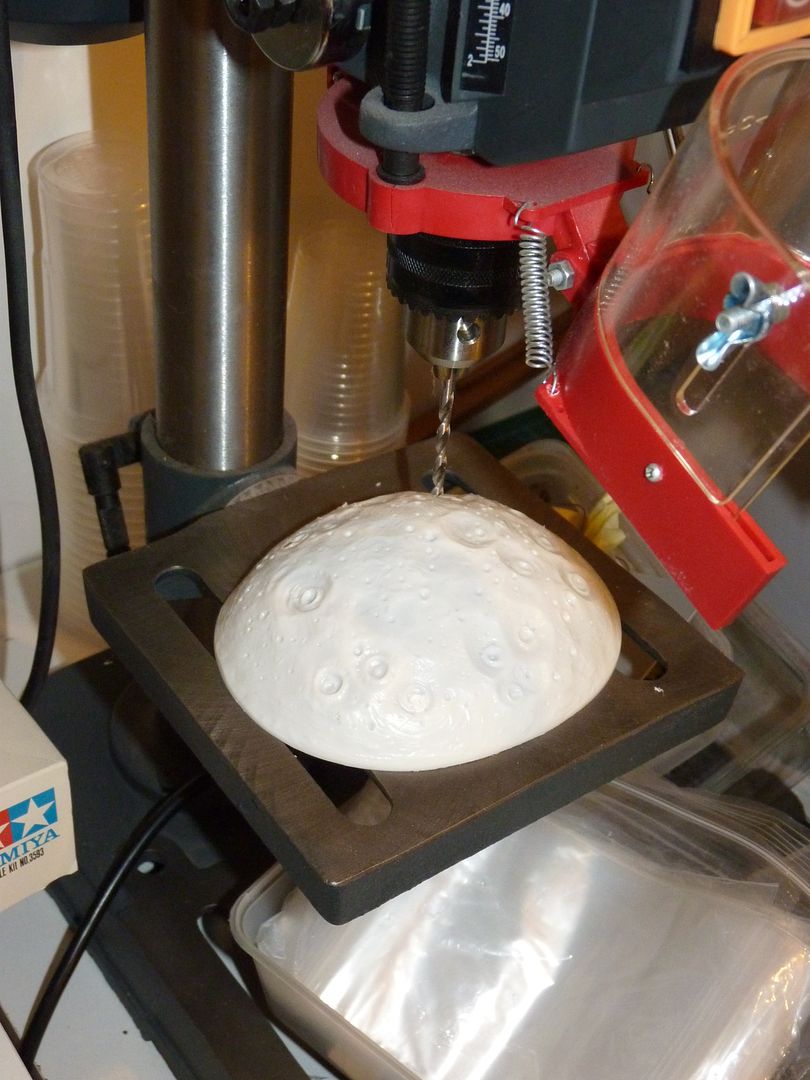
A short pece of brass tubing was cut....the internal diameter of this matches the external diameter of the mounting rod...
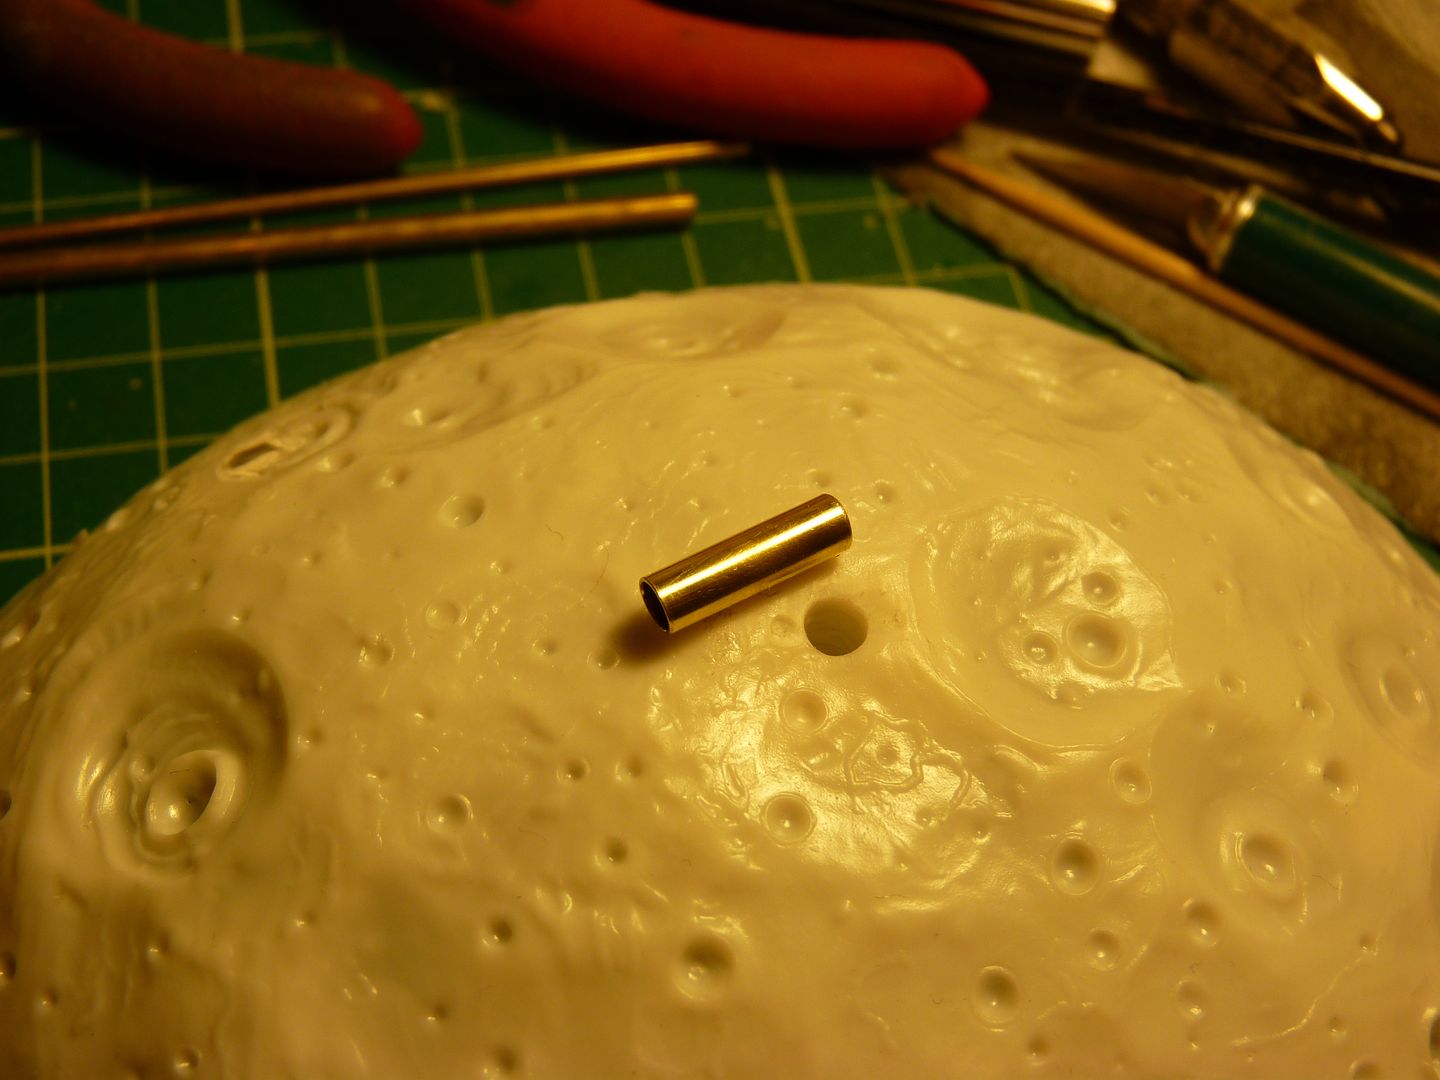
Here it is glued in place....
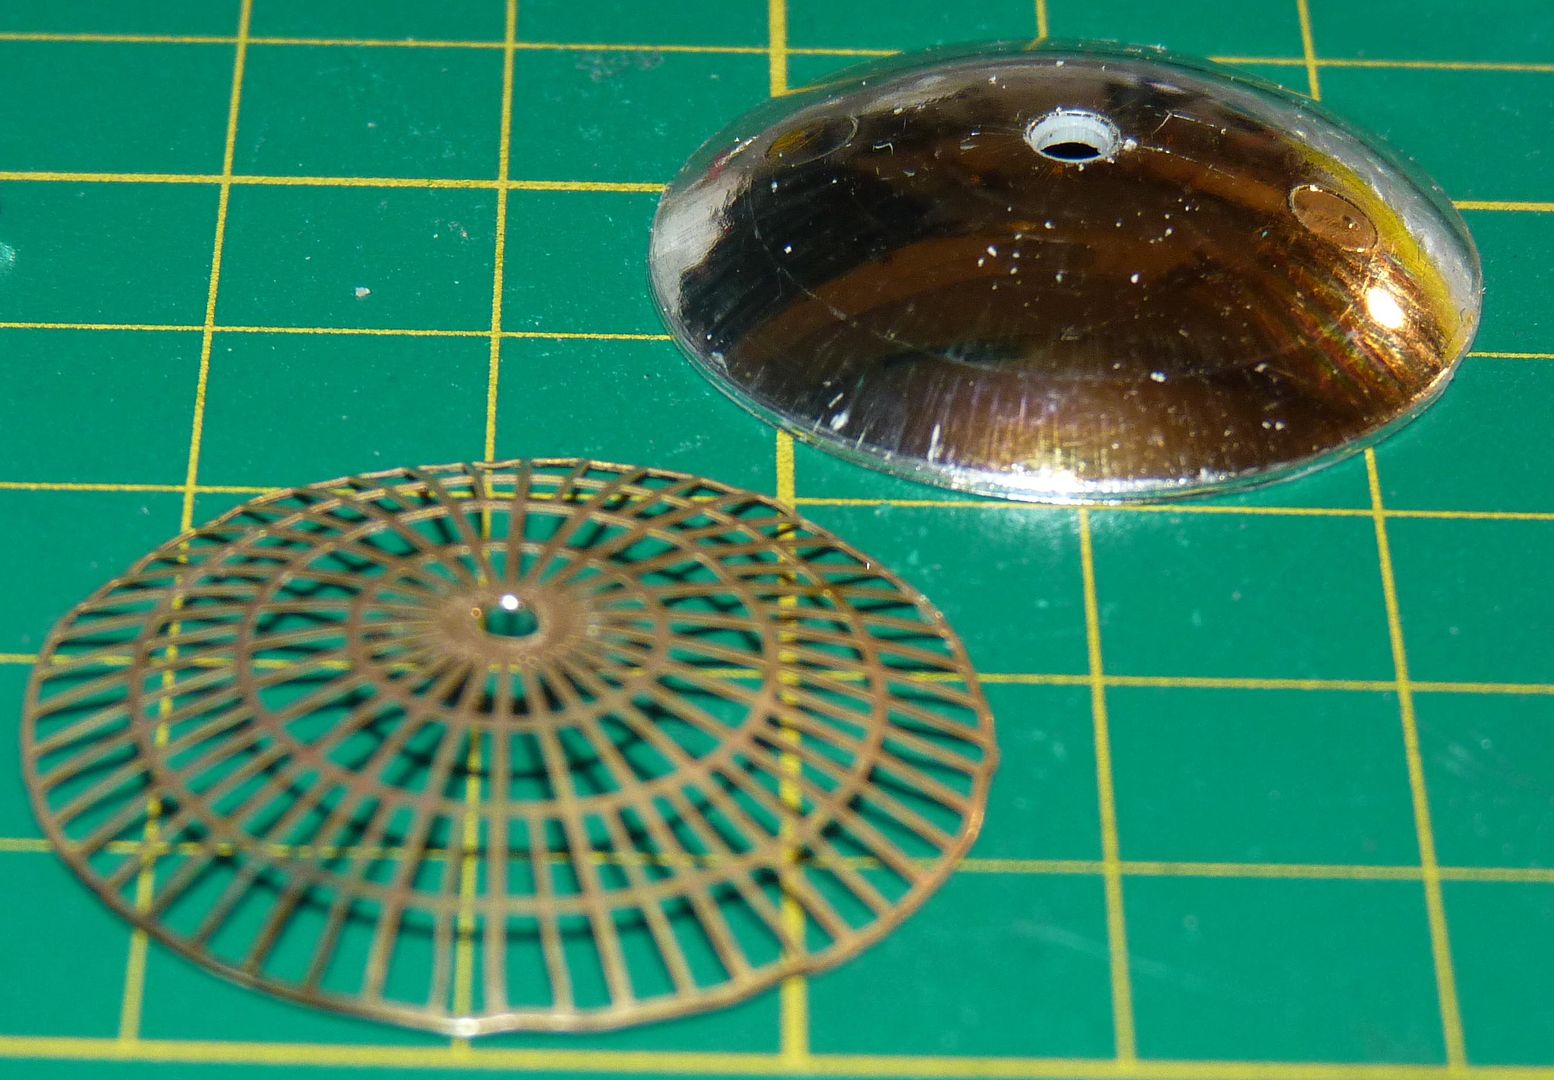
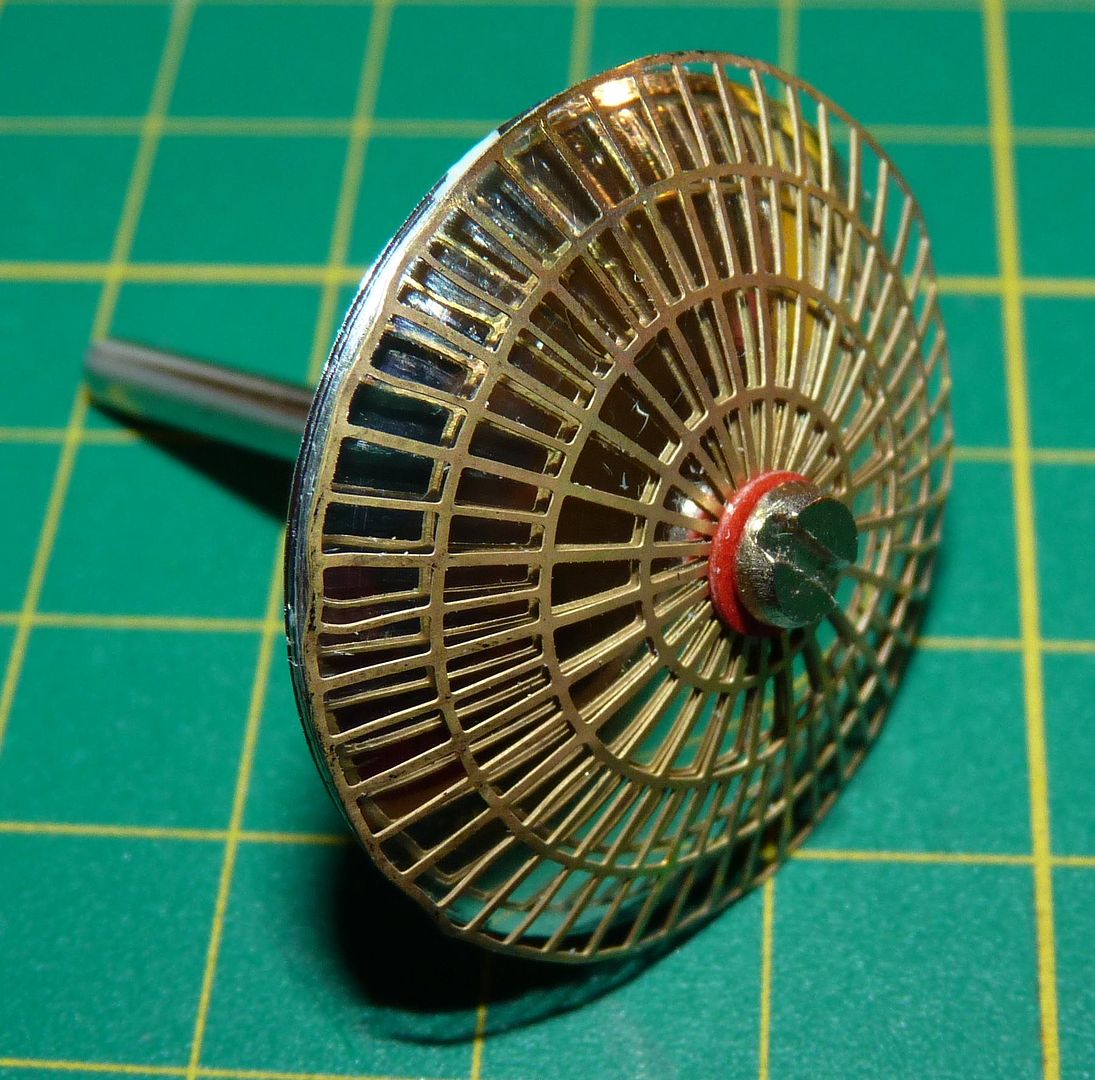
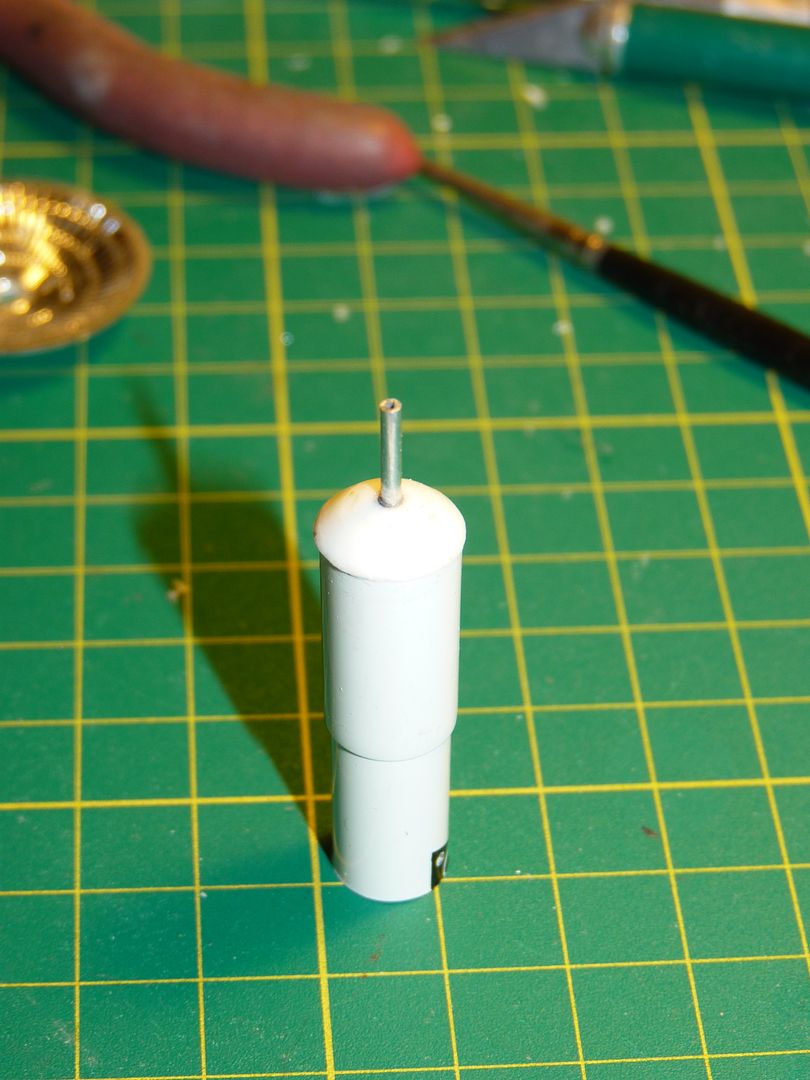
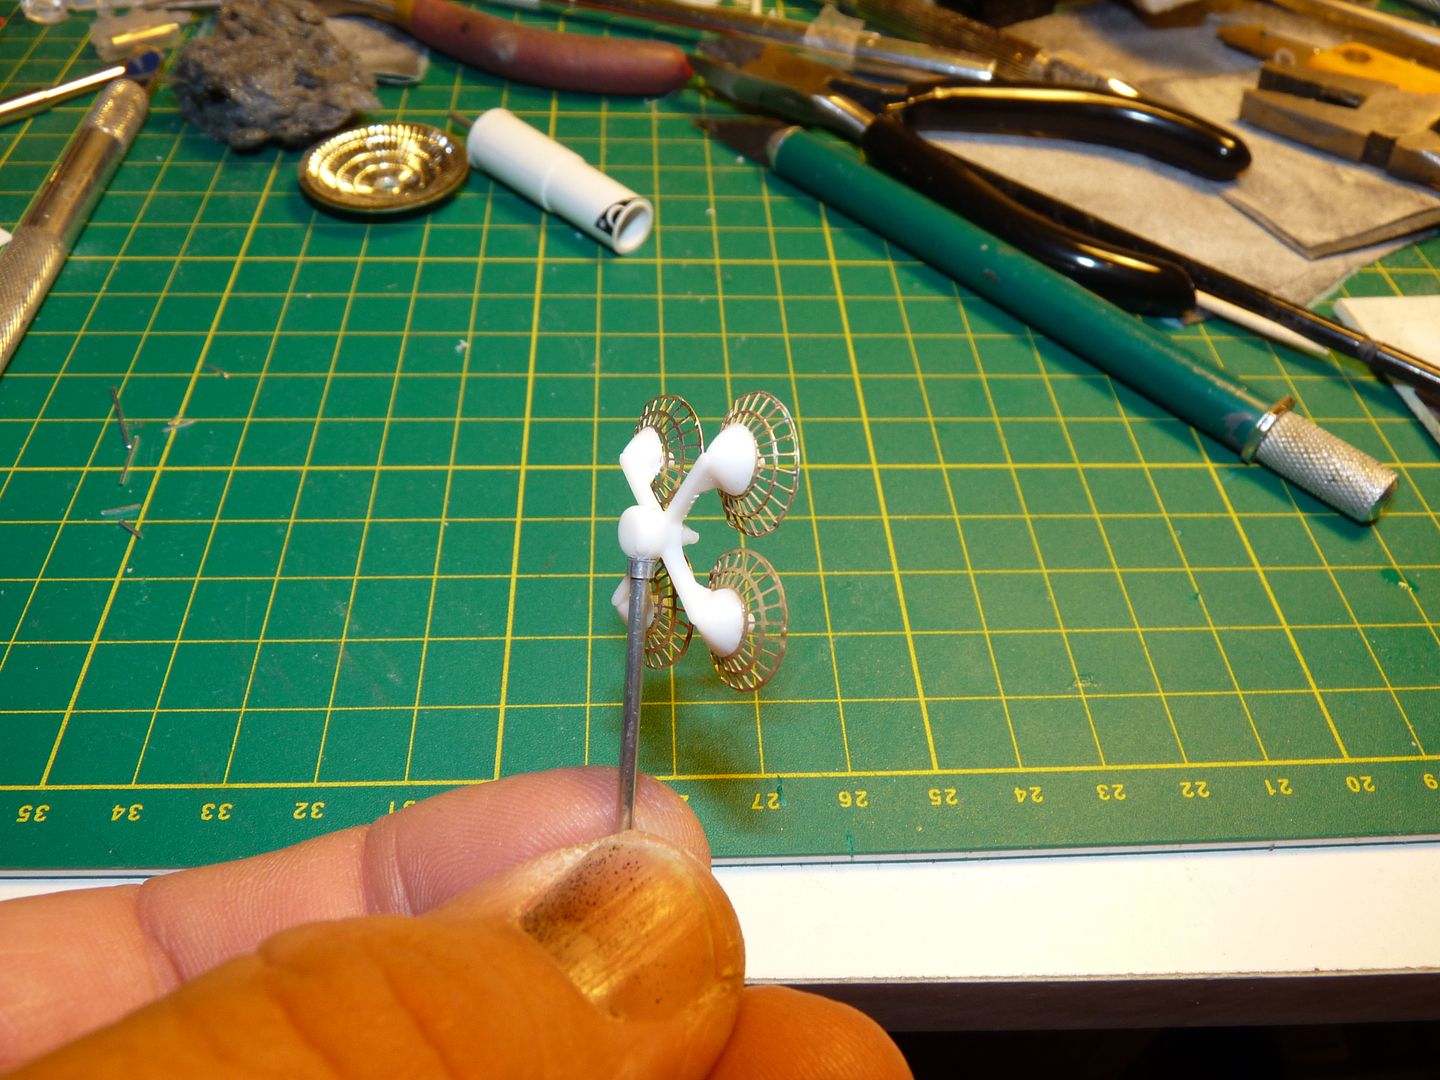
I also fashioned a shaping device for the four small etched dishes from one of the kit dishes fixed to a section of a pen body...the aluminium rod fits the hole in the centre of the etch....
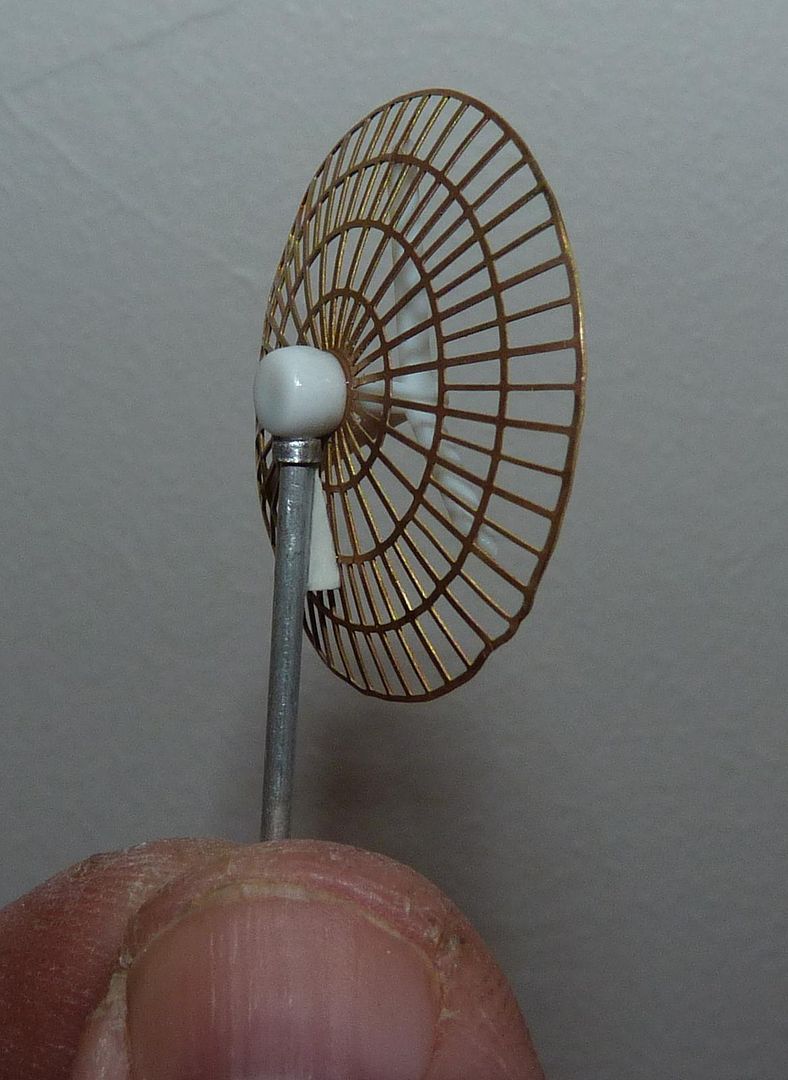
After several failed attempts I finally managed to get the brass discs to conform to the shape....still not absolutely perfect but I think good enough....
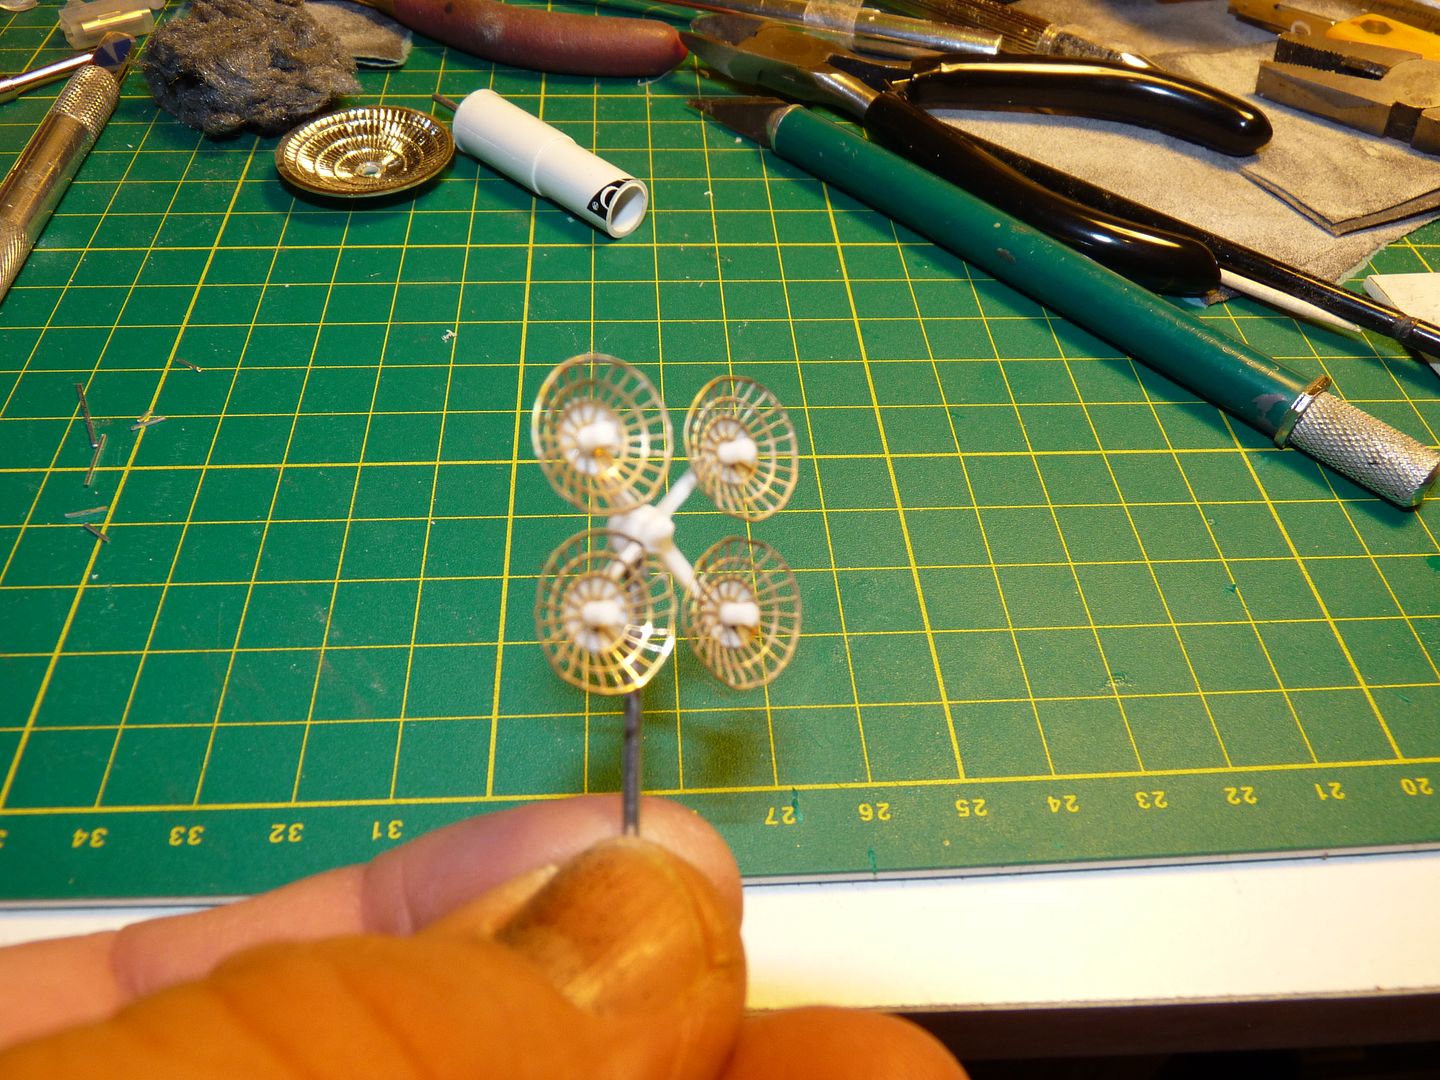
I think the only way to get a better-shaped dish would be to either etch them in finer gauge material that may be slightly more pliable...maybe copper, although then much of the strength would be lost...or to have them formed under pressure in a metal former/mould....
That said, I think ParaGrafix have done an amazing job producing this sheet in the first place and I can live with some minor kinks given the quality of the rest of the parts....
The asteroid base was prepped to receive the mounting rod by first cementing a block of styrene pieces to the underside....

The base was then drilled through on the drill press to ensure the hole was vertical...

A short pece of brass tubing was cut....the internal diameter of this matches the external diameter of the mounting rod...

Here it is glued in place....

I also fashioned a shaping device for the four small etched dishes from one of the kit dishes fixed to a section of a pen body...the aluminium rod fits the hole in the centre of the etch....

After several failed attempts I finally managed to get the brass discs to conform to the shape....still not absolutely perfect but I think good enough....

I think the only way to get a better-shaped dish would be to either etch them in finer gauge material that may be slightly more pliable...maybe copper, although then much of the strength would be lost...or to have them formed under pressure in a metal former/mould....

That said, I think ParaGrafix have done an amazing job producing this sheet in the first place and I can live with some minor kinks given the quality of the rest of the parts....
-
jargonking
- Onto the Clever Stuff, Now.
- Posts: 119
- Joined: May 4th, 2011, 12:21 am
Re: MPC Pilgrim Observer Upgrade
A productive day yesterday, got the rest of the main components basecoated and started on some of the detail painting.
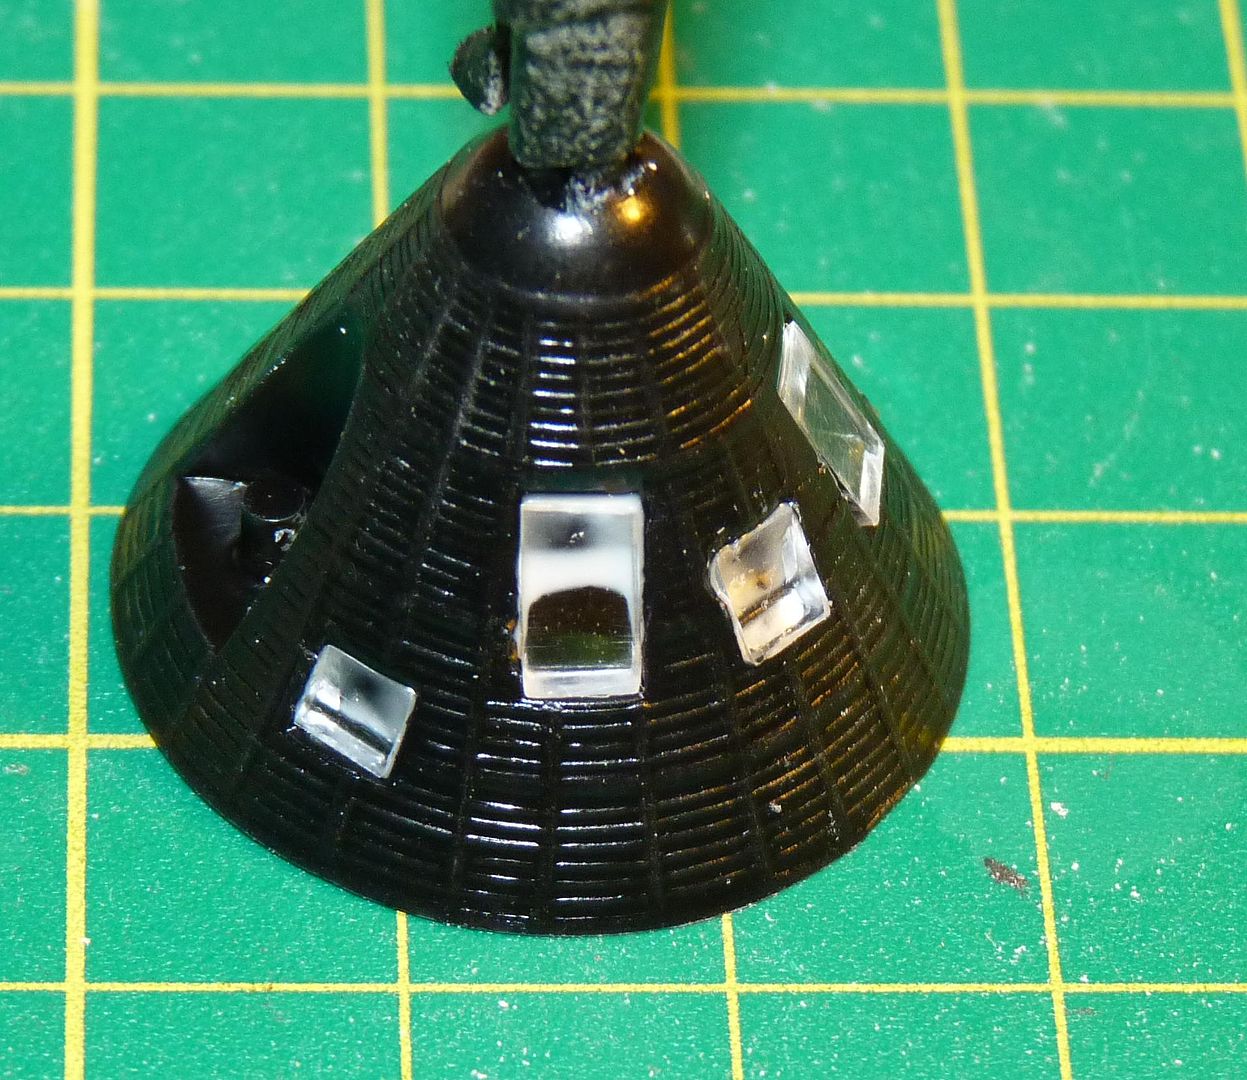
Here's the capsule basecoated in black and the windows installed with white PVA glue which dries clear....
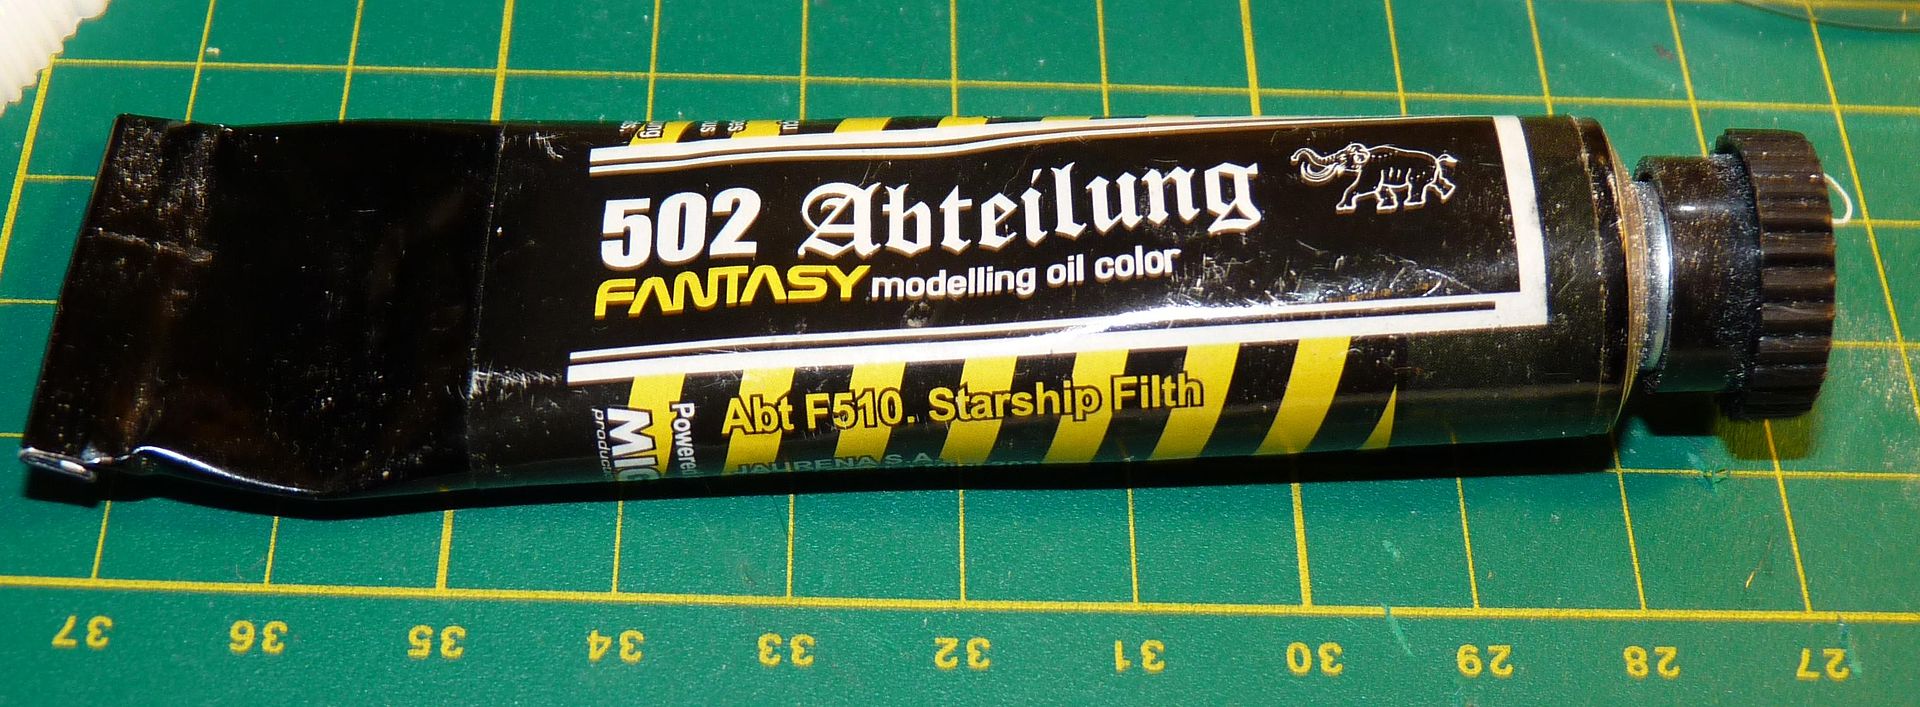
I gave all the main structures a thin wash using MIG Starship Filth oil paint....this toned down the brightness of the white to a more scale effect and starts to bring out the detail....
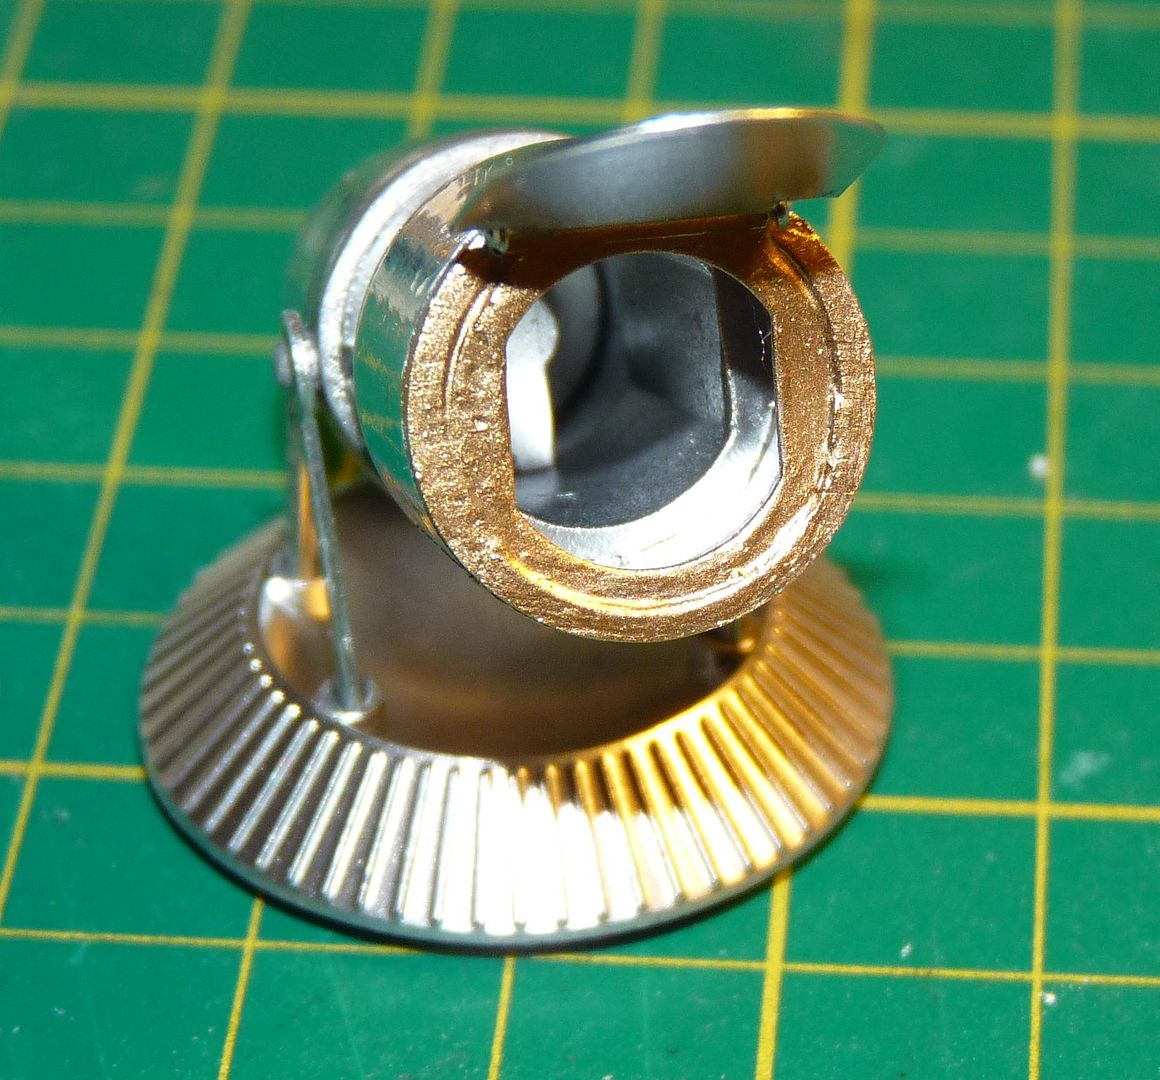
The Hubble-like telescope was assembled...I went for various metallic shades here as a contrast to the white of the command module...
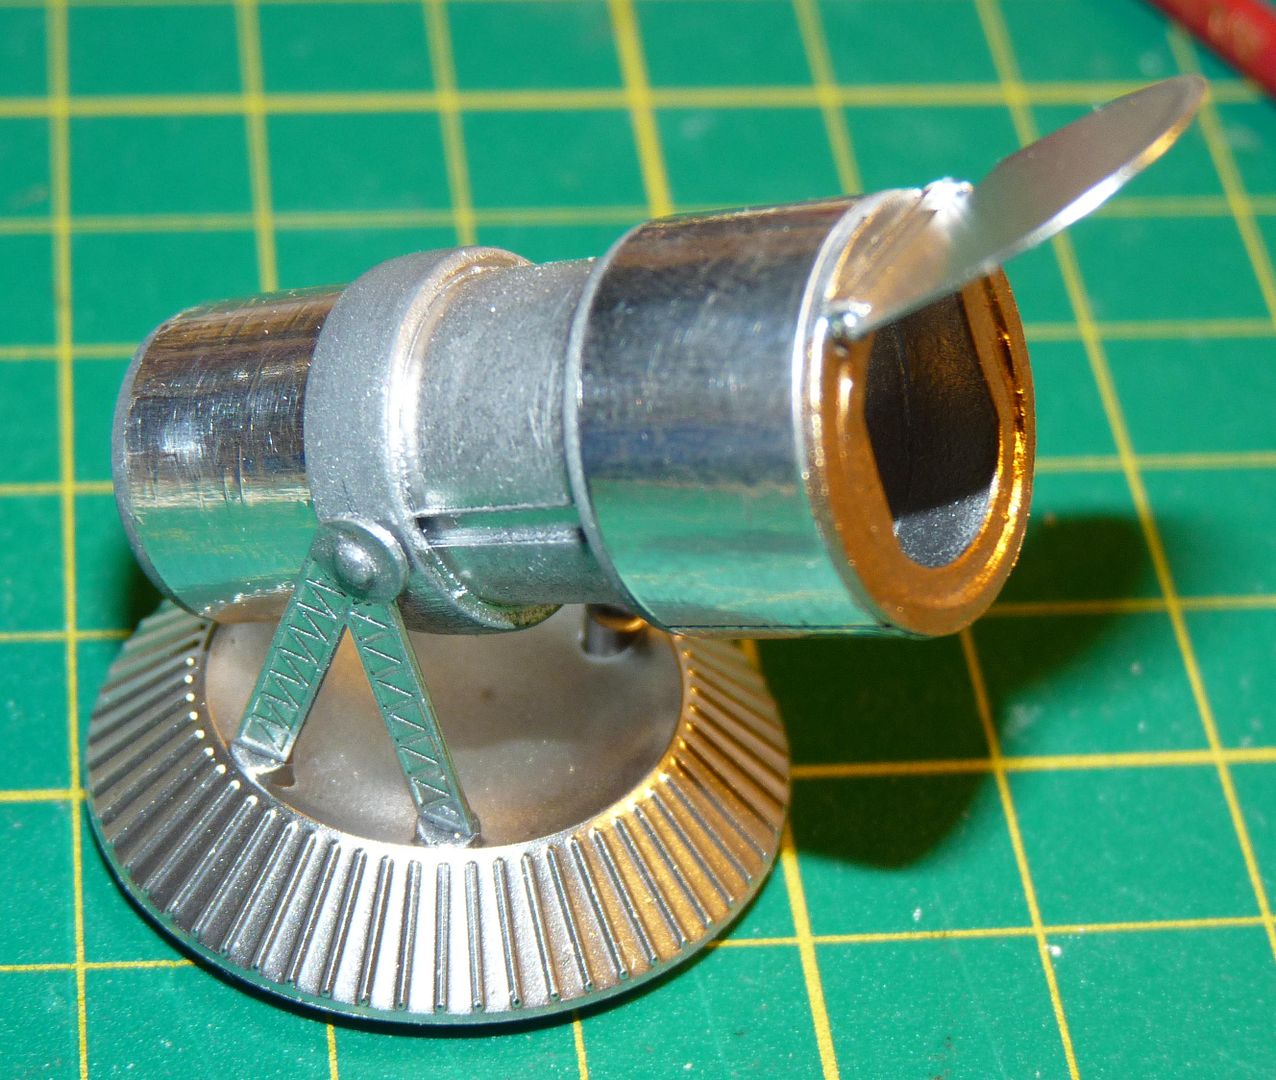
Another view...the mirror at the bottom of the telescope is the only kit part I left in the original chrome....
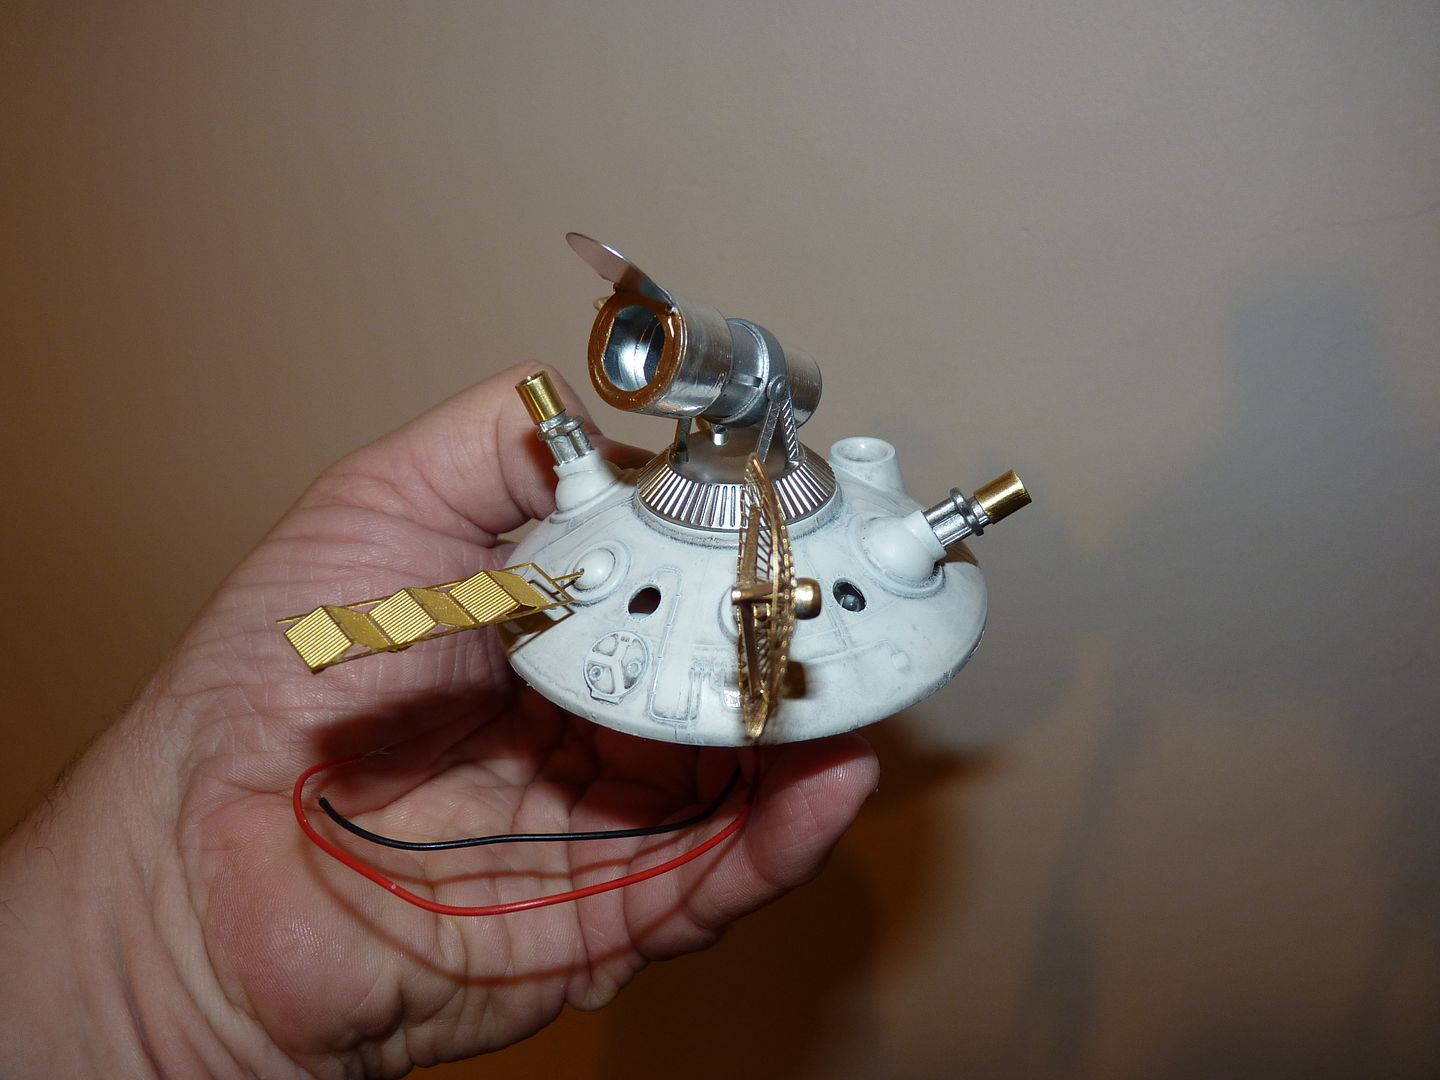
A test fit of the antenna assemblies and telescope with the parts held in place with blutack...
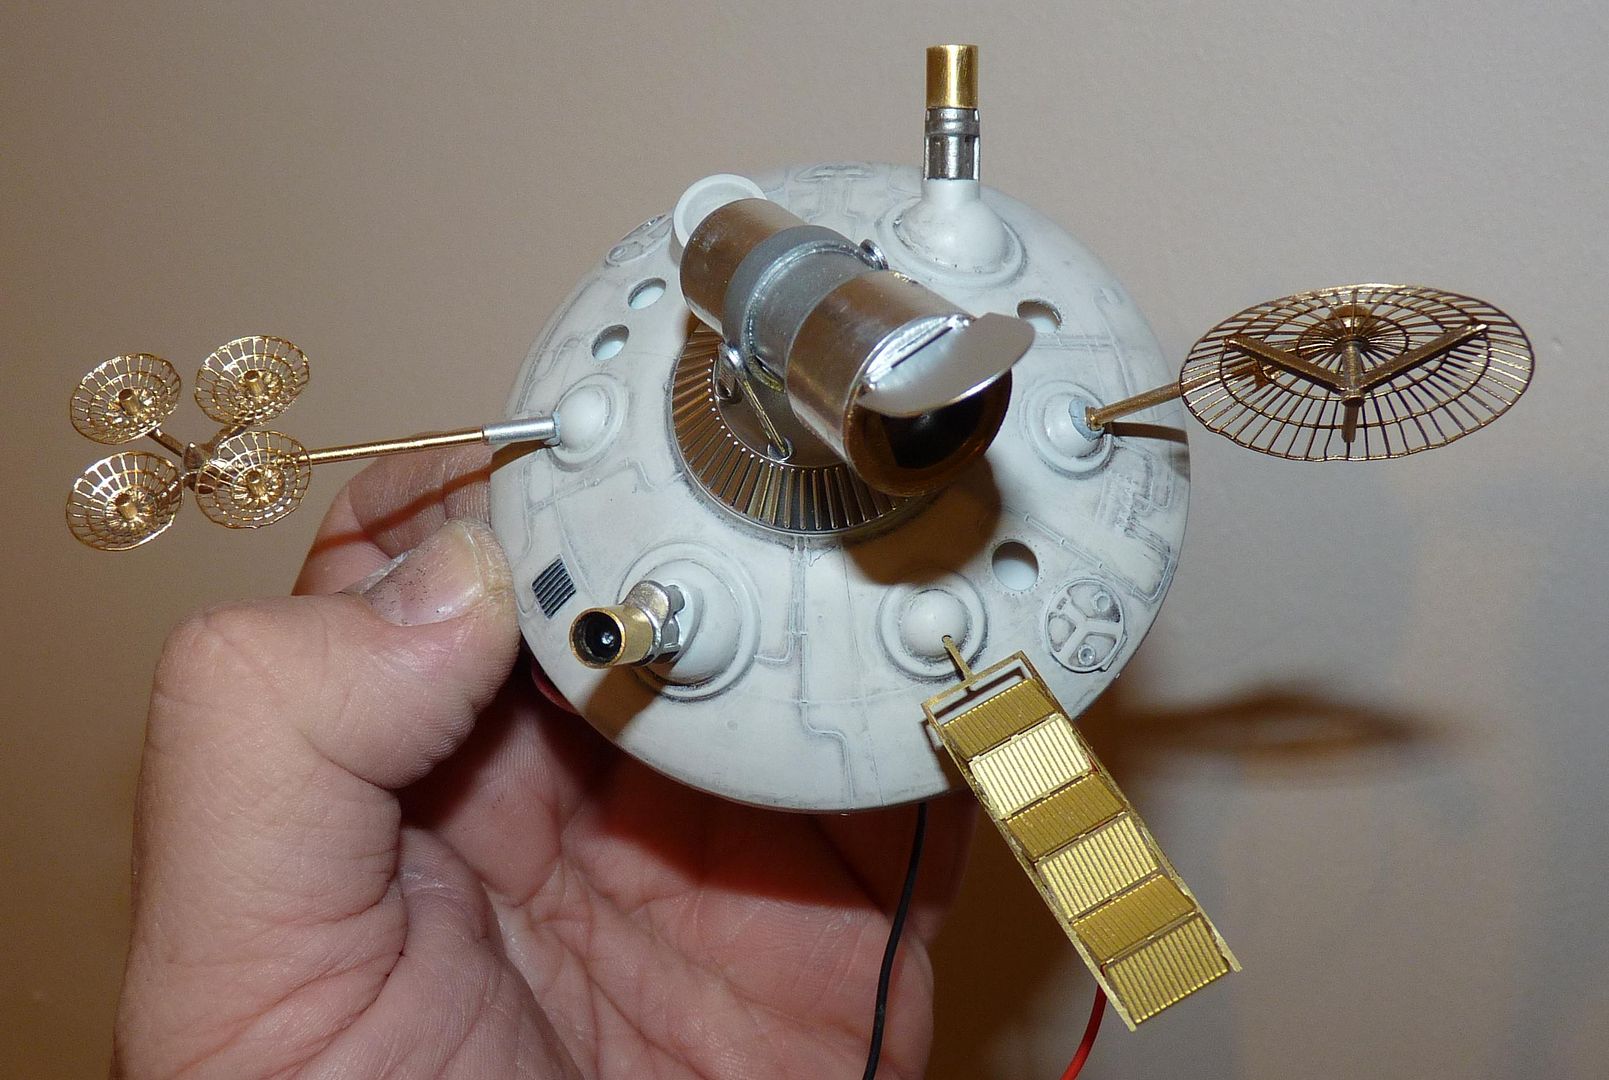
...the concertina antenna/solar panel/whatever-it-is still needs painting...
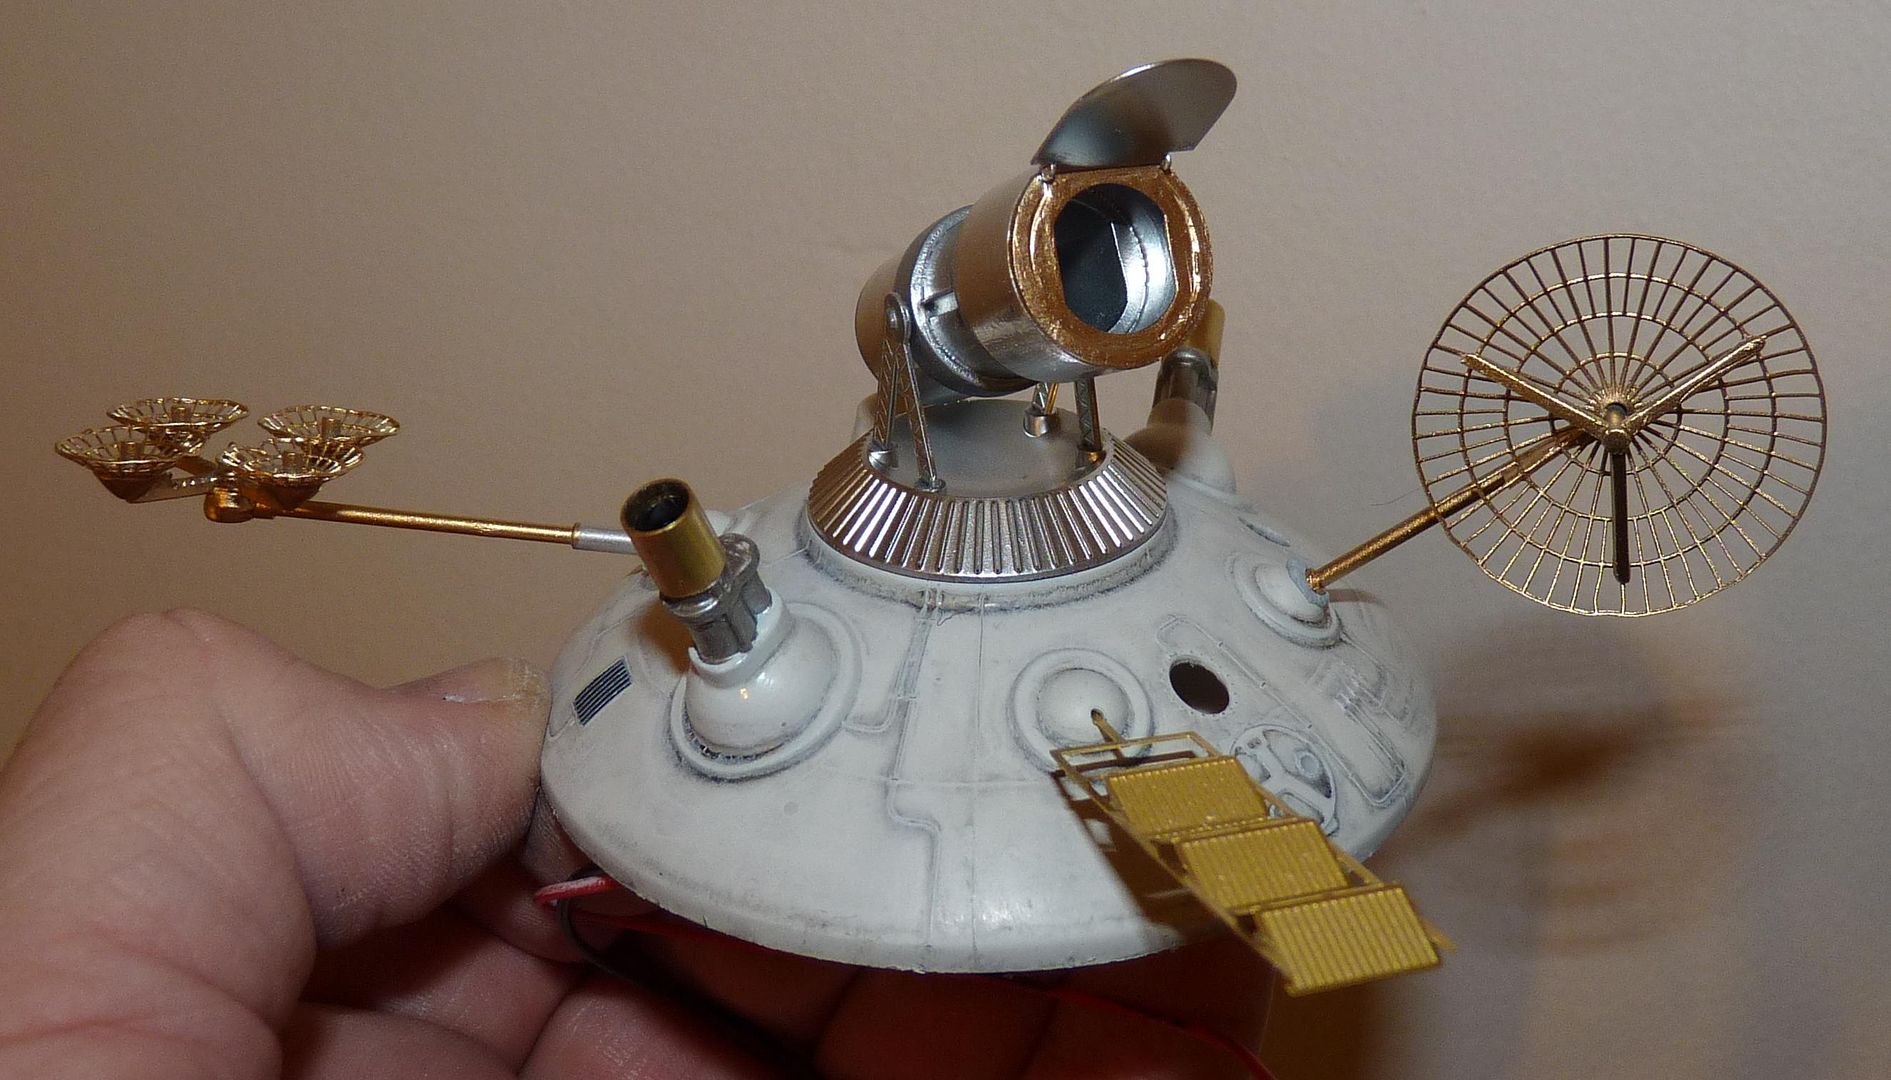
...also the white areas are still to receive a pin wash to further enhance the details along with some selective panel detailing and drybrushing...

-
jargonking
- Onto the Clever Stuff, Now.
- Posts: 119
- Joined: May 4th, 2011, 12:21 am
Re: MPC Pilgrim Observer Upgrade
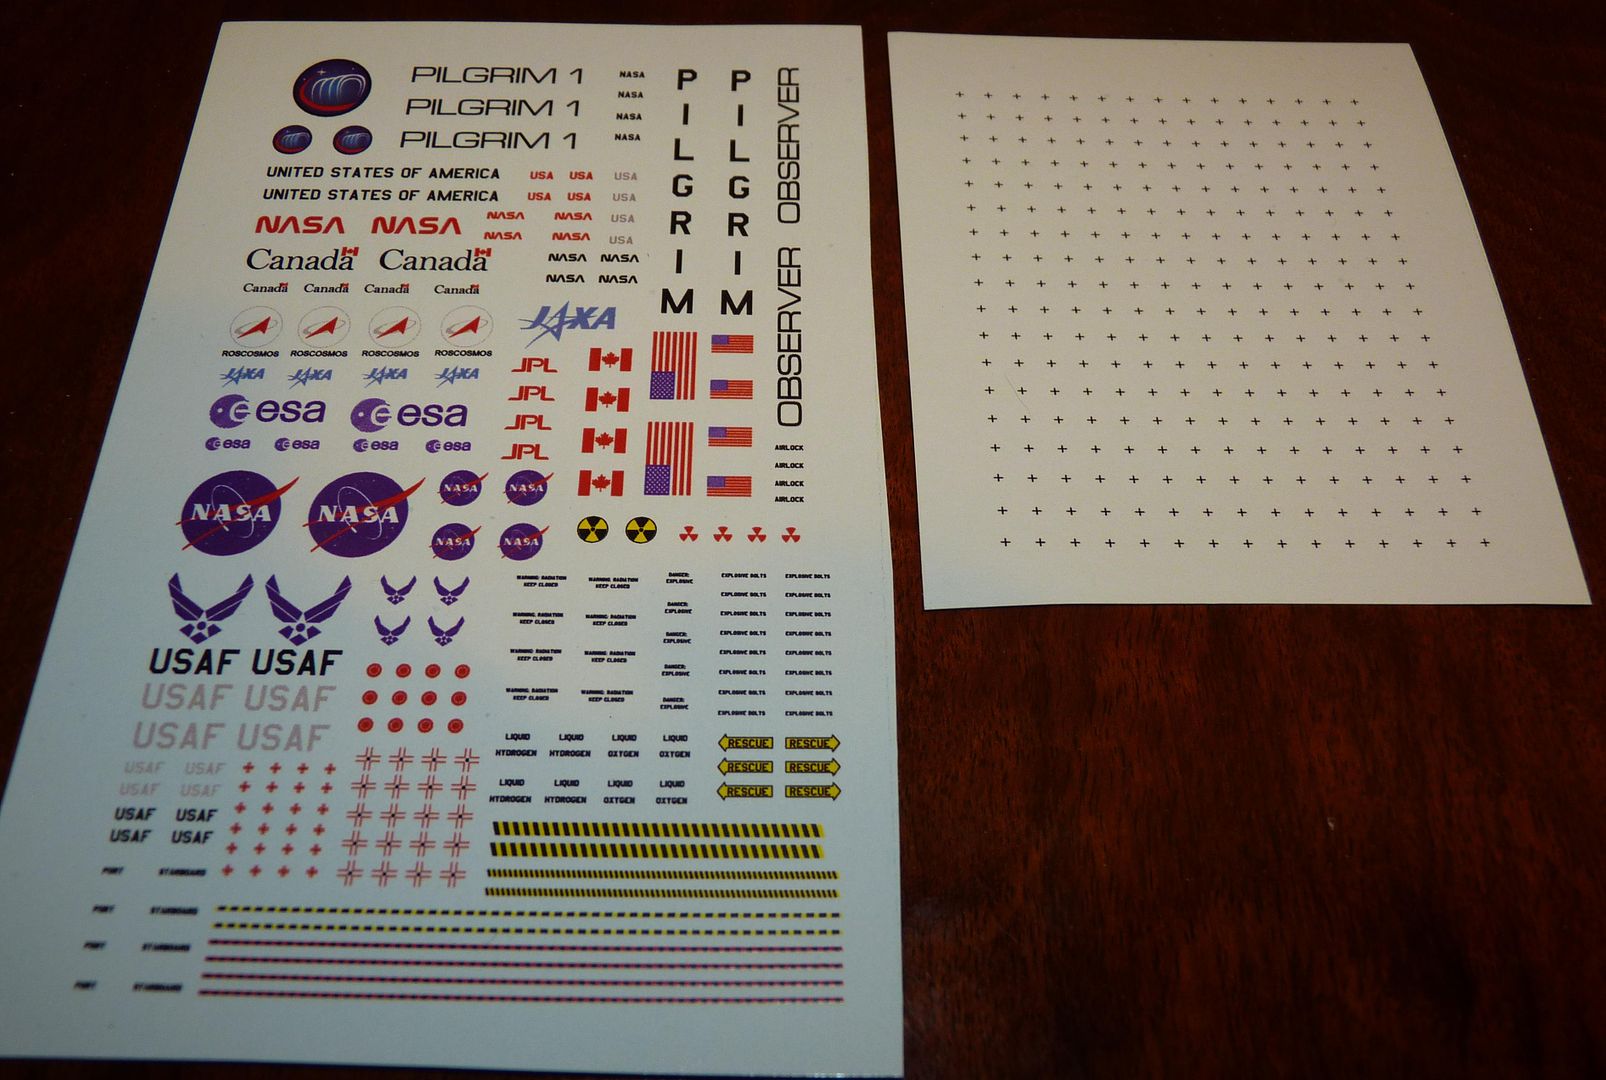
With impeccable timing the Acreation decals turned up today from Steve Iverson....not sure what all those tiny crosses are for but I'll be using a combination of this shhet and the kit decals....