My effort here will be the Revell Fokker D7, a kit that has been in my stash for a number of years. Pics will follow shortly.
Shaun Fokker - DVII
-
ShaunW
- NOT the sheep
- Posts: 26180
- Joined: November 26th, 2011, 6:11 pm
- Location: Pontefract West Yorkshire
Shaun Fokker - DVII
I can't believe I'm doing this with two kits already on the go but you lot are infecting me with your enthusiasm for multi-kit builds and who can resist a GB where you can use words like Fok and Fokking without being moderated 
My effort here will be the Revell Fokker D7, a kit that has been in my stash for a number of years. Pics will follow shortly.
My effort here will be the Revell Fokker D7, a kit that has been in my stash for a number of years. Pics will follow shortly.
Doing - Tamiya 1/35th Universal Carrier.
Work is the curse of the modelling classes!
IPMS#12300
Work is the curse of the modelling classes!
IPMS#12300

Re: Shaun Fokker - DVII
Welcome to the build. I'm looking forward to this one. Looks like we will have a whole staffel of DVII's by the end of it :-)
All the best.
Greg
All the best.
Greg
Two things are infinite: the universe and human stupidity; and I'm not sure about the the universe.
The difference between stupidity and genius is that genius has its limits.
Albert Einstein
The difference between stupidity and genius is that genius has its limits.
Albert Einstein
-
ShaunW
- NOT the sheep
- Posts: 26180
- Joined: November 26th, 2011, 6:11 pm
- Location: Pontefract West Yorkshire
Re: Shaun Fokker - DVII
Thanks Greg and I'm happy to be aboard.
As promised Fab Fokker Fans herewith pics of the kit starting with the box top
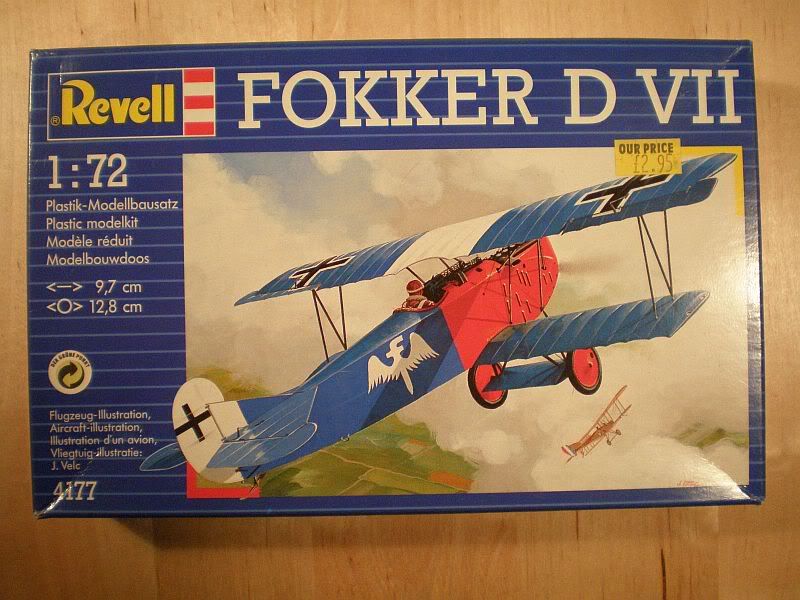
I originally built this kit back in the 70's and it came with more decal options. This one has two, the blue and red example shown on the box top flown by Oblt. Rudolph Berthold and the all-white version flown by Hermann Goering.
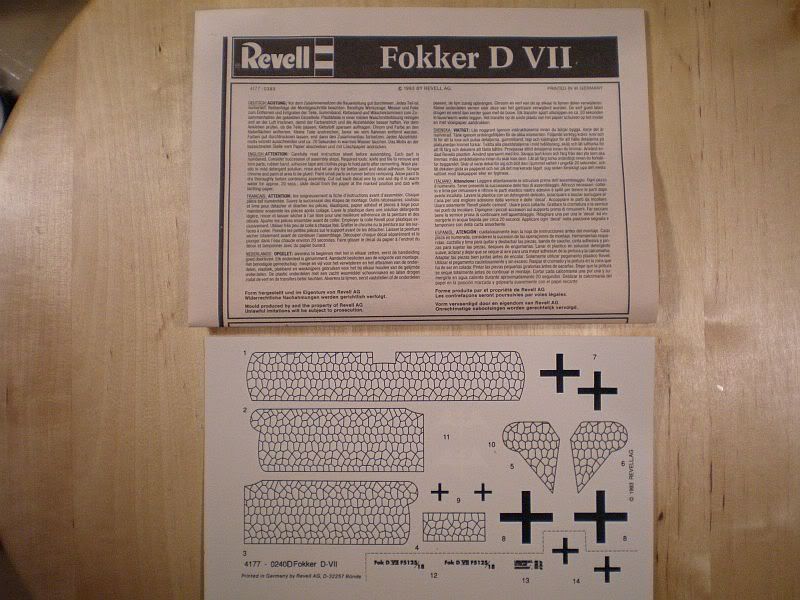
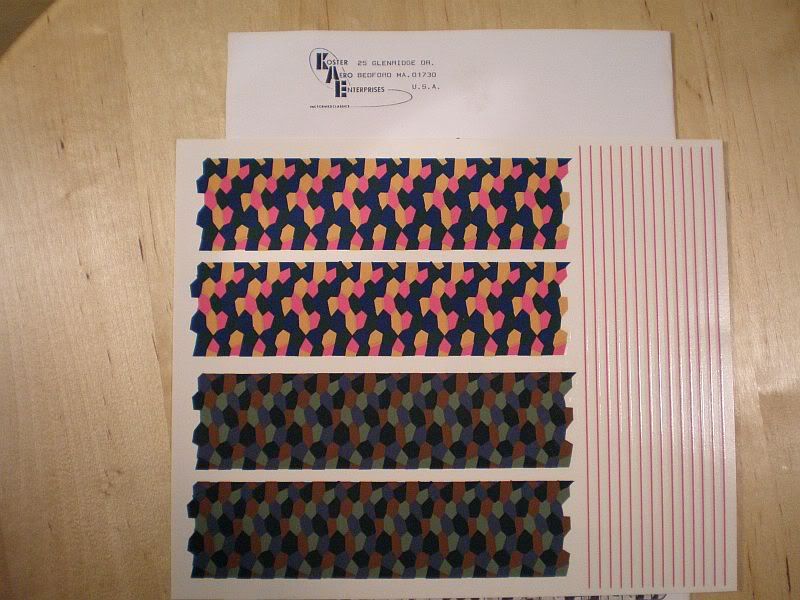
I note from the instructions that Revell optimistically expect the modeller to paint the lozenge fabric. Ho, ho, they're surely having a laugh, I think I would go mad(der) if I tried that exercise. To save my eyes and what's left of my sanity I have a set of Koster lozenge decals should I decide to go with Berthold's version which has lozenge undersides to the wings and tailplanes. The Goering example is tempting for its relatively easy paint job, but I feel a bit whited out at the mo following the Big Boeing paint job.
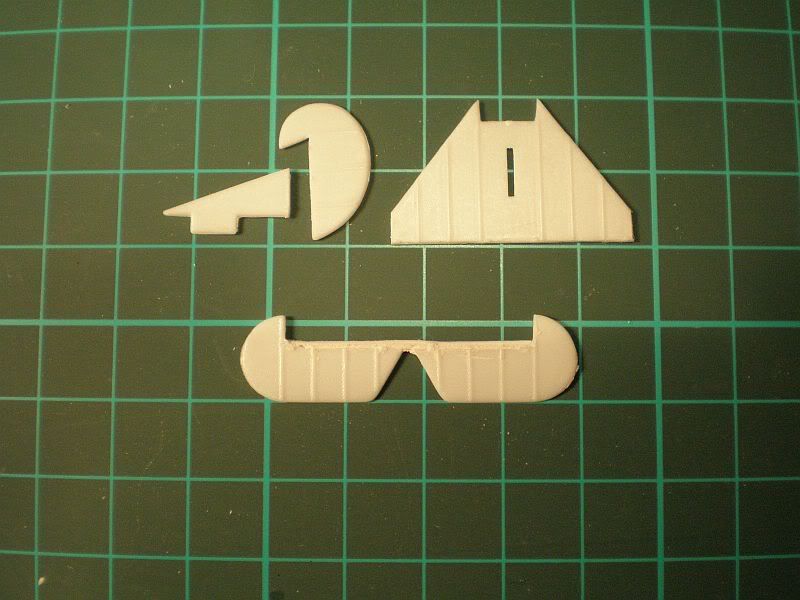
Finally is a shot of the kit parts (more bloody white plastic ) and there's not a lot so even I might be able to build this one inside a month!!
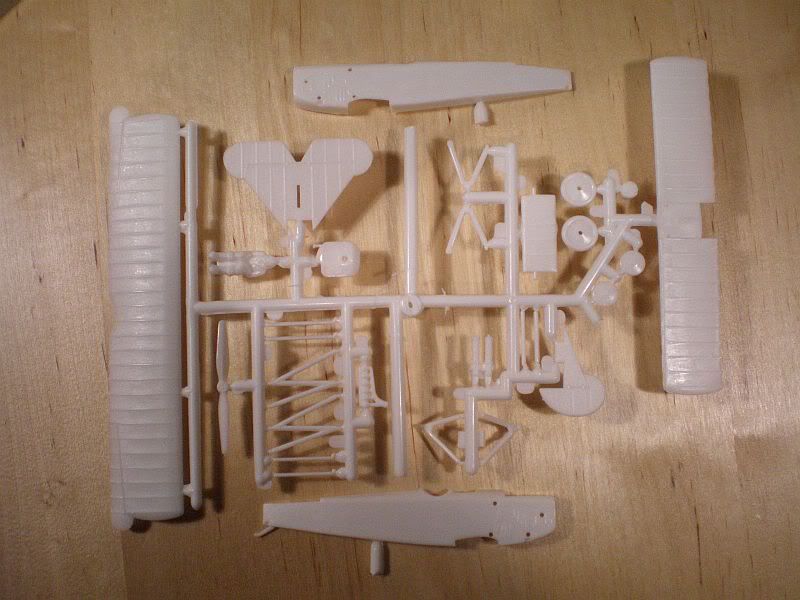
Over recent years I've been used to dealing with somewhat larger subjects and I can't believe how tiny this thing is, I need a magnifier just to see the little bugger . Onwards and upwards then, I've now got to shoehorn the little fella inbetween my 747 and F100 builds. It should fit quite nicely
As promised Fab Fokker Fans herewith pics of the kit starting with the box top
I originally built this kit back in the 70's and it came with more decal options. This one has two, the blue and red example shown on the box top flown by Oblt. Rudolph Berthold and the all-white version flown by Hermann Goering.
I note from the instructions that Revell optimistically expect the modeller to paint the lozenge fabric. Ho, ho, they're surely having a laugh, I think I would go mad(der) if I tried that exercise. To save my eyes and what's left of my sanity I have a set of Koster lozenge decals should I decide to go with Berthold's version which has lozenge undersides to the wings and tailplanes. The Goering example is tempting for its relatively easy paint job, but I feel a bit whited out at the mo following the Big Boeing paint job.
Finally is a shot of the kit parts (more bloody white plastic
Over recent years I've been used to dealing with somewhat larger subjects and I can't believe how tiny this thing is, I need a magnifier just to see the little bugger
Doing - Tamiya 1/35th Universal Carrier.
Work is the curse of the modelling classes!
IPMS#12300
Work is the curse of the modelling classes!
IPMS#12300
-
ShaunW
- NOT the sheep
- Posts: 26180
- Joined: November 26th, 2011, 6:11 pm
- Location: Pontefract West Yorkshire
Re: Shaun Fokker - DVII
I've managed to make a start tonight and have begun to make a rudimentary cockpit interior. I don't want to go too far as not a great deal can been seen. As you can see I've made up a basic floor and rear bulkhead together with some sidewall tubing made out of stretched sprue left over from my 747 repair job. It's not perfect and is only very loosely based on the real thing but anything is an improvement on the OOB cockpit. Fokker purists please look away now
I've left in the Revell shelf to make the seat easier to mount, when of course I've found or made a suitable seat that is! I'll also make up a basic instrument panel and joy stick and leave it at that. To help with this build I've got a Windsock datafile D7 book and can also make reference to one I built earlier, back in the mid 90's or thereabouts. This model was built from the 1/48th Dragon kit
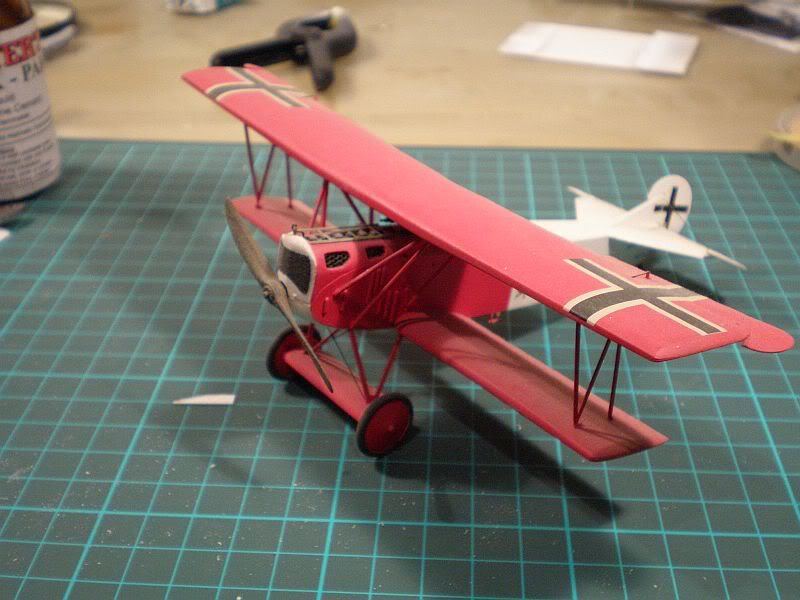
Alas the poor thing is a bit dusty from being transported between houses and stored before I got my cabinets and I'll now treat it to a clean I think. From what I remember the kit was modified with re-positioned control surfaces and vents opened up in the nose, backed by mesh, making reference to the Windsock book.
Thanks for looking.
I've left in the Revell shelf to make the seat easier to mount, when of course I've found or made a suitable seat that is! I'll also make up a basic instrument panel and joy stick and leave it at that. To help with this build I've got a Windsock datafile D7 book and can also make reference to one I built earlier, back in the mid 90's or thereabouts. This model was built from the 1/48th Dragon kit
Alas the poor thing is a bit dusty from being transported between houses and stored before I got my cabinets and I'll now treat it to a clean I think. From what I remember the kit was modified with re-positioned control surfaces and vents opened up in the nose, backed by mesh, making reference to the Windsock book.
Thanks for looking.
Doing - Tamiya 1/35th Universal Carrier.
Work is the curse of the modelling classes!
IPMS#12300
Work is the curse of the modelling classes!
IPMS#12300
-
ShaunW
- NOT the sheep
- Posts: 26180
- Joined: November 26th, 2011, 6:11 pm
- Location: Pontefract West Yorkshire
Re: Shaun Fokker - DVII
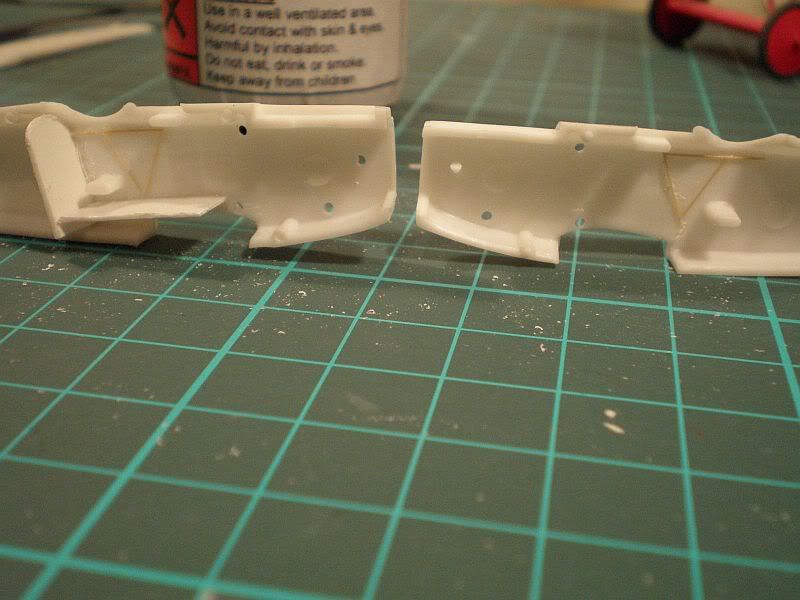
I've managed to get a bit done this afternoon. First up I've added a bit more to the cockpit and have painted it up with my interpretation of the interior colours. I've gone for deck tan sides, in the hope of approximating the unpainted canvas with wooden floor and rear bulkhead in NATO brown with an overpaint of clear orange. I've gone for gloss black for the internal steel tube structure. All of this is guesswork of course as my Windsock reference is vague as to internal colours, which probably means they haven't got a clue either The problem with WW1 aircraft of course is the lack of colour photos of the original machines. That's my excuse and I'm sticking to it.
I know the painting looks a bit rough but it looks better once the fuselage halves are joined. The plastic on this kit is almost see through and once the outer coat of paint is on the whole lot should darken. I've also made up a small dashboard using the Windsock reference and my Dragon D7. The greeblies on there are made out of scrap plastic card and tubing.
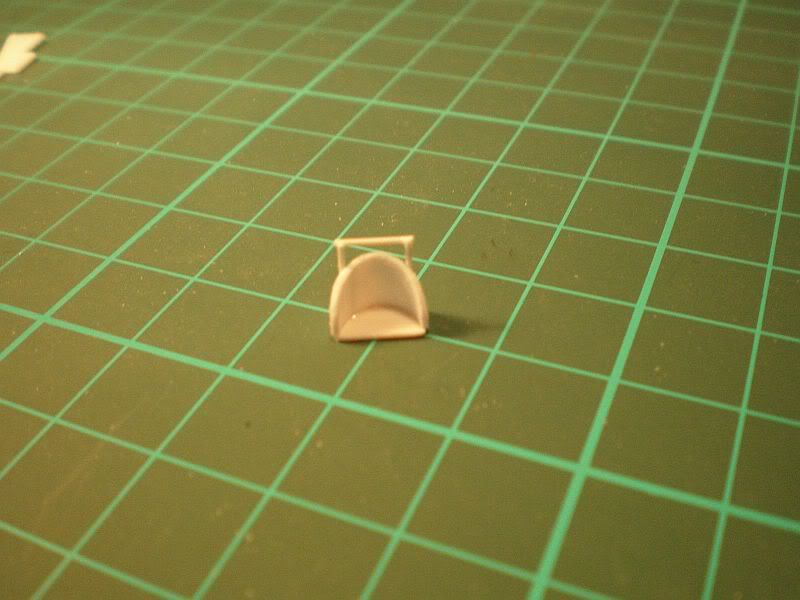
I've made up a seat using scrap card for the base and cut in half tubing for the rest of the seat, which has been filed to something like the shape of the original. It wouldn't pass muster as an Aeroclub replacement but I think it is better than the kit supplied bench pegs. On the real aircraft, the seat is supported by a tubular metal framework and I have attempted to simulate the feel of that with the tubing you can see at the rear of the seat.
Finally, I've separated the rudder and elevators, which I will pose deflected on the finished model, to replicate what is a common sight on period photos of the type (or indeed on photos of just about any other type of WW1 aircraft). I will also pose the ailerons deflected to a lesser degree and will probably score through those control surfaces to allow a little movement to the required angles, rather than remove them entirely.
Next up is to join up the fuselage, add the lower wing and prepare to paint. I will add a control column to the cockpit later so as to avoid damage by the masking that I'll use during the painting process.
Thanks for looking.
I know the painting looks a bit rough but it looks better once the fuselage halves are joined. The plastic on this kit is almost see through and once the outer coat of paint is on the whole lot should darken. I've also made up a small dashboard using the Windsock reference and my Dragon D7. The greeblies on there are made out of scrap plastic card and tubing.
I've made up a seat using scrap card for the base and cut in half tubing for the rest of the seat, which has been filed to something like the shape of the original. It wouldn't pass muster as an Aeroclub replacement but I think it is better than the kit supplied bench pegs. On the real aircraft, the seat is supported by a tubular metal framework and I have attempted to simulate the feel of that with the tubing you can see at the rear of the seat.
Finally, I've separated the rudder and elevators, which I will pose deflected on the finished model, to replicate what is a common sight on period photos of the type (or indeed on photos of just about any other type of WW1 aircraft). I will also pose the ailerons deflected to a lesser degree and will probably score through those control surfaces to allow a little movement to the required angles, rather than remove them entirely.
Next up is to join up the fuselage, add the lower wing and prepare to paint. I will add a control column to the cockpit later so as to avoid damage by the masking that I'll use during the painting process.
Thanks for looking.
Doing - Tamiya 1/35th Universal Carrier.
Work is the curse of the modelling classes!
IPMS#12300
Work is the curse of the modelling classes!
IPMS#12300

Re: Shaun Fokker - DVII
I like your work so far. The Koster decals will look great also.
Besting 60 years of mediocre building of average kits in the stand off scale
-
ShaunW
- NOT the sheep
- Posts: 26180
- Joined: November 26th, 2011, 6:11 pm
- Location: Pontefract West Yorkshire
Re: Shaun Fokker - DVII
Thanks Jeff. Not being a dedicated WW1 modeller (in fact this is the first propeller driven aircraft of any era I've built in about 12 years), I have no experience of using lozenge decals but want to have a go so I am looking forward to seeing how I fair with them. If it goes wrong at least I have the option of the all-white Goering example!
In between having to do some work this afternoon, I did manage to do some more on this build. First up I decided that the cockpit didn't look complete without a rudder bar so I fashioned one with plastic rod. There should be loop type foot stirrups at each end but in this scale they are tiny and after several attempts I gave up! Ditto the cables running from the rudder bar back through the cockpit. I think there comes a time in every build where you have to say enough is enough and move on. Therefore I have just a plain bar, but it looks better than nothing. I have angled the bar to take into account the fact that the rudder will be deflected on the finished model. Hopefully I will remember to deflect the rudder the correct way in accordance with how I've set the rudder bar!
After that, I assembled the fuselage, the front end and the lower wing. For an old kit, the fit was not bad at all and sanding was relatively easy. Filler was needed only where the stand slot caused an indentation on the underside. I will now sand that smooth, micromesh all of the joins and then should be ready to paint.
As always, thanks for looking.
Doing - Tamiya 1/35th Universal Carrier.
Work is the curse of the modelling classes!
IPMS#12300
Work is the curse of the modelling classes!
IPMS#12300
-
AndrewR

- In the basement lab
- Posts: 24072
- Joined: April 5th, 2011, 4:13 pm
- Location: Ottawa, Ontario, The Great White North
- Contact:
Re: Shaun Fokker - DVII
Nice work on the cockpit. And the interior colour is probably fine!  It's certainly more plausible than the kit instructions.
Cheers
Andrew
Cheers
Andrew
Up in the Great White North
-
ShaunW
- NOT the sheep
- Posts: 26180
- Joined: November 26th, 2011, 6:11 pm
- Location: Pontefract West Yorkshire
Re: Shaun Fokker - DVII
Thanks Andrew, I'll leave it as is, I'm not going to attempt a repaint now.
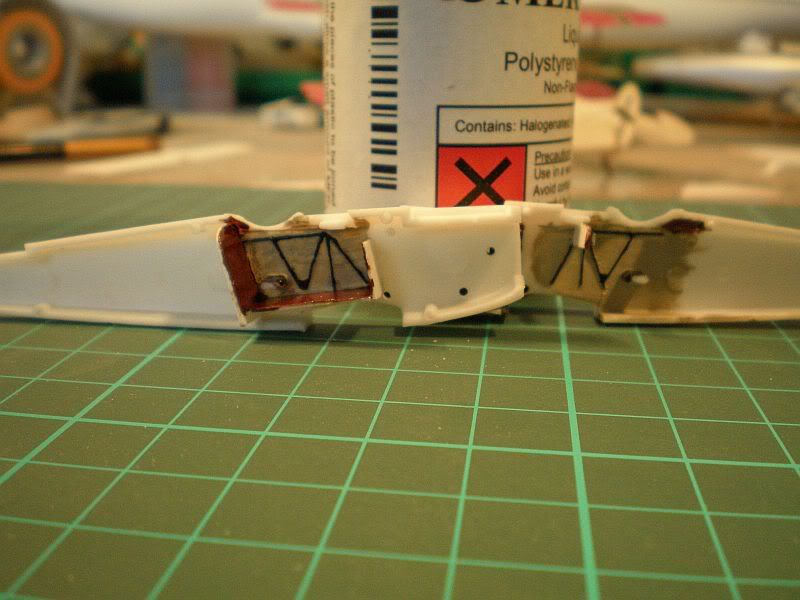
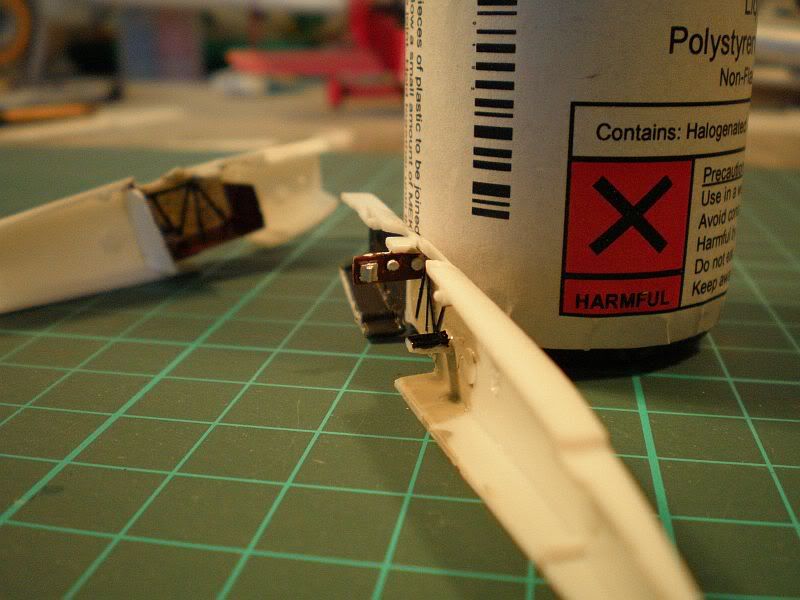
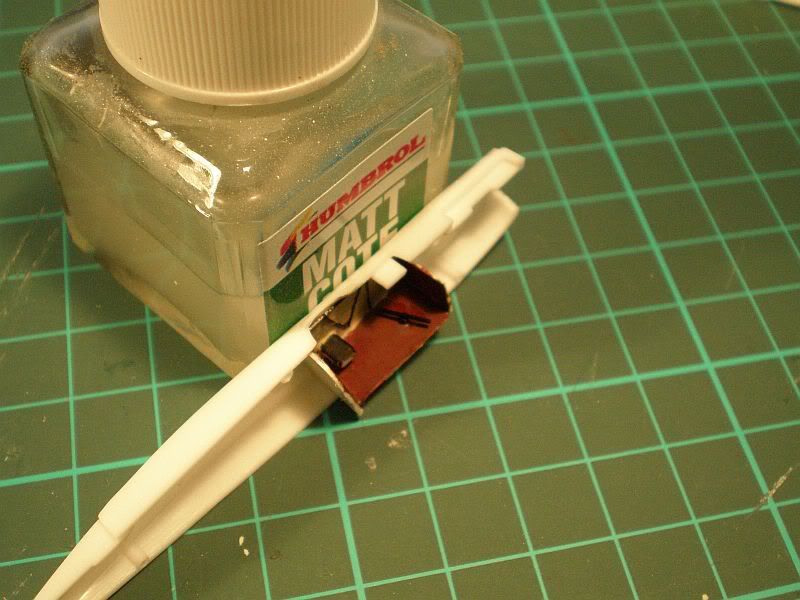
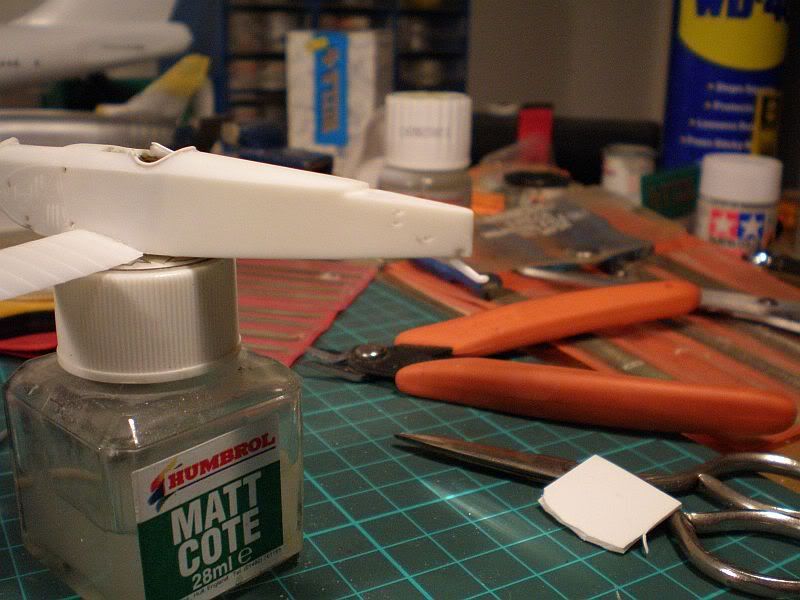
I have been fokking (I had to get at least one in ) about tonight after work however. After finishing up sanding, the cockpit coaming was left looking a little worn down so I bolstered it up with some thin plastic rod, teased into place with Mekpak.
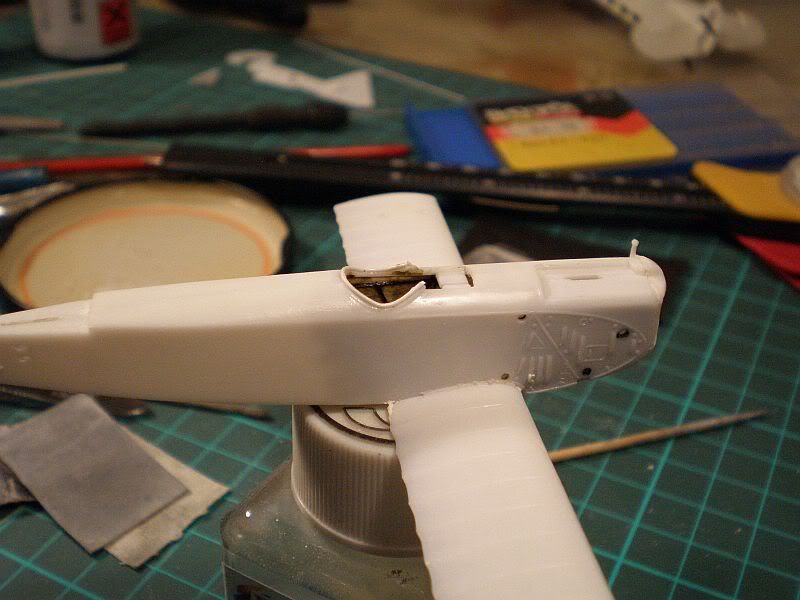
That was quite a fiddly job in this scale, the Humbrol Matt Cote jar gives an idea of the size of the fuselage. I will gently sand the new coaming to blend it in a little better before painting.
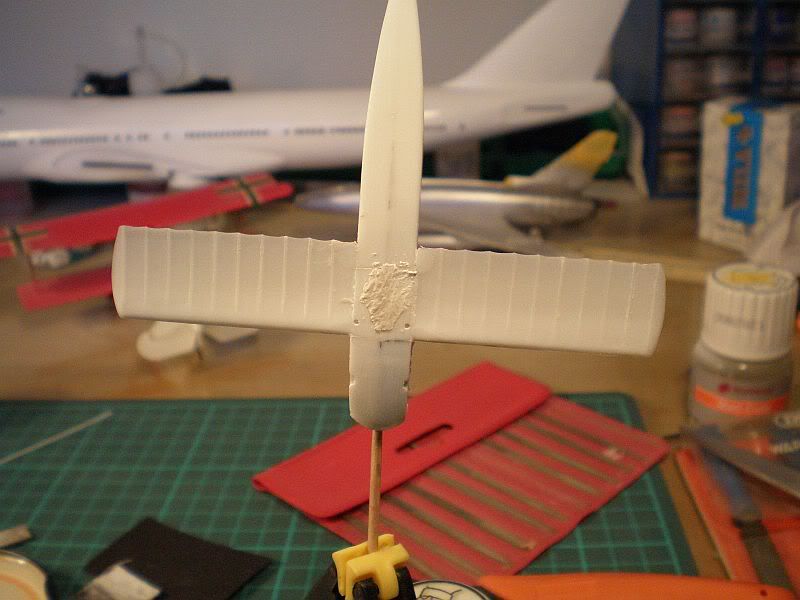
After that I drilled holes at the rear of the fuselage on both sides for the elevator and rudder cables to pass into. I used plans in the Windsock Datafile book that I have and measured the distances with a dial guage. Thereafter I used a fine drill bit in a pin vice and have drilled the holes at an angle as opposed to straight in to allow the cables to lie more realistically against the fuselage. I will also have to drill a corresponding hole through the top of the tail planes for the upper elevator cable to the control horn.
The pic is not terribly clear I'm afraid but I hope it gives you the general idea. Next up should now be to get some paint on.
Thanks for your time.
I have been fokking (I had to get at least one in
That was quite a fiddly job in this scale, the Humbrol Matt Cote jar gives an idea of the size of the fuselage. I will gently sand the new coaming to blend it in a little better before painting.
After that I drilled holes at the rear of the fuselage on both sides for the elevator and rudder cables to pass into. I used plans in the Windsock Datafile book that I have and measured the distances with a dial guage. Thereafter I used a fine drill bit in a pin vice and have drilled the holes at an angle as opposed to straight in to allow the cables to lie more realistically against the fuselage. I will also have to drill a corresponding hole through the top of the tail planes for the upper elevator cable to the control horn.
The pic is not terribly clear I'm afraid but I hope it gives you the general idea. Next up should now be to get some paint on.
Thanks for your time.
Doing - Tamiya 1/35th Universal Carrier.
Work is the curse of the modelling classes!
IPMS#12300
Work is the curse of the modelling classes!
IPMS#12300
Re: Shaun Fokker - DVII
Looking very sharp.
Besting 60 years of mediocre building of average kits in the stand off scale
-
ShaunW
- NOT the sheep
- Posts: 26180
- Joined: November 26th, 2011, 6:11 pm
- Location: Pontefract West Yorkshire
Re: Shaun Fokker - DVII
Thanks Jeff, in fact it looks a lot sharper than me as I've come down with Man Flu, which I need to get rid of quickly - there's modelling to be done!
Doing - Tamiya 1/35th Universal Carrier.
Work is the curse of the modelling classes!
IPMS#12300
Work is the curse of the modelling classes!
IPMS#12300
-
ShaunW
- NOT the sheep
- Posts: 26180
- Joined: November 26th, 2011, 6:11 pm
- Location: Pontefract West Yorkshire
Re: Shaun Fokker - DVII
Why not Bruce? drag it out of the stash and build it. So far, I've found it to be a great old kit although of course I've ended up fiddling about with it because I just can't help myself! No wonder it takes me for ever to finish anything 
Doing - Tamiya 1/35th Universal Carrier.
Work is the curse of the modelling classes!
IPMS#12300
Work is the curse of the modelling classes!
IPMS#12300
-
MerlinJones
Re: Shaun Fokker - DVII
I'll see what the time's like after my 4 DR1's.
Regards,
Bruce
Regards,
Bruce
-
AndrewR
- In the basement lab
- Posts: 24072
- Joined: April 5th, 2011, 4:13 pm
- Location: Ottawa, Ontario, The Great White North
- Contact:
Re: Shaun Fokker - DVII
It's a nice kit. If you have any strut material left from the DVI, I'd use it on the cabanes (spellchecker keeps insisting on cabanaMerlinJones wrote:I'll see what the time's like after my 4 DR1's.
Regards,
Bruce
Cheers
Andrew
Up in the Great White North