I have the upper version too...MerlinJones wrote:Aaaah...now that's UPPER 4-colour lozenge"
Shaun Fokker - DVII
-
AndrewR

- In the basement lab
- Posts: 24093
- Joined: April 5th, 2011, 4:13 pm
- Location: Ottawa, Ontario, The Great White North
- Contact:
Re: Shaun Fokker - DVII
Up in the Great White North
-
ShaunW
- NOT the sheep
- Posts: 26188
- Joined: November 26th, 2011, 6:11 pm
- Location: Pontefract West Yorkshire
Re: Shaun Fokker - DVII
You two have completely lost me now. Upper lozenge, lower lozenge?!? is there?!? 3-colour, 4-colour ????  Ignore me, I'm just a numpty jet builder
Doing - Tamiya 1/35th Universal Carrier.
Work is the curse of the modelling classes!
IPMS#12300
Work is the curse of the modelling classes!
IPMS#12300
-
AndrewR
- In the basement lab
- Posts: 24093
- Joined: April 5th, 2011, 4:13 pm
- Location: Ottawa, Ontario, The Great White North
- Contact:
Re: Shaun Fokker - DVII
For the Germans, there are patterns with 4 different coloured lozenges, which come in two varieties, for upper and lower wings. There are also 5 lozenge patterns, again for upper and lower wing. I think there was also a three lozenge pattern for all over the aircraft too.ShaunW wrote:You two have completely lost me now. Upper lozenge, lower lozenge?!? is there?!? 3-colour, 4-colour ????
It's just as simple as the 50 different shades of grey used on pointy jets...
http://arizonamodels.com/product_info.p ... ucts_id/91;
Of course the Austrians had their own lozenges...
And we had Fisherman's Friends
Up in the Great White North
-
MerlinJones
Re: Shaun Fokker - DVII
We should really be talking uppers and unders, with the upper sides of wings receiving one set of 4- or 5-coloured lozenge and the undersides receiving the corresponding set.
On my DVI, the underside lozenge;

...And the upper side lozenge, which also covers the fuselage sides;

On my DVI, the underside lozenge;
...And the upper side lozenge, which also covers the fuselage sides;
-
ShaunW
- NOT the sheep
- Posts: 26188
- Joined: November 26th, 2011, 6:11 pm
- Location: Pontefract West Yorkshire
Re: Shaun Fokker - DVII
Thanks for taking the time to enlighten me Fellow Fokker Fudgers. This build has resulted in a bit of chin scratching and looking at the Avro 504 and Pfalz kits in my stash - maybe I should build another stringbag! Plenty of rigging on those two as well!
Doing - Tamiya 1/35th Universal Carrier.
Work is the curse of the modelling classes!
IPMS#12300
Work is the curse of the modelling classes!
IPMS#12300
-
AndrewR
- In the basement lab
- Posts: 24093
- Joined: April 5th, 2011, 4:13 pm
- Location: Ottawa, Ontario, The Great White North
- Contact:
Re: Shaun Fokker - DVII
ShaunW wrote:Thanks for taking the time to enlighten me Fellow Fokker Fudgers. This build has resulted in a bit of chin scratching and looking at the Avro 504 and Pfalz kits in my stash - maybe I should build another stringbag! Plenty of rigging on those two as well!
My birthday prezzies included a Roden Camel and Brisfit, and the Eduard Dr.1 dual combo which Bruce has been building, so I will probably be building those soon. Although there's a P51D and a night fighter F-82 to do too. In The Scale, naturally.
I like these little kits with few parts, because you get a result (good or bad
Cheers
Andrew
Up in the Great White North
-
ShaunW
- NOT the sheep
- Posts: 26188
- Joined: November 26th, 2011, 6:11 pm
- Location: Pontefract West Yorkshire
Re: Shaun Fokker - DVII
So far, I've enjoyed this kit very much but I can never seem to build OOB and always end up trying out various "improvements". Of course, I don't always end up improving the kit at all!! My preferred scale for single seaters is 1/48th though, I find it just a little less fiddly especially for small aircraft such as the D7.
Doing - Tamiya 1/35th Universal Carrier.
Work is the curse of the modelling classes!
IPMS#12300
Work is the curse of the modelling classes!
IPMS#12300
-
ShaunW
- NOT the sheep
- Posts: 26188
- Joined: November 26th, 2011, 6:11 pm
- Location: Pontefract West Yorkshire
Re: Shaun Fokker - DVII
OK I've finished up the lozenge on the upper wing and I found this hard work. You will note that in my quest for accuracy I have even included patches where Herr Berthold had the ground crew repair battle damage 
Here's the underside of the top wing and the u/c wing
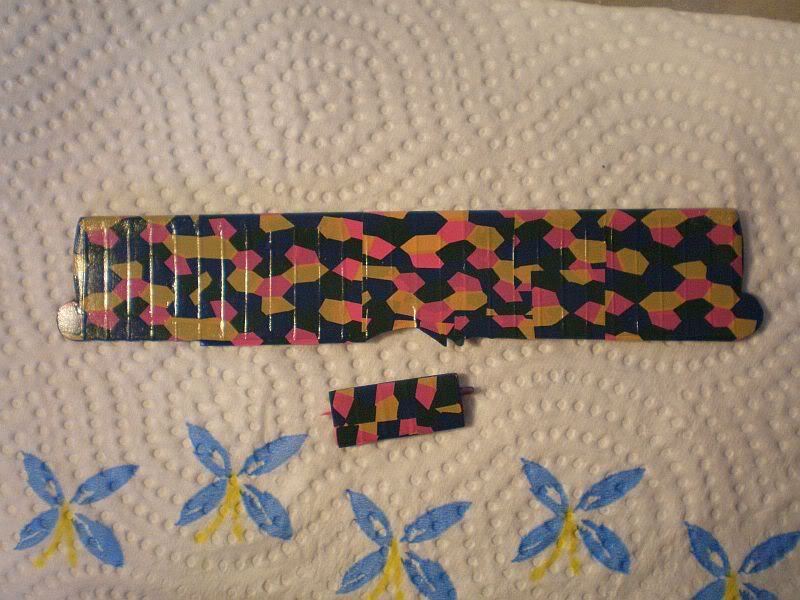
Yeah right, believe that and you'll believe anything, in fact as usual I've been bodging in the face of adversity. After carefully trimming the overspill lozenge round the edges of the wing with a sharp modelling blade, I moved on to apply rib tapes - oh deep joy! I didn't apply tape to every rib but went for alternate ribs just to give a feel for it. Mind you, I haven't got a clue whether or not tape should be applied to every rib or not. Research? whatever dude, I'm here to build and have fun
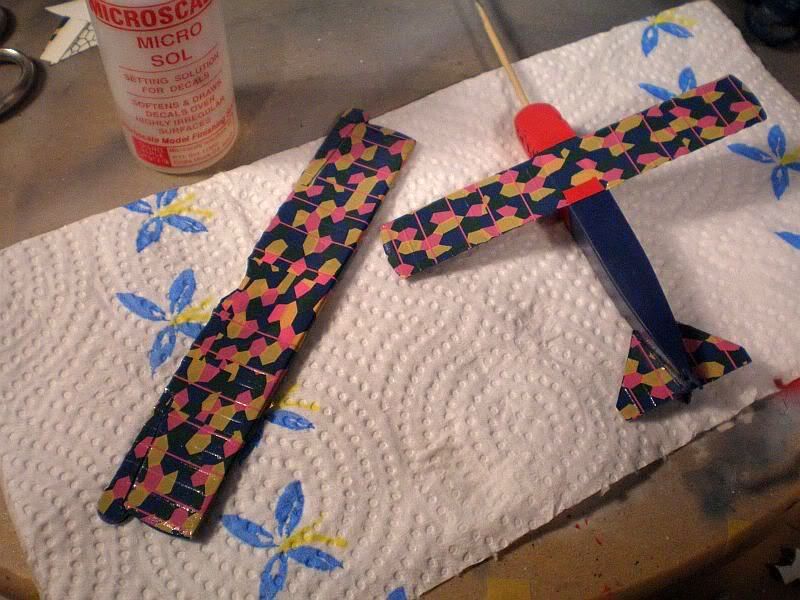
I've cut through the aileron joins to avoid the dreaded pasted over look and I will have a shufty at repositioning those surfaces. Next up I'll finish the rest of the decals and then protect the whole lot with Matt Cote. Should be able to start final assembly then as I've been painting the other parts inbetween the decalling jobs. I'm really enjoying this build although the lozenge work could be better, but hey it's my first attempt and at least it's on the underside .
.
As always, thanks for looking.
Here's the underside of the top wing and the u/c wing
Yeah right, believe that and you'll believe anything, in fact as usual I've been bodging in the face of adversity. After carefully trimming the overspill lozenge round the edges of the wing with a sharp modelling blade, I moved on to apply rib tapes - oh deep joy! I didn't apply tape to every rib but went for alternate ribs just to give a feel for it. Mind you, I haven't got a clue whether or not tape should be applied to every rib or not. Research? whatever dude, I'm here to build and have fun
I've cut through the aileron joins to avoid the dreaded pasted over look and I will have a shufty at repositioning those surfaces. Next up I'll finish the rest of the decals and then protect the whole lot with Matt Cote. Should be able to start final assembly then as I've been painting the other parts inbetween the decalling jobs. I'm really enjoying this build although the lozenge work could be better, but hey it's my first attempt and at least it's on the underside
As always, thanks for looking.
Doing - Tamiya 1/35th Universal Carrier.
Work is the curse of the modelling classes!
IPMS#12300
Work is the curse of the modelling classes!
IPMS#12300
-
AndrewR
- In the basement lab
- Posts: 24093
- Joined: April 5th, 2011, 4:13 pm
- Location: Ottawa, Ontario, The Great White North
- Contact:
Re: Shaun Fokker - DVII
An interesting on lozenge camo, with the pretty blue flowers. 
You're right, you can hardly see the undersides when it's all finished!
And my first attempt at lozenges, on the same kit, was just as big a bodge job
Looking good!
Cheers
Andrew
You're right, you can hardly see the undersides when it's all finished!
And my first attempt at lozenges, on the same kit, was just as big a bodge job
Looking good!
Cheers
Andrew
Up in the Great White North
-
MerlinJones
Re: Shaun Fokker - DVII
Looking good, Shaun. Check whether the lozenge goes underneath the fuselage, though it'd be a shame to have to paint over it.
Regards,
Bruce
Regards,
Bruce
-
ShaunW
- NOT the sheep
- Posts: 26188
- Joined: November 26th, 2011, 6:11 pm
- Location: Pontefract West Yorkshire
Re: Shaun Fokker - DVII
Thank you for your kind words boys. The pretty blue flowers come courtesy of Mrs W's kitchen roll that she doesn't know I've nicked for modelling duties because I've run out of cheapy tissues
Alas Bruce if there is supposed to be lozenge on the fuselage underside it's tough for my model as I've used all the underside lozenge except for a few scraps.
Alas Bruce if there is supposed to be lozenge on the fuselage underside it's tough for my model as I've used all the underside lozenge except for a few scraps.
Doing - Tamiya 1/35th Universal Carrier.
Work is the curse of the modelling classes!
IPMS#12300
Work is the curse of the modelling classes!
IPMS#12300
-
MerlinJones
Re: Shaun Fokker - DVII
Er...there should might be no lozenge on the underside of the fuselage...including the centre.
Regards,
Bruce
Regards,
Bruce
-
ShaunW
- NOT the sheep
- Posts: 26188
- Joined: November 26th, 2011, 6:11 pm
- Location: Pontefract West Yorkshire
Re: Shaun Fokker - DVII
Sorry Bruce, but it would appear that I didn't read your comment properly  I used the Revell paint-it yourself decals as a template and in my boxing of the kit the lower wing is provided as a full span decal with a small cut out at the back, which is how it is depicted on my model. It did cross my mind that Revell could be wrong but after mulling and chewing I decided to go OOB and, of course, I make no claims as to accuracy. The Goering version would have been easier, but the whole point of going for the Berthold version for me was in order to have a go at lozenging.
Doing - Tamiya 1/35th Universal Carrier.
Work is the curse of the modelling classes!
IPMS#12300
Work is the curse of the modelling classes!
IPMS#12300
-
AndrewR
- In the basement lab
- Posts: 24093
- Joined: April 5th, 2011, 4:13 pm
- Location: Ottawa, Ontario, The Great White North
- Contact:
Re: Shaun Fokker - DVII
As it won't be seen much once the model is complete, it doesn't really matter too much about the underside.

Nothing to lose sleep over
Actually, you could probably get away with the Revell uncoloured decal.
Cheers
Andrew
Nothing to lose sleep over
Actually, you could probably get away with the Revell uncoloured decal.
Cheers
Andrew
Up in the Great White North
-
ShaunW
- NOT the sheep
- Posts: 26188
- Joined: November 26th, 2011, 6:11 pm
- Location: Pontefract West Yorkshire
Re: Shaun Fokker - DVII
Well I've pressed on regardless with my version of this famous Fokker. In between other more mundane Bank Holiday tasks, such as mowing the lawn, I've been doing battle with the little Fokker in an attempt to get it on the road to completion. Originally it was my intention today to put on the rest of the decals but instead I decided to get on with the build. I was going to replace the kit struts with rod but in the end I decided to stick with it as is although I did reposition the ailerons. The top wing put up a bit of a fight, but it was no match for a seasoned campaigner like myself and I made it have it, armed with little more than blind faith and Mekpak The wing did, however, manage to collapse on me and set itself at odd angles and I also managed to get glue where glue has no right to be on a mostly painted model. Some touching up was, therefore, required but the wing is on. The landing gear also attempted to take more years off my life but eventually that too succumbed and is now propping the thing up at more or less the correct angle. So, a bit of stress then! (consumed four pack and bulging ashtray not shown).

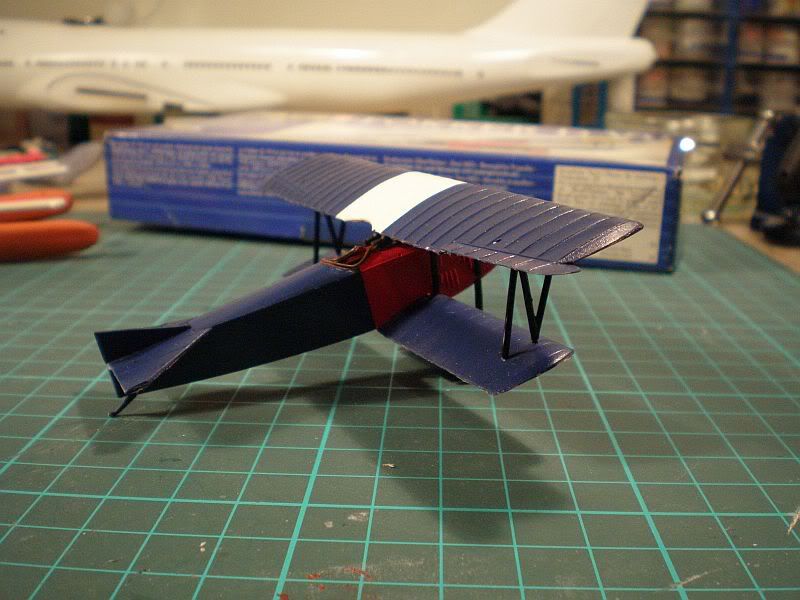
I'm seriously not happy with the wrap round of the leading edge with the underside lozenge, what was I thinking?!? so that is going to get painted over. Currently I am fettling the rudder and elevators and then there is more touching up and the remainder of the decals etc etc. It is all advancing towards completion though and hopefully I will actually manage to finish on time.
Thanks for looking.
Doing - Tamiya 1/35th Universal Carrier.
Work is the curse of the modelling classes!
IPMS#12300
Work is the curse of the modelling classes!
IPMS#12300