Dazzled's Venerable Victor
-
bromo

- On a long, long journey
- Posts: 1249
- Joined: May 2nd, 2011, 7:05 pm
- Location: Wolverhampton,England
Re: Dazzled's Venerable Victor
Bad news with the PC, looking forward to seeing the progress pictures.
BEEN A WHILE
-
Dazzled

- Modelling Gent and Scholar
- Posts: 9592
- Joined: October 1st, 2011, 11:08 pm
- Location: Mid Glamorgan, South Wales
- Contact:
Re: Dazzled's Venerable Victor
PC came back today but only just got in from work. Too late to do much tonight and file system is still a mess so update pics will be up in a day or two.bromo wrote:Bad news with the PC, looking forward to seeing the progress pictures.
COLD WAR S.I.G. LEADER
Wherever there's danger, wherever there's trouble, wherever there's important work to be done....I'll be somewhere else building a model!
Wherever there's danger, wherever there's trouble, wherever there's important work to be done....I'll be somewhere else building a model!
-
bromo
- On a long, long journey
- Posts: 1249
- Joined: May 2nd, 2011, 7:05 pm
- Location: Wolverhampton,England
Re: Dazzled's Venerable Victor
Good news the PC is back, look forward to seeing those pics.
BEEN A WHILE
-
Dazzled
- Modelling Gent and Scholar
- Posts: 9592
- Joined: October 1st, 2011, 11:08 pm
- Location: Mid Glamorgan, South Wales
- Contact:
Re: Dazzled's Venerable Victor
At last things are up and running again. Although not altogether "normal", at least my files and bookmarks are organised now 
Now lets see if I can get the updates in order. You may have to bear with me on this.
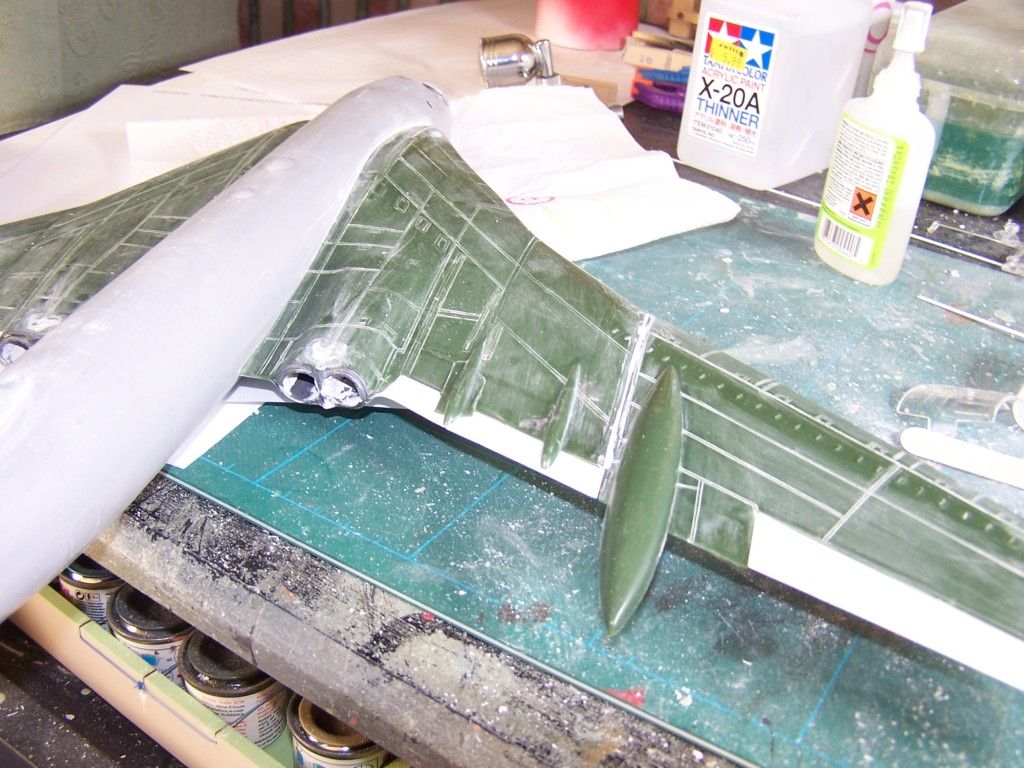
As I remember, I left off with a section of the wing removed to correct a step in the joint. This got cleaned up and refitted. Happily, it went back together quite neatly so I moved swiftly on to boxing in the Kuchemann carrots and fitting the control surfaces, and these went on quite nicely, for the most part (more later), with only a minimal amount of fettling at the trailing edge required.
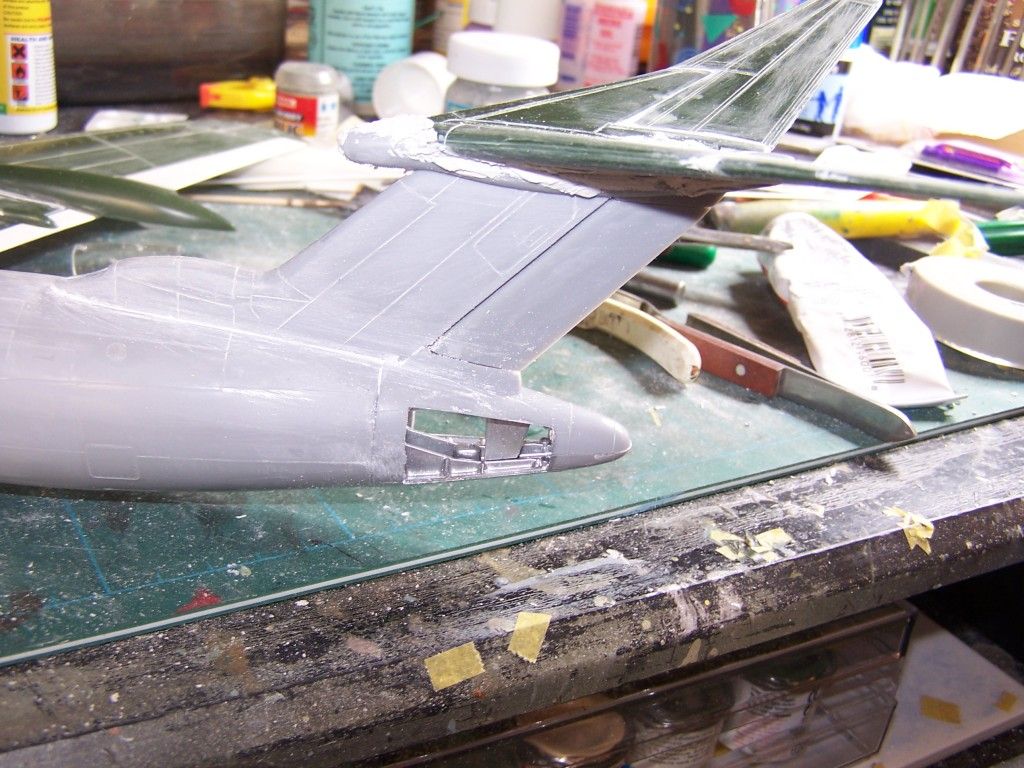
Then I turned my attention to the tail, fitted the lower half of the tail cone and added a "little" filler around the tailplanes and their fairing. Quite a bit of blending in is required here in order to get the right profile around the bullet fairing at the front.
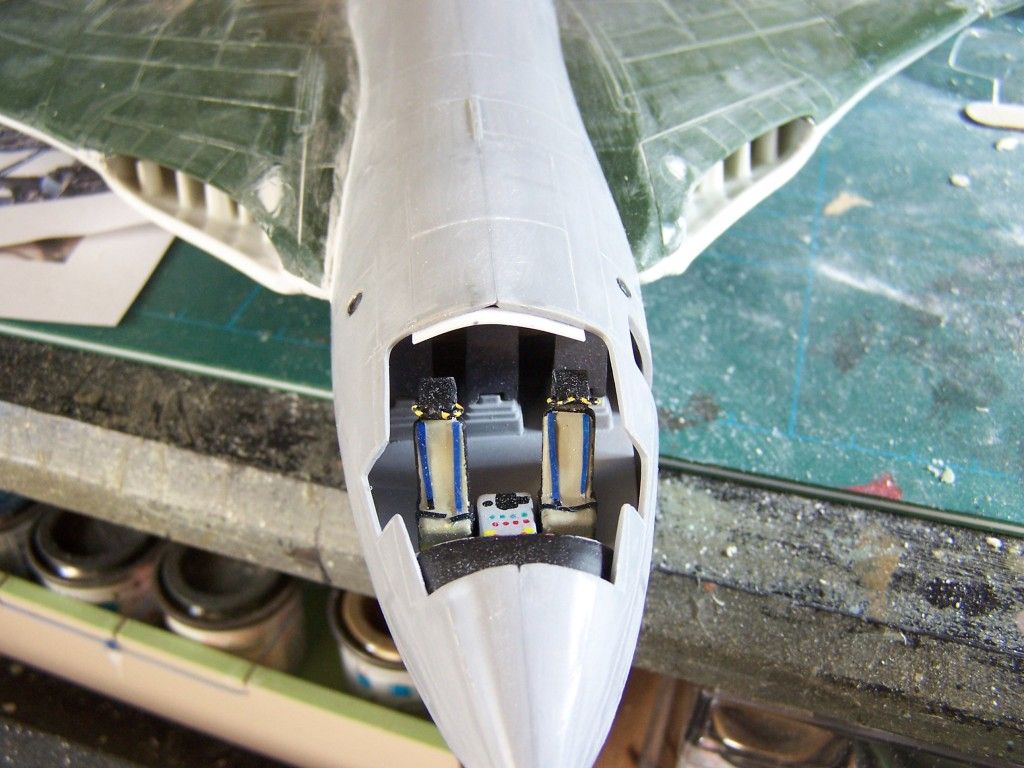
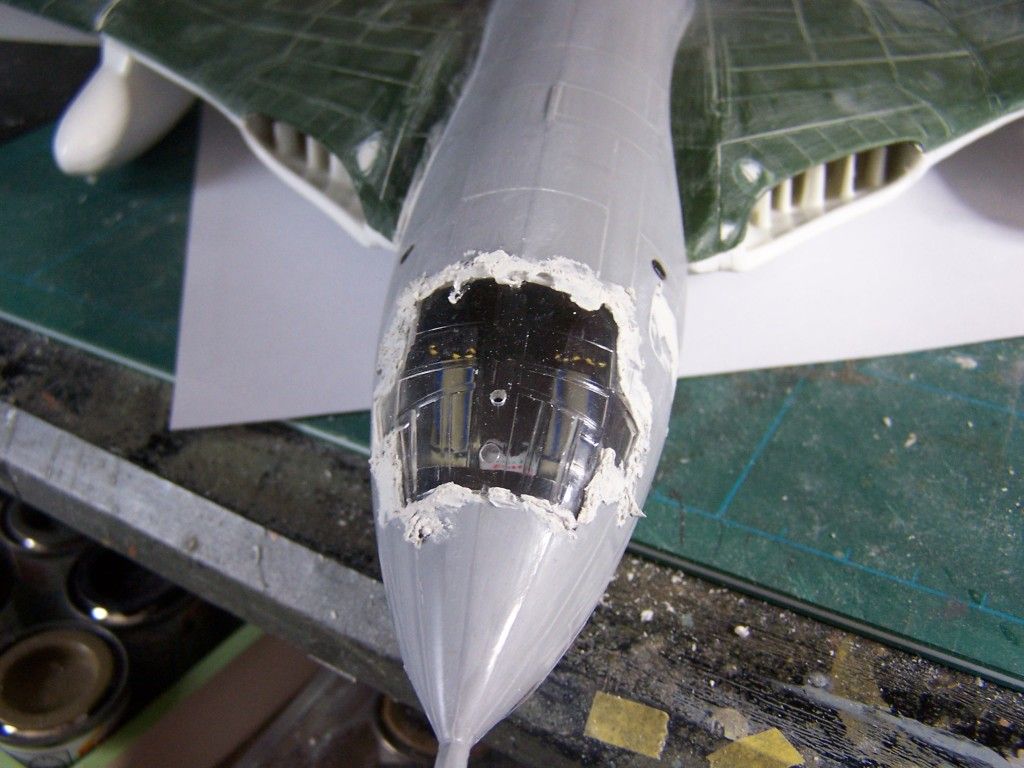
To give the filler a chance to dry, I decided it was time to start hiding the flight deck details. First I added a fillet of plasticard at the rear to support the canopy component.
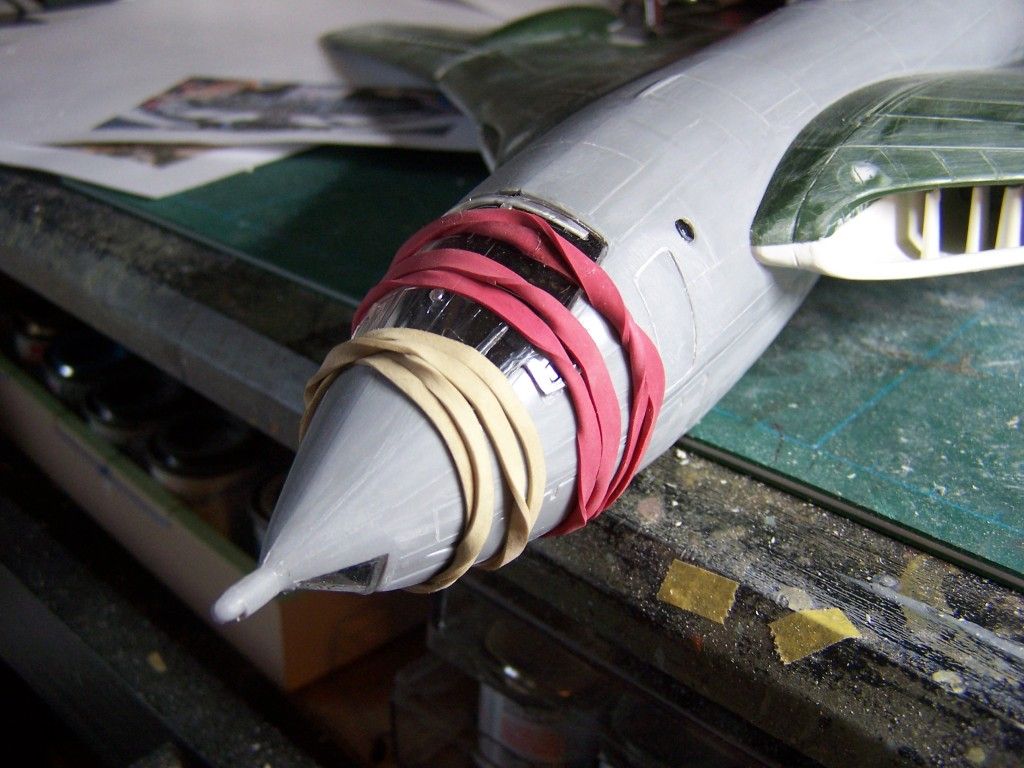
Then I attached the canopy with a good helping of Clearfix and a few elastic bands for encouragement.
Then the (appropriately rescribed) top halves of the fuel tanks were attached with zap-a-gap and clamped up. Everything was set aside to dry overnight like this.
The morning after I had a couple of issues to deal with. Firstly, the starboard flap, for reasons best known to itself (and a kit designer at Matchbox thrty-odd years ago) had a big gap between it and the wing.
The best route to getting thid filled, I determined, was to apply some styrene strip and filler. So it was in with the styrene and cyano....
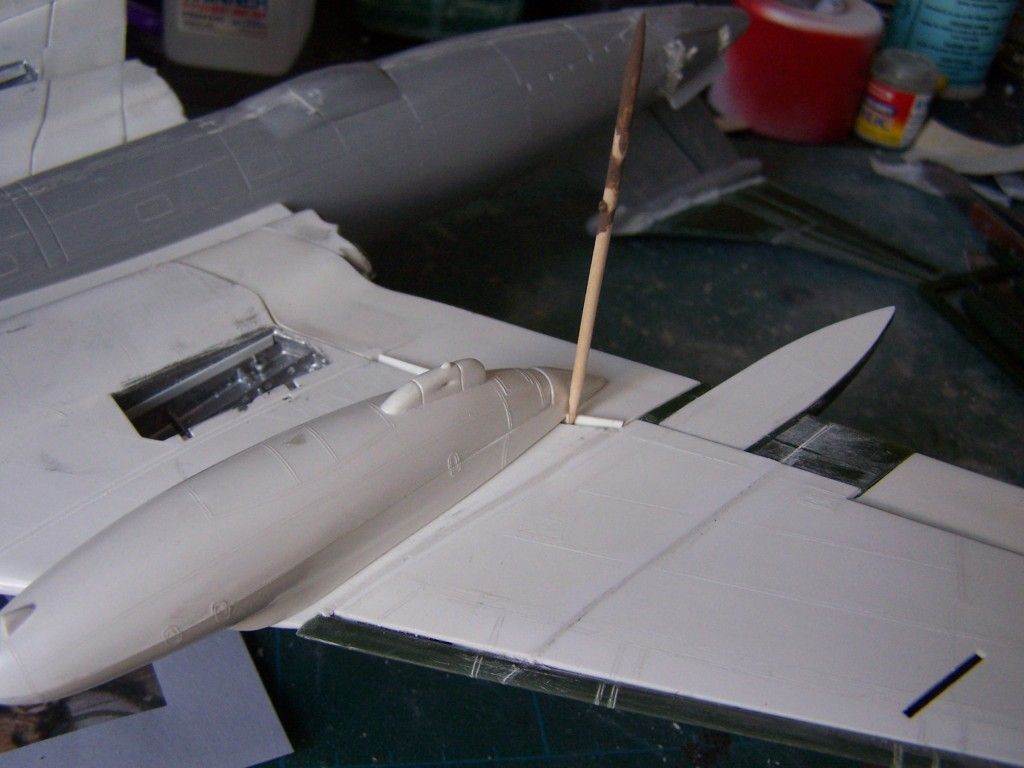
... wedged in place, in one part, with a coctail stick. This picture also shows the neat join in the repair and the, soon to be sanded, complete fuel tank.
Then a bit of filler went in.
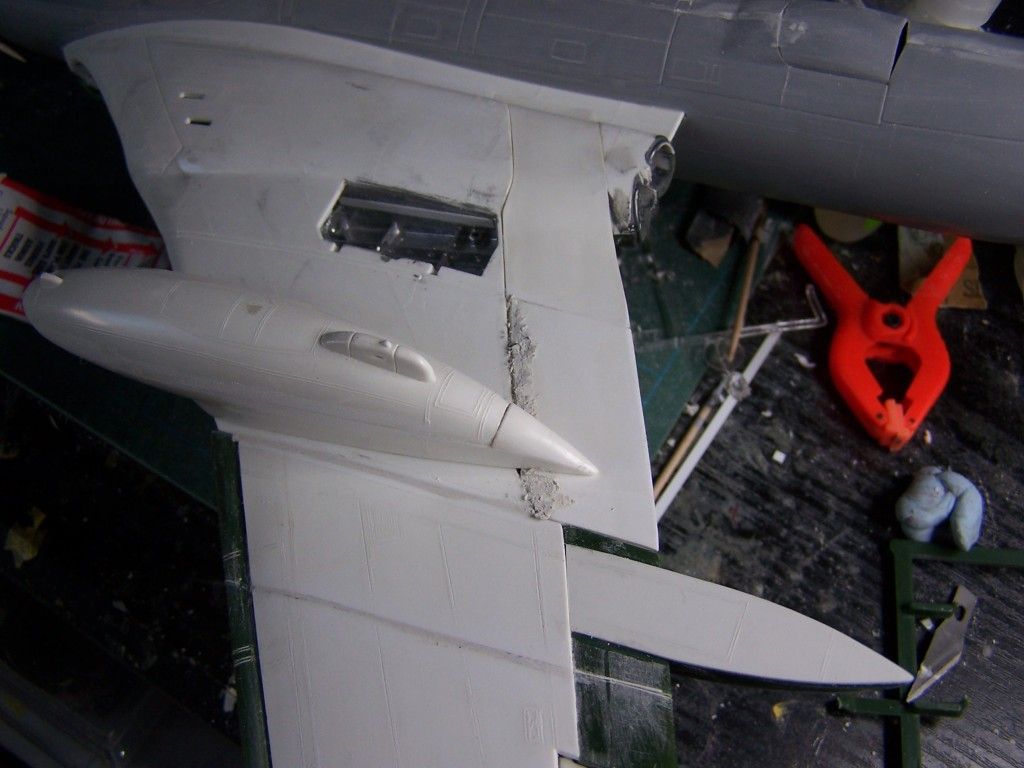
With that drying, I turned to issue number two. The canopy didn't fit . There was a big step in the starboard side
So I had to pop it back out and do a bit more trimming and cleaning up.
Then it went back in with even more "encouragement".

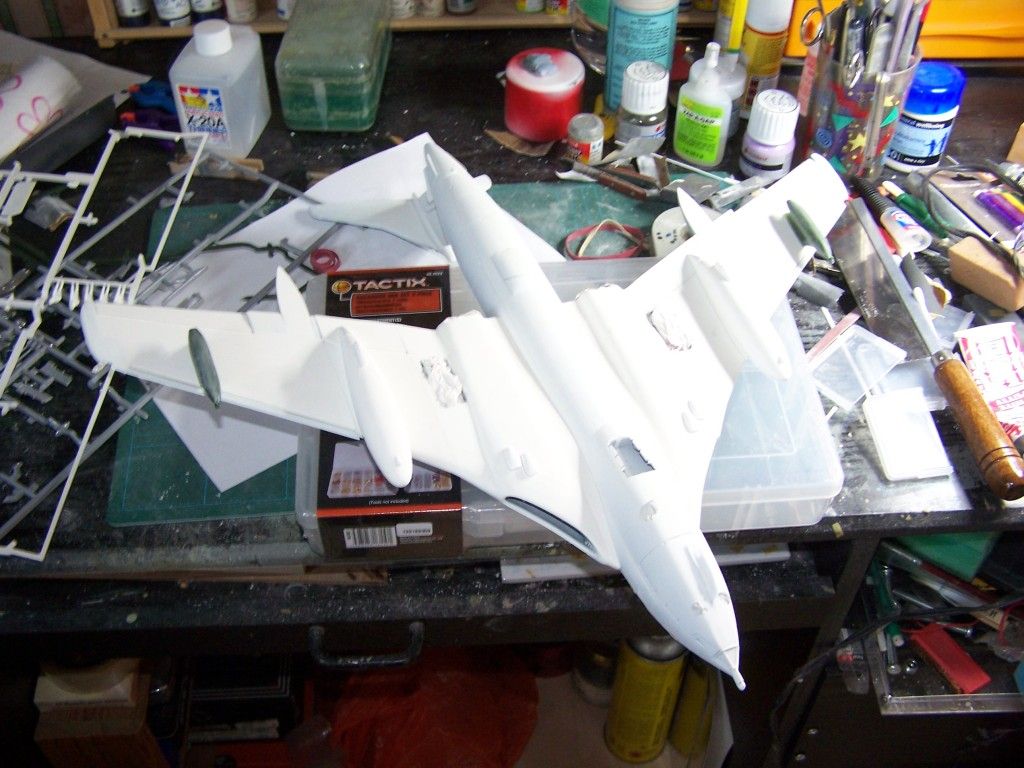
I know it looks like a model in traction but it did set the part in place reasonably well. There was however (and inevitably) a need for even more filler.
And that's as far as the pictures go so far. I've also tidied up and repainted the jet exhausts and covered up the gaps in the u'c bays. The filler has now been rubbed down all over the model and it's currently sitting upside down on a big piece of cardboard with a dust coat of white primer on it's belly. That should give me an idea of any parts that need further attention.
More updates soon
Now lets see if I can get the updates in order. You may have to bear with me on this.
As I remember, I left off with a section of the wing removed to correct a step in the joint. This got cleaned up and refitted. Happily, it went back together quite neatly so I moved swiftly on to boxing in the Kuchemann carrots and fitting the control surfaces, and these went on quite nicely, for the most part (more later), with only a minimal amount of fettling at the trailing edge required.
Then I turned my attention to the tail, fitted the lower half of the tail cone and added a "little" filler around the tailplanes and their fairing. Quite a bit of blending in is required here in order to get the right profile around the bullet fairing at the front.
To give the filler a chance to dry, I decided it was time to start hiding the flight deck details. First I added a fillet of plasticard at the rear to support the canopy component.
Then I attached the canopy with a good helping of Clearfix and a few elastic bands for encouragement.
Then the (appropriately rescribed) top halves of the fuel tanks were attached with zap-a-gap and clamped up. Everything was set aside to dry overnight like this.
The morning after I had a couple of issues to deal with. Firstly, the starboard flap, for reasons best known to itself (and a kit designer at Matchbox thrty-odd years ago) had a big gap between it and the wing.
The best route to getting thid filled, I determined, was to apply some styrene strip and filler. So it was in with the styrene and cyano....
... wedged in place, in one part, with a coctail stick. This picture also shows the neat join in the repair and the, soon to be sanded, complete fuel tank.
Then a bit of filler went in.
With that drying, I turned to issue number two. The canopy didn't fit
So I had to pop it back out and do a bit more trimming and cleaning up.
Then it went back in with even more "encouragement".
I know it looks like a model in traction but it did set the part in place reasonably well. There was however (and inevitably) a need for even more filler.
And that's as far as the pictures go so far. I've also tidied up and repainted the jet exhausts and covered up the gaps in the u'c bays. The filler has now been rubbed down all over the model and it's currently sitting upside down on a big piece of cardboard with a dust coat of white primer on it's belly. That should give me an idea of any parts that need further attention.
More updates soon
COLD WAR S.I.G. LEADER
Wherever there's danger, wherever there's trouble, wherever there's important work to be done....I'll be somewhere else building a model!
Wherever there's danger, wherever there's trouble, wherever there's important work to be done....I'll be somewhere else building a model!
-
Dazzled
- Modelling Gent and Scholar
- Posts: 9592
- Joined: October 1st, 2011, 11:08 pm
- Location: Mid Glamorgan, South Wales
- Contact:
Re: Dazzled's Venerable Victor
Had a couple of unintentional days off the Victor. Aside from having a particularly involved OU assignment to finish, we've had the police around today. After yesteradays Wales-Barbarians match we went home around 9, leaving my daughter and her friend in the local (both 18 years old). After they split up to go home it seems that my daughters friend was sexually assaulted on the way to her sisters house. We're all pretty upset about this at the moment, particularly as my wife had asked her if she wanted to spend the night at our place, as she has done on several previous occasions.
Puts the urgency of building a model into perspective a bit.
Puts the urgency of building a model into perspective a bit.
COLD WAR S.I.G. LEADER
Wherever there's danger, wherever there's trouble, wherever there's important work to be done....I'll be somewhere else building a model!
Wherever there's danger, wherever there's trouble, wherever there's important work to be done....I'll be somewhere else building a model!
-
splash

- Senior Service Rotorhead
- Posts: 13828
- Joined: May 1st, 2011, 11:02 am
- Location: Somerset England
Re: Dazzled's Venerable Victor
You must feel gutted.
As you say it puts the hobby into perspective.
Regards
Splash
As you say it puts the hobby into perspective.
Regards
Splash
My work bench is starting to look like Portsmouth Naval Dockyard.
-
Dazzled
- Modelling Gent and Scholar
- Posts: 9592
- Joined: October 1st, 2011, 11:08 pm
- Location: Mid Glamorgan, South Wales
- Contact:
Re: Dazzled's Venerable Victor
Feeling the need for a bit of therapy after the events of the weekend I've turned to my modelling bench for a bit of solace. Good progress with my Gnat build has prompted a further burst of progress with the Victor.
I already had the refueling pods together so I attached them together with the ancilliary intakes. Also, the white primer has dried and showed up a few areas that needed closer attention. Unfortunately, I seem to have used up all of my rattle can. Off to the car spares shop for me tomorrow. This is how it looks with a bit of white applied.
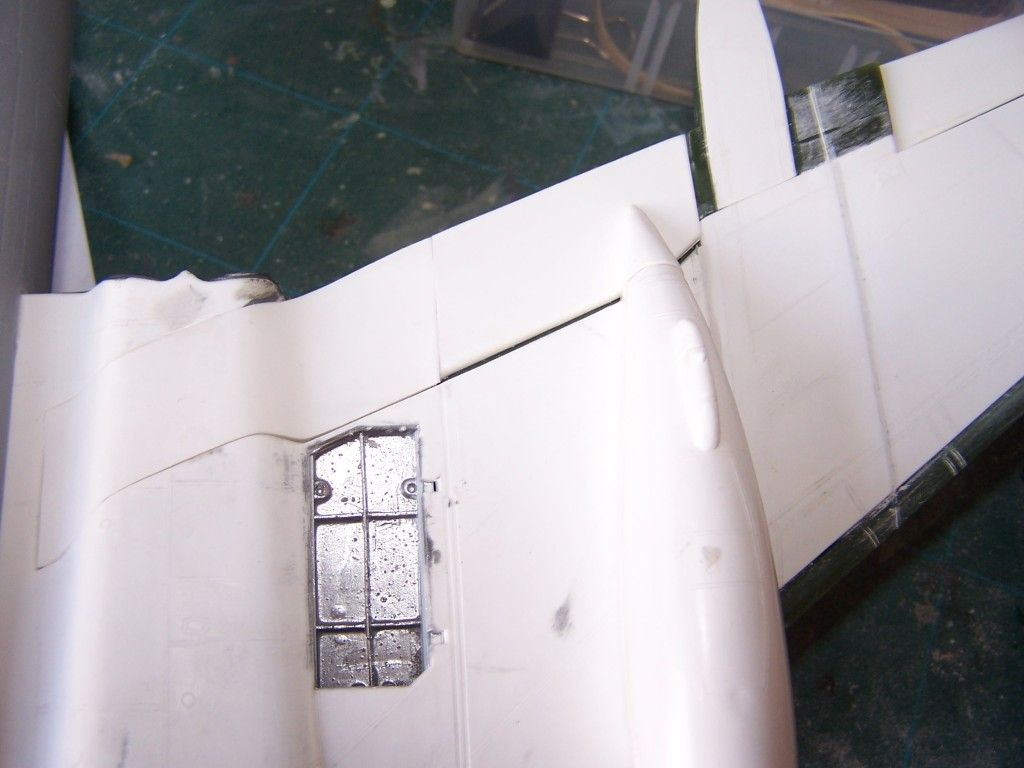
Happily though, my modified flap seems to have worked out quite well.

This is where the majority of extra work needs doing. A bit more sanding along the joint and a few sink marks that I missed first time round.
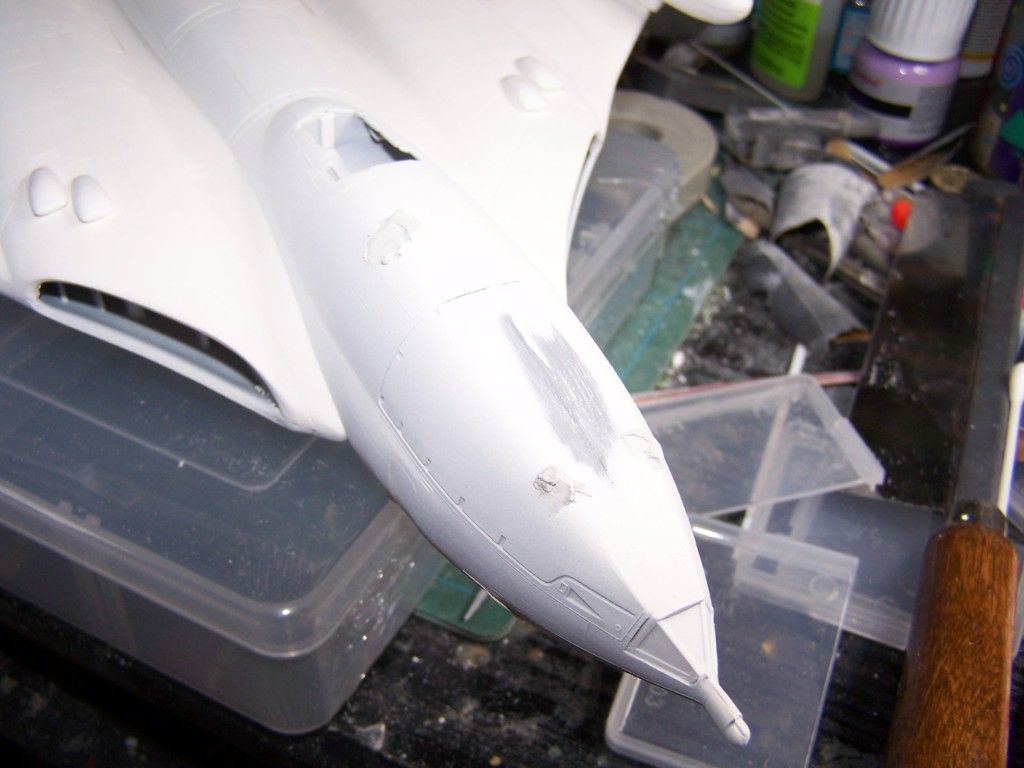
I've allowed the bomb aimers window to be painted over as my research showed that the tanker variants of the Victor had the glazed areas plated over. In reality of course they would have served little purpose on a refuelling aircraft.
Another thing to do, which was highlighted by the overspray that drifted onto it, was to tidy up the bullet fairing and to blend it into the tailplane.

Surprised myself by missing that one first time!
And this is how full my bench looks now.
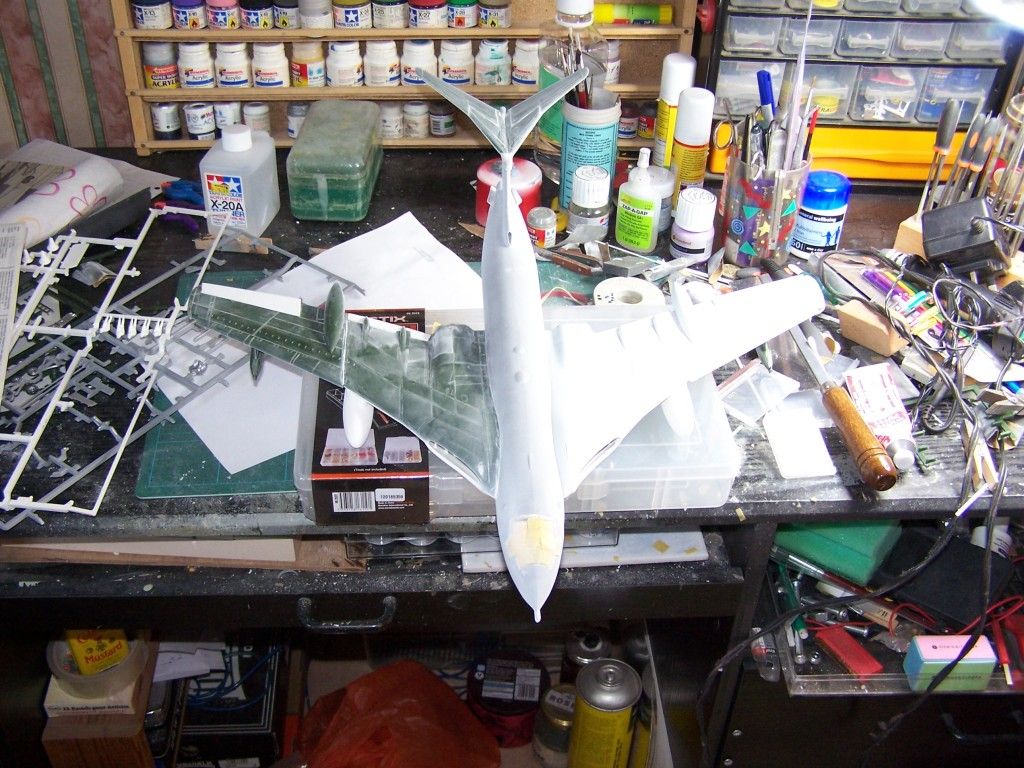
I may need to build an extension!!
I'll give everything time to dry, attach the pitot probes and refuelling boom, do a bit more sanding and masking, then the paint shop beckons.
While things are drying I'll be moving on to the undercarriage.
Things are, at least, progressing . Barring any other major problems, I still reckon I can slip this one under the wire.
I already had the refueling pods together so I attached them together with the ancilliary intakes. Also, the white primer has dried and showed up a few areas that needed closer attention. Unfortunately, I seem to have used up all of my rattle can. Off to the car spares shop for me tomorrow. This is how it looks with a bit of white applied.
Happily though, my modified flap seems to have worked out quite well.
This is where the majority of extra work needs doing. A bit more sanding along the joint and a few sink marks that I missed first time round.
I've allowed the bomb aimers window to be painted over as my research showed that the tanker variants of the Victor had the glazed areas plated over. In reality of course they would have served little purpose on a refuelling aircraft.
Another thing to do, which was highlighted by the overspray that drifted onto it, was to tidy up the bullet fairing and to blend it into the tailplane.
Surprised myself by missing that one first time!
And this is how full my bench looks now.
I may need to build an extension!!
I'll give everything time to dry, attach the pitot probes and refuelling boom, do a bit more sanding and masking, then the paint shop beckons.
While things are drying I'll be moving on to the undercarriage.
Things are, at least, progressing
COLD WAR S.I.G. LEADER
Wherever there's danger, wherever there's trouble, wherever there's important work to be done....I'll be somewhere else building a model!
Wherever there's danger, wherever there's trouble, wherever there's important work to be done....I'll be somewhere else building a model!
-
ShaunW
- NOT the sheep
- Posts: 26188
- Joined: November 26th, 2011, 6:11 pm
- Location: Pontefract West Yorkshire
Re: Dazzled's Venerable Victor
This Victor is looking really something Dazzled and your build thread makes for great reading apart that is for the incident involving your daughter's friend, that is seriously bad news and is not something that should happen to anyone.
Doing - Tamiya 1/35th Universal Carrier.
Work is the curse of the modelling classes!
IPMS#12300
Work is the curse of the modelling classes!
IPMS#12300
-
bromo
- On a long, long journey
- Posts: 1249
- Joined: May 2nd, 2011, 7:05 pm
- Location: Wolverhampton,England
Re: Dazzled's Venerable Victor
Very very sorry to here about your daughters friend,as a Father of two girls it brings home how risky the world can be these days.
Regards the Victor great progress again,you have managed to create such a fantastic build thread i have been surfing the tinter web looking for some Victors to add too the stash,i think one would look nice alon side the Nimrod
Martin
Regards the Victor great progress again,you have managed to create such a fantastic build thread i have been surfing the tinter web looking for some Victors to add too the stash,i think one would look nice alon side the Nimrod
Martin
BEEN A WHILE
-
Dazzled
- Modelling Gent and Scholar
- Posts: 9592
- Joined: October 1st, 2011, 11:08 pm
- Location: Mid Glamorgan, South Wales
- Contact:
Re: Dazzled's Venerable Victor
No more pics at the moment but the Victor is ready for masking and painting at the moment. Work has been a bit hectic over the last few days with a new aircraft coming in that , typically, required more repair work than anticipated. I've also had a bit of studying to catch up on after my PC meltdown a couple of weeks back and have had to spend some time making my re-motherboarded computer work properly again (pdf's are still a bit dodgy but at least I can send Emails now.
Things are moving along slowly though. The pitots and refuelling probe are on and I've had a bit of luck in that a work friend, who is also a modeller, has given me the decals from the Revel Victor he is building as a B2 so I now only have to use the serials from my 30 year-old set.
So paint will go on later today (when I can take a break from my essay on tidal power) and some more work on the undercarriage also.
Anther update coming soon.
COLD WAR S.I.G. LEADER
Wherever there's danger, wherever there's trouble, wherever there's important work to be done....I'll be somewhere else building a model!
Wherever there's danger, wherever there's trouble, wherever there's important work to be done....I'll be somewhere else building a model!
-
splash
- Senior Service Rotorhead
- Posts: 13828
- Joined: May 1st, 2011, 11:02 am
- Location: Somerset England
Re: Dazzled's Venerable Victor
My work bench is starting to look like Portsmouth Naval Dockyard.
-
Dazzled
- Modelling Gent and Scholar
- Posts: 9592
- Joined: October 1st, 2011, 11:08 pm
- Location: Mid Glamorgan, South Wales
- Contact:
Re: Dazzled's Venerable Victor
No, but I do ebb and flow a bit 
COLD WAR S.I.G. LEADER
Wherever there's danger, wherever there's trouble, wherever there's important work to be done....I'll be somewhere else building a model!
Wherever there's danger, wherever there's trouble, wherever there's important work to be done....I'll be somewhere else building a model!
-
Dazzled
- Modelling Gent and Scholar
- Posts: 9592
- Joined: October 1st, 2011, 11:08 pm
- Location: Mid Glamorgan, South Wales
- Contact:
Re: Dazzled's Venerable Victor
The Victor has provided me with a few nice breaks from the joys of tidal barrages today. It kind of went...write a couple of hundred words....do a bit of modellling....write some more words....do some more modelling. In all I've had quite a relaxed day and got half my next assignment out of the way
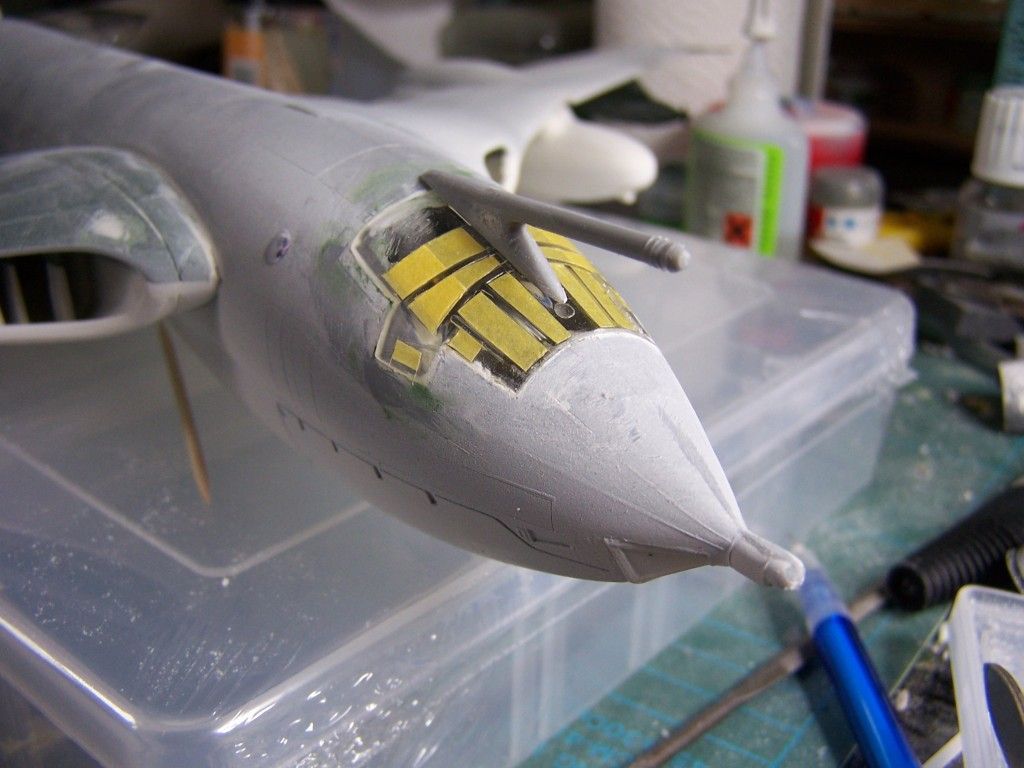
Anyhow, here's what happened to the Victor today. After a little bit of final sanding around the pitots and the air brakes I masked off the flight deck windows.
Next up was the question of whether or not the beast would fit inside my spray booth/cardboard box
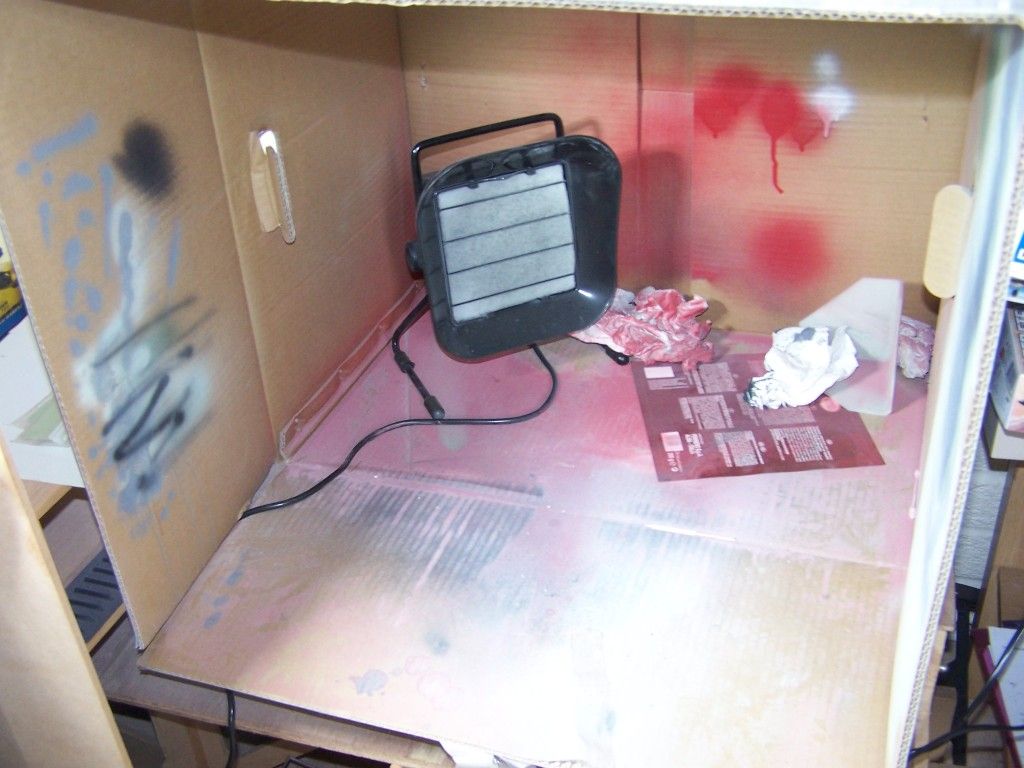
Space definately looked a bit tight and, with the sound of raindrops pitter-pattering on the window, I didn't fancy having to lug everything down to the garage and then have to wait for the model to dry before beginning.
Luckily....

it went in, just, and at the end of the lower flap so not much room to manouvre.
First the window area got a bit of matt black from a rattle can.
Then I had to figure out how I was going to be able to get at the entire underside of the kit and still keep my airbrush horizontal(ish).
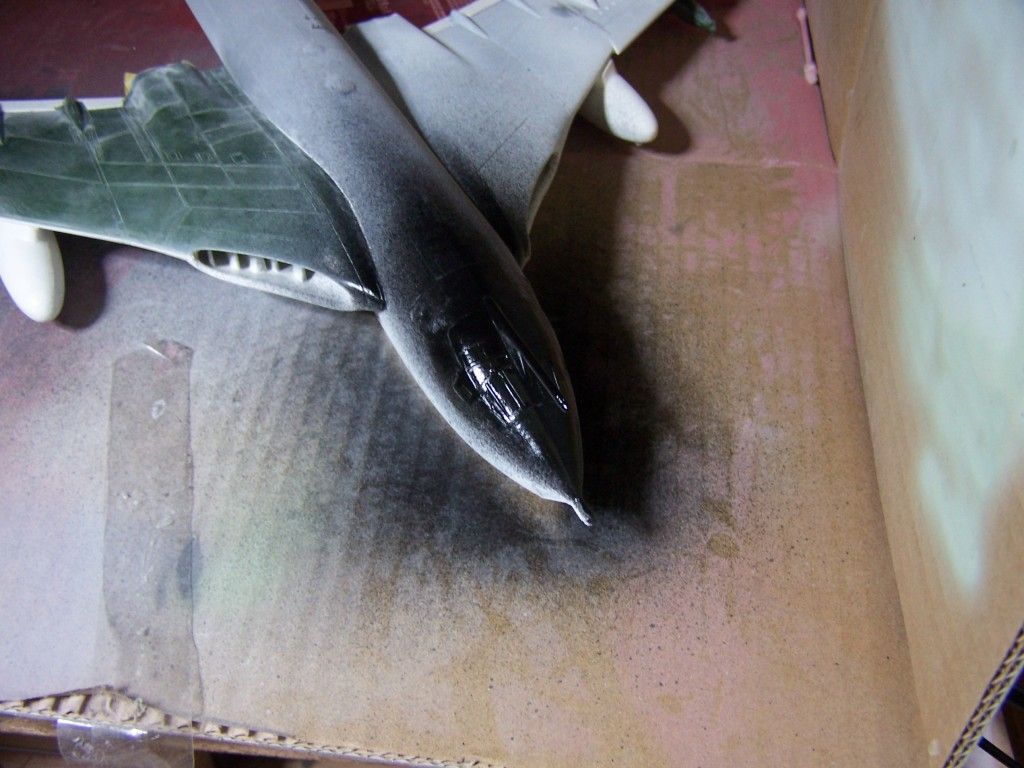
After a bit of mental gear grinding a plastic clamp came to the rescue. I made a hole in the top flap of the boothbox and squeezed the clamp through the hole. The clamp was then attached to the nose "bump" and the model supported between the clamp and the tail like so.

I figured that I could touch up the nose and tail afterwards if I needed to and this method gave me good painting access and the ability to turn the model to get into the awkward crevices, particularly around the refuelling units.
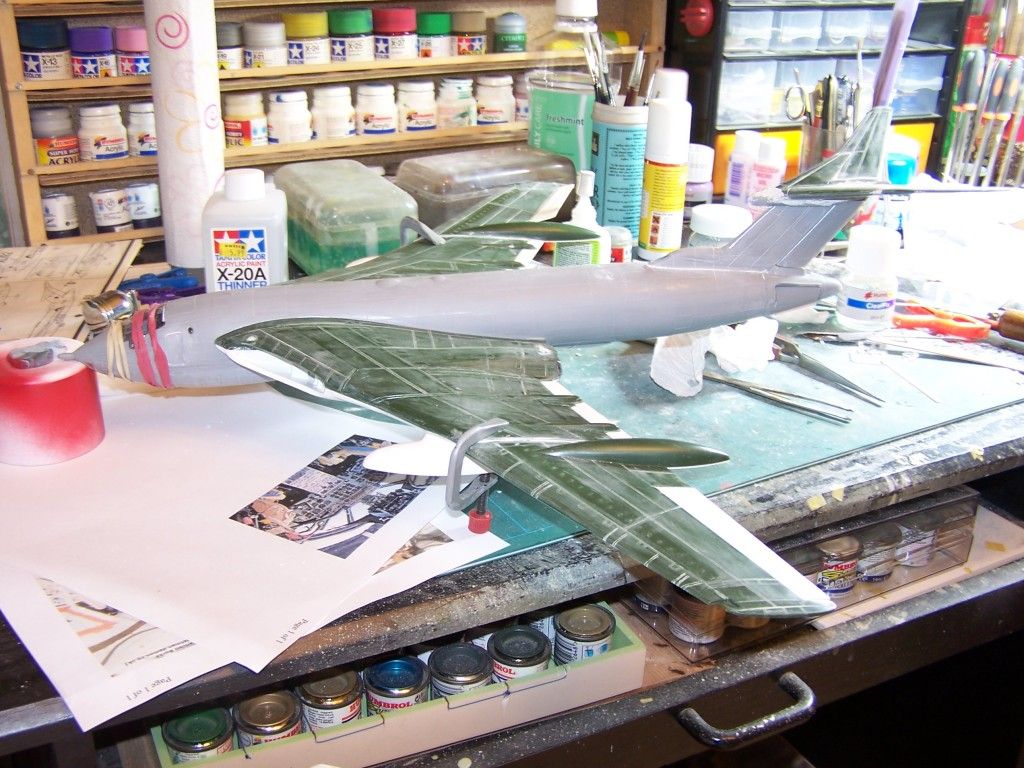
I loaded my airbrush with thinned Tamiya XF-2 and set to work. After 3 coats, with an hour or so in between each (I wasn't counting that hard) plus a bit of extra to dry to a handling state, I removed the model from it's makeshift stand and touched in the last bits while holding it in my free hand before placing it, propped on it's back, to dry,as shown below.

As you can just about see in the picture, I've also painted the u/c doors. They're nice and simple on the Victor. Only 4 doors on the whole aircraft.
I'll give it overnight to dry. I'm on early shifts tomorrow and I can now spare a bit of time from studying so, when I get home, I intend to mask off the underside and go for the grey on top
Anyhow, here's what happened to the Victor today. After a little bit of final sanding around the pitots and the air brakes I masked off the flight deck windows.
Next up was the question of whether or not the beast would fit inside my spray booth/cardboard box
Space definately looked a bit tight and, with the sound of raindrops pitter-pattering on the window, I didn't fancy having to lug everything down to the garage and then have to wait for the model to dry before beginning.
Luckily....
it went in, just, and at the end of the lower flap so not much room to manouvre.
First the window area got a bit of matt black from a rattle can.
Then I had to figure out how I was going to be able to get at the entire underside of the kit and still keep my airbrush horizontal(ish).
After a bit of mental gear grinding a plastic clamp came to the rescue. I made a hole in the top flap of the boothbox and squeezed the clamp through the hole. The clamp was then attached to the nose "bump" and the model supported between the clamp and the tail like so.
I figured that I could touch up the nose and tail afterwards if I needed to and this method gave me good painting access and the ability to turn the model to get into the awkward crevices, particularly around the refuelling units.
I loaded my airbrush with thinned Tamiya XF-2 and set to work. After 3 coats, with an hour or so in between each (I wasn't counting that hard) plus a bit of extra to dry to a handling state, I removed the model from it's makeshift stand and touched in the last bits while holding it in my free hand before placing it, propped on it's back, to dry,as shown below.
As you can just about see in the picture, I've also painted the u/c doors. They're nice and simple on the Victor. Only 4 doors on the whole aircraft.
I'll give it overnight to dry. I'm on early shifts tomorrow and I can now spare a bit of time from studying so, when I get home, I intend to mask off the underside and go for the grey on top
COLD WAR S.I.G. LEADER
Wherever there's danger, wherever there's trouble, wherever there's important work to be done....I'll be somewhere else building a model!
Wherever there's danger, wherever there's trouble, wherever there's important work to be done....I'll be somewhere else building a model!