Page 4 of 7
Re: 1/76 M3A1 and M5A1 US Armored Halftracks
Posted: September 22nd, 2017, 1:59 am
by gnomemeansgnome
Fantastic work. One of the better .50 cal's I have grappled with in Braille Scale.
Re: 1/76 M3A1 and M5A1 US Armored Halftracks
Posted: September 22nd, 2017, 12:43 pm
by ShaunW
Brilliant, the end products are far superior to what came in the boxes. Your efforts with the .50 cal are also worthwhile, Neil. The indents are difficult to do in this scale (I've had a go myself in the past but wasn't wholly satisfied with my attempt) and maybe it would be worth replacing the barrel if you feel that the OOB one is too thick - I've replaced one or two such barrels in the past with thinner plastic tubing to give a better scale effect.
Re: 1/76 M3A1 and M5A1 US Armored Halftracks
Posted: October 2nd, 2017, 11:32 pm
by ntrocket88
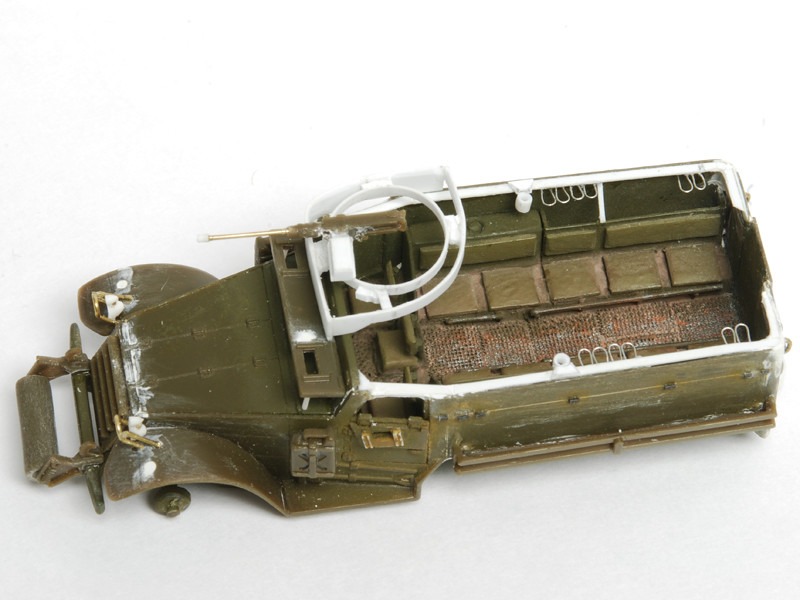
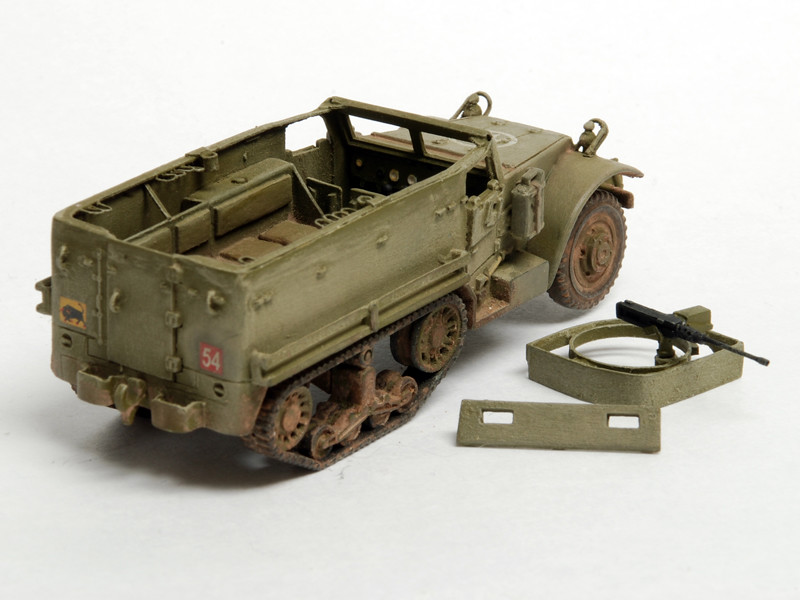
Thanks again for the interest and kind comments. Some more progress with some fiddly bits! I am going to call the pre-painting assembly complete. All that is left is to glue the tracks, wheels, clear windscreen (cut and ready to go), windscreen armor and the 50-Cal pulpit. Oh, and add all the stowage...
Anyway, this is the progress so far, shown with the windscreen armor and pulpit dry assembled. I added the front headlights on the mudguards, the 30-cal MG mounts to the MG rail in the passenger area and the rifle racks just below the MG rail:
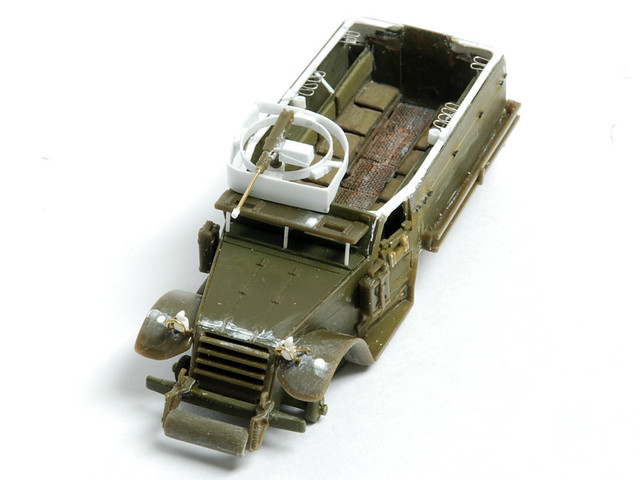
The headlights supplied by the kit, while simplified, would be OK for an early M3 or a very early M5. Most M3 and M5 seem to have these smaller twin lamps, mounted on the inner side of the mudguards, level with the front of the radiator armor. I made the lamps by filing down the ends of two different diameter Evergreen rods to create rounded backs, drilled holes then mounted them together on brass rod and then inserted the brass rod into a drilled hole on each mudguard. The lamp guards were made from the same brass rod, bent to shape. The International Harvester M5 lamp guards were a slightly different design than used on the White M3. And easier to copy...


I tried at least a half dozen different ways to represent the rifle racks that mounted under the MG rail in the passenger area. The best I came up with is loops made from 5A fuse wire. Not as complex as the real ones, but there were at least three versions and the loops loop a little like one version I found photos of. I also added two mounts for the 30-cal MG, one on each side.
Now on to my favorite part - painting and weathering.
Re: 1/76 M3A1 and M5A1 US Armored Halftracks
Posted: October 3rd, 2017, 4:21 am
by gnomemeansgnome
This is amazing work.
Re: 1/76 M3A1 and M5A1 US Armored Halftracks
Posted: October 3rd, 2017, 6:08 am
by Clashcityrocker
Loads of extra work. Very nice.
Nigel
Re: 1/76 M3A1 and M5A1 US Armored Halftracks
Posted: October 4th, 2017, 4:11 pm
by ShaunW
The extra detail work here is fantastic, Neil and could easily pass as 1/35th - are you using a microscope?

Re: 1/76 M3A1 and M5A1 US Armored Halftracks
Posted: October 5th, 2017, 7:32 pm
by PTB11
Awesome scratchbuilding. They look fantastic.
Re: 1/76 M3A1 and M5A1 US Armored Halftracks
Posted: October 13th, 2017, 12:18 am
by ntrocket88
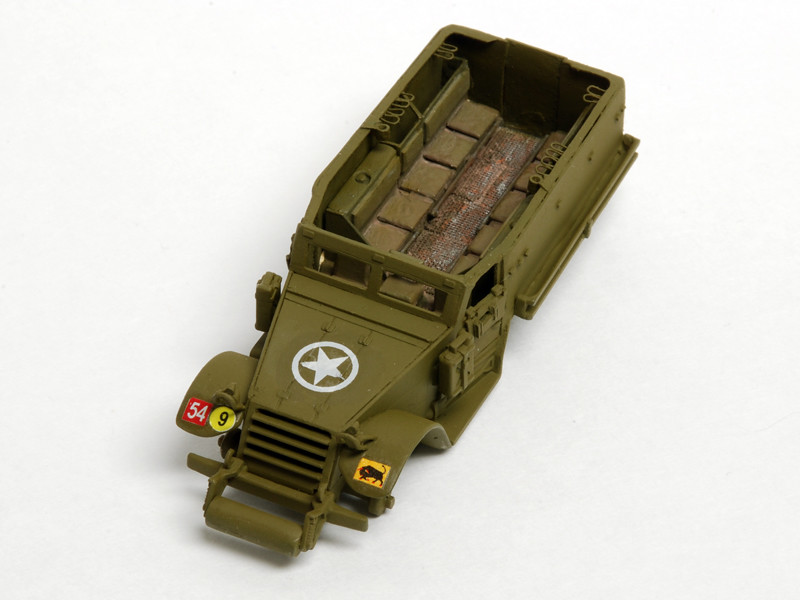
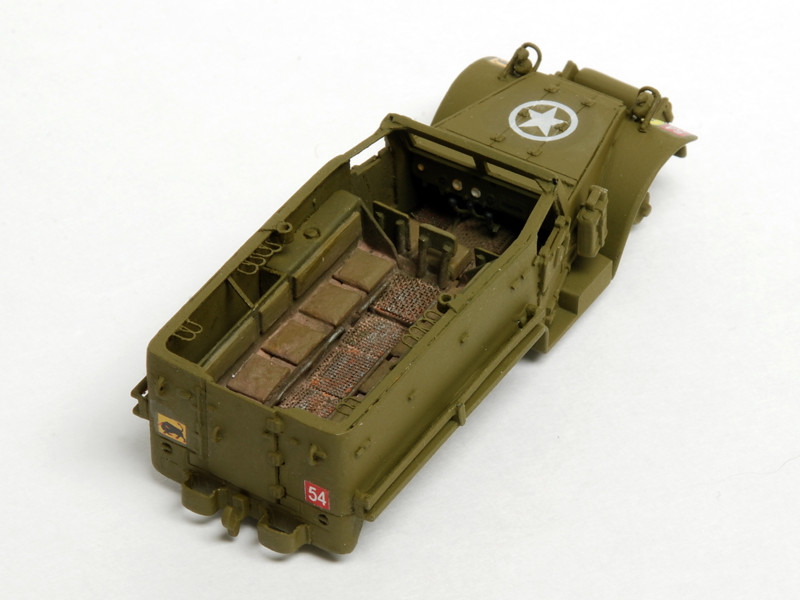
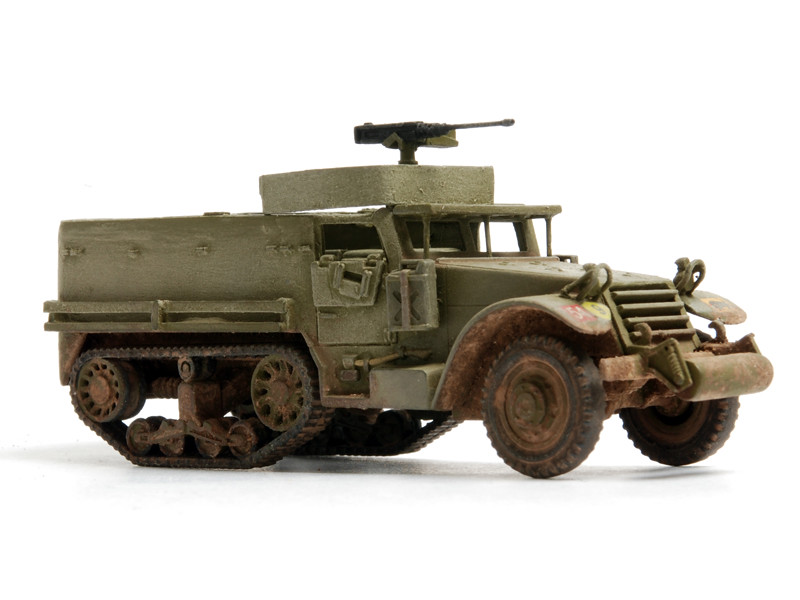
Some more progress. The overall coat of US Olive Drab has been airbrushed on and I applied decals for the 8th Motor Battalion/The Rifle Brigade, 29th Armoured Brigade, 11th Armoured Division.
Re: 1/76 M3A1 and M5A1 US Armored Halftracks
Posted: October 13th, 2017, 2:36 am
by gnomemeansgnome
Looks incredible.
Re: 1/76 M3A1 and M5A1 US Armored Halftracks
Posted: October 13th, 2017, 2:50 am
by Clashcityrocker
Great work.
Nigel
Re: 1/76 M3A1 and M5A1 US Armored Halftracks
Posted: October 13th, 2017, 6:15 pm
by ShaunW
Superb, Neil, that is really coming to life now the paint and decals are going on.
Re: 1/76 M3A1 and M5A1 US Armored Halftracks
Posted: October 15th, 2017, 10:56 pm
by ntrocket88
Thanks again for the interest and very kind comments.
I painted the wheel and bogie tires (tyres) and the rubber tracks in black, and now on to my favorite part... the MUD!
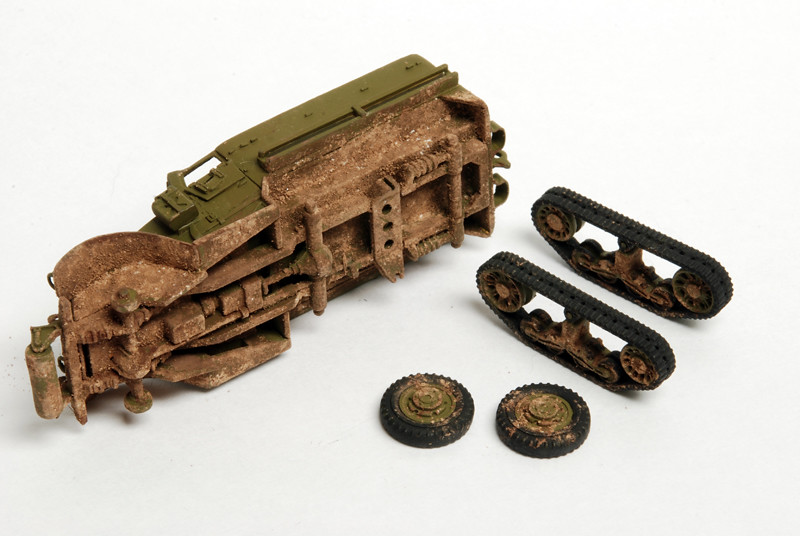
The tracks and wheels will get an additional wash of mud to lighten them and work the mud into the indents and crevices.
Re: 1/76 M3A1 and M5A1 US Armored Halftracks
Posted: October 16th, 2017, 5:41 pm
by ShaunW
Nicely muddied underside there, Neil!
Re: 1/76 M3A1 and M5A1 US Armored Halftracks
Posted: October 20th, 2017, 12:39 am
by ntrocket88
Some more progress and an 'oops'. In studying M5 photos some more, I realized that the windscreen armor had the adjustable opening mechanisms on the inside, the same as the side doors on the M5 (already corrected...). The M3 had the sliding panels on the outside, as the kit has them. So, I cut off the support legs, drilled new holes on the opposite side and added new legs, out of brass rod this time. I completed a mud wash of the wheels and track assemblies, working the mud into the treads on both tires and tracks, then painted the contact face of the drive sprocket and idler in gunmetal, before assembling the wheels and track units onto the body. I fitted one of the wheels last and cut the locating hole in the wheel into a slot, allowing the wheel to find it's own level on a flat surface, ensuring good four-point contact (not in the photos as the paper is uneven...). I then gave the first mud/dust application with Tamiya makeup. next will be airbrushing matt varnish to seal the decals, mud and at least some of the makeup.


Re: 1/76 M3A1 and M5A1 US Armored Halftracks
Posted: October 20th, 2017, 12:53 am
by gnomemeansgnome
Great work!