Softscience's Step by Step AFV finishing guide

Millitary miscellany; Tanks, AFV, Trucks and other Soft-Skin vehicles etc.
User avatar
Softscience
Staring out the window
Posts: 7485
Joined: April 5th, 2011, 4:34 pm
Location: Maryland, near Washington DC

Softscience's Step by Step AFV finishing guide

Post by Softscience »

A few people have asked me how I paint and weather my armor models. I don't use any one method, as each vehicle, the theater it served in, and the amount of exposure being modeled is different. However, all of my models receive a standard weathering treatment which is the basis for all additional weathering, or can stand on its own as visually interesting finish for a kit.

This treatment is results in a somewhat stylized finish which some modelers frown upon as being unrealistic. To this I reply with a quote from master modeler Tony Greenland who wrote that he is interested in modeling the AFV and not interested in modeling "The dust and the mud they fought in". Again, this is not the only method, and it may not appeal to you, so go forth and experiment.

One last note. I use an airbrush to paint my models, but many of the airbrush steps described below can be substituted with oil paints or pastels. I will mention non airbrush alternatives to the steps if I am aware of them.

This thread is being written more or less in real-time, hence it will be updated as I make progress on the model. Feel free to follow along if you have a kit of your own at the painting stage.

Without further ado; a simple technique for finishing model AFVS. So easy, even I can do it.

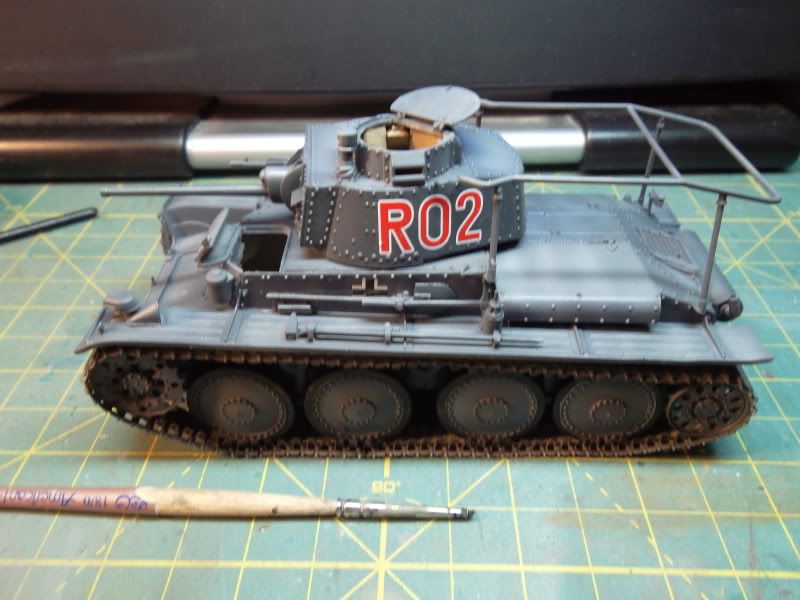
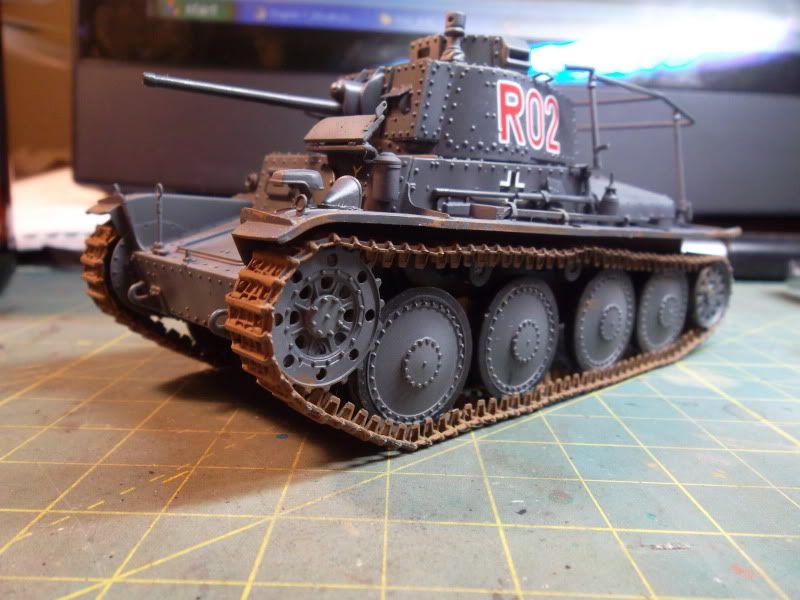
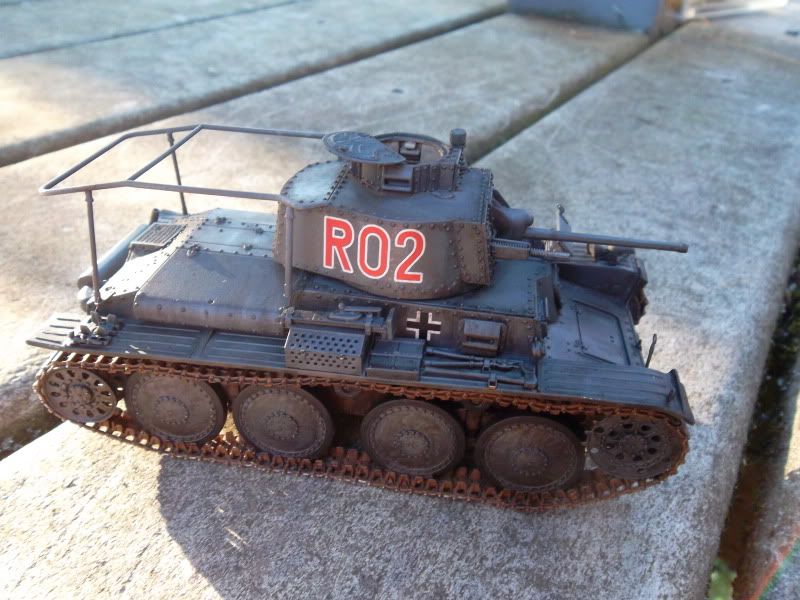
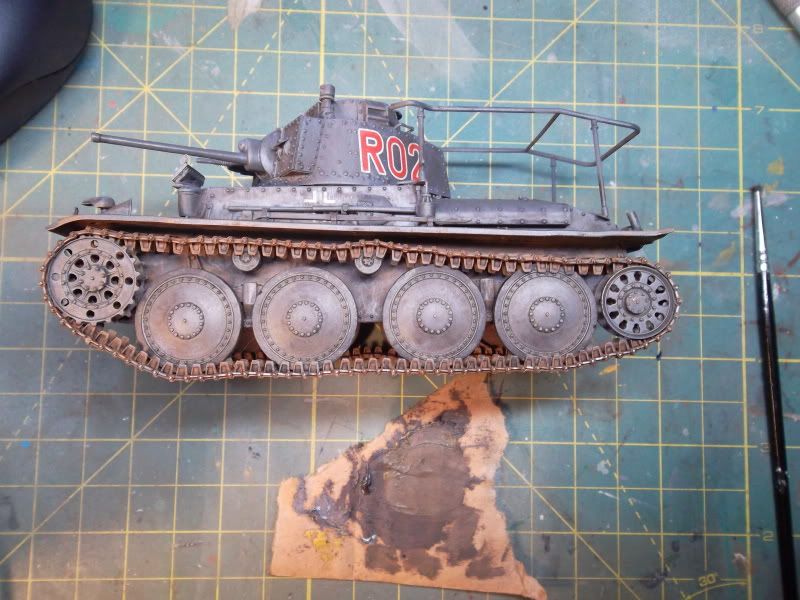
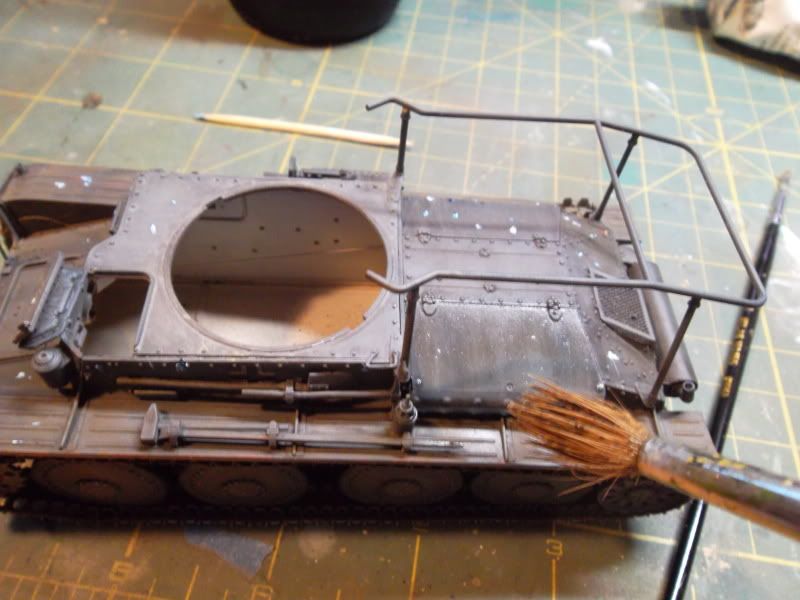
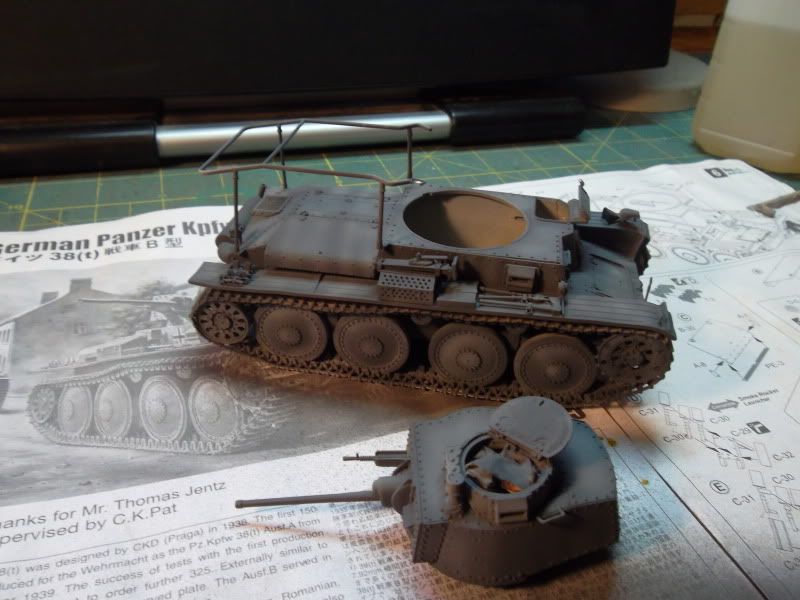
The model being built in this instance is a 1/35 Tristar 38(t) light tank finished in overall dark gray. This method presented here is especially effective on monochrome camouflage schemes but can also be applied to polychrome camo and works equally well in all scales. What I describe here is nothing new, its just a synthesis of several methods which I found to be simple but elegant.

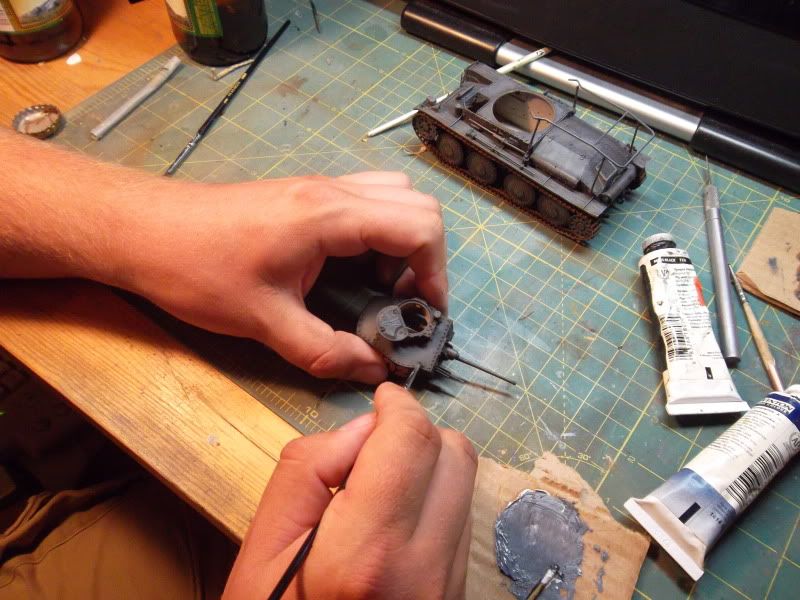
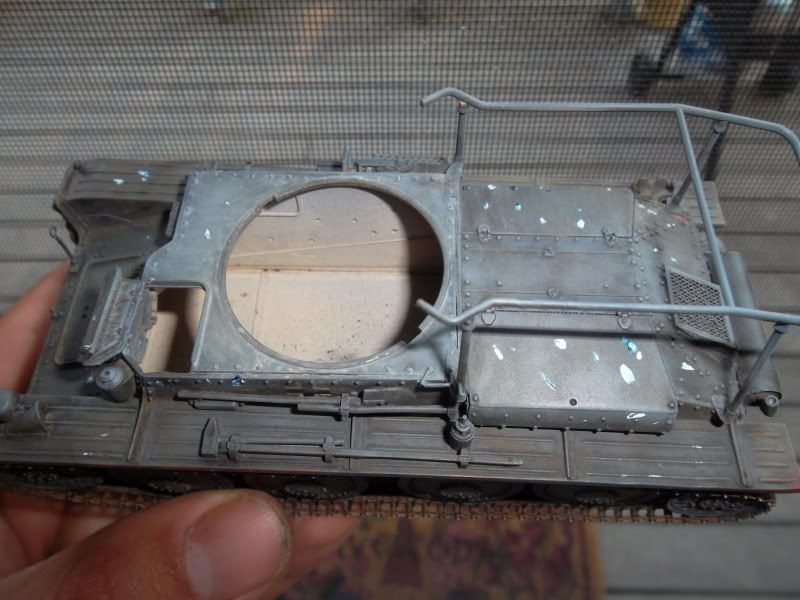
To begin with, I often (though not always) paint my models in toto . In other words, I build the whole kit prior to painting. I only leave off the most fragile elements, such as aerials, photo-etch (PE) chains, and the like.

Image

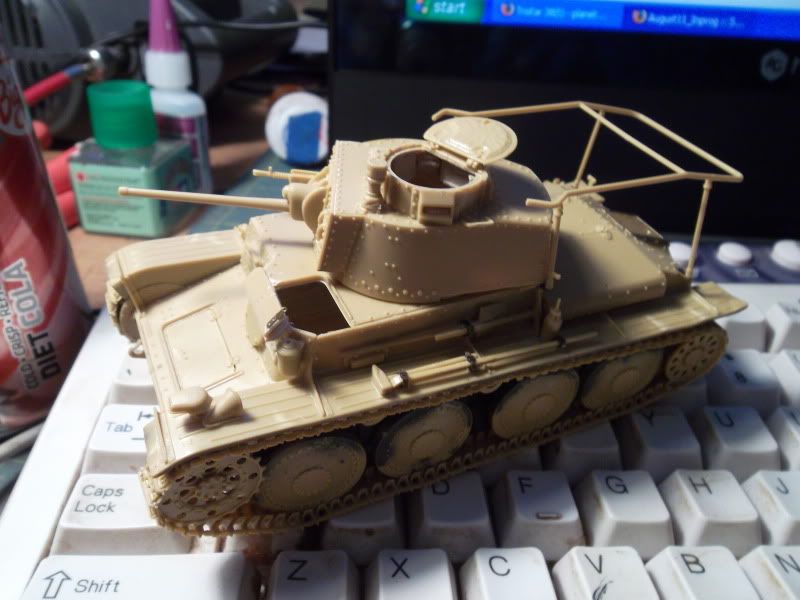
Since this kit includes several PE elements, I first sprayed it with a coat of Tamiya primer. Most autobody primers work as well. I prefer to use a neutral colored gray primer, though others prefer browns and blacks. Autobody primer is a cheap alternative to Tamiya. If you will be painting your kit with acrylics, then a primer is essential. If you prefer enamels, it may not be necessary if you have no PE parts to worry about. Paint applied directly to PE metal tends to rub off.

After the primer coat had cured for a few days, I airbrushed the model with Tamiya German Gray. I made sure to get the paint into all of the little nooks and crannies on the kit. I wasn't overly concerned about coverage on the tracks though.

Image

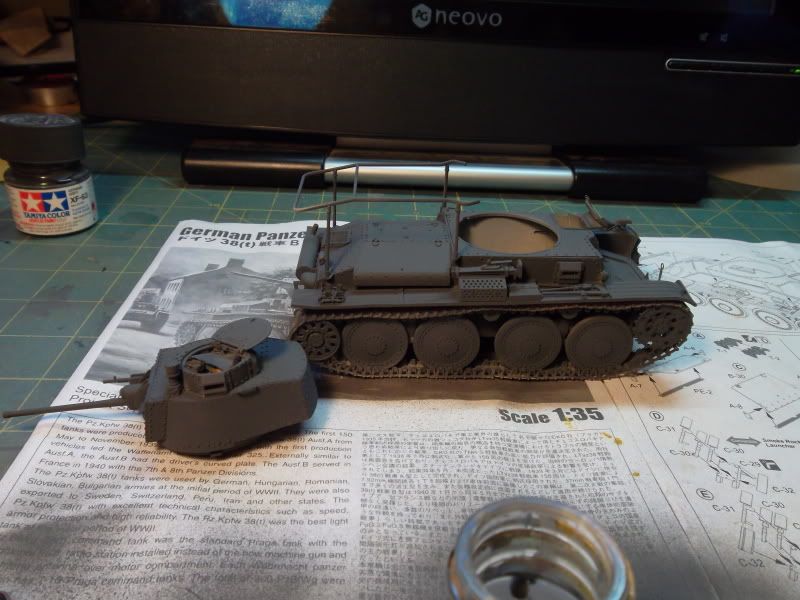
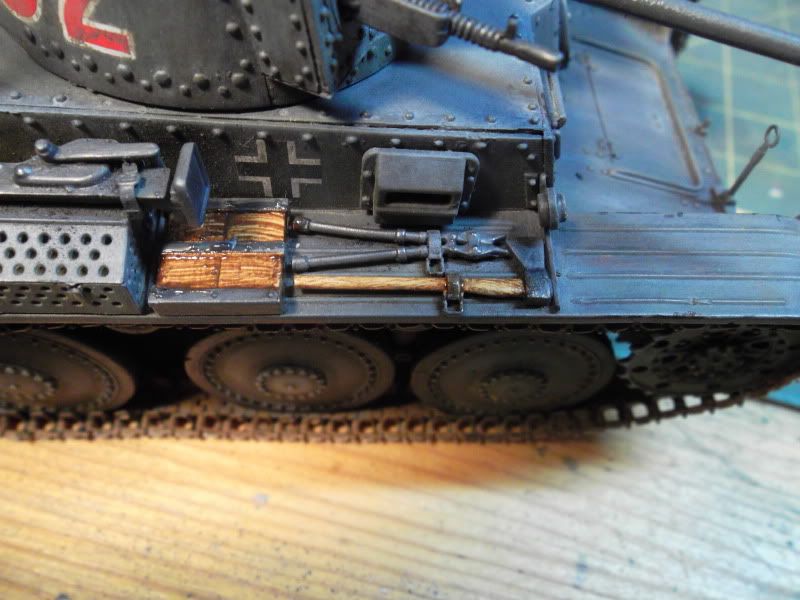
After the base coat was applied, I lightened the german gray with some Tamiya deck tan paint (approximately 3:1) and then thinned the paint about 1:1 with isopropyl to achieve a semi-translucent mixture. I sprayed this on in irregular splotches onto the the horizontal surfaces of the tank, and then as vertical streaks on the turret and hull sides. On the wheels I sprayed the lighter shade in a circle around the outside of the hub.

Image


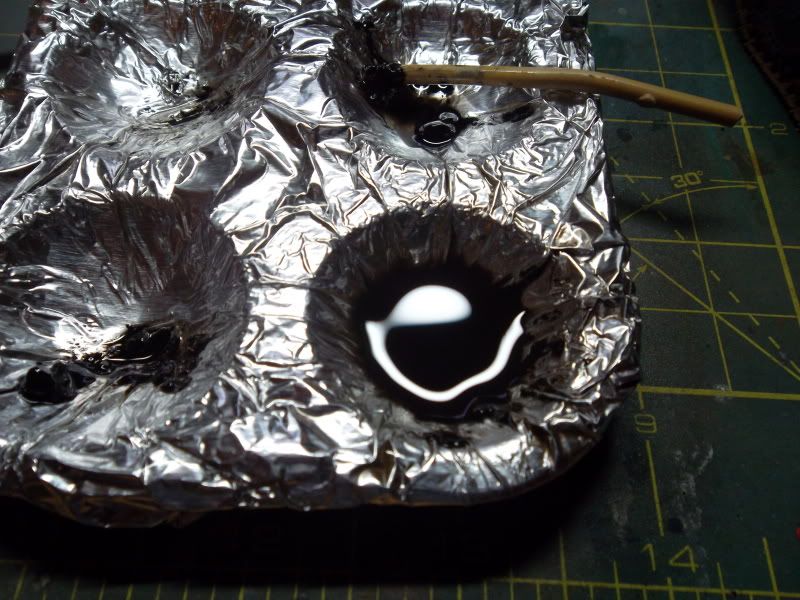
Those of you who do not have an airbrush can achieve a similar result with oil paints. Mix up a mixture which is a shade or two lighter than your base coat, and then using a soft flat brush, apply small amounts of the oils in similar patterns to those described above. This is important, a little bit of paint will go a long way here. You don't want to be drybrushing at this stage, but you do want the color you apply to be semi-translucent, and allow the base coat color to show through. Also make sure to feather your edges. You do not want a stark solid border between your base coat and your highlight. Give your oils a few days to dry, and then seal everything in with a clear coat. (See also the discussion of dot-filters several postings below)

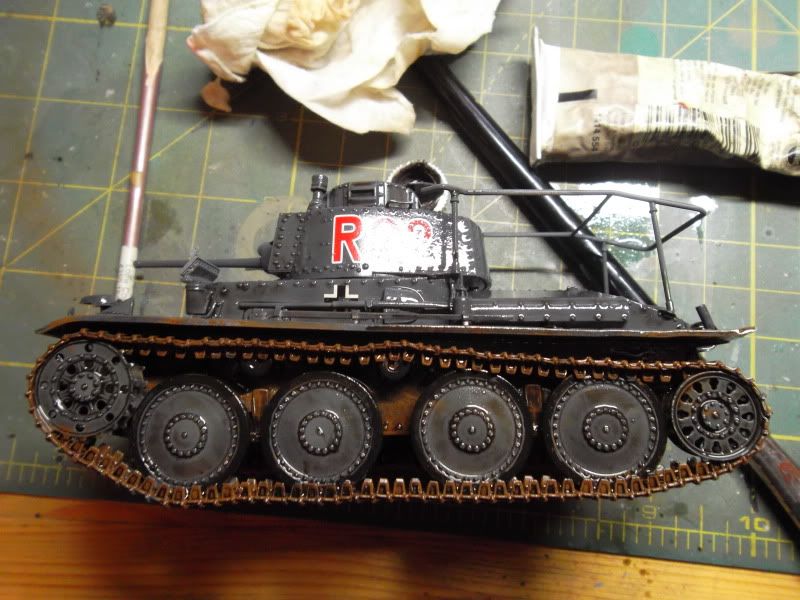
Do not be overly concerned if the contrast between your base coat and highlight coat looks excessive. The following steps will tie everything together.

You may also skip this step entirely, and simulate your highlights and shadows with washes and drybrushing, which will be completed further down the line


When this thread continues, We will apply decals to the kit and then begin the simple process of color alteration.
User avatar
Softscience
Staring out the window
Posts: 7485
Joined: April 5th, 2011, 4:34 pm
Location: Maryland, near Washington DC

Re: Softscience's Step by Step AFV finishing guide

Post by Softscience »

Day 2.


After the paint had dried, I applied a very thin coat of a satin coat onto the model. This step is important for several reasons. First, it gives the decals something to adhere to (you all knew that), it will help the oil paints do what we want them to, and most importantly it will provide a nice contrast to the dead flat dust and earth which we will apply later.

I also can't stress enough to use satin rather than gloss. If you do go with a gloss coat before the decals, follow up with a satin coat to seal them in.

Image

At this stage I also begin to paint detail on the wheels and tracks. I start with the rubber rims. In most models I use a very dark gray for this, but since this kit is already a dark gray, I used a tire-black from Model Master's acrylic range. Perfection here is not necessary, just make sure you get coverage on the visible areas. It may be tricky to get paint in between the track teeth, so use a toothpick or cocktail stick. Again, close counts. There will be several layers of paint which blend a lot of things together.

Although not photographed, the next step is to paint the tracks themselves. At this point, the only thing to do is apply a base coat of very dark earth brown shade. Humbroll or Vallejo dark earth are my favorites for this. Here you should try not to get any of the brown paint on the rubber rims you just painted.

More to come.
User avatar
Beowulf Shaeffer
Earning Reputation Points
Posts: 823
Joined: May 1st, 2011, 12:01 am
Location: Monkey Hanger Town, UK

Re: Softscience's Step by Step AFV finishing guide

Post by Beowulf Shaeffer »

now this will be an interesting thread.....always enjoy learning new weathering techniques.....and ive yet to be brave enough to try using oils
many thanks for doing this :grin:
The time you enjoy wasting is not wasted time........Bertrand Russell

On the Bench: Beagle
Next on the bench: not sure yet lol
User avatar
montessa315
Modelling Gent and Scholar
Posts: 1564
Joined: May 1st, 2011, 9:34 am
Location: Rugby - UK

Re: Softscience's Step by Step AFV finishing guide

Post by montessa315 »

A good start to what will be a good thread.

Always interesting to see how other people achieve the effects of their finishes.

I'm always willing to try out and learn new ideas.

Will watch with interest...


Alan..............
_______________________________________________________________________
If you always do what you've always done, you'll always get what you've always got.
User avatar
Desert_fox
The Bug Has Well And Truly Bitten
Posts: 213
Joined: June 6th, 2011, 9:37 pm
Location: Scotland

Re: Softscience's Step by Step AFV finishing guide

Post by Desert_fox »

Looking good already! I will watch this with great interest. I would have done anyway, but I think I've caught the armour bug which has ensured that this thread is getting favourited :-D
Will write history dissertations for modelling supplies...
User avatar
malepo
Active Participant
Posts: 782
Joined: May 1st, 2011, 4:04 pm
Location: Germany

Re: Softscience's Step by Step AFV finishing guide

Post by malepo »

hey cool - will follow with interest
Cheers
Martin
User avatar
Softscience
Staring out the window
Posts: 7485
Joined: April 5th, 2011, 4:34 pm
Location: Maryland, near Washington DC

Re: Softscience's Step by Step AFV finishing guide

Post by Softscience »

I'm glad you guys are finding this useful.


Just a short update for tonight. I finished painting the track with Vallejo dark earth. If you decide to use humbroll instead, then you'll want to seal it with an acrylic flat coat.

As a matter of fact, before you move on to the next step you'll want to seal your model with acrylic coats. The next step will involve using thinned oil paints, and the thinner can attack and partially dissolve enamels.

Image

It is paramount that you don't just use any old thinner for the next step. Most are too harsh and will eat through acrylics and enamels. I use Mona Lisa Oderless Paint Thinner which I picked up at an art store. Webber's Turpernoid, and Sunnyvale Turpentine work well also. I've also had good results Humbroll's thinner.

But back to the tracks for a moment. You may have noticed that last night I said you should avoid getting the brown paint on your wheel rims. What I should have said instead is that if you do get brown paint on the rims (which is almost inevitable) you could go back and repaint those areas black. On the other hand, you should not worry about any paint splatters on the wheel faces or fenders. I left some on, and also splashed some brown paint behind the wheels by sticking a long haired brush up from below and behind each wheel. Its not very visible in the photo, and is not a necessary step.
User avatar
MrDyzio
The Bug Has Well And Truly Bitten
Posts: 353
Joined: May 2nd, 2011, 12:24 am
Location: DC Metro Area
Contact:

Re: Softscience's Step by Step AFV finishing guide

Post by MrDyzio »

Softscience wrote:It is paramount that you don't just use any old thinner for the next step. Most are too harsh and will eat through acrylics and enamels. I use Mona Lisa Oderless Paint Thinner which I picked up at an art store. Webber's Turpernoid, and Sunnyvale Turpentine work well also. I've also had good results Humbroll's thinner.
I use humbrol thinner or for most of time lighter fluid (Ronson, Zippo). WARNING! These thinners can melt rubber tracks.

Carry on Ralph :mrgreen:
My modeling Blog Dyzio Scale Models
User avatar
jssel
Still crazy after all these years
Posts: 12005
Joined: April 5th, 2011, 3:42 pm

Re: Softscience's Step by Step AFV finishing guide

Post by jssel »

Great tutorial here. I never get tired of learning how someone else does things.

Well done and a great looking model.
Besting 60 years of mediocre building of average kits in the stand off scale
User avatar
Softscience
Staring out the window
Posts: 7485
Joined: April 5th, 2011, 4:34 pm
Location: Maryland, near Washington DC

Re: Softscience's Step by Step AFV finishing guide

Post by Softscience »

Thanks Jeff. Here is some more


Today's step deals with the wash and drybrush stage. These are old tricks in the modeler's book, and there are a million ways to accomplish either process. Its at this stage that no amount of how-to will make you a better modeler. You just need to practice the techniques, adjust to suit your own needs, and develop YOUR OWN style with time.

My washes are made using oils paints thinned with Mona Lisa thinner. About 3 parts thinner to 1 part paint. The result is an opaque dark liquid. I most often use a mixture of black and raw umber paints, but different finishes call for different colors.

Image

I apply my wash over the entire model. Some modelers prefer to focus it only around the bases of raised and recessed detail, but on a tank as heavily riveted as this, it would make no difference in the end. I apply the wash with a wide flat brush.

I begin by sitting the model on one of its sides and applying a very heavy wash to one side of the wheels and lower hull. When most of the thinner evaporates (about 20 minutes), I turn the model over and then repeat on the other side. When that side begins to dry I sit the model upright and apply a slightly less heavy wash over the upper hull, top and turret. Some errant streaks of wash which invitably end up on the upper hull from the earlier washing can now be blended in.

Image

The beauty of the wash is that you can regulate its intensity, and change its appearance as it dries. As the thinner begins to dry, come back to your model and with various sized brushes, pull the oils into vertical streaks, smears, and other random stains. If they begin to pool in one area, work them out and around with your brush. The wash is difficult to screw up IF you mixed your wash properly.

If you have too much paint it will do nothing but smear, thick, opaque globs of paint on the model. If you have too much thinner, it will dribble out and not collect around the raised details.

After your initial dark wash, you can add a second layer of washes using a lighter shade. I did not do so on this model.

Allow the wash 24 hours to dry before proceeding.

Image

Notice in the photo above how the overall finish is darker. This is one reason I do not worry too much about color matching. As a matter of fact, I often lighten my AFV colors to offset some of the effects of the dark wash. Looking at this photo, I should have lightened the paint a few more shades than I did.

Once the wash is dry you should decide whether or not you wish to drybrush the model. It is not always necessary, and I have seen many well built models, absolutely ruined by a bad drybrush job. I have plenty of models from my past which I refuse to show to others simply because of the awful drybrushing.

What I'm getting at is that this step is very easy to overdo. Two things to keep in mind

1) Drybrushing under the intense lights of a workdest (you all use good lighting, yes?) looks better than it will in natural lighting. So avoid the temptation to add more because its looking pretty right now.

2) A light touch is key. You only want to hit the tops of the raised details and whisk the edges on the model. You don't need 100% coverage, nor should you attempt to rub the paint into flat surfaces.

I do my drybrushing with oils, as they afford me plenty of time to fix mistakes, and to mix the exact shade that I am looking for. Humbroll enamels are also fine for drybrushing, but dry much quicker (this can be a good or bad thing- depending on how patient you are.

For this project I mixed some black, white, and prussian blue oils to get a bluish gray shade, just a few tones lighter than my base-coats. The closer to you can match the color to the basecoat the more subtle the result will be. Although you be the judge of the exact effect you want.

I lightly whisk a small and badly damaged brush over the raised rivets and sharp edges on the kit. I also let a bit of the gray get onto the rubber wheel rims to further fade them.

Image

Normally I would let the drybrushing dry for a few days before proceeding with the next shade, but for expediency's sake I only waited 12 hours this time. The second drybrush shade is a mix of raw umber, yellow ochre, and some of the gray mix I had prepared earlier. I apply this more sparingly, and touch the hull more lightly, just to leave a hint of dirt and discoloration. I apply it more vigorously to the lower hull and wheels.

Image
>>here I have applied the earth tone drybrush to the wheels and lower hull<<


At this point you can decide if you want to add more earth tone drybrushings, or if you're satisfied with what you see. If you're done drybrushing, than put the model into a drying cupboard for a few days to let the oils cure. Go work on another kit :)

More soon.
User avatar
Softscience
Staring out the window
Posts: 7485
Joined: April 5th, 2011, 4:34 pm
Location: Maryland, near Washington DC

Re: Softscience's Step by Step AFV finishing guide

Post by Softscience »

Up next I'll discuss a method called the dot-filter. This step is not always necessary. I am presenting it here for those of you who want to add further color variation into your finishes, but do not own an airbrush and can't spray mist coats to achieve the effect. I'm also doing it because the heavy wash darkened my paint and I want a slightly lighter effect.

Dot filters are simple, and require some oil paints, thinner, and a wide soft brush. I begin by selecting the shade of the filter (or glaze) that I want on my model. In this case I know I want and overall lightening effect, so I will use lighter shades of my base coat. I use white, prussian blue, and a mix of the two to make a very light blue (99% white, 1% blue - the blue in prussian blue is very strong, and you only need a little dot of it added to your white).

I squeeze out a bit of each color onto a palate (a piece of card) and using toothpicks, dab small dots of each color somewhat randomly onto the upper hull and turret.

Image

Then I dip a wide flat brush into the thinner, and wipe it on a piece of card to get most of the thinner off. I just want the hairs dampened with thinner, and not dripping. I then use the damp brush to make downward strokes on the model's surface, blending the dots of color into subtle streaks. I am careful to not let too much of the light colors pool into recessed areas and around the base of bolts. If they do, I just keep brushing downwards until they work themselves out.

Image

As with all things here, I have to stress the importance of subtlety. You don't want stark white and blue streaks all over your model. If you're doing this and think "just a little more and it will look perfect" then it means you've done enough. I gave the filter overnight to dry and the sealed it with an almost flat, satin coat.

This photo was taken under harsh lighting to accentuate the result.
Image

----------------------------------------

Now it is finally time to begin painting some of the small details. I will begin with the pioneer tools.
This is very easy.

First, paint the metal portions of your tools (and machine guns) with a very dark gray, almost black paint. Once dry, rub a pencil on some sand paper in order to make graphite powder. Dip a brush into the powder, and then rub it onto the metal portions of your tools and MG. The harder you scrub in the graphite, the more metallic the finish you will achieve.

For the wooden tool handles, I begin by painting with a yellowish tan color, and once dry, applying a thin coat of burnt sienna oil paint. As the oil starts to dry, I use an old stiff brush to swipe most of it away leaving streaks of paint to simulate the wood grain

Image

Once all this is done, use your basecoat paint to touch up the tool clasps, or if they are leather straps, use a reddish brown to paint them last.


Next time we'll rust up the muffler, add a few paint chips and finish weathering the track.
User avatar
Ernie
The Bug Has Well And Truly Bitten
Posts: 354
Joined: May 1st, 2011, 3:09 am
Location: A small town in New Hampshire

Re: Softscience's Step by Step AFV finishing guide

Post by Ernie »

Very nice work Ralph, and well presented how to as well.
Ernie
User avatar
pilgrim1
Getting well comfy!
Posts: 83
Joined: August 23rd, 2011, 12:17 pm
Location: savona Italy

Re: Softscience's Step by Step AFV finishing guide

Post by pilgrim1 »

Thanks for very interesting explanation
I apologize for the incorrect english
User avatar
Beowulf Shaeffer
Earning Reputation Points
Posts: 823
Joined: May 1st, 2011, 12:01 am
Location: Monkey Hanger Town, UK

Re: Softscience's Step by Step AFV finishing guide

Post by Beowulf Shaeffer »

ive been wanting to practice that dot filter for ages......i really must pull out an old test mule of a kit to have a go
The time you enjoy wasting is not wasted time........Bertrand Russell

On the Bench: Beagle
Next on the bench: not sure yet lol
User avatar
montessa315
Modelling Gent and Scholar
Posts: 1564
Joined: May 1st, 2011, 9:34 am
Location: Rugby - UK

Re: Softscience's Step by Step AFV finishing guide

Post by montessa315 »

Great work, look forward to the rest of it.


Alan...................
_______________________________________________________________________
If you always do what you've always done, you'll always get what you've always got.
Post Reply

Return to “Tanks, AFV and other Military Models”